Books · Mini-quilt · Tiny Quilts

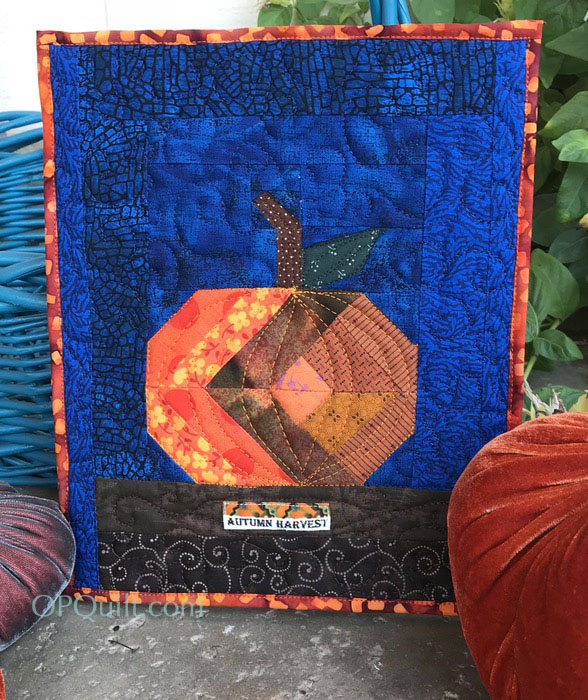
A Tiny Quilt for Autumn

Tiny Pumpkin Quilt_front2

So, one day I just had to do some creating.  Not following a big-deal pattern with billions of pieces, but a little project that just allowed me to follow a simple set of instructions and play with fabric.

Tiny Pumpkin Quilt_pattern

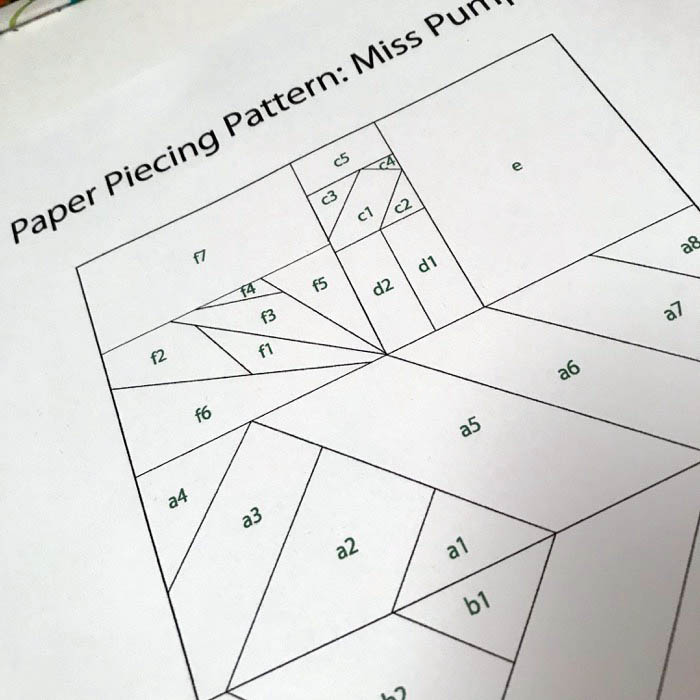
I had saved this paper pieced pattern from Chase of the blog Quarter-Inch Mark.  It was a free download at the time, and since I was just playing, I printed it out at 100% which made it about a 6-inch pumpkin.  I think if I were doing this again, I’d go up to 125% or so, trying to get the pumpkin a bit bigger. [Update: Chase’s patterns can be found on ETSY as of 2025, but just not this one.]

I just cut strips and went to it, and in hindsight, should have put the shaded strip on the outside, but since this was for a little quilt, and I was just playing, I shrugged and kept going.

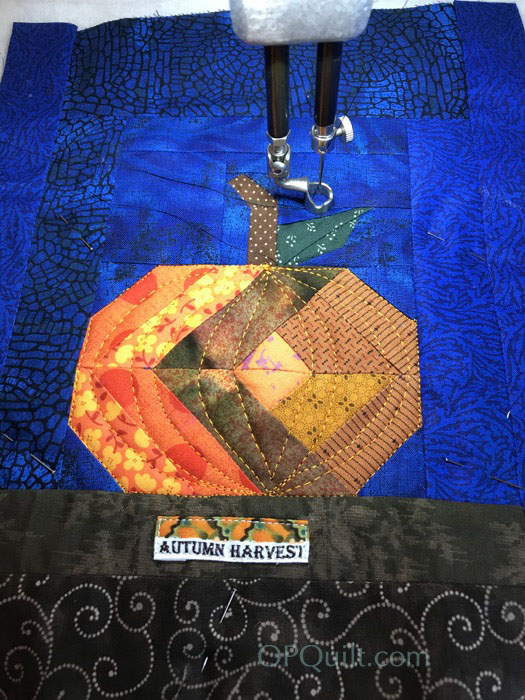
Tiny Pumpkin Quilt_quilting

I am following the tutorial for another tiny quilt I made, which you can find here.  It’s little quilt that fits onto a plastic picture frame that I bought at Wal-Mart for a buck-fifty ($1.50).

Tiny Pumpkin Quilt_binding0b

See the other tutorial for how big to make this (I added strips to the pumpkin to make it large enough), and how big to make the sleeve that goes on the back.  All instructions are on that post.Tiny Pumpkin Quilt_binding1b

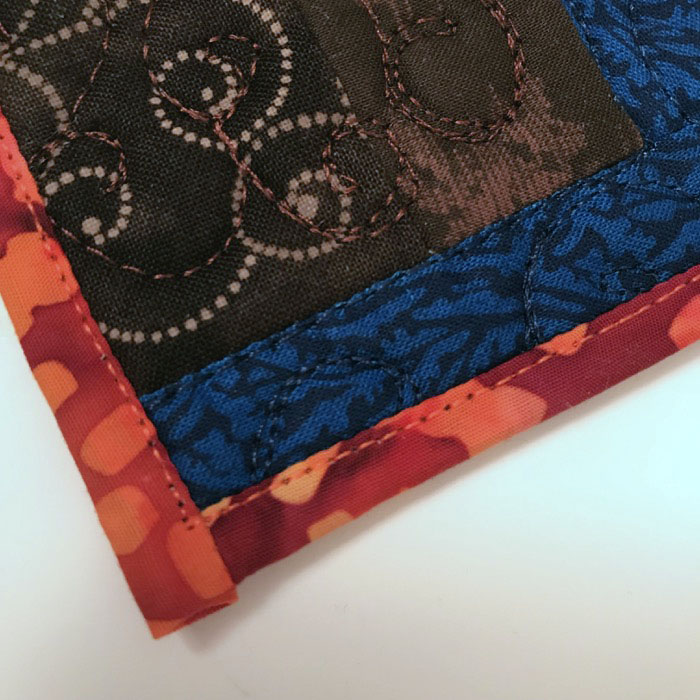
I like to do single-fabric bindings on my mini quilts.  Cut a strip 1-1/2″ wide, stitch RST, first the right/left sides of the quilt, then the top/bottom.  Fold up the raw edge of the binding, to the raw edge of the quilt.

Tiny Pumpkin Quilt_binding1c

Use a glue stick to help you out, as you do the next step, which is folding the folded edge over your stitching that attaches the binding.  See both sides done (below):

Tiny Pumpkin Quilt_binding2
Tiny Pumpkin Quilt_binding3

Now do the top and bottom, folding in the raw edges, and then the folded edge over that (orange) line of stitching, which attaches the binding.

Tiny Pumpkin Quilt_binding3a

Because you’ve used a glue stick to help you out, the top-stitching (from the top) is easy-peasy.

Tiny Pumpkin Quilt_frame2

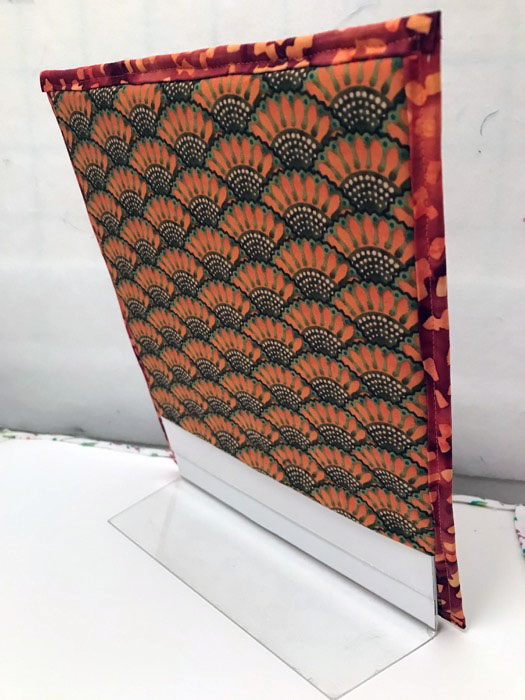
Slip the quilt over the plastic frame (above and below).

Tiny Pumpkin Quilt_frame
Tiny Pumpkin Quilt_front

I hope to make several of these mini quilts so I can change them with the seasons.

tiny-sailboat-quilt_front-on-frame

Now I have a summer tiny quilt and an autumn tiny quilt!

Classes · Mini-quilt · Quilt Patterns · Quilts

Home, Sweet, Home Mini-Quilt Class

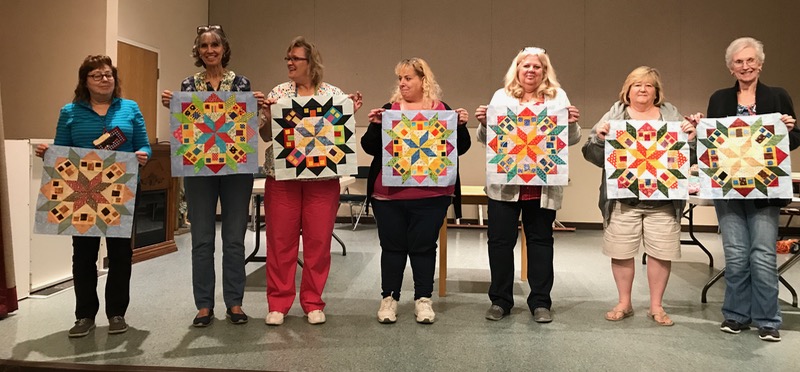
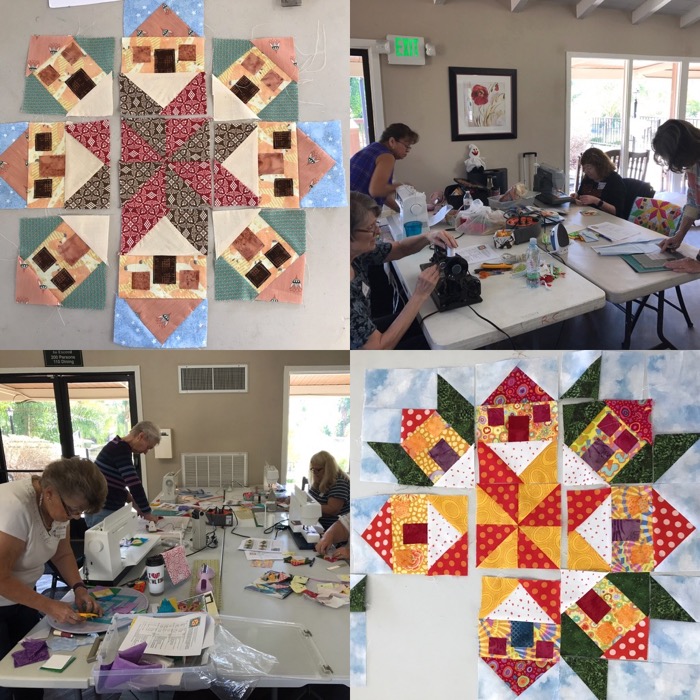
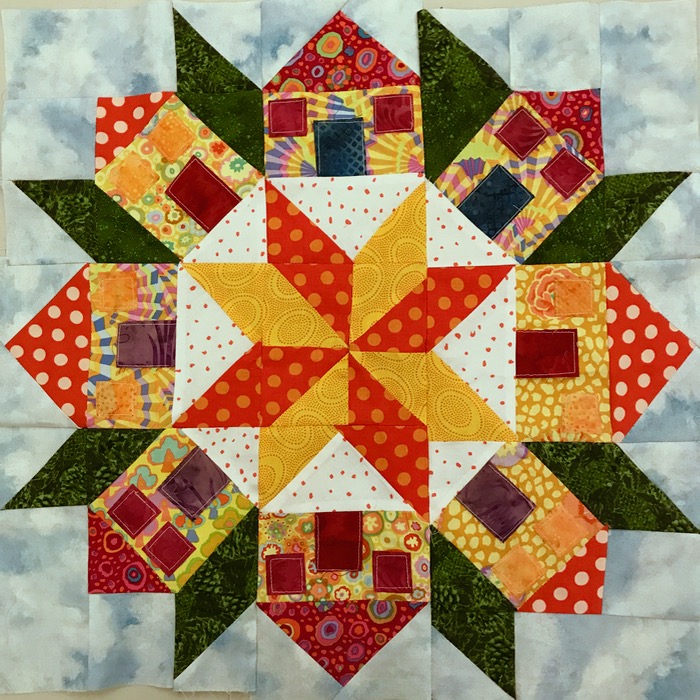
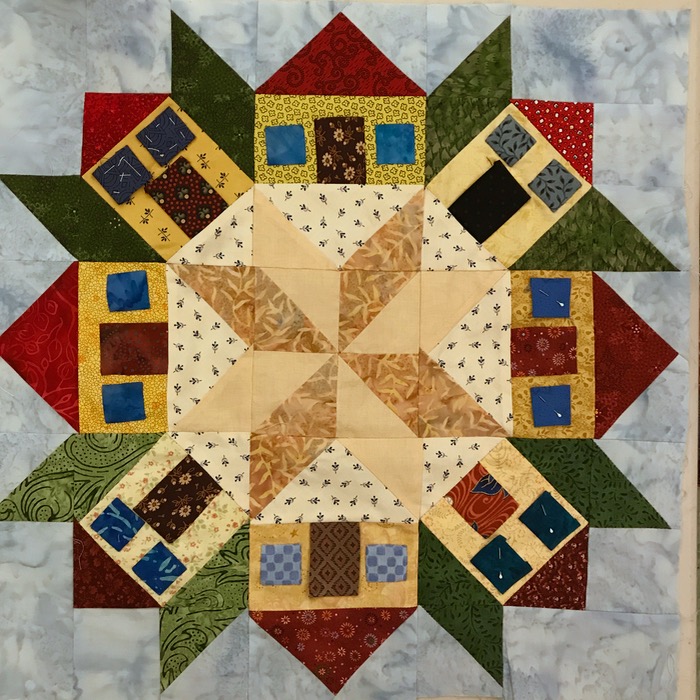
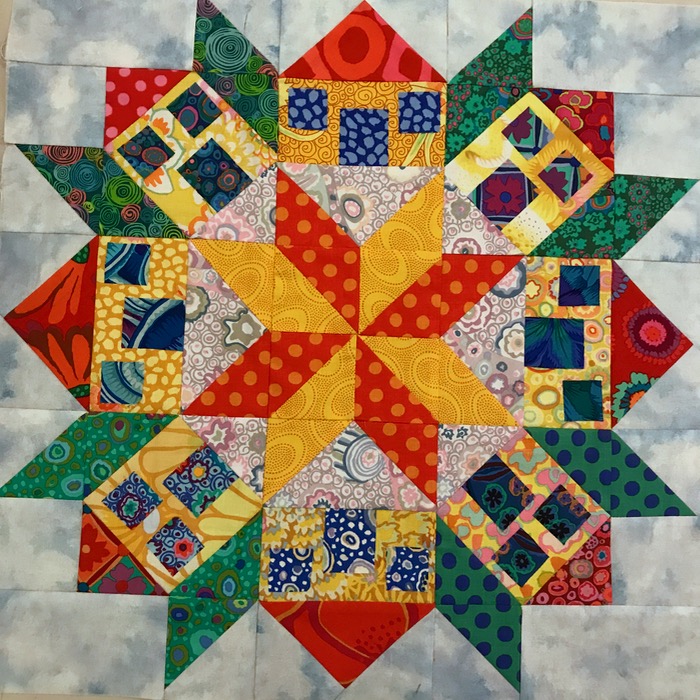
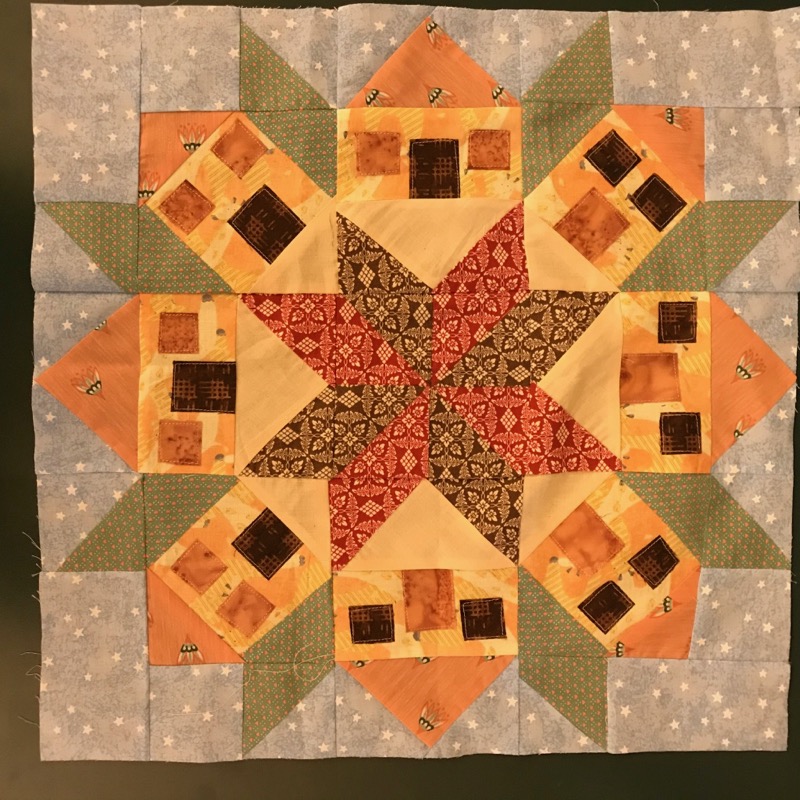
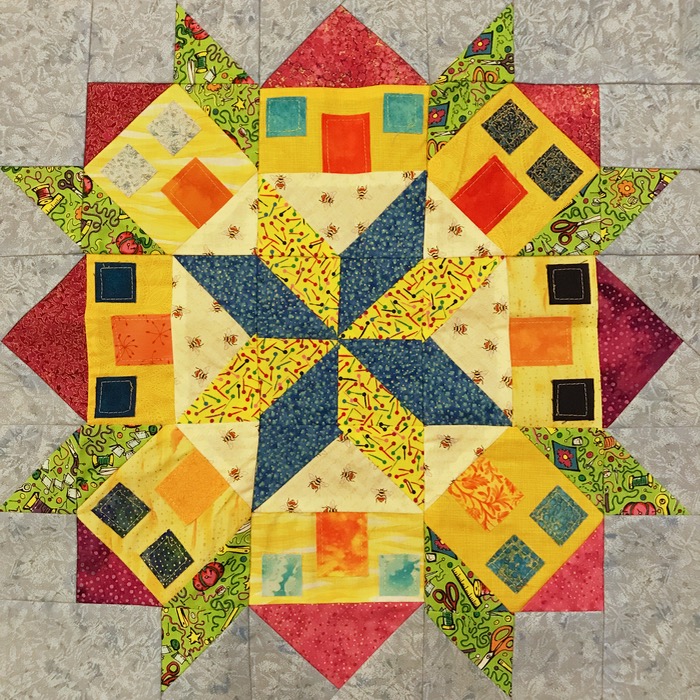
HomeSweetHomeClassRecently I taught a class for my Home, Sweet, Home mini quilt.  I snapped these photos as they were working; they’d all mostly prepped up their pieces before coming, and it made the class go quite smoothly.  I loved all the different ways that people did their blocks (shown here at our Guild Meeting):

HomeSweetHomeClass_1

Here are most of them (some didn’t bring them to Guild):

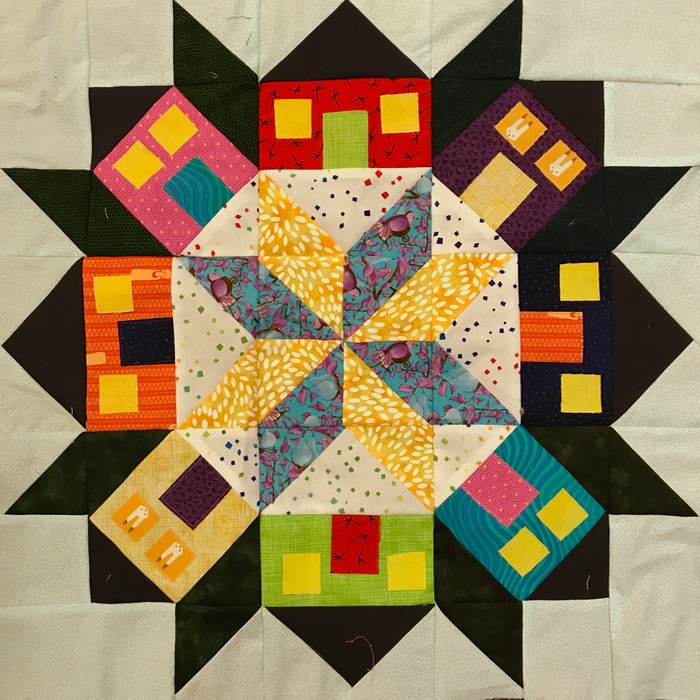
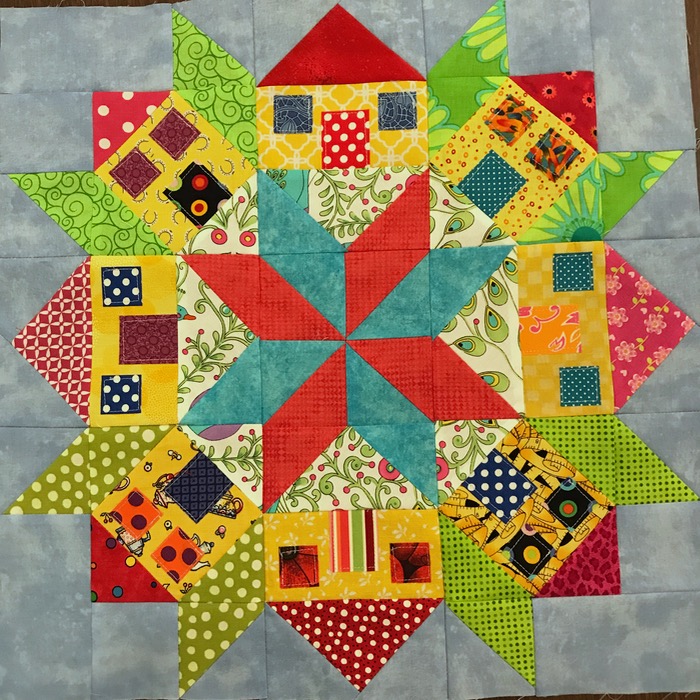
It wasn’t until posting these up that I found two errors in these quilts.  Isn’t it funny that you don’t see things…until you do?  (Hint: it’s in the bushes.)  I love the rainbow quilt made by my friend Lisa.  I may have to make one for myself.

HomeSweetHome_Melissa

(Breaking News: Melissa finished hers!)

Four-in-Art · Mini-quilt · Quilts

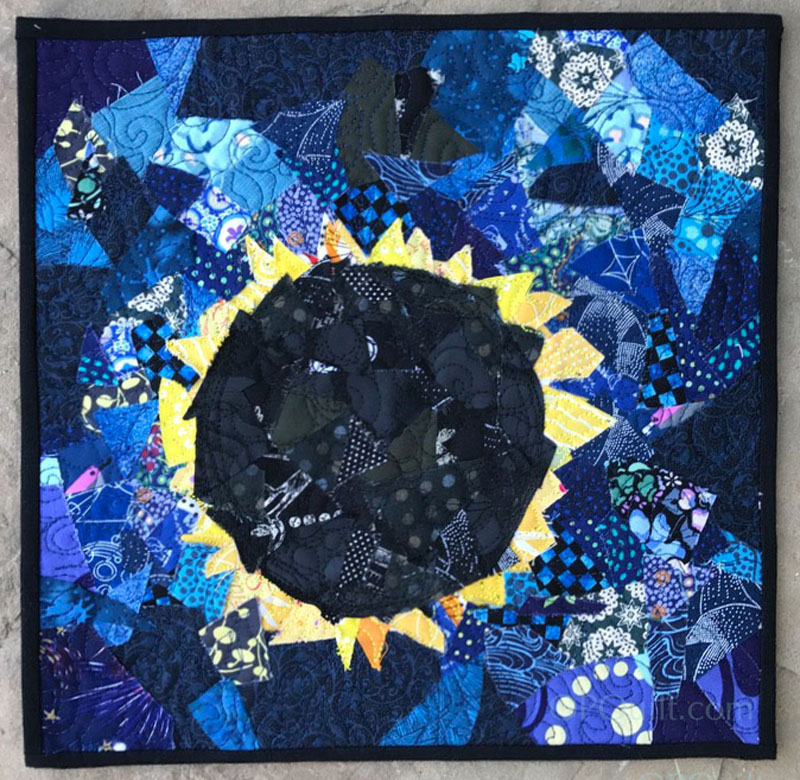
Eclipse: Final *Four-in-Art* Art Quilt


Eclipse_fourinart_frontEclipse • Quilt #189
Four-in-Art, Series Four: Light
12″ square

Click to enlarge any photo.

This is the final post of our Four-in-Art Art Quilt group.

Our group had its genesis when I saw the Twelve-by-Twelve group at a quilt show. Rachel and I emailed back and forth about maybe trying to make some art quilts.  I think we had done tons of regular quilts, and were looking for something new.  The idea was to put out a theme, create a quilt around the theme and maybe try a new technique while we were at it.  It started with just four quilters who wanted to try something, so we called ourselves Four-in-Art, and I made up a logo, incorporating the idea of four:
Sometime later, we added four more quilters, then switched the scheduling to four times a year, so we were still Four-in-Art.  We created a blog to post our quilts, for once you archive, you are real.

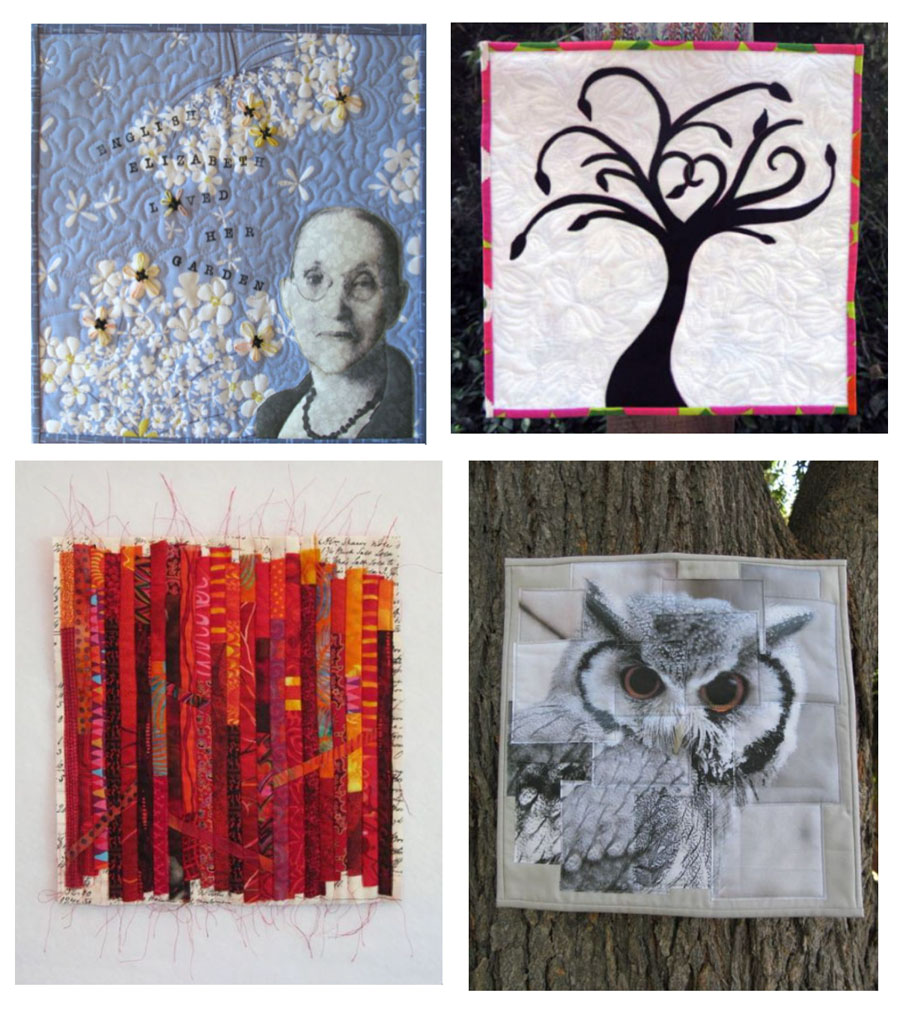
 Here is an overview of my quilts: (By the way, I am following the newspaper convention of captioning underneath my photos, so look there for details.
Year 1: Nature

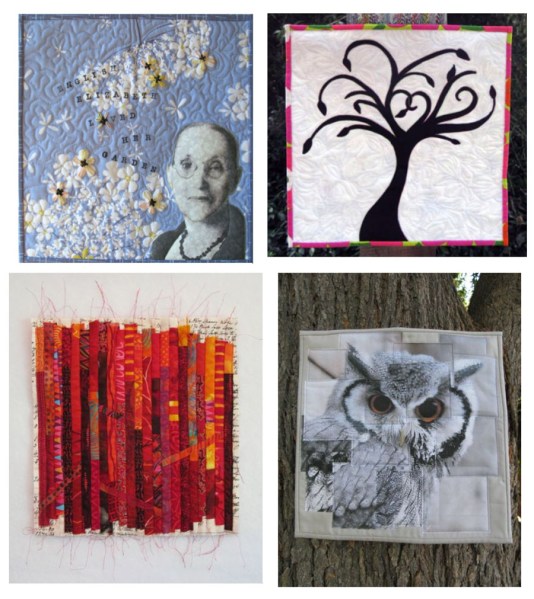
We took turns coming up with the overarching theme for the year, then again, turns for the quarterly challenges.  The challenges are, from the upper left: Queen Anne’s Lace, Tree(s), Fire, Owl.  It was liberating to craft this way, without getting out too many rulers or drafting things on the computer (see below for a glimpse of my journal).

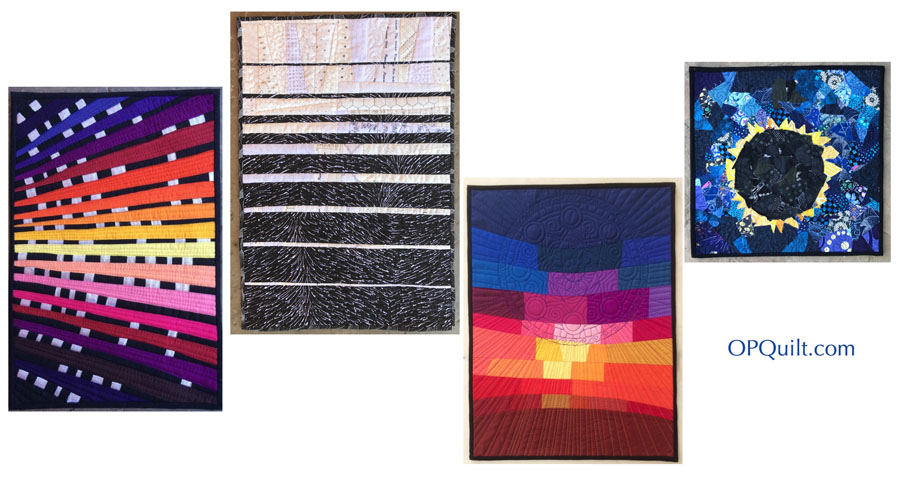
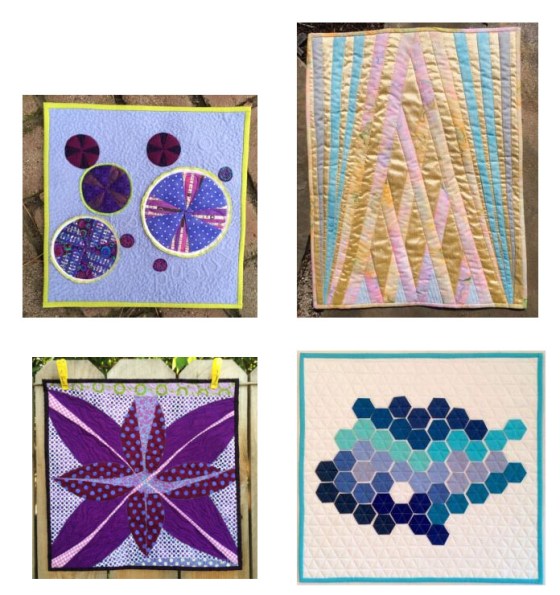
Year2_FourinArtYear 2: Urban  Quarterly Challenges (from upper left): Maps, Structure, Landmarks, Contrast, Light (we seem to like this topic).Year 3: Literature  —  We could choose what segment of literature to focus on.  Some did a series of novels, Nancy did a series of children’s books’ titles, which she then donated to her local library, and I did a series of poems.  I love the poems, pretty much hate these quilts, for a variety of reasons.  Year 4: Color, and the challenges (again, from upper left): Microscopic, Music, Purple Passion, and I’ve Got the Blues.
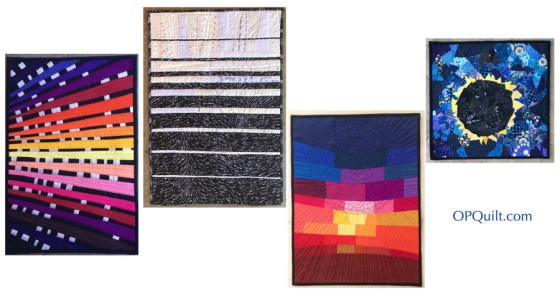
And this year’s, with the yearly theme of Light.  The quarterly challenges were: Shimmer,  Light in the Darkness, Stained Glass Shadows, and Illumination.

It’s very satisfying to notice the growth, the steps backward, the consequence of leaving things to the last minute, and how having enough time impacts what you can create.  I also learned new techniques, new ways of doing things, new ways to incorporate design beyond the grid and have it mean something.

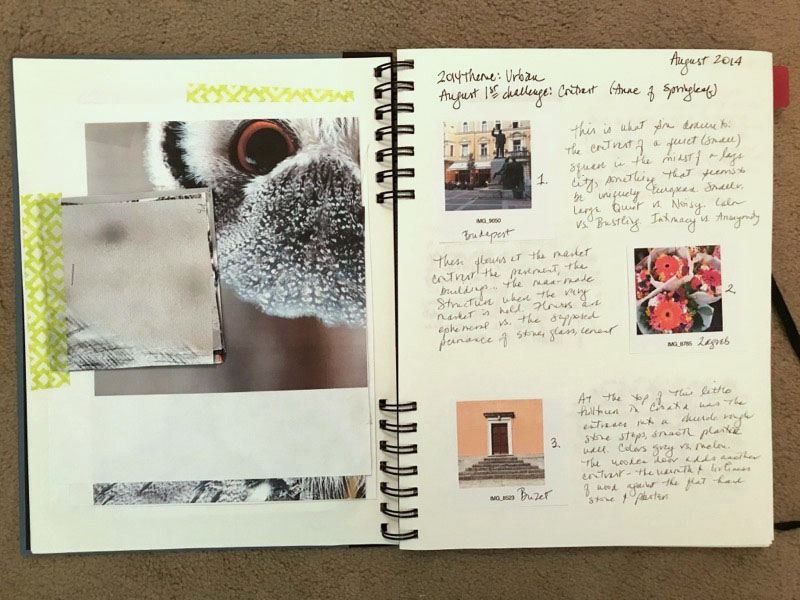
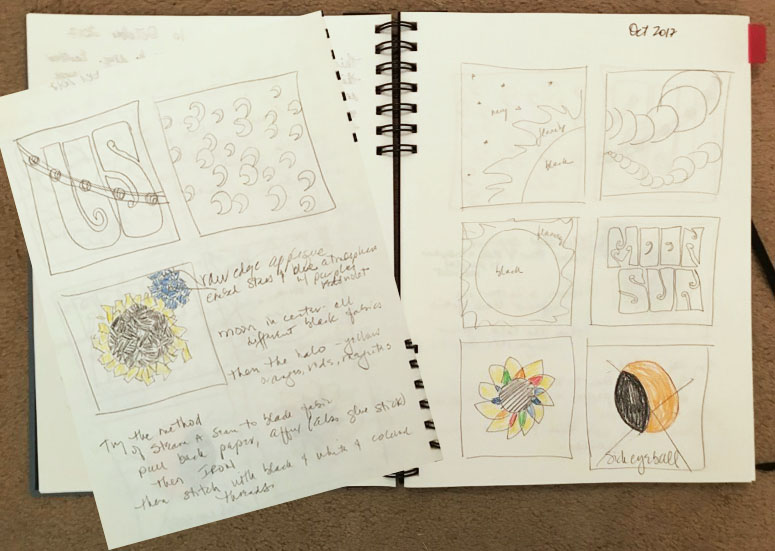
A few pages from my notebook/sketchbook.  It really helped to keep one of these, and not just for the journaling.  I was often able to arrive at an idea for my quilt through drawing out (that old mysterious hand-brain connection) and writing out my feelings about the theme and the challenge.
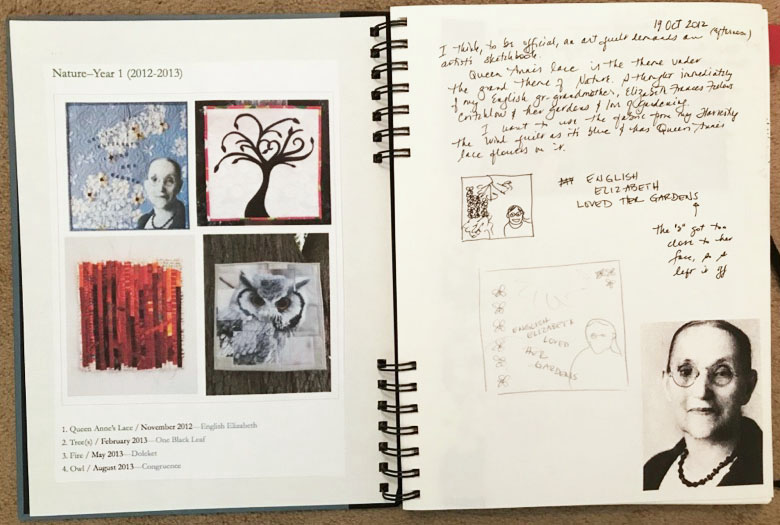
Four-in-Art_book2

(I came back in later and pasted in the four quilts we did under that theme.)

Four-in-Art_book1Four-in-Art_book4

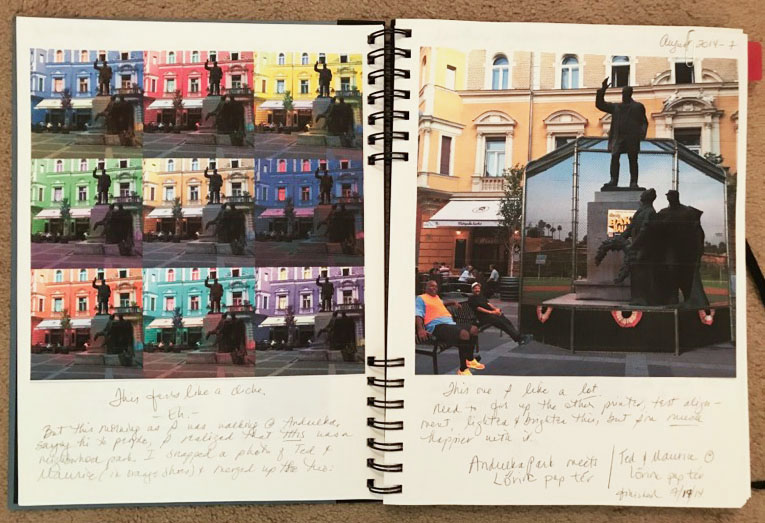
It was also a place to keep patterns, those bits and pieces of paper that led me to the final quilt, as well as notes and thoughts while on the run:

Four-in-Art_book3Four-in-Art_book5Four-in-Art_book6

Pages about this quilt (the second page is digitally pasted on top of the first).  You can see the rejected ideas.

This little quilt, Ted and Maurice at Lorinc Pap Ter, is my favorite, not only for the idea of Contrast which it expresses (and was our challenge for this 12″ square quilt), but also because I learned how to print photos onto fabric [making my own photo-ready fabric, not buying it] and had a great time doing this.

I have more than one that qualifies for the Least-Favorite-Maybe-Even-Hate, so I won’t tell you which ones.  But I can share the why: when I was trying to be too “artsy” and didn’t let the idea drive the design, or when I forced the design, or when I was new at this and just had no clue how to execute the idea.

Four-in-Art Index

I used to have a dedicated page for all the Four-in-Art quilts, but recently I was cleaning out around here and filed them away in the Master Index to my quilts.  Now they are all on the 200 Quilts page, making them easy to find.  Slowly I’m going through the posts, adding the tag “Technique” to those pages that show how I tried a new way of doing things, or a new method.  I hope they will be helpful for you (use my search engines to the right–Wordpress has outstanding search capability).

It’s been a wonderful journey, these past five years, and my hat is off to those who started — and stuck — with me: Rachel and Betty.  They were some of the best companions to have alongside me as I traveled this road.  Other travelers were Leanne (SheCanQuilt), Anne (SpringLeaf Studios), Amanda, Carla, Jennifer, Nancy (Patchwork Breeze), Simone (Quiltalicious), Susan (PatchworknPlay), and Camilla.  Finally, Catherine (Knotted Cotton) and Janine (Rainbow Hare), who were also members, will be carrying this art quilt group forward, through their Endeavorers.  Click on their links to be taken to their blogs. And thank you for reading this WHOLE thing.

Now, please enjoy the final round of quilts for the Four-in-Art group!

Betty        Blogpost on Four-in-Art

Catherine         http://www.knottedcotton.com

Janine         http://www.rainbowhare.com

Nancy         http://www.patchworkbreeze.blogspot.com

Rachel         http://www.rachel-thelifeofriley.blogspot.com

Simone         http://quiltalicious.blogspot.com

All of our blocks are on our blog, Four-in-Art.


SaveSave

200 Quilts · Free Quilt Pattern · Giveaway · Mini-quilt · Quilts

Red, White, and Blue Star

Welcome to Day 4 of the Patriotic Palette Blog Hop, hosted by Paintbrush Studios and Painter’s Palette Solids!

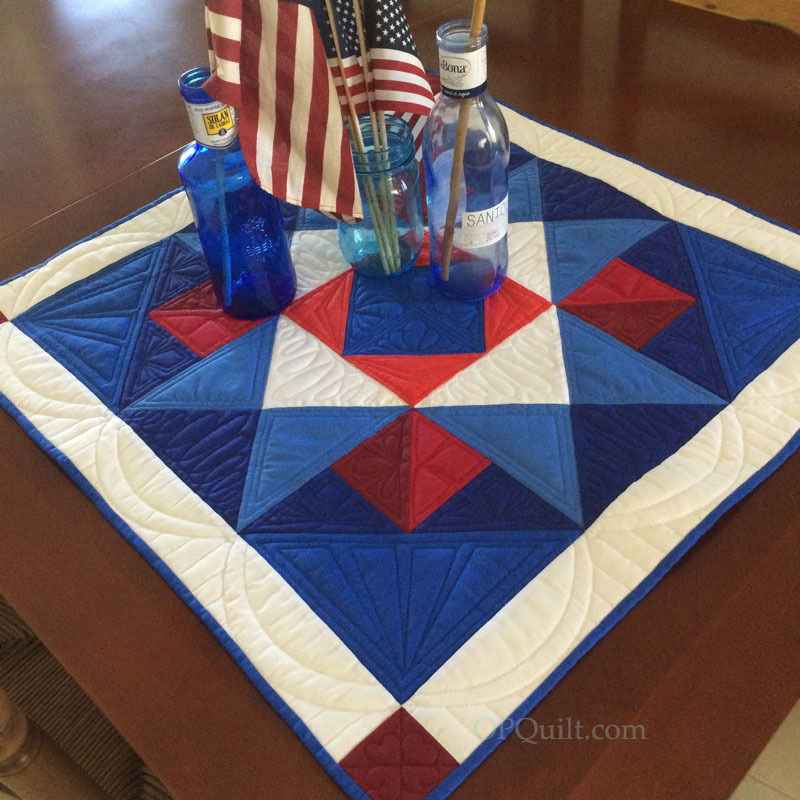
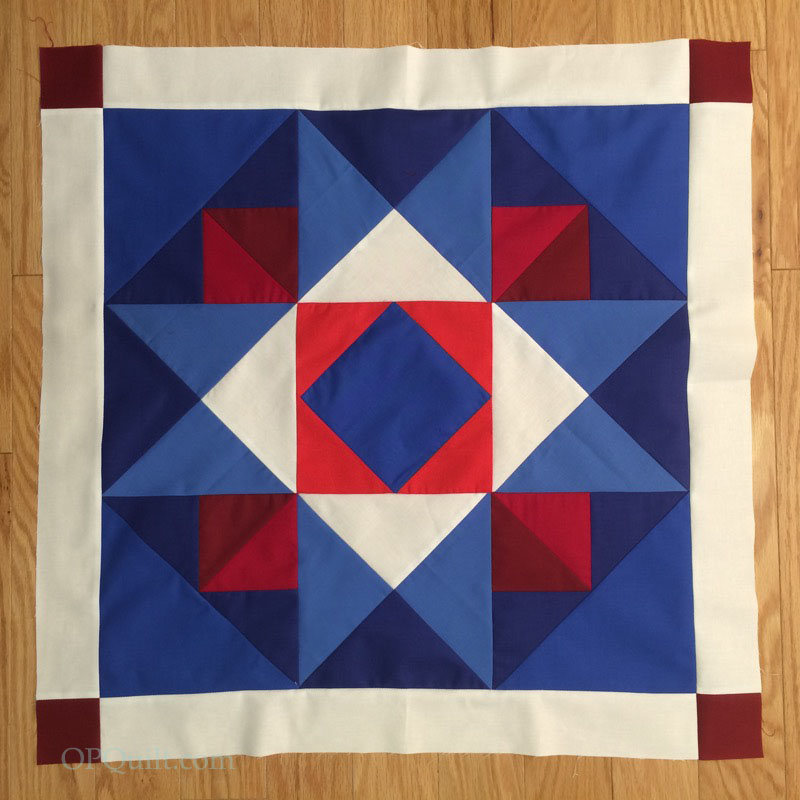
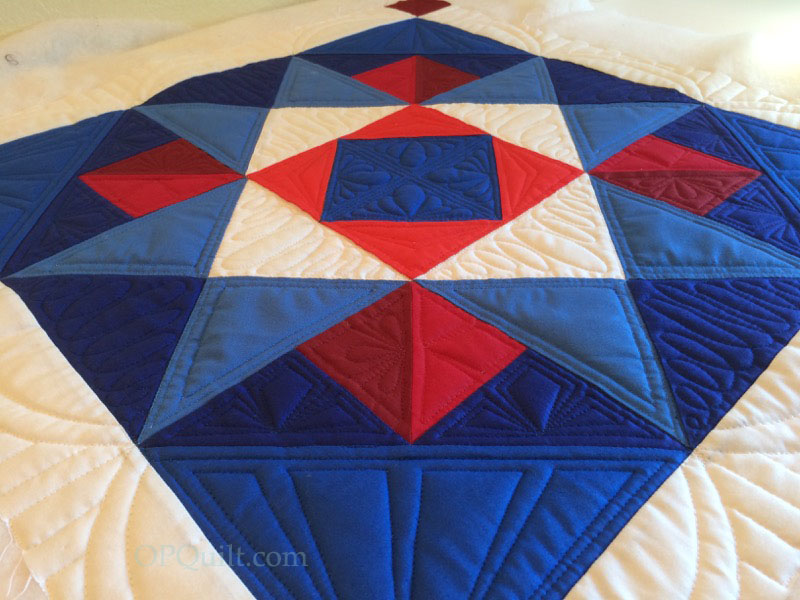
Red, White, and Blue Star • Quilt #183
25″ square, made from Painter’s Palette Solids

NOTE: THIS POST HAS BEEN UPDATED, WITH A FREE DOWNLOAD OF THE PATTERN.

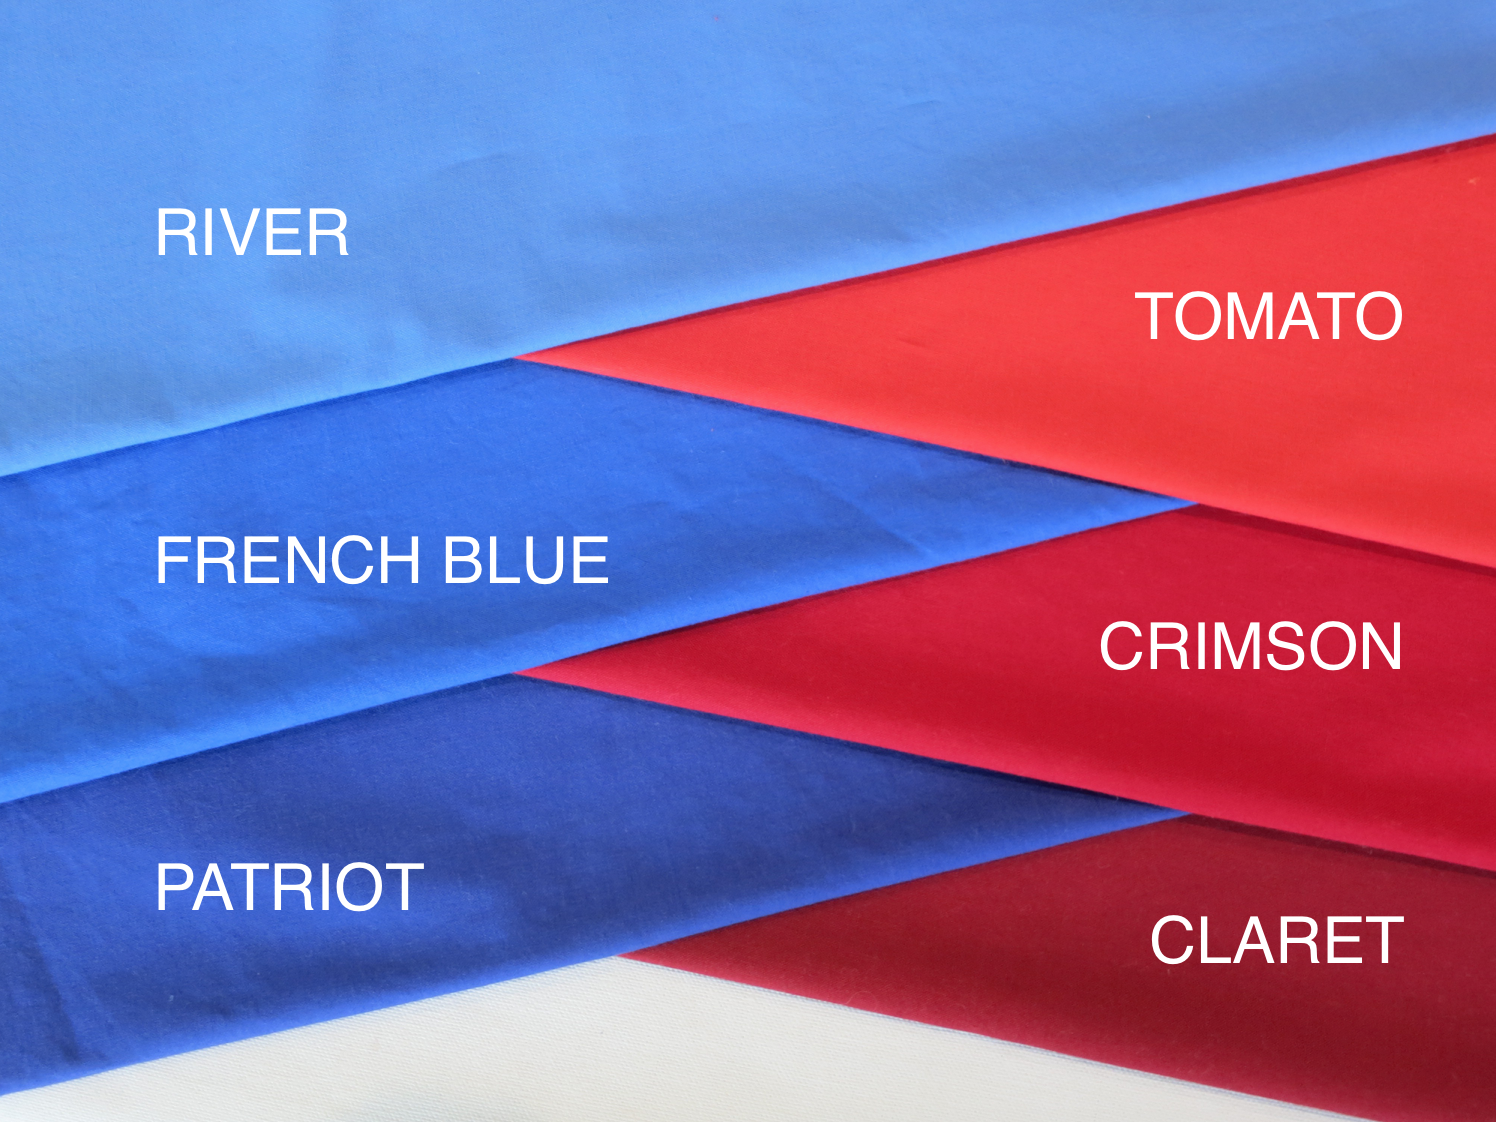
A couple of weeks ago, the fine people who make Painter’s Palette Solids sent me some fabric and asked if I would make something. At the end of this post, there is a giveaway so you can win your own stack of red, white and blue fabrics.

I’m part of a series of posts showing items you can make with just three reds, three blues and some white.  Here is the complete list and the days that they are presenting:

6/23: Jayne of TwiggyandOpal (@twiggyandopal)
6/26: Elizabeth of OPQuilt (@occasionalpiecequilt)
6/30: Cindy Wiens of Live a Colorful Life (@liveacolorfullife)
7/3: Stephanie of Peas in a Pod (@stephiepeterson)

The project I chose was a quick and easy mini-quilt, which finishes at 25″ square, and is perfect for a table top when you want to give a little patriotic flare to the kitchen.  I’ve written up a free pattern, (see below for download), but the instructions are here if you need any tips and help with construction.

RedWhiteBlueStar_9
RedWhiteBlueStar_2

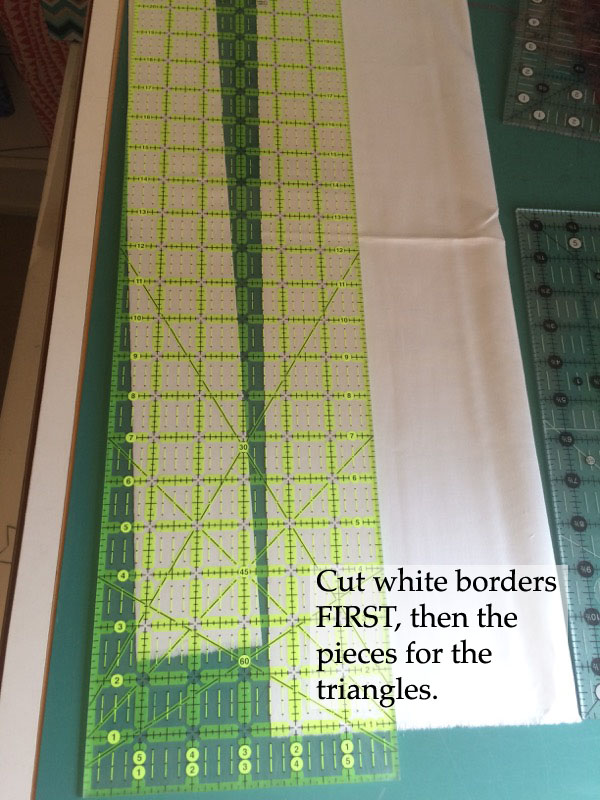
I was sent fat quarters in three shades of red, three shades of blue and a fat quarter of white.  The white needs special cutting: cut the long borders first (see chart on pattern), then the squares for the half-square triangles.  You may have enough the other way, but do it this way to be safe.  I also was tight on the medium blue, as I used it for the binding, too.  You’ll need to provide your own backing (about 3/4 yard, or pieced scraps).

RedWhiteBlueStar_3

RedWhiteBlueStar_2a

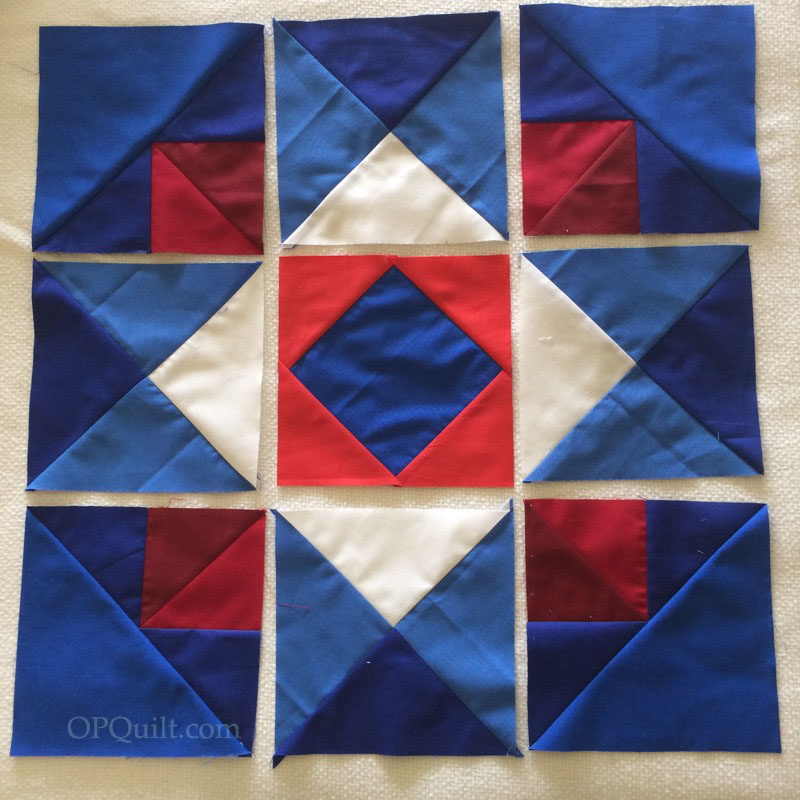
I basically constructed this as a nine-patch, a favorite thing of mine to do with minis. I started by sewing four bright red triangles on the edges of the blue square, then pressed them all away from the center.  I squared this unit to 7 1/2″.  (This quilt is forgiving if yours is slightly smaller.)  I squared all my nine units to the same 7 1/2″ as then I wouldn’t have to square up (or true up, depending on how you refer to it) the finished quilt top.

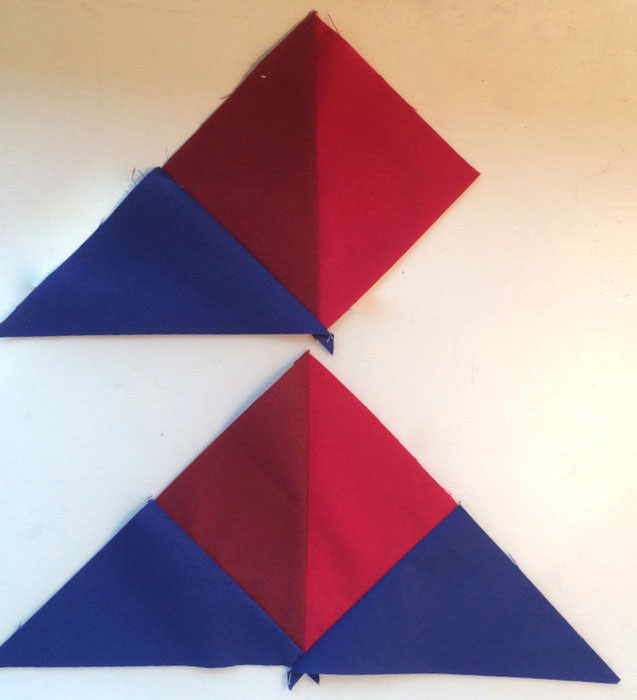
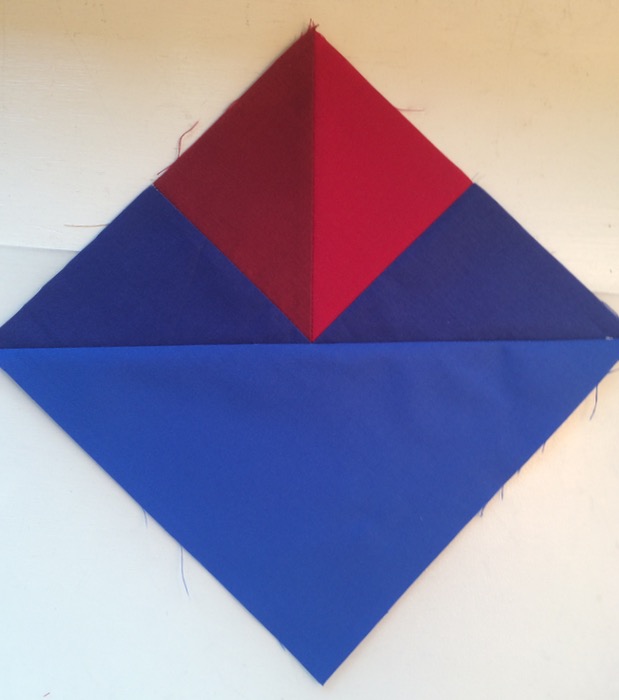
Next was the construction on this corner, sewing the medium and dark red triangles together to make a square, then sewing on the dark blue triangles to make a larger triangle.

RedWhiteBlueStar_2a1

RedWhiteBlueStar_2b

Sew on the medium blue triangle to make it a square; true it up to 7-1/2″ inches.

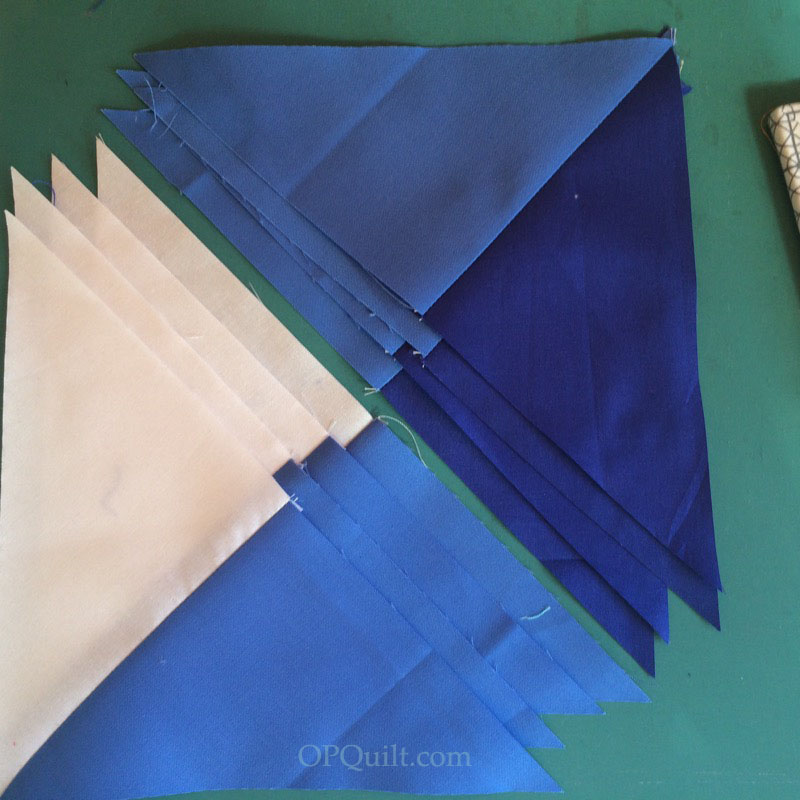
Now make the rest of the blocks: sew the triangles together as shown, then seam those together to make a square.  I always press to the side, if you are wondering.  Only rarely do I press open, so avoid that.

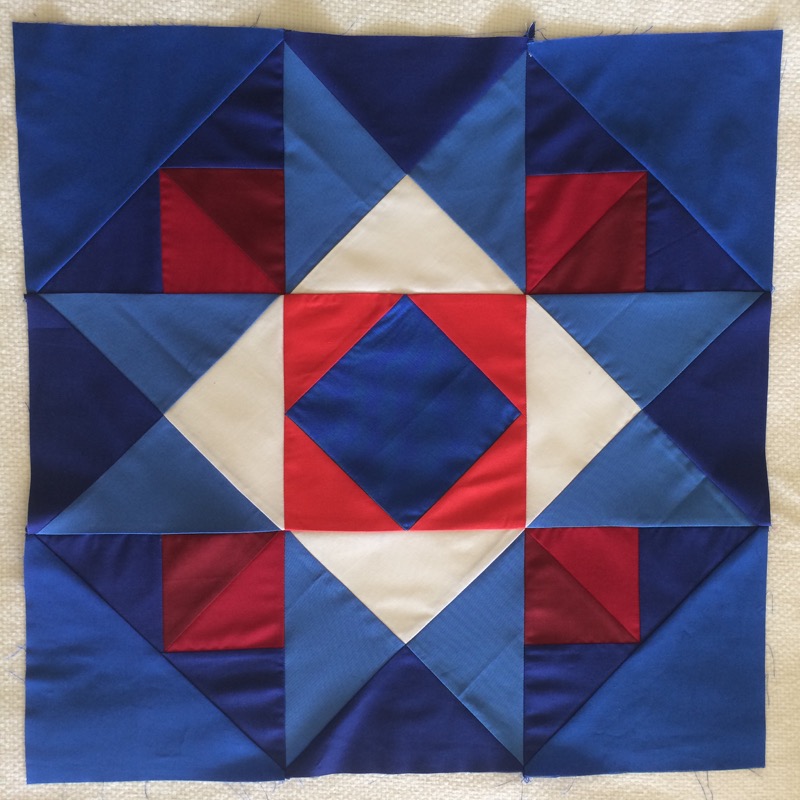
Lay out all your squares (as shown above, left), then sew them together like a nine-patch (upper right).  Measure the square; the sides should measure 21-1/2″.  Trim your long white border rectangles to measure.  Sew the darkest red blocks on each of two of the white rectangle borders.

Sew two white borders: one on top of the quilt and one of the bottom.  Press.  Then sew on the borders with the squares attached; press.  Admire your quilt top.

Let’s get quilting!

Here’s a picture of the quilt in the sunshine, showing my quilting stitches.  I always have the hardest time coming up with what to quilt where; yours may vary.  The “bandstand swag” arcs on the outside were a happy accident.

RedWhiteBlueStar_6

This was all done on my Sweet Sixteen machine, but that functions like a domestic sewing machine. I did do ruler work (which is probably easier on my machine than a domestic) but it can be done on your regular sewing machine.  Just make sure you have a thick enough hopping foot and thick rulers designed for this task (not your cutting rulers!); put grippy stuff on the bottom of your rulers, as you’ll use them to help you move the fabric under your needle.

Happy Fourth of July!

If you haven’t heard me tell you about Painter’s Palette Solids, made by Paintbrush Studio, you must be a new reader.  It is my FAVORITE solid: it’s easy to work with, has a nice hand, deals well when I need to unpick and re-stitch (I had to do that with the quilting, but you can’t see it, right?).  It’s a fairly new fabric to the market, but many brick-and-mortar shops, as well as online shops, are starting to carry it.

Giveaway Banner

Patriotic Bundle June 2017
from here

As is my custom when sewing for Painter’s Palette, I give away my scraps when I finish a project, so that some fortunate quilter can give this fabric a try.  BUT!  Paintbrush Studios has generously offered up a stack of the fabrics I used in this quilt — seven fat quarters — so you can make your own (giveaway is for domestic/US only).

To enter, leave me a comment telling me if you like fireworks, and why (or your most memorable).  I’m not talking the little things that are lit up down on street level, but those glorious bursting displays of color and light.  It will get us all in the mood for Independence Day.

Giveaway picking a winner

I’ll activate the Husband Random Number Generator and pick a winner, to be contacted by email.

Giveaway closed.  
Winner has been notified and will be announced in next post.  Thank you all!

SaveSave

SaveSave

SaveSave

SaveSave

SaveSave

SaveSave

SaveSave

SaveSave

SaveSave

SaveSave

SaveSave