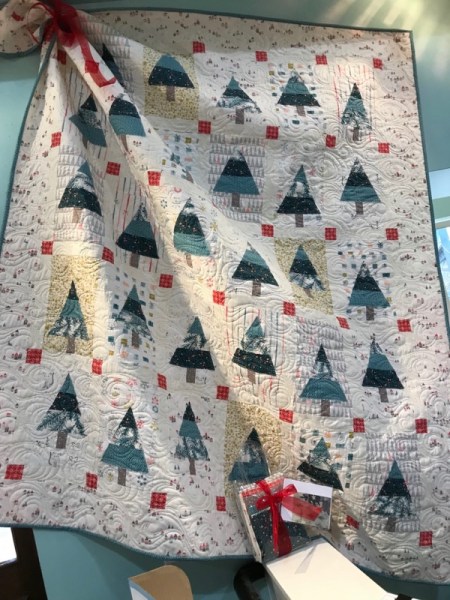
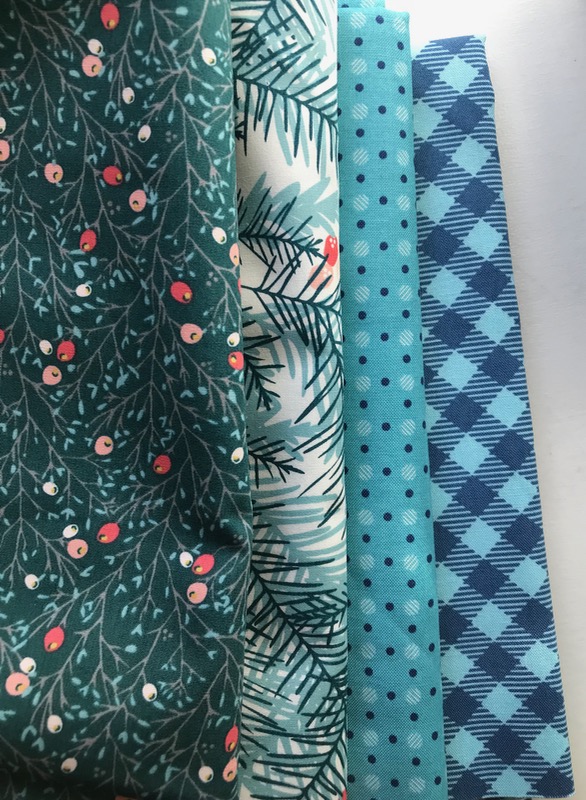
It all began here, with a visit to Gardner’s Quilt shop in Utah, where I saw this quilt. I realized I had many fabrics that would work, so purchased only the pine boughs and a couple of other coordinates:The two fabrics on the left are from Amy Sinibaldi’s latest line, Little Town, and the two on the right are from Lori Holt’s collections. I decided my brain hurt from some other projects, so went with the pattern they had at the shop. It’s called Rustic Pines, from Amber and Amanda and you can get it free online.
But…I didn’t really like the way they made the pine tree. Yes, they strip-pieced together some fabrics, cut out the trees, but they raw-edge appliquéd on the trees. Yeah, okay. I didn’t want my quilt to look old before its time, so I drew up a pattern in Quilt Pro software (RIP), that is really very much like the tutorial I already have for Christmas Trees.
The big difference is the size. I drafted this second pattern to match the size the pattern makers had for their trees, and you can download a PDF version of this tree here:
The usual requests apply: don’t download billions for your friend and neighbors, but instead send them here to get their own. The tutorial runs about the same as Christmas Trees, with a few different measurements.

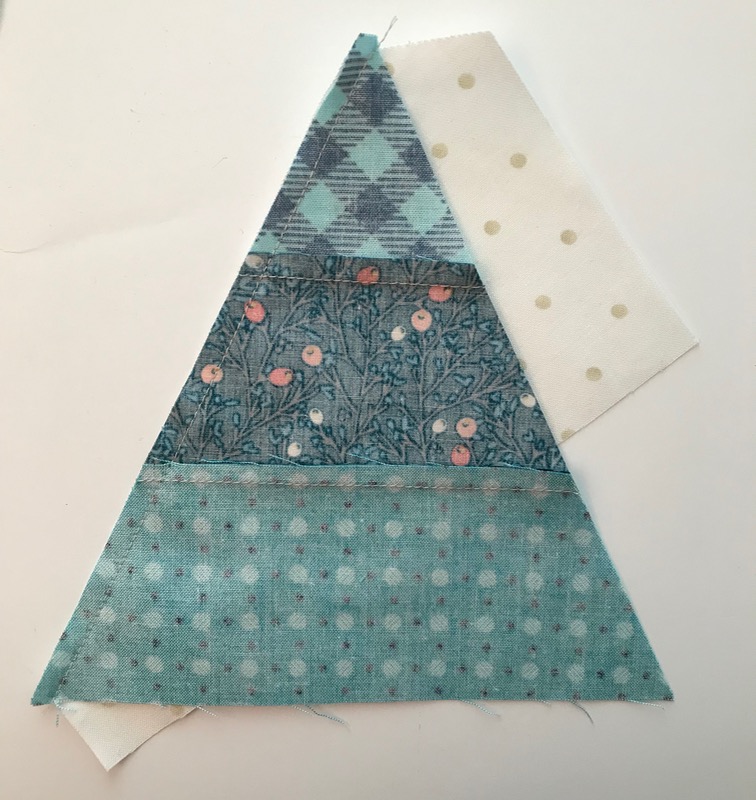
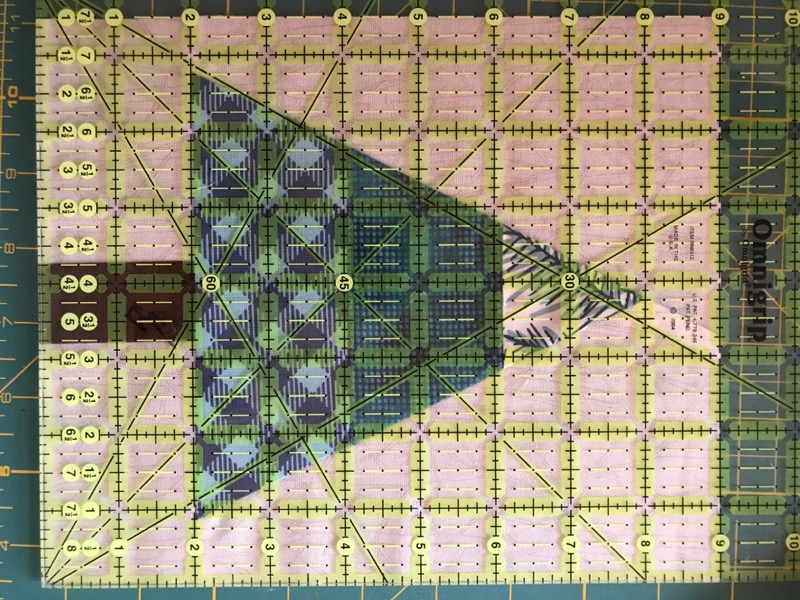
After making the tree add the right side by matching up the bottom edges of the piece. A teeny triangle will overhang the edge, as shown on the left bottom corner in the photo above. Stitch and press toward the tree (you’ll want your trees to look like they are in front of the background).
Match up the left side, again letting that teeny triangle overhang the background fabric (lower left corner in photo above). Stitch, then press toward tree.

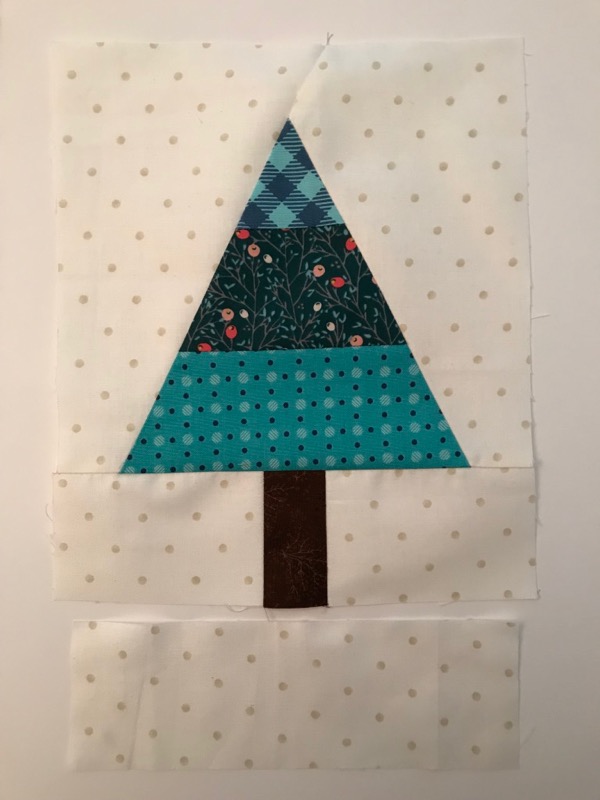
Stitch two background pieces on either side of the tree trunk; press toward trunk. Line up the tree trunk with the tree’s top point, as shown. Stitch seam. I trim off the little triangles, too.
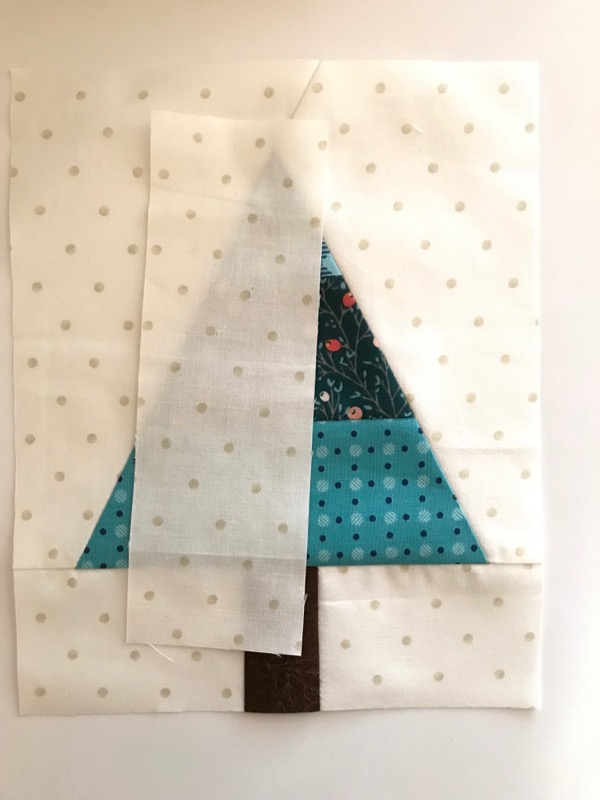
Because this pattern has you add an extra piece, I cut that too, and kept it to the side (but it’s shown, above).
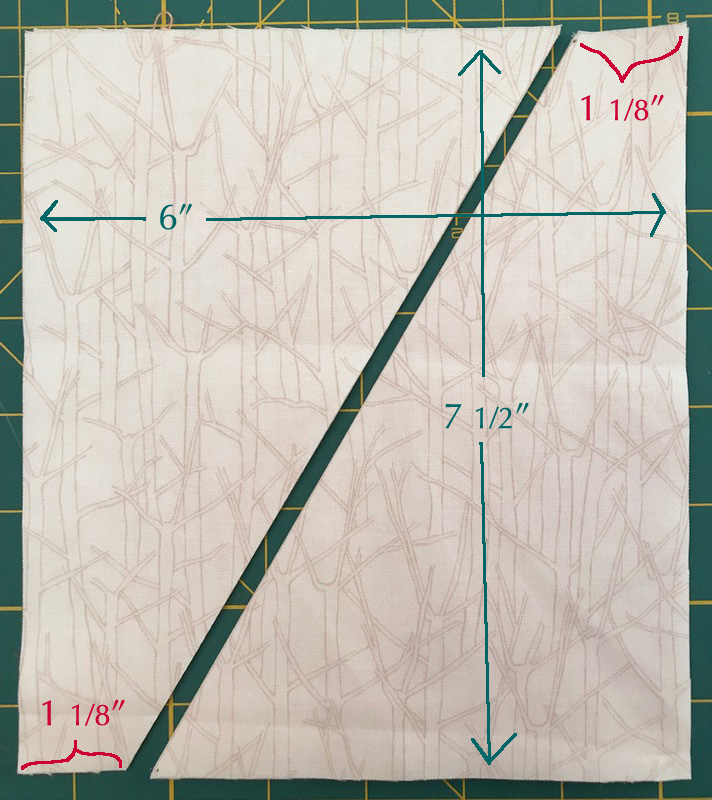
I like to streamline my cutting. I cut two rectangles 6″ wide by 7-1/2″ tall, placing right sides of fabric together.
NOTE: This only works if you have TWO of each fabric, and place them right sides together. Layer up a couple of these rectangle sets — in units of two-right-side-together — then make marks roughly 1-1/8″ inches in from each side.
NOTE: It’s a FAT 1-1/8″ or a SKINNY 1-1/4″ measurement. Aim for something in between. Cut a diagonal line, as shown. Now you’ll have backgrounds for your trees.
But the deal is, you’ll have to trim that sticky-outee triangle shown above, which really is no big deal.
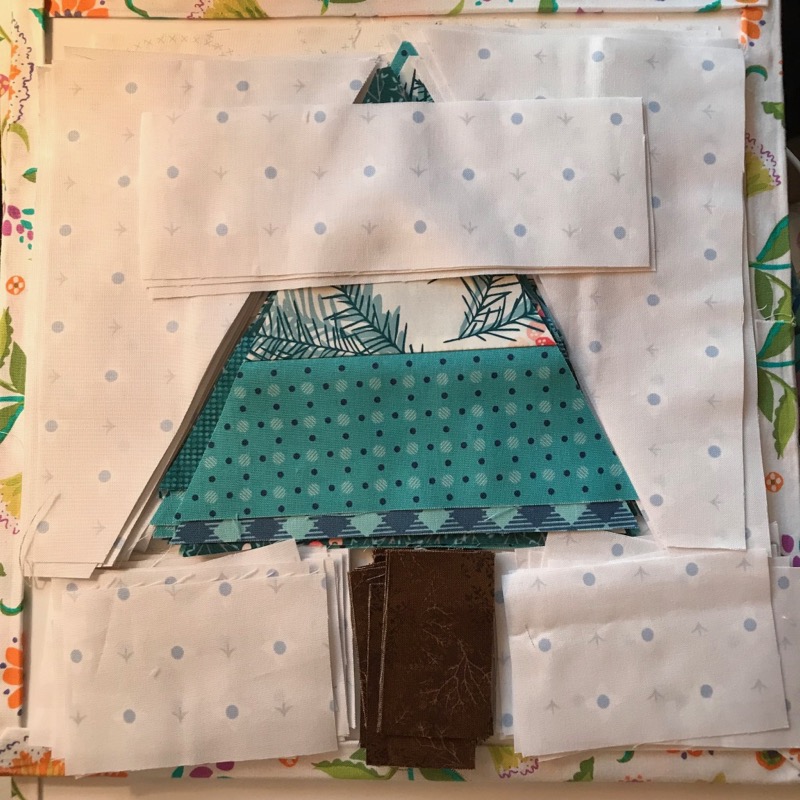
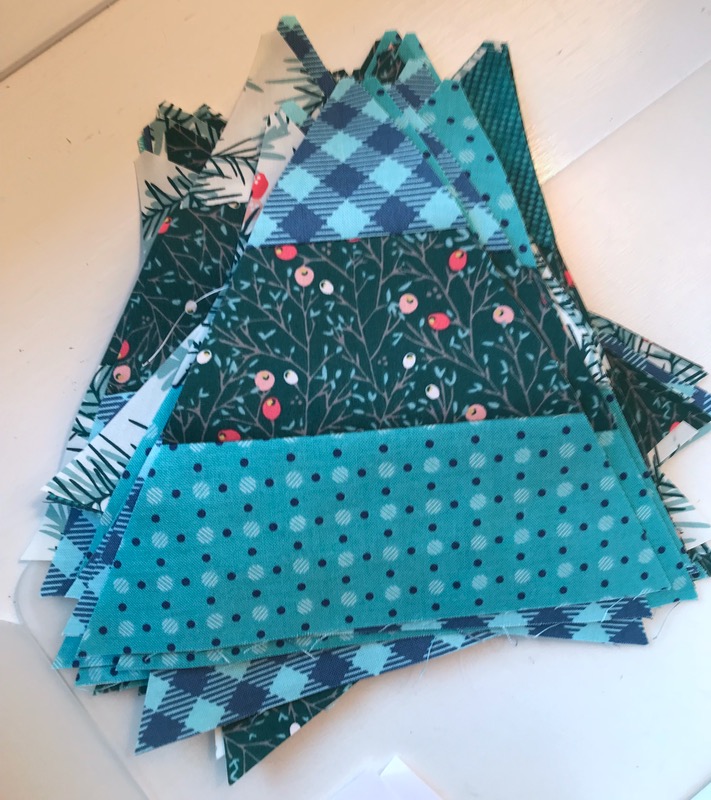
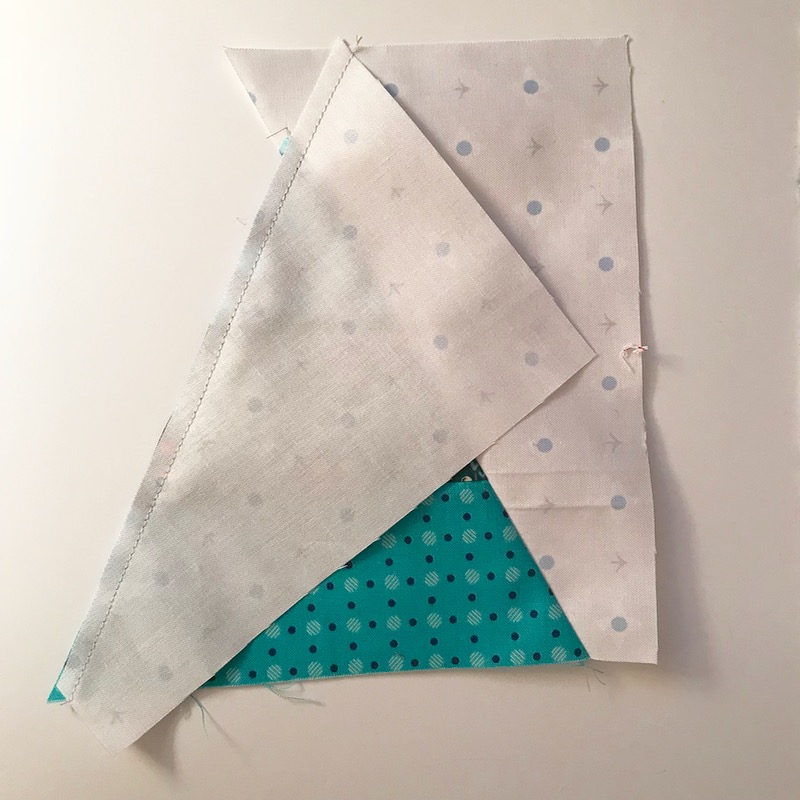
This is how I kept track of trees, backgrounds, trunks and bits-and-pieces. I layered them up, stitching a bunch of right backgrounds onto the tree, then right backgrounds onto the trunk. Head to the iron, then back to the machine to stitch on the right backgrounds onto the tree, then right backgrounds onto the trunk.
PAUSE, to slice off the bigger triangle, as I mentioned, then to the ironing board to press. Stitch the tree trunk unit onto the tree.
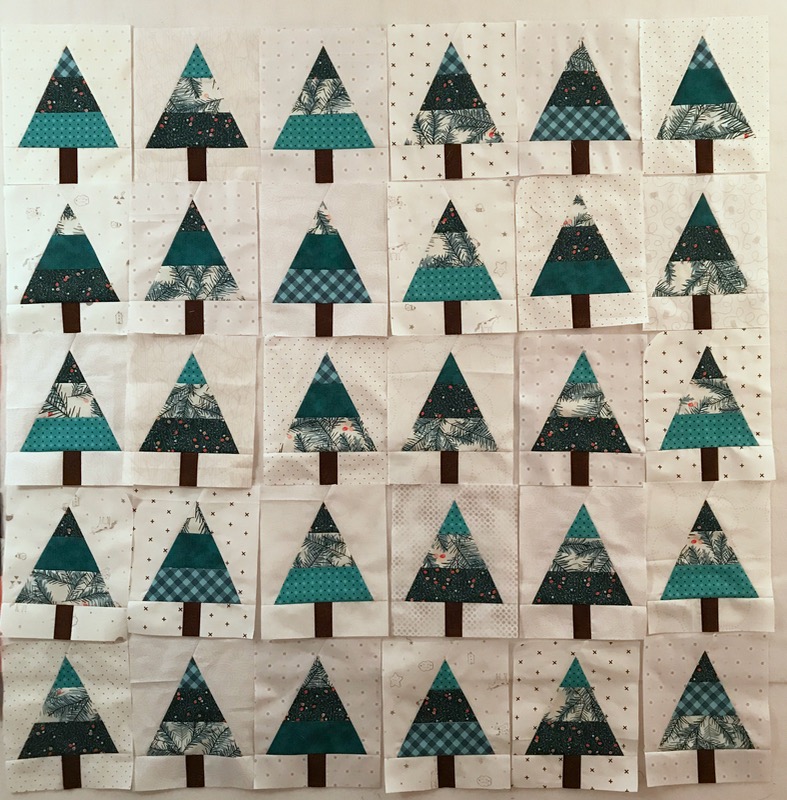
Time to true up the block. My tree blocks were slightly smaller than the pattern’s, coming in at 7-1/2″ wide by 9″ tall. Really, it just doesn’t matter — true yours up to your smallest tree and move on.
Arrange, and re-arrange until you like your trees, then sew on the extra strips, following the pattern’s instructions (shown below).
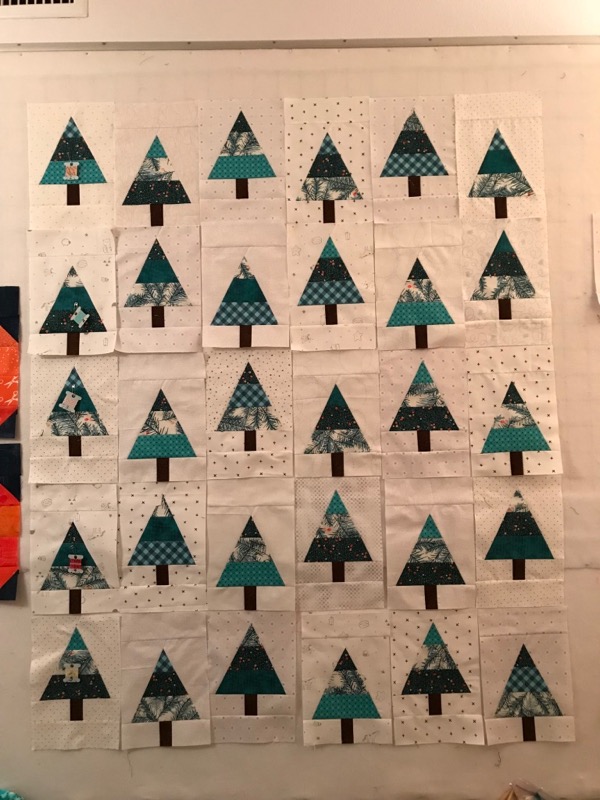
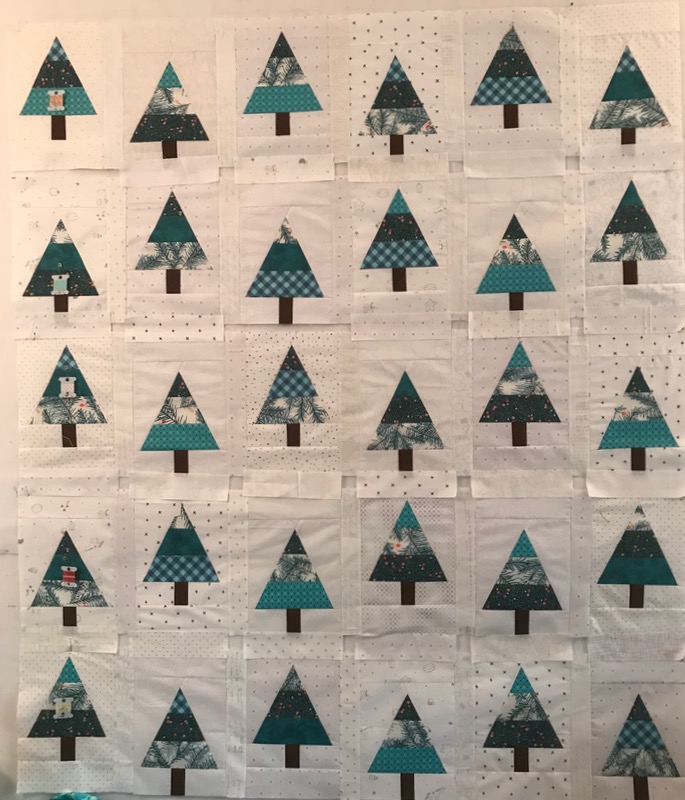
Stitch the sashing in between the trees, cutting that strip to the measurements of YOUR tree (mine was 11″), yielding strips of forest. Then lay out the shorter sashing strips (mine measured 7-1/2″) for the horizontal sashing, making sure to distribute your background prints evenly, then add the sashing square (as per pattern) and sew.
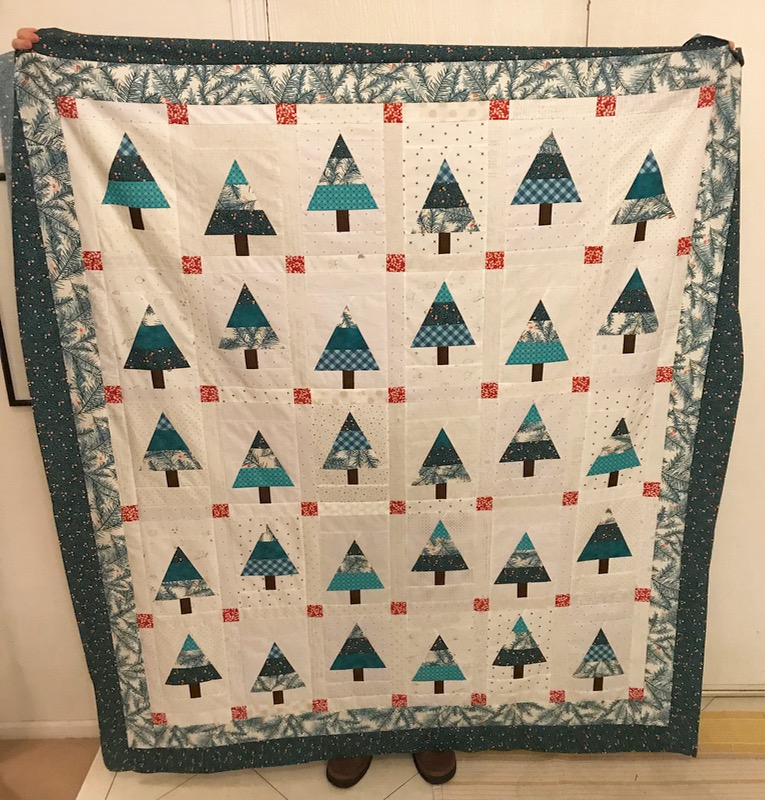
I had a bit of the pine branches fabric and the darker one with the berries, so used them to add two 3″ borders around my quilt. I just ran it up to the quilter’s and hopefully will have it back to enjoy before our Southern California winter disappears (it’s really only about 15 minutes long these days, given the effects of climate change). Today is a deliciously rainy day, and I can hardly wait to use my Winter Pines quilt on days like this!


Get the other free Christmas Trees pattern *here* (shown above)
Discover more from OccasionalPiece--Quilt!
Subscribe to get the latest posts sent to your email.

It looks wonderful! Projects like these inspire me to think about sewing on a machine.
Love your pine trees, Elizabeth! Thanks for the extras – how you modified the pattern, your tips for keeping the parts organized, and especially your use of technical language like “sticky outee triangles.” Made my day!
As always, you share your expertise with clarity and humour! And such a sweet tree quilt too! My, you are speedy!
Thank you for sharing your tree quilt, I especially like the quilting it looks as though the wind is blowing!
I can relate to, “my brain hurt from other projects! “ Lol
I’m working on a pattern with a million y seams!
Beautiful – I’m with you on the raw-edged applique. It’s got to be pieced or needle-turn applique fo me
Lovely quilt. I enjoyed reading your blog.
I love that you can use this so much past Christmas! Unless you are correct and winter is over by January 15. 😦
I love this! Your fabrics are just perfect in it.
Thank You for sharing this super cute quilt. I love tree quilts and I love your fabric choices. Thank you for sharing what they are. I love your finished edges too.
I really love this one Elizabeth. Perfect for a winter day if you ever have them there in southern cal. I made my own pine quilt using equilateral triangles in all greens and whites with a few snowcapped chickadees thrown in. Had hoped to finish before Christmas but didn’t make it. Now it’s covered by another triangle quilt that I’ve laid out on top of it. Wasn’t my smartest decision because now its going to be a bitch to move the new one so I may just leave it until it’s also sewn together and then quilt them both at the same time.
I have been so delighted by the rain we’ve had the past 36 hours. A full inch accumulation in my area! I hope that winter does finally decide to be here for a while… we’ll see. I really like how you modified the pattern to work for you!
Nice! I heartily approve of your decision to piece the trees to the background!
Happy New Year. Again, thanks for sharing the way to cut the side additions to the trees. Years ago, I “wasted” a lot of fabric cutting those side pieces.. What fun, another “quick” quilt to start.
It’s wonderful.
The little red squares in the sashing have such a big impact! Little details matter!
I agree: raw-edge applique is a peculiar way to create such a simple shape. This is a much more sensible way!
I just love this Happy Quilty forest!!! Thank you for the tutorial:).
For not wanting to do much thinking on this one, you sure did anyway. Though I would have run fast from the idea of raw edge appliquéing for a shape this piece-able. I love how soothing these colors are.
Very cute! I love it that you cannibalized a pine print to make pine trees. 🙂 Glad you will have some cozy time with this quilt, at least when you sit down to hand sew the binding.
It is really a nice size and very environmental. Kudos to the quilt holder, whose shoes I spy at the bottom of the quilt.