Yeah, I promised I’d do these blocks every two weeks, but it was a day I wasn’t weeping over Dad and stuff, and I could breathe and the sun was out and the white snow atop the mountain in the distance was so beautiful, and it was time to sew. It’s good to have days like this every once in a while. Plus I still had some awesome Valentine Candy for snacks (Trader Joe’s Xs and Os anyone?), so that must have been an omen to get out the fabric.
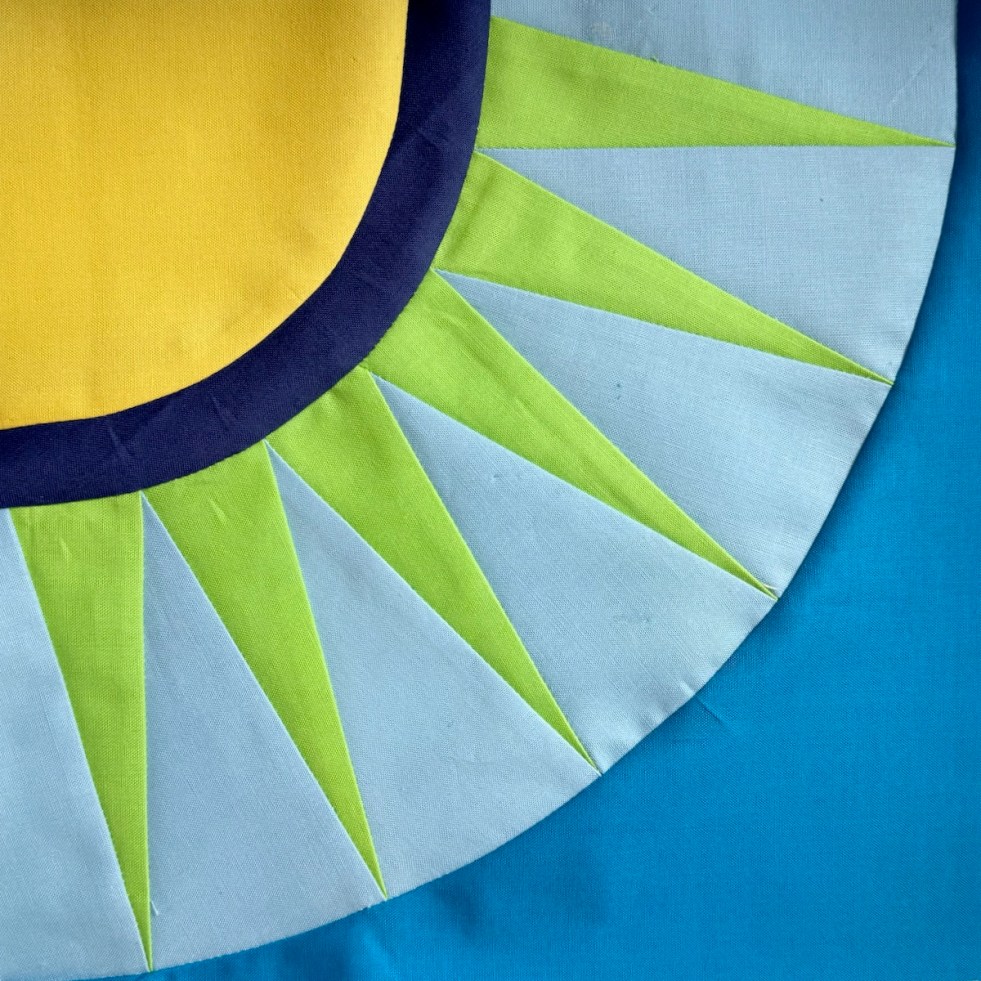
I skipped way ahead in the line-up and went for Aurora, the eleventh block in my New York Beauties quilt. Maybe I just wasn’t up to some fancy piecing, or I loved the blues, or what, but again, I used freezer-paper piecing and still liked it.
Rhonda wrote to say that the older freezer paper seems better than the newer stuff, and in her case, it can sometimes shrink slightly, so press it once down onto your ironing board, just to be safe. Carol wrote to say she was able to get five uses from her freezer paper: love to get comments giving me tips. I realize the last post was sort of intense, so this one will be lighter.
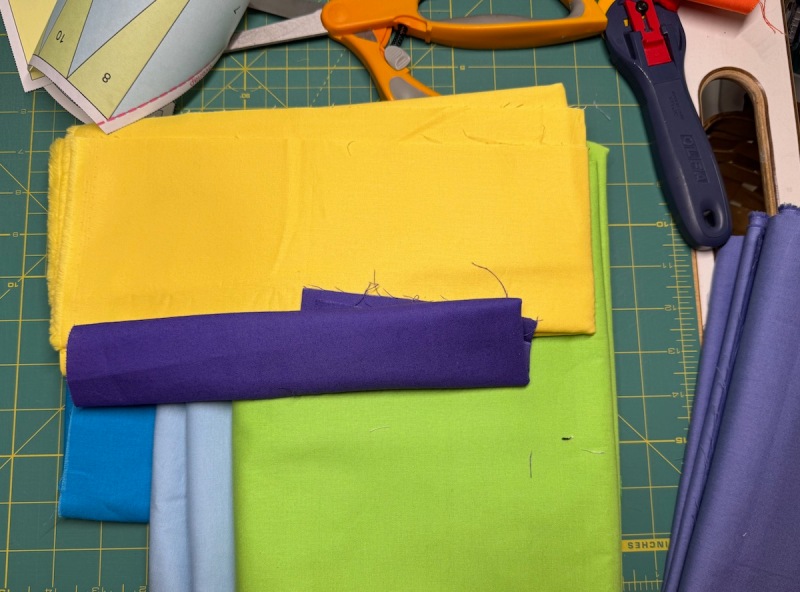
I use Painter’s Palette Solids from Paintbrush Studio (you can buy them here). Good goods. Full stop.
I’m starting to make a color card for this project, adding in the colors I use, in case you want to duplicate this. I am going the full color range for this quilt, but not full-strength. Some colors are muted (with gray added to them) and some colors are lightened (white added to them). The muted colors will keep this from looking less like a paintbox exploded (no laughing out there, yes I know it’s still pretty colorful). Here’s the card, so far. I will keep the card updated on online, where the pattern lives (not here).
To get your free download, go to the pattern, and click on the word Preview (in the pink circle). It’s also a way for you to get the color numbers of colors that work together.
This is where I started. My printer was having fits, so I cut the freezer paper slightly smaller than a page of card stock I had and taped it to the card to send it through. Then I arranged colors of my fabrics, trying out what I wanted to combine.
Then I folded the creases in from the front, then from the back (another tip from Rhonda).
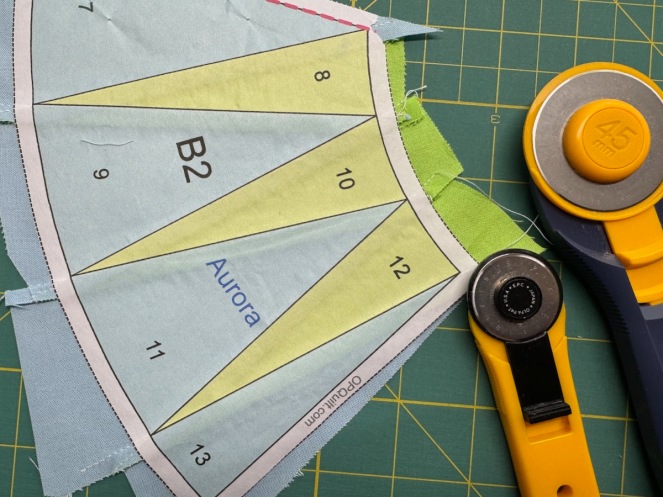
I use two sizes of rotary cutters for those curves (little for the inside, larger for the lower curve).
Peel back the center papers to join the B1 piece to the B2 piece (same on all the blocks).
This has a narrow inner ring, unlike Block One, Wild Sunflower. You can sew the ring either to the rays or to the Inner Center Piece. I make marks in the center for this short distance, so there are three pinning points.
For the lower curve of the rays to the Outside Corner, I do three different marks, so there are five pinning points.
I’m getting ambidextrous, but I still prefer the pieced rays on top when I sew.
Home stretch.
And although this is a wonky photo, I did evenly trim them to 9 1/2.” Two are done in no time at all.
My chart for keeping track. They are all in their places, with colorful faces!
Reminder: the coupon is good until Leap Day, February 29th, if you want to make some, too.
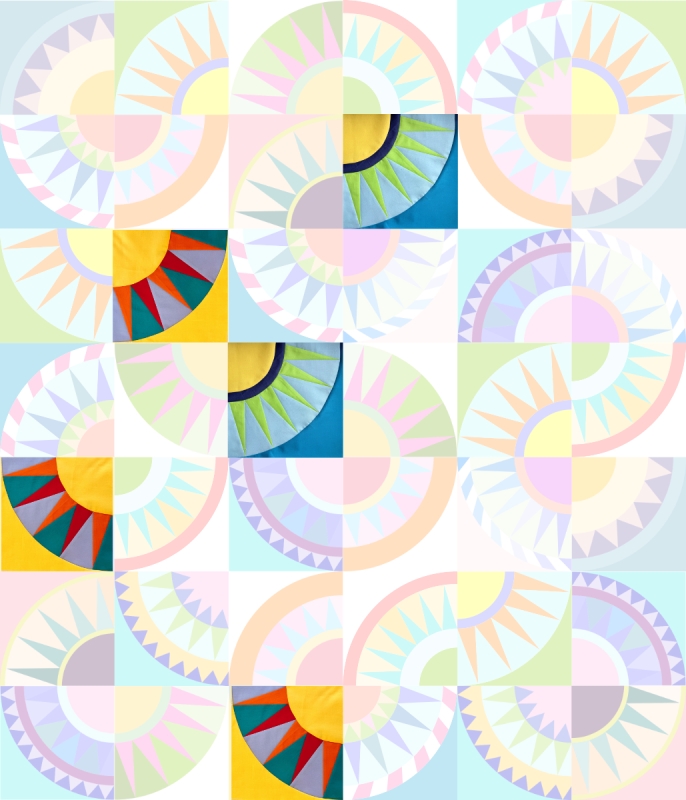
PS: I carted home several journals and photo albums from the clean-out of my parents’ apartment, which made me realize that the little photo, above — a composite of my monthly markers on Instagram — is like a type of journal for 2023. Good memories!
This phrase intrigued me. It came from a podcast I listened to while out walking, so I’ve been thinking about what happens when we try to learn something new. Or lean away from “what we’ve always done.” Or have to hang out in the middle of a decision, not knowing the best way forward (the temptation is always to force it to a conclusion, apparently, limiting new possibilities). These ideas on uncertainty are from Maggie Jackson:
“Neuroscientists are beginning to unpack what happens in the brain at the uncertainty of the moment, when the realization that you don’t know that you’ve reached the limits of your knowledge instigate a number of neural changes. Your focus broadens and your brain becomes more receptive to new data and your working memory is bolstered. So this kind of rings a bell: you’re on your toes and that’s why uncertainty at that moment is a kind of wakefulness. In fact, Joseph Cable of the University of Pennsylvania said ‘that’s the moment when your brain is telling itself there’s something to be learned here.’ So by squandering that opportunity or retreating from that discomfort, we’re actually losing an opportunity to learn. Your old knowledge is no longer sufficient.” –Maggie Jackson on the podcast The Grey Area, with Sean Illing
So what does this have to do with quilting?
I recently finished up my pattern of the New York Beauties (more on that in a minute) and decided I wanted to make each block in the quilt in regular intervals, but many of those above are multiples of the same block. So I thought I’d test out using freezer paper, instead of my usual parchment paper, and see how I liked it. (Besides that, my regular 17 lb. parchment wasn’t being made anymore–only the 28 lb. Time for an update!)
And the verdict? I like it!
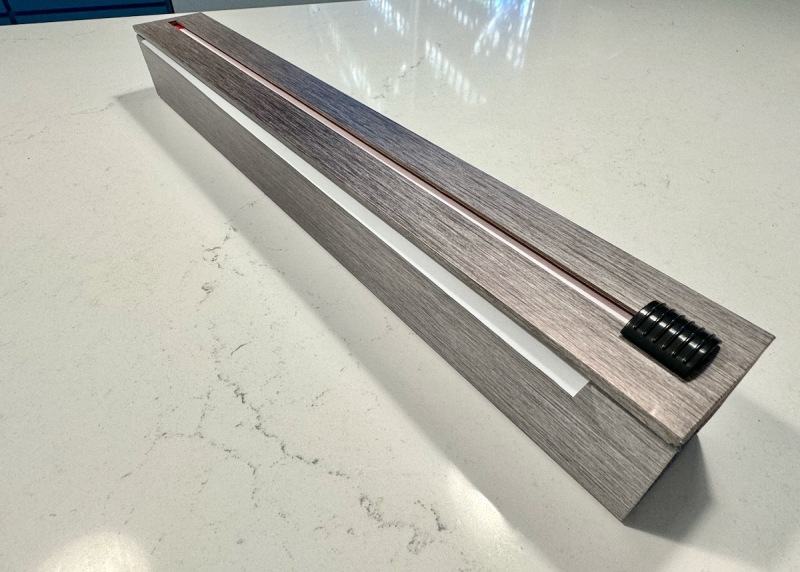
First, start with this: ChicWrap’s 18″ aluminum foil dispenser. It comes with foil, but I put that back in the kitchen, and slipped in my 18″ roll of freezer paper.
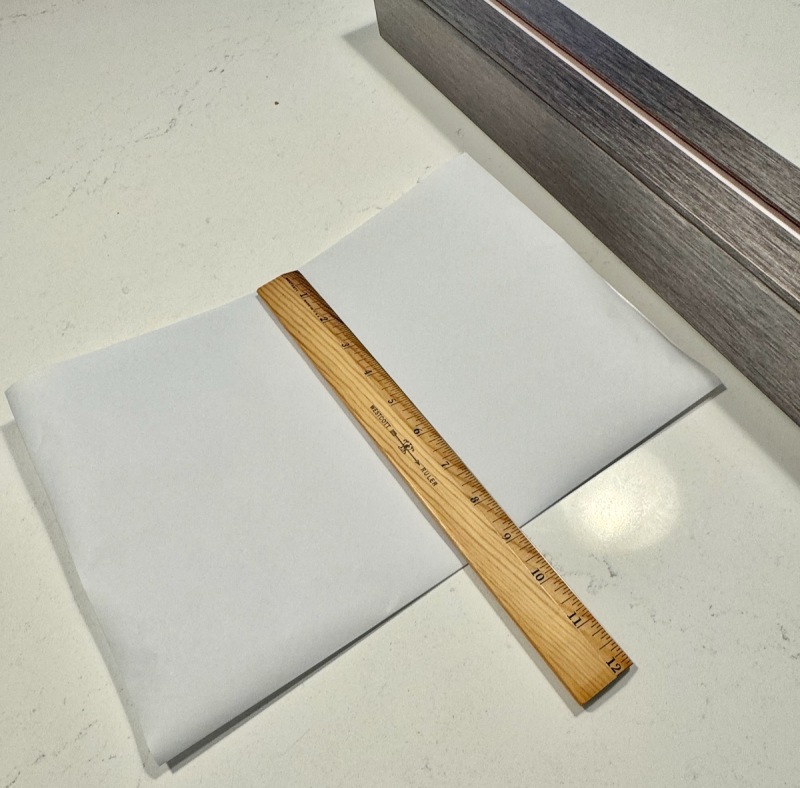
You don’t thread it through that slit, but instead, lift the lid, to set up the paper for cutting.
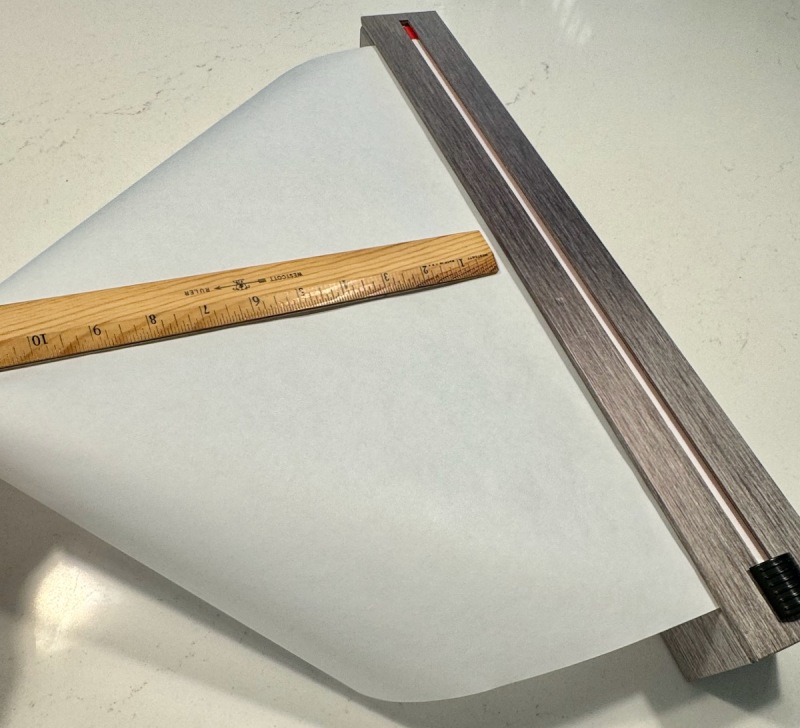
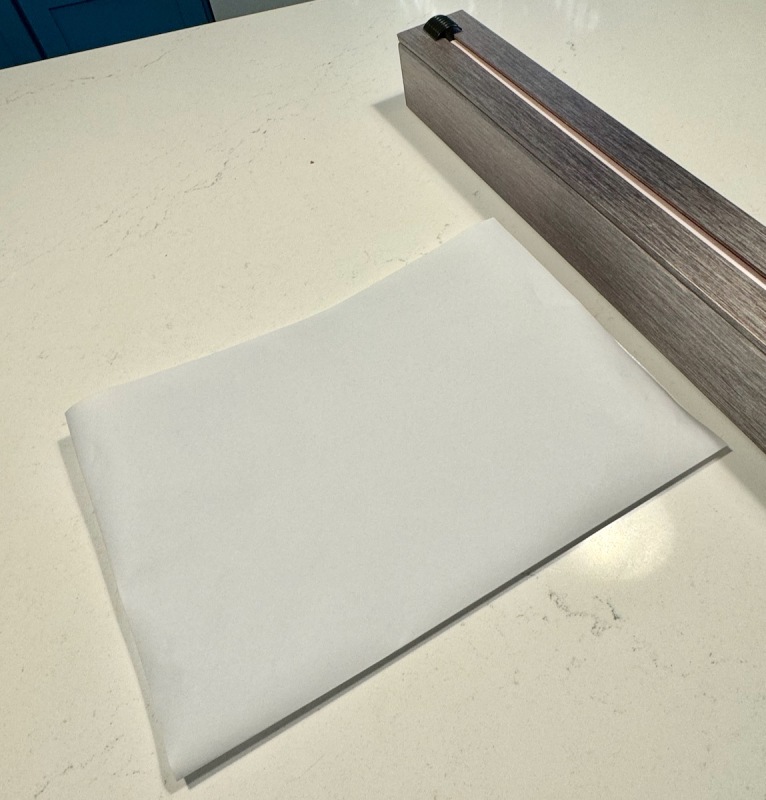
Pull it out so you have at least 11″ of length. Fold it in half (it will measure about 9″ in width), then take it to your cutting mat to trim it up to 8 1/2″ x 11.” Now you are ready to feed it through the printer. If you don’t have a printer that will allow you to feed it one sheet at a time, you can tape the freezer paper to a piece of heavier paper or cardstock (trim the freezer paper down to 8″ x 10 1/2″) and send that through.
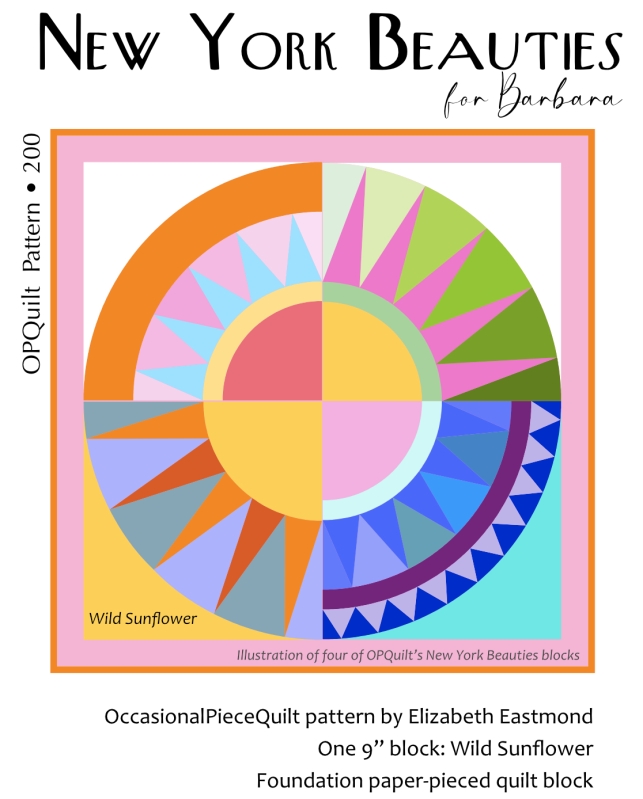
I read about buying sheets of freezer paper already cut, but most of the commenters said it was no sturdier than the stuff we use from our rolls, so I just cut it from the roll, and went with it. After printing, I cut it out around the outlines of the piece I was using. You can experiment with this technique by downloading my free New York Beauties single pattern from PayHip:
Even though I’d already printed out all the regular parchment papers, my brain was saying “there’s something to be learned here.” So here we go:
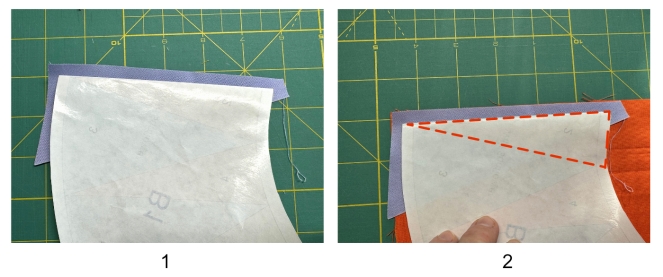
After cutting out your shape from the printed freezer paper, fold on the first line, and press just this section (Ray 1) to your first piece of fabric (picture 1: muted lavender). Then lay that on top of your second color (picture 2: orange).
Later on, I figured that I should make a crease on all the lines of my section, but for now, I digitally outlined the rays in orange dashes to help you see the shapes.
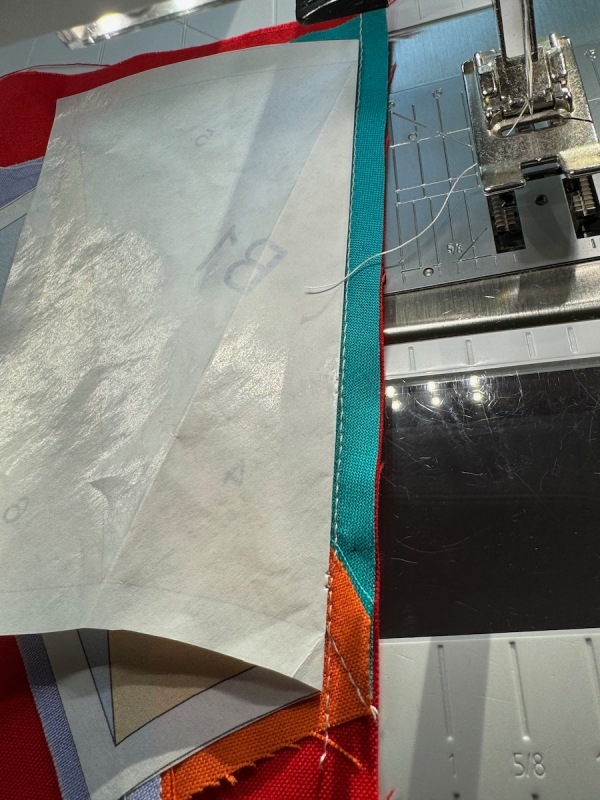
Make sure there is enough of your second fabric underneath your first fabric. Pin, or clip. Head to the sewing machine, and sew next to that folded edge.
Now to the ironing board. Press, smoothing the fabric away from the seam. Iron only on the next section (Ray 2). Fold back along the line between rays 2 and 3.
At the cutting board, align your ruler for a scant quarter-inch seam, and cut off the excess. If you need to trim at the end of the piece, open up your paper, so you know you aren’t going to cut off something you’ll need later on. Use the edge of the paper as a guide, but rough-cut off the extra. (See picture 12, below.)
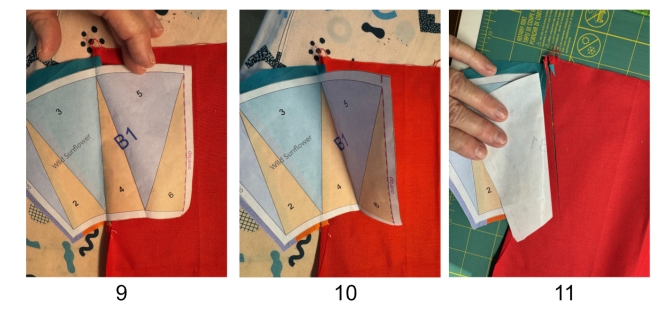
Fold back alone the line between sections 2 and 3, revealing the shape of the next ray (shown here in dashed orange lines). Place on your third fabric (picture 5: blue-green). Stitch along that folded edge. Iron Section 3 paper onto the blue-green fabric, smoothing out the fabric underneath.
Fold on the line between sections 3 & 4 (Ray 4 shown here in orange dashed lines). Place until on next fabric (picture 6: tomato red).
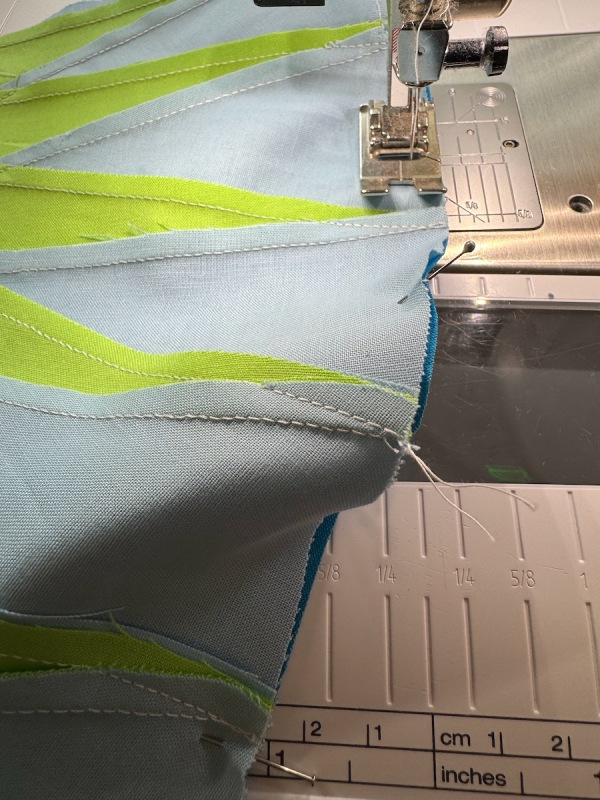
Close-up of stitching
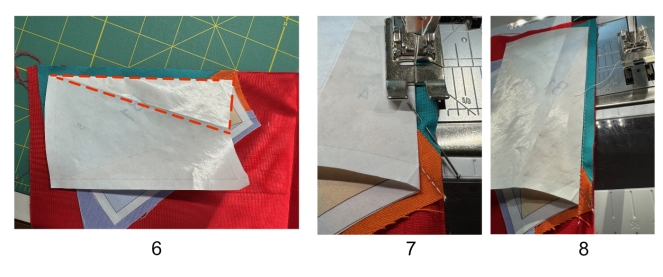
Again, stitch along folded edge, shown in pictures 7 & 8. You can also see how I pin — just in that seam allowance. Did all my fabrics have a straight edge, making it easy for me to align (as in picture 6)? No, not always. If not, I would place, trim…and then pin and sew.
You know the drill now: press just that section (Ray 4), then trim at the cutting table, as shown in picture 11.
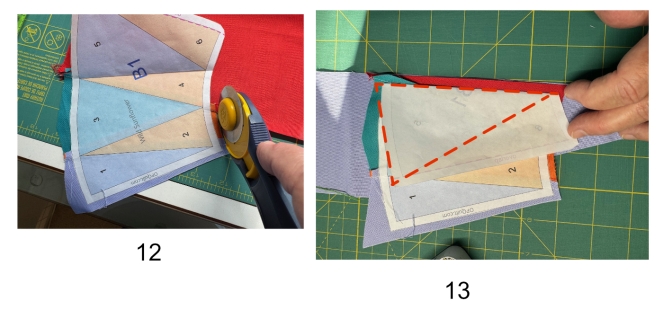
In picture 12, I show how I open up my paper, so I can cut off the excess at the base of the B1 section. Then I fold it back down and trim that scant quarter-inch at the crease of the paper (between Rays 4 and 5). In picture 13, I fold it back down, and lay it on the next fabric, using the shape of Ray 5 to check you have enough fabric. Those orange dashed lines are a visual guide: I do have enough. Stitch along the folded edge.
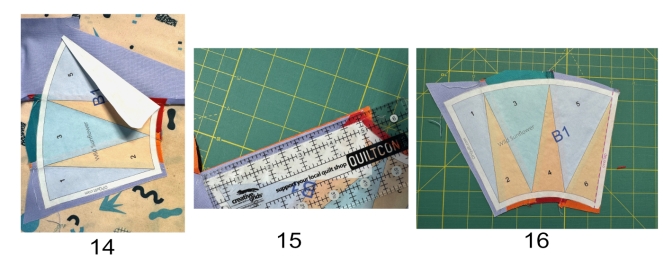
Yep–you know: press only the Ray 5 section of freezer paper onto your fabric. Back to the cutting mat to trim at a scant quarter-inch, then repeat with your final ray (picture 15: a happy orange for me). Press that freezer paper to your final ray. It should look sort of like the image in picture 16. Set aside, and start on B2.
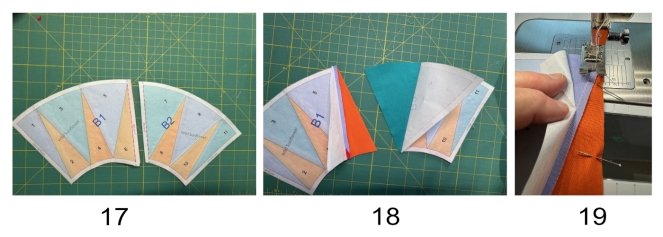
Following the numbers, and using the same technique, stitch all the rays for B2. Trim carefully around the edges of both, neat and clean (picture 17). Peel back the papers for those edge-rays with wrong sides together and pin, aligning lower and upper edges of B1 and B2. Take to sewing machine. I found I had to peel back even a little more. Stitch, then carefully peel off the freezer paper. When you take it to your ironing board, press that last seam the same direction as all the rest (you’ll figure it out).
Charging right ahead, press a center mark in the A Outer Corner, the B1/B2 piece, and the C Center. Don’t press down through the whole piece — just the tip of your iron is all that’s needed. Pin the outer edges of the A Outer Corner and the center marks, and head to the sewing machine.
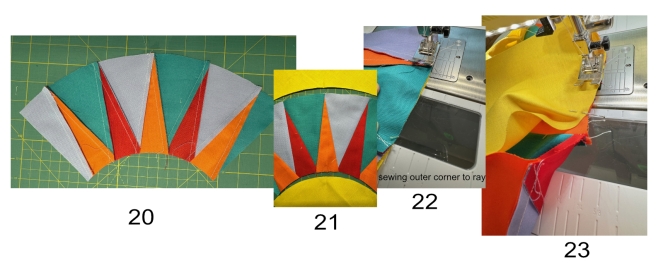
In picture 22, I sewed the A Outer Corner to my rays, PUTTING THE LARGER OUTER CORNER TO THE BOTTOM. This is different than you usually see. Please take it slowly, no rushing, keep aligning as you go from pin to pin to pin (there are only three).
In picture 23, after putting in my three pins, I sewed the C Center to the rays, WITH THE RAYS TO THE FEED DOGS. Again, take it slowly, and keeping aligning the fabric. You can pull it toward you a little as you stitch, because those curves are bias. By elongating them (by stretching them out), it may help them to line up a little easier. But not a big pull, not a big tug. Little adjustments. You are the tug boat, getting that steamship into port — little by little. (Okay, enough bad metaphors.)
Press. Usually you are pressing away from the rays.
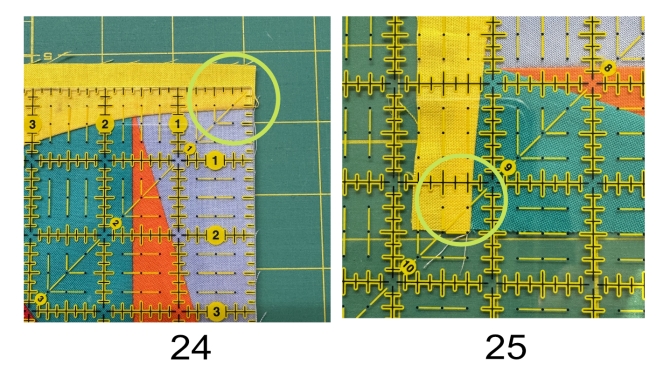
Now to trim up. I gave you extra on the A Outer Corner so if your block went askew, it wouldn’t be a tragedy (just another way I show my love to you in my patterns — I make the mistakes so you won’t have to). Align the corner of your ruler so the 1/4″ line is right at the Outer Corner fold, as show in picture 24.
Then check the opposite corner, lining that 9 1/4″ mark at the folded edge. It’s not rocket science, meaning that it most likely won’t be exact. Get as close as you can. Trim, then turn the block, lining up the 9 1/2″ line with the trimmed edge, and slice off whatever is left (not much on this side).
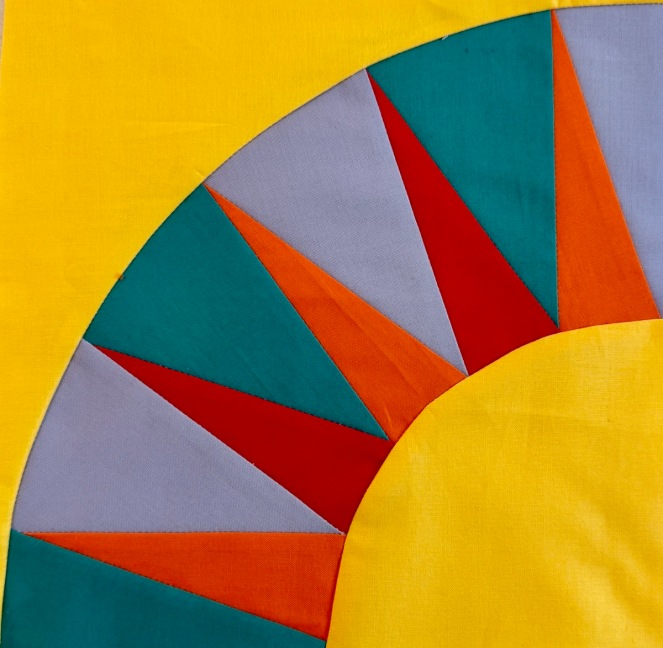
Done! Wild Sunflower block is complete. Now, if you are going for the full quilt, the pattern says to make a total of three. So will the freezer paper keep sticking?
Ray Two is finished, and I’m plowing again into Ray Three, and yep — it’s still sticking. For one of the blocks you make it five times. I’ll be interested to see how that goes. And overall, I felt like using this method is faster, always a plus.
Just like I used a weekly goal to help pull me out of my sewing slump last summer, I’ll be using these New York Beauties to get me going for this year. If you want to follow along, I have a coupon for you to use, if you want to purchase the pattern. (I’ll probably do this every two weeks, so don’t panic.)
Just head to my quilt pattern shop, and when you check out, type in this code (note the three capital letters at the beginning). You’ll get 20% off the pattern. It expires on Leap Day! (February 29)
All of this can be found on the Master New York Beauties page, on the tab above. When the coupon expires, I’ll take it down, but a listing of the blog posts will be linked there, if you want to refer to them.
What we ate for the Super Bowl (no, we did not watch it): Homemade Focaccia
Just before kick-off, Camryn and Landon (he, of Focaccia fame) stopped by to visit, then took off again to their Super Bowl party. Later that night, we blanked out by watching the movie Dune on Netflix, understanding about 60% of it. If you’ve seen it, what was your percentage?
Sometimes the title for these posts can nudge toward the trivial, but the first thing I want to talk about was anything but trivial.
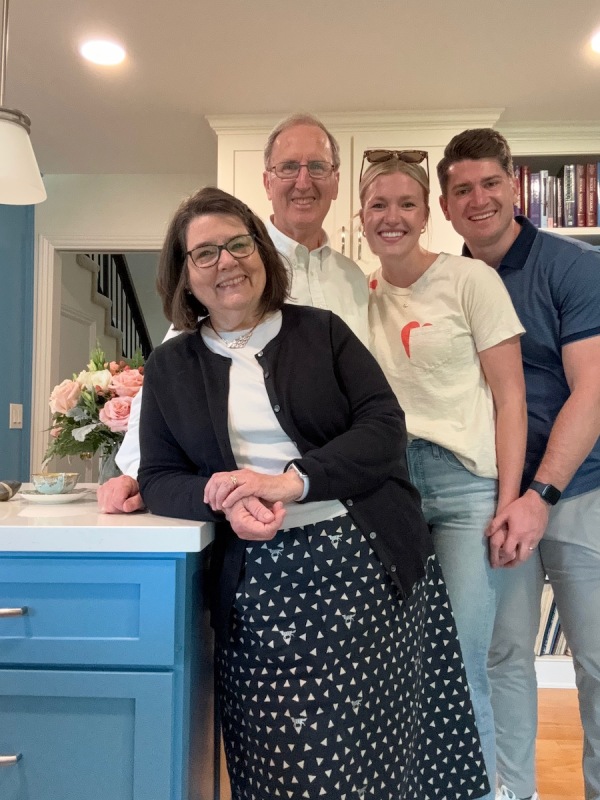
My family.
Our four children do not live near us, for some, the far-away is very-far-away, and for others, it’s a bit closer. My husband proposed taking me out to dinner for my milestone birthday, but to “prepare for photos.” And “maybe don’t wear your sneakers.” We went to our local Fancy Dining Place, The Mission Inn, which was still decked out in holiday lights. When I rounded the corner to our table, the kids were all sitting there. Oh, My! I was quite touched that they would come to celebrate with me, and they spent the next day with us, too. Quite the loveliest of birthday surprises. By Sunday, they had all gone home, and the house was very quiet.
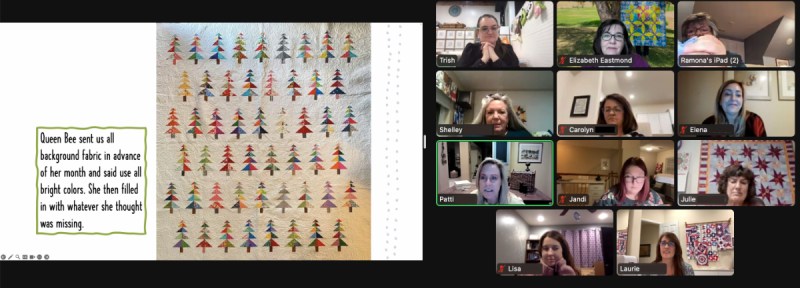
When an opening became available, I rejoined the Gridster Bee. It was one I’d started several years ago, but I’d bowed out last year. Patti, ever capable, took over and has been a steady hand in keeping it going, as many bees dissolve after a short time. We had our kick-off Zoom call at the beginning of the month (one positive from the 2020 pandemic is this technology):
I loved seeing Carol’s Christmas quilt, one done in an earlier iteration of this Bee.
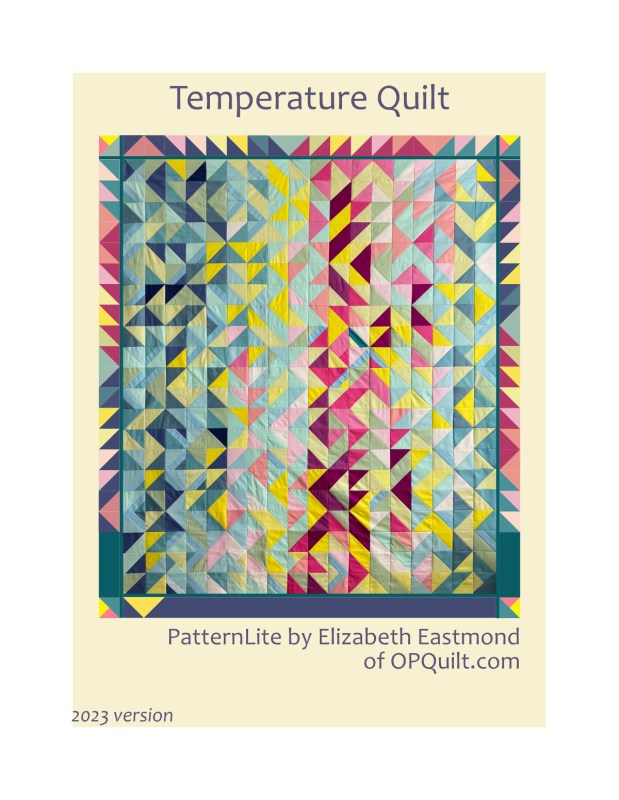
I finished this. It’s a free pattern, here on the website (keep reading). I’d started writing it ages ago, but who knows where time flies? Inside is the color key for both this 2023 (softer) version of Painter’s Palette fabrics, as well as the (bolder) version used in 2019:
I haven’t yet finished the 2023 quilt; for one, I’m still embroidering the temperature range numbers onto the Circle of Geese block that I’ve used for a key.
And about this geese pattern. It was originally made by Kelly Liddle of JelliQuilts. If I could find her again, I’d link to it. She seems to have vanished without a trace, and it’s a pretty good pattern for this sort of thing. I’ve even written to the last email I have from her, when I paid for and downloaded the pattern: Zip. Nada.
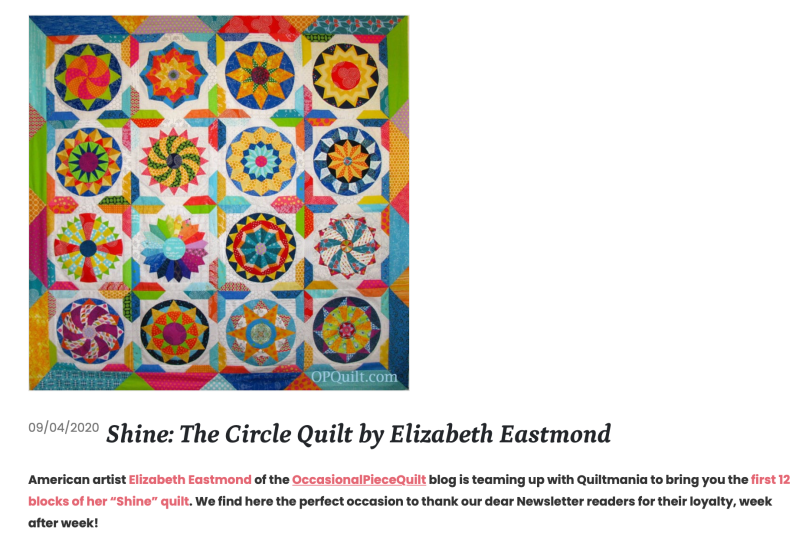
Which brings me to the podcast I listened to this past week, where Ezra Klein and his guest, Kyle Chayka, talk about how the internet isn’t fun anymore. Boring, too. And part of it is what Chayka calls the SEO-ification of the algorithm. Everything resembles everything else, as we use Search Engine Optimization (SEO) to get a wider reach. While this can have benefits, Chayka and Klein argue that we seem to be homogenizing our world, as every website looks like another as the robots send you to whatever you’ve liked before, and assume you will like again.
I’m fine with that, especially when I do a search on Temperature Quilts on Instagram. But I’m also not fine with it as it seems to have flattened out what we see. Like hashtags used to be an interesting way to get a range of images, from temperature quilts that began as crocheted blankets to the most recent version of houses, leaves, and birds. Now we just get the “TOP” images. Are they the top “eye-ball-getting” images? The most colorful? The most interesting? And how will we ever know what the robots, aka: algorithm, have come to choose what they are showing us.
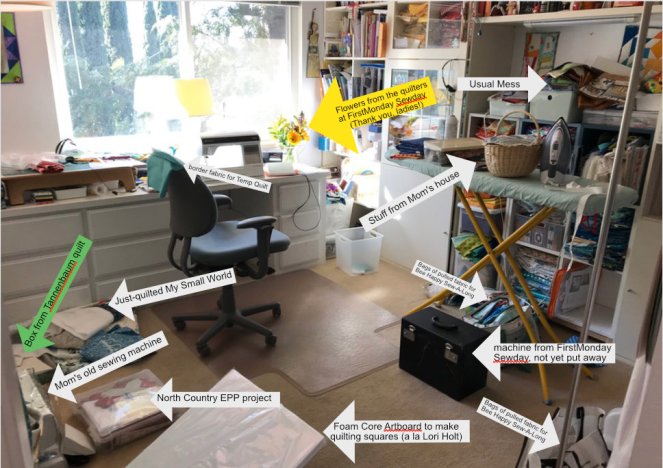
Chayka says he misses the curated web, where various people wrote random things, like a writer went flying through a rainbow and put the colors up on a blog. A blog!?! Who writes those anymore? Well, I do. Maybe that is why I also write about quilting, but also more-than-quilting, trying to avoid being boring, and maybe to avoid having to clean up my sewing room:
(from 2020, but it still looks the same)
One more thing: this week is Road to California, a local, national quilt show. I’m signed up for two classes: one from Lori Kennedy (FMQ on Monday) and one from Annie Smith (Design Your Own Appliqué on Thursday). I’ll also go one more day, Saturday, so I can stay to get my quilt that is hanging in the show: Aerial Beacon.
I would take a closer photo of this, but it will have to wait until next week, when I get some pictures of it hanging in the show. If you are headed there, find me and say hi!
Here’s the Temperature Pattern download. It will stay here on my website for a bit, then move over to my Pattern Shop on PayHip. Enjoy!
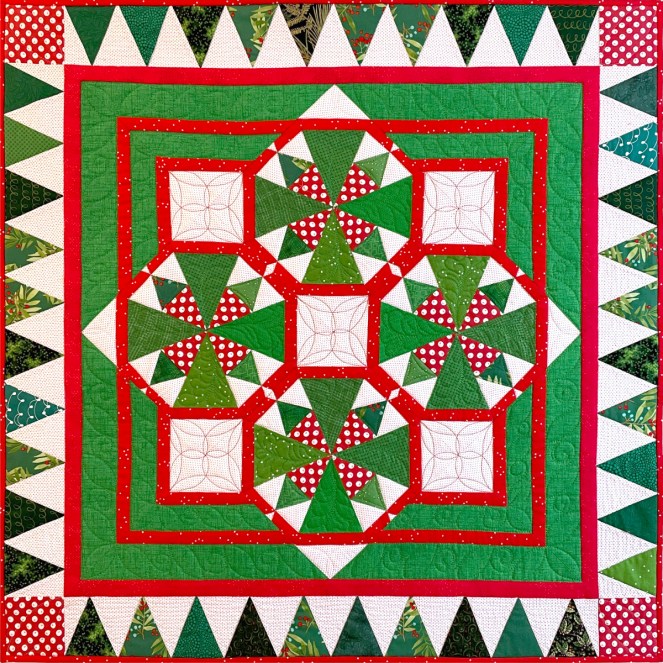
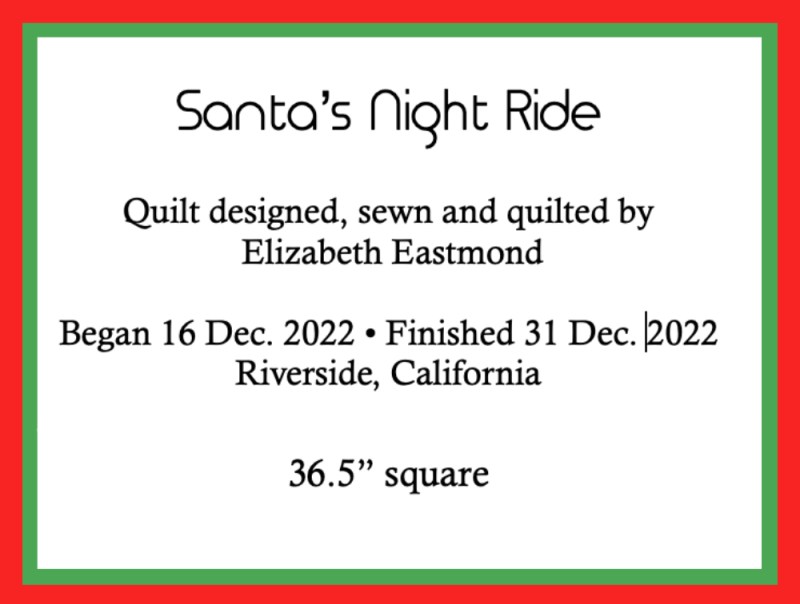
This quilt has been on quite a ride. A Santa’s Night Ride, to be exact.
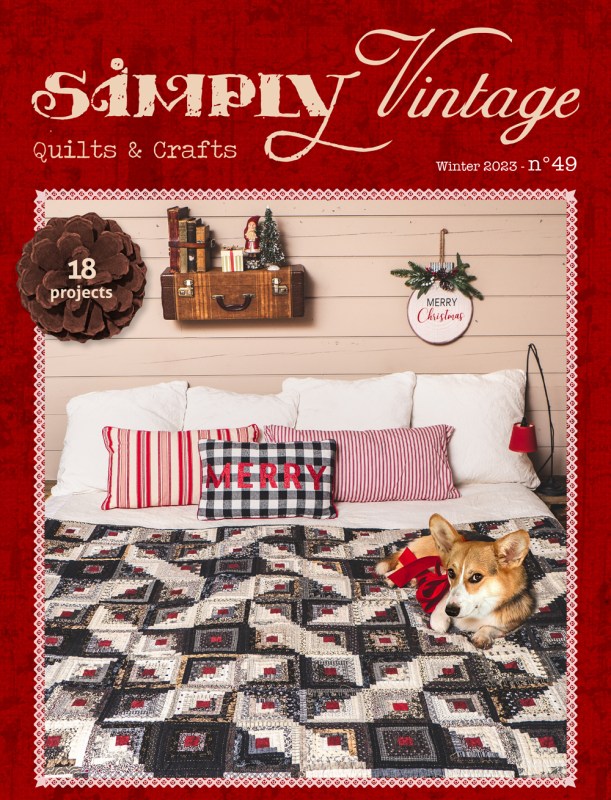
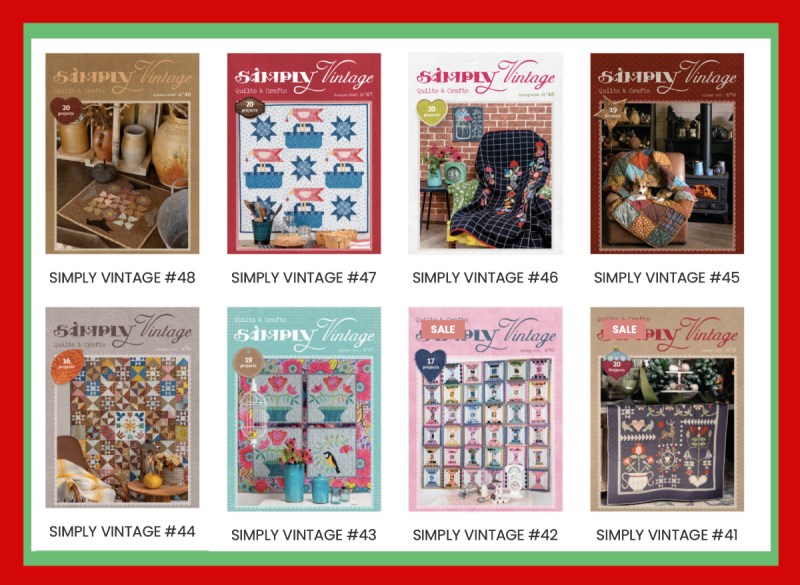
It has flown over to France, to the QuiltMania people, who publish three fine magazines: QuiltMania, Simply Moderne and Simply Vintage.
It has flown home.
And it will be making its debut in one of the QuiltMania magazines: Simply Vintage!
I know my friend Carol will like the Corgi on the bed. I do too! My quilt, Santa’s Night Ride will be in this issue, Number #49, which should be out about now. For those of you not aware of the THREE Mania magazines, let me introduce you to this one. While it says “Vintage” on the top, you might instead think of it as more traditional than vintage. It has a lot of our favorite quilt designs, as well as some new ones. I’m just pleased as punch to have my quilt published, and you can buy it from them directly here. Just click on the newest issue, with the Corgi on the front.
label
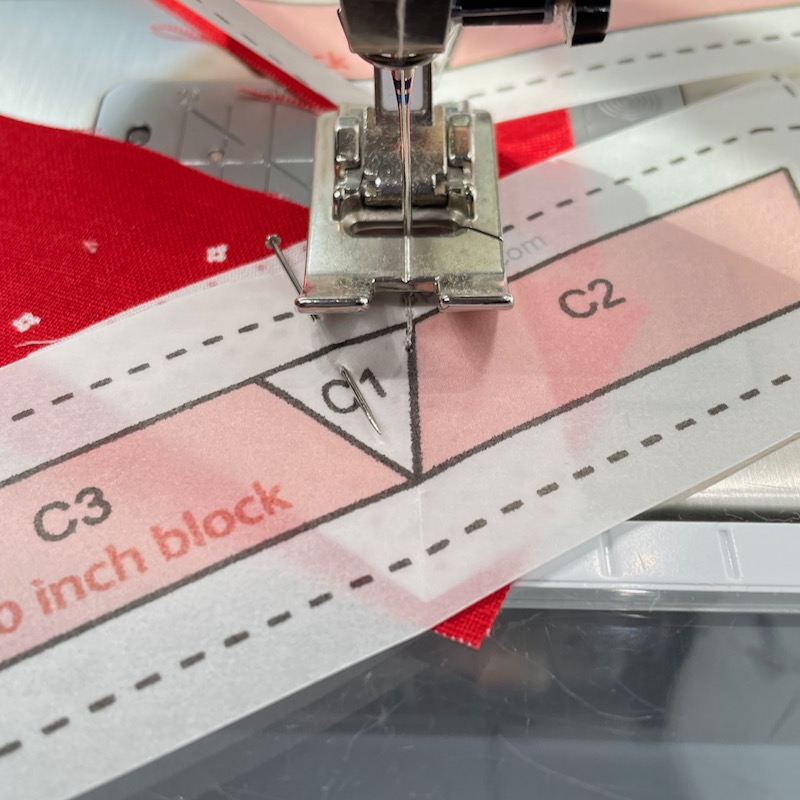
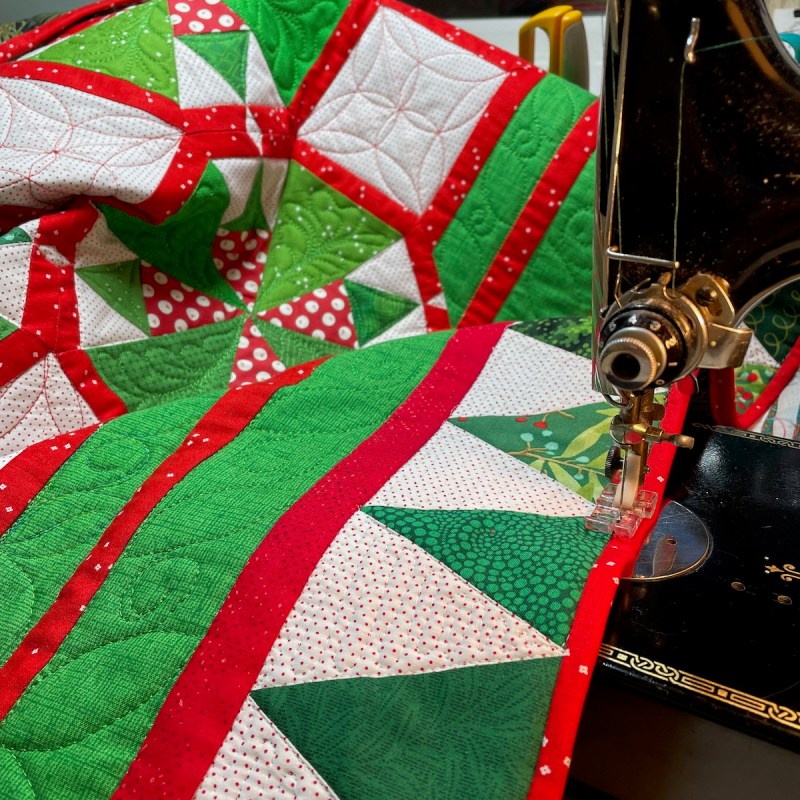
The center blocks are Foundation Paper Pieced (FPP) and they go together quickly.
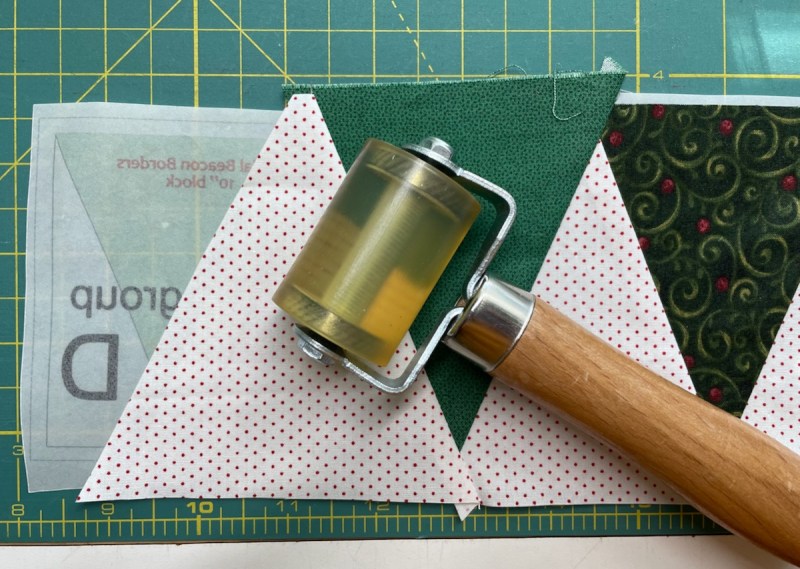
I also made the border with FPP, and here you see my favorite roller. Instead of running to the ironing board, just use this tool, an automotive tool, with ball bearings — I prefer it to the old wooden one I used to use, and it’s $cheaper$.
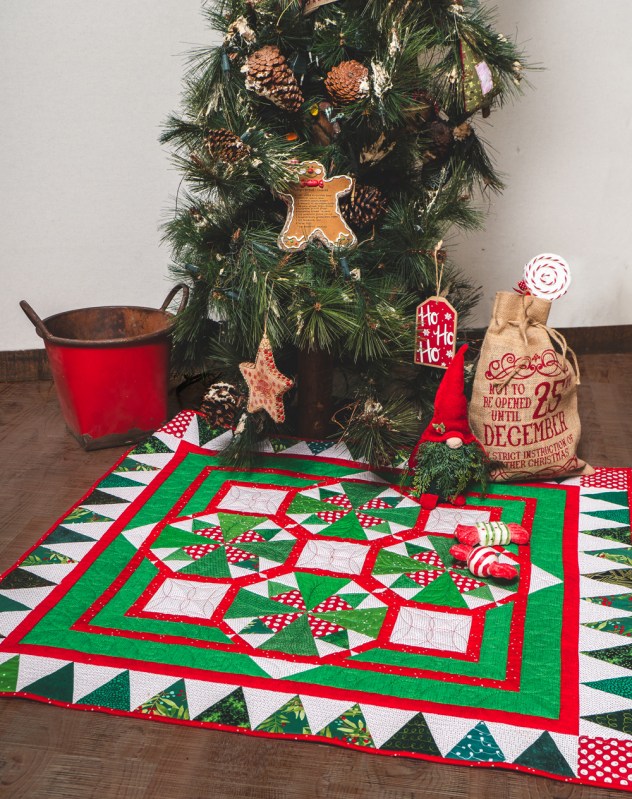
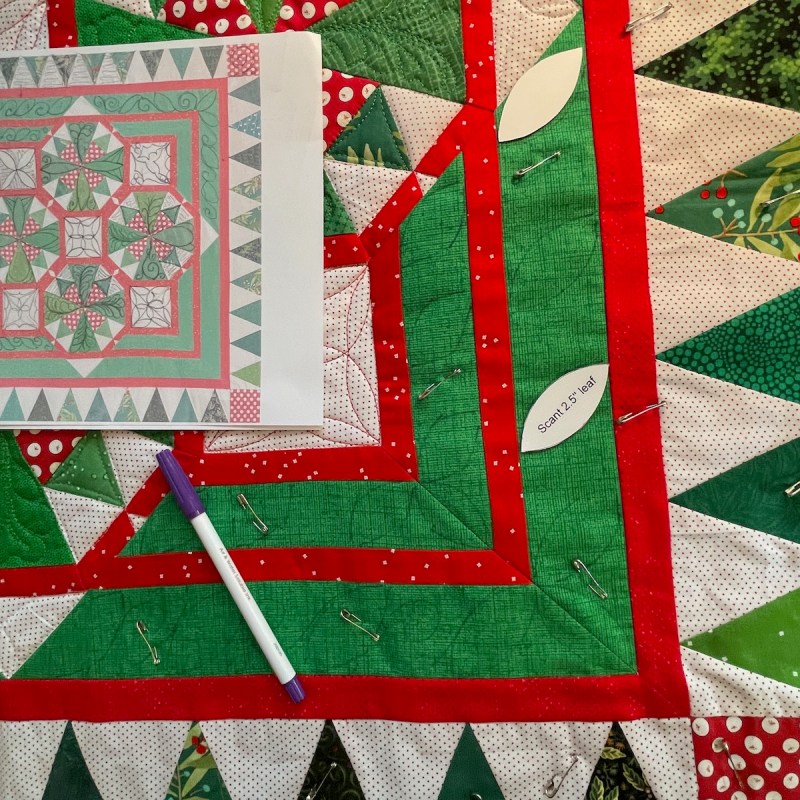
I always print out a light version of my quilt and map out my quilting. Then I will often use a disappearing pen to transfer my ideas to the quilt.
I even sewed on the binding by machine. It seems like every December, when I’m deep in the Christmas season, I get the bug to make a quilt, but I always finish it up in January. Not this one! This is Quilt #272 in my Quilt Index.
Some tips on using scraps: Keep them in similar values for the center blocks. All my blocks are different, but they “read” the same because I used the same red/white for the inner triangles, and while I used four different greens for the large triangles, they are distributed evenly throughout each block.
Go for one fabric for the light background for both the center blocks and the outside little tree-triangles in the border, as it helps tie the quilt together. You can see above all the different fabrics I used in the outer tree-triangles: cut loose and cut from your scraps.
This has been in the works for nearly a year, so while you may have had a glimpse or two of this small quilt, I was waiting for the day when I could share the happy news, of this publication.
During the pandemic, I agreed to let them share my blocks with readers of the QuiltMania newsletter. The patterns have now come home to stay, and most are free (see tab, above).