Or, the Almighty Sawtooth. Or the Magnificent Sawtooth. Or the Sawtooth Supreme. But first:
The famous novelist, Joyce Carol Oates, talked about what she turns to after she finishes a novel, as she described herself then as spent, and empty. Poetry, she said. I was sitting in that audience when she gave that talk, and it taught me the value of not abandoning the craft when weary. But it also taught me that it’s okay to take a moment after going full steam ahead, a thousand hours a week, pedal-to-the-metal. This week was one like that, maybe not like writing a novel, but the always On, always Going, and by Thursday, I turned to my kind of poetry: sawtooth stars.
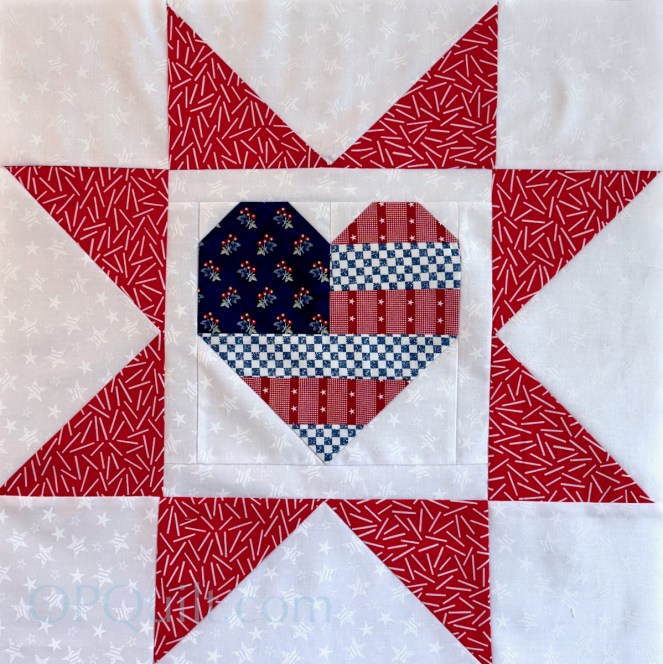
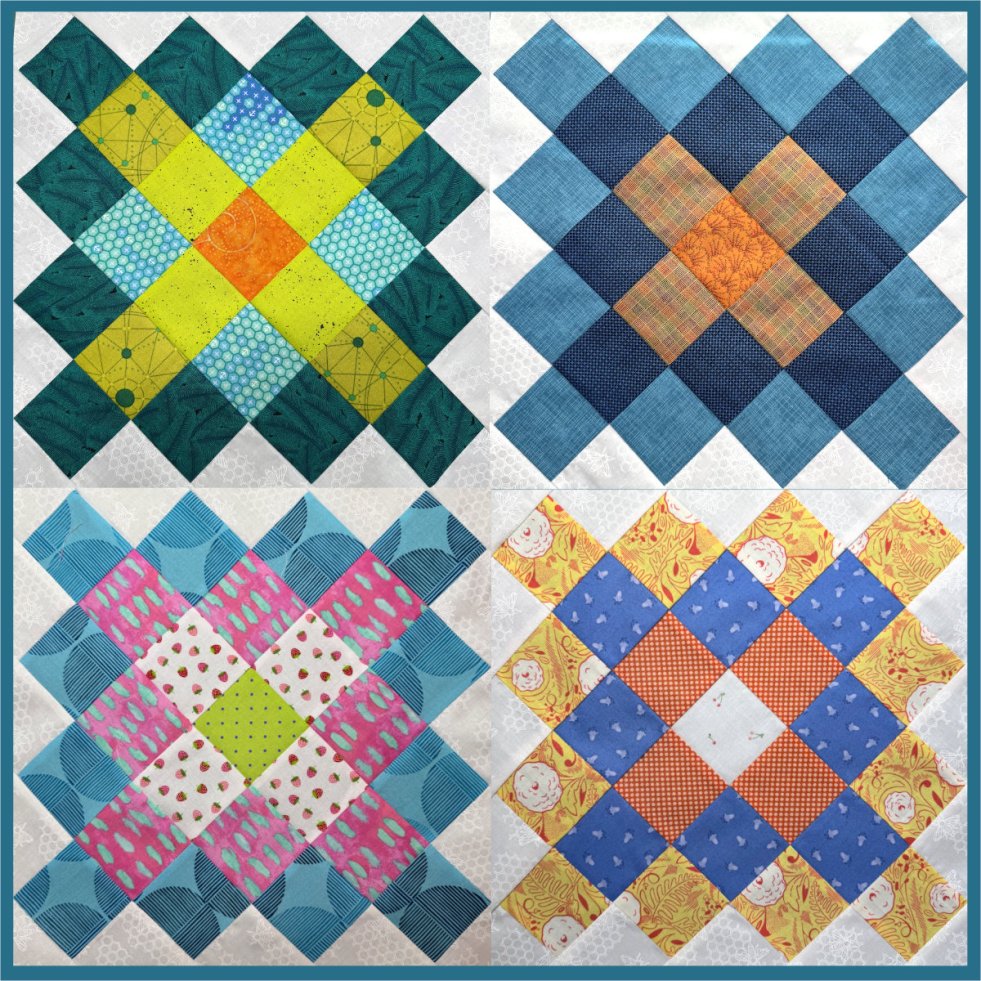
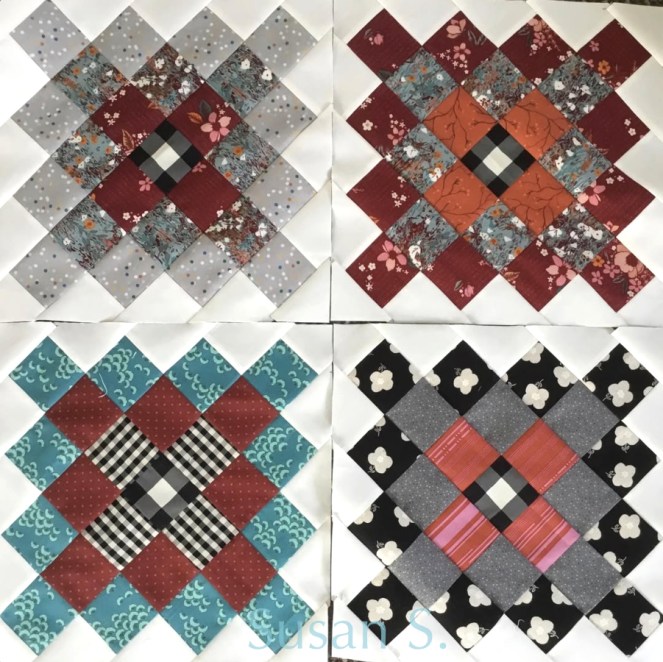
A rendering of a current popular pattern, but I’ve done this before:
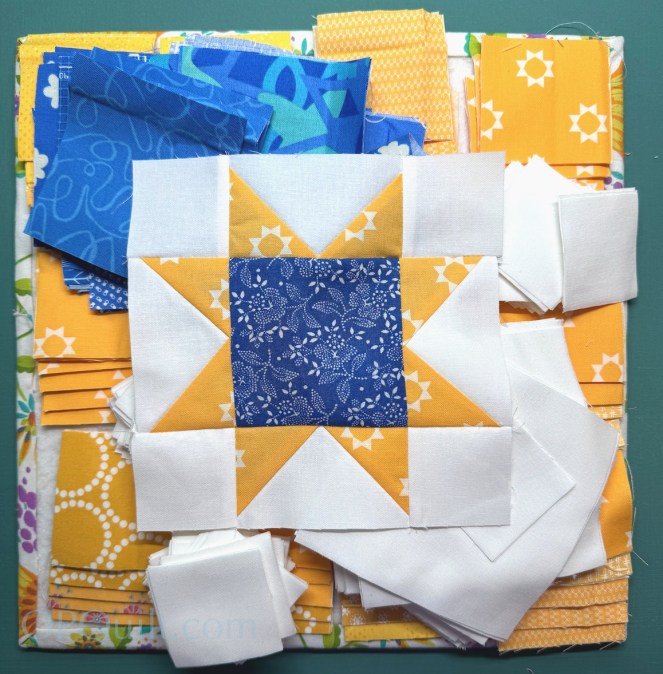
“This” being to make an outer frame of the sawtooth’s Flying Geese blocks, and insert a design in the center. Why do we like the Sawtooth Star so much? I think the answer to that lies also in why we like star blocks so much. And it was to this I returned this week, after dancing around with multiple combinations of everything for the Granny Square blocks.
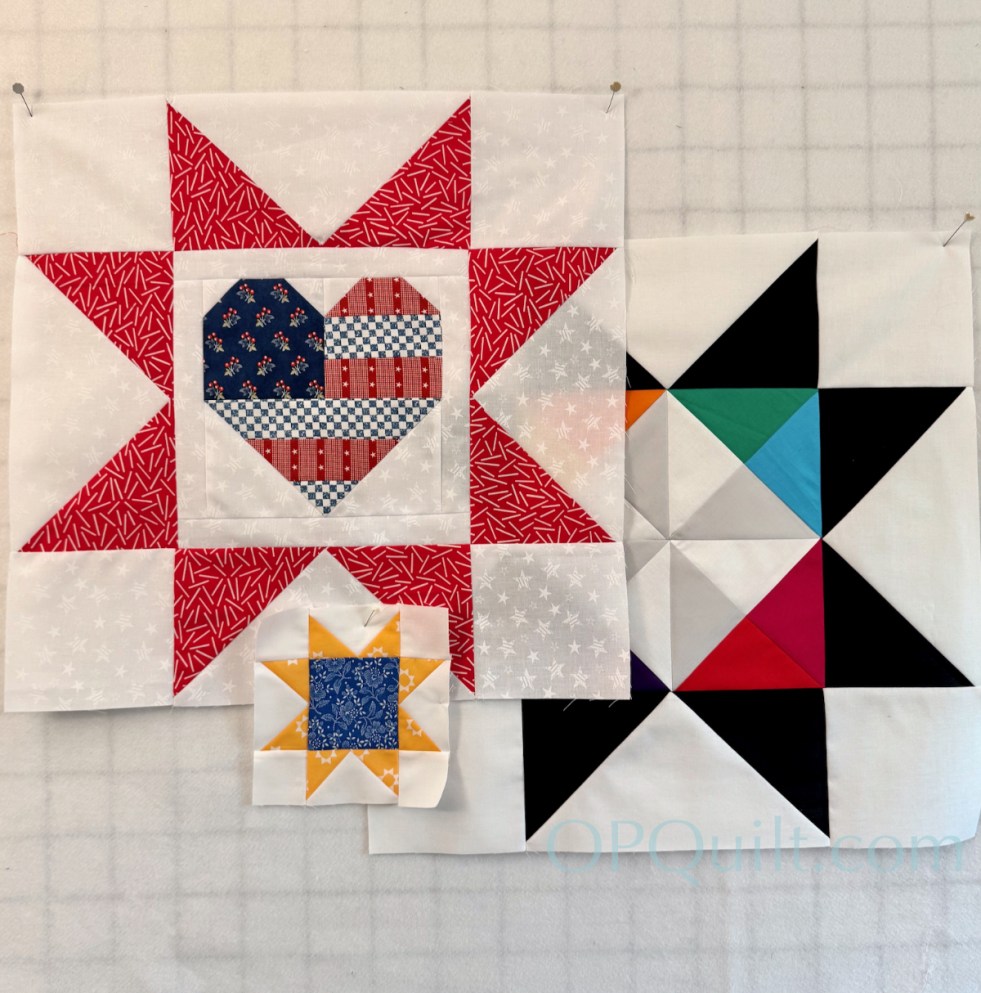
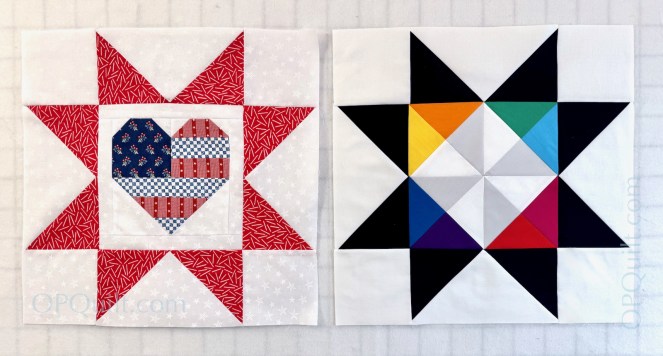
I’ve had this sawtooth star idea floating around my sewing room for probably five years, the how-to sheet pinned to my design wall just to the side (see the free download at the end). It was time. The large block measures 20″ finished.
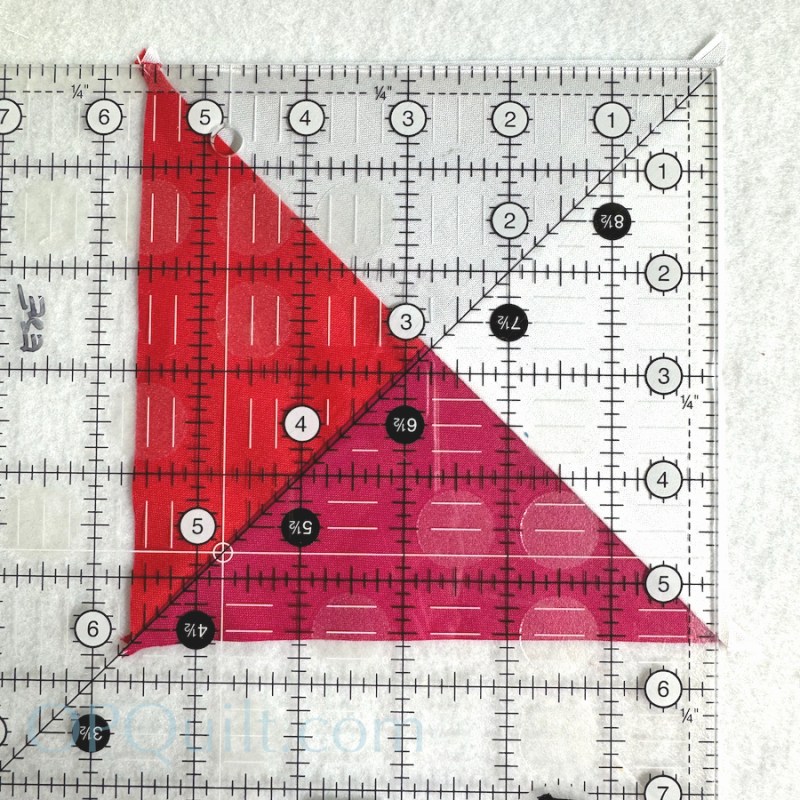
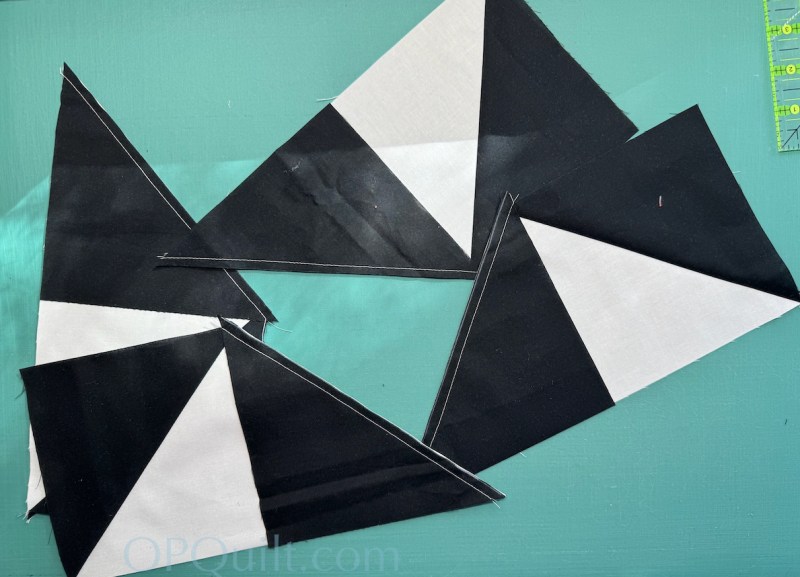
The handout/pattern is pretty loosey-goosey but after you make the inner quadrants, trim them to 5 1/2″ square, making sure you are centered with your ruler. And maybe also centered in your soul. Kidding.
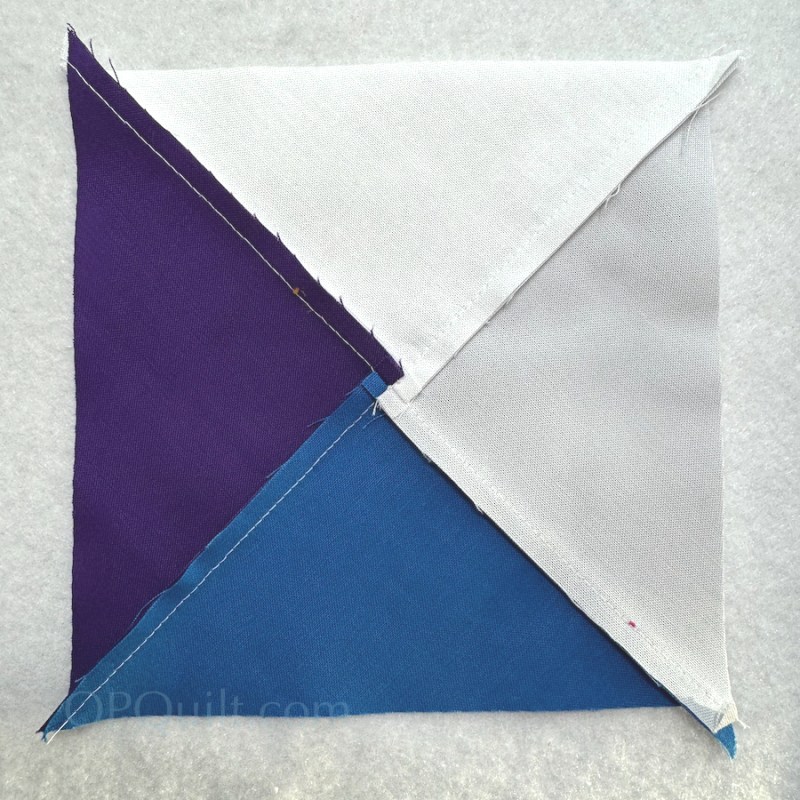
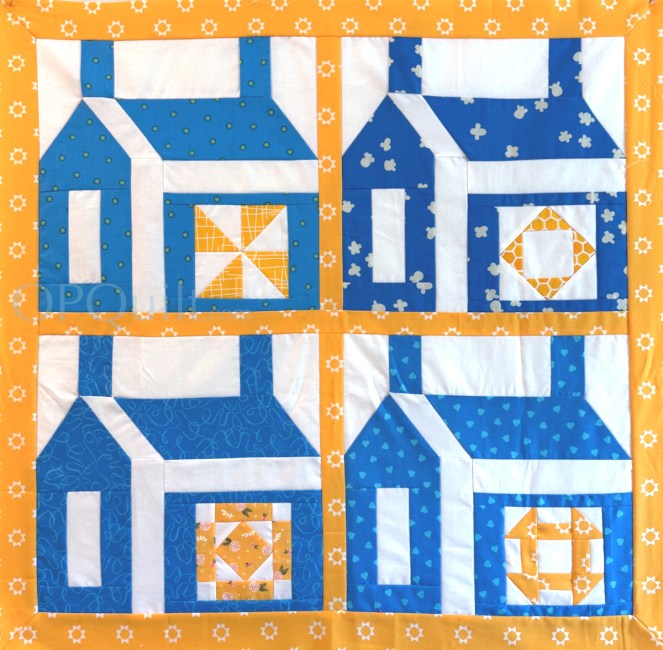
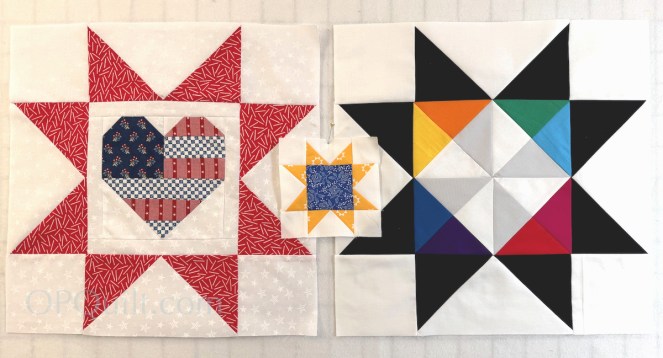
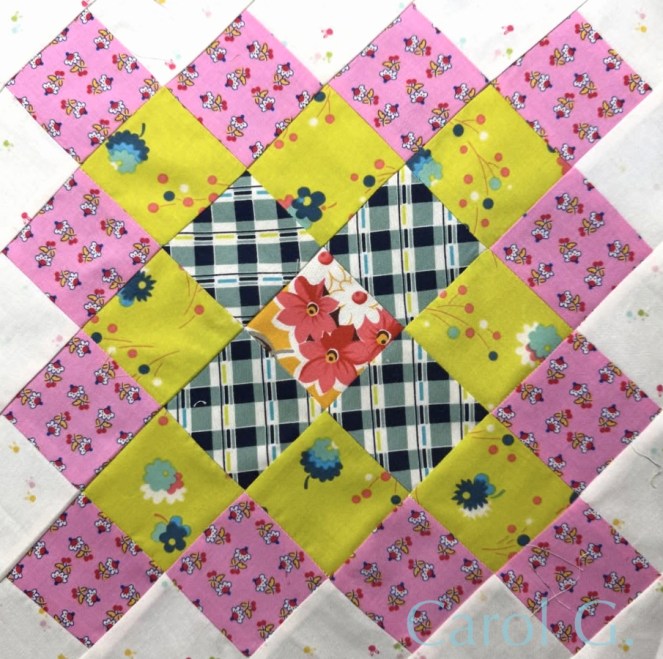
As I mentioned, these are jumbo blocks, 20 inches square, finished. The one on the left is destined to be quilted and then made into a pillow for — what else? — Flag Day, which is today! (Put out your flag and celebrate America’s 250!) The multi-hued block will probably kick around my sewing room for another few years until I decide what to do with it.
But there is one more.
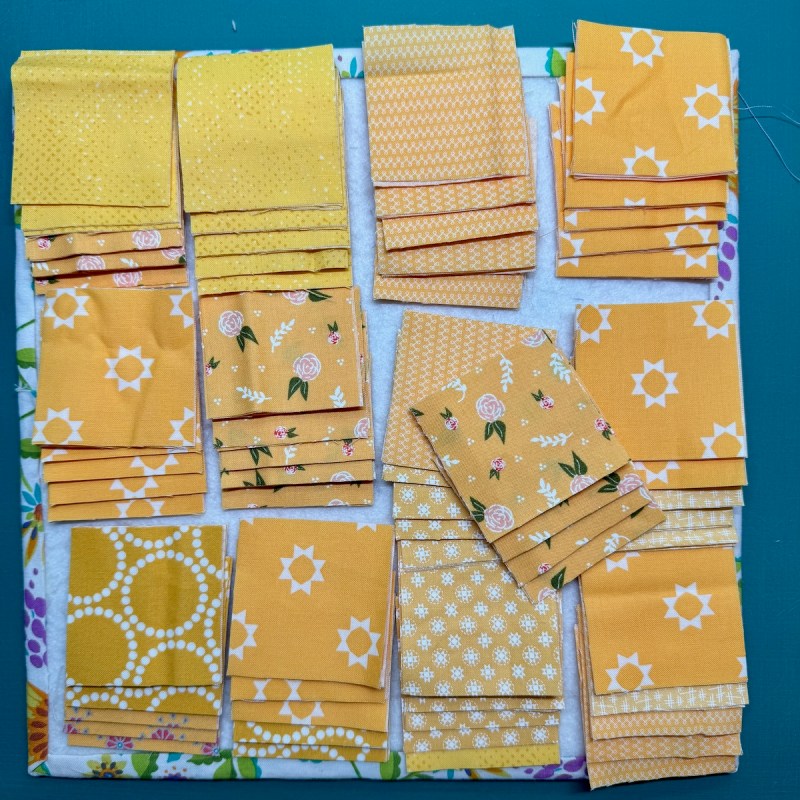
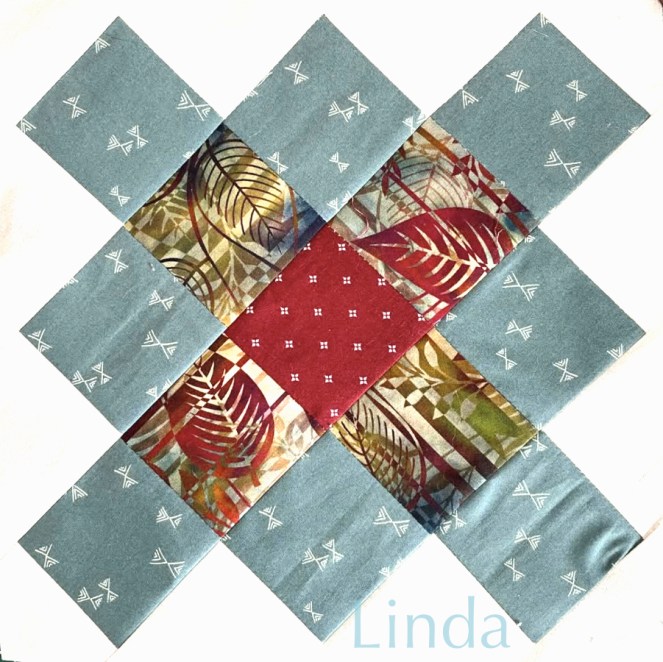
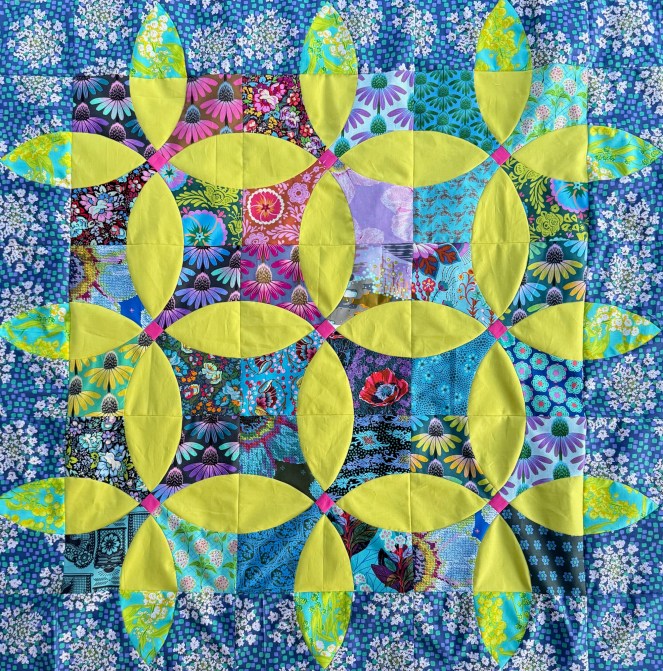
Yellow and blue are two of my favorite colors.
This came from when I was experimenting with BlockBase+ software and wanted to insert blocks into a different frame than a Sawtooth. Original post is here.
And now I wanted to finish this idea.
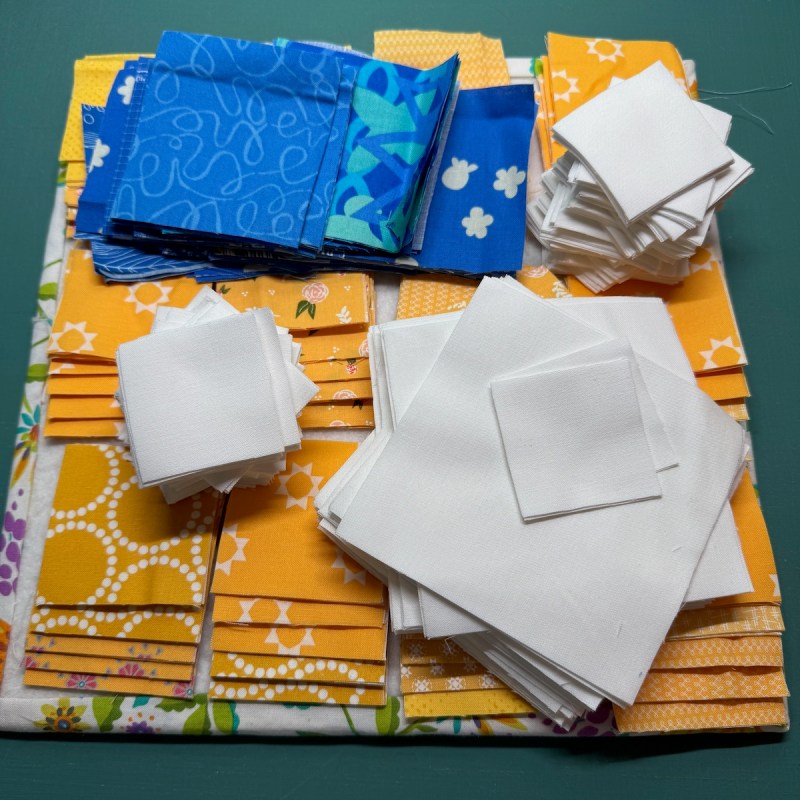
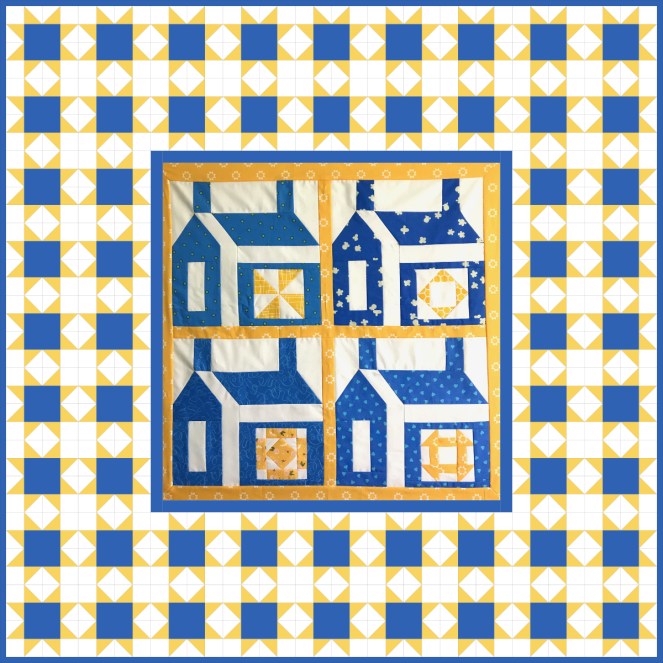
Here’s something I sketched up in my Affinity Designer software. That’s a total of 64 sawtooth blocks surrounding my houses, and finishes at about 55 inches square, a nice wallhanging size. I included the info when I revised the Build Me A House pattern. (It’s a PatternLite pattern: cheap.)
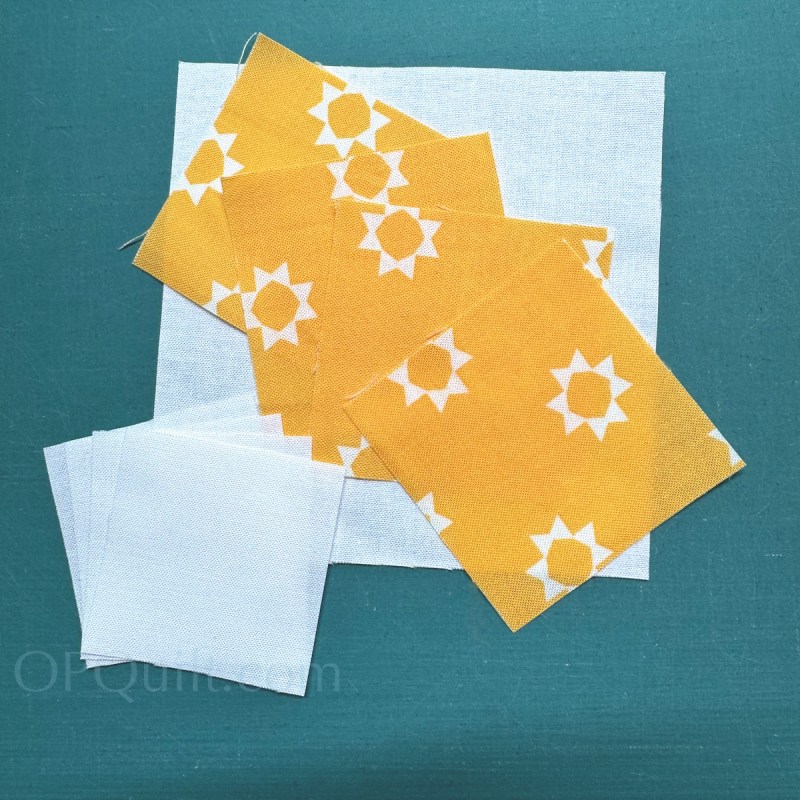
This block finishes at 6″ square — after spending several hours on the two jumbo sawtooth stars, this was made in a blink of an eye, it seemed like.
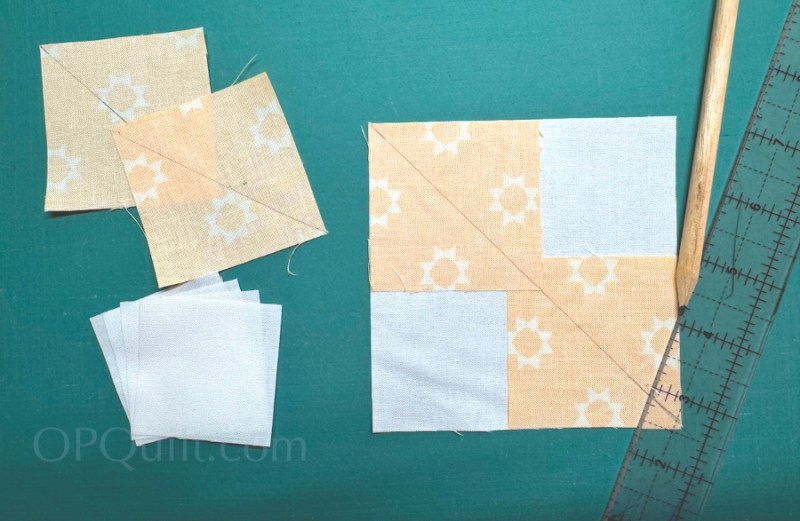
First one done, sixty-three to go. That blue fabric in the center square is from my very first quilt. I try to slip it into my current quilts when I have a chance.
It’s been lovely to spend some time writing poems–
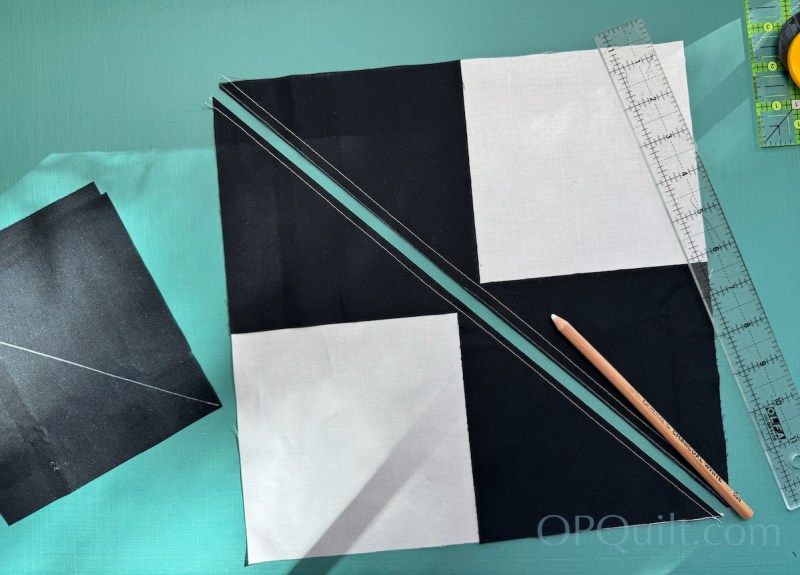
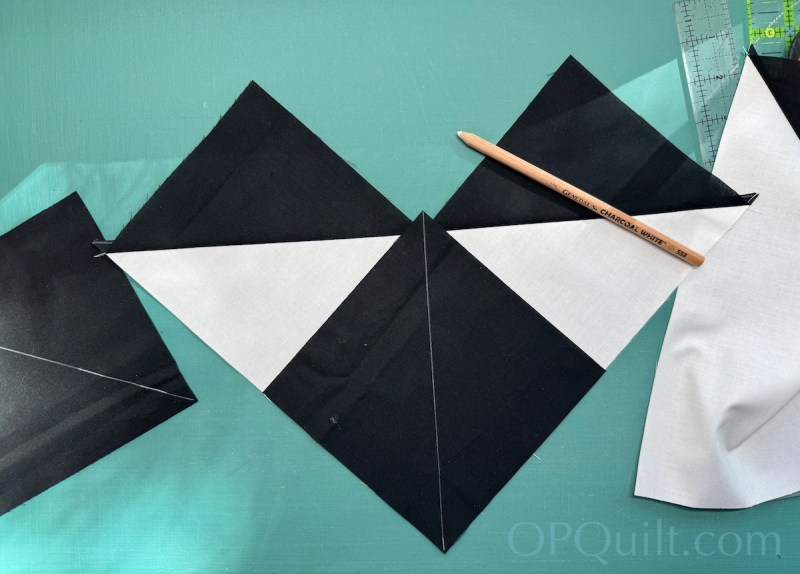
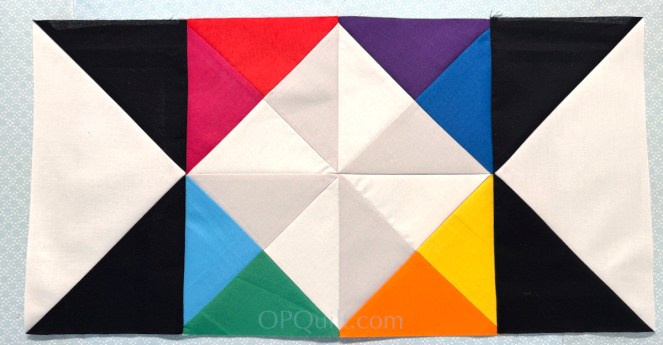
Before I sewed on the top Flying Geese: I thought it looked kinda cool.
If you are honoring the 250 anniversary of the Constitution and Declaration of Independence, be sure to visit the Official America 250 website. There are some fun ideas on there to commemorate and celebrate!
I read recently how Japan has multiple micro-seasons, not just our talked-about four. Some of the micro-seasons are East Wind Melts The Ice, or First Cherry Blossoms, or Great Rains Sometimes Fall. Devon Peticolas has worked out that New York City has 12, and one of my favorites is what he calls “Hell’s Front Porch.” (photos by my DH and I)
Apparently, one of my quilting micro seasons is Make Something in Red, White, and Blue. I know people who have this season year-round (Carol, I’m looking at you), but mine just comes around about every May, right around Memorial Day.
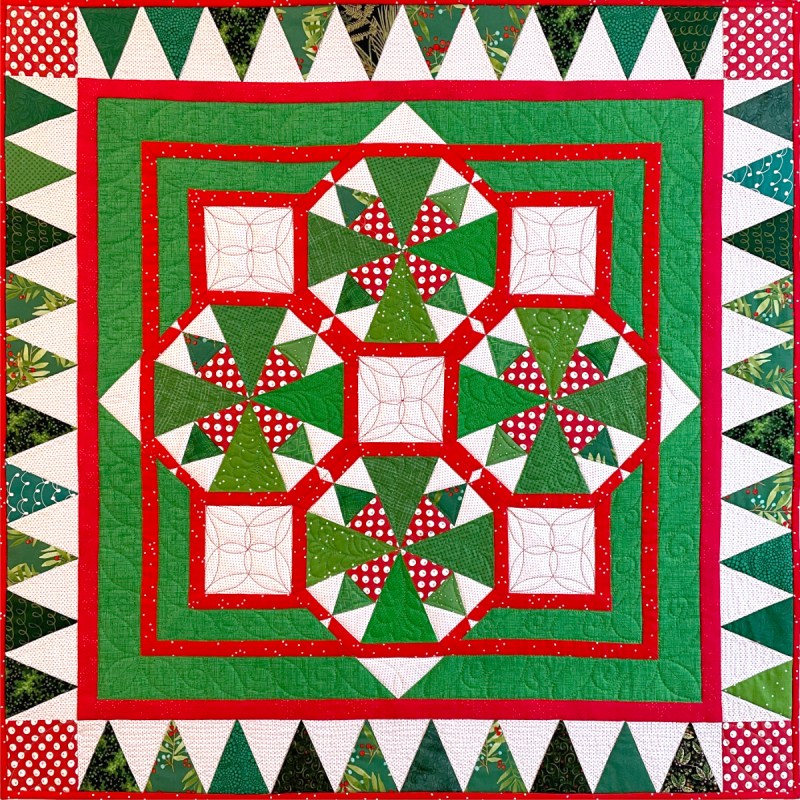
Here is The Kid Sister to Aerial Beacon, a quilt finished some time ago, but the when the Computer Ate My Homework (aka, my Patterns), it took me two more years to redraw and re-write to get the pattern out.
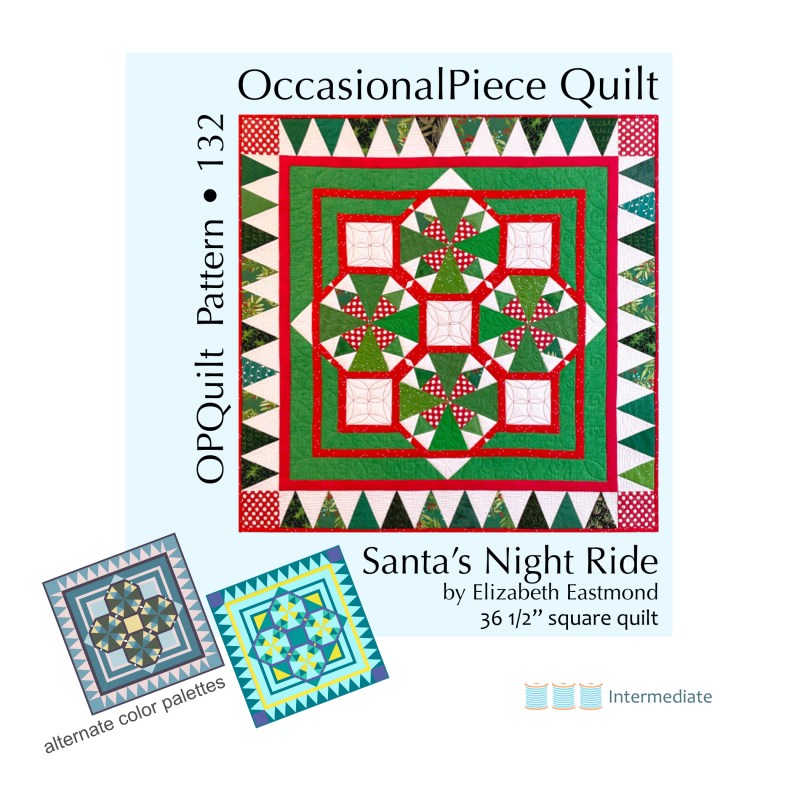
But there’s another there, too: Santa’s Night Ride, which was published in Simply Vintage Magazine, December 2023. The copyright restrictions are now past, so now you also can get this in PayHip, my online pattern shop.
Why didn’t I combine them? The publisher wasn’t interested in the larger quilt, but did like the smaller version, so I wrote that up and it was published. When I went back to finish up the original Aerial Beacon quilt — because I included so many photo illustrations and variations of the pattern (FPP, EPP and regular piecing), as well as three different border treatments — the page count became quite large, and I didn’t want to freak anyone out with the size of the two combined. But I’ve got them both on sale for a couple of weeks (no coupon needed) and combined it’s about the price of one pattern. (So you don’t have to choose, if you don’t want to.)
If your quilty micro-season is calling out for a red, white, and blue quilt, here’s my recipe for this one. Make the four blocks, then add a 1″ border. I added cornerstones in that border.
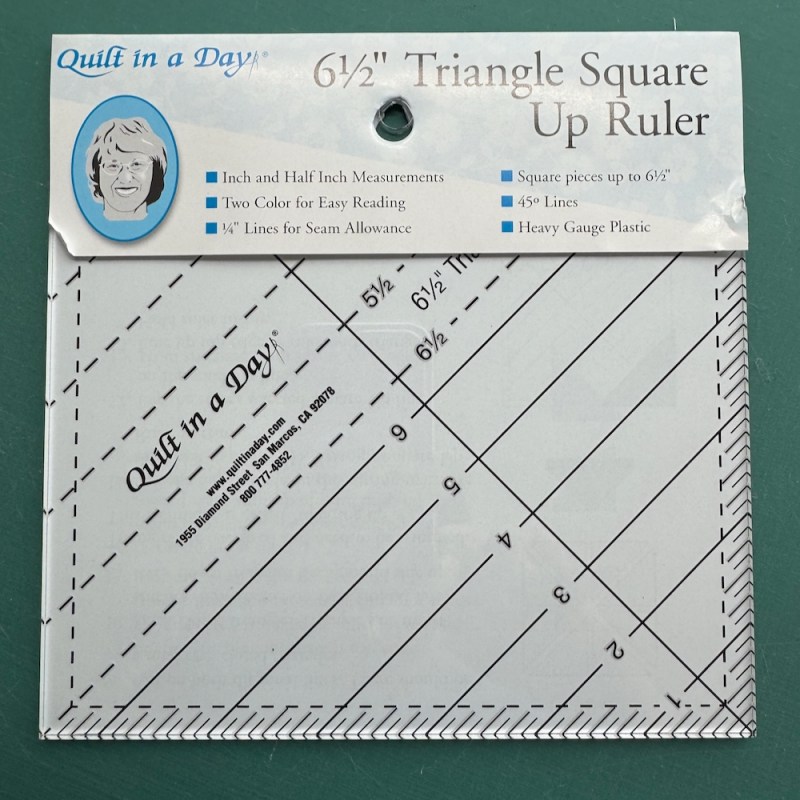
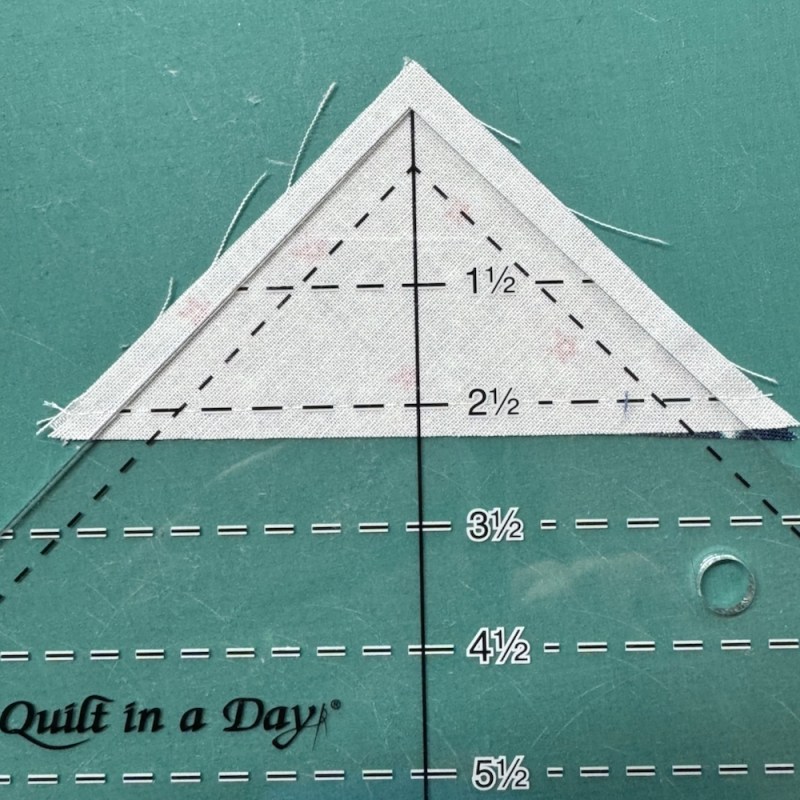
I tried a new-to-me half-square-triangle method when I found a small baggie of already cut blue and red/white print triangles, cut off from some other project (I have no idea what). I had recently purchased the Quilt in a Day Triangle Square Up Ruler, and I laid the 2 1/2″ marking on the stitched line, then trimmed. Then I pressed to the dark side, as always, and trimmed the dog ears. I was only lacking 7 half-square triangles for my outer border, showing that truly, I am in the right micro-season and the red, white, and blue gods are smiling down on me.
I had a bit of fabric leftover from making these center blocks, so I used that fabric in the corners of my two outer borders.
I’d originally made these red, white and blue blocks to test the Aerial Beacon pattern using the cut-out-the-pattern-pieces method, rather than using the foundation-paper-pieced method. I do think it’s easier to do the FPP method, but take your time with the first block to get the hang of it.
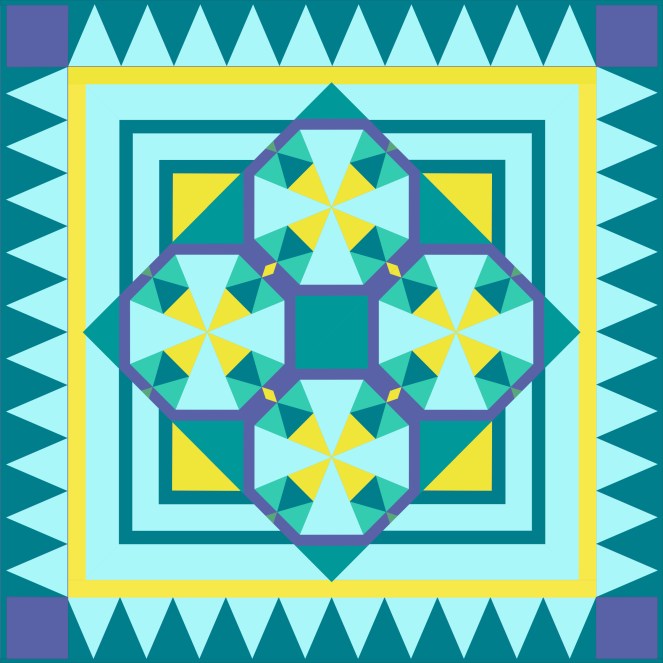
But since school is out in some places, and going-to-be-out-soon in others, maybe you are in your Go To The Beach micro-season, and need something seagreen and sunny. Then maybe make it up in these colors.
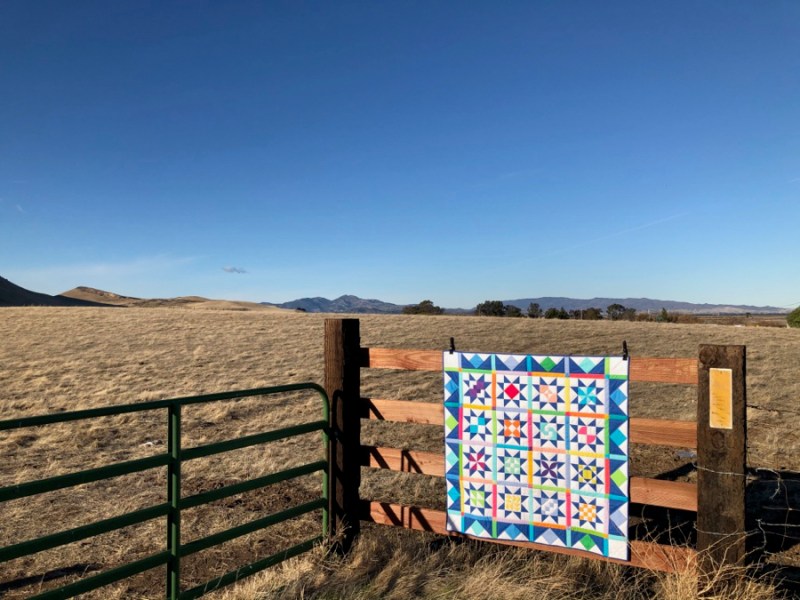
All three together in the garden, showing their relative sizes: 26 1/2″, 36 1/2″ and 65″ square.
I’ve been trying to think of other micro seasons for quilters. Certainly the Sew Until You Are Too Tired To See Straight could be put on the calendar somewhere around October and end the night before Christmas. There’s also the New Fabric Lines Drop, which happens right after quilt market. I can think of also think of seasons for Make a New Tote Bag (right before a trip somewhere), Clean out the Stash to Make Room For More (when you see a new group of beautiful fabrics). And I just noticed ads pushing holiday quilts: I detect another micro-season heading our way!
Whatever season you are in, savor it–
Some Real Aerial Beacons
I wrote about Aerial Beacon here, if you want to read about the genesis of it all, and here, for the early signposts, the large concrete arrows, and how airplanes navigated once upon a time (scroll down in the post to get past the Ladies’ quilt). Here are some more images.
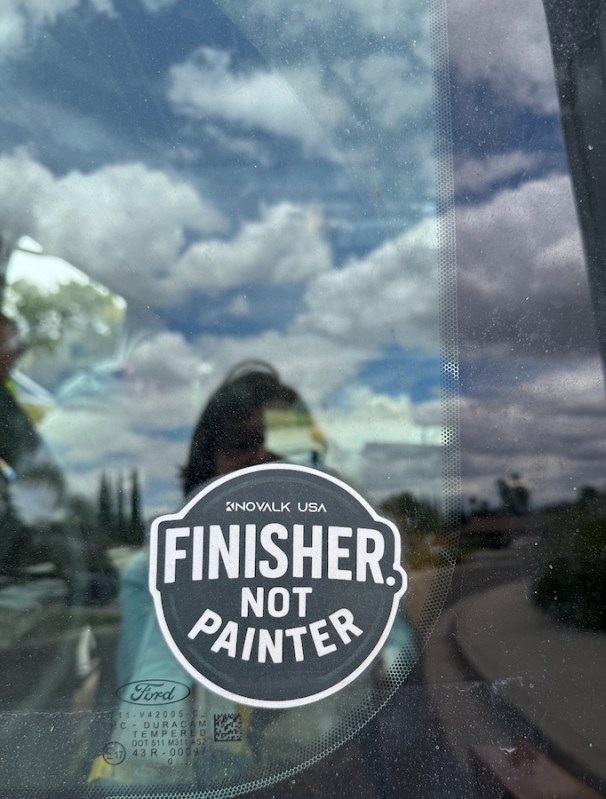
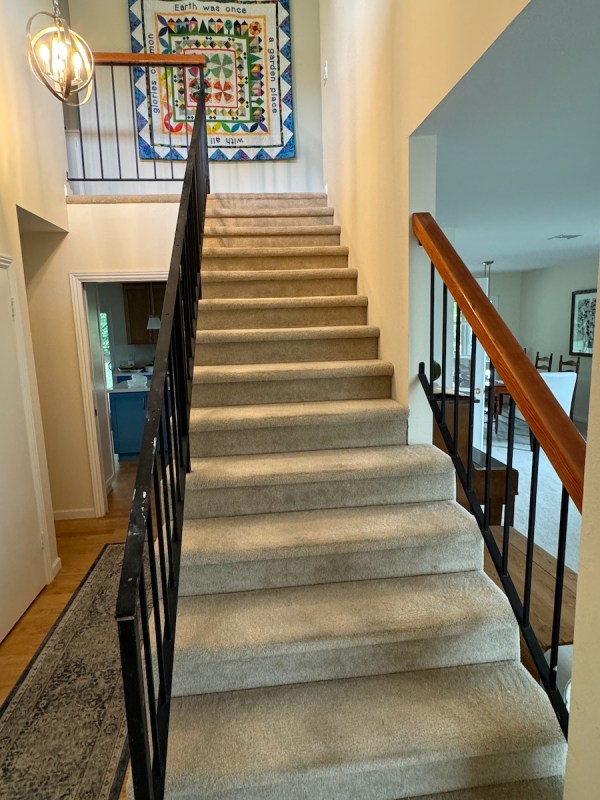
Let’s begin this overdue missive with the mundane: the stair rails in our house. This sticker belongs to Bryan, who I finally called in to finish the project after mucking around with it since March 6th.
I need a sticker that has the words “finisher” and “quilter” in it, although I haven’t yet figured out in which order the words would go.
This is when I called him. We’d had other recent attempts at this project of refinishing the stair rails, including a feeble attempt by Yours Truly, but in the end I called Bryan of Fine Wood Finishers to get the job done. It was needed as they probably hadn’t been refinished in the life of the house (about 50 years).
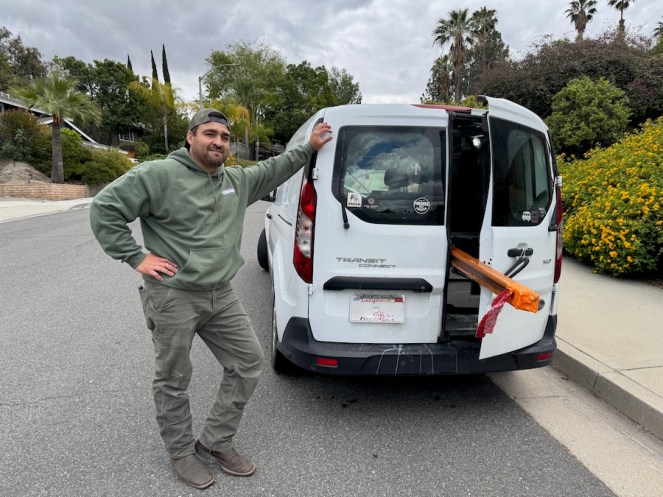
Do we exude this kind of confidence and fun? He spent some time trying to get it in his shorter van, and in the end needed a bit of a red flag. I’m your gal! I called as I zipped upstairs, ripped off a strip of red fabric and brought it back down to him. Now we just let him do his magic; I’ll keep you updated. (He does have a bigger van for delivery; no worries.)
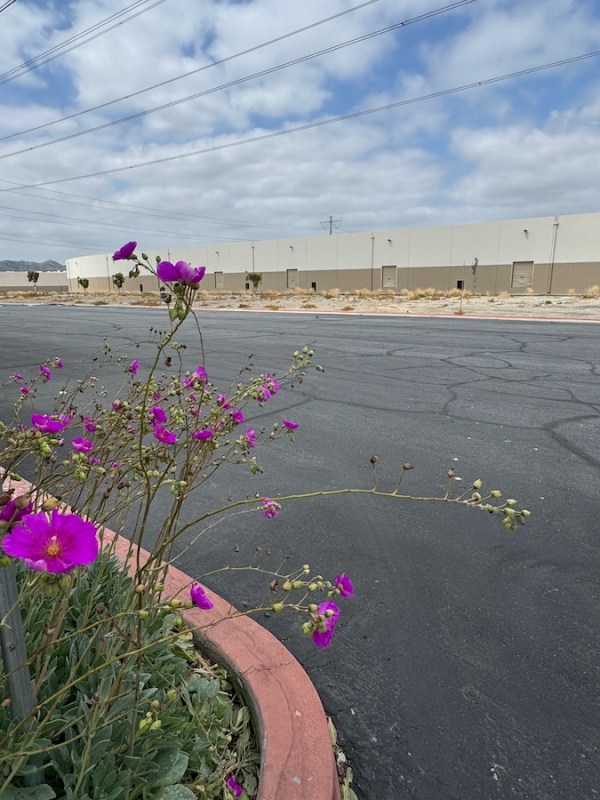
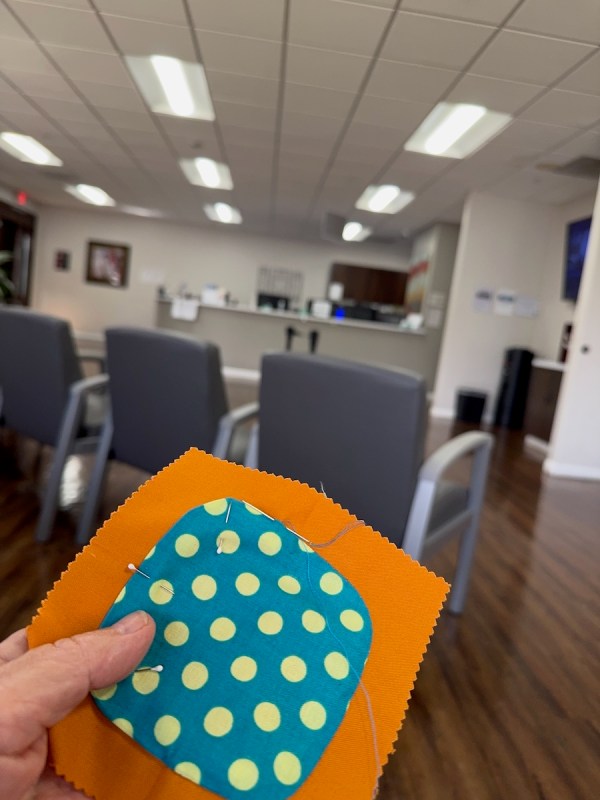
Apparently all our businesses are in warehouses now. I took my husband to his physical therapy and was off by one block. We were at Jump and Shout Therapy, instead of Marketplace Therapy. While he was in there, I sewed squircles while I waited in the car…
…but first I took a walk around the complex where I took photos. (I’m always taking photos.)
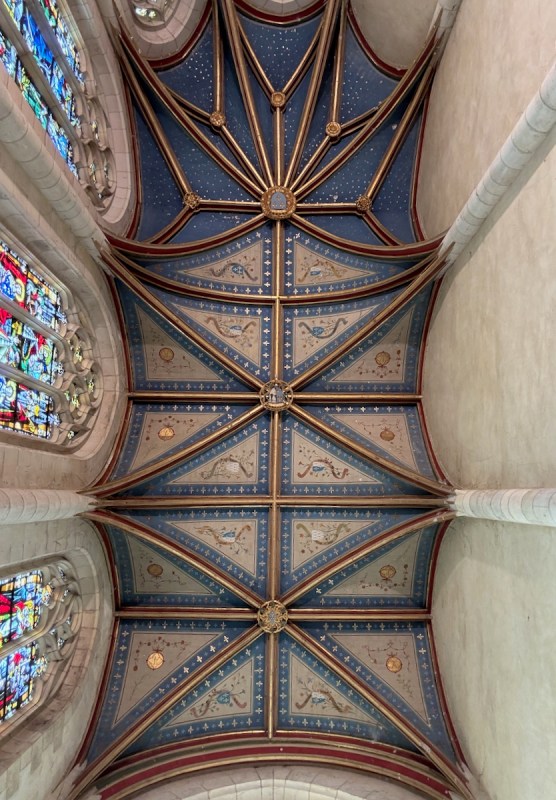
That skeleton of metal reminded me of this sweet little chapel in the Blois Chateau in Blois, France, where even the ceilings were amazing. And this reminded me that I wanted to show you this:
Now that you know there are 640 of them, and that she made each one different, you’ll want to see some detail shots (click to enlarge any photo):
This is a quilt from the Pour l’Amour du Fils show in Nantes, France. I did include some more photos in the most recent post, but rather than overwhelm you, I’ll drop some more in here and there over the next while, like this one with 640 different little purses and dresses.
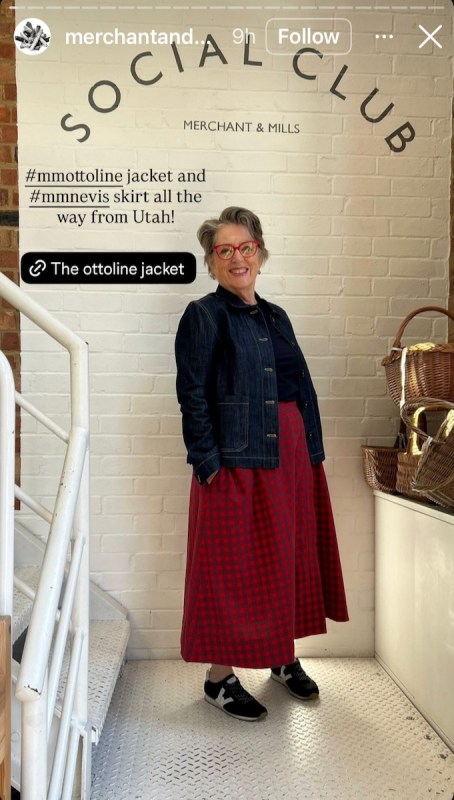
My sister Susan also did some traveling, but to London. She’s become an avid sewer, getting me interested again in garment sewing. She’s a fan of Merchant & Mills, so traveled out to Rye to see their enterprise and buy fabric. While there, they photographed her for their well-known inspiration called Social Club, and put her up on Instagram. Wow! (Doesn’t she look fabulous?)
I squircled while in doctor’s offices this month, too, keeping vigil while my husband was there. I’m really getting close to done, as I’m trying to keep up with Gladi, who has finished her squares.
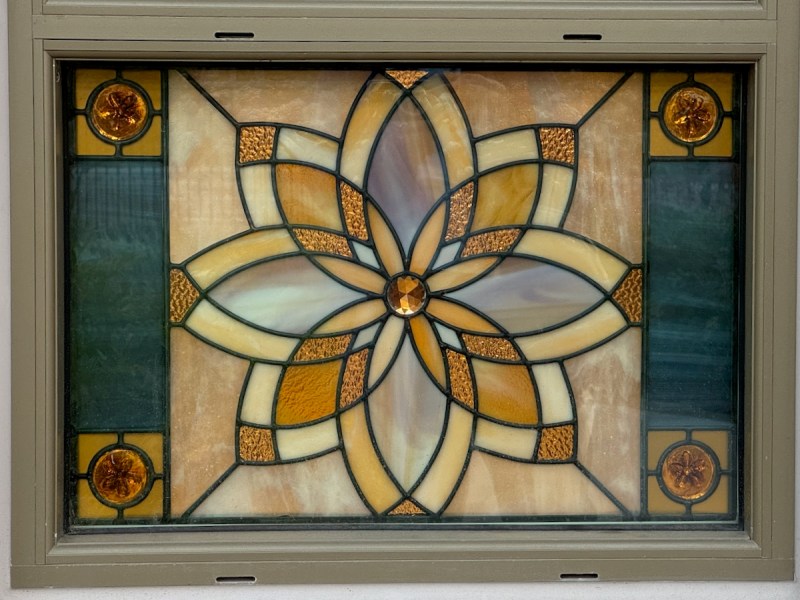
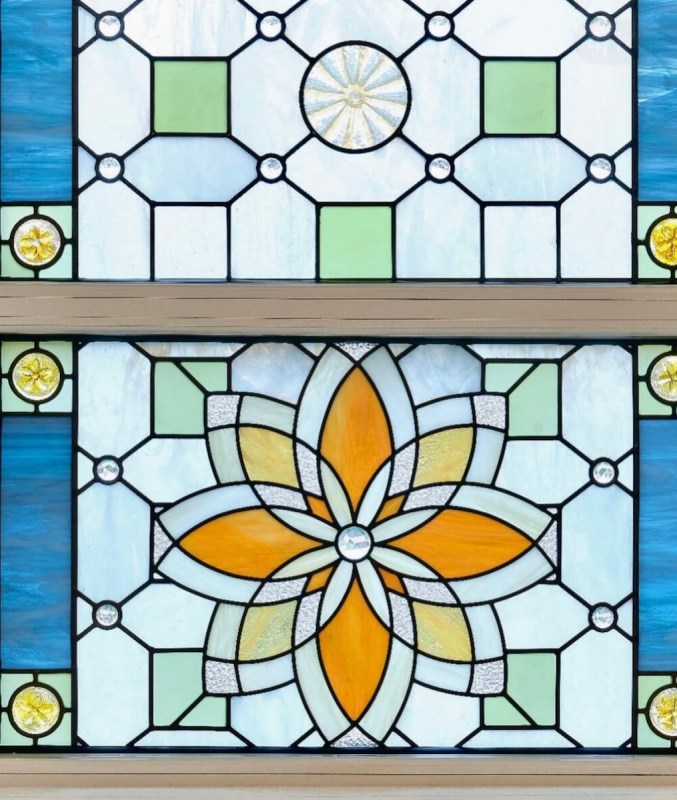
Our church is dedicating a new temple not too far from our house, the Yorba Linda Temple, and we had a chance to go for their Open House to tour the building before it’s closed to the public. As always, I’m drawn to pattern and visual texture, so I loved the stained glass, done by Holdman Studios.
My photo at dusk, on the left. Another photo of this motif, from the Holdman Studios’ Instagram, is on the right (which also has more pictures). That would make a marvelous center to a quilt, right?
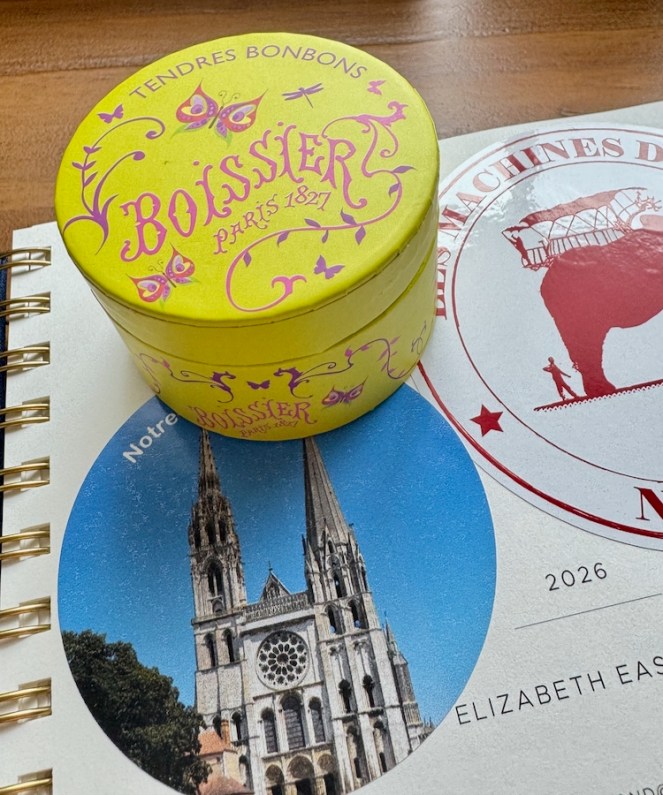
I tend to carry home smaller things from my travels, like stickers and an elegant candy box. Sadly, I ate the last one of the little sweet bits inside while writing this post.
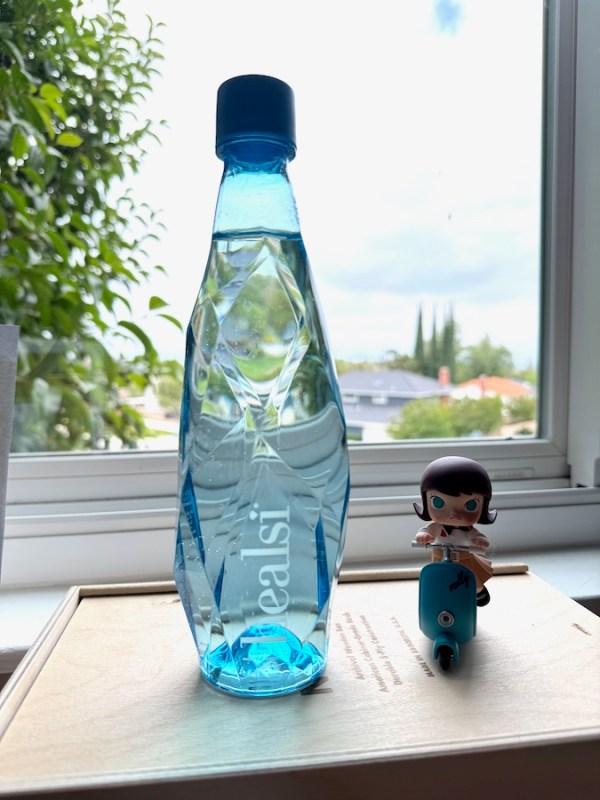
But water bottles are also a prime souvenir for me, as they remind me of my experiences. Oh, and tote bags for my grocery shopping (our state has a no plastic bag rule), but I won’t show you my collection at this time.
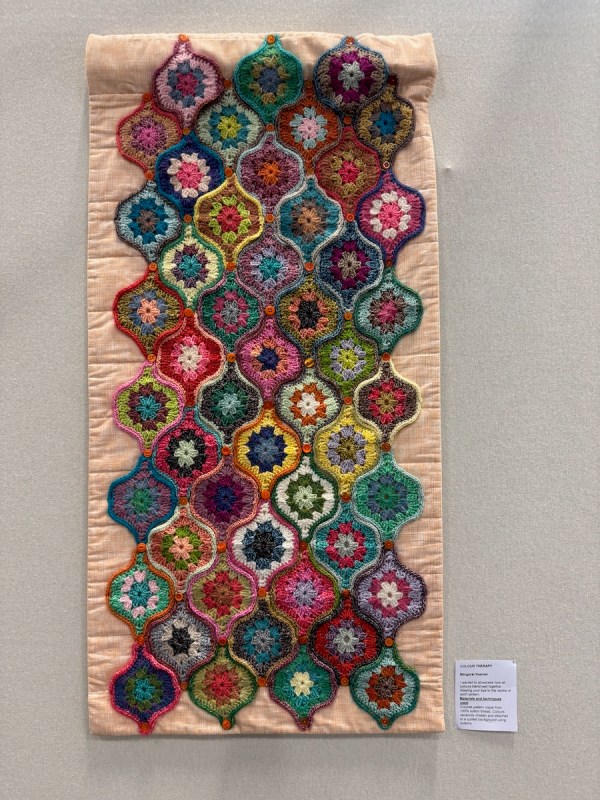
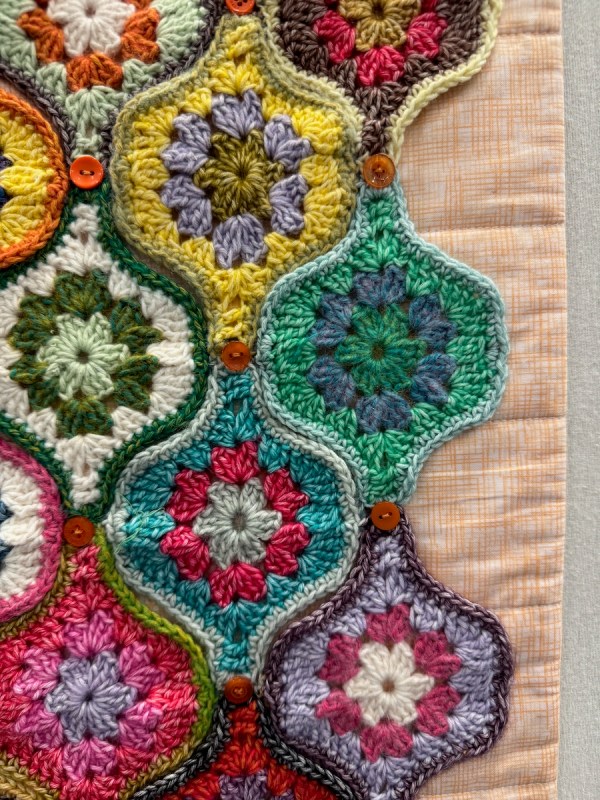
One last quilt from Nantes: a granny square-inspired quilt, with “granny lanterns.”
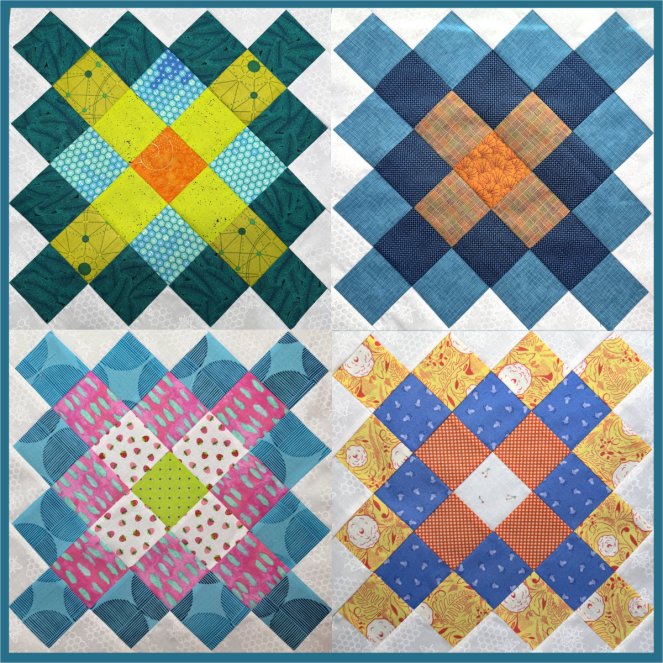
Besides the one you saw a couple of weeks ago, here are four more. I need to make eight total for May’s allotment, so have a few to go. Others who are playing along have posted theirs, too, on Instagram:
Since hashtags are dead in Instagram, if you want to join the gang, either leave a comment on this post, or on This Instagram Post, and I’ll add your account to the list I’m keeping on that post. If you have a a photo and don’t use Instagram, I’m happy to post it up here, or link to your blog. I’m also on BlueSky for those who have left Meta behind, although I don’t know if you need to join to see my blocks on there.
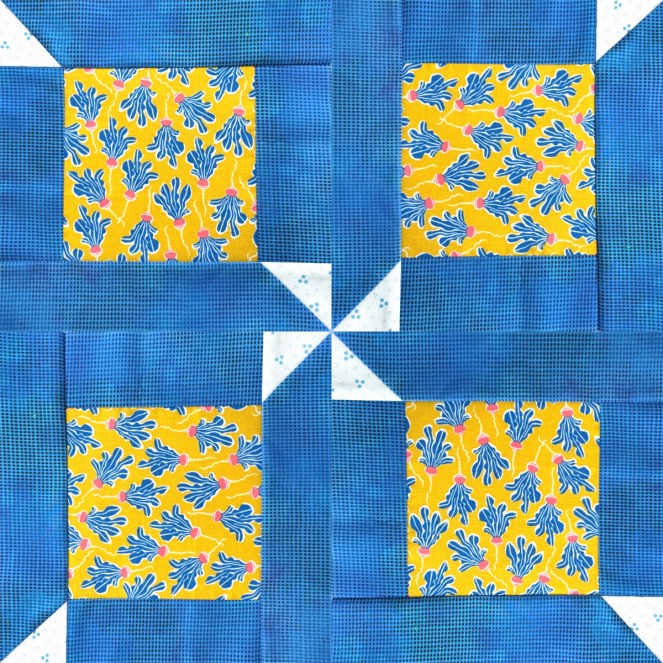
I’ve also reworked some earlier handouts and patterns. This is a digital image of four pinwheel blocks, but I really only made one. The original post shows it in red and white; here’s the free download, if you want it:
One of the challenges in our modern life is to deal with disruptions, distractions, and never letting us have a minute without someone telling us the five steps to a better life, to better breathing, to being a better whatever. Or as tech, culture and political writer Derek Thompson observed on his podcast Plain English, these voices tell you “everything is figureoutable. And if I just listen to these five steps, I can figure out all my life’s problems” (from here).
But for me, I escape to quilting to not figure everything out. I mean, yes, sometimes just cranking out on a pattern and whipping up a quilt is a good time and I like that as much as anyone. But hopefully, as Thompson noted, “you can have intimacy with a craft.” The challenge “is if we are constantly being distracted or interrupted, it’s hard to find that intimacy. It’s hard to get into the slipstream or the pocket of a creative project” (same source as above).
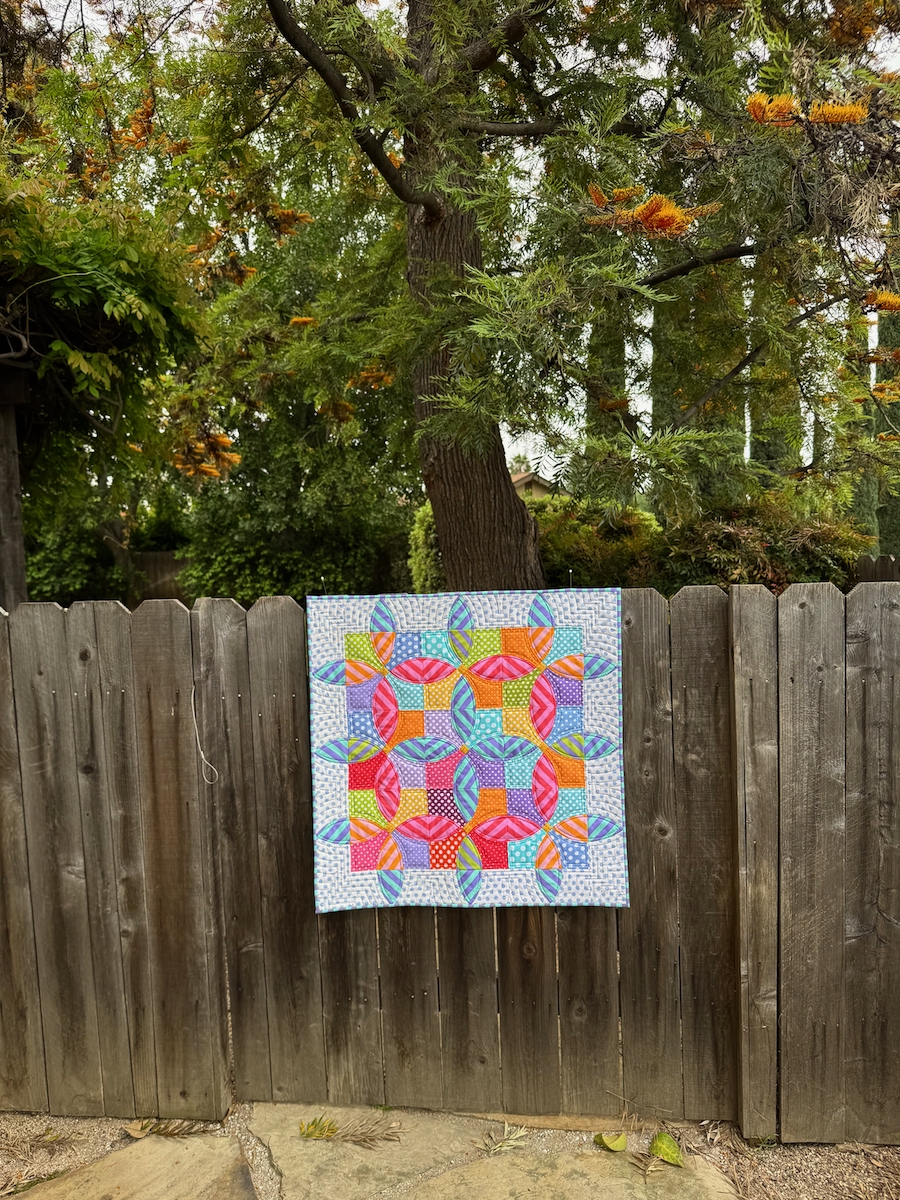
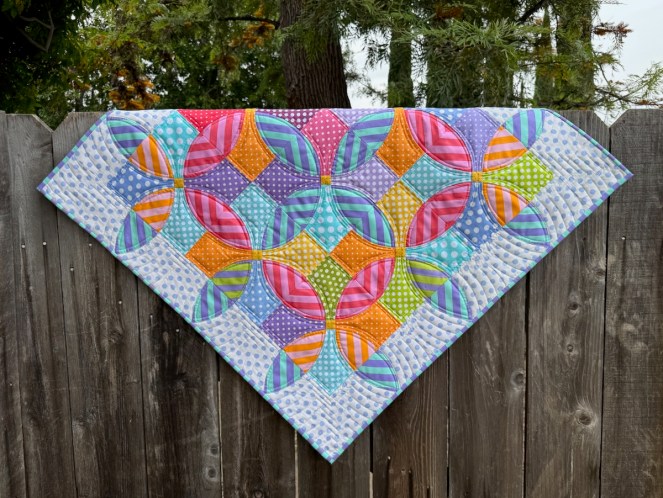
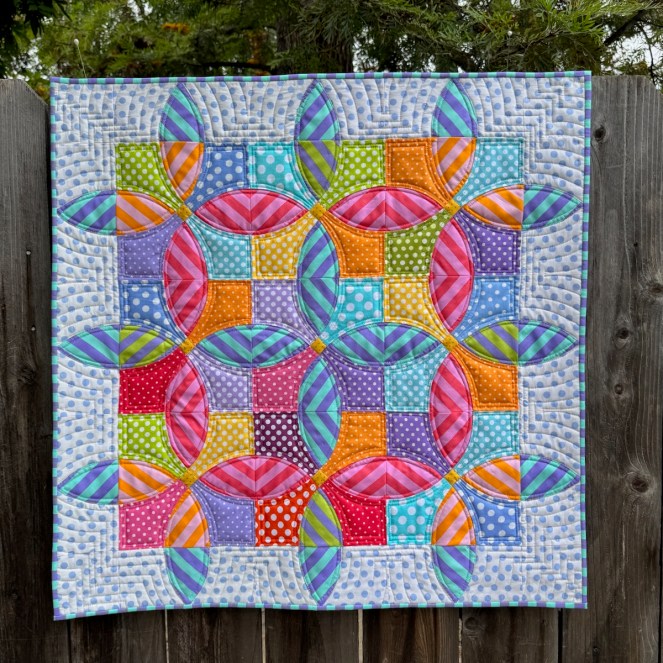
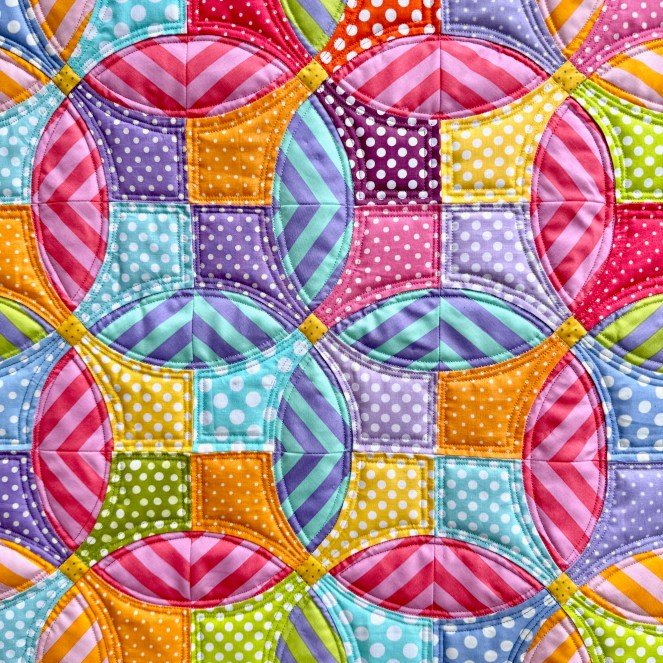
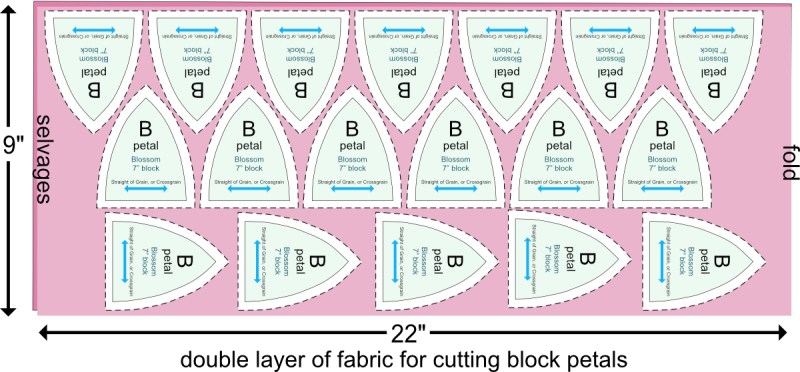
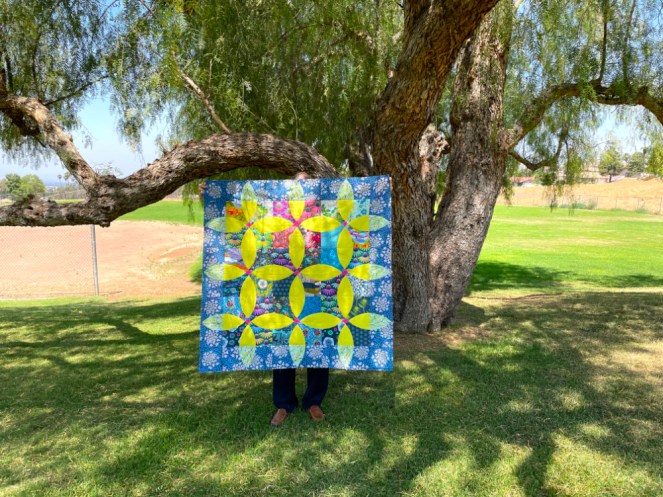
I like my pursuit of my craft. Of taking a well-known-to-me pattern like my Blossom, and seeing what I can do with it that sends me into discovery, of finding a new way to see what I’ve seen before. Because, really, haven’t we all seen it all before: make a cut, stitch a seam, sew it together, quilt it, and don’t forget the label?
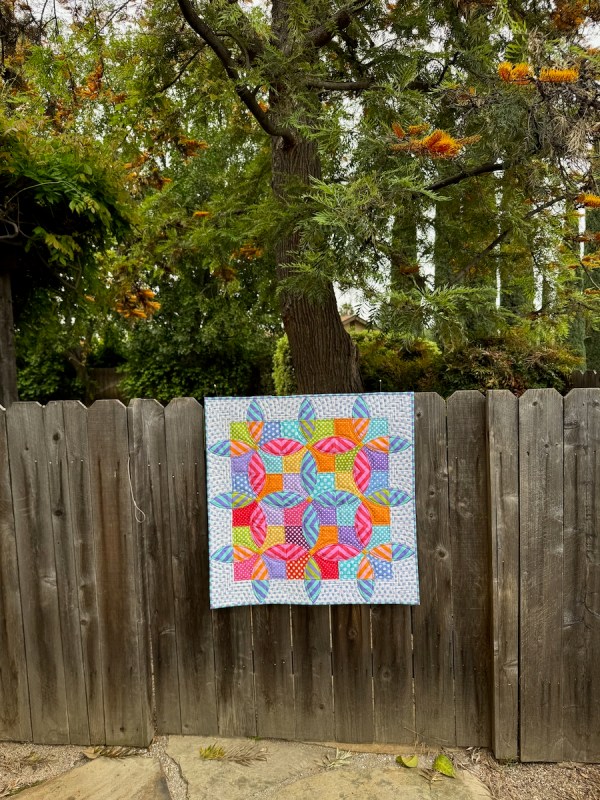
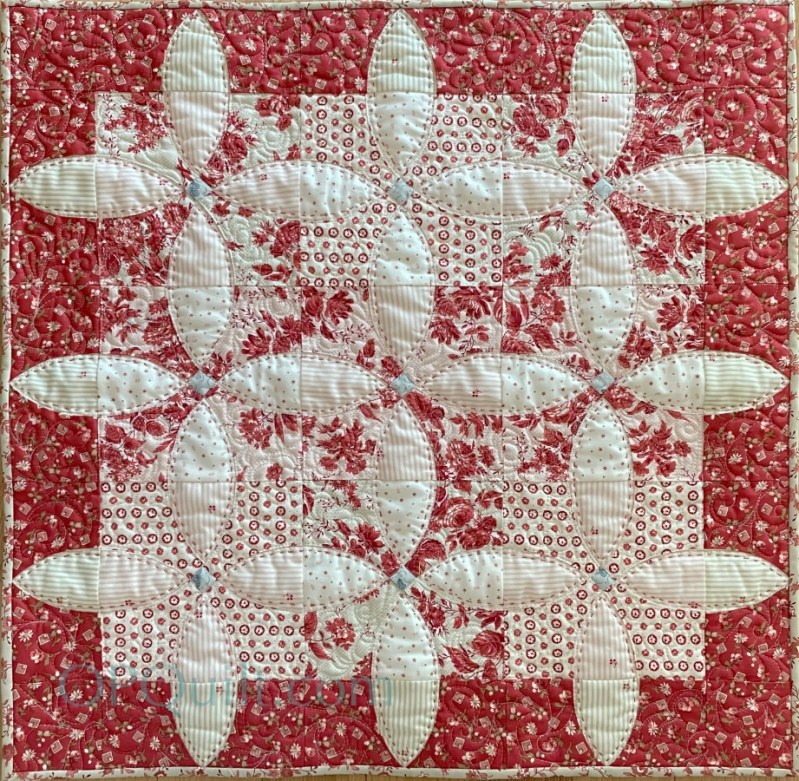
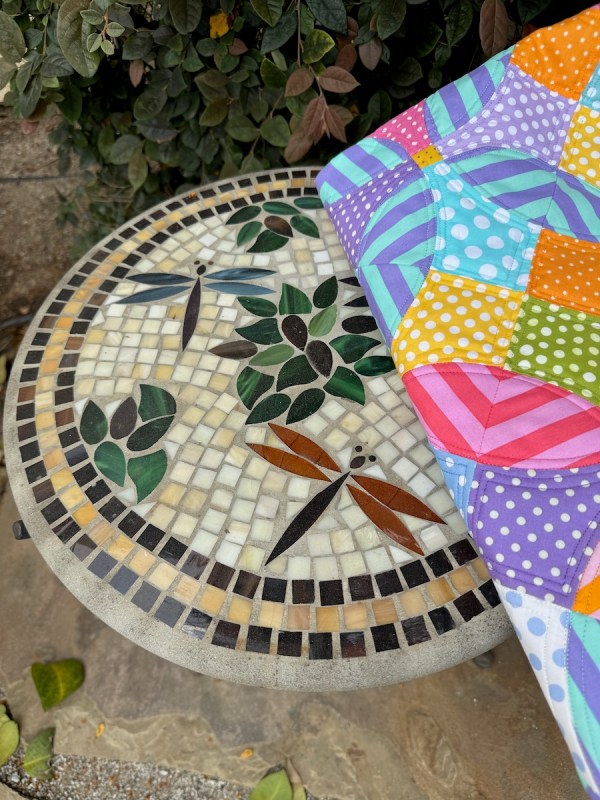
For this quilt (Spring Dots & Stripes), I chose to work with just two elements: • dots and stripes (had to be white dots on bright colors), • Tula’s Tent Stripes (in only four colorways).
It was this challenge that coaxed me into flow.
What is flow? The Czech psychologist Mihaly Csikszentmihalyi coined the word “flow” to refer to the psychological state of optimal performance.
“He recalled in an interview how he would watch painters in their studios and how he was fascinated by their ability to forget everything while working. He was also surprised by what happened when they were done: They’d finish a work of art, and instead of enjoying it…they would put it against the wall and start a new painting. They weren’t really interested in the finished painting. What these artists were after, Csikszentmihalyi realized, wasn’t the finished work itself but the experience of full immersion and absorption in the act of creation” (from here).
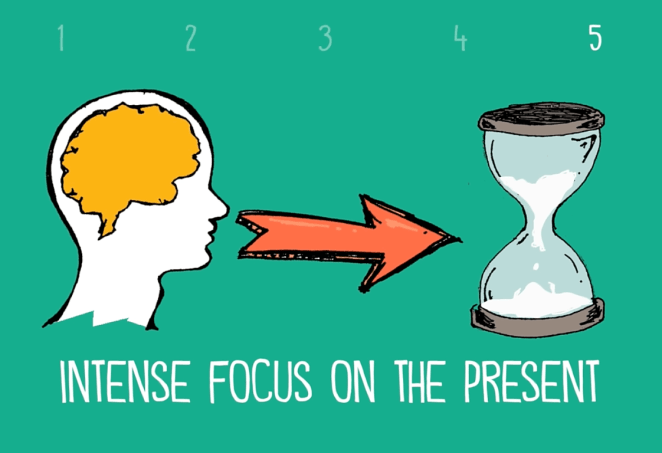
To understand it better, I watched several videos online, and liked the one from John Spencer, titled “What is Flow Theory?” He highlighted it like this (click arrows to advance):
Since no matter what I tried, the slides kept getting out of order, the basics are:
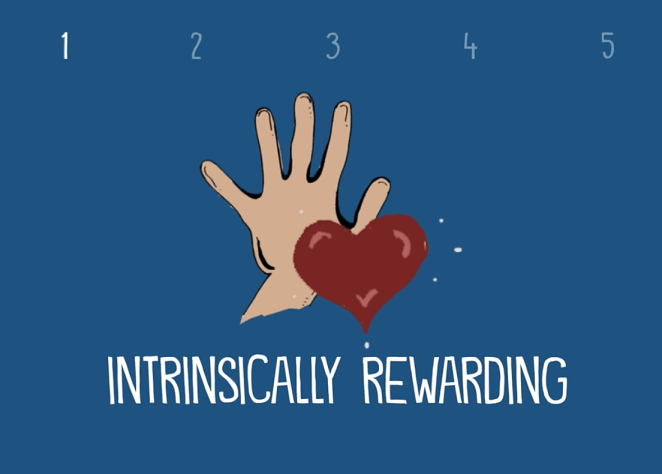
The task has to be intrinsically rewarding;
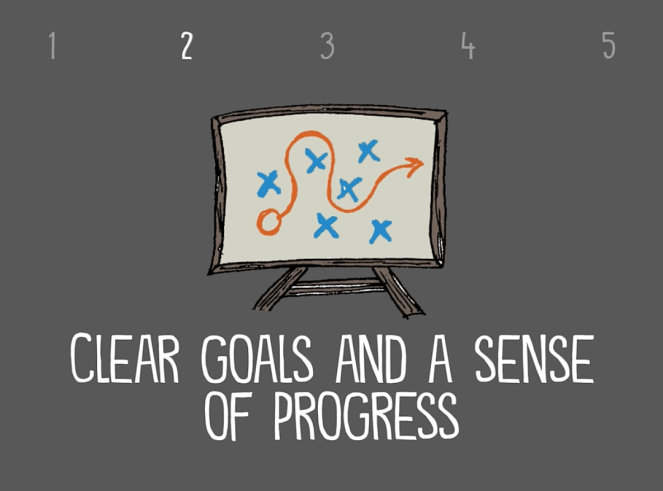
The task has to have clear goals and a sense of progress;
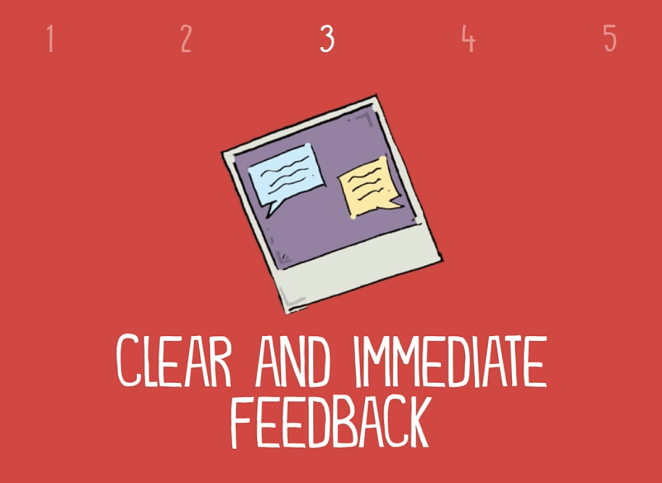
Clear and immediate feedback is critical;
It’s a balance between the challenge of the task and the set of skills needed to complete it; and
The person in the flow state has an intense focus on the present.
I cut out pieces in certain colors — the ones I thought I would want — and started putting them up on the design wall. And then in an a-ha! moment, I could see that I could group them differently to create a pattern of interest. Maybe that came from trial and error, maybe it came from being in the flow? I was able to discover a different way as I grouped the petals into colors, cutting and discarding and pinning up and sewing, as I ignored all that was going on around me.
I took the finished quilt out into the garden for some photos this week.
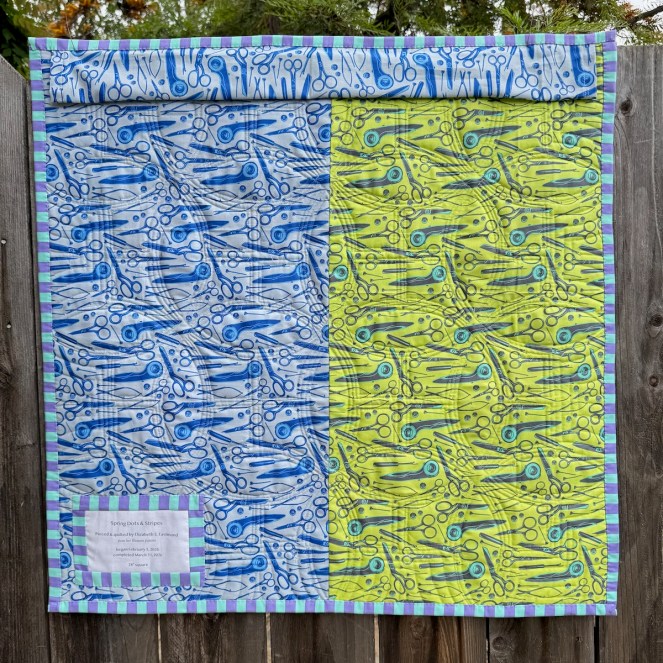
Side Note: I’ve decided there are two categories of fabric design that I don’t like on the front of my quilts: the first is sharp things, like anything on this fabric. The second is insects, so these often end up on the back. (Cute small bee prints are the exception.)
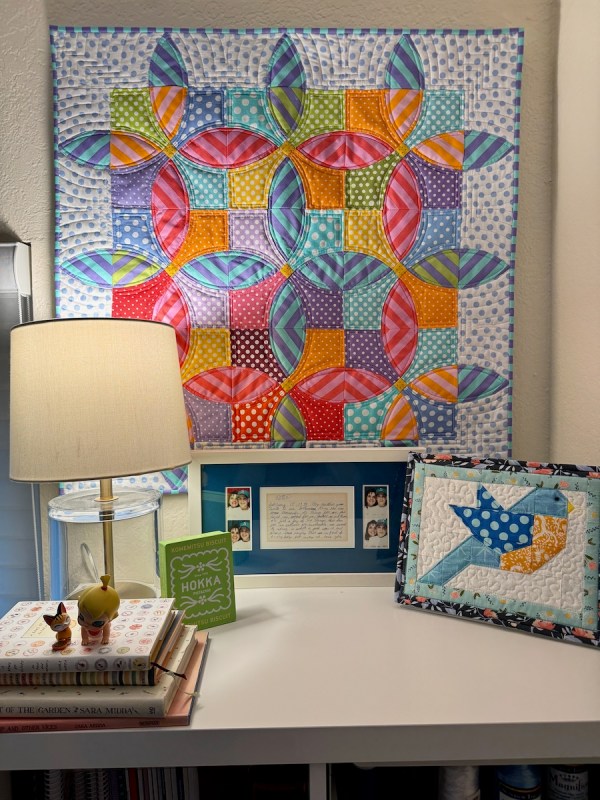
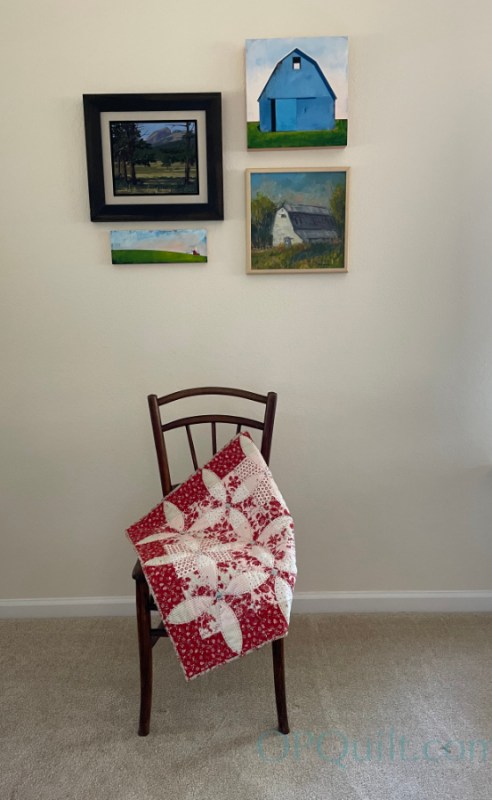
I needed a mini-quilt of just the right size to fit in a specific space (photo near the end), and it needed to be spring colors.
So when I turned to the Blossom pattern (which in turn has it beginnings in the traditional Flowering Snowball block), I didn’t have the right size. Because…
…last spring I discovered that over half of my computer files were corrupted. Not a virus. Just gone (it’s complicated). And 50 percent of those were my more recent pattern files. So many patterns that I’d written could never be updated. Unless…unless…I recreated all the missing, corrupted files to revise the pattern. Like this one:
So I have been busy re-drawing the files I lost, and while I was at it, adding a new size (7″ block), and re-writing the pattern. If you’ve purchased Blossom from me before, you can go to the email you received with the pattern and re-download it. And for those who haven’t made one of my patterns, and want to try it, I put it on sale for a few days if you want to grab it now in my pattern shop.
This a photo of another quilt, Aerial Beacon, that is stuck in re-write-land. I was about a month away from the release when I discovered the corrupt files. Talk about a way to stop the flow! I’ve slowly been re-creating this one, too. (Slowly is the operative word here, but it’s coming.)
UPDATE: The quilt patterns (there are actually two different Aerial Beacon quilts) are finished, and can be found in my pattern shop.
Yes, I should have had it done by now, but this is what I call a “reverse flow” task. All those glowing ideals in the list in the beginning have their counterpart: discovering and ferreting out and crying inside over lost work and then redoing the lost work, I would say are just about the opposite of the bliss of being in the flow.
Since I was in the Blossom flow, I re-made the larger 12-inch block version as well, especially since I found that outer border fabric at Road to California this year. It’s in the needs-to-be-quilted stack.
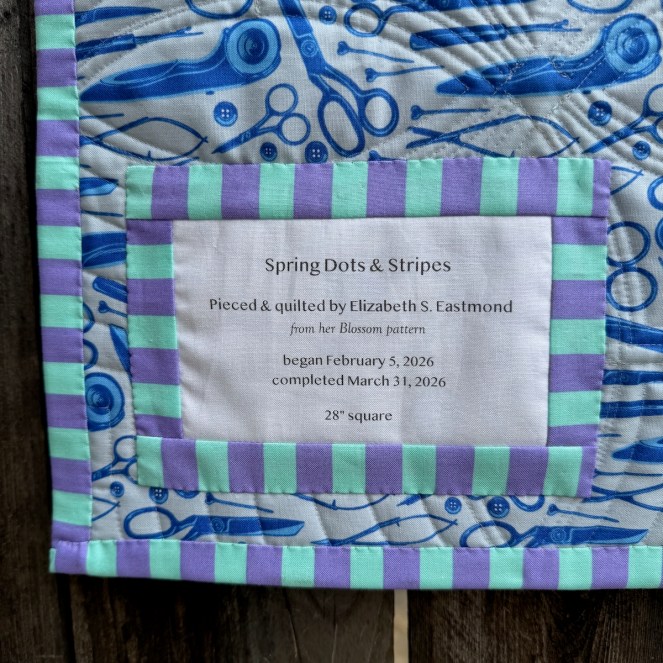
Quilt #316 • 28″ square, shown in that space where I needed a quilt
I’ll let this paragraph from Mihaly Csikszentmihalyi’s book, flow The Psychology of Optimal Experience, close up this post:
In the course of my studies I tried to understand as exactly as possible how people felt when they most enjoyed themselves, and why. My first studies involved a few hundred “experts”—artists, athletes, musicians, chess masters, and surgeons—in other words, people who seemed to spend their time in precisely those activities they preferred. From their accounts of what it felt like to do what they were doing, I developed a theory of optimal experience based on the concept of flow—the state in which people are so involved in an activity that nothing else seems to matter; the experience itself is so enjoyable that people will do it even at great cost, for the sheer sake of doing it. (from here)
I wish you all a week of flow, of enjoyable quilting, and a most happy Easter–
Other posts about Blossom, the pattern and quilts:
For a while I was a traveling quilter, teaching and visiting at Guilds in Southern California. During the covid shutdown, I taught several classes of this pattern, and the one above is Robin’s quilt — a study in the tones of autumn — a very successful one! You can read about her quilt here, and more, if interested.
Lastly, a post about how I moved from the simple traditional block to the larger quilt is found in this post.
I think Easter is a good time to sit in the garden.