I told you in the last post that I’d made up another version of Circles #6, and today I’ll show you what I came up with.
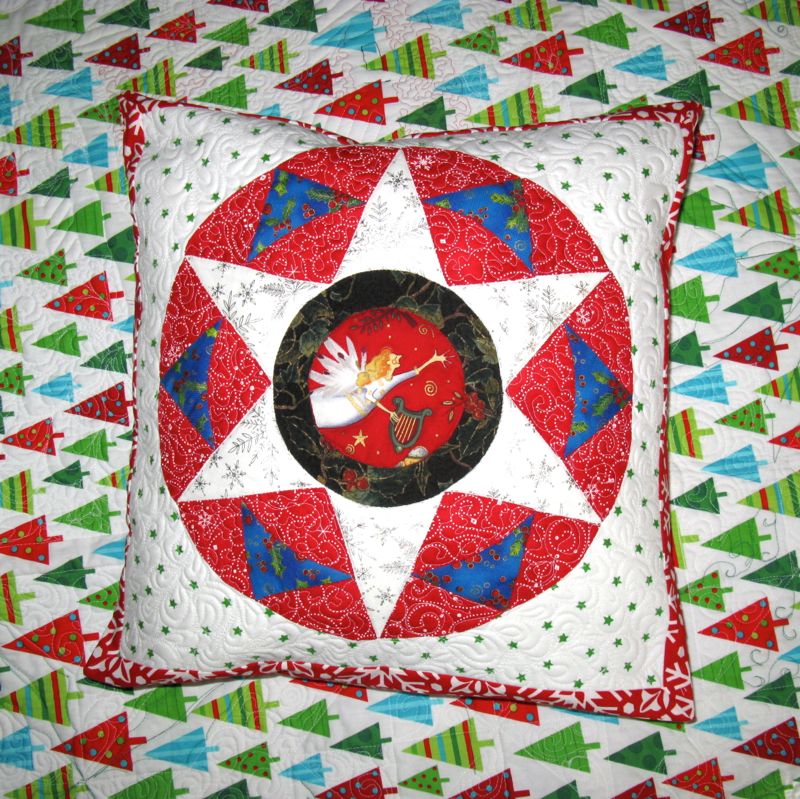
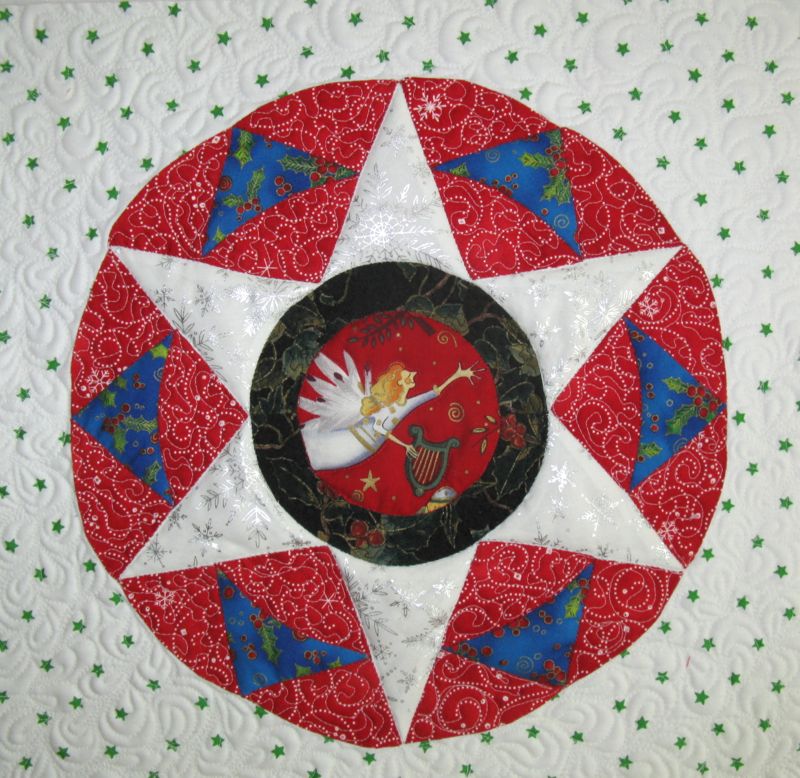
When I was sewing this up, I kept thinking what a great Christmas pillow it would make.
So I made one!
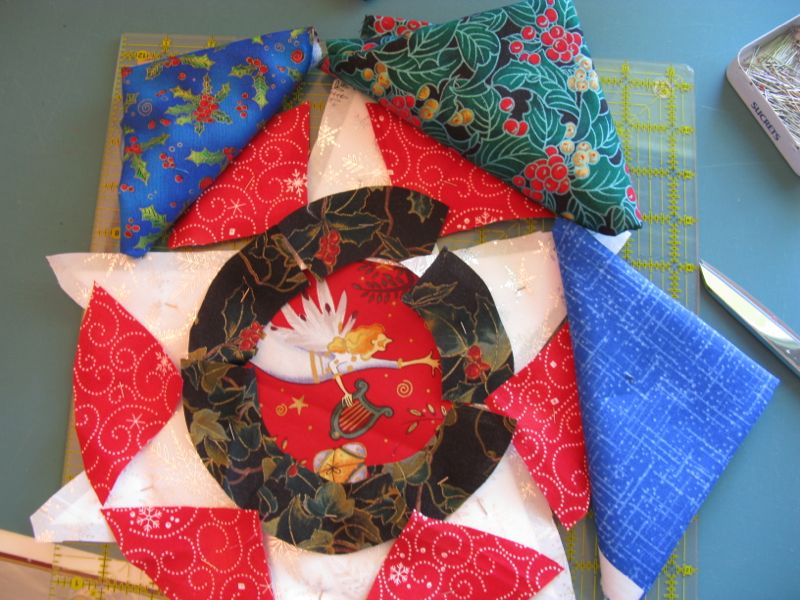
As usual, I audition fabrics to see what I like. You can see which won.
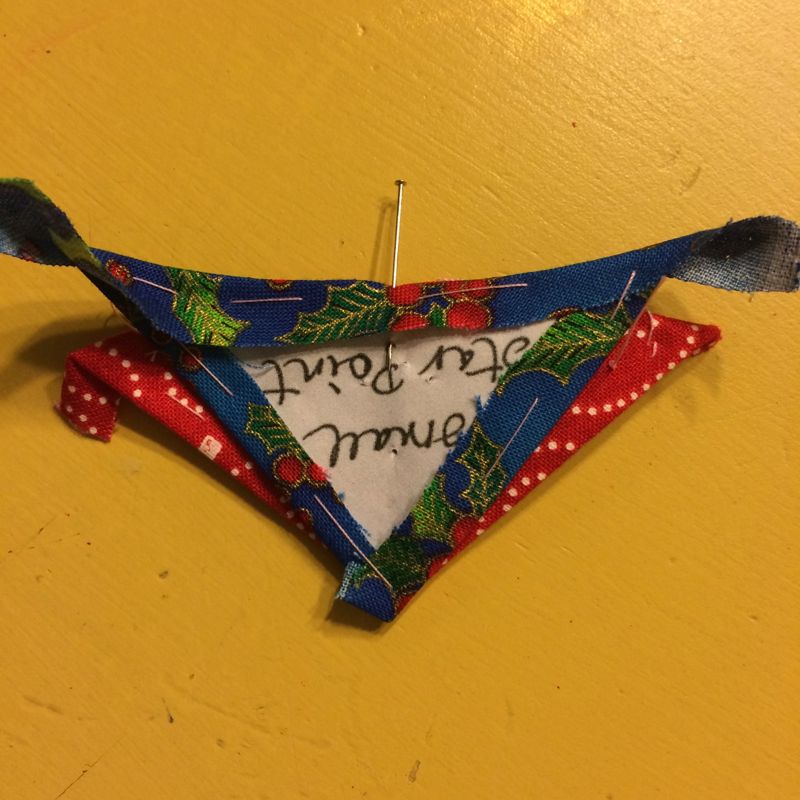
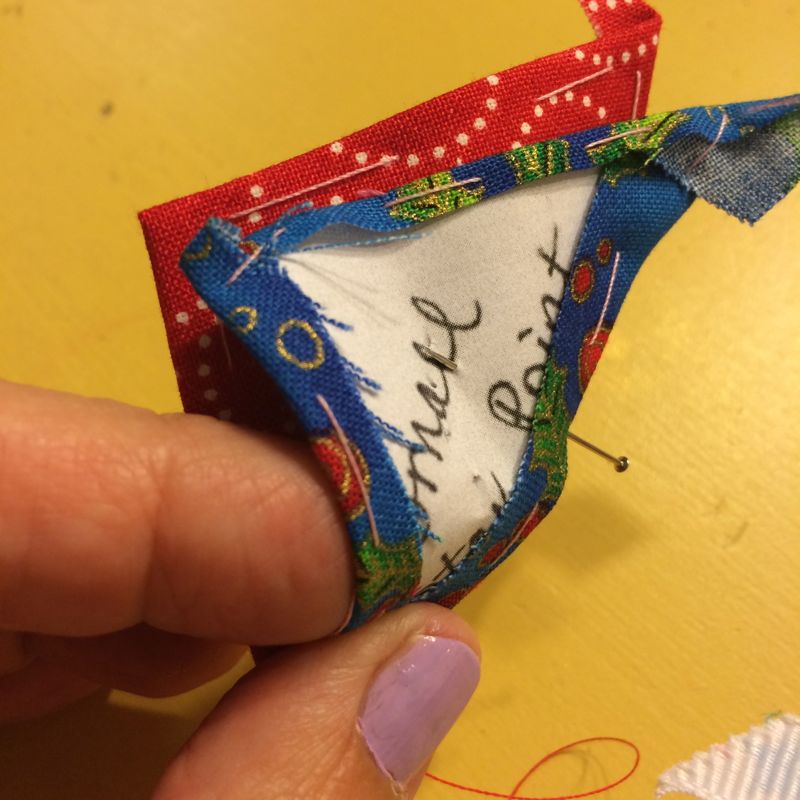
I lined up the Star Point with the lower inner arc and put a pin through the centers.
It’s easier to stitch when you do it three-dimensionally.
Cute little thing, isn’t it?
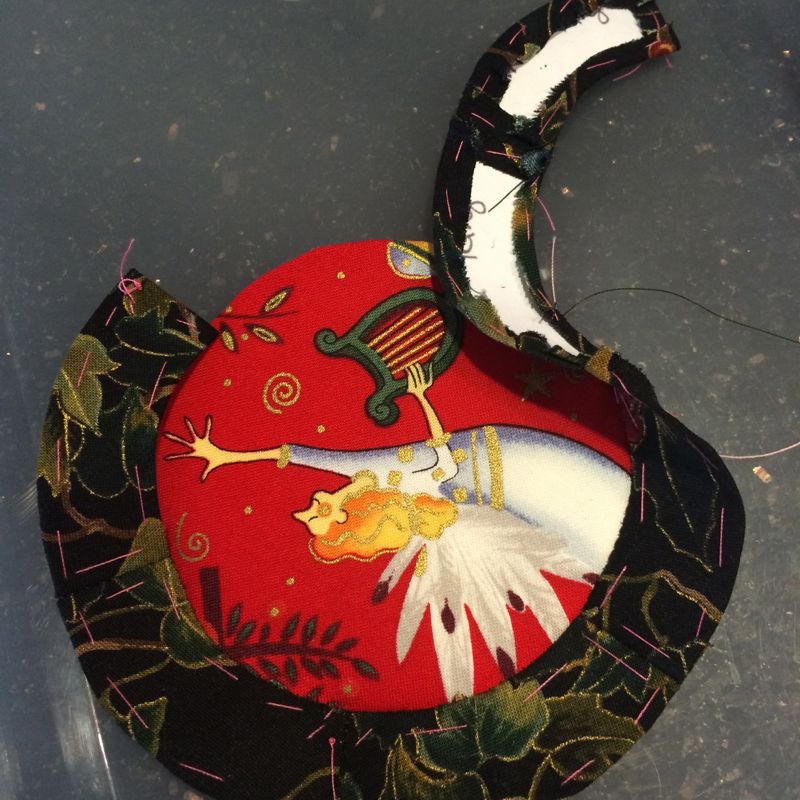
I made this circle differently. I think the method I showed you on the first post is much better, but here’s this one: Stitch the inner ring pieces together, then stitch to the center circle. There’s no need to ease; it should fit together neatly by taking a stitch or two at a time, then moving along. Sew the final inner ring seam together.
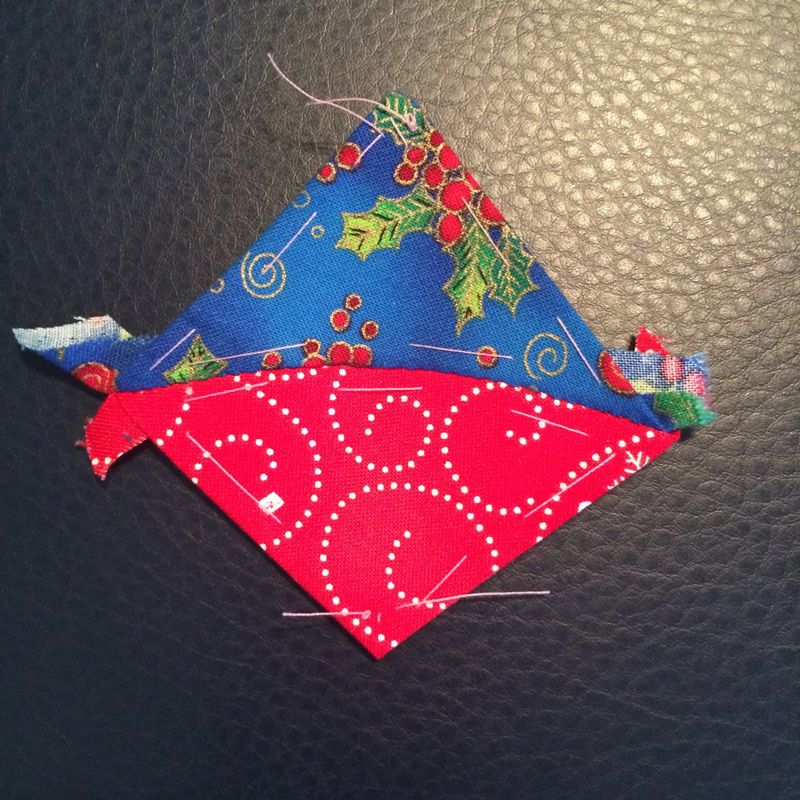
Now stitch together the inner arc (red) and the small star point (blue) and add the left star points (more red, on either side of the blue). After you’ve made six of those little units, start making the larger outer ring by attaching the large star points (white). Like the first ring onto the center circle, it should “match” easily onto the sign. You can see how I began here, by dropping the ring down and starting the stitching. I did take time to figure out how I wanted the white star points to be aligned on the final block.
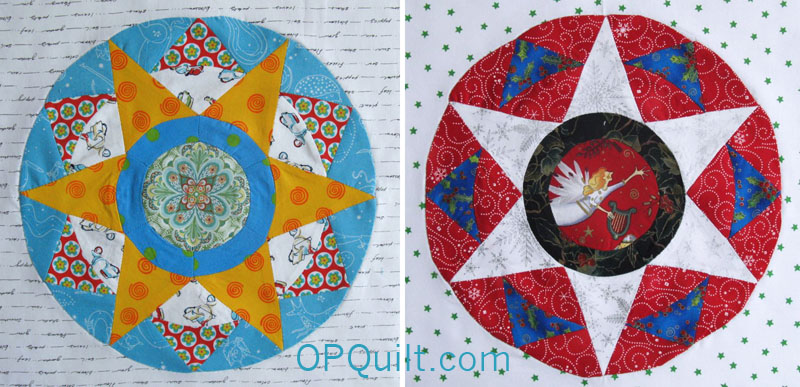
See the two circles side-by-side, above, to see the different alignments. The Christmas Star has a star point centered, pointing North, but the other circle has it differently.
Like I said, I think the other method is much easier.
Done!
Ah, you know I love this view!
I had several backgrounds to choose from, but my granddaughter Emilee helped me choose the white one with the stars.
Papers out, and here we go a-quilting!
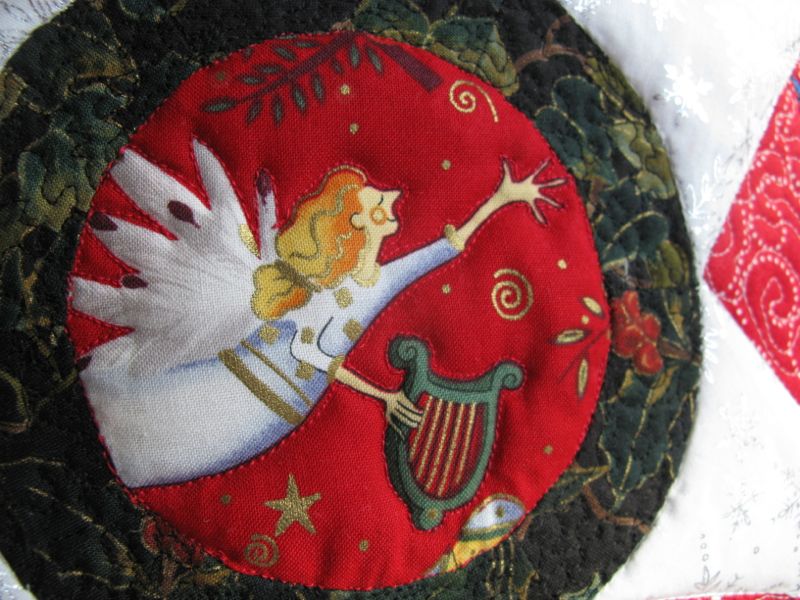
One thing I learned from Sandra Eichner’s blog is how to let the batting poof up under a design element by stitching towards it. First I did the red pieces in between the star points in a meander, trying to quilt toward the star points large and small. Then I went for the outer margins, having fun and letting the machine roll. Black thread and a tiny stipple for the inner ring, dodging the berries, and then outline the angel in the center in order to control the fullness of the batting. Lastly, I outlined everything, using my even-feed straight-stitch foot.
Yay! A new piece of Christmas fun. Hope you’ve enjoyed seeing both of these Circle Blocks. I’m taking a break during December and will be back in January for the last six circles in this project. Yes, I’ve decided I’m stopping after twelve EPP circles. That ought to give you enough to play with! If you are making these blocks, please shoot me a photo, and I’ll post it up on the blog.
This is the fifth in our series of circle blocks, inspired by circles I’ve seen in my travels, as well as found on other quilts. I think this one was found in Barbara Brackman’s Book, Encyclopedia of Pieced Quilt Patterns and modified slightly. I chose an eight-pointed star to keep the variety in our English Paper-Pieced blocks. I assume you have some knowledge of English Paper Piecing, which is the method of printing out a pattern, cutting it out, then wrapping and sewing your fabric over the little pieces before sewing them together. When I read that last sentence, I know for sure we quilters are a bit insane.
A word about cutting out the pieces and another couple of words about fabrics. The patterns are drawn to the best of my ability, and although I long to be a machine, cranking out the patterns, I am not. So sometimes I might cut the pattern right on the line, sometimes I may fudge and cut it slightly inside the line and sometimes I cut it on the outside of the line, just like it used to happen in those Famous Old Days.
My favorite fabric to use is one that has a soft hand, and is 100% cotton. Why? Because I need to be able to shrink up — using a hot steam iron — any excess caused by my human imperfections. All the fabrics above, except for the green print, are those type of fabrics and after working the circle, they lay nice and flat. The green ones caused many moments of ill will at the ironing board, because it is a sheeting, like what you find in a batik and is very tightly woven. Many Art Gallery fabrics are made from this type of weave. This fabric generally doesn’t move or shrink or give once it has been stitched. It is what it is, so if you need to shrink in a bit extra of the ease. . . um, not happening. I know that when I quilt this thing, I’ll put some extra stitches in those wedges and they will flatten out and be fine, but there were some tense moments earlier this week when I discovered the problem.
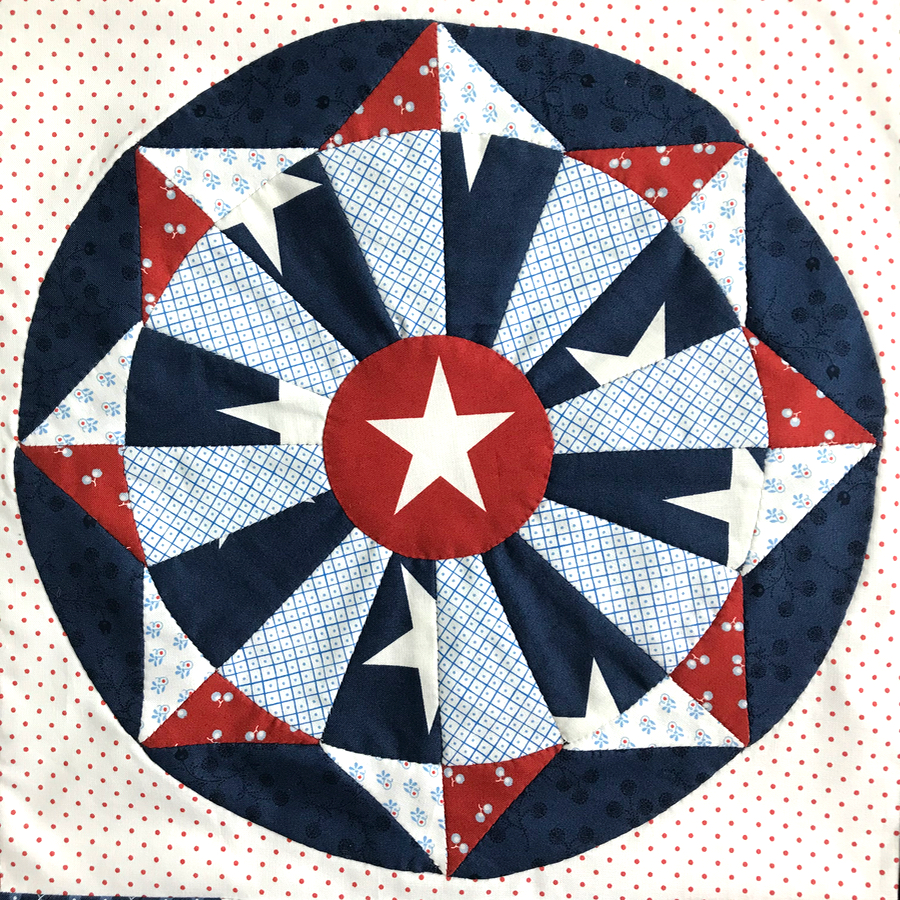
The free patterns are now returning (Red, White and Blue version, above). I request that you not distribute them, but send people here to this website to get them. Click to download a PDF file:
Please remember to set your printer settings to 100% and check the little scale square included on the pattern. It should measure 1″ in size. The illustrations of the patterns below vary from the newer version of the pattern.
Those outer arcs I knew would be confusing once they were covered with fabric, so I prepped up the pattern by drawing arrows pointing to the top center-most point. This will help when I try to sew them together later. (I should have drawn them on both sides, as I ended up putting the printed side UP. Sometimes I am my own worst sewing enemy.)
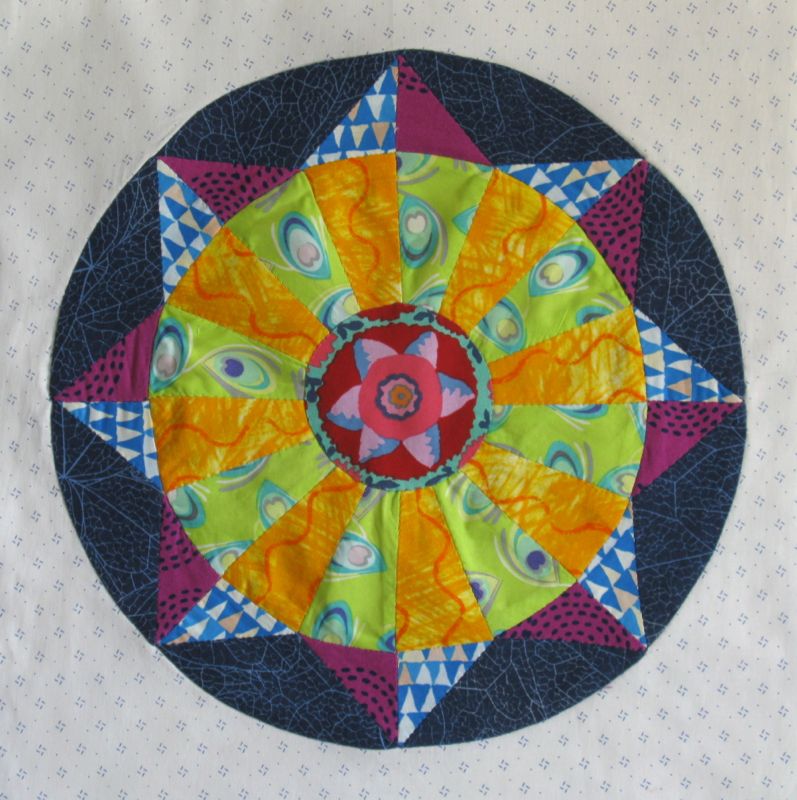
I wanted to try to fussy cut some chevron fabric so that the zigzags were going down the middle of the double-wedge piece. I matched the chevrons, then lay on the pattern.
And once I’d sewn a few together, I just didn’t like it. Call it a gut feeling, but it just didn’t feel like it was made of the Right Stuff. Back to the cutting board. I printed out another set of patterns, cut them apart, and started again:
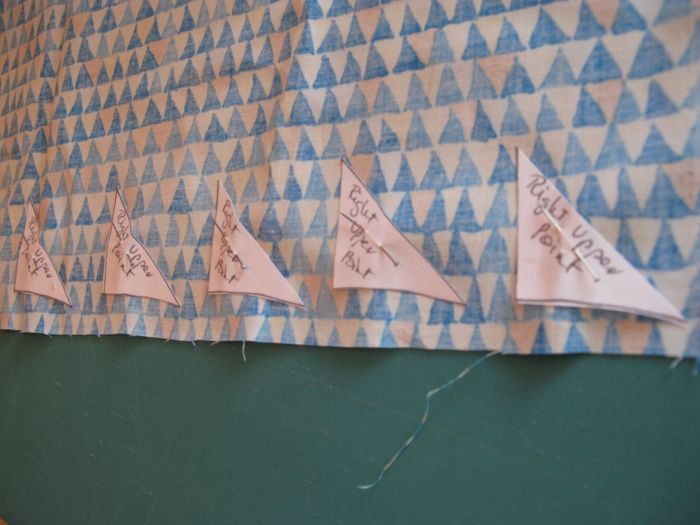
Remember to be aware when you are laying out your pattern. Mine are laid with all the printing UP. And yes, I can see where I should have trimmed off those pieces a bit. So don’t be in a hurry.
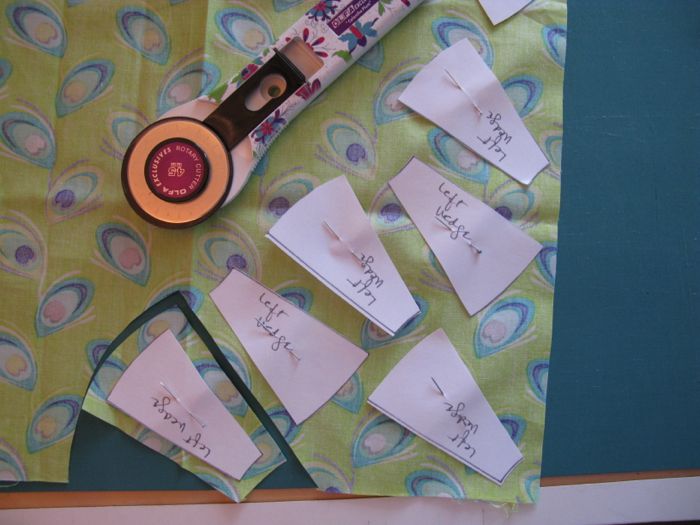
Again, I use my rotary blade to cut the fabric roughly 1/4″ away from the paper. I can trim it more closely when I am hand-sewing if I want.
This is from the BEFORE block, but you can see my general layout.
If you have a motif and you want to make sure your circle is centered, one way is to fold the pattern into fourths, and put the tip of the fold in the center of your motif. Pin one side, then carefully unfold and pin the rest.
I stitched all my wedges together, then I constructed the star-point ring: I sewed all the star points together, then joined them to the blue outer arcs.
This is my attempt to figure out if I wanted the blue-triangle fabric over the green, or over the yellow. I try out my combinations as I go. I’m spending a lot of time sewing this and I want to like it when I’m finished.
Blue-triangles over the yellow was the winner. Here is the back with all the paper in it. I will never tire of this view.
But boy, does all the paper make it lumpy. (And that unforgiving green sheeting-type fabric didn’t help either!)
I took out all but the blue outer arc papers and gave it a press. Much better. Now I need to audition that center. The first flower (above) was a definite NO.
I cut out several more. I use a running stitch around the outside, then laying it on a piece of fabric to protect my ironing board, I give it a shot of spray starch.
I slip in my cardboard or plastic circle template, then lightly press it, pulling that thread taut to draw the gathers up around the circle.
I turn it over and give a good press. Pick the iron up and down so you are NOT sliding it around–you want your circle to be centered, not skewed and moving the iron can throw it off center. You can moosh it into place with your fingers if it does move off-center, then press it again. Let it cool, then cut the thread to about 4 inches and slip out your template. Tighten the thread back up again.
Aren’t we having fun? Yes, I tried seven different circles. I do keep these little circles though, as they may come in handy further on in our series.
You can choose to English Paper Piece your outer edges onto your circle (pattern is here: EPP Corners) but I think this method of appliqué yields a better product. Prepare a square of 14 1/2″ fabric, then fold it into quarters and give a light press to give you some guidelines for placement.
You get to decide how you want your block placed. This one emphasizes the outer points.
This one emphasizes both the outer points and that cool inner square thing that is happening around the wedge circle. I like both placements, but went with this one.
I smoothed out my circle onto the large square, then used appliqué pins (you can use regular pins) to attach the circle to the background. I leave that mess at the edge of the arc to deal with as I come to it, as I am appliquéing around the circle. When I do get there, I snip out the extra seam allowances from behind to remove bulk, tuck in the raw edges, smooth out the outer line and stitch it down. (I wrote about it on Circles Block #3.) Monkey with it until it is a nice and smooth outer line.
I know there is a lot going on in this little corner of your sewing, but be patient and work with the cloth, use the pins and the tip of your needle to smooth the fabrics into place, and it will happen.
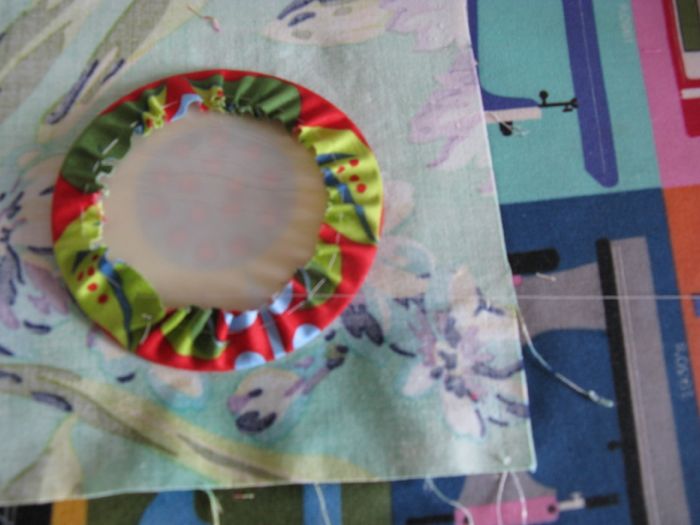
After this large circle is appliquéd on, I cut away the background fabric from behind the circle, leaving a 1/4″ seam allowance. (Again Circles Block #3, shows this step.) Center your chosen small circle over the hole. I like to do this on a hard, flat surface, so that there is no distortion. Pin, then appliqué it on, making sure you have sufficient coverage with no gaps.
And there you have it!
I’m thinking I’d like to do at least twelve circles, but again, feel free to move at your own pace, stopping when you feel like you’ve done enough. I do want to remind you that Downton Abbey is just a short three months away, so you may want to get a hand-piecing project to do in front of the TV come January. These circles might work for you. If you do make a circle, shoot me a photo and I’ll post it up here.
Since this is a free pattern, please do attribute the source of this to Elizabeth at OccasionalPiece-Quilt (or OPQuilt.com) and do not print off copies for your mother or your friends. Please direct them here to get their free copies. Many thanks.
I went into Los Angeles to meet my sister, who was accompanying her husband for his treatments here, in the Saperstein Center, at Cedars Sinai Hospital. I’m including this photo so my mother will know what it looks like. It’s a comfortable room, with private bays all along the sides of the main room. My sister and I curl up in the comfy chemo chairs (that aren’t being used, of course) and talk while we wait to visit with him. But this time while he was in treatment and couldn’t be visited, we first went to lunch at a favorite place of mine:
Sycamore Kitchen, which has very inventive and delicious food.
Then to The Grove, where we hit Barnes and Noble because I was looking for Quilty Magazine, because I’d just hit print:
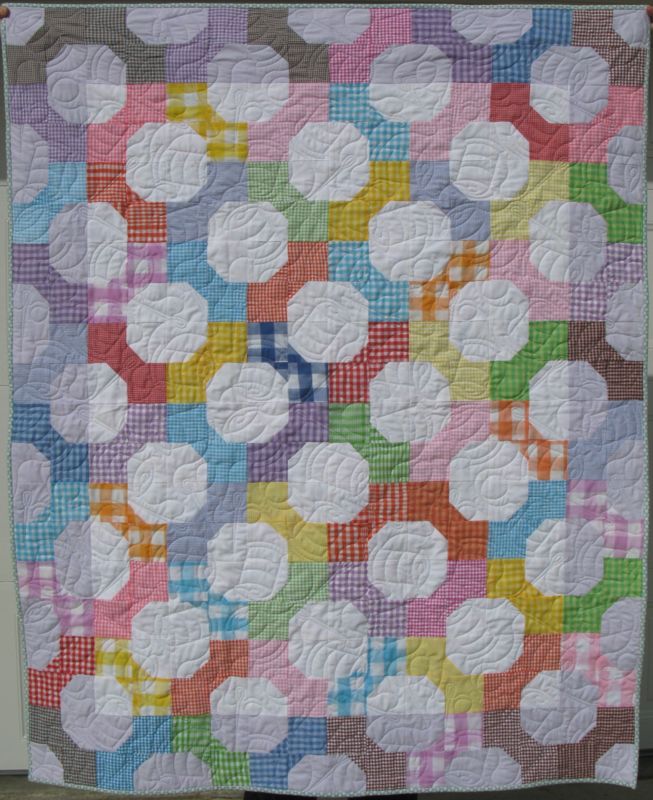
My gingham quilt was featured in “Girls on Film,” paired with Dorothy in the Wizard of OZ.
Here’s a better look at it, and here’s the blog post about it. We didn’t find the magazine; my issue came a couple of days later in the mail.
And then Nordstrom’s where just seeing these makes my feet hurt. The heels on the left remind me of my mother’s “spectator” pumps, worn for years and very stylish.
Better.
Then back to the hospital. We later had dinner at a lovely little Italian place, then it was home for me, as we were both tired and she had to drive to her hotel.
Another place I’ve been is my local community college, where school started. (The white blobs are where I whited out each student’s name.) This ought to give you a representative sample of who is in my classroom. I finally have a great class! (Intro to Literature) and I’m more excited to teach this semester than I have been in a while.
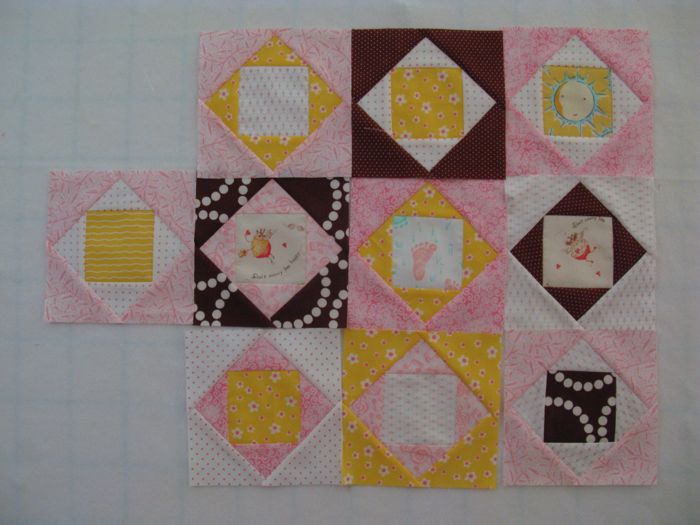
I’ve also found a few minutes to spend in the sewing room. No, I’m not playing in the Economy Block Sew-a-Long. The pretty pink, yellow and chocolate square-in-a-square blocks are for a friend’s baby quilt, and I’ve already sent them to the quilter who is putting it all together. We used Red Pepper Quilt’s tutorial *here.*
I’ve already made a quilt out of the (officially known) Square-in-a-Square block, in my quilt “Into the Woods,” (number 103 on the 200 Quilts list, shown below), so I’m squared out. The block in my quilt above is 9″ square, larger than the baby blocks, and I drafted it in my quilt software, QuiltPro.
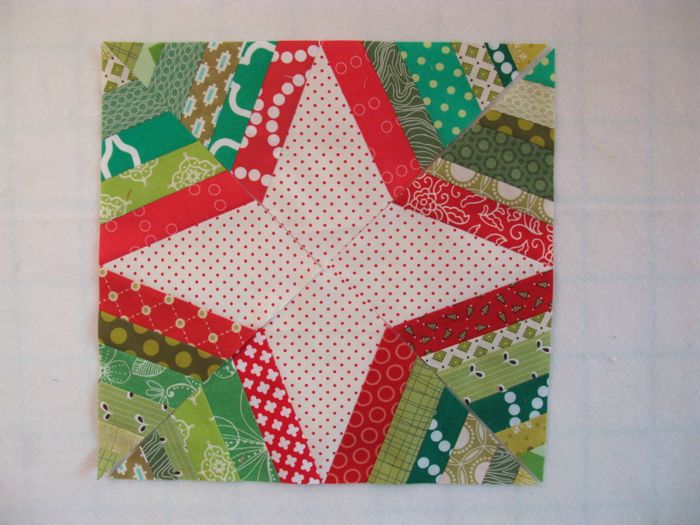
This is the block for January for the Always Bee Learning Bee. Toni of Hoosier Toni wants to make Christmas quilts for her children’s bed, and I thought her choice of the SpiderWeb block was great.
This is like the one we made a couple of months ago for another bee; the tutorial is found *here.*
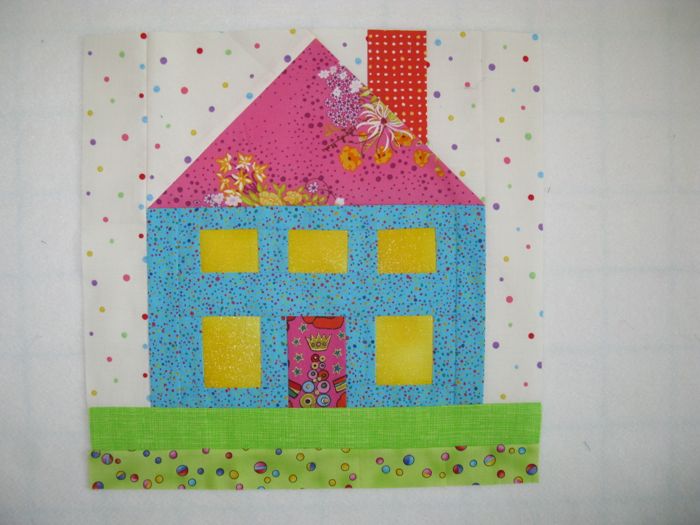
This is for the Mid-Century Modern Bee, for Linda of Buzzing and Bumbling. Her house burned to the ground right before Thanksgiving last year, so we were happy to make her house blocks to help her re-create her life in a new fashion. This is my own design. I’ve got a PDF file of the templates here: *Hyde Park House*, but I have to warn you that since it’s a 12″ block finished, some of the templates “fall” off the page, and you’ll have to figure it out the measurements. What I did was measure the templates, then write the measurements down on the paper. Then I used that as a guide for cutting out the pieces. Somehow I ended up short on the height and had to add another strip of green on the bottom. Just don’t be too precious about this and you’ll get through. Hey, it’s free and untested, so Buyer Beware.
Lastly, my mind has been in Budapest, Croatia and Slovenia, places I hope to go to this summer. The challenge is when you are in lots of places, it’s sometimes hard to figure out where you need to be. Today I needed to be here in my sewing room, finishing up the Amish With A Twist 2 quilt top (next post).
And often when you are too distracted with your head in many places, you fall into the procrastinating habit. I had a student from my last class write to me, as she was worried about trying to overcome her habit of procrastination (although her habit is very slight, truthfully). I told her I sometimes ask myself “What do I want to have done before this day ends?” and sometimes that helps. Other times it is just not wanting to face that dreaded task every day, so you finally find the resources to get it done.
Although you might think this doesn’t really apply to us quilters, I think it does. Sometimes we put off tackling the really hard tasks and instead do our bee blocks (Ahem.) Other times we have sketched out a terrific quilt, but are seduced by the latest trend on Instagram (Economy Blocks) and let that pull us away from doing the hard work of designing and figuring out the quilt in our head.
An article in the New Yorker noted that “The essence of procrastination lies in not doing what you think you should be doing, a mental contortion that surely accounts for the great psychic toll the habit takes on people. This is the perplexing thing about procrastination: although it seems to involve avoiding unpleasant tasks, indulging in it generally doesn’t make people happy.”
So I’m trying to figure out which place I should go next, which direction I should head in my quilting. Shall I fall back on something easier to do than what I have to (“we often procrastinate not by doing fun tasks but by doing jobs whose only allure is that they aren’t what we should be doing”) , distract myself by buying more fabric (judging from the recent Instagram De-Stash, a lot of people have been doing this one!), or simply surf the web some more to get so many ideas, I can’t possibly make them all in my lifetime (“many studies suggest that procrastinators are self-handicappers: rather than risk failure, they prefer to create conditions that make success impossible, a reflex that of course creates a vicious cycle”).
Ultimately, it comes down to Getting The Work Done: “Since open-ended tasks with distant deadlines are much easier to postpone than focussed, short-term projects, dividing projects into smaller, more defined sections helps.” And aren’t most of our UFOs the result of procrastination?
So get yourself a notebook, break down the quilt you want to make into smaller steps, and check them off as you go. It also helps to set a deadline–try the Finish-A-Long if you need a little help with that; because of that I finished several dead-in-the-water quilt tops, surprising even myself with twenty-four completed quilts in 2013. Not all of these were begun and finished in that calendar year, but that’s when they came alive. I’ll close with some lines from one of my son’s favorite books, “Oh the Places You’ll Go,” by Dr. Seuss:
On and on you will hike and I know you’ll hike far and face up to your problems whatever they are.
You’ll get mixed up, of course, as you already know. You’ll get mixed up with many strange birds as you go.
So be sure when you step. Step with care and great tact and remember that Life’s a Great Balancing Act.
This is where I was Wednesday morning, after listening to hours and hours of a new audio book: Beautiful Ruins. My mother’s still reading listening to it, so I’ll withhold my review until later. But the really good thing about audio books is that when they are playing on your desktop computer in the same room as the sewing machine, a lot gets sewn, like a quilt top for our new-to-our-family adopted grandson Chris. This is my Sashless Quilt, with the tutorial found *here.*
Full length shot on our front porch, with hands belonging to my tall husband Dave.
This isn’t a complicated quilt, it sews up quickly, and I love using favorites from my stash like the bicycle fabric. I’d been saving that for a long time and this was the perfect use because my son (Chris’ Dad) loves bike riding, owns a bunch of them and takes all his sons out on bike rides.
I started cutting this on Monday, sewed Tuesday and Wednesday morning, quilted Thursday, did the binding on Friday. Hey! I felt like Rita from Red Pepper Quilts, only I’m not listing it in my ETSY shop. (I don’t even have an ETSY shop.)
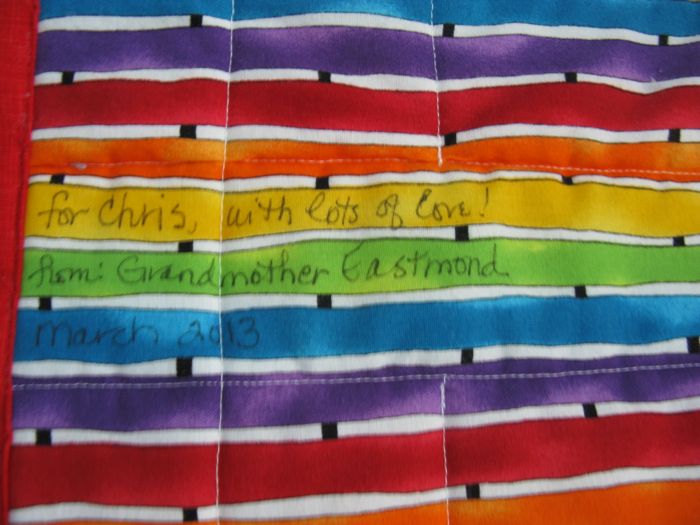
The “label.” Sometimes with quilts I know will be washed and washed, I don’t mess with a formal label, but simply write directly on the quilt with a Micron Pen.
Glamour shot, reclining on the sofa. I did the basic quilting: stitch in the ditch. I’d played with the idea of doing echo-quilting alongside the seams, but in the end changed my mind.
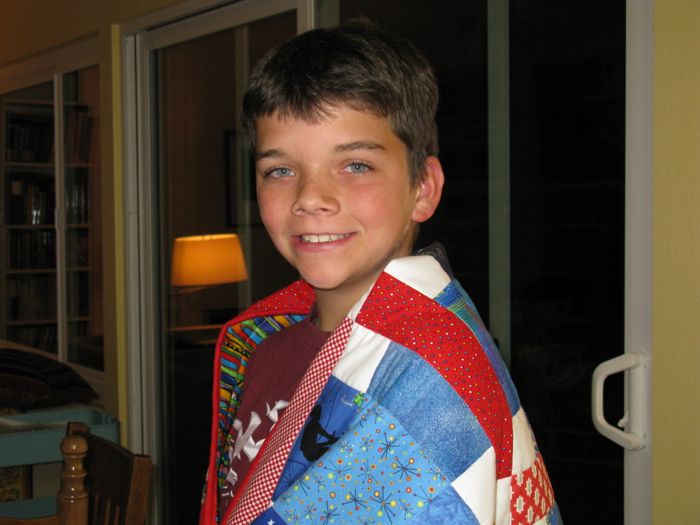
I gave it to Chris as they arrived on Saturday evening to celebrate my husband’s birthday. Chris’ younger brother Andrew used it first.
Later on, after dinner and all the adults talked, Chris nabbed it and settled into a movie. Or was it a game? I can see that at the dimensions of 46″ x 57″ he will soon outgrow the quilt, but I didn’t want it too big–it’s a “welcome to the family” quilt, like what his brothers received when they were newborns.