This phrase intrigued me. It came from a podcast I listened to while out walking, so I’ve been thinking about what happens when we try to learn something new. Or lean away from “what we’ve always done.” Or have to hang out in the middle of a decision, not knowing the best way forward (the temptation is always to force it to a conclusion, apparently, limiting new possibilities). These ideas on uncertainty are from Maggie Jackson:
“Neuroscientists are beginning to unpack what happens in the brain at the uncertainty of the moment, when the realization that you don’t know that you’ve reached the limits of your knowledge instigate a number of neural changes. Your focus broadens and your brain becomes more receptive to new data and your working memory is bolstered. So this kind of rings a bell: you’re on your toes and that’s why uncertainty at that moment is a kind of wakefulness. In fact, Joseph Cable of the University of Pennsylvania said ‘that’s the moment when your brain is telling itself there’s something to be learned here.’ So by squandering that opportunity or retreating from that discomfort, we’re actually losing an opportunity to learn. Your old knowledge is no longer sufficient.”
–Maggie Jackson on the podcast The Grey Area, with Sean Illing

So what does this have to do with quilting?
I recently finished up my pattern of the New York Beauties (more on that in a minute) and decided I wanted to make each block in the quilt in regular intervals, but many of those above are multiples of the same block. So I thought I’d test out using freezer paper, instead of my usual parchment paper, and see how I liked it. (Besides that, my regular 17 lb. parchment wasn’t being made anymore–only the 28 lb. Time for an update!)
And the verdict? I like it!
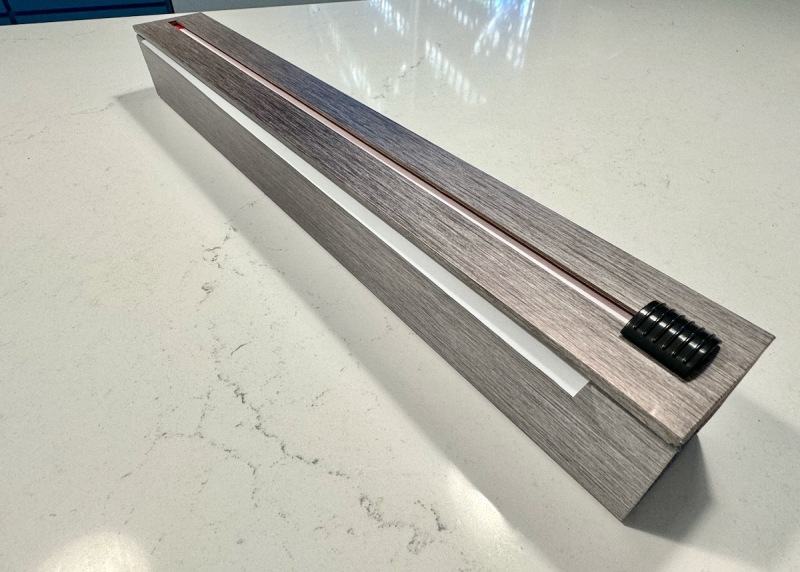

First, start with this: ChicWrap’s 18″ aluminum foil dispenser. It comes with foil, but I put that back in the kitchen, and slipped in my 18″ roll of freezer paper.

You don’t thread it through that slit, but instead, lift the lid, to set up the paper for cutting.
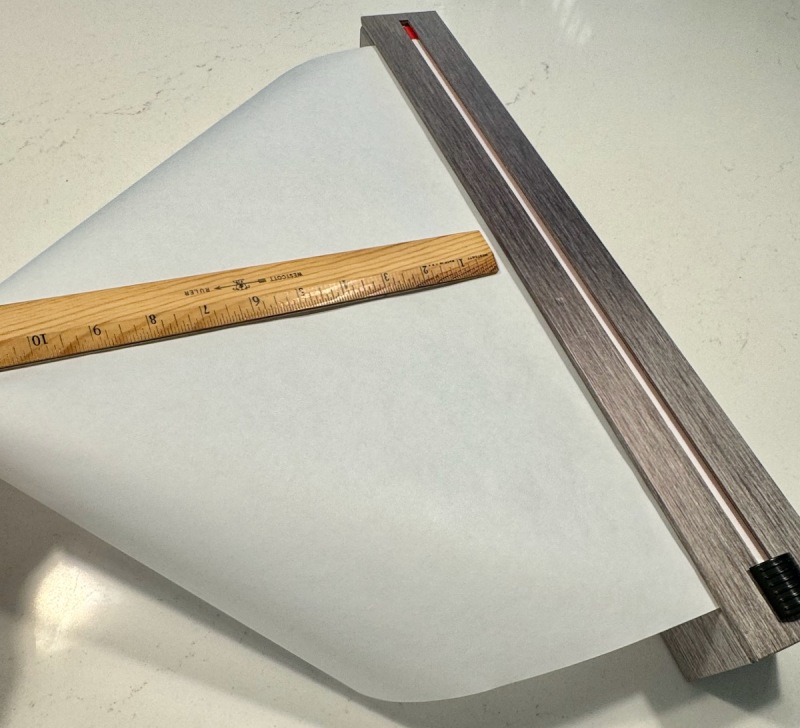
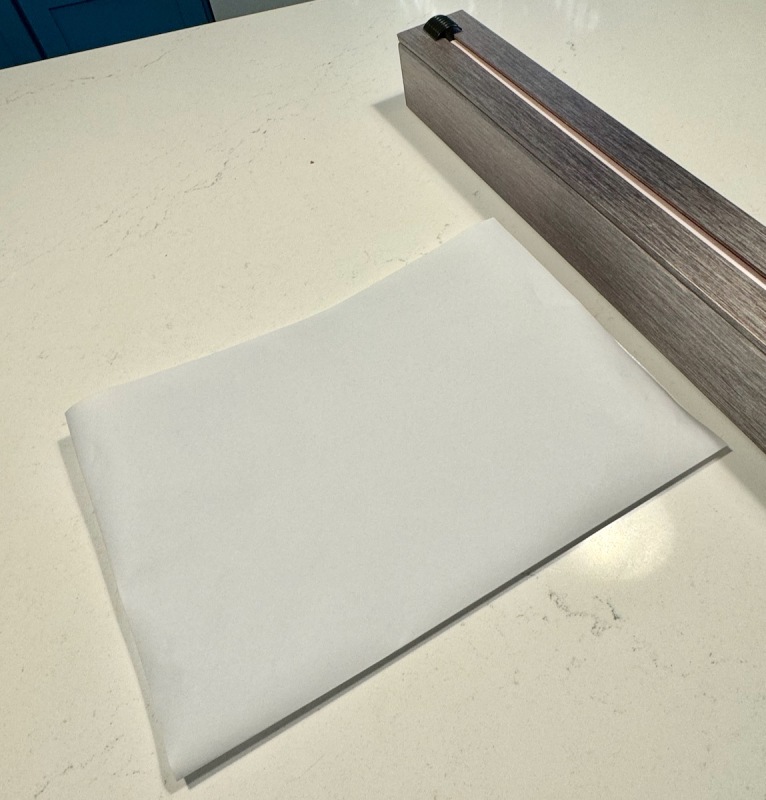
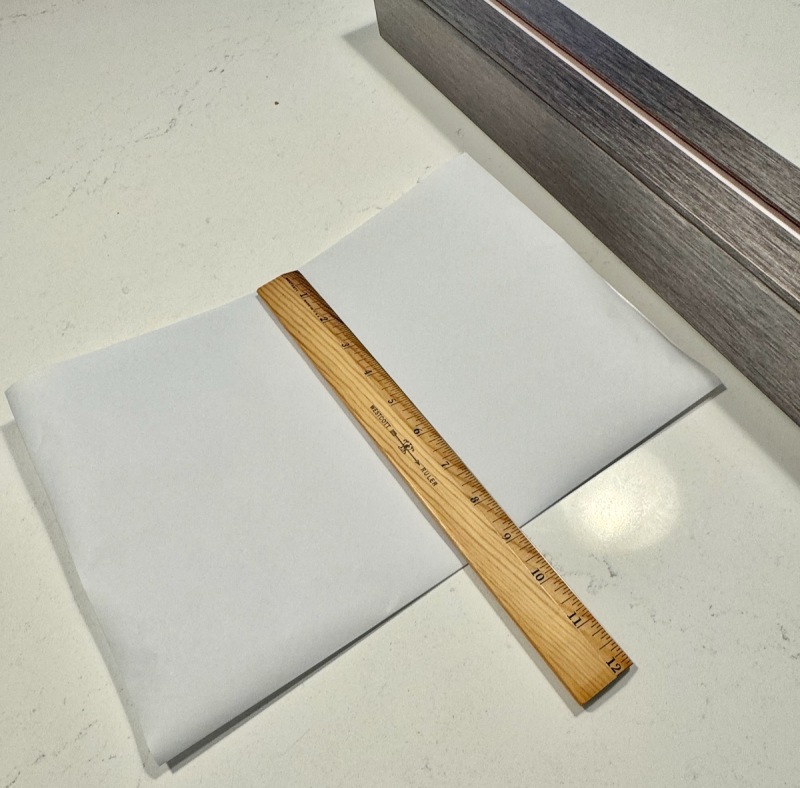
Pull it out so you have at least 11″ of length. Fold it in half (it will measure about 9″ in width), then take it to your cutting mat to trim it up to 8 1/2″ x 11.” Now you are ready to feed it through the printer. If you don’t have a printer that will allow you to feed it one sheet at a time, you can tape the freezer paper to a piece of heavier paper or cardstock (trim the freezer paper down to 8″ x 10 1/2″) and send that through.
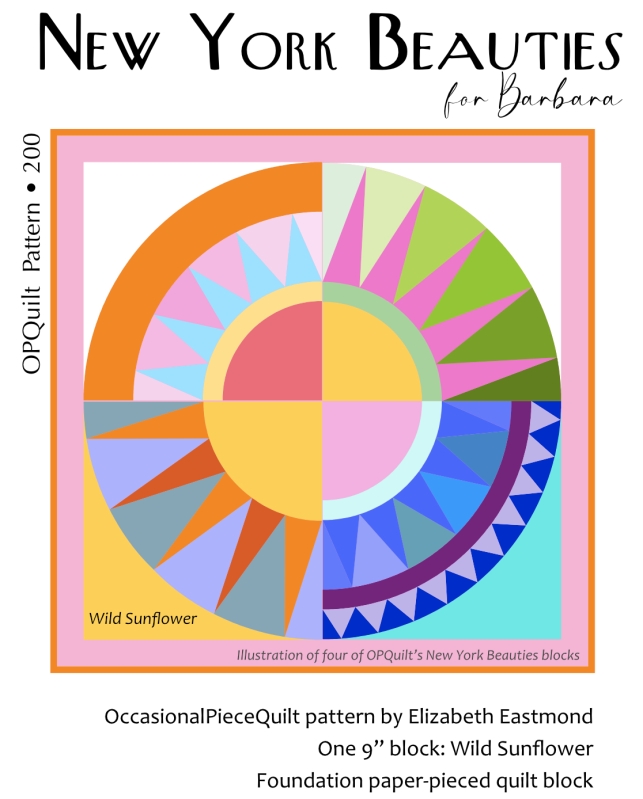
I read about buying sheets of freezer paper already cut, but most of the commenters said it was no sturdier than the stuff we use from our rolls, so I just cut it from the roll, and went with it. After printing, I cut it out around the outlines of the piece I was using. You can experiment with this technique by downloading my free New York Beauties single pattern from PayHip:
Even though I’d already printed out all the regular parchment papers, my brain was saying “there’s something to be learned here.” So here we go:
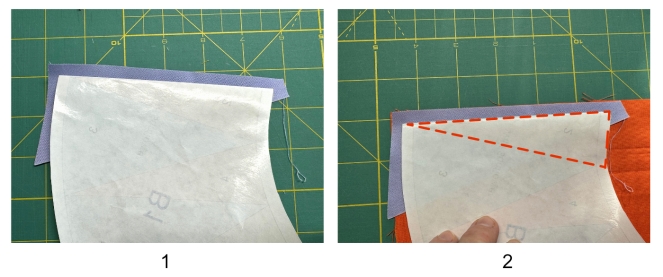
After cutting out your shape from the printed freezer paper, fold on the first line, and press just this section (Ray 1) to your first piece of fabric (picture 1: muted lavender). Then lay that on top of your second color (picture 2: orange).
Later on, I figured that I should make a crease on all the lines of my section, but for now, I digitally outlined the rays in orange dashes to help you see the shapes.
Make sure there is enough of your second fabric underneath your first fabric. Pin, or clip. Head to the sewing machine, and sew next to that folded edge.

Now to the ironing board. Press, smoothing the fabric away from the seam. Iron only on the next section (Ray 2). Fold back along the line between rays 2 and 3.
At the cutting board, align your ruler for a scant quarter-inch seam, and cut off the excess. If you need to trim at the end of the piece, open up your paper, so you know you aren’t going to cut off something you’ll need later on. Use the edge of the paper as a guide, but rough-cut off the extra. (See picture 12, below.)
Fold back alone the line between sections 2 and 3, revealing the shape of the next ray (shown here in dashed orange lines). Place on your third fabric (picture 5: blue-green). Stitch along that folded edge. Iron Section 3 paper onto the blue-green fabric, smoothing out the fabric underneath.
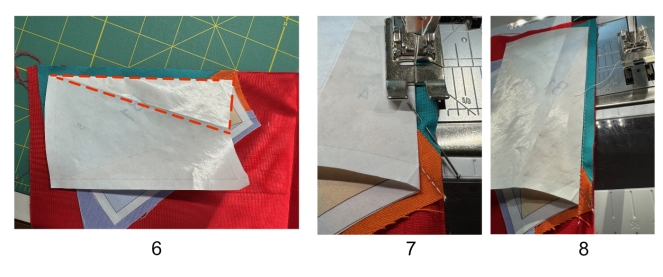
Fold on the line between sections 3 & 4 (Ray 4 shown here in orange dashed lines). Place until on next fabric (picture 6: tomato red).
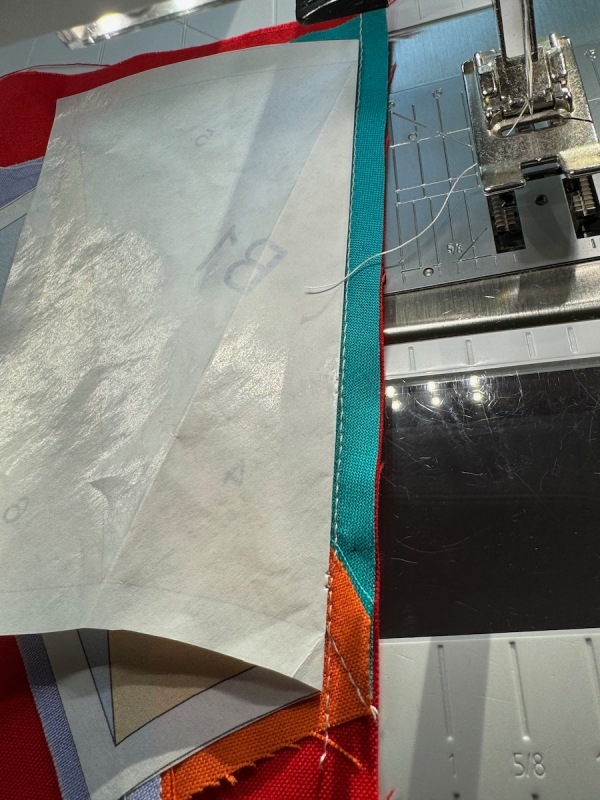
Again, stitch along folded edge, shown in pictures 7 & 8. You can also see how I pin — just in that seam allowance. Did all my fabrics have a straight edge, making it easy for me to align (as in picture 6)? No, not always. If not, I would place, trim…and then pin and sew.
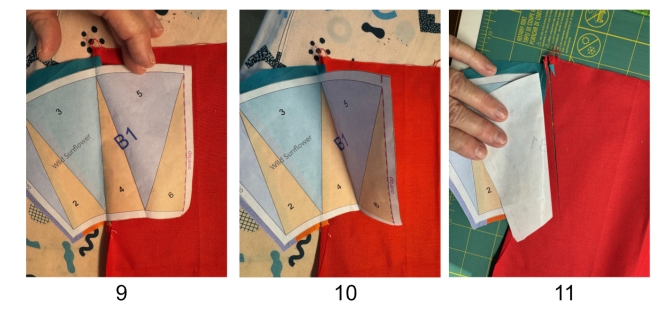
You know the drill now: press just that section (Ray 4), then trim at the cutting table, as shown in picture 11.
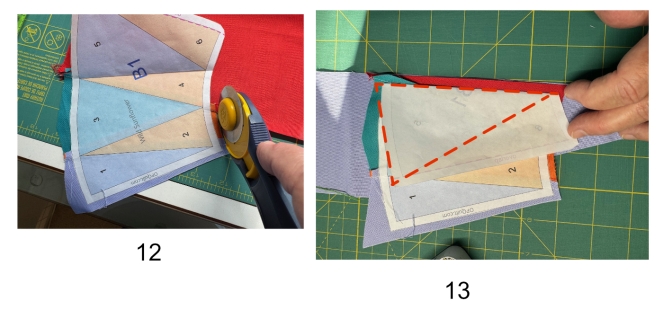
In picture 12, I show how I open up my paper, so I can cut off the excess at the base of the B1 section. Then I fold it back down and trim that scant quarter-inch at the crease of the paper (between Rays 4 and 5). In picture 13, I fold it back down, and lay it on the next fabric, using the shape of Ray 5 to check you have enough fabric. Those orange dashed lines are a visual guide: I do have enough. Stitch along the folded edge.
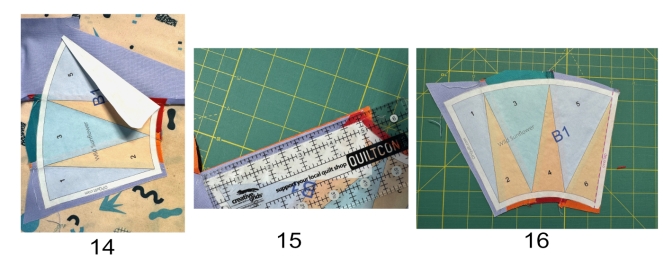
Yep–you know: press only the Ray 5 section of freezer paper onto your fabric. Back to the cutting mat to trim at a scant quarter-inch, then repeat with your final ray (picture 15: a happy orange for me). Press that freezer paper to your final ray. It should look sort of like the image in picture 16. Set aside, and start on B2.
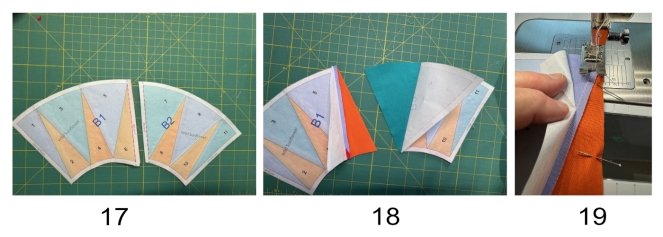
Following the numbers, and using the same technique, stitch all the rays for B2. Trim carefully around the edges of both, neat and clean (picture 17). Peel back the papers for those edge-rays with wrong sides together and pin, aligning lower and upper edges of B1 and B2. Take to sewing machine. I found I had to peel back even a little more. Stitch, then carefully peel off the freezer paper. When you take it to your ironing board, press that last seam the same direction as all the rest (you’ll figure it out).
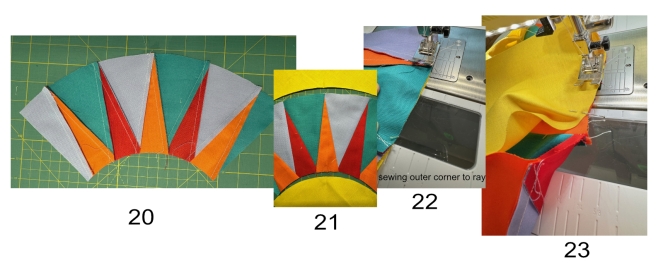
Charging right ahead, press a center mark in the A Outer Corner, the B1/B2 piece, and the C Center. Don’t press down through the whole piece — just the tip of your iron is all that’s needed. Pin the outer edges of the A Outer Corner and the center marks, and head to the sewing machine.
In picture 22, I sewed the A Outer Corner to my rays, PUTTING THE LARGER OUTER CORNER TO THE BOTTOM. This is different than you usually see. Please take it slowly, no rushing, keep aligning as you go from pin to pin to pin (there are only three).
In picture 23, after putting in my three pins, I sewed the C Center to the rays, WITH THE RAYS TO THE FEED DOGS. Again, take it slowly, and keeping aligning the fabric. You can pull it toward you a little as you stitch, because those curves are bias. By elongating them (by stretching them out), it may help them to line up a little easier. But not a big pull, not a big tug. Little adjustments. You are the tug boat, getting that steamship into port — little by little. (Okay, enough bad metaphors.)
Press. Usually you are pressing away from the rays.
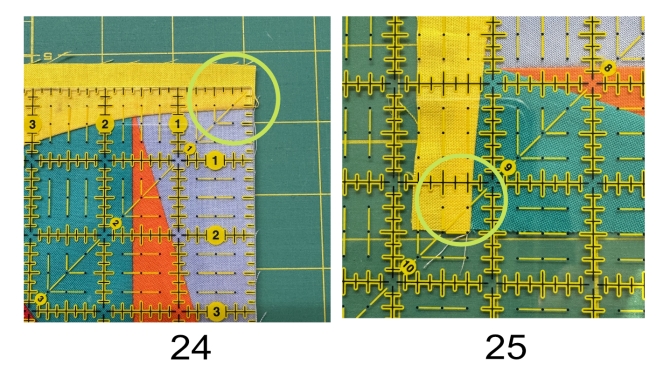
Now to trim up. I gave you extra on the A Outer Corner so if your block went askew, it wouldn’t be a tragedy (just another way I show my love to you in my patterns — I make the mistakes so you won’t have to). Align the corner of your ruler so the 1/4″ line is right at the Outer Corner fold, as show in picture 24.
Then check the opposite corner, lining that 9 1/4″ mark at the folded edge. It’s not rocket science, meaning that it most likely won’t be exact. Get as close as you can. Trim, then turn the block, lining up the 9 1/2″ line with the trimmed edge, and slice off whatever is left (not much on this side).
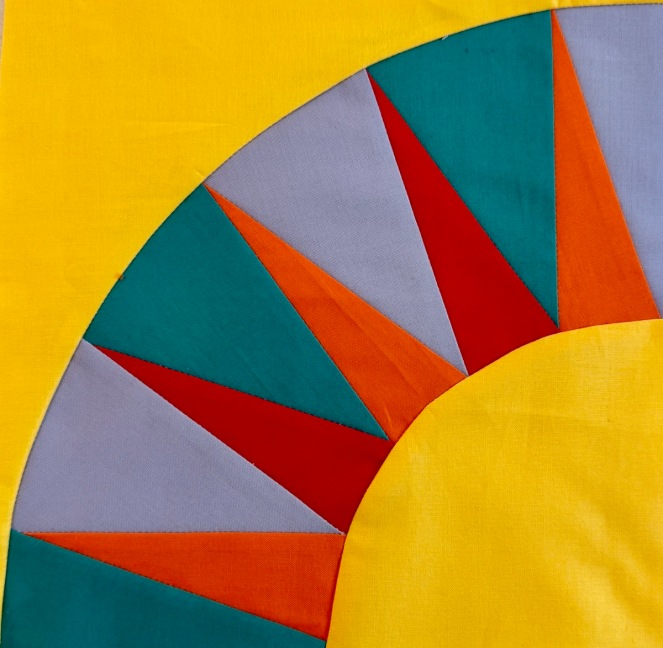
Done! Wild Sunflower block is complete. Now, if you are going for the full quilt, the pattern says to make a total of three. So will the freezer paper keep sticking?
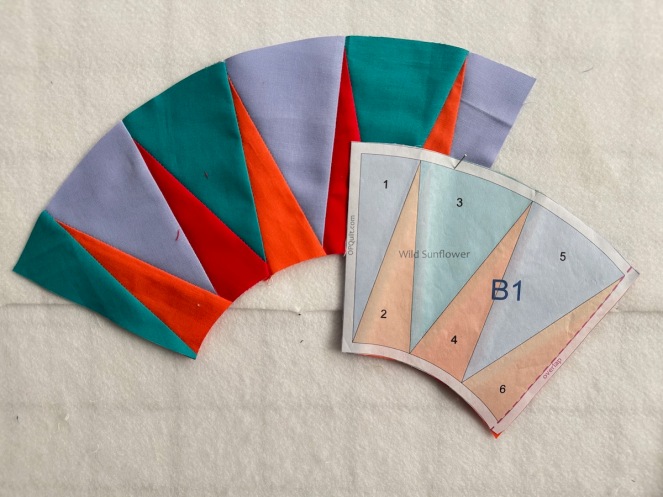
Ray Two is finished, and I’m plowing again into Ray Three, and yep — it’s still sticking. For one of the blocks you make it five times. I’ll be interested to see how that goes. And overall, I felt like using this method is faster, always a plus.
Just like I used a weekly goal to help pull me out of my sewing slump last summer, I’ll be using these New York Beauties to get me going for this year. If you want to follow along, I have a coupon for you to use, if you want to purchase the pattern. (I’ll probably do this every two weeks, so don’t panic.)

Just head to my quilt pattern shop, and when you check out, type in this code (note the three capital letters at the beginning). You’ll get 20% off the pattern. It expires on Leap Day! (February 29)
All of this can be found on the Master New York Beauties page, on the tab above. When the coupon expires, I’ll take it down, but a listing of the blog posts will be linked there, if you want to refer to them.


What we ate for the Super Bowl (no, we did not watch it): Homemade Focaccia

Just before kick-off, Camryn and Landon (he, of Focaccia fame) stopped by to visit, then took off again to their Super Bowl party. Later that night, we blanked out by watching the movie Dune on Netflix, understanding about 60% of it. If you’ve seen it, what was your percentage?