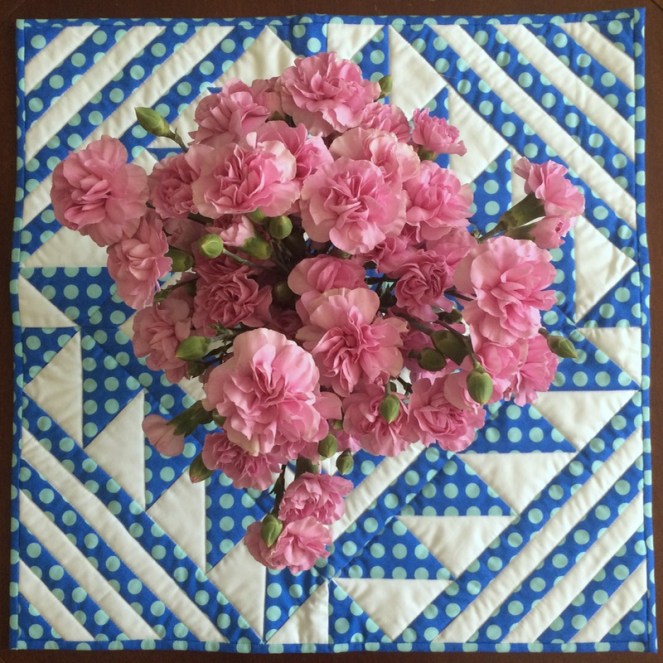
 We all put double layers of fabric bindings on our larger quilts, but have you thought about using a single binding on a smaller quilt? It’s quicker, flatter, and really–are you going to wear out those edges any time soon? And if you do, won’t you just repair them? That idea came from Gwen Marston, in one of her last workshops. That idea — that a quilter would just repair them if they became worn — is why she uses single bindings on all her quilts.
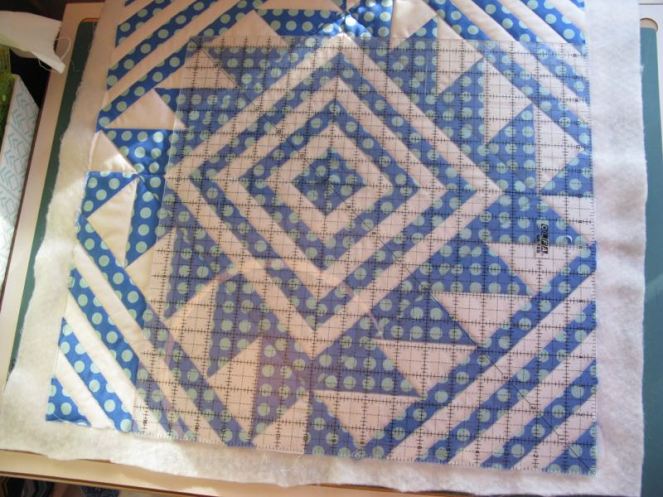 Start by squaring up your mini-quilt. Yes, that is a gigantor square ruler, and I use it a lot, actually.
 Prepare your hanging corners, by cutting a larger square (for a 24″ quilt, I use a 5 1/2″ square), folding in half, diagonally, and pinning it in the upper corners of your mini, against the back, matching raw edges to the edge of your quilt.
 (Here’s what it looks like on another quilt, as my corners just disappeared on this one.)
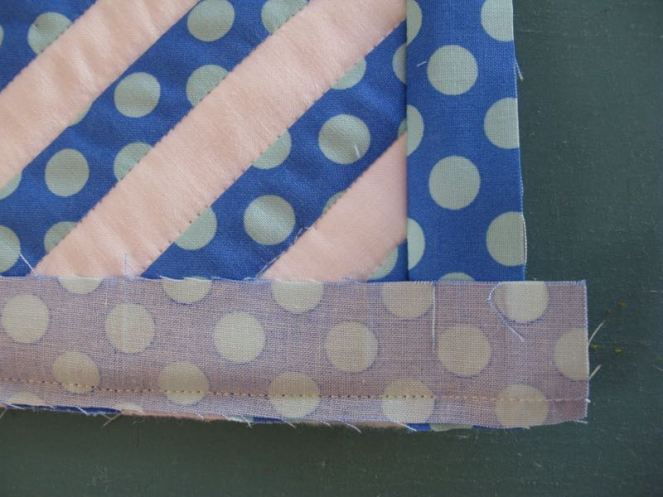
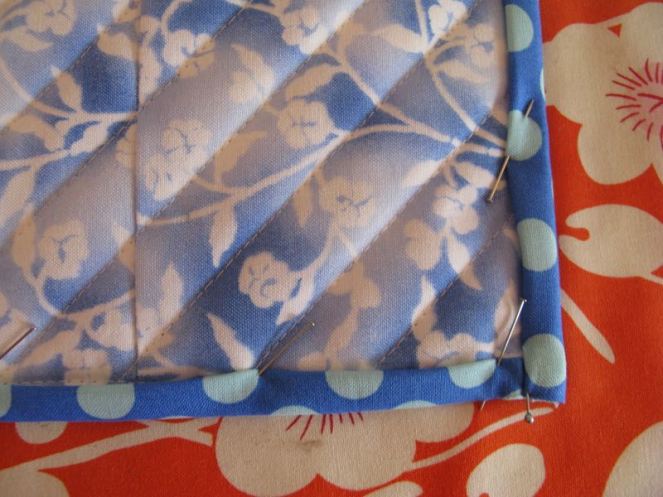
 Cut strips of fabric (lengthwise, if you can) about 1 1/2″ wide and the size of two sides. Pin, then stitch on, using a 1/4-inch seam.
 Repeat for upper and lower edges. Pin and stitch, but watch out that you don’t veer off on those corners (I pin them).
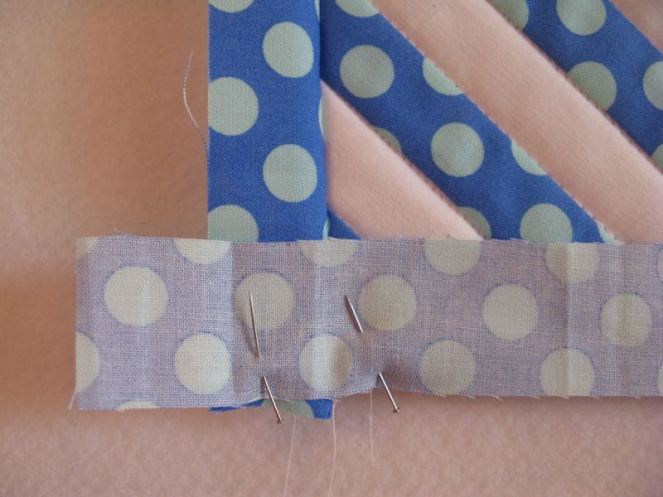
 Square up the corner, and cut off the excess, both underneath (above) and on the outer edge (below).
 While this looks angular, it isn’t.
  Press binding out away from quilt.
 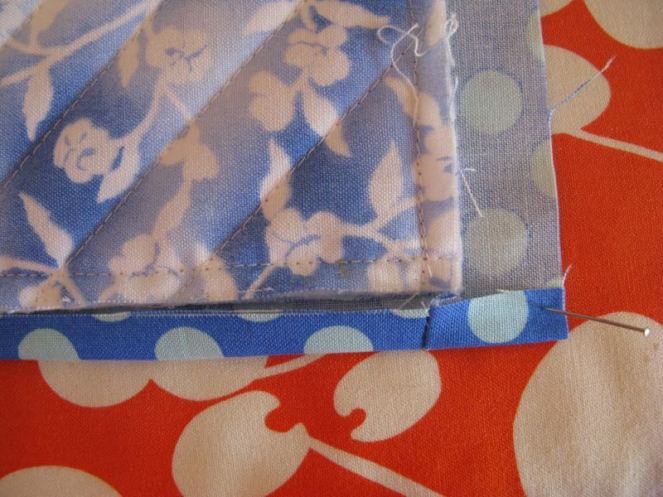 Fold up lower edge, so the raw edge of the binding meets the raw edges of the quilt.
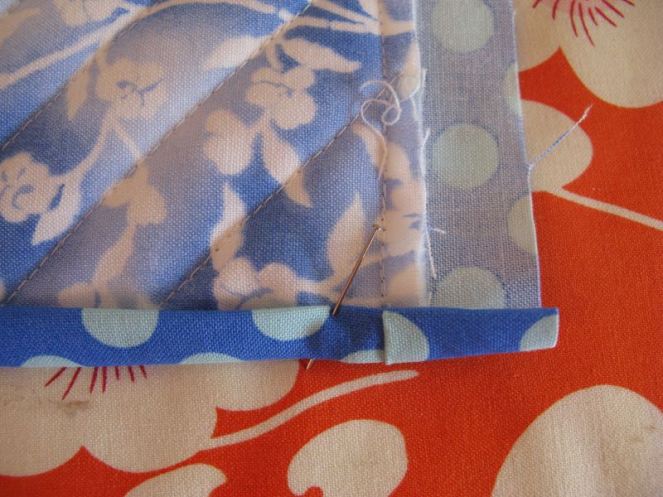 Fold it up again, covering the raw edges of the quilt. Pin in place, and then repeat with the sides:
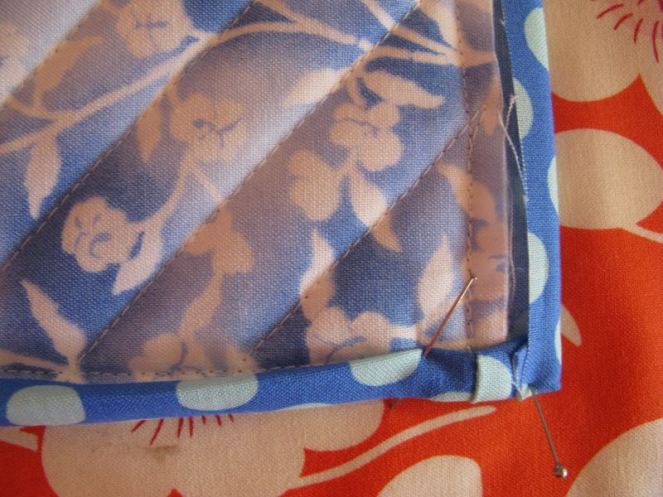
 Hand stitch all the way around, or if you are a confident quilter, you can use a glue stick to affix the binding edges down, then machine stitch. I personally don’t like the machine stitching, as I think it makes the edges too rigid, but “To each his own,” said the Old Lady as she kissed the cow. (My Dad used to say that all the time.)
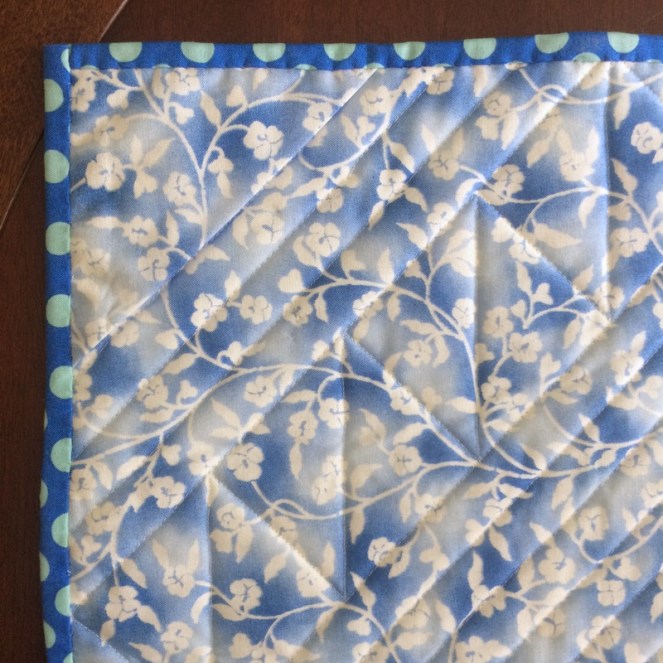 Here’s the corner already on, but it’s hard to see. I cut a dowel the width of the quilt, minus 2″ and slip it into place. Then I hang my minis, balancing it on a push pin.
 Thanks to all who came to the Trunk Show and to all who sent their best wishes. It was a lovely evening! If your guild would like to see my Abecedary of Quilts Trunk Show, just drop me a note.
Discover more from OccasionalPiece--Quilt!
Subscribe to get the latest posts sent to your email.

Single fold binding has been a great choice for me on smaller projects in the past as well. Especially if the item is meant to be more decorative and washed less often, why not?
I’ve made single fold binding many times, usually for small things like wall hangings and placemats. However, I’ve never put it on using the method you shared! In fact, I’ve never seen it done this way. So interesting. You’ve just proven that you can teach an old dog new tricks! Thanks for sharing!
NIce job Elizabeth. Your mini looks so pretty with the vase of flowers too. ! I’ve used single bindings before too, especially on mini quilts. But I’m afraid if I used one on a full sized bed quilt and it needed replacing or repairing, the long forgotten recipient wouldn’t be too happy! 😃
Thanks for the great tutorial. That block looks very familiar. Hmmmm!
I don’t make many small quilts, but I do think a single binding looks better proportioned on them. Your method is simple and I’ll keep it in mind next time.
Thank you very much for this extremely clear tutorial. Your timing was perfect for me, which may have been mere luck, but I appreciate it!
So glad to hear that your Trunk Show was a good experience. This was one of those times I nearly forgot I’m no longer a Southern Californian–I saw your announcement and immediately wanted to run to our calendar and write it down “in ink” as we say about important events.