200 Quilts · Creating · Family Quilts · Quilts · Something to Think About

Christine’s Philadelphia

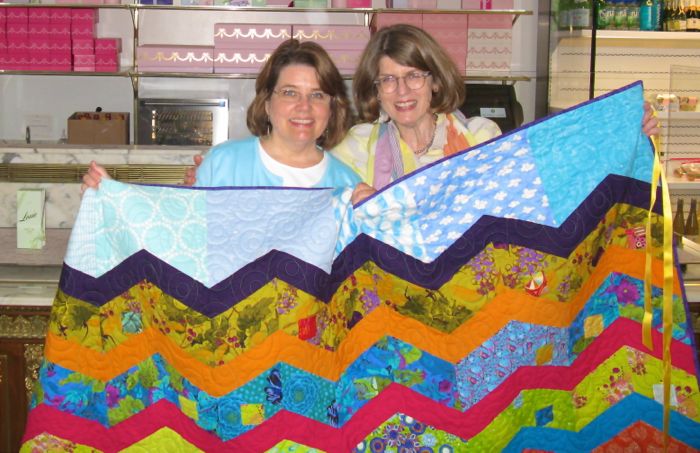
At the last post, we were in the bakery section of Bottega Louie and I had a big surprise for my sister Christine.

ChrPhilly all wrapped up

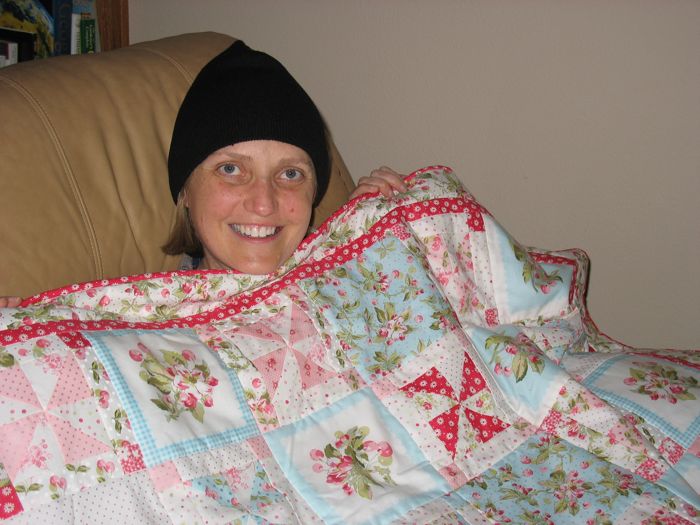
 It was  Christine’s Philadelphia, a quilt celebrating her life and her newly adopted city.  She moved to a Philadelphia row house this past year, after ten years in transition.  First, she raised all her children, then began a new section of her life as an artist, returning to school.  Settling in to this life was not for long, as her husband died of cancer in a quick and wild two years.  She went on a mission for our church to New York City, and resumed a friendship with Doug, who had also lost his wife.  They married after her mission and she moved from the West Coast, where she’d spent most of her adult life, to the East Coast (Delaware), then finally to a lovely home in Philadelphia, within walking distance of art museums.  She resumed her art, but one more mishap: while biking to her studio one evening, she was hit by a car, but has now mostly recovered from that accident.  She is taking on new challenges all the time.  So you can see why I wanted to make her a quilt.  I had lots to cram into one tiny creation of mine.

She was surprised.  And I think, delighted.

ChristineESE Row Quilt

I’d been planning it and working on it for a few weeks, and when she came out for her son’s graduation, I knew I could give it to her then and see her face, and then mail it back later (which I’m doing).

Christine's QuiltSketch labeled

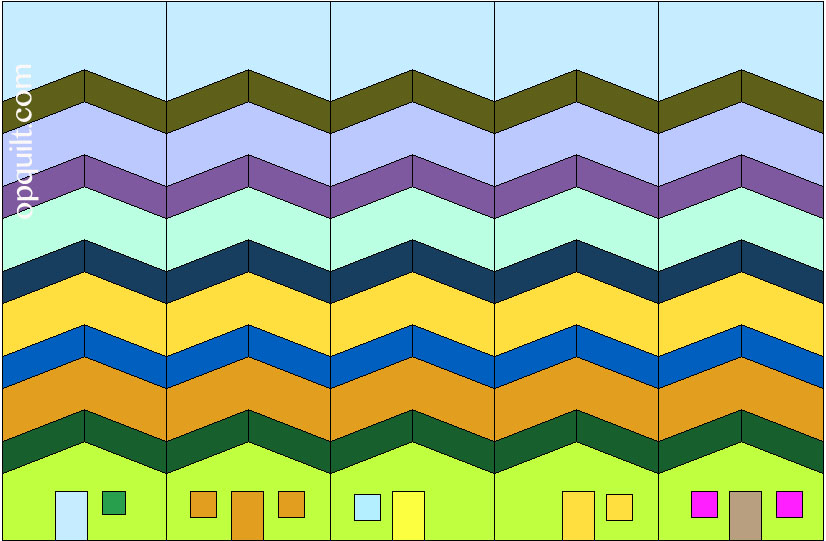
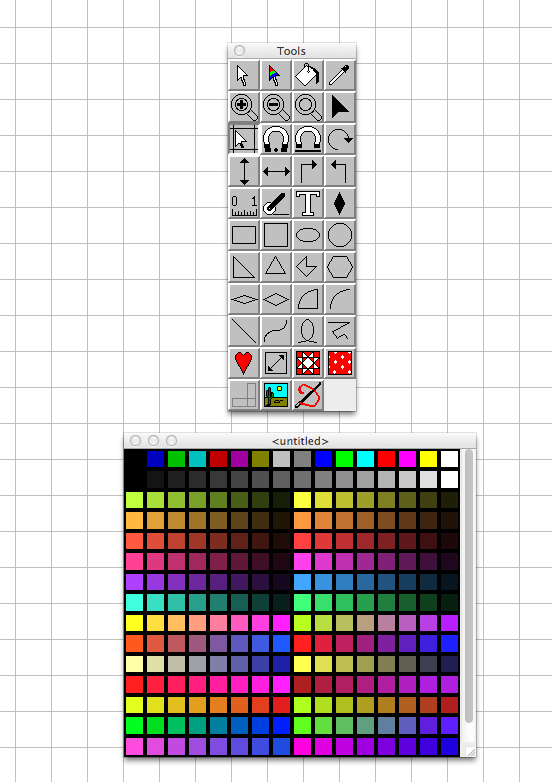
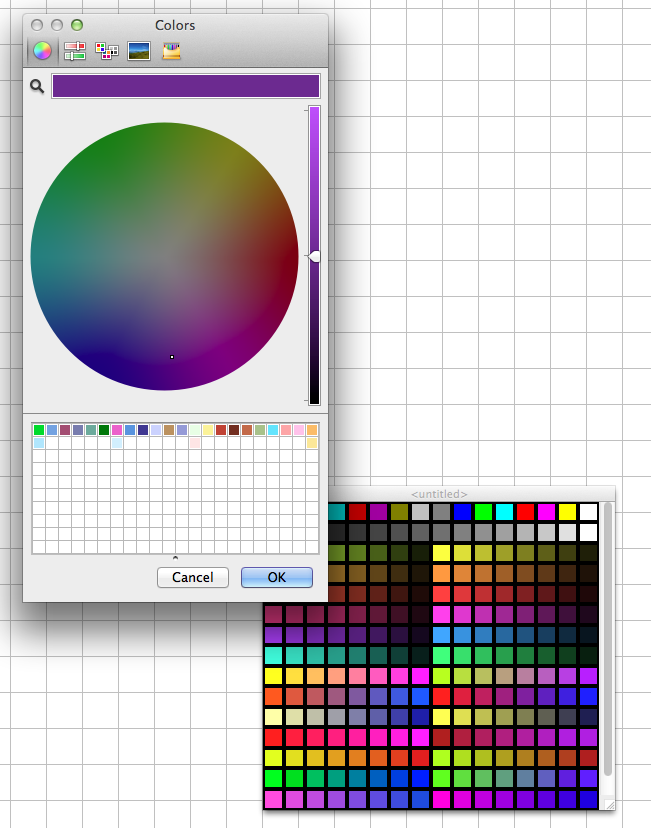
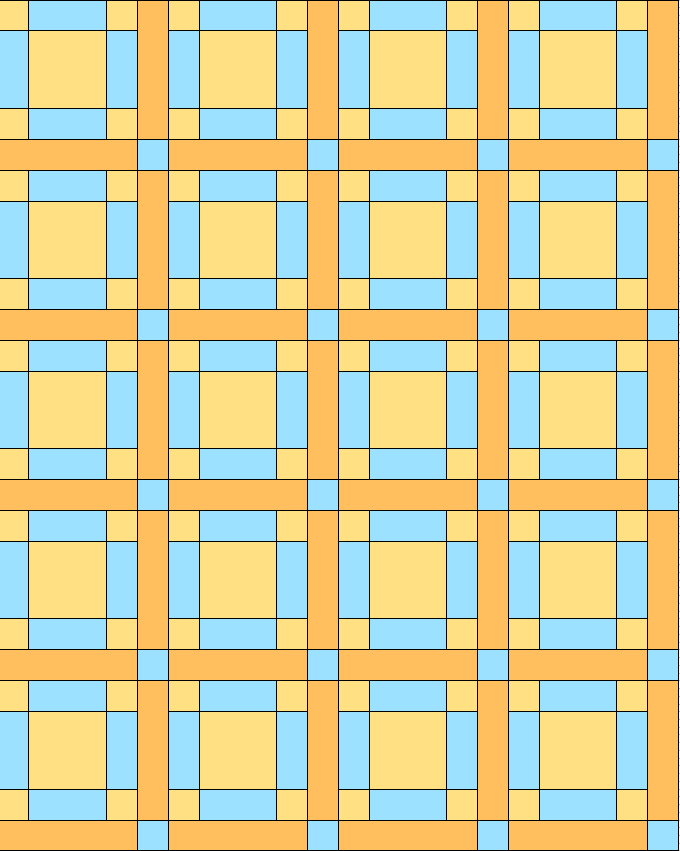
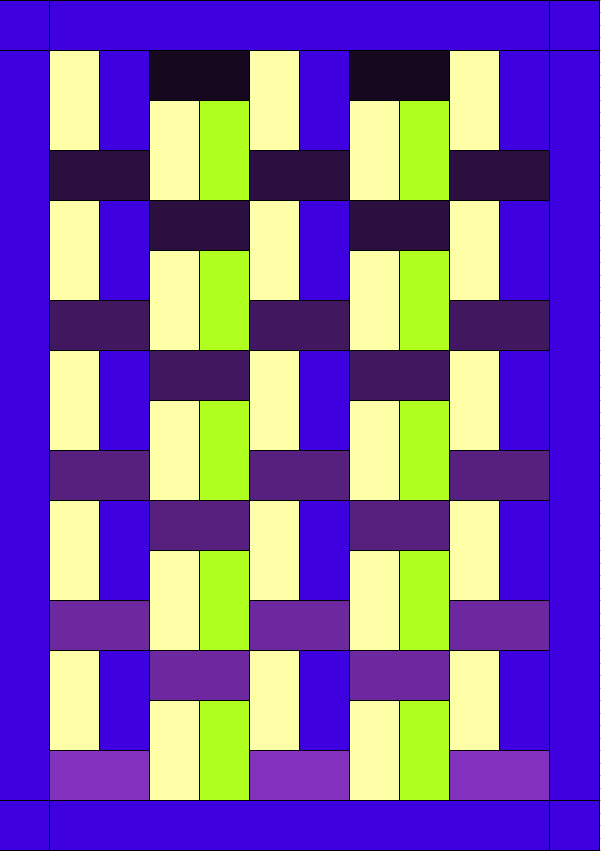
This was the sketch I made in QuiltPro.  I knew that I wanted to alternate bold solids (for the roofs) with other patterns (for the houses).

Christine's Row Quilt labeled

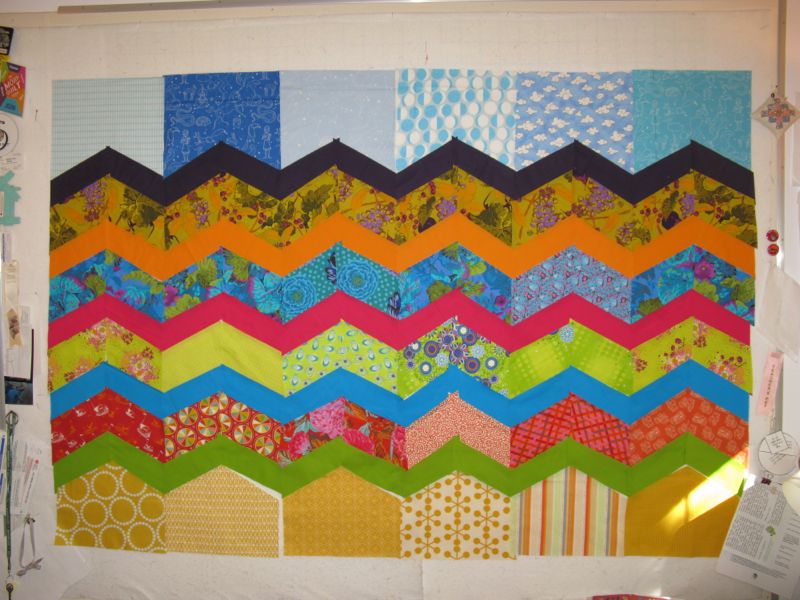
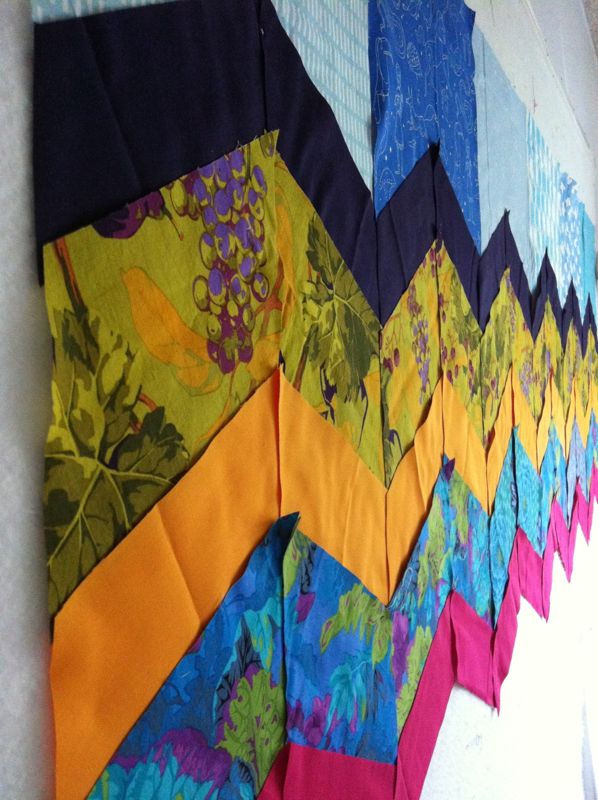
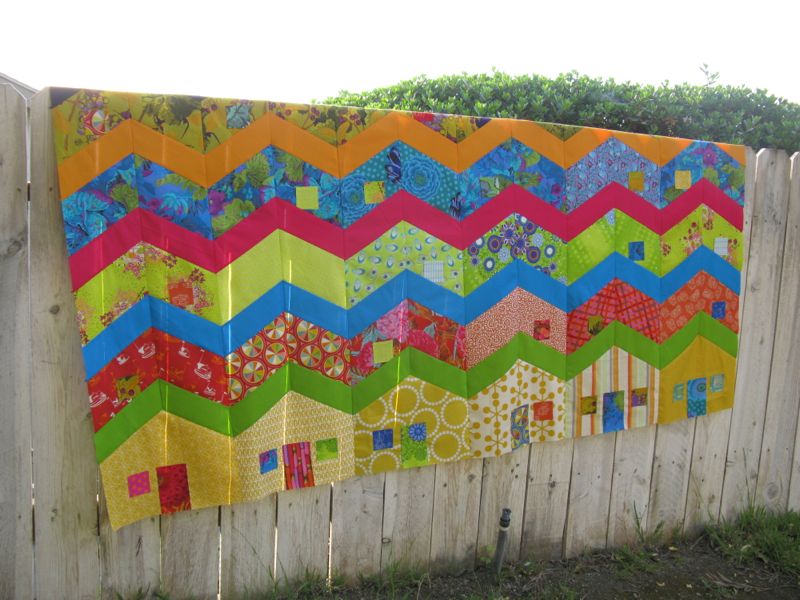
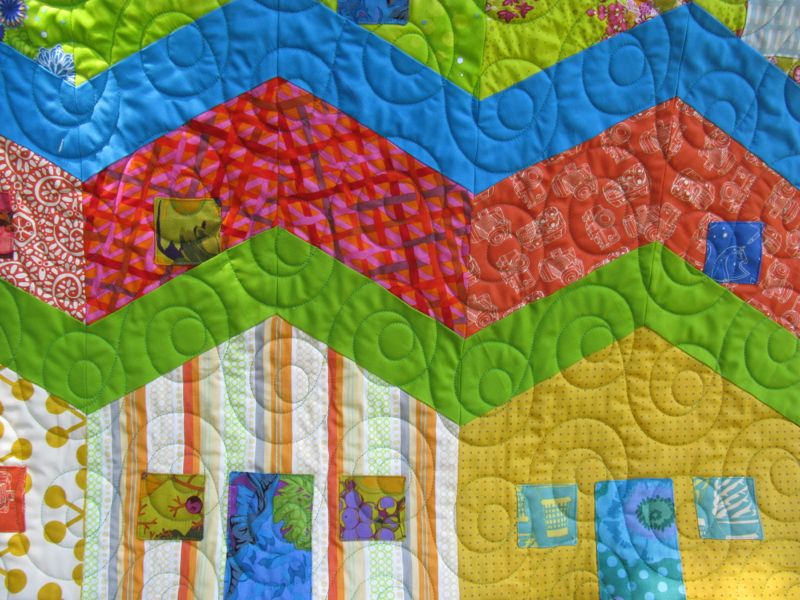
This was the quilt, all sewn and smoothed up on the pin wall.  I think I was able to execute the vision I had fairly successfully.  I also wanted to emphasize the chevron effect, but didn’t want a steep 45-degree angle on the roofs, instead I went with something more sloping (drawing my own pattern to get this done). I often thought about making this just in solids, like the sketch, but I’m all about richness and texture in my quilts.

Pulling fabrics

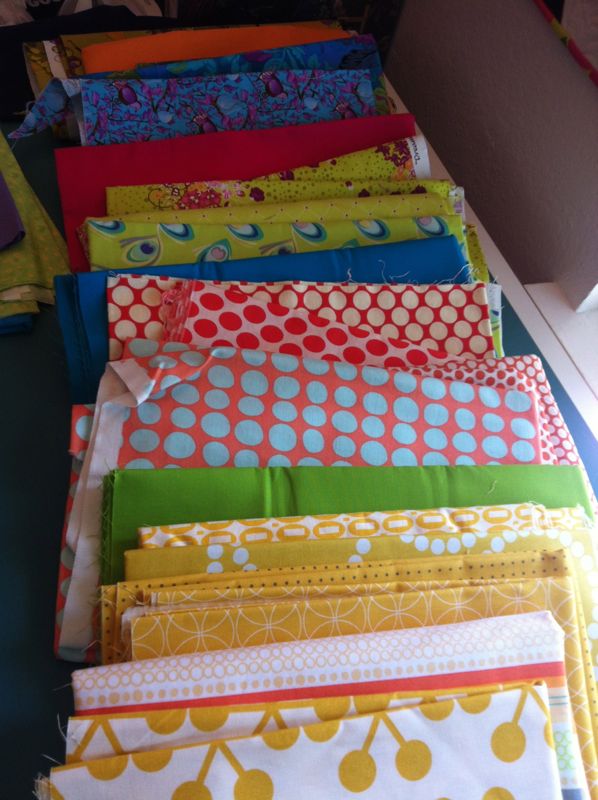
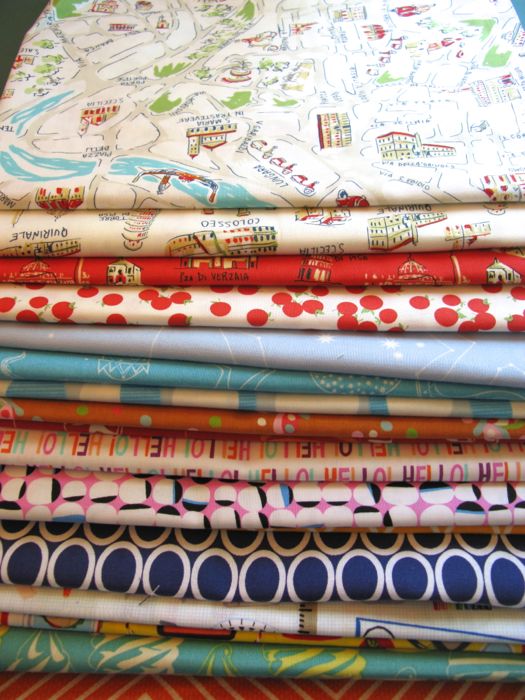
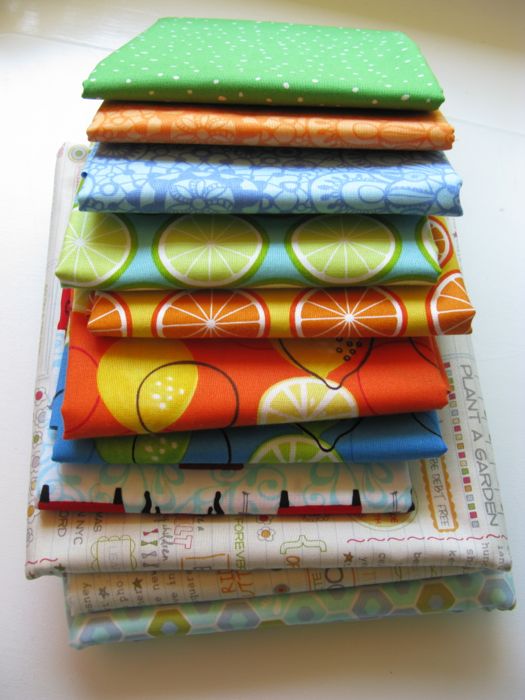
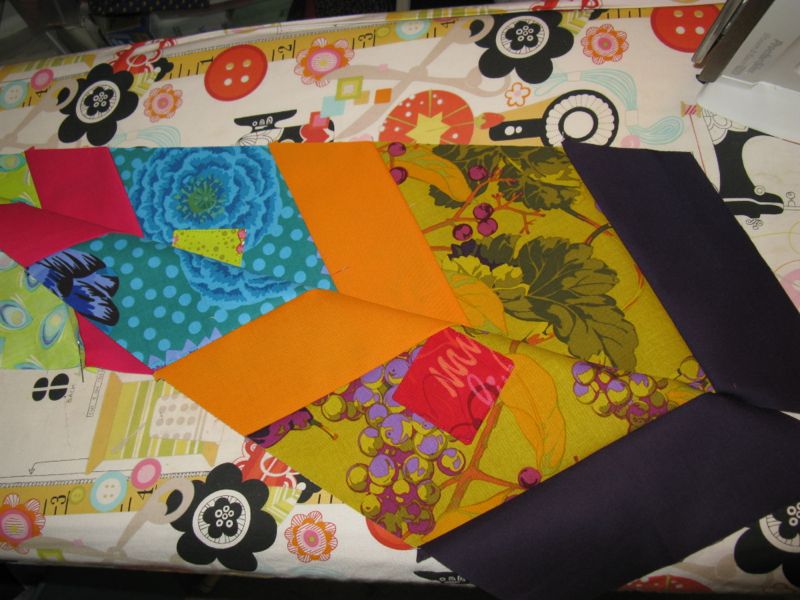
This was the first pulling of fabrics.  I was worried about mixing the moderns (used mostly for the houses and the row above, as well as the sky) with the densely colored, floral Kaffe Fassett fabrics.

ChrPhilly on pinwall 1

I sent a photo of this around to some friends and asked them what they thought.  Cindy of LiveAColorfulLife said, “Oh, go for it.”  So I did.   (Like all my junk on the sides of my pinwall?  Sometimes I treat it like a giant cork board.)

ChrPhilly on pinwall 2

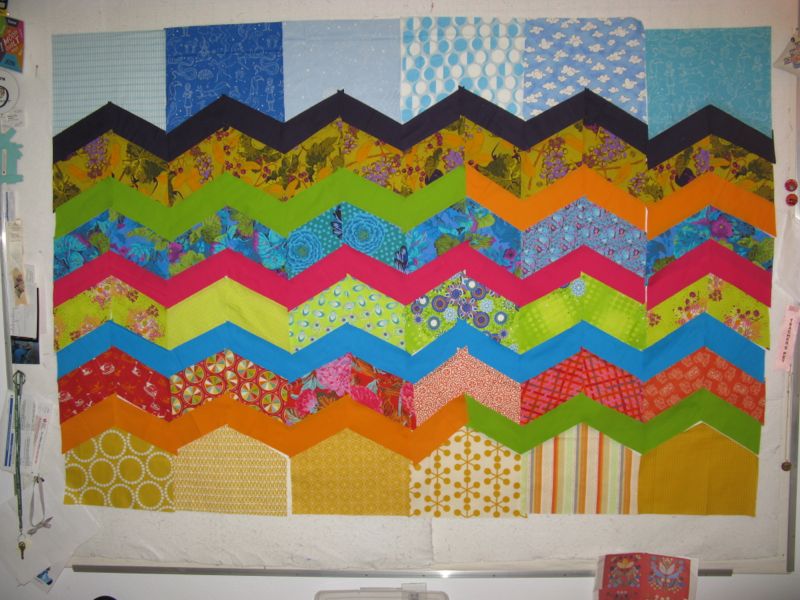
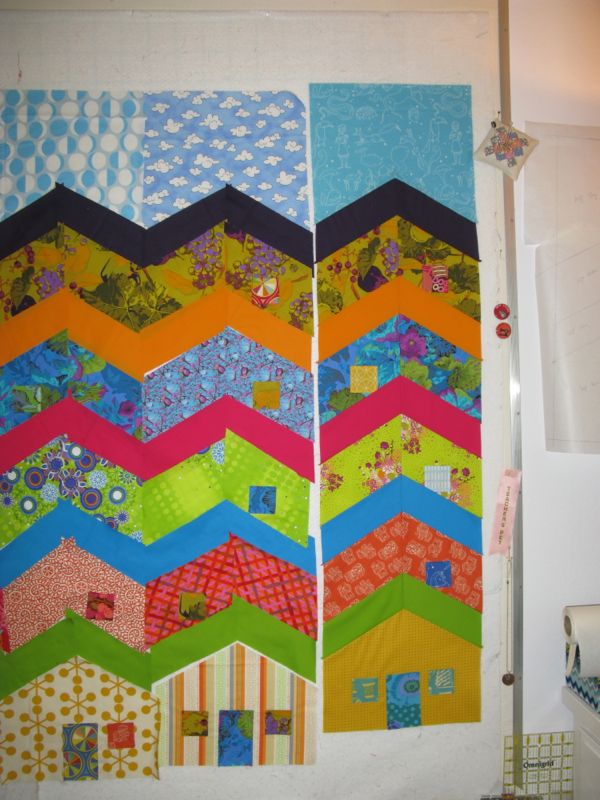
Swapping out roofs on the right side to see if I like the orange down on top of the yellows any better.  I don’t.

ChrPhilly on pinwall 3

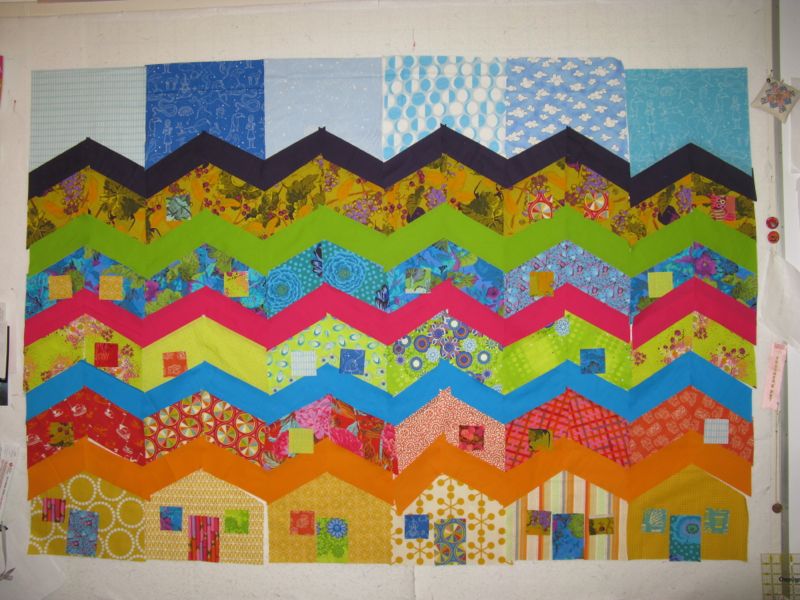
But I tried the whole row and added in the doors and windows.  You’ll notice there’s a bold blue sky piece which disappeared in the final version.  I keep trying to refine my design as I go, snapping a digital picture, evaluating, moving things around, and repeating the process.

First glimpse on wall

I am not a fan of when people say “Oh, I am working on this but I can’t show you.”  Then just don’t show me.  I hate keeping quilt secrets, but I had to keep it secret from my sister as it was a surprise, so I tried this sideways artsy shot on Instagram one day, hoping it would disguise the basic design.  I didn’t want to put it anywhere on my blog since she’s a faithful reader.

stitching on windows

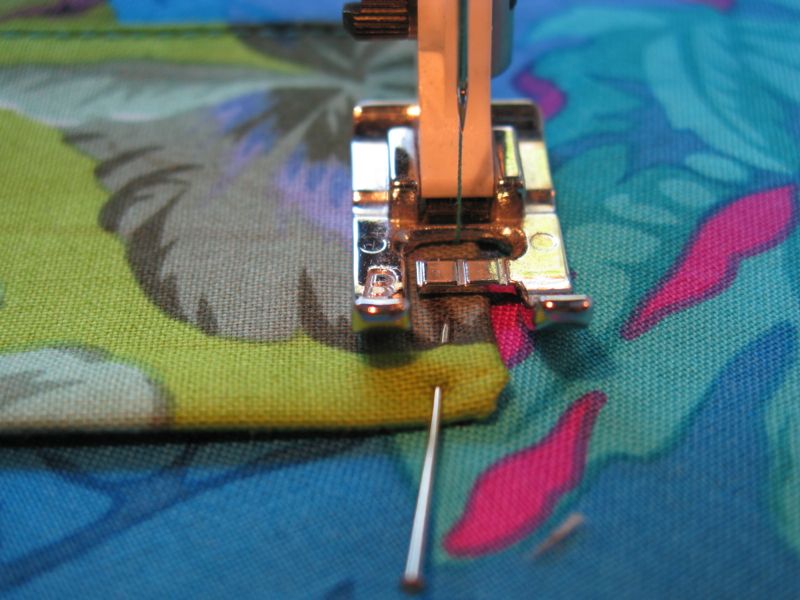
I formed the windows and doors over a piece of stiff paper (like what is in a calendar) so they would be all the same size, then topstitched them down.

lined up for piecing

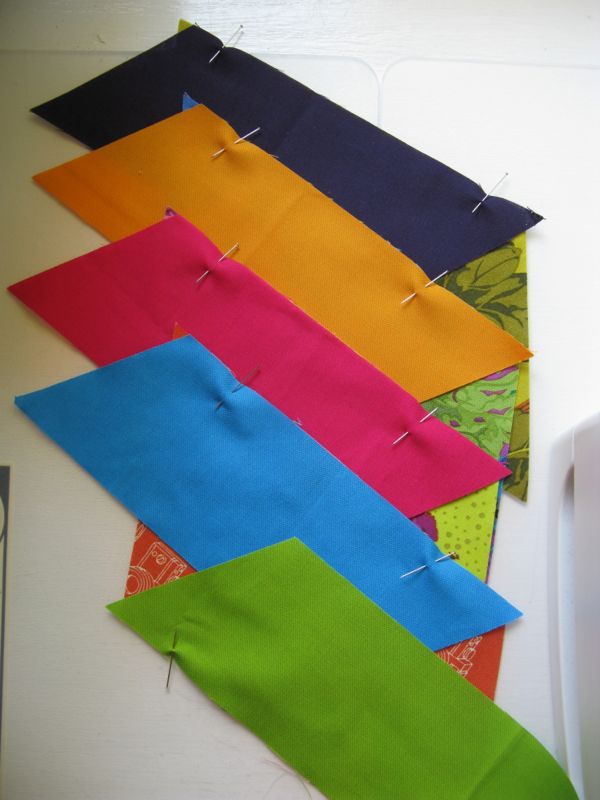
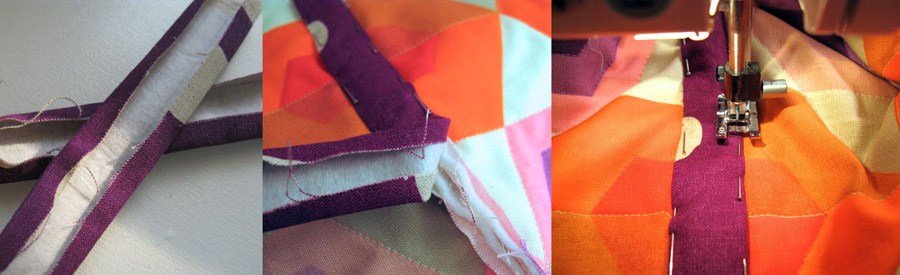
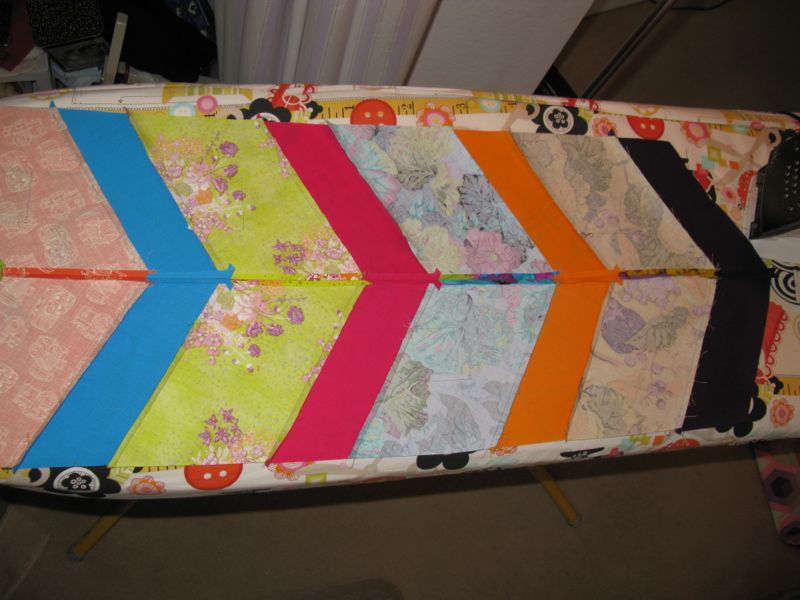
I sewed the narrow roof/house sections row by row; here’s one row lined up for stitching.

ChrPhilly piecing 2

Then I would add the house, then the sky. The “row” on the right is all done.  I’ll do another post on sewing those Y-seams, but later.

ChrPhilly pressing

I like this shot.  It reminded me of the AMH feather block I’d done for my Mid-Century Modern Bee.

ChrPhilly piecing 1

I pressed the seams open — a rarity for me.

ChrPhilly top

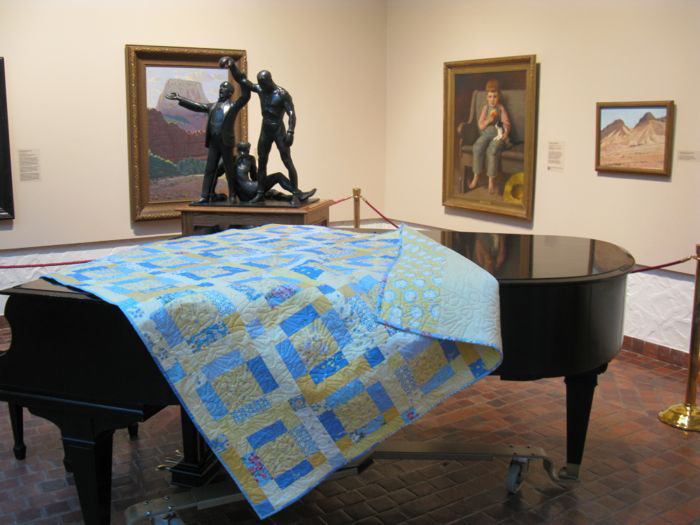
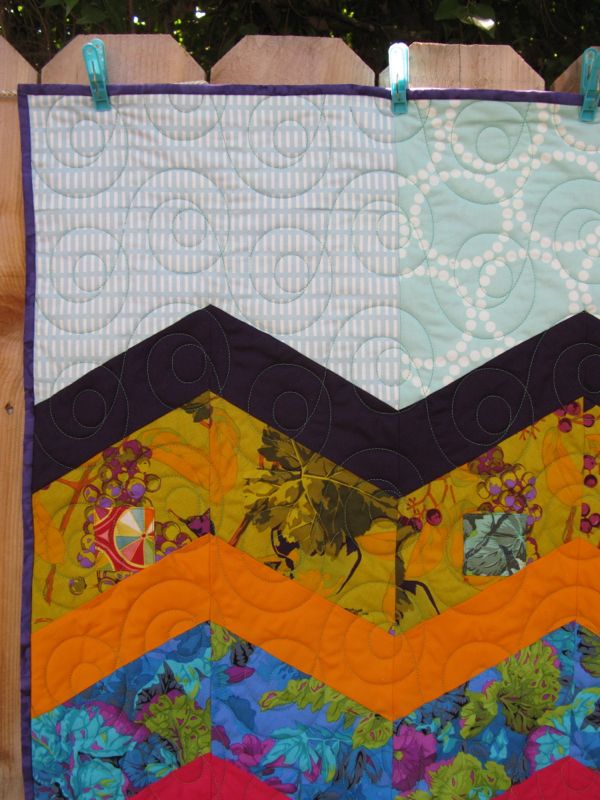
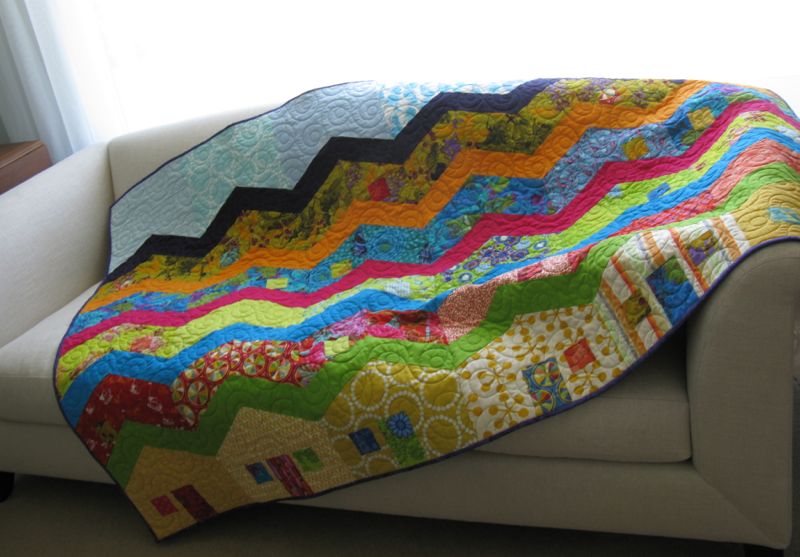
I took it outside to photograph the top, and just by draping it over the fence, I could see how valuable that deep plum-colored roof was to the whole composition.  This partly influenced what color I chose for the binding.

Christines Philadelphia Quilt Front

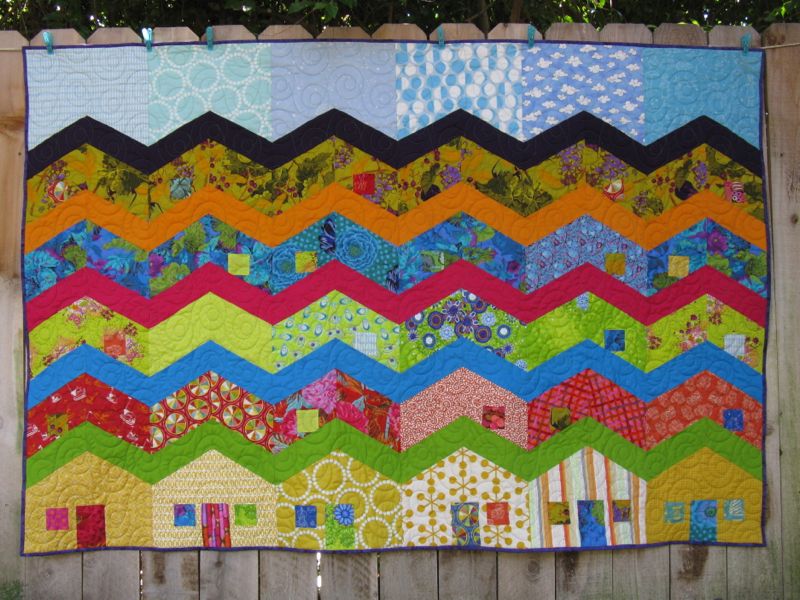
Christine’s Philadelphia, front

Christines Philadelphia Quilt Back

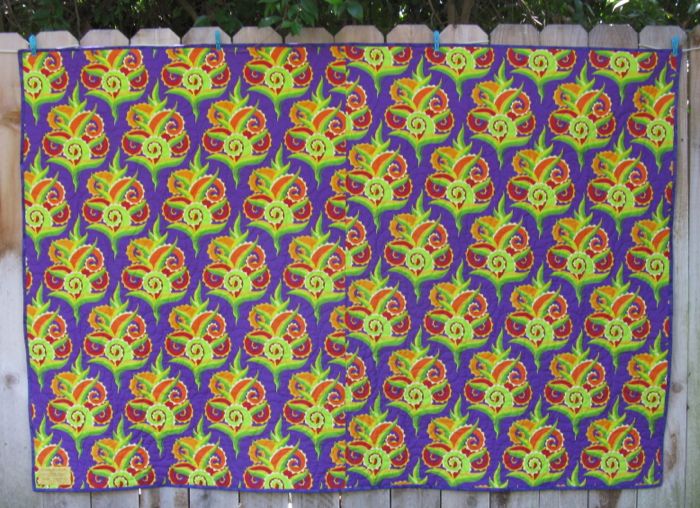
I rigged up a clothesline on my back fence to take photos, as my husband wasn’t home and I wanted to get it ready to go with us to the graduation.  I used a Jane Sassaman for the backing (above), and my quilter was lickety-split on the quilting (thanks, Cathy!).

ChrPhilly detail 1

ChrPhilly detail 2

Christines Philadelphia Quilt Label

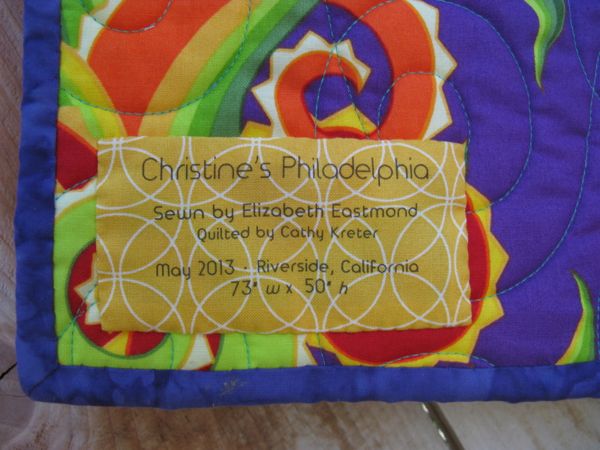
I didn’t want the quilt label to stand out too much on that background, so printed it on yellow.

Giving Christine the quilt

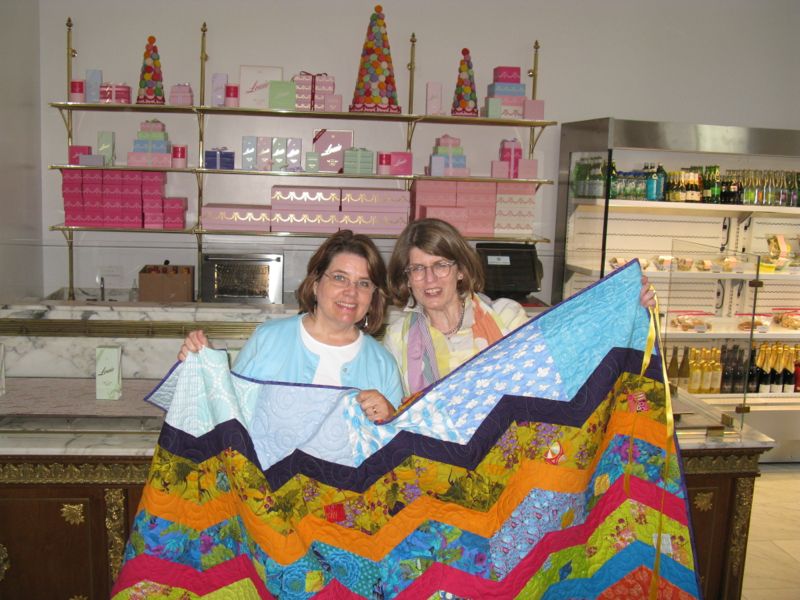
Here we are again, in an uncropped photo.  You can see all the bakery goodies in the background.

ChrPhilly on sofa 1

When you sew on a quilt that is destined for someone, you spend a lot of time thinking about that person, in essence sending good vibes out into the universe for them, I think.  I remembered the time she had mononucleosis when she was going to Stanford, and moved home (my dad was a professor there so we lived in the area). I was in high school at the time, and we shared a room while she convalesced.  She hates it when I say this, but she has served as a great example for me and my other sisters, as all four of us are close together in age.  All of my sisters are amazing.  I am beyond lucky to be able to say this, and I know it.  I made a quilt with Cynthia, made one for Susan, and now, with this one, they all have one of my quilts.

And with each quilt, I send them my love.

****

This is Quilt #115 of 200 quilts, and I’m publishing this post on my mother’s 85th birthday.  Happy Birthday, Mom!!

(Don’t worry.  A long time ago, I made her a quilt too.)

Creating · Housekeeping · Quilts

QuiltPro Quilt Software

I’ve used QuiltPro software for about a decade now, choosing it first because it worked on a Mac as well as a PC (I’m a Mac user, and Electric Quilt has ignored people like me).  I’ve been reading about another quilt software program that you rent monthly, and thought I ought to talk about an alternative to that, especially since QuiltPro is having a sale right now of 30% off. 

Screen Shot 2013-04-28 at 9.05.42 AM

What I like about this program is its simplicity.  It didn’t take me long to figure it out–click on the square icon and draw a square, click on the triangle (there are two kinds) and draw a triangle.  Click on the paint can and color in your shapes.  It does have a fabric library, but after a few times, I’ve skipped over that and just use the solids, coloring in what I want to show value and placement. (And sometimes I wonder if that’s not why we’ve had such a surge of popularity in using solids–we see them in our quilt software and then want to make those quilts? Who knows, but I’ve thought about it.)

Screen Shot 2013-04-28 at 9.06.48 AM

And if I want to, I can change the colors by double-clicking on one of the little squares.

QuiltProBlocks

There’s a block library if you want it, but I use QuiltPro mostly to work up a design that’s in my head, like this one:

Screen Shot 2013-04-28 at 9.28.25 AM

Which became this:

IMG_7185

and this

SunshineShadow3

Screen Shot 2013-04-28 at 9.30.04 AM

Or this design, to make use of some lovely bits and pieces from a cherished set of fabrics, which became this:

HeatherQuilt

A quilt for a friend who needed some quilty hugs.  And I’m now thinking about how to make this one, dreamed up recently:

ManCharacterQuilt

Sometimes when I read quilty blogs, I get the feeling that whatever is being shown, or pitched, becomes an extension of that quilter.  That is to say, that if you buy this, or shop here, then that’s like a ‘vote’ for that quilter, and you say you like her better.  I don’t really care if you use QuiltPro or not.  I do use it and I’ve had great success with it as a tool to help me get done what I really do love: quilting, so I thought you might want to know about it.  I used to draft blocks using graph paper, pencils, rulers, drawing out the templates by hand.  This program does all that for me (yes, it prints the templates too, so I can measure them to use with my rotary cutter and rulers).  It’s my tool.  I’ve used this tool in my little quilt group, Good Heart Quilters, when we do our block swaps, or someone needs me to draft up how their chevron quilt will look.  It’s been very helpful in a lot of ways.

mag-17Talk-t_CA0-articleInline

Here’s a photo of Congresswoman Tammy Duckworth, who lost both of her legs in combat.  She was recently profiled in the New York Times–go read the article; it’s short and sweet and makes you want to cheer.  But I liked what she said here:

“Q: When you wake up do you feel a sense of loss when you realize what happened to your legs?
A: Of course. But I have a different perspective for what my legs are now. Now they’re just tools, you know? If I still had my legs, I would be in line for a battalion command, and instead I’m flying a desk.”

I want to fly my version of a desk–my sewing machine–making quilts and sewing and playing with cloth and squares and triangles and designs.  I love quilting and am happy to have my rotary cutters and rulers and yes, my QuiltPro software.  It’s just a tool, you know, to get the quilting done.

Creating · Quilts

The Winners and Other Musings

Congratulations to Mary of Mary on Lake Pulaski who won the Hot Stuff bundle, and Nita of NitaDances won the boy fabric and the Power Tool button. I’ve had fun going around to people’s blogs and noticing what they are making and quilting and just plain old doing.  Some are bemoaning the long cold spring, others are finishing up other projects, some are buying fabric.

Like me.

Fabric 1 April 2013

I’m in love with that Italy fabric and plan to make a Schnibbles with it in Sherri and Sinta’s Another Year of Schnibbles.  The pattern they’ve chosen is Top Hat, and as soon as I finish up the prep for class today, I’m going to start cutting out my nine-patches.  If it’s not the Italy fabric then how about one or two of those others?  I’m saving the Lizzy House Constellations for another project, so it won’t be that fabric that gets rotary-bladed today.  This fine stack is from Fabricworm, who will give you a discount of 5 bucks on 50 dollars worth of fabric.  No problem!  There’s always one more piece I want to buy to get it up to that amount.

Fabric 2 April 2013

This past weekend I flew up to Utah to see my parents, and there is a fabulous quilt shop there: Gardiner’s.  I took my Dad in with me and in a few quick minutes, given how well they display everything, I had these cut, paid for and we were out the door.

GG3 McArthur Grave

I always enjoy visiting my parents, and Sunday afternoon we took a drive up Route 89, which winds all the way to Yellowstone, but we weren’t going that far.  We were headed to Brigham City, and as we passed through Willard, my mother mentioned that her great-grandmother was buried there.  At my request, we veered into this old pioneer cemetery, where we stopped and looked at her great-grandparents’ grave.

Willard Cemetary

Most of this area was settled by immigrants like my great-great-grandparents: he was a tailor in Scotland, who, when he landed here in this sloping valley, became a farmer.  I was intrigued that he was a tailor first, given my love of sewing.  This Elizabeth Dickson, born in Needles, Scotland, was the mother of Elizabeth in my English Elizabeth quilt.

It’s interesting to hear these things at my age.  I’m sure I’ve heard all the stories more than once, but somehow they hit a touchstone now, and these grandparents are more real to me: a tailor, turned farmer, a Scotswoman who immigrated with her husband and gave birth to my great grandmother who I’m named for.  Next time I go up, I want to visit all the graves of my relatives, something my mother and father do every Memorial Day, so get ready, Mom and Dad.  It’s our next field trip.

Do we have a quilting heritage?  I think so.  I learned to sew from my mother, from my sixth-grade sewing class where I made a gingham apron, and quilting entered when I was pregnant with my first child and wanted a baby quilt.  I’ve lived through one solids phase, when it was the Amish quilts we hungered and thirsted after, stitching them up in bold modern shapes.  They are the mother to today’s Modern Quilts, I believe, but instead of black as the neutral, white or gray are preferred in this iteration.  I think many of us remember our first quilting experience, whether it be last year or decades ago.  While we don’t have markers of stone set in hillsides overlooking Willard Bay and the Great Salt Lake, we might have quilts tucked away in corners, or given to children and friends.  There is a rich lineage of quilting in our world, and I’m happy to be a part of it.

I think the associations we form amongst ourselves as quilters, are every bit as valuable as those folds of fabric sitting in our cupboards and closets, the pieced quilts hanging on walls and draped over beds. Thanks again to all those who visited the blog this past week, who leave comments of support and who are (or who became) followers.

********************

UPDATE:  Doing this Bloglovin’ thing after so many of you indicated you’d signed up that way.  Thanks.
Follow my blog with Bloglovin

Classes · Creating

Bostonian Bag and a Wrap-up

While this post has lots of pictures of my recent class, the Bostonian Bag (which they titled Bag Bostonian), it is NOT a tutorial nor are there any patterns.

Class 6

For this you’ll need to take the excellent class from Kathy Ranabarger at Sewing Party in Orange County, California; our class was held last Friday, March 22nd.  And because it’s a wrap-up of some of the details of the class, the post itself may not make any sense to you at all.  (Hey, I have many days like that!)  In the photo above I’m on the right in the aqua sweater.

Bostonian Bag side view

First off, here it is.  It’s a good-sized bag. . .

Class 1

. . . and the ten-member class made excellent progress. But nearing the end, I was nervous about beating the traffic home, so I left a few minutes early but not before taking lots of photos of Kathy’s samples to jog my memory.  I told the class I’d post them in case they needed them too (so, this post is picture-heavy).

Bostonian Bag details ESEFirst, here’s some details, just for visual ideas: the bag bottom with decorative piece, the side trim piece wrapped to the inside and stitched down by hand, and the pockets I made in class: a double pocket (one on top of the other, and on the other side, a zipper-closed pocket.

Class 2

Class 3

So, after the fabric’s been quilted, the pockets made and the lining basted to the bag on the sides and top (wrong sides together), the decorative trim is attached to the zipper-opening edges (shown).  Kathy showed us how to install our zippers in class, and I’m pretty sure we were all successful in getting those in before we left for home.  Next was sew the side seams together, lining right sides together, so the seam allowances ended up on the outside of the bag, which is covered with a decorative trim piece.

Side Cover Strip ESE

(Click to enlarge so you can see detail.)

I did end up interfacing the side trim piece, as my 1/2″ seams were pretty bulky.  I pinned down the trim piece, then stitched it by machine as she showed us in class.  I kept going at the end: I stitched right off the edge of the bag on my trim piece, continuing along the pressed-under seam allowances, top-stitching them down.  I then folded the piece over as Kathy showed us, then trimmed and hand-sewed it down as I was using two colors of thread (one dark, one light) and it just wouldn’t have worked to machine-stitch. (See very top grouping of photos, illustration in upper right.)

Bag Corner

“Boxing” the corner, with a five-inch measurement, centering the seam at 2 1/2″ inches.  Stitch along that line.  In that same top grouping of photos, you can see my bag corners in the lower pocket photo.  In the final bag, I wasn’t really keen about how the bottom trim piece stopped an inch short of the boxed corner, so in the future versions of this bag I’ll either 1) box the corner in deeper (maybe at 6″) or 2) make the bottom decorative piece longer.

Hardware Bostonian Bag

Attach the bottom trim piece to the side, by sewing the point to the side trim piece. The ring moves freely, and is not sewn down.

Class 4

Handles are next.  Flatten out the bag, take the handles out and let them relax, then place them near the top, centered on the bag.

Handle Placement

I put a couple of pins to anchor mine, then did a backstitch all around the outside, starting about 4 holes down from the upper left holes, taking it up to the end, then backtracking all the way around the tab. I wasn’t really keen about how the inside looked and ended up cutting some more lining fabric to applique it over the stitching, so it will be unnoticeable.  I have to say that attaching the handles was one of the more frustrating parts of the bag and it took me some time.  Sit in really good light, use a heavier hand-sewing needle and thimble on your finger for pushing it through the hole (which is sometimes not easy to locate and yet other times it is), and work steadily.

Now here are a bunch of photos of the samples we saw that day in class.

Teacher Bag 1

Teacher Bag 2

When she attached this particular bag handle, she used a running stitch, which looks like this on the back.

Teacher Bag 3

Teacher Bag 4

Teacher Bag 5

Teacher Bag 6

Handle attached with a back-stitch.

Teacher Bag 7

Teacher Bag 8

Teacher Bag 9

Teacher Bag 10

And here’s a few more of mine:

Bostonian Bag unhooked

Bag unhooked.  I think I could fit a small laptop in there, or at the very least, a tablet.  It’s quite roomy inside.

Class 5

Our class.  This was a fun group of ladies to sew with.

Full Bostonian BagAnd that’s it!

Another March finish for me.  Actually I took this class the last day of Spring Break.  I started Spring Break with tune-up visits to doctors, getting the have-to’s out of the way before I quilted all week. So in the spirit of a teacher giving a grade to things. . . I’m at an interesting place in my life right now, and so content and calm about what I’m doing that I’m sure the proverbial “other shoe” will drop from the sky at any minute.  I have a job I mostly enjoy, love my church and congregation as I’ve been going there for nearly a quarter-century and know their histories, and they, mine, and we have both endured each other’s quirks and habits. My husband and I have worked out a good balance between together time and “cave-time,” and really enjoy each other’s company when we are together. I could make a list of all the good things in my life, of which family and friends would occupy the top spots, and I’m sure that your list might echo mine in magnitude and depth. I also have this blog, and love to write and quilt and have the wherewithal to do both.

As I listened to others talk while our class was in session, I caught whiffs of the same sort of feeling: one woman expressed pride over her daughter’s achievements, another woman was having her sewing room re-made which I gathered was something she’d looked forward to for many years, and several of us found we had connections (via our children) to UC-Davis, of all places.  Perhaps it was the beautiful weather, or a relaxed and informative class or the fun of getting something done in a creative environment, but I could see that many of us were living in a “parallel contentment.”  Maybe we’ve just learned not to sweat the small stuff. . . and at our age have figured out which is the small stuff and which isn’t.

While the grading will pick up to a dull roar in the next few weeks of the semester, it’s really nice to feel this way — especially tonight, when some nice tunes are on the playlist and the fragrance of the wisteria blossoms is drifting in through my open window.

Happy Quilting.