While this post has lots of pictures of my recent class, the Bostonian Bag (which they titled Bag Bostonian), it is NOT a tutorial nor are there any patterns.

For this you’ll need to take the excellent class from Kathy Ranabarger at Sewing Party in Orange County, California; our class was held last Friday, March 22nd. And because it’s a wrap-up of some of the details of the class, the post itself may not make any sense to you at all. (Hey, I have many days like that!) In the photo above I’m on the right in the aqua sweater.
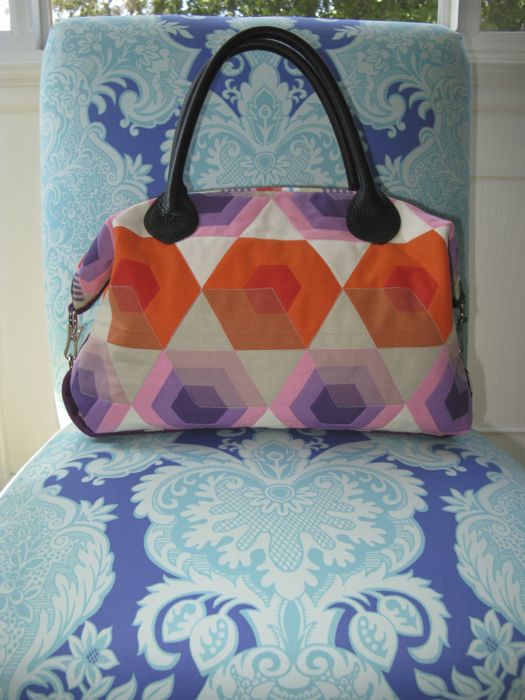
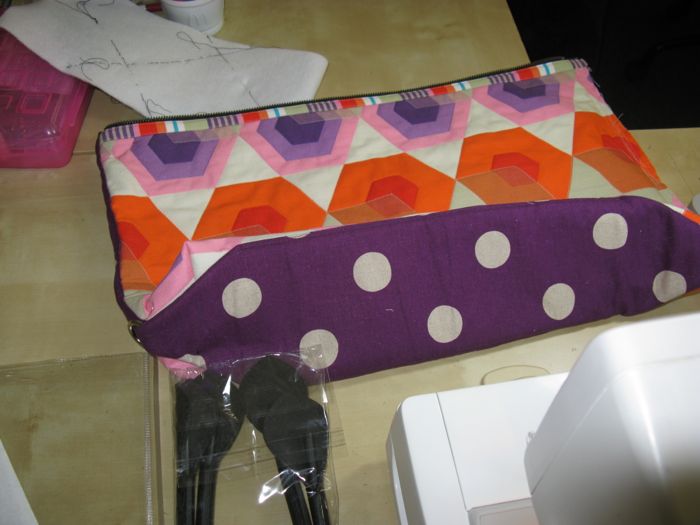
First off, here it is. It’s a good-sized bag. . .

. . . and the ten-member class made excellent progress. But nearing the end, I was nervous about beating the traffic home, so I left a few minutes early but not before taking lots of photos of Kathy’s samples to jog my memory. I told the class I’d post them in case they needed them too (so, this post is picture-heavy).
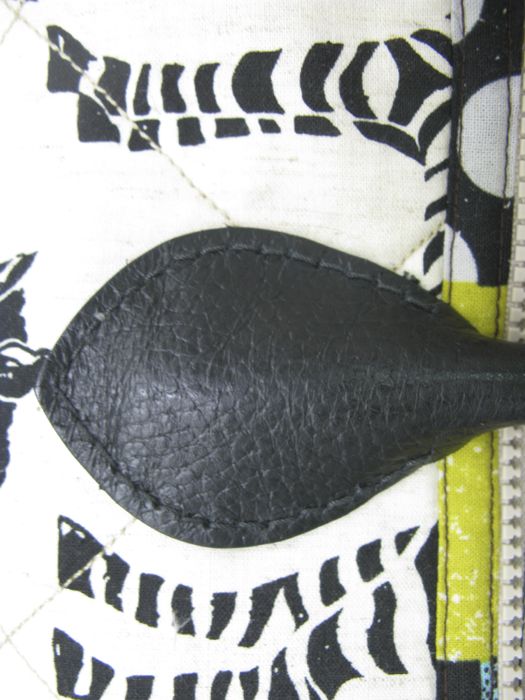
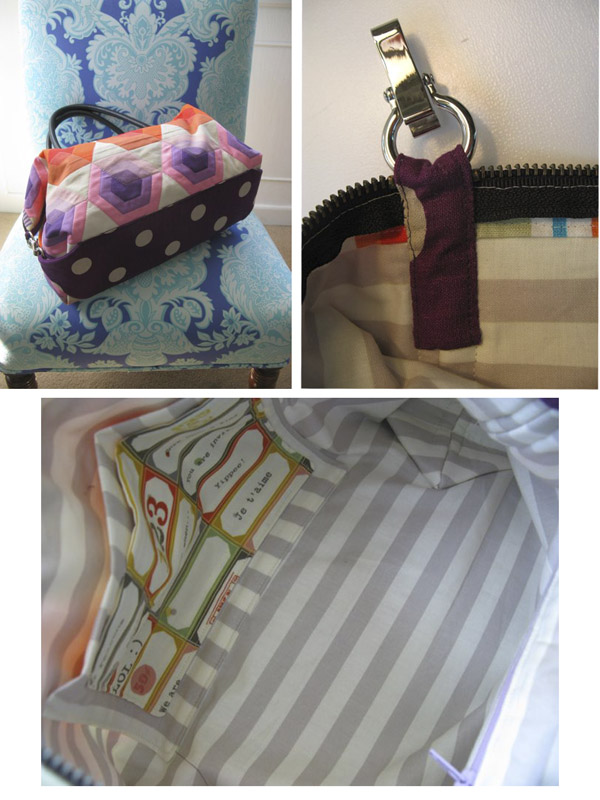 First, here’s some details, just for visual ideas: the bag bottom with decorative piece, the side trim piece wrapped to the inside and stitched down by hand, and the pockets I made in class: a double pocket (one on top of the other, and on the other side, a zipper-closed pocket.


So, after the fabric’s been quilted, the pockets made and the lining basted to the bag on the sides and top (wrong sides together), the decorative trim is attached to the zipper-opening edges (shown). Kathy showed us how to install our zippers in class, and I’m pretty sure we were all successful in getting those in before we left for home. Next was sew the side seams together, lining right sides together, so the seam allowances ended up on the outside of the bag, which is covered with a decorative trim piece.
(Click to enlarge so you can see detail.)
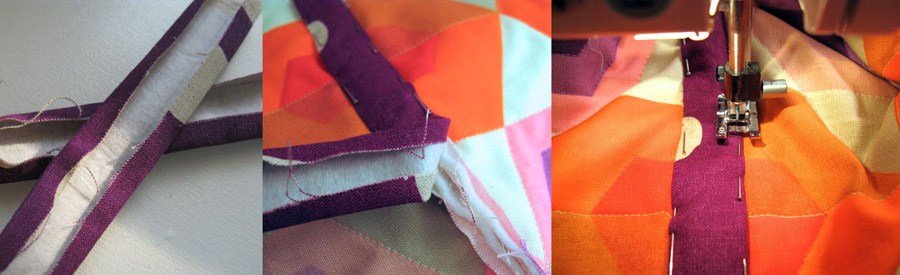
I did end up interfacing the side trim piece, as my 1/2″ seams were pretty bulky. I pinned down the trim piece, then stitched it by machine as she showed us in class. I kept going at the end: I stitched right off the edge of the bag on my trim piece, continuing along the pressed-under seam allowances, top-stitching them down. I then folded the piece over as Kathy showed us, then trimmed and hand-sewed it down as I was using two colors of thread (one dark, one light) and it just wouldn’t have worked to machine-stitch. (See very top grouping of photos, illustration in upper right.)

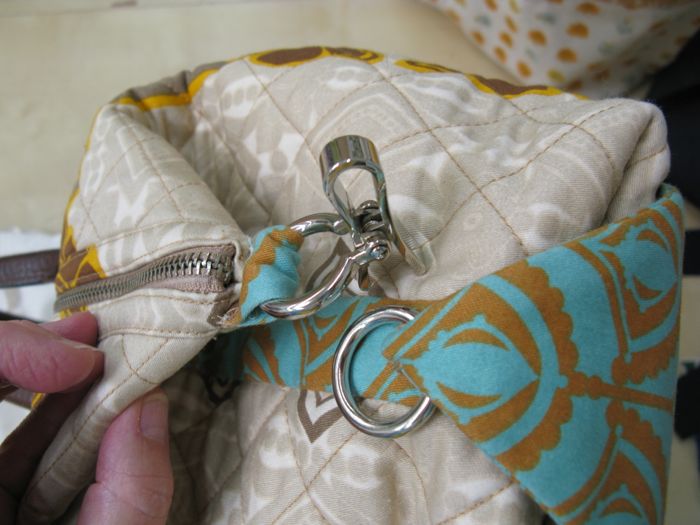
“Boxing” the corner, with a five-inch measurement, centering the seam at 2 1/2″ inches. Stitch along that line. In that same top grouping of photos, you can see my bag corners in the lower pocket photo. In the final bag, I wasn’t really keen about how the bottom trim piece stopped an inch short of the boxed corner, so in the future versions of this bag I’ll either 1) box the corner in deeper (maybe at 6″) or 2) make the bottom decorative piece longer.
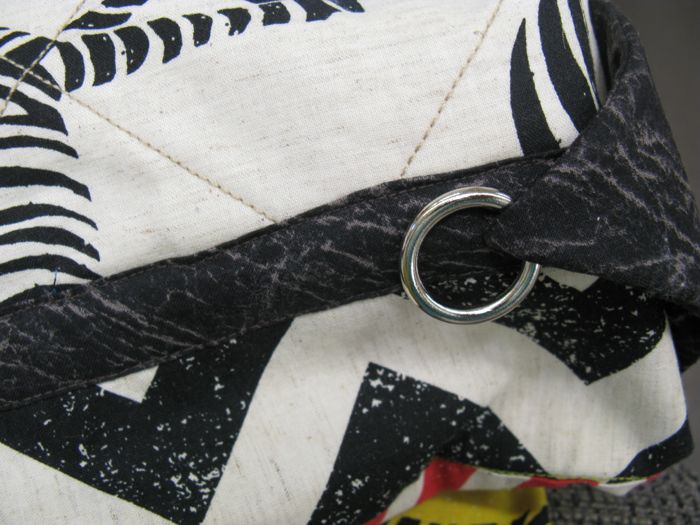
Attach the bottom trim piece to the side, by sewing the point to the side trim piece. The ring moves freely, and is not sewn down.
Handles are next. Flatten out the bag, take the handles out and let them relax, then place them near the top, centered on the bag.

I put a couple of pins to anchor mine, then did a backstitch all around the outside, starting about 4 holes down from the upper left holes, taking it up to the end, then backtracking all the way around the tab. I wasn’t really keen about how the inside looked and ended up cutting some more lining fabric to applique it over the stitching, so it will be unnoticeable. I have to say that attaching the handles was one of the more frustrating parts of the bag and it took me some time. Sit in really good light, use a heavier hand-sewing needle and thimble on your finger for pushing it through the hole (which is sometimes not easy to locate and yet other times it is), and work steadily.
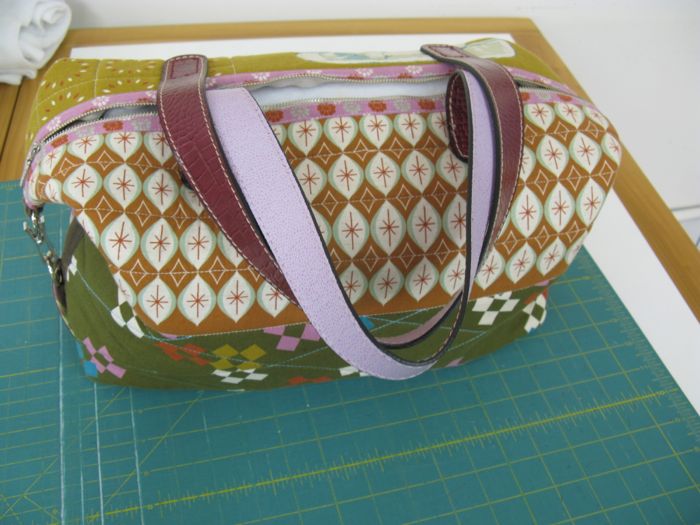
Now here are a bunch of photos of the samples we saw that day in class.

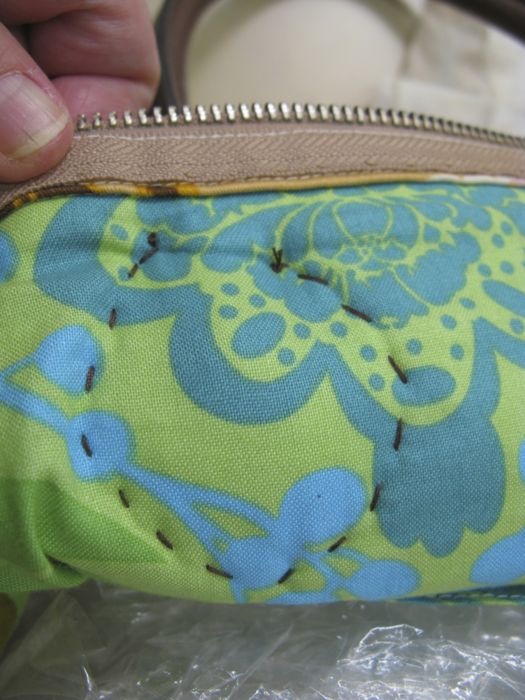
When she attached this particular bag handle, she used a running stitch, which looks like this on the back.

Handle attached with a back-stitch.


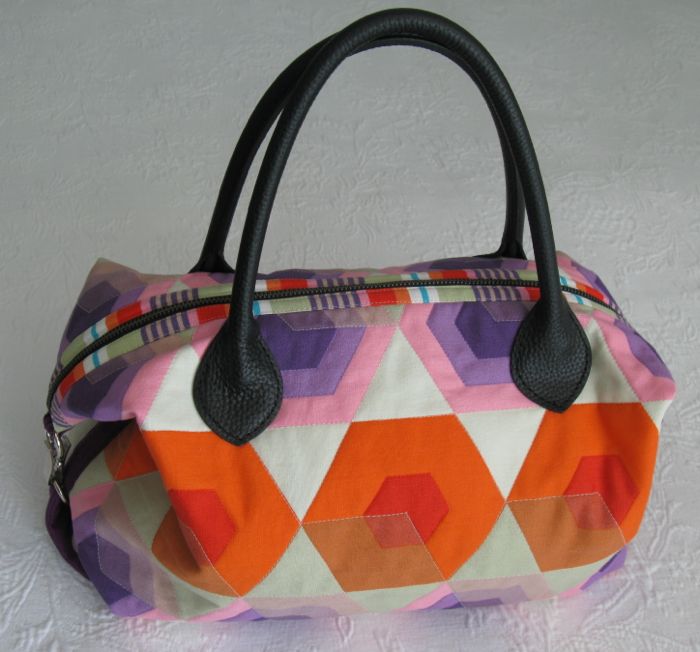
And here’s a few more of mine:
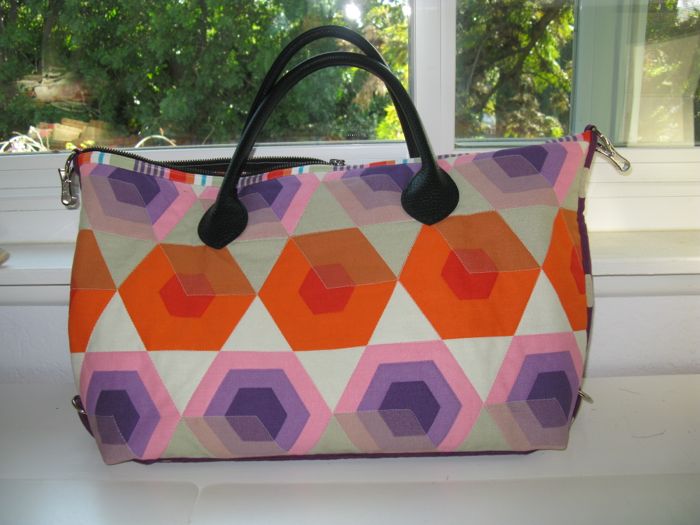
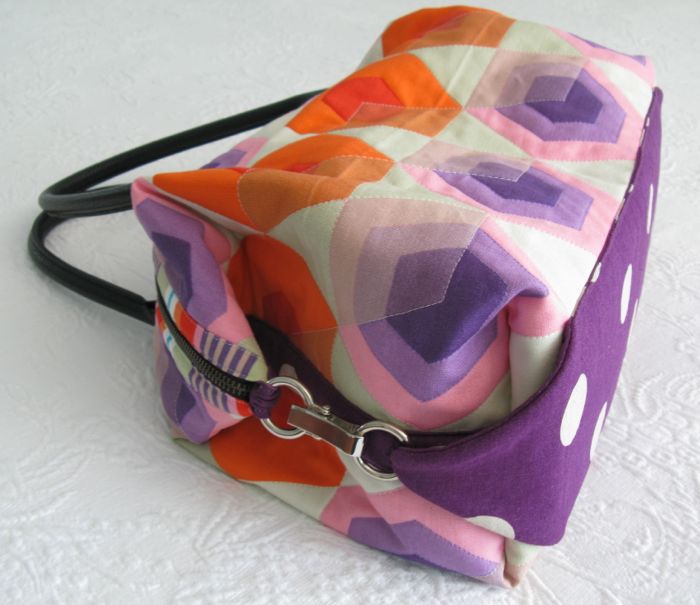
Bag unhooked. I think I could fit a small laptop in there, or at the very least, a tablet. It’s quite roomy inside.

Our class. This was a fun group of ladies to sew with.
 And that’s it!
Another March finish for me. Actually I took this class the last day of Spring Break. I started Spring Break with tune-up visits to doctors, getting the have-to’s out of the way before I quilted all week. So in the spirit of a teacher giving a grade to things. . . I’m at an interesting place in my life right now, and so content and calm about what I’m doing that I’m sure the proverbial “other shoe” will drop from the sky at any minute. I have a job I mostly enjoy, love my church and congregation as I’ve been going there for nearly a quarter-century and know their histories, and they, mine, and we have both endured each other’s quirks and habits. My husband and I have worked out a good balance between together time and “cave-time,” and really enjoy each other’s company when we are together. I could make a list of all the good things in my life, of which family and friends would occupy the top spots, and I’m sure that your list might echo mine in magnitude and depth. I also have this blog, and love to write and quilt and have the wherewithal to do both.
As I listened to others talk while our class was in session, I caught whiffs of the same sort of feeling: one woman expressed pride over her daughter’s achievements, another woman was having her sewing room re-made which I gathered was something she’d looked forward to for many years, and several of us found we had connections (via our children) to UC-Davis, of all places. Perhaps it was the beautiful weather, or a relaxed and informative class or the fun of getting something done in a creative environment, but I could see that many of us were living in a “parallel contentment.” Maybe we’ve just learned not to sweat the small stuff. . . and at our age have figured out which is the small stuff and which isn’t.
While the grading will pick up to a dull roar in the next few weeks of the semester, it’s really nice to feel this way — especially tonight, when some nice tunes are on the playlist and the fragrance of the wisteria blossoms is drifting in through my open window.
Happy Quilting.
Discover more from OccasionalPiece--Quilt!
Subscribe to get the latest posts sent to your email.

Lovely bags, and that bright quilt on the back wall!
Oh, my! I just fell in love with the fabric on that chair! Glorious. Nice bags, too.
Well done! That’s a tough little bag there and you did a beautiful job. And your musings are sweet as ever – thanks for sharing them!
Love the bags….I especially love the group photo of everyone smiling and happy…because they’re SEWING!
So much of what you wrote truly expresses how I feel at this stage of my life. I’m especially fearful of the “other shoe dropping,” though.
I love the phrase “parallel contentment” too…so much to ponder here! Thanks for the words of wisdom.
Hi,
I found your bag when searching the Bostonian bag. I’m in the process of making this and the instructions are very confusing for the side trim. I see that we cut 44 x 5″ piece, but the instructions make it look more like a bias strip. What size strip did you guys actually use to cover that side seam??
And it appears that seam is flat when you cover with the strip? I had thought it was covered much like we covered that top (zipper) edge at the top. Much like a bias covered edge.
Thanks for any tips you can give!! Your purse looks great. I’m really excited to get mine done.
Ramona