Free Quilt Pattern · Something to Think About · Tiny Quilts

Weary | Hopeful

Blog-writing for other organizations can sometimes make me weary. I’ve been the blog-writer for a local guild here, and the other day — Blog Writing Day, as I like to call it, when everything stops and I won’t do one more thing before writing out the news and stuff for the organizaion — I sat at the computer, my mind blank. I wrote the usual paragraphs, then wondered if I should delete some of it, as I am turning everything over to a new person in a month, and would she want to have to write this in her tenure? It all became very complicated, trying to write what’s in someone else’s head, in someone else’s world.

When I write for this blog, on the other hand, I try to find some space and some quiet — a recent challenge during covid-time and we’re all shut in our houses together.

The conditions of these two aforementioned things may explain why you haven’t see a post from me in some time. But here goes.

Part of the title of this post, weary, might describe us all at this time. We’ve been covid-ing since March (wearying), made it mostly through an election (wearying), our energy levels are low, and now we are all putting up our Christmas lights early, trying to bring in some light into this weary world of ours. Ours went up last Saturday, and since we celebrated Thanksgiving early — a social distanced, outside on our patio, meal with local family this past Sunday — all our Christmas decor is creeping in to the house, well before the end of Thanksgiving Day.

It feels right. We need something to celebrate, to rejoice in, and I am looking to the familiar warm-hearted feelings that the Christmas season can bring, and if that means early tinsel and lights and nutcrackers, bring it on. If that means putting out the Christmas quilts, and pillows and table runners, I’m in. Christmas tunes? Now on the playlist.

I was trying to think of ways to help lift the weary and wondered if you were interested in a quilty make to up the holiday cheer. If so, here are two possible ways:

This is a teeny little quilt (4″ x 6″) that can be slipped over a frame. These make cute gifts for friends, for shut-ins, for people you visit but who are still fretting about their gain of the Covid-fifteen-so-no-more-chocolates-please. Directions are found *here.*

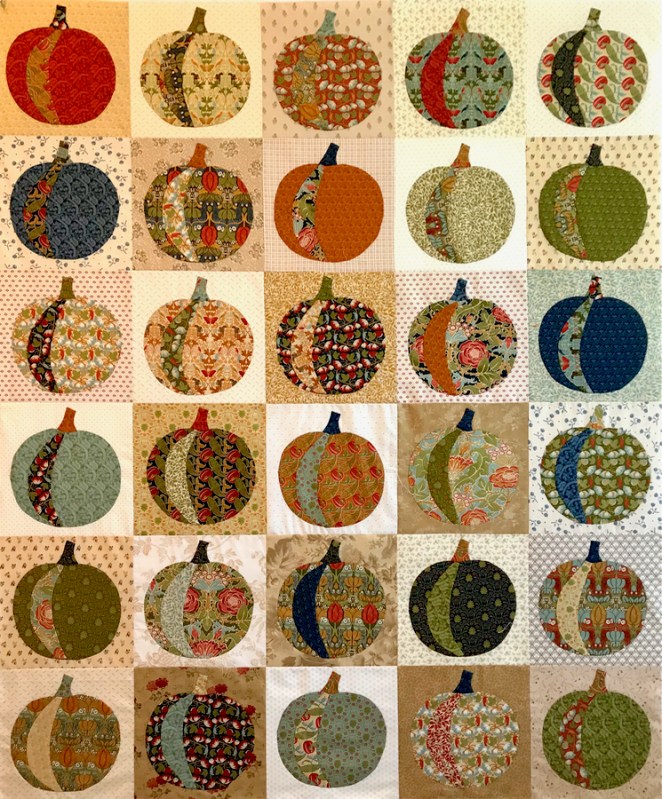
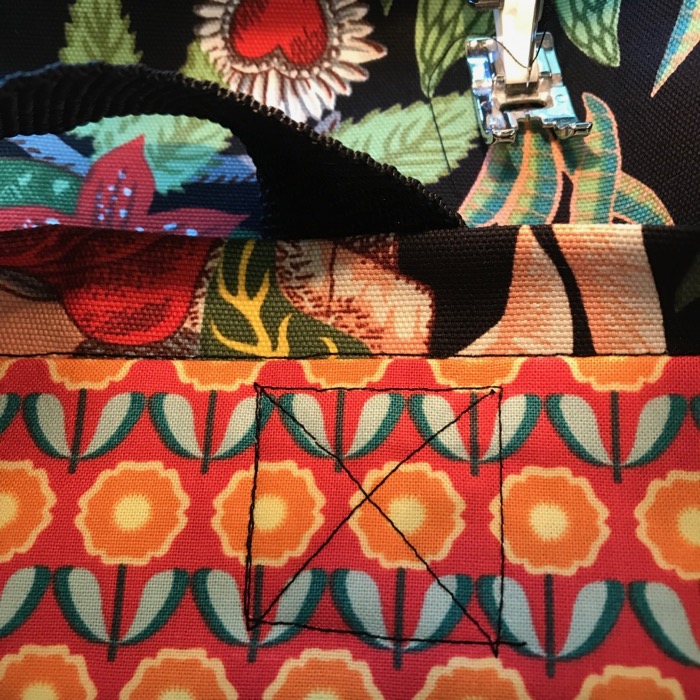
This is my field of Christmas trees, made so long ago from *this free tutorial* and which needs to be finished. What always stops me in a project is that I get plans which then complicates everything to that something perfect in my mind, which then shifts me to never-getting-it-finished. Keep in mind that just participating in the act of creation (like our quilts and blocks –and even wooden blocks on barns), can help us feel better about life.

Example of Complicated (work in progress):

Second Iteration

Example of Uncomplicated:

Pumpkins quilt top, finished Tuesday night

Maybe December 2020 is the season for simple, for easy, for uncomplicated. Maybe it’s the time for bringing light, for sharing our lives, for writing holiday cards, letting people know we are still here. And next year, when we’re all vaccinated (my Christmas 2021 wish) and we’re out and about and full of vim and vigor and excitement, and even in spite of all the recovery work that will be around us, we’ll not be weary.

We’ll be hopeful.

from here

Happy Thanksgiving, everyone!

Totes and Purses

Frida Kahlo Tote Bag Tutorial

Frida Bag_1

I recently had two birthdays to celebrate, that are near each other in the calendar.  I cut up my precious Frida Kahlo canvas fabric (made by Alexander Henry), yielding two bags from one yard.

So I wrote a little tutorial, for everyone should know how to make a bag out of fabric.  Hope this helps.

Frida Bag_Fabric Cutting

Do the same cutting with your chosen lining, trimming 2″ off the upper edge of the lining, as you want the lining to be slightly shorter than your Frida fabric.

Keeping Frida on her feet, seam the selvage sides Right Sides Together (RST), and then sew across the bottom.

Sew the lining bag sides, then across the bottom seam BUT LEAVE A 7″ OPENING IN THAT SEAM at the bottom of the bag.  You’ll need an opening later in this construction process, and leaving the bottom seam with a gap will later allow you to turn the bag.

Frida Bag_2

To make the bag have a flat bottom, you’ll line up the bottom seam with the side seam (where there wasn’t a seam, I pressed the side edge with my iron).  When you get them lined up, pin.  I went for a six-inch bag bottom, so I lined up the middle of my ruler along the seam, and drew a line.

Frida Bag_2a

You can see the faint pencil line here, on the lining. This is from the folded side of the bag, and you can see the ironed crease in the side, heading up to the point.

Frida Bag_2b

Stitch along that line, then 1/4″ away from that line, into the peaked corner.

Frida Bag_2c

Cut off the excess, leaving 1/4″ seam allowance.

Frida Bag Illus_2

Frida Bag Illus_2a

Frida Bag Illus_3

Matching the edges, stitch around the top of the bag using a 1/2″ seam.  Turn inside out through opening on bottom.  Line up the bottoms of the bag and lining, allowing the Frida fabric to roll over into the inside:

Frida Bag_3

I pressed the seam towards the lining fabric, into the bag.

Frida Bag_3a

Stitch in the ditch, just above the fold of the lining, using thread that matches the Frida fabric.

Frida Bag_3b

Stitch the opening in the lining bottom closed, by topstitching the two edges together.  It can also be done by hand with tiny stitches.

Frida Bag_4

Time for handles.  On the front of the bag, find the center (matching up sides).  Mark with a pin.  Each bag handle is placed 3-1/2″ from the center.

How long to cut the webbing?  It depends on your use and how tall you are.  I wanted these to go over my shoulder, yet stay off the ground when using the handles to carry, so after pinning it at different heights to try it out, I finally cut two pieces of webbing 27-1/2″ each.

Pin them to the bag, making sure each handle stays on the same side of the outside.  In other words, don’t attach one end to one side of the bag and one end to the other.  The bag handles should be attached the same side of your bag (otherwise it won’t open widely).

I placed the handles lower than the top edge of the bag, leaving an inch free.  I then sewed them down with a cross-in-a-box design:

Frida Bag_4a
Back, showing the stitching pattern for handles.

Frida Bag_5

Done!  I marked one side of the bag, so the user can find the “front” easily.  One has Frida’s Garden selvage label (shown above).

Frida Bag

The other one has a woven ribbon that says Ahali, which means “family relations.” (It’s for my sister.)

Now you have a quick tote, that is perfect for everyting, and because it’s lined, it’s sturdy and looks neat.  It took me a couple of hours from first cut, to this photo, for both bags, but having done this multiple times, I’m kind of fast at this sort of thing.  My grocery sack tutorial is a similar bag, but unlined. That site has a downloadable instruction page, if that works better for you.

tiny-nine-patches

I wanted to close out this post with a couple of photos from two women who attended my workshops.  It’s always a delight to see how others interpret the pattern.  If you have made one of my patterns, don’t hesitate to send me an photo!  You can also tag me on Instagram: @occasionapiecequilt.

Sheri MSquare
Merrion Square, version by Sheri

Charlotte HomeSHome
Home, Sweet Home, version by Charlotte


Household Crafts

Hot Mitts • July 2017

HotMitt_7

It was time.  When I last made hot mitts, it was 2013 and now,  many hot pans later, I was in desperate need of new hot mitts.  Scary picture of old mitts, below.

HotMitt_0

I made it really small so you wouldn’t faint.

HotMitt_1
DON’T DOWNLOAD THIS for pattern!

So I looked up my tutorial about when I first made these oven hot mitts.   I printed out the pattern at 100%, checking that picture of the ruler to make sure it matched 1″ on a real-life ruler. I taped the two parts together (shown above…again DON’T use that photo as your pattern!–refer to the tutorial), and set them aside..  Layer up the fabrics, according to the directions in that original post.


I chose my thread, using a variegated So Fine for the Amy Butler floral, and quilted the fabric layers together by just scribbling and swirling all over it. I’ve also used my walking foot and done straight lines.  It really doesn’t matter what you do; just get those layers secured together.

HotMitt_5HotMitt_6

I cut out enough for two mitts: that’s four hand-shaped pieces.  Remember to reverse the pattern when cutting a pair (as shown in the top photo).  Then it was make bias binding time.

making-bias-tape1I followed the instructions, as before (old picture, above), but if you need a more detailed refresher on how to make bias tape, head here, to the Dritz website..  (Or download their PDF file here, if that link doesn’t work: dritz-tutorial-how-use-bias-tape-maker)

I now have some handy-dandy new hot mitts.  Reminder: they are a little big until you wash them a couple of times.  I built in that shrinkage to the pattern.

HotMitt_7a

Mitts in action.  Recipe is my go-to Summer Pasta Salad, found on ElizabethCooks.com, my recipe blog (see below).

summer-pasta-salad-with-asparagus-and-tomatoes

Now I can cook in style.

giveaway-banner

The ongoing OPQuilt Summer Book Giveaway is still going on: you get a new book and I get more shelf space in my sewing room.

OPQuilt Summer 2017 Book Giveaway

Here’s the total stack of books I’m giving away.  The first two titles are lined out as they are all finished, and next up is the Denyse Schmidt book.  I’ll let this one run until August 3rd, and will notify the winner by email.  I’m letting you know what is coming up so you can either enter all the giveaways, or just the one you want.  I’m still very happy to receive your comments, though!  This week’s Intentional Piecing has been given, in accordance with the strict rules of the Husband Random Number Generator, to Andrea in Florida.

4-in-art_3

The penultimate Four-in-Art reveal for 2017 is coming up on Tuesday, with the Challenge of Stained Glass.  Join us all then to see the quilts our group makes.

Denyse Schmidt Book

Leave me a comment below to enter the giveaway for this week.

200 Quilts · Quilts · Tutorial

Single Binding on a Mini Quilt

Mini Quilt Binding TutorialWe all put double layers of fabric bindings on our larger quilts, but have you thought about using a single binding on a smaller quilt?  It’s quicker, flatter, and really–are you going to wear out those edges any time soon?  And if you do, won’t you just repair them?  That idea came from Gwen Marston, in one of her last workshops.  That idea — that a quilter would just repair them if they became worn — is why she uses single bindings on all her quilts.Mini Quilt Binding_1Start by squaring up your mini-quilt.  Yes, that is a gigantor square ruler, and I use it a lot, actually.Mini Quilt Binding_2
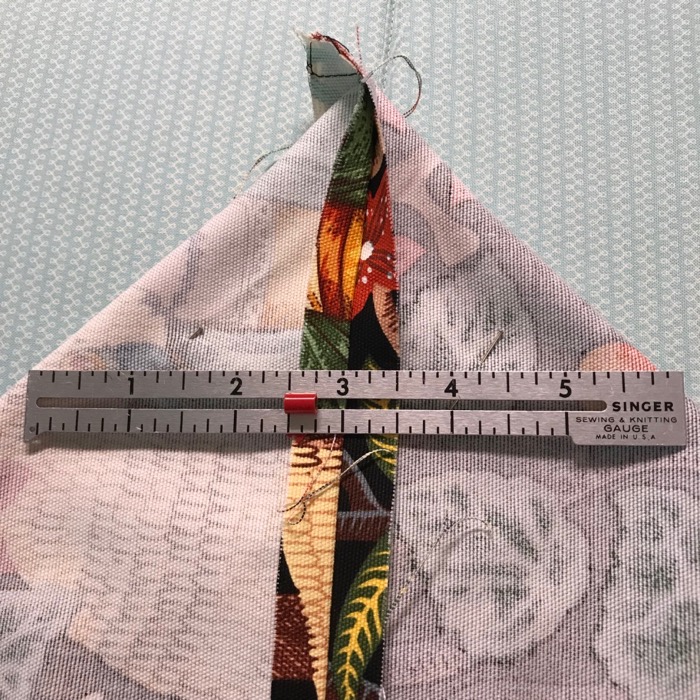
Prepare your hanging corners, by cutting a larger square (for a 24″ quilt, I use a 5 1/2″ square), folding in half, diagonally, and pinning it in the upper corners of your mini, against the back, matching raw edges to the edge of your quilt.

Mini Quilt Binding_115a
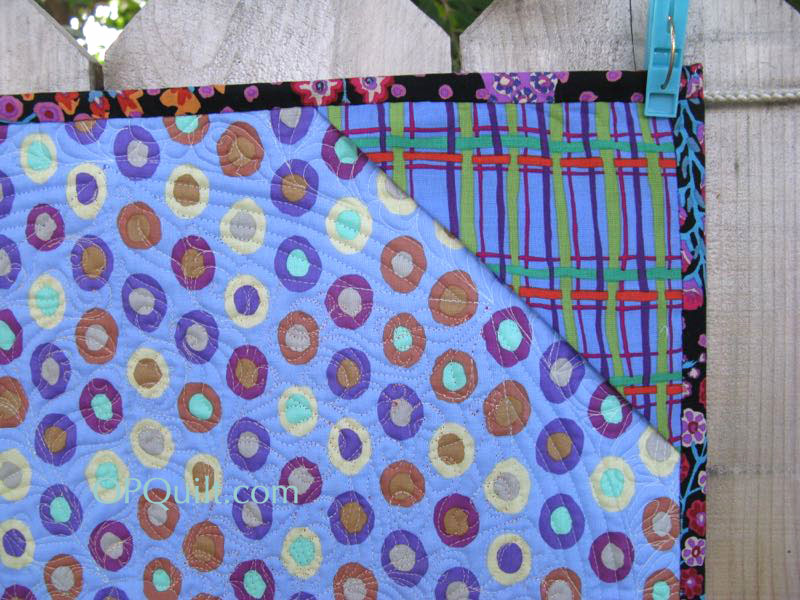
(Here’s what it looks like on another quilt, as my corners just disappeared on this one.)

Mini Quilt Binding_3
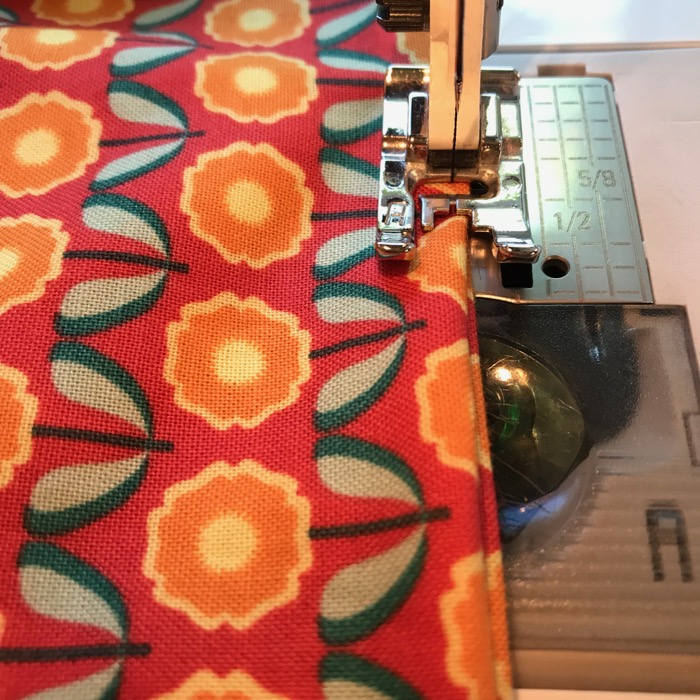
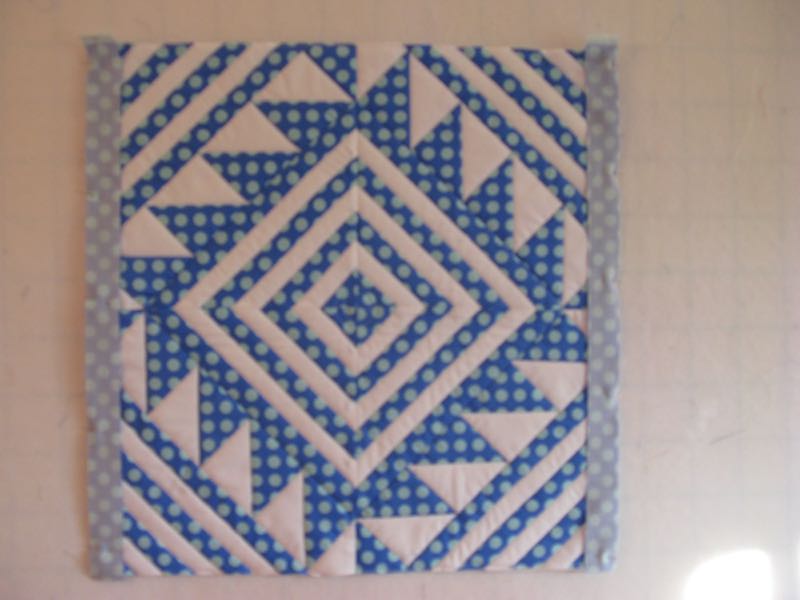
Cut strips of fabric (lengthwise, if you can) about 1 1/2″ wide and the size of two sides.  Pin, then stitch on, using a 1/4-inch seam.

Mini Quilt Binding_6Repeat for upper and lower edges.  Pin and stitch, but watch out that you don’t veer off on those corners (I pin them).Mini Quilt Binding_5Mini Quilt Binding_7Square up the corner, and cut off the excess, both underneath (above) and on the outer edge (below).
Mini Quilt Binding_8While this looks angular, it isn’t.  Mini Quilt Binding_9
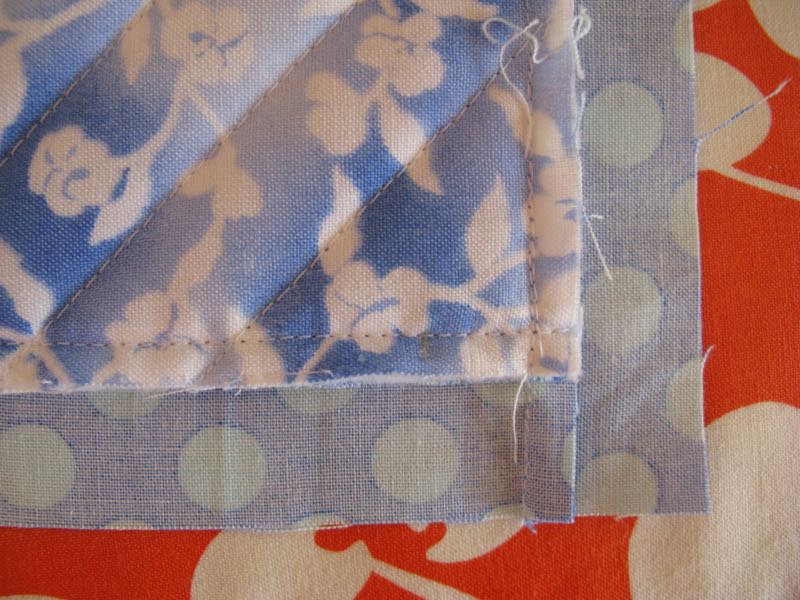
Press binding out away from quilt.  Mini Quilt Binding_10
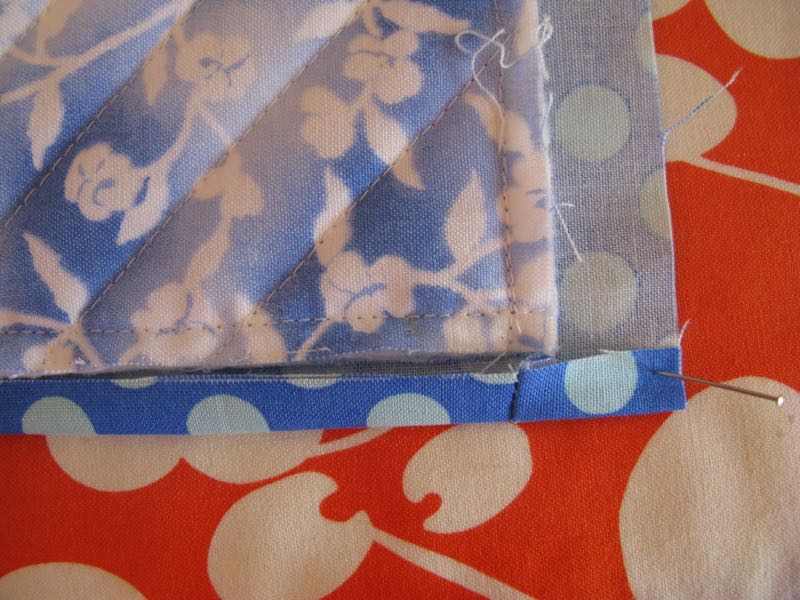
Fold up lower edge, so the raw edge of the binding meets the raw edges of the quilt.Mini Quilt Binding_11Fold it up again, covering the raw edges of the quilt. Pin in place, and then repeat with the sides:Mini Quilt Binding_12Mini Quilt Binding_13Hand stitch all the way around, or if you are a confident quilter, you can use a glue stick to affix the binding edges down, then machine stitch.  I personally don’t like the machine stitching, as I think it makes the edges too rigid, but “To each his own,” said the Old Lady as she kissed the cow.  (My Dad used to say that all the time.)Mini Quilt Binding_14Here’s the corner already on, but it’s hard to see.  I cut a dowel the width of the quilt, minus 2″ and slip it into place. Then I hang my minis, balancing it on a push pin.Mini Quilt Binding_15Mini Quilt Binding_aThanks to all who came to the Trunk Show and to all who sent their best wishes.  It was a lovely evening!  If your guild would like to see my Abecedary of Quilts Trunk Show, just drop me a note.

Quilt Shows · Quilts · Tutorial

Lanyard Tutorial for Quilt Shows

lanyard_hangingI didn’t have a lanyard last year at QuiltCon, and my pins slipped and slid everywhere, beside the fact that I jingle-jangled as I walked.  I wanted one of those spiffy ones, where I could pin on my pins.

lanyard_1

I patchworked up a strip 3 3/4″ wide and 37″ long, took it to my ironing board and pressed it in half, lengthwise. lanyard_2

Open it up, and to one side of the center fold, lay down a 1″ wide by length-of-lanyard strip of fusible interfacing; iron that into place. lanyard_3

Fold both raw edges in, almost to the center, but not quite.  The side with the interfacing should be folded over that interfacing, and the side without interfacing should match when all folded up.  With the interfacing UP (not to the feed dogs), stitch first along one long side about 1/4″ away from the fold, then the other.  Make sure you’ve caught all the folded edges when you stitch it down.  Then stitch down the center. lanyard_4

Arrange the strips so that it will hang around your neck (see top photo), then mis-align the lower raw edges, setting the top one 1/4″ beyond the bottom strip.  Slip on the lanyard clasp. lanyard_5

Zigzag the extended top strip over the bottom strip, to hold it in place. lanyard_6

(View from the underside)

Again, for ease in wearing, slightly splay the two strips apart, then stitch along the finished ends (refer to photos). lanyard_7

(View from the top side)

lanyard_heartYes, I’m headed to QuiltCon West 2016 this week (held in Pasadena, California), along with some friends from the Good Heart Quilters, the small monthly sewing group I belong to here (which is why there is heart fabric on our lanyards).

1QuiltCon2016Classes

That Friday night class is taught by Jacqueline Sava.  I hope to meet a lot of my online friends, trying to make “real” the digital friendships I’ve enjoyed.  There should be more than a few a whole mess of photos on my Instagram feed (button is to the right).  If you are going, find me and swap me a button!

Button for QuiltShows

Quilts

Wonky Baby Baskets and Narrow Stem Applique

Vietnam War Memorial Statuette

(momentos left at the Wall–I am grateful to those who have fought in service of our country.)Arlington Cemetary Mem DayHappy Memorial Day, to those of you who are in the United States.  We spent a year back in Washington, DC some time ago, where I toured every monument I could (going to the Vietnam Wall on Memorial Day and waving on the East Coast Rolling Thunder motorcycle riders on the bridge near the Lincoln Memorial; today I’ll be waving on the West Coast Rolling Thunder).  I also joined a lovely little quilt guild, named the Mt. Vernon Chapter of Quilters Unlimited (which covered the entire state of Virginia), where I learned this technique.

Basket Blocks Quilt Top

I recently made a wonky basket quilt with some baby baskets (below).  Here’s some basic guidelines for the baby baskets.

Baby Baskets

Baby Basket Dimensions

Follow the directions for the Wonky Baskets, cutting the base pieces smaller, as the finished size is shown above.  So maybe cut the upper part in the 5″ by 3″ range, and the lower part the same (it will be bigger after you splice in the basket).

Sewing the handles mini baskets

Follow the instructions for the bias strips for the bigger basket, but sew these narrower–about 3/8″ wide.  I’m using leftover handles strips for the big baskets. The woman who taught me this. in our Mt. Vernon Guild, made very narrow stems for her flowers by using this method.  So I call this the Narrow Stem Method.

trimming the handles baby basketsTrim close to inner stitching.

pinned handles baby baskets

Laying the basket below (to gauge for the width), pin on the handles with the raw edges facing towards the outside.  Place the handle edges at least 1/2″ inside the basket to allow for turning.

Narrow Stem Applique 1

Stitch on sewing line.

Narrow Stem Applique 2

Narrow Stem Applique 3

Now press the bias strip outward–letting the fabric fall back over the stitched line and the raw edges.

Narrow Stem Applique 4

Narrow Stem Applique 5Stitch down both edges, then finish block as for the bigger wonky block.   If you were doing a stem, you would hand-stitch down that outer edge invisibly.

Trim as shown in above photo–to 4 1/2″ by 5 1/2″.  I combined two to fill out those rows without the wider basket blocks.

Dumpling Bags

I had some leftover little baskets, so used them to make tiny Dumpling Bags, using a free pattern from Michelle Patterns.

Basket Blocks in the garden

WWII Lincoln Memorial One of my favorite memorial sites in Washington, D. C.  

My mother remembers this day not just for the Veterans, thinking instead of its original purpose: that of taking a day to remember our own deceased relatives.  She still calls it “Decoration Day.” My parents would go around to all the graves of their deceased ancestors and leave flowers.

Memorial Day 2014

I went up last year to see them on this weekend, but they’d already done most of the graves.  I did get to go with them for a couple of my great-grands, my father anchoring the pot of mums with bamboo skewers so it wouldn’t tip over.

Mother

This week is also my mother’s 87th birthday, and so I celebrate her as well.
Happy Birthday, Mom!