300 and Beyond · Patterns by Elizabeth of OPQuilt · Quilt Finish · Quilts · This-and-That

This and That • October 2025 • Quilt Finish

Boo!

This latest finish had a few mothers:

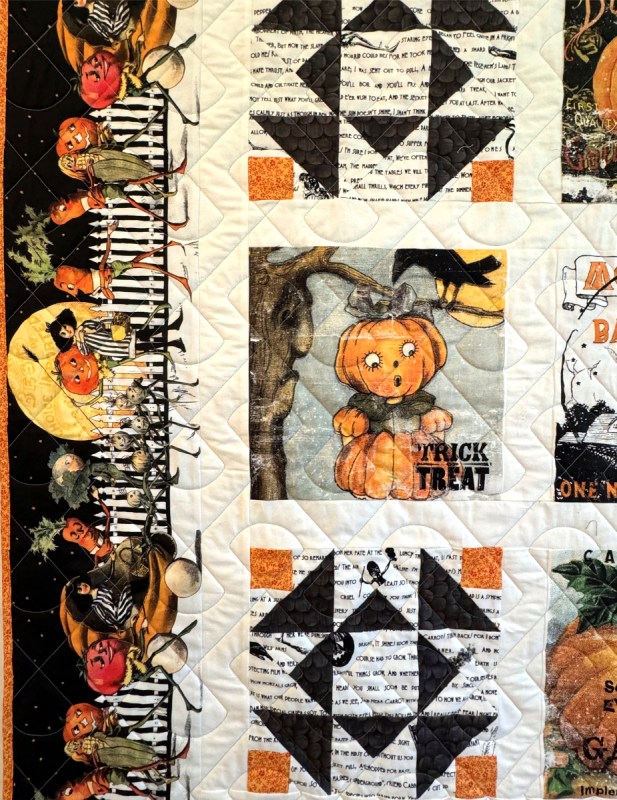
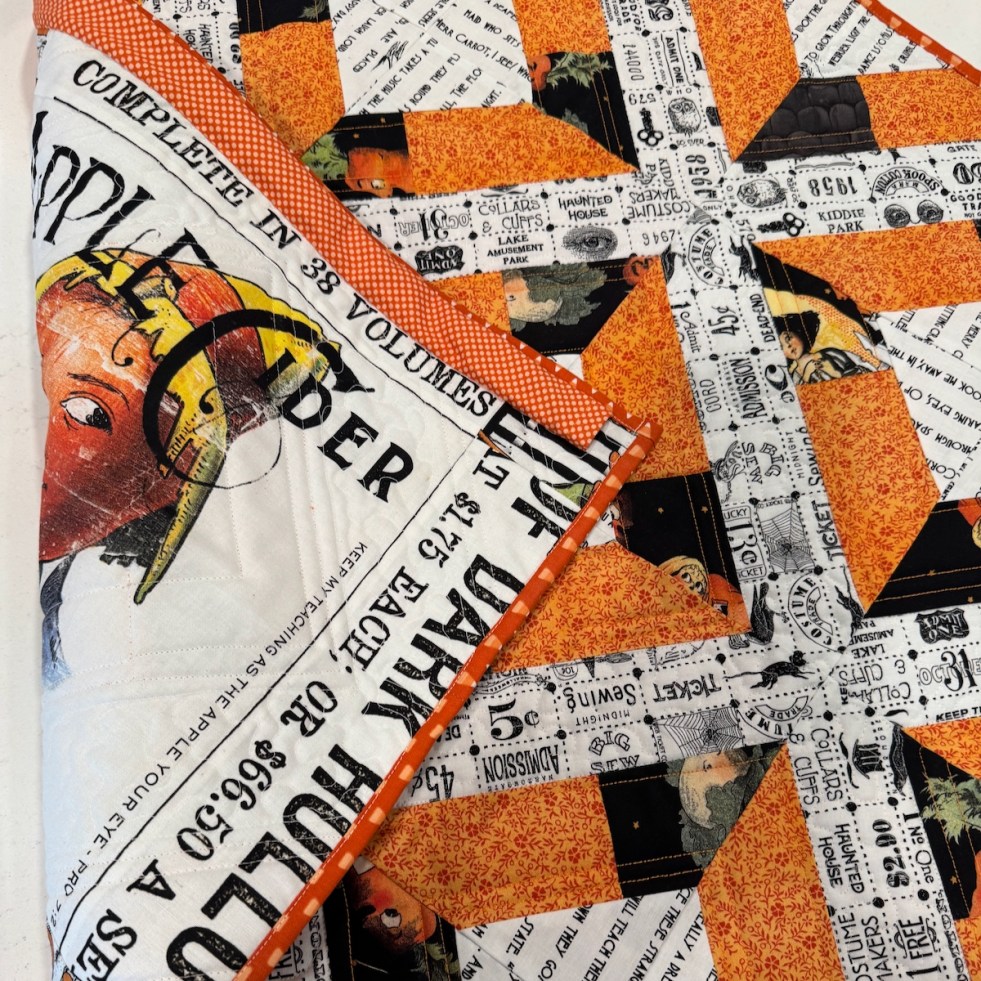
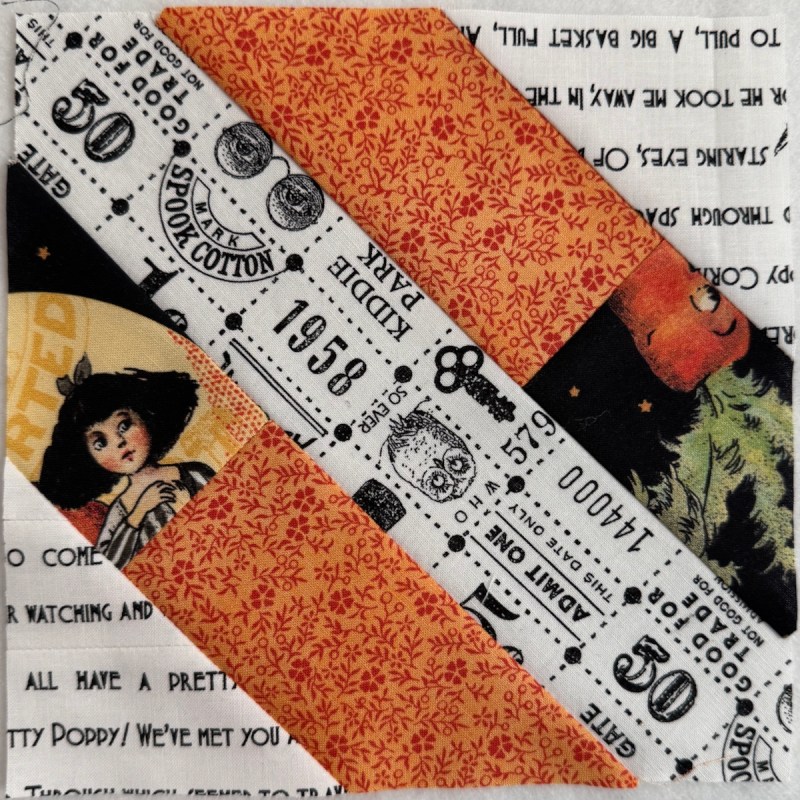
1) a bag of scraps from mine and Leisa’s Halloween in the Vegetable Patch quilt, and…

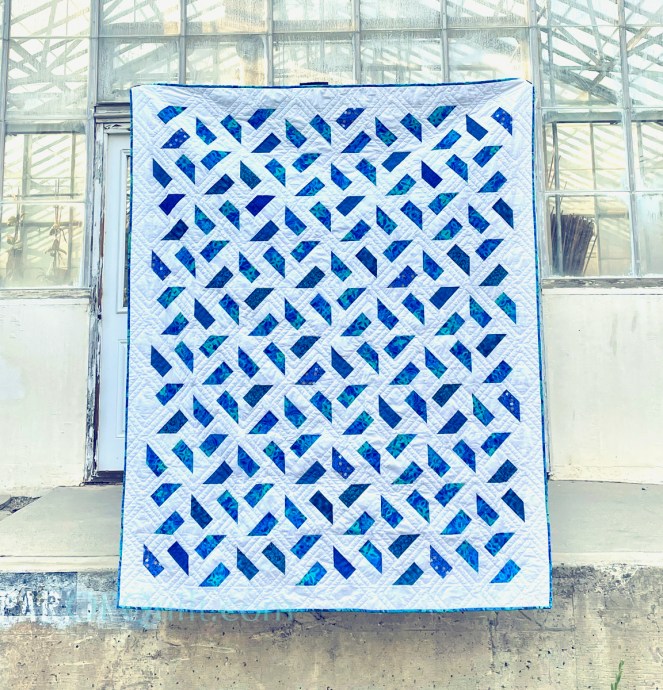
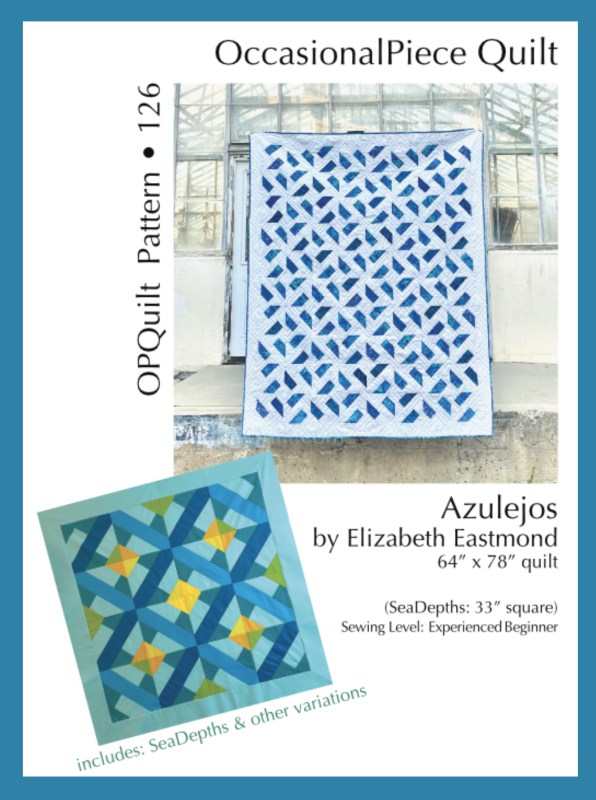
2) a need to make a quick quilt, which Azulejos is, and…

3) After the Great Computer Debacle and File Deletion Tragedy, I’ve been trying to put back together my pattern files, and Azulejos was the first one I finished. So I needed to test it out, and…

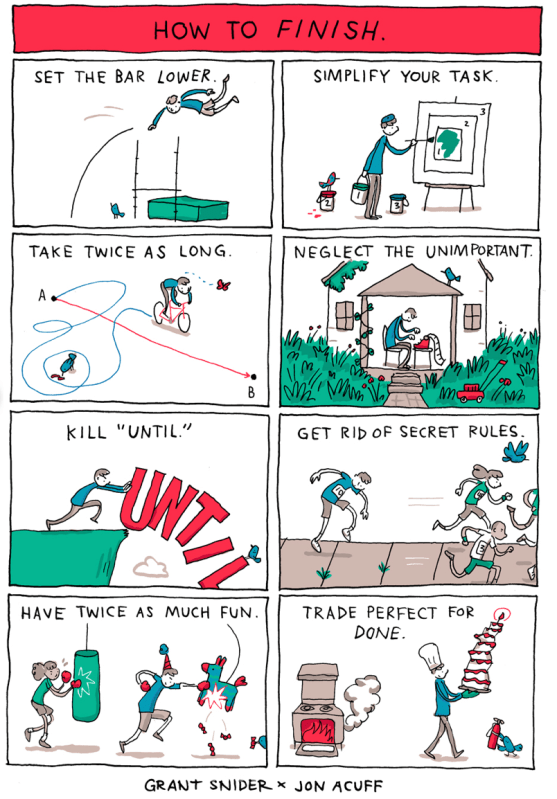
4) This cartoon from one of my favorites (Grant Snider) and a collaborator (Jon Acuff), and…

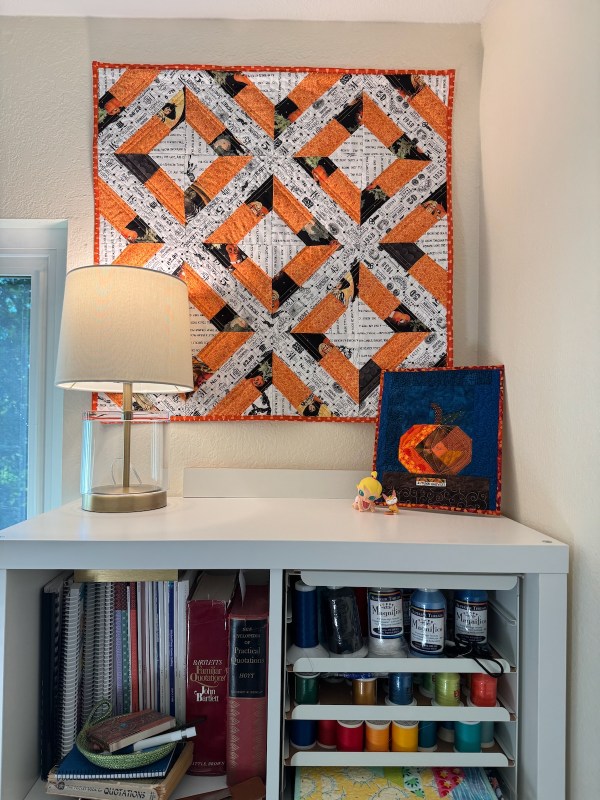
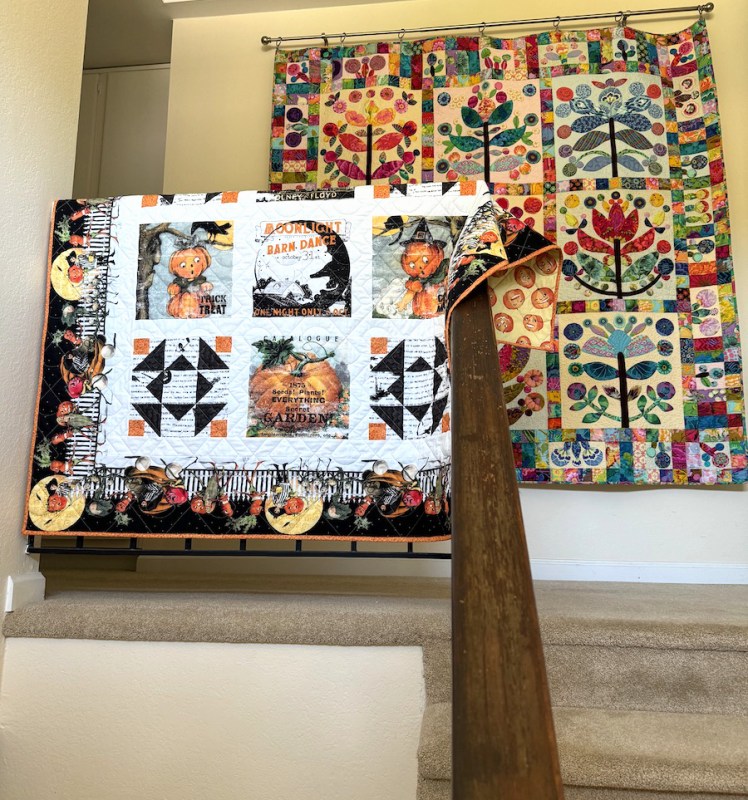
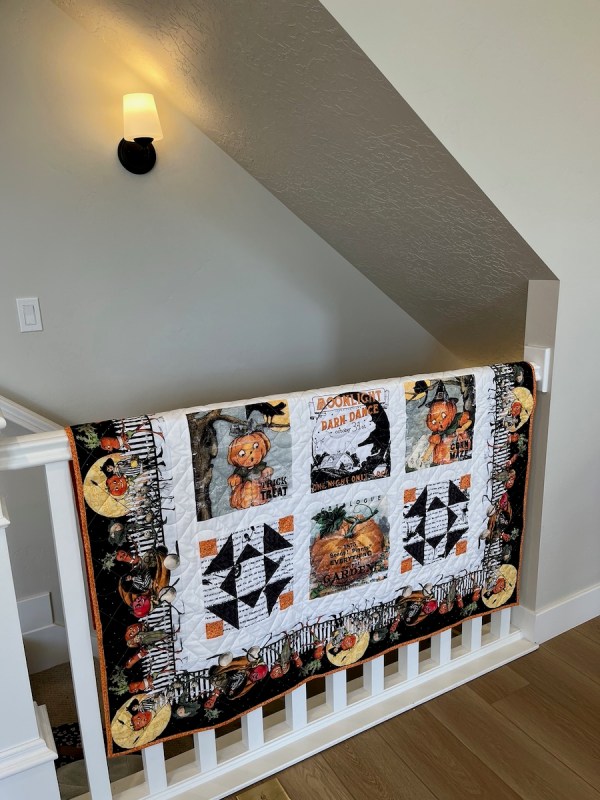
5) Realizing that I still had the 4th of July redwhiteblue quilt above this cupboard and now it was the orangeblackwhite season.

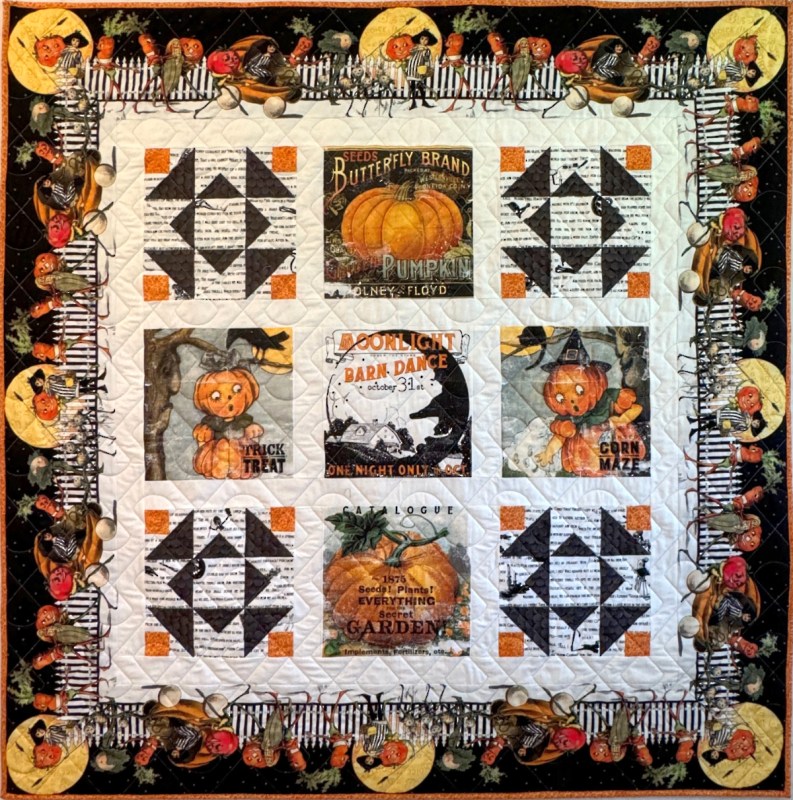
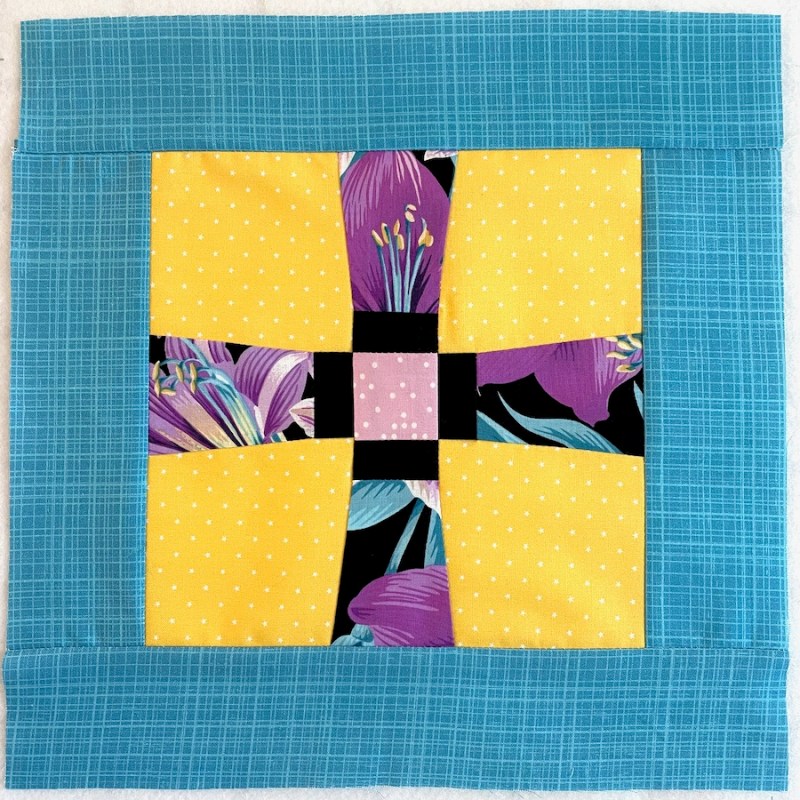
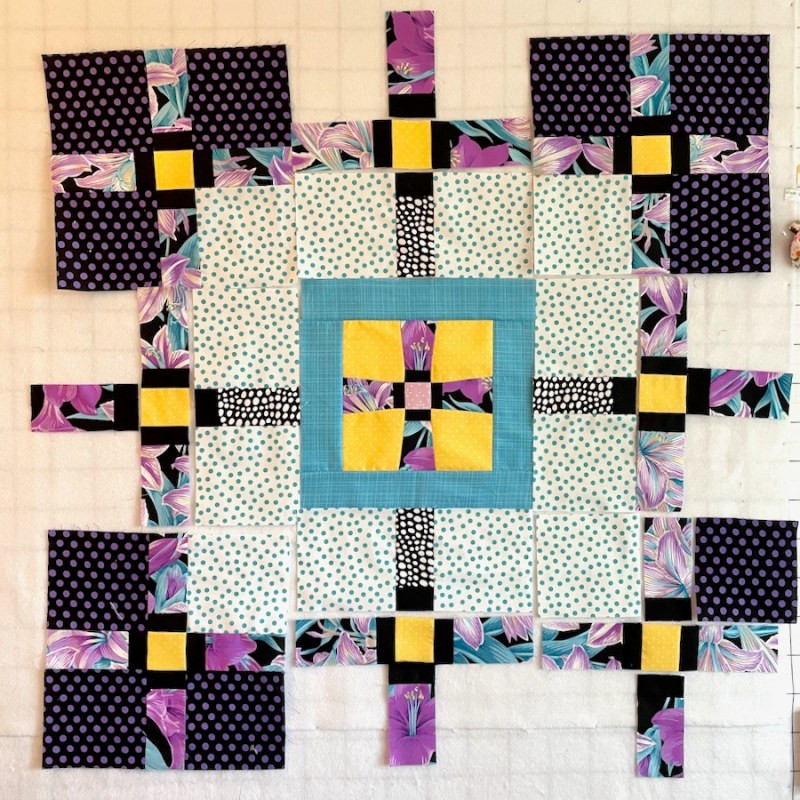
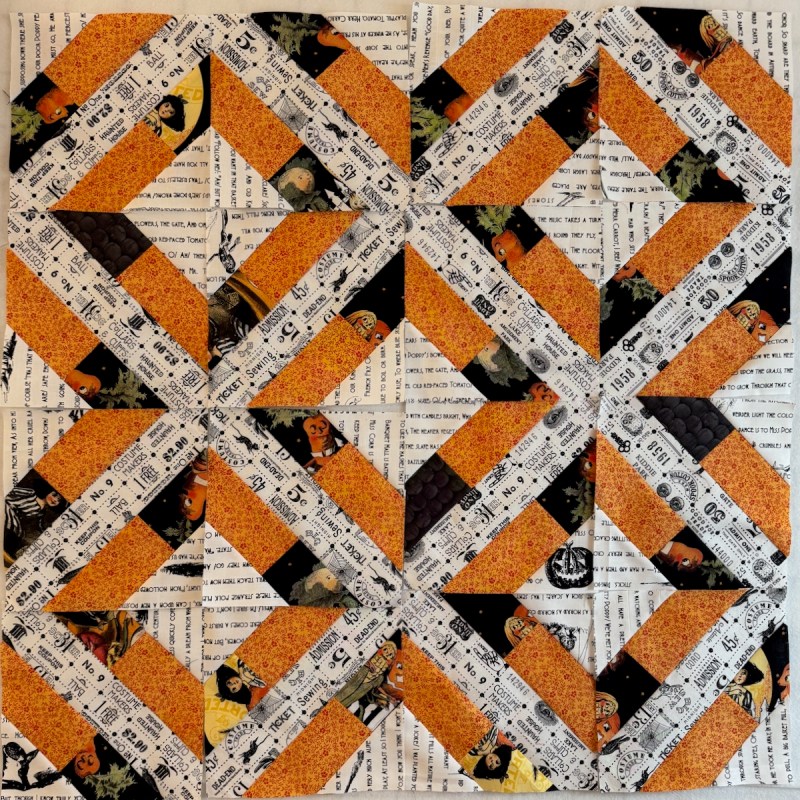
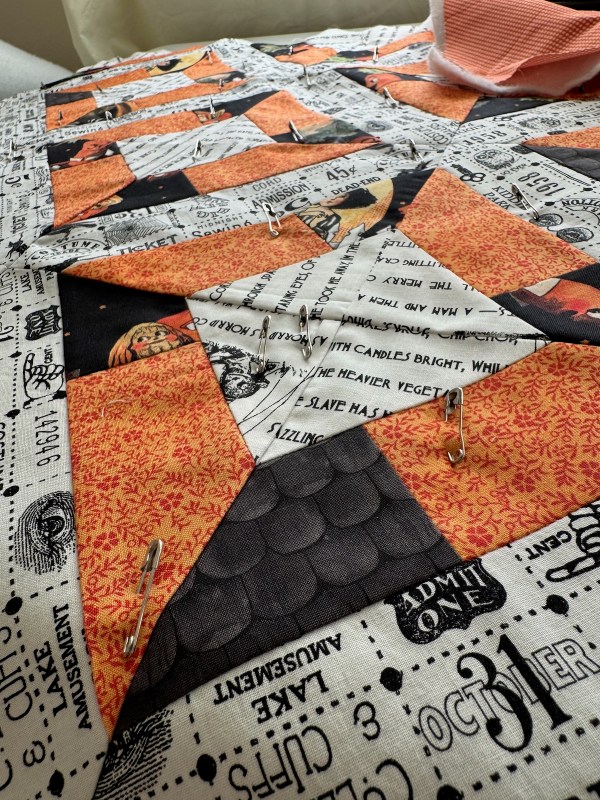
This is how it came together in two days (click to enlarge any photo below):

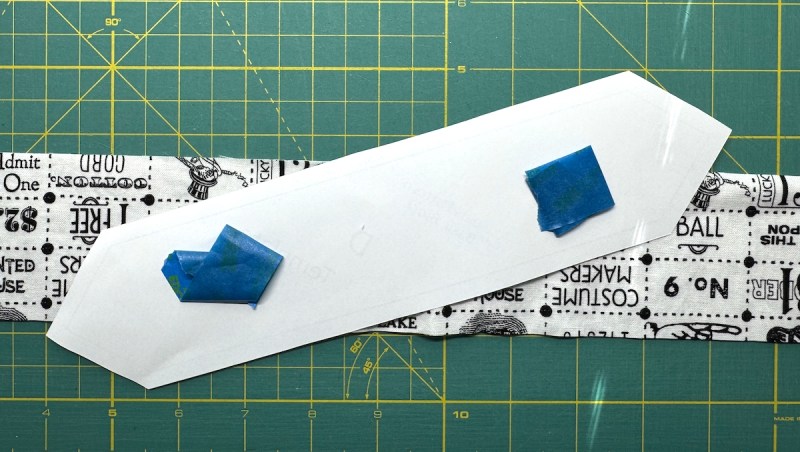
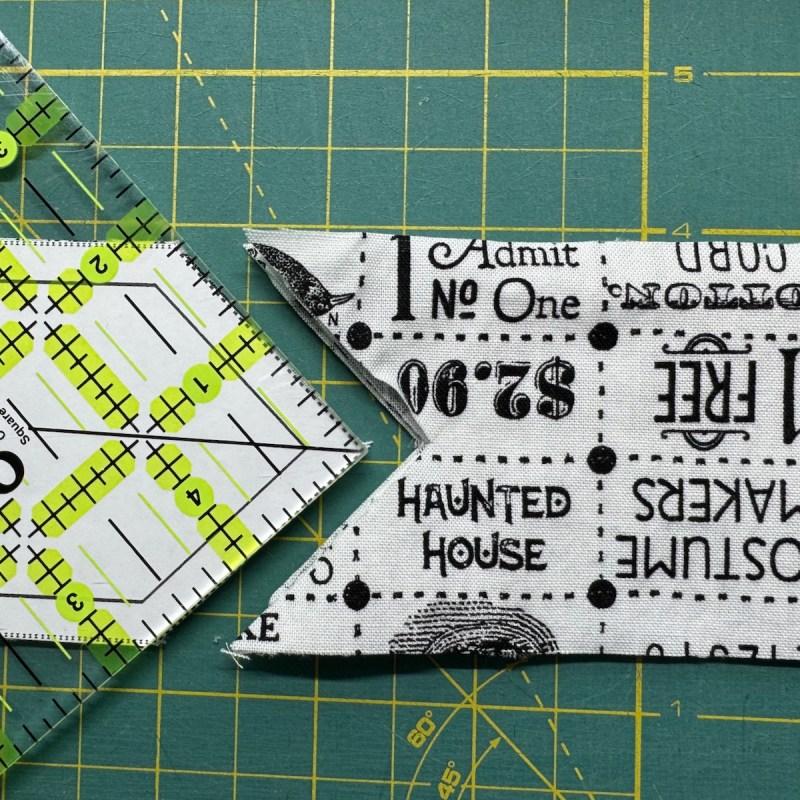
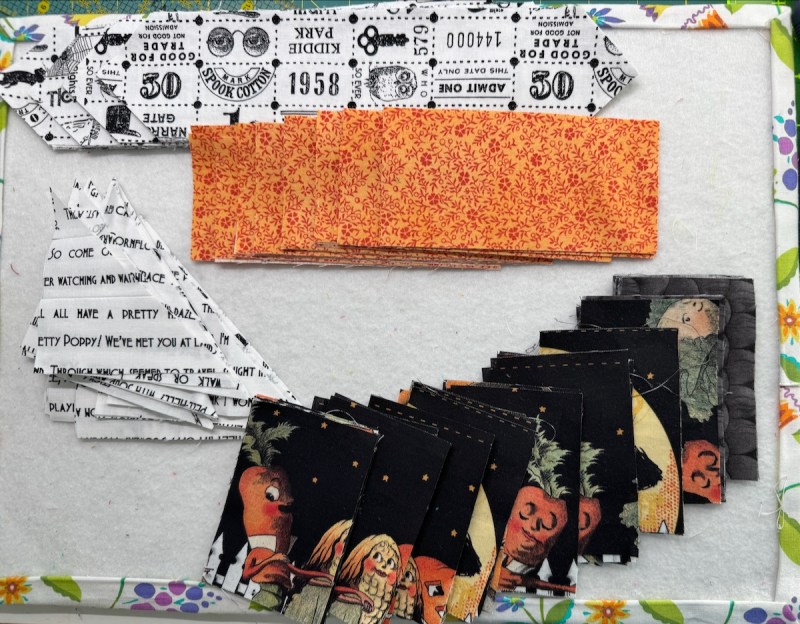
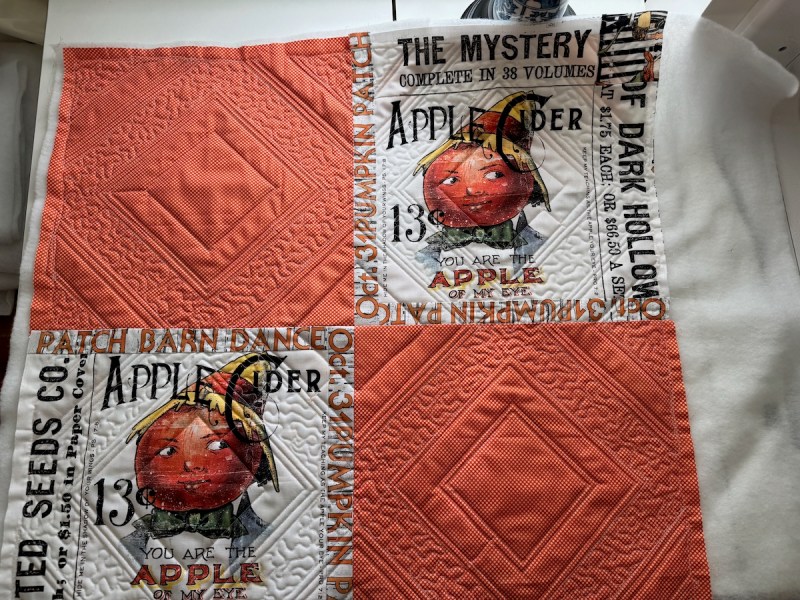
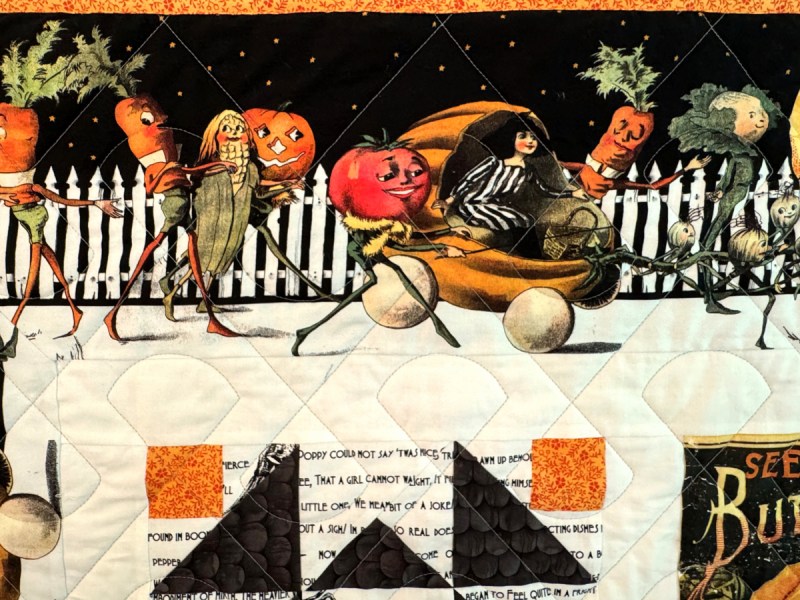
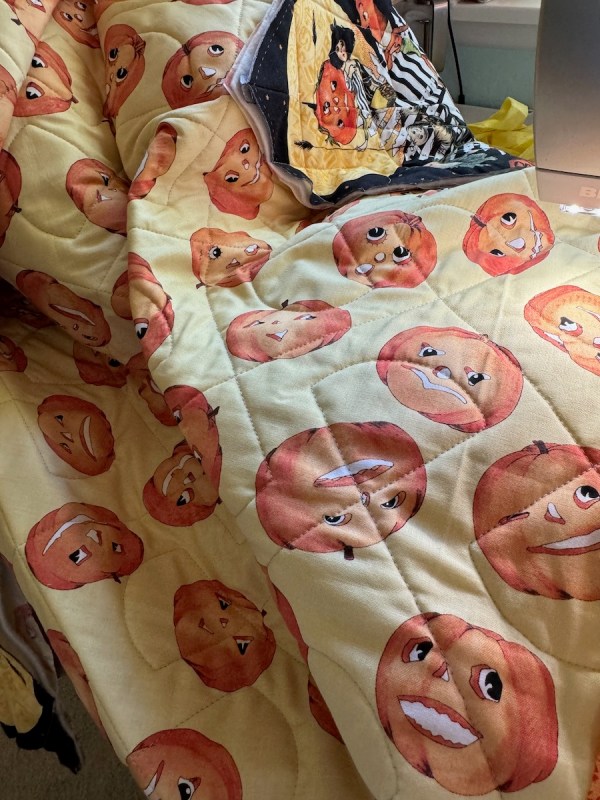
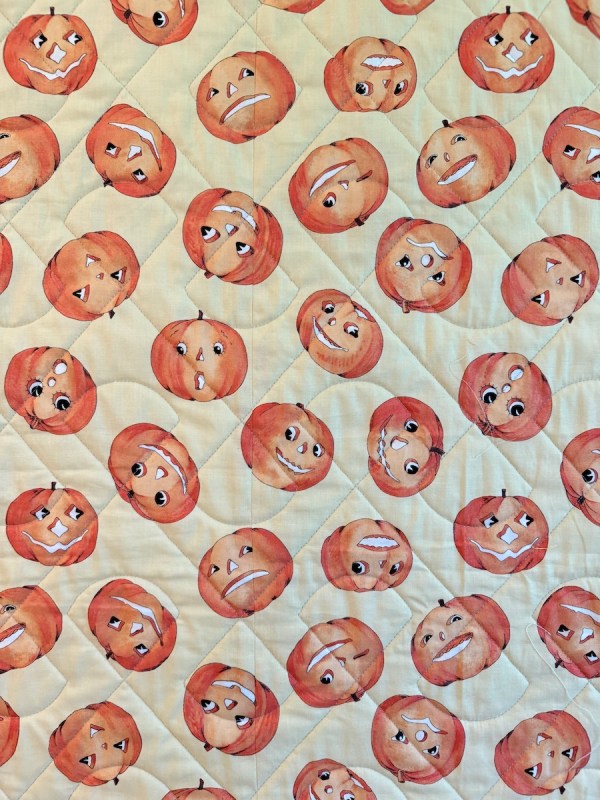
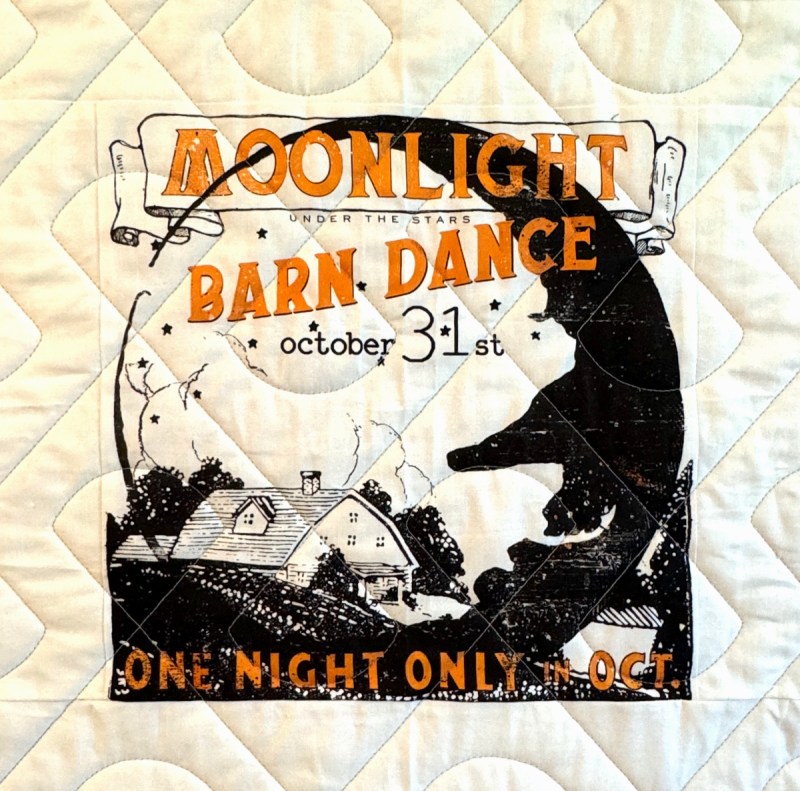
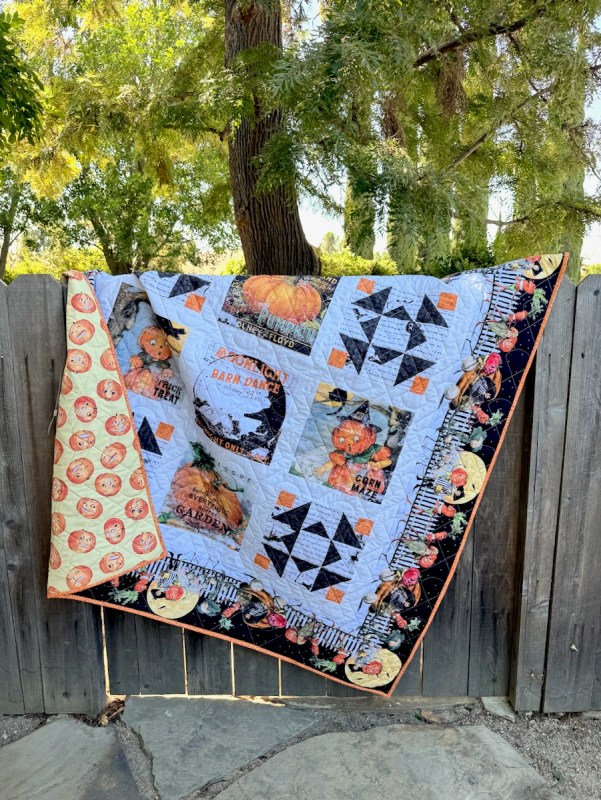
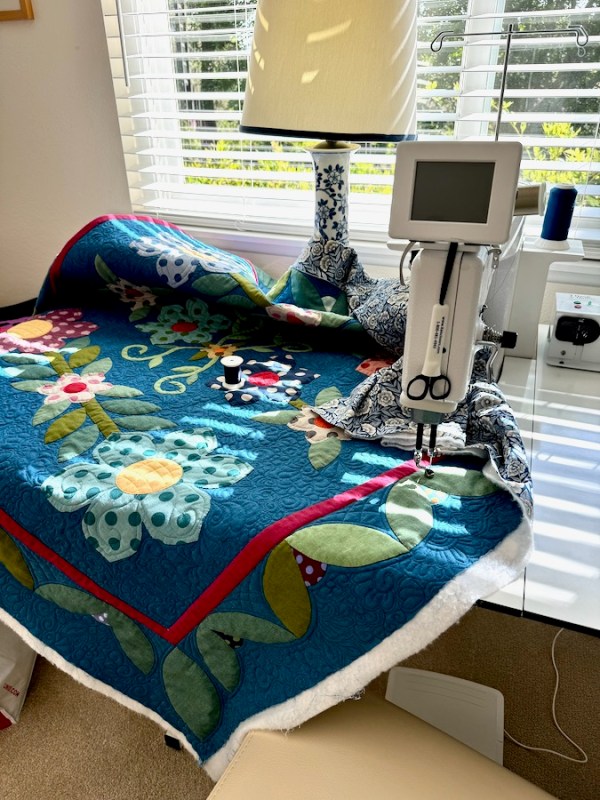
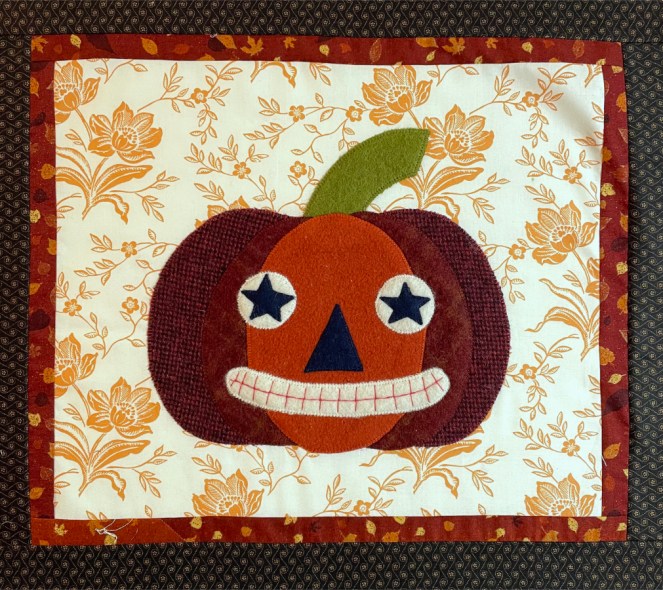
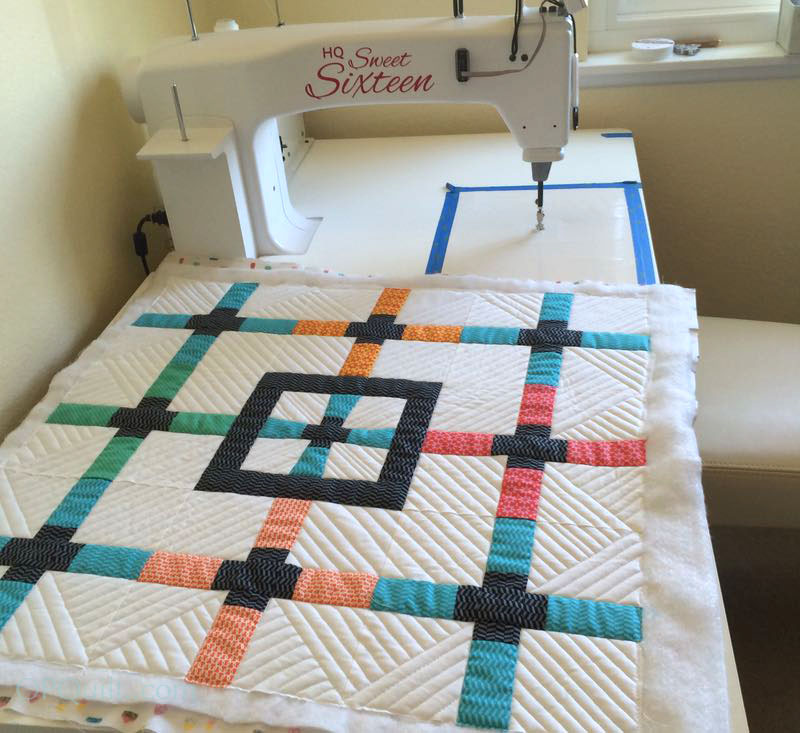
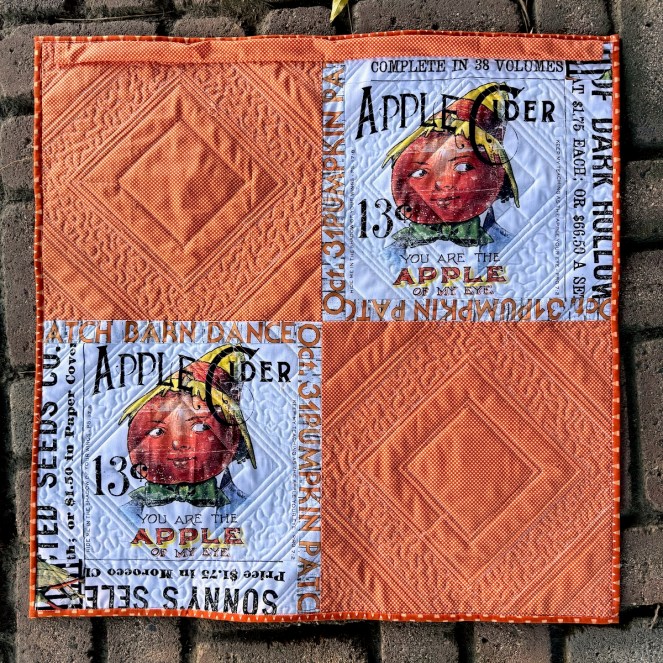
I kept the quilting simple. On the back were two leftover panel blocks from the original kitted Halloween Quilt, along with some rando orange dot fabric from the stash. I used the bits we’d cut off to border the panels, so they’d be large enough. And since this pattern — while quick and easy — calls for a template, I put tape on the back so it won’t move around, then I use a ruler to help in the cutting.

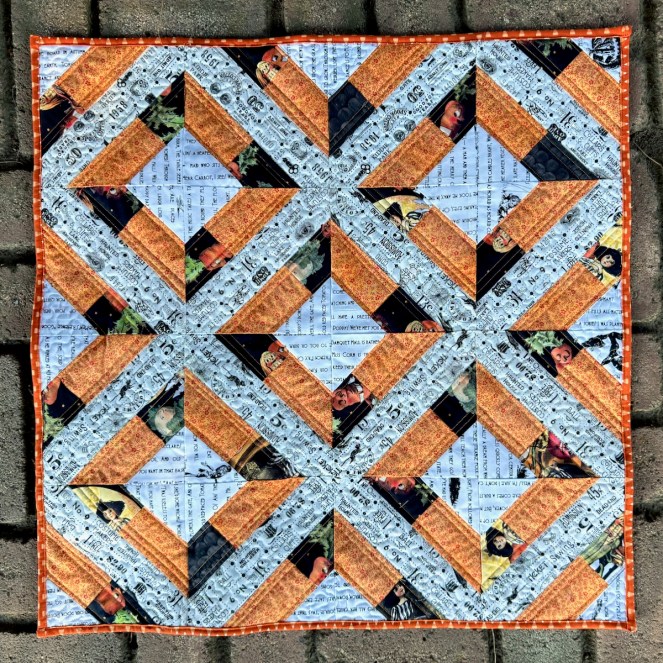
Quilt #308 | Halloween Mini-quilt | approximately 28″ square.

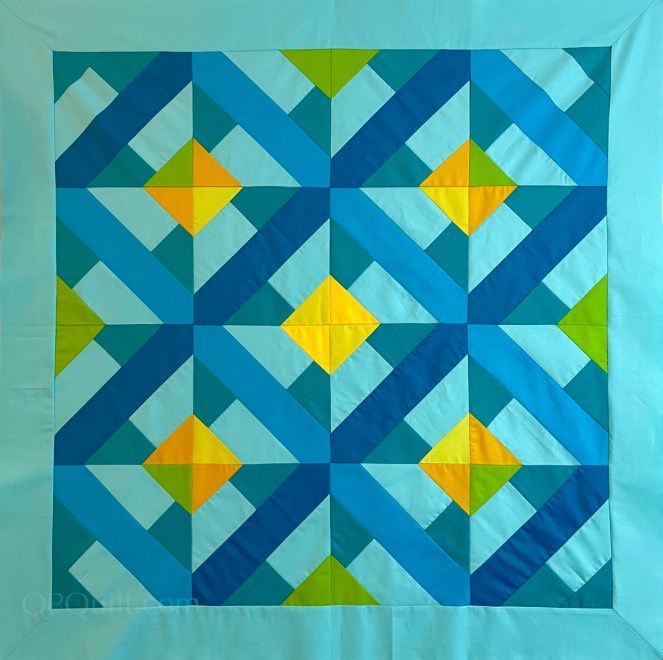
This is still one of my favorite versions of this pattern: SeaDepths. I have one more version to try, a deep blue and cheddar combo. Some of this is that I realize that every corner of my room holds the promise of a project/quilt-to-be. I’d been saving the scraps since last year and the bag kept kicking around the edges. GONE! I have been saving the deep blue/cheddar fabrics since 2019. They are washed, and stacked, ready to go next week. And yes, I threw away the scraps from the scraps, as there was so little left.

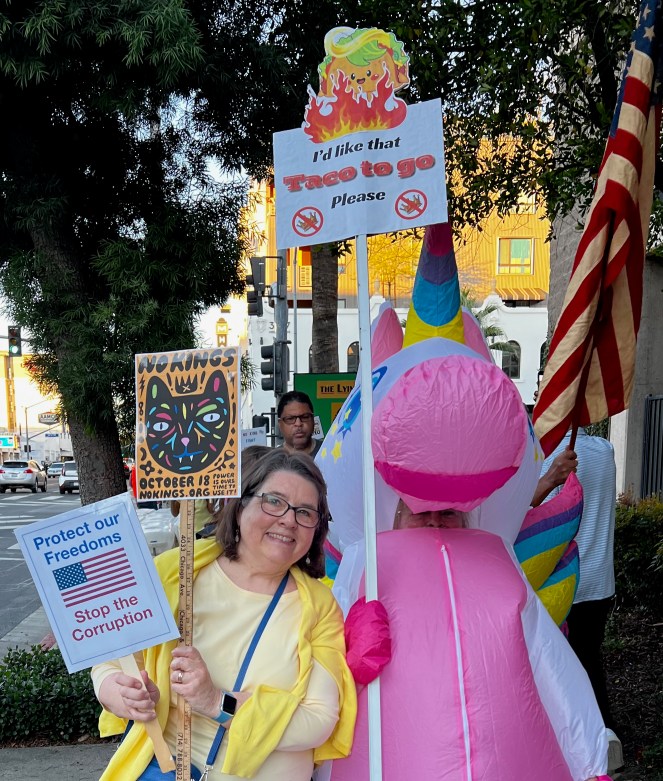
You know I wouldn’t want to miss America’s throwing itself a party. One of my signs was a cat print-out from Martha Rich’s art (used with permission), and the other sign was my husband’s (Protect Our Freedoms) with the wording he chose. We both wore yellow, as did others.

Bravo to all the unicorns who came out to walk and gather. Lots of flags, lots of good will and as I noted in my Instagram post, we detoured into the Korean chicken place mid-way. It was delicious. Then back to the march. Then home.

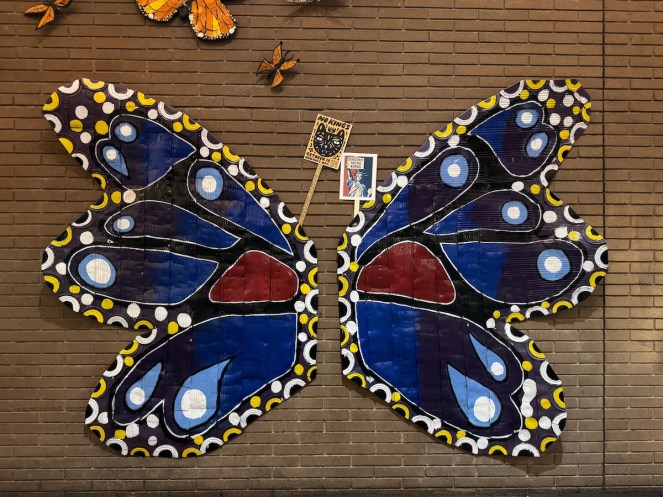
Our signs posed together in the Butterfly Alley, near the gathering.

Started the latest Thursday Murder Club listen: The Impossible Fortune.

How does he come up with these plot lines? I am really loving this.

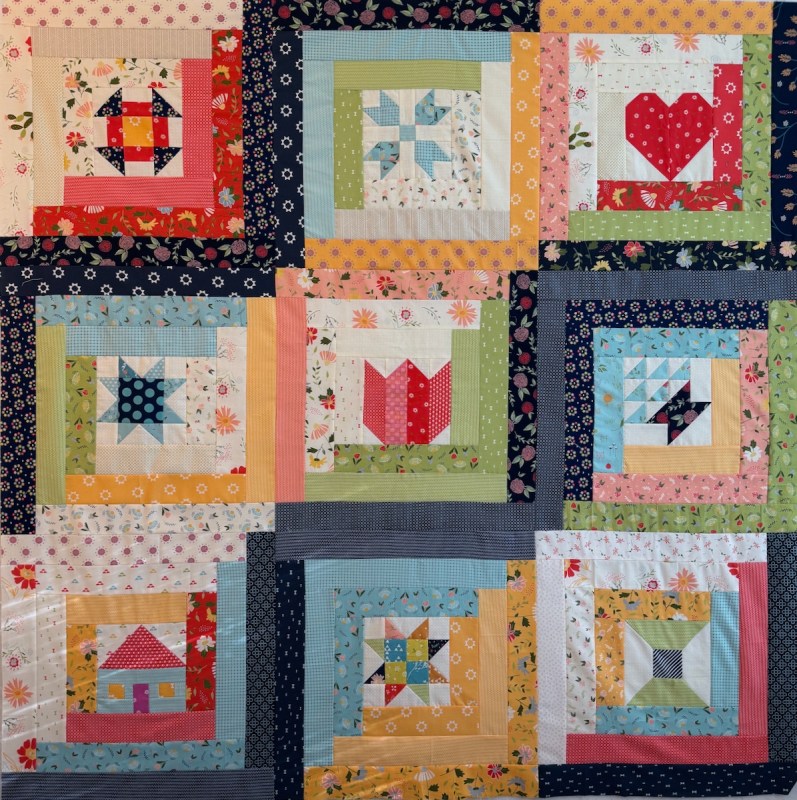
Even though there are technically three more blocks to this A Quilting Life 2025 Block of the Month Quilt, I’ve using Grant Snider’s advice #6 — getting rid of rules — and calling it done here. It’s been a fun project and hats off to Sherri for her creativity and for sharing these free blocks with us. Now to figure out a border, and get it quilted.

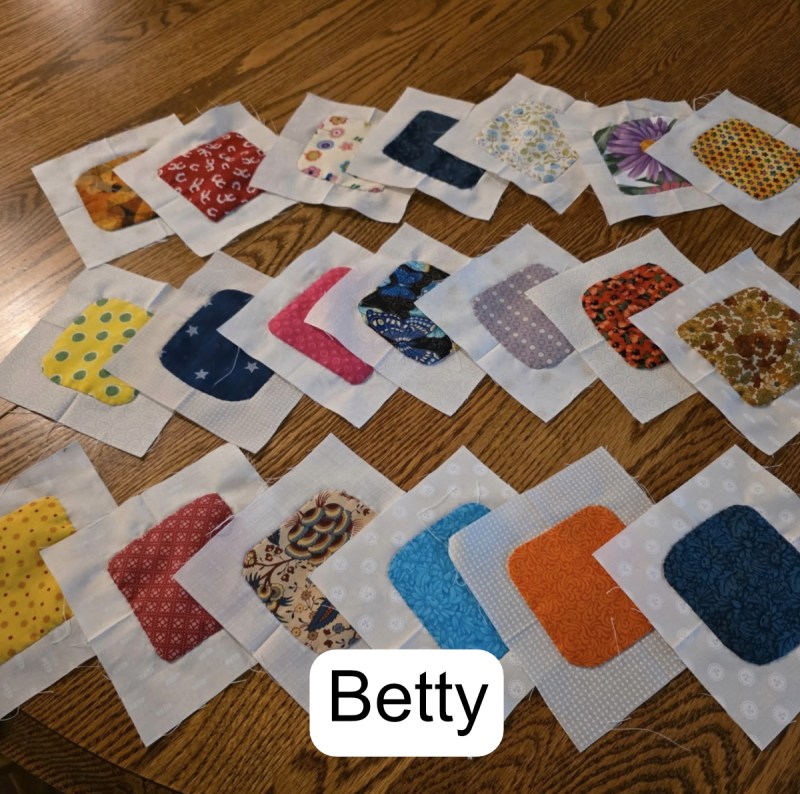
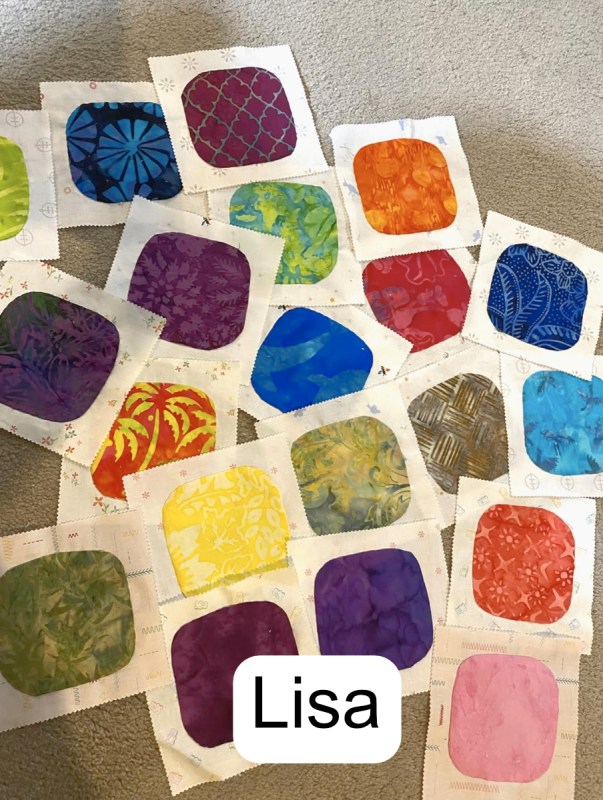
Finally, Squircles will finish this edition of This and That for October 2025. The hashtag we’re using — #backtosquircle — showed up with two more squircle makers: Lisa and Betty, both from the mountain west.

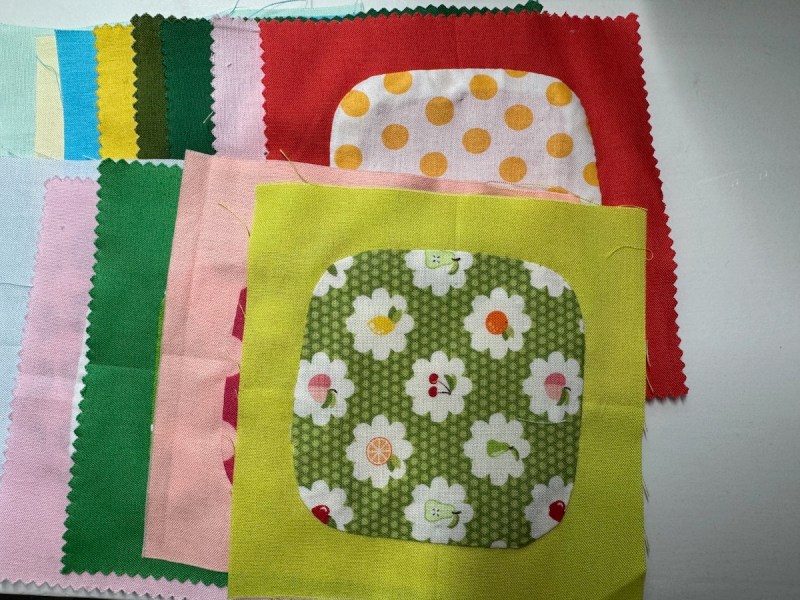
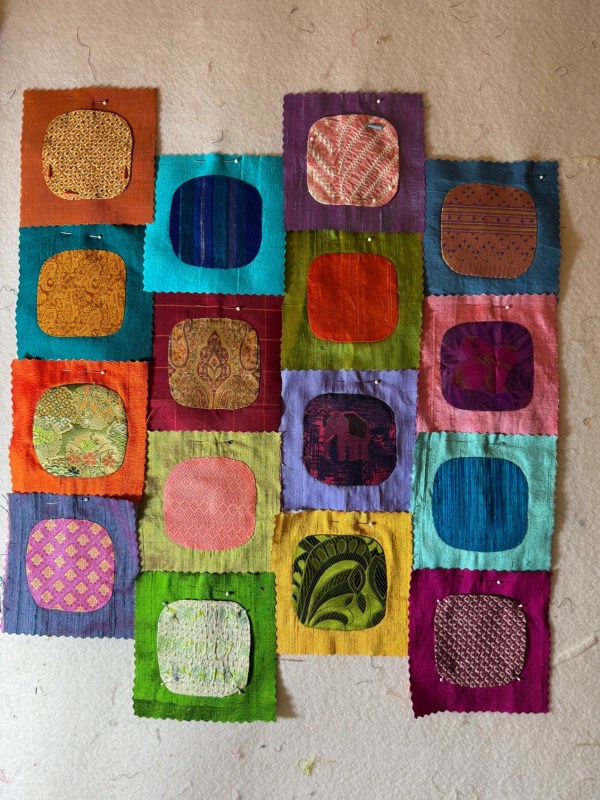
Mine are on the above left, and Gladi has some that are shown on the above right, out of beautiful brocades and silks.

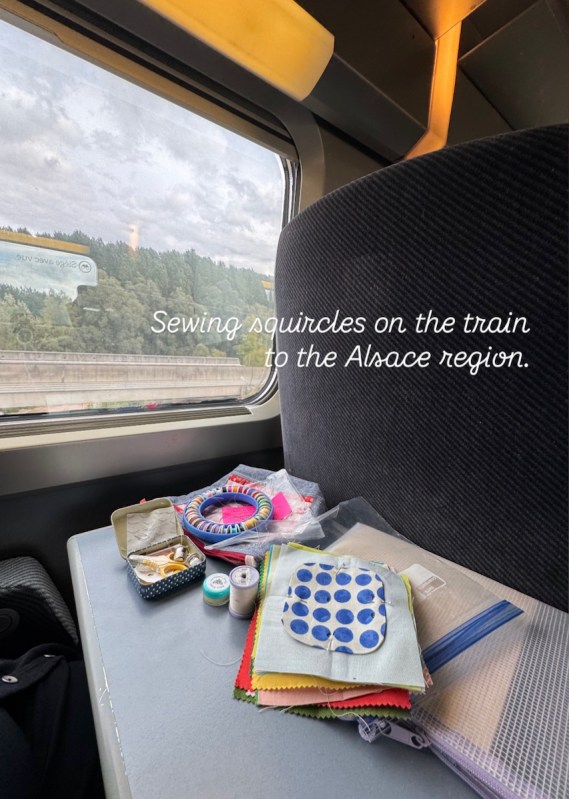
On the train to Strasbourg.

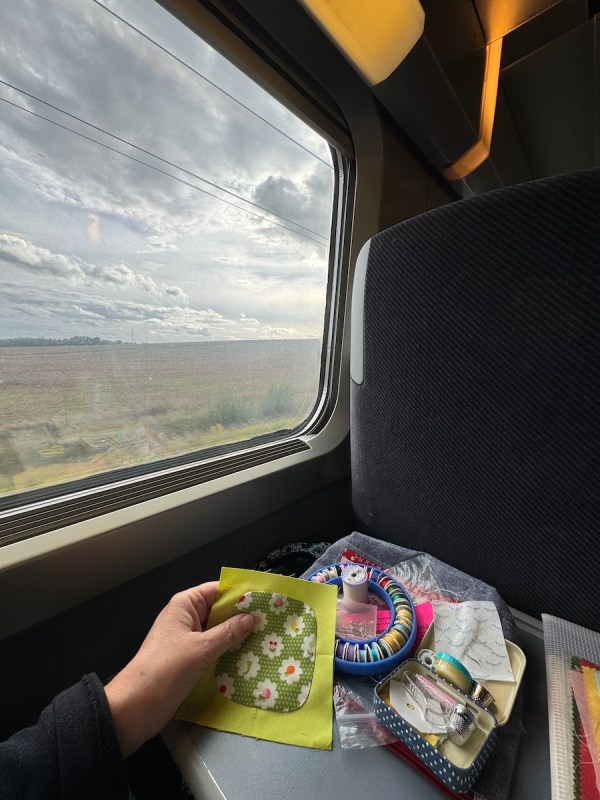
On the train to Colmar. I must admit that I looked out the windows a lot.

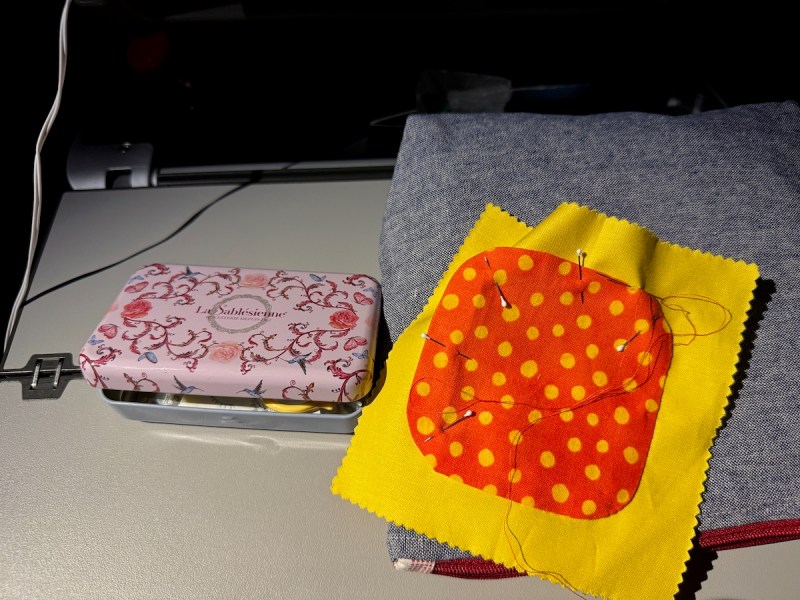
Now, with a new sewing box, courtesy of a run through Le Grande epicerie in Paris (where I purchased some cookies just.for.the.tin), this is me stitching in the airplane on the way home. In the dark (again). Why do we never put up our window screens anymore to see the miracle of flying through the air? Nevermind. #screensrule

I’m almost to 60 squircles finished, one-third of the way there.
Keep stitching, keep stitching!

Last Look

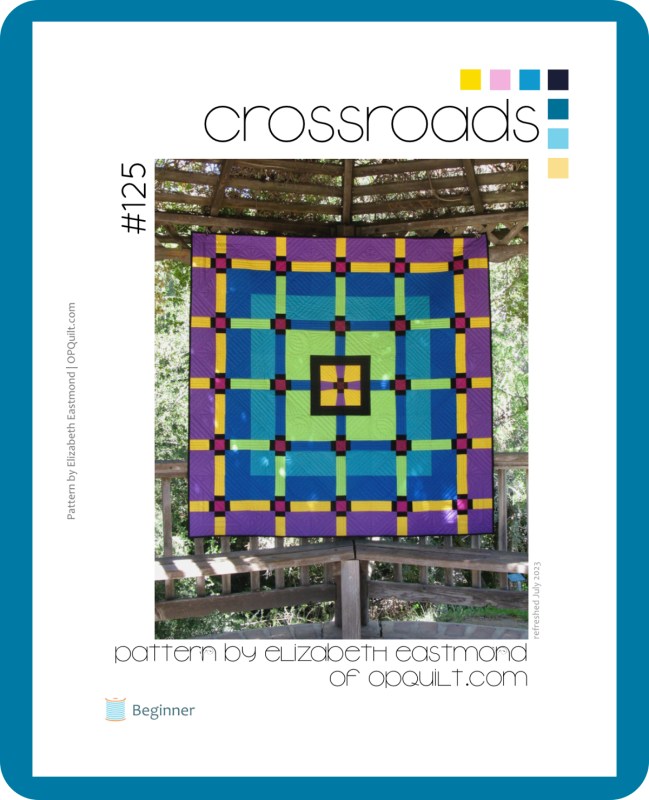
Other posts about Azulejos

Azulejos Pattern
Azulejos • Quilt Finish
SeaDepths • Quilt Finish
Color, Venice and Valentino • This and That July 2021 (showing quilting on SeaDepths)

Backside of my husband’s sign. As I was working on this, and having just been in Colmar, the town in France where the creator of the Statue of Liberty lived, I realized I didn’t know what was written on the book she holds. So I looked it up: the date of our Declaration of Independence from the king of Britain. I thought it was a good motif for Saturday.

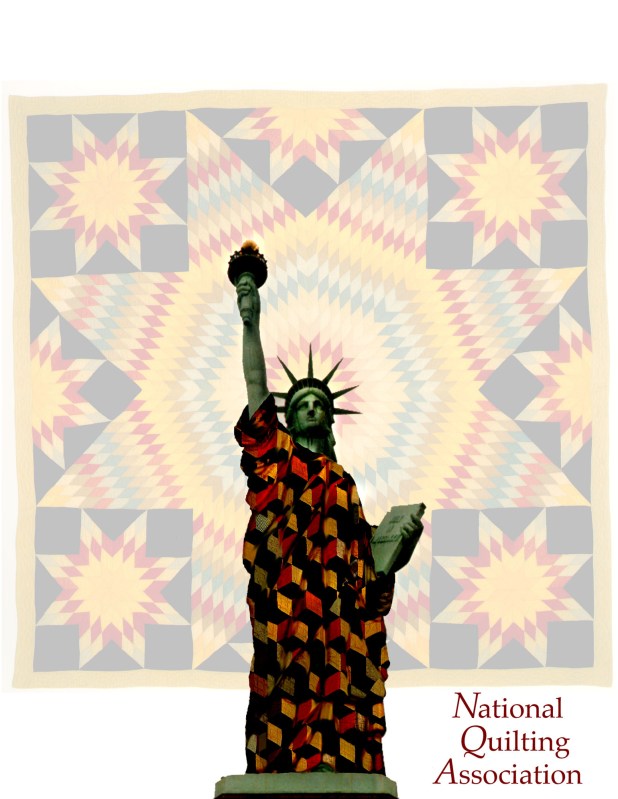
From an old homework assignment in my Digital Art class. (They were all amused that I would use a quilt.)

300 Quilts · Quilt Finish

Halloween in the Vegetable Patch

At first I thought it was a squash patch, but there were the onions. And the carrots. And the cabbage and corn, so I included them all:

Of course, the fabric is by J. Wecker Frisch, which I fell in love with (pattern) and convinced Leisa and Carol to buy, too. Leisa and I sewed the quilts together, then dropped the tops off on Tuesday. The quilter had them back to us by Thursday night — a record. We wonder what we are going to make next, for we are both giving them to our sisters. A quilt this whimsical needs to be gifted.

As I was trying to beat a deadline, I put a machine-stitched binding on it, but the quilt is still very soft and snuggly, due to the very loose density of the quilting. I hope my sister loves using it this coming season. I snapped a photo of the backing while I stitched. I thought these Halloween heads were hilarious. And I loved how well the seaming went on the back — it was a challenge to match up those pumpkins, but I think I did okay.

My sister Susan said she’s going to hang it over her stair rail, so I thought I’d given it a try before it left our house. Halloween in front, summer in the back hanging on the wall. Time to change out the hanging quilt, as tomorrow, what my daughter calls the “bers” will be here: September, October, November, December. But we’ll also have a scorcher of a week, so out here in Southern California, we’re not quite through with summer’s heat.

Quilt #291 • 54″ square

And it’s gone!

And this one waits patiently to be finished.

Soon, soon.

(Too early for pumpkins?)

P.S. The quilt arrived, and is hanging nicely on her stairwell.

Mr. Pumpkin pillow, available here
300 Quilts · Patterns by Elizabeth of OPQuilt · Something to Think About

Crossroads

What is the difference between achievement and accomplishment? asked Adam Gopnick. That question has set me thinking about it ever since. We quilters work hard to get our quilts finished, our patches pieced and all the little scraps of fabric marching in order toward our vision. Are we achieving? Or are we accomplishing?

class taught for South Bay Quilters

Achievement,” writes Gopnick, “is the completion of a task imposed from outside — the reward often being a path to the next achievement. Accomplishment is the end point of an engulfing activity we’ve chosen, whose reward is the sudden rush of fulfillment, the sense of happiness that rises uniquely from absorption in a thing outside ourselves.”

“Our social world often conspires to denigrate accomplishment in favor of the rote work of achievement,” write Gopnik, and many of us are “perpetually being pushed toward the next test or the “best” grammar school, high school or college they can get into.” The result of this is that we drive the young (and maybe ourselves) toward achievement, toward “tasks that lead only to other tasks.”

Guild challenge fabric in front

Our Guild recently handed out their yearly challenge fabric, chosen by someone who loves purple:

While the challenge (due in September) is divided up into four categories (wallhangings/runners, quilts, wearables, bags/totes), for me the real challenge was working with this fabric.

Challenge accepted. When I was in Utah, I stopped by The Quilters Lodge and they helped me pick out some hues not readily observable, as well as a bold and sassy turquoise polkadot. Was this merely another task that led onto a task, “the point of it all never made plain,” as Gopnik asks?

I remember that Bonnie Hunter, master of the scrap quilt, always said that if a fabric is ugly to you, then you haven’t cut it up into small enough pieces. I didn’t find the fabric ugly — no Philip Jacobs fabric ever is, to my way of thinking. But the colors were definitely a challenge. So…I cut it up small. I chose one of my older patterns that I’d had previously published in Simply Moderne to be my guide through this. It has never been published as a stand-alone pattern, and I knew it was really versatile and strong enough to handle any fabric thrown at it. And it was fast and easy…also a requisite for this Guild challenge, to my way of thinking.

This could have been a series of exercises, dictated-from-the-outside, as so many guild challenges are. I’ve seen some so constrained that it really is ridiculous: how many of you have done the “crayon” challenge, or the “scraps in paper bag” challenge, or the “page number in a magazine” challenge? (However constraining, I happen to like that one.)

But on the other hand, says Gopnik, we’ll head towards accomplishment by looking at this big self-assigned task and “breaking it down into small, manageable tasks” that later lead to the final result. This experience of breaking down, then building up can also inform later professional work, even leading to a vocation. And my guess is that Gopnik meant these as self-directed tasks, with enough time and little enough direction, so that we can roam far and wide and back again in order to find that accomplishment.

“Self-directed accomplishment, no matter how absurd it may look to outsiders or how partial it may be, can become a foundation of our sense of self and of our sense of possibility. Losing ourselves in an all-absorbing action, we become ourselves.” (from here)

I spent the better part of a day cutting, arranging, sewing, finishing the top in a short amount of time. I recognize that I now have the opportunity to do that, and the support of my family. It was not always so easy, and when I was in graduate school (can we say “outside task” to “outside task” to “outside task”?) trying to get a degree so I could launch my professional life, I didn’t sew or quilt for two years. But I returned to it, and when I retired from teaching, my days of quilting — coupled with my education — allowed me to move into teaching Guilds, and writing this blog (“inside” tasks).

“Pursuit of a resistant task, if persevered in stubbornly and passionately at any age, even if only for a short time, generates a kind of cognitive opiate that has no equivalent. There are many drugs that we swallow or inject in our veins; this is one drug that we produce in our brains, and to good effect. The hobbyist or retiree taking a course in batik or yoga, who might be easily patronized by achievers, has rocket fuel in her hands. Indeed, the beautiful paradox is that pursuing things we may do poorly can produce the sense of absorption, which is all that happiness is, while persisting in those we already do well does not.”

So what is achievement? What is accomplishment? Maybe the words don’t fully articulate the slender difference, but we know it when we push through something hard, to end with something beautiful. We know it when that pursuit doesn’t end, although we may leave and come back to it after a time. We know it when we finally finish the quilting or the binding or the label, having worked our way through color choices and fabric choices and design and cutting and stitching, and hang up that quilt and stand back to look.

We most certainly know it then.

Other posts about Crossroads

Its Inception, long ago
Guild Visit, and a little stitching for NASA’s JPL Mars
Do You Tweet?
Crossroads & Simply Moderne Magazine

The pattern is now on sale in my PayHip shop.
Did you notice the new cover design? Just freshening things up a bit around here.

Quick Quilt

Summer Treat Block Tutorial

This is an OPQuilt Quick Quilt, as the block (even with unpicking my mistake) took me about 1 hour. But I sew quickly.  Your actual time may vary.  (Aren’t I supposed to say this kind of stuff?)

Each block has three colors: main color (color A), white (color B) and accent color (color C).
Cut 4-1/2″ squares–5 of color A (shown here as aqua)
Cut 4-1/2″ squares–4 of color B (shown here as white)
Cut 2-1/2″ squares–8 of color A (shown here as aqua)
Cut 2-1/2″ squares–12 of color B (shown here as white)
Cut 2-1/2″ squares–12 of color C (shown here as yellow)

Now ready, set, sew by propping up your sewing machine on door stoppers as the angle of your machine makes you less tired.  I learned this at a quilt show, which is why it’s always a good idea to take classes once in a while.  You can’t learn everything on the internet.

You need some way to mark the diagonal lines.  Of course, you can eyeball them, but if you’re like me, your straight-stitching skills go out the door.  This is called a Quick Quarter tool, and you can find it at JoAnn’s.  Often I’ll use a template with lines marked that affixes to the bed of the sewing machine, but I just went with this for one block.  That latter-not-shown gizmo is called “The Angler” and is worth every penny of the eight bucks it cost.

Align the outer edges of the small square with the large square and stitch just to the side of the pencil line, moving your needle towards the outer corner.

You can see it in this photo here.  My stitching line is not ON the pencil line, but towards the outside edge by a couple of threads.  This allows you room for the fold, and so it won’t distort the shape of this smaller unit in your block.

Sew on as many of these corners as you can, as it saves time to do a bunch of sewing, then a bunch of ironing/pressing, then a bunch of trimming.  But I’m sure you already knew that.

This is the part where you should turn off your music or that novel you are listening to, because you have to think CAREFULLY about what part should be cut off.  I remember it by placing the ruler over the part I want to preserve, then lining up my ruler.  I then cut 1/4″ away from that stitching line.

Yes, you are making a bunch of snowball blocks.

Keep trimming.  Love how the white looks pink.  But, it’s white.  After trimming, head to the ironing board and press the snowball corners away from the center of the larger square.

Unit #1 is done, all four of them.  Set them aside.  And yes, I press my seams to one side.  It’s not a gospel with me, this press-seams-open business, like it is with some modern quilters.  If it is with you, have at it.  I prefer them pressed to one side because I own several old quilts, and they are still sturdy  although worn, and I haven’t had to sew any seams back together from popping apart.  Since pressing to one side works for me, I’m sticking with it.  I believe the thinking it that they look “flatter.”  Judging from the appearance of my older, worn quilts, um . . . that’s really not an issue after a few years.

First corner is on, so lay out the next set of stitching.  I put the yellow square opposite on one of my squares, to remind me that only one has all four corners that are yellow.

Stitch, again staying a few threads to the outside edge of your pencil lines.  Chain stitch as many as you can together.  I found that by focusing on my end point and going a bit faster speed, my stitching line was straighter than if I obsessed about staying next to the pencil line.  Aim for a straight seam, as my college Clothing and Textiles professor used to say.

See that thread cutter on the back of the machine that you sometimes use?  Use it now, letting it cut your sewn units apart.  Quick! and easy.

Keep sewing. Keep trimming.  Keep pressing.  Repeat until all the snowball corners are on all the blocks.  Give these units another final press if you haven’t done so already.

Now eat your vegetables, by taking time to true up all the units.  I learned long ago that by truing up the inside units, there is less distortion in the final block (and usually I never have to true up those).  If you are a newbie quilter, it simply means to lay a ruler over your block/unit and trim off those slight edges that don’t belong.  I also take this time to get it back to “square” by checking the diagonal and making sure it runs from corner to corner.

All the units are trimmed up, and I laid them out next to my “pattern,” a print-out of the block.  Now sew the first row’s units together, then the middle, then the last row.

To make sure those intersections line up, stick a pin through them (top photo).

Straddle that pin on either side with two other pins, then remove the placeholder pin (bottom photo).  It shouldn’t shift now under the needle.

This is how I pressed my seams (seen from the back).  I like to be able to nestle the seams together by feel, so one has to go one way, and one has to go the other.  Now pin the rows together, then flip over the block and check them.

Otherwise, if you are like me and are talking to your mother and wishing her a Happy 84th Birthday, you’ll sew them all together incorrectly.  A nice block to be sure, but not the one I’m trying to make.  Unpick.  Re-stitch.  Then give it a good pressing.  How did I press these last seams?  Towards the middle.  Often a seam will make its will be known by how thick it is, or how many intersecting seams it has.  Just be consistent.  I do admit that if it’s a really pesky, lumpy intersection, I may press just that part of it open, leaving the rest of the seam pressed to one side.  Experiment, but remember you are making these quilts to last.  And last and last.

And that’s it!  Now make 11 more, throwing in a random darkish patch here and there to keep the eye moving and give it some interest.  Or not.

Happy Summer Sewing.  Now I’m off to figure out my gingham quilt!