Appliqué · Free Download · PatternLite · Patterns by Elizabeth of OPQuilt · Quilt-A-Long · Quilts · This-and-That

This and That for JulyAugust 2026

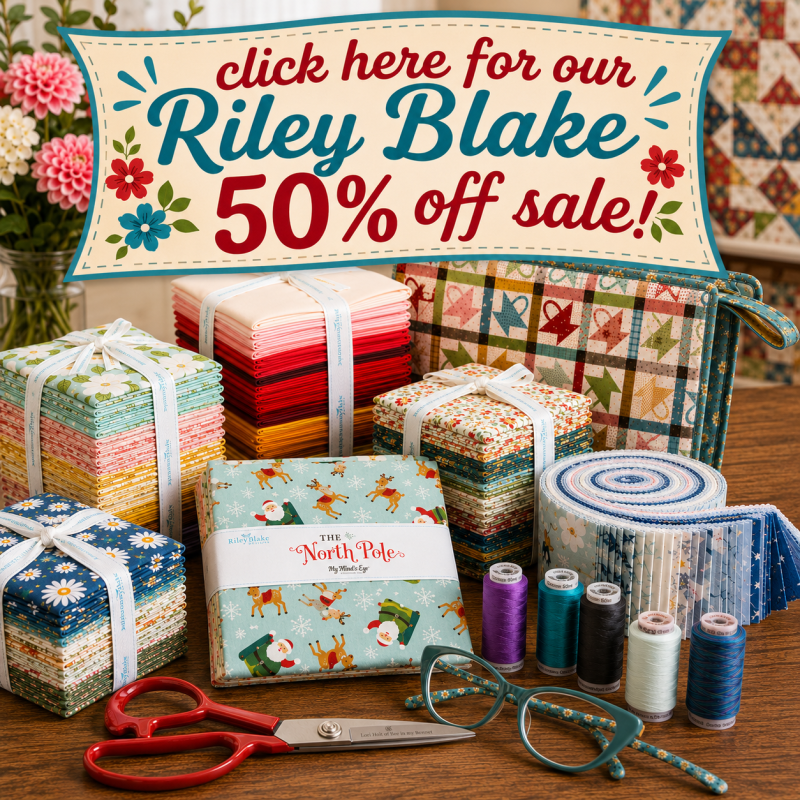
Can I just get this off my chest? I am not a fan of AI, even though — it appears — that we will all soon be swimming in it if we aren’t already. This ad is from a prominent mail-order quilt shop. Love the three parts of the glasses in the front: the lenses part, the eyeglass arms…and the other eyeglass arm, sticking out from the right. Every fat quarter fabric is a perfect shape-replica of the one underneath it/above it.

And then there’s this:

Should I be honored that the Giant Vacuums of AI have hoovered up (if you know the reference, you are showing your age) my blog, the thing that I’ve spent years writing and creating and making quilts and talking and thinking up? And if they’ve come for mine, they’ve come for yours, as well as the text in your gmails, the fun stuff on Instagram and Threads and anything that is online. And now, to make money to pay their data center loans, they are selling MY content back to the world?

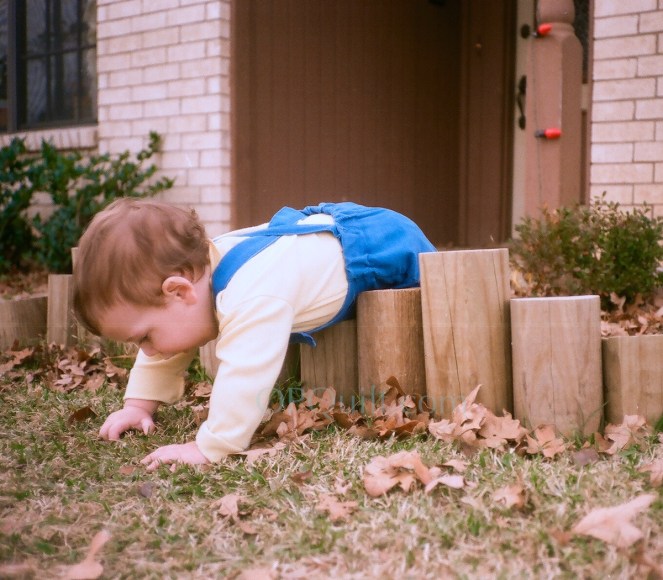
Such a cute baby!

Yes, I’m a bit ragey when I think about this. In my last post, I wanted to grab a picture of a baby crawling. Fifteen years ago, that would have been no problem. I was happy to share my images with others, and they shared their with me. But now every illustration is AI. I don’t want to put AI on my blog — I want it an AI-free zone. So I went back in my personal photo archives and pulled up a picture from long ago of my child, knowing that by putting it on my blog, I was now subjecting it to the Giant Vacuums of AI (I should copyright that phrase) and now it will also become AI by the very fact that it’s been published online. All my quilts are not now “my” quilts. And if you’ve posted online, yours aren’t either.

Ok, rant over. Sigh. Do I feel any better? Please be assured that I don’t use ANY AI to generate any writing either here on the blog, or in the emails I type back to you.

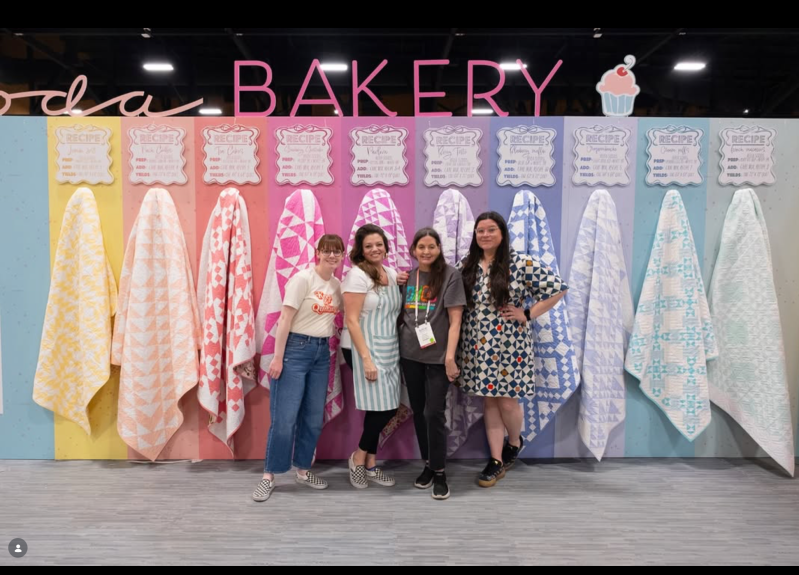
Moving on…A random shot from Moda’s display at Market a couple of years brings joy to my heart: look at these amazing (mostly) two-color quilts! We generally think in red/white, or blue/white, but definitely I want to make a periwinkle/white quilt now! (Add it to the list, she hollers!)

For a mere $5,000, you, too, can wear a Gee’s Bend Jacket made out of old jeans. Don’t forget your $3,000 tote bag!

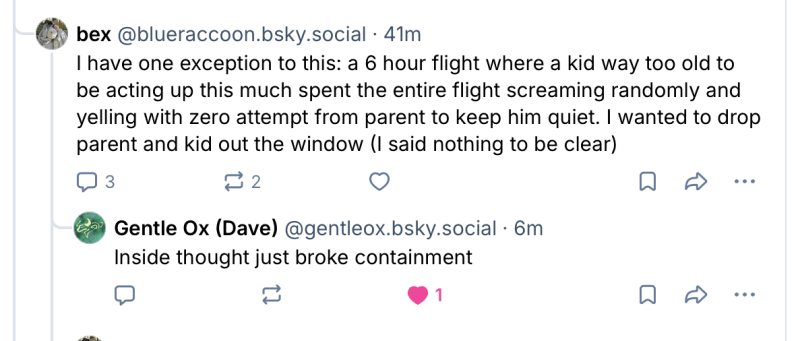
In a recent social media post about screaming children on airplanes, I read this:
“Inside thought just broke containment,” may apply to those paragraphs at the beginning of this blog. I apologize.

Recently an artist covered the Pont Neuf Bridge in Paris in order to make it look like a big mountain.

And inside, you could walk through tunnels to some interesting soundscape music. Please click on the Instagram of @kristinetghardeberg to listen. And thank you to her for posting!

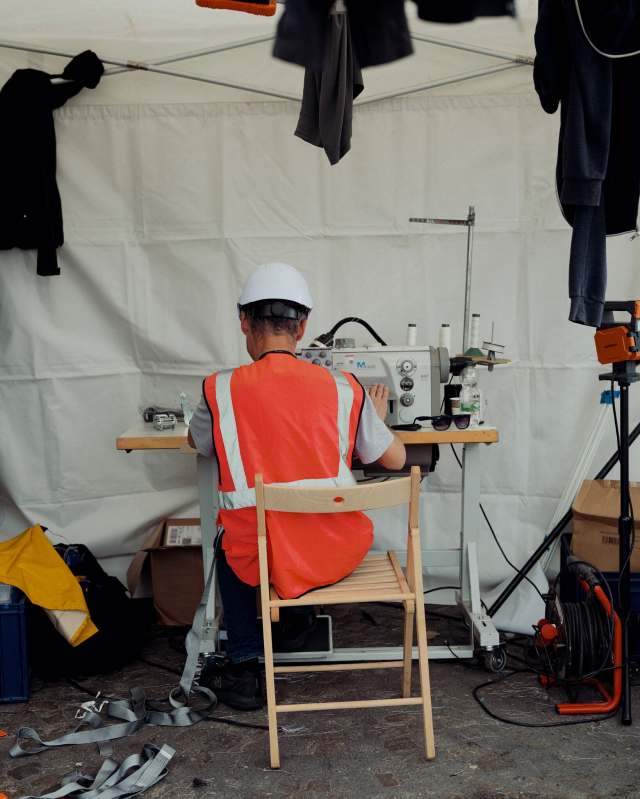
This is why that is so fascinating to me: here’s the guy sitting at his (industrial) sewing machine, cranking it out. Oh, I’m sure those belts and geegaws also played a part.

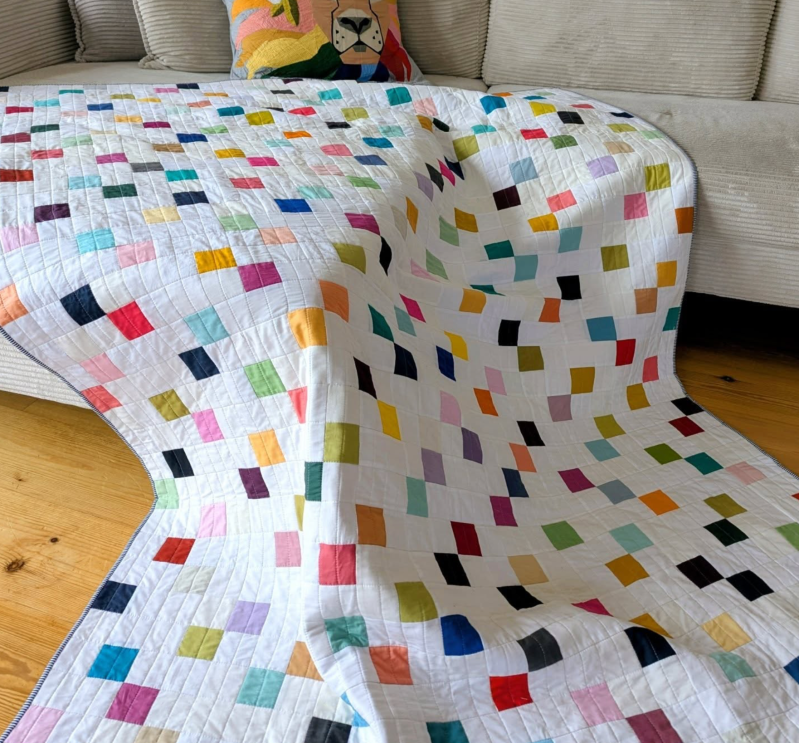
I don’t know about you, but this is more my speed this summer. I did finish up a couple of quilts, but the energy overall has been so incredibly low, for some reason. Good thing I make quilts to nap with! And of course, that’s a screen shot from somewhere and I don’t know who to give credit to. When I did a Google Search, a whole lot more really fun “confetti” quilts pop up. Now I have lots more ideas of what to do with all those leftovers squares from my Oh! Granny quilt.

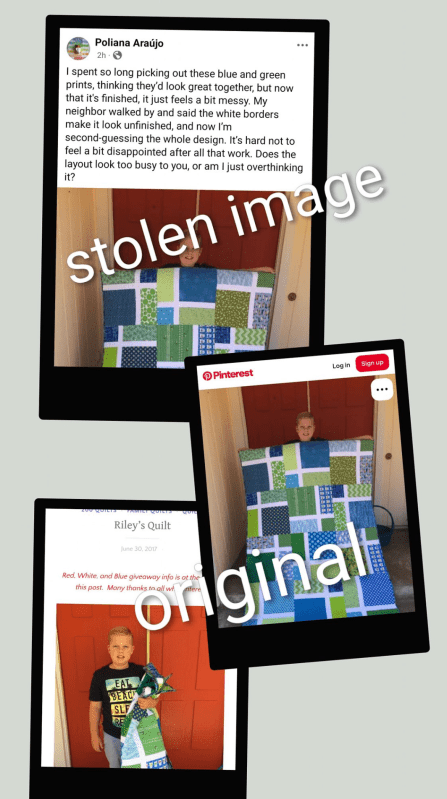
I don’t know who Poliana Araújo is, but really? She spent “so long picking out these green and blue prints?”

And even though I have this declarative statement on my website? Happily my wonderful readers saw the stolen quilt images and connected it to this one that Riley and I made some years ago, and called her out on it. Hmmm. Is this the early version of the Giant Vacuum of AI? Link to her ill-gotten Facebook post.

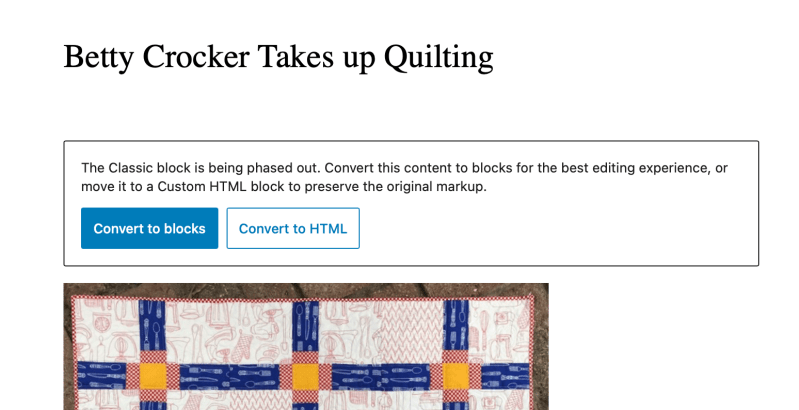
Apparently the “Classic Block” is being phased out. So I’ve been busy updating all my posts to the recommended “Block” style. Besides working on that, I’ve also been working on updating the Blog Index that shows a photo from every blog post, as well as a little bit of the writing.

Here’s a video showing a page from far back…and right in the middle of it is Riley, making his quilt! (Sure hope this works on your computer/browser/whatever.)

These represent the blog Four-in-Art blog on Blogspot/Blogger, as well as the Mid-Century Modern blog. I was supposed to delete them several years ago, but just now (sadly) said good-bye. Here’s a record of the quilts I made in the Mid-Century Modern, as well as other bees. The Four-in-Art quilts are scattered through the Quilt Index, above, or you can do a search by typing that phrase into the cute little box, above right.

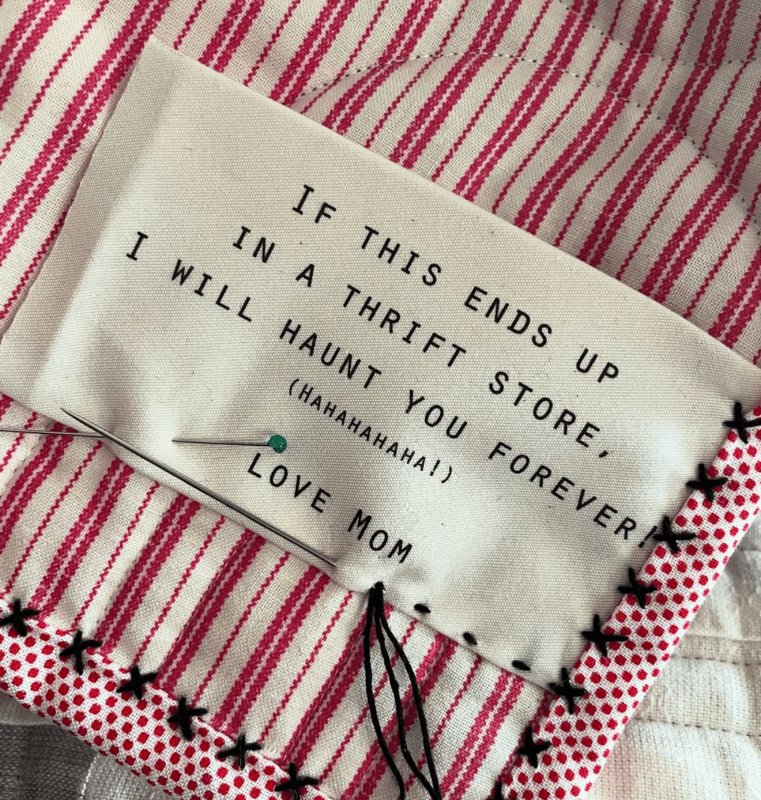
As I’m starting to distribute my quilts more frequently now, I *need* this label! Clever way to tack down a binding, too.

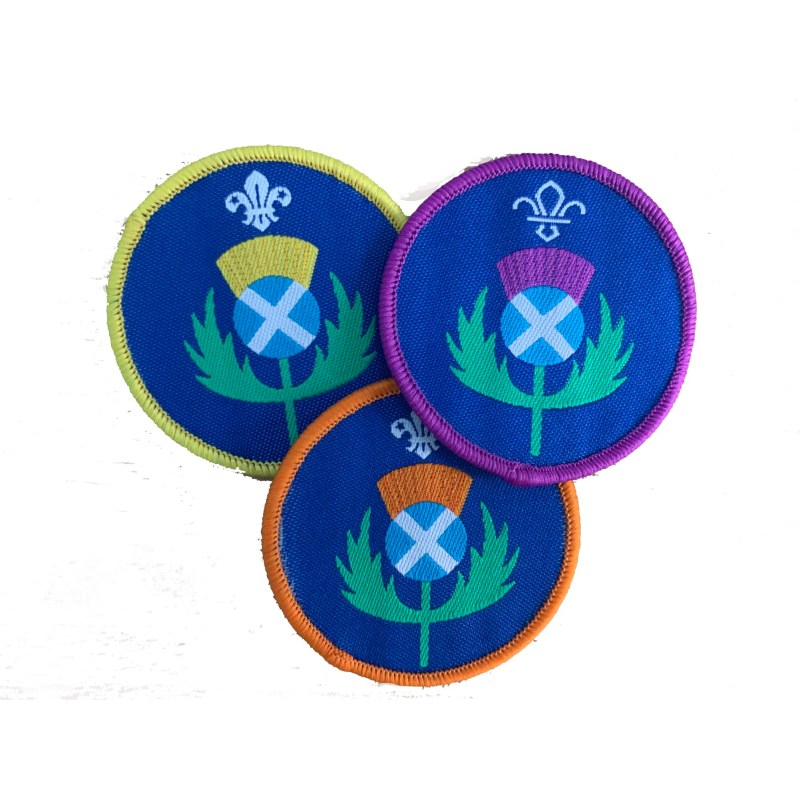
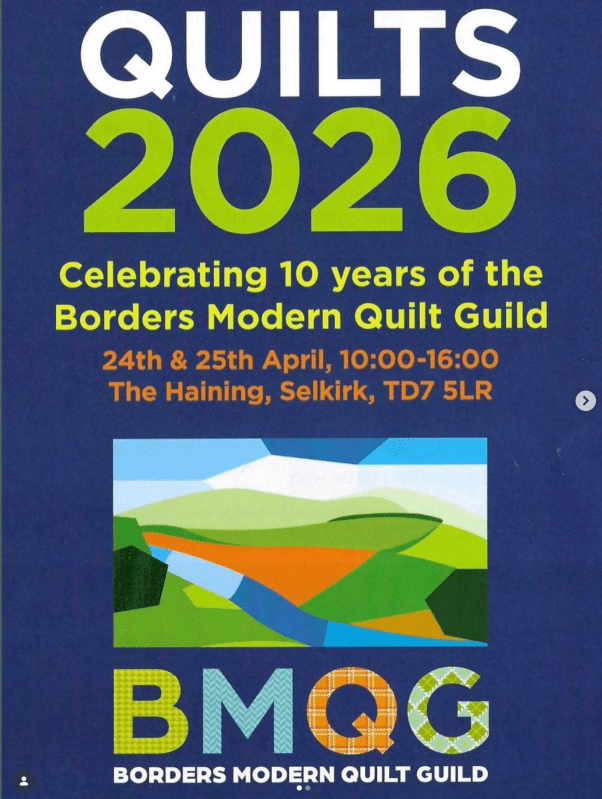
As my husband and I are taking a trip to Scotland soon, I’ve been looking at what connections I can make there with quilters. I’m a bit too late for this one!

However, I did find a quilt shop in Edinburgh, as well as a tartan shop (or twenty).

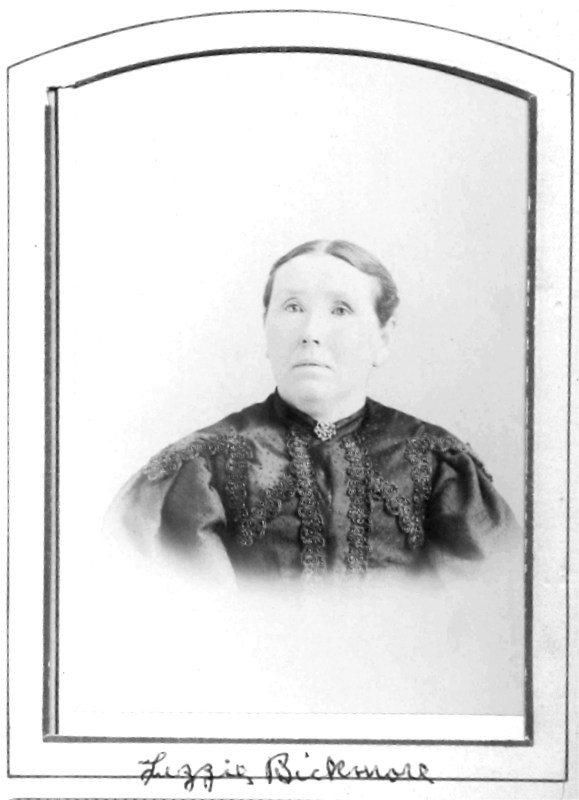
I was named for two “Elizabeth” great-grandmothers. One of them was my great-grandmother who came from Haddington, Scotland. (The other great-grandmother was born in England). Because of this, I’m figuring out bus routes and times, so I can pay a visit to that village, as my mother did when she visited Scotland some time ago. My husband’s forebears also immigrated from the Edinburgh area, so we have another small village to visit for his relatives, too.

I’ve been doing my searching on Family Search, an online archive of lineage and memories. You can find your relatives, too, by going there and setting up an account. I’m not a genealogist, by any stretch, but my friend Dayna is and she’s teaching me how to use it. I’ve got so many things I want to upload on my relatives’ pages, to “make them known to their grandchildren,” as Dayna says. Maybe I’ll bring back a photo or two of her Scotland for her page?

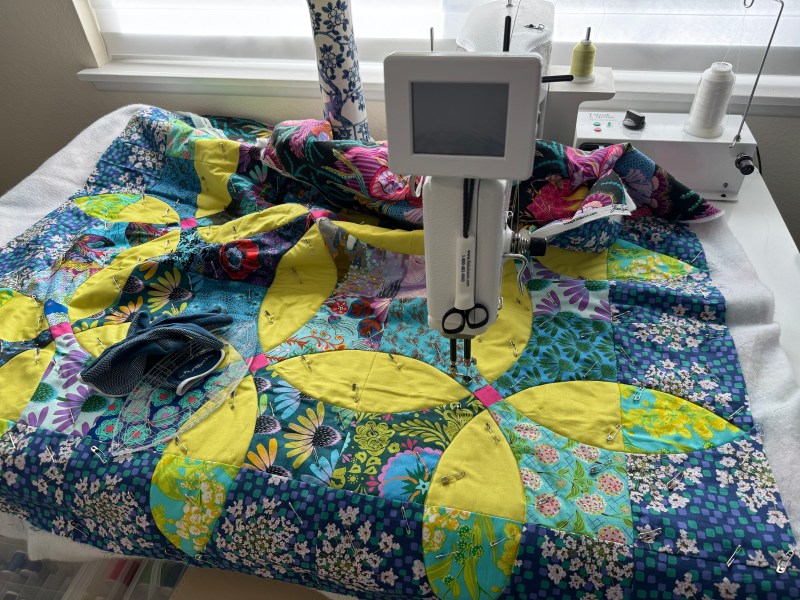
Lest you think I’m a total slacker, this has been patiently waiting for me while I run around like a chicken with her head cut off…wait…wrong image…while I laze around like a woman in August, trying to beat the heat and keep her sanity. (Better.)

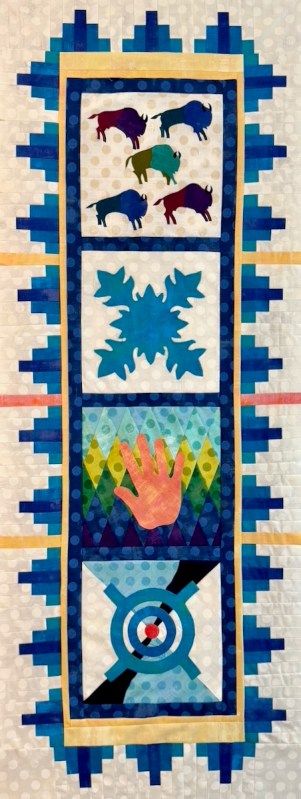
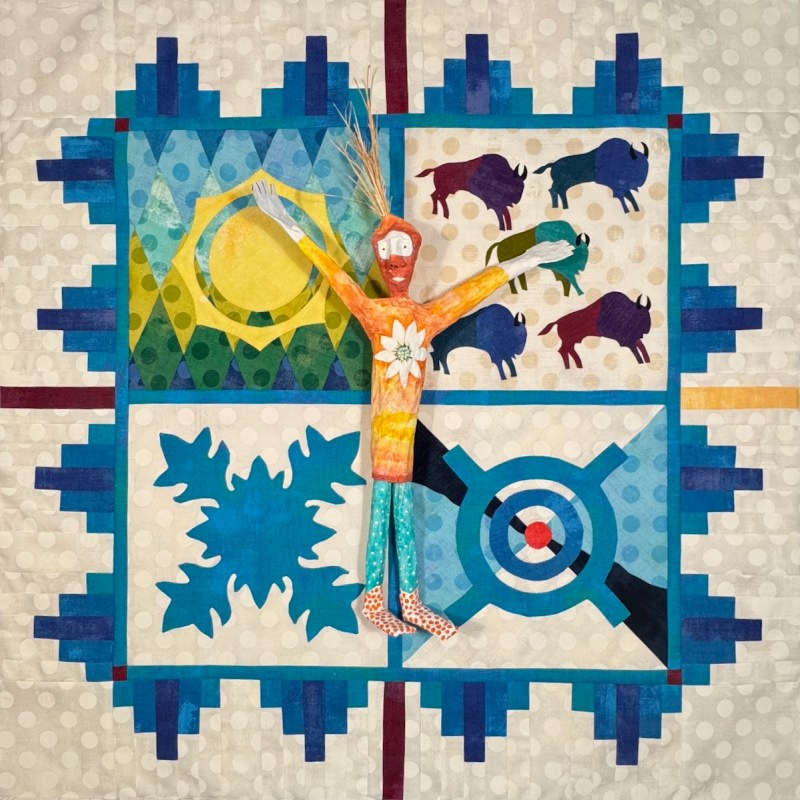
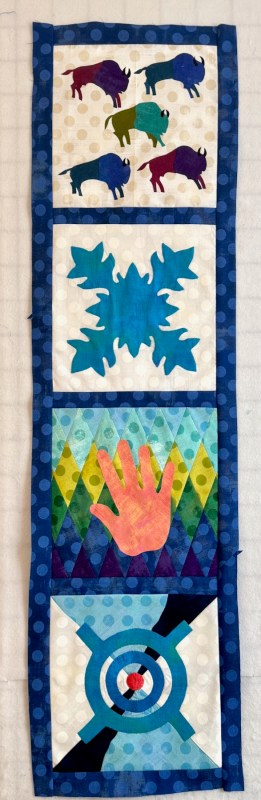
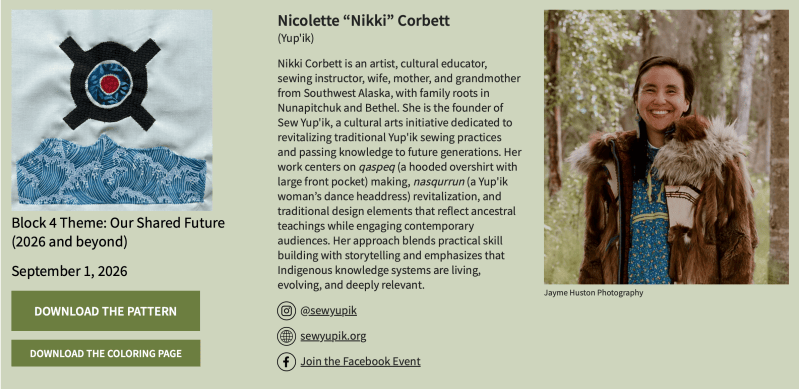
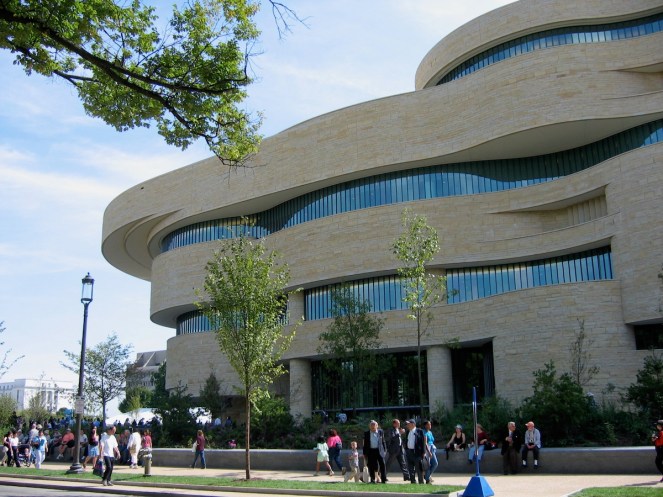
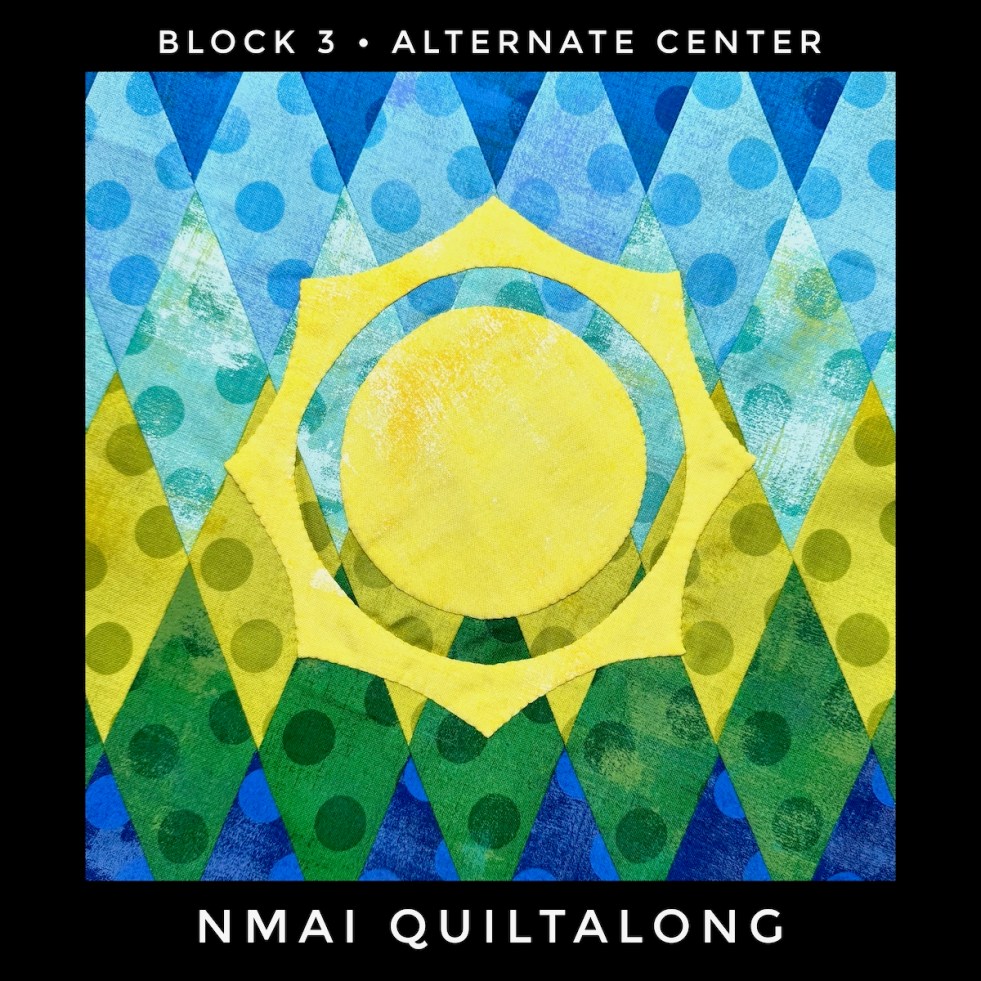
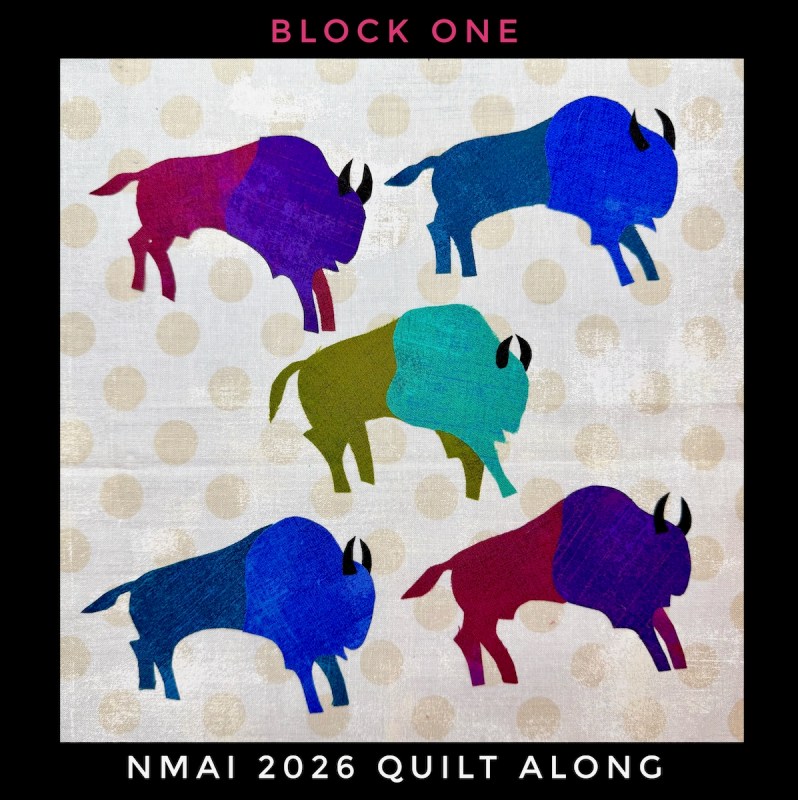
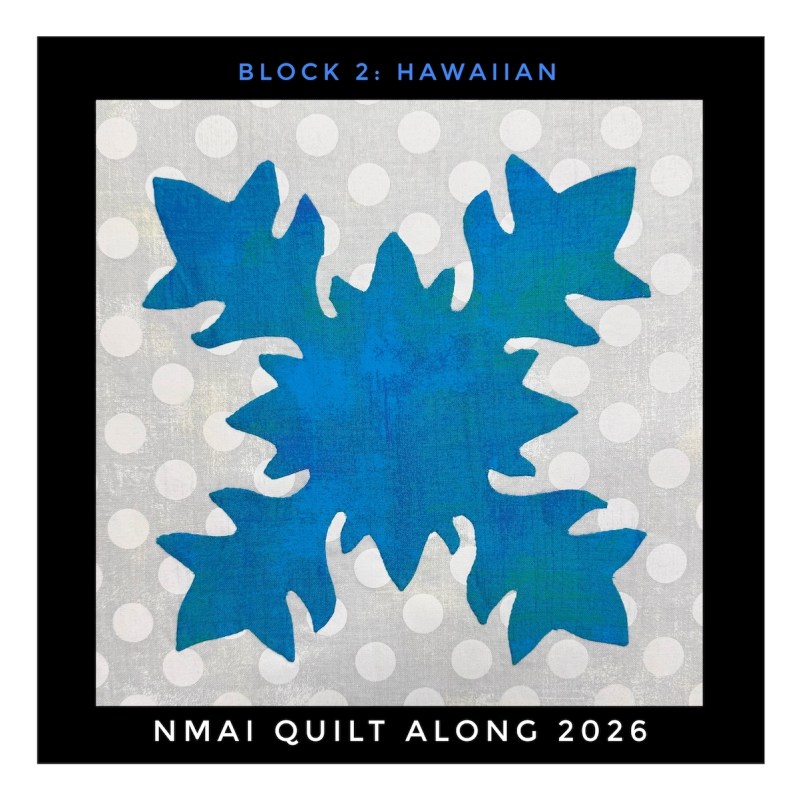
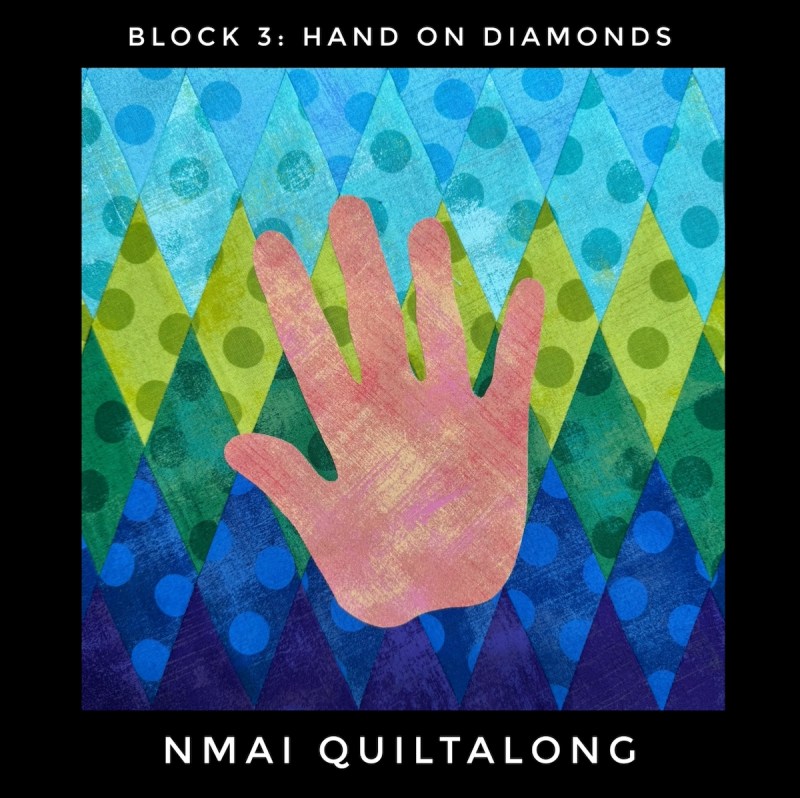
Remember these? It’s the Smithsonian’s National Museum of the Indian’s quilt-a-long for our 250th celebration. I made their August 2026 block:

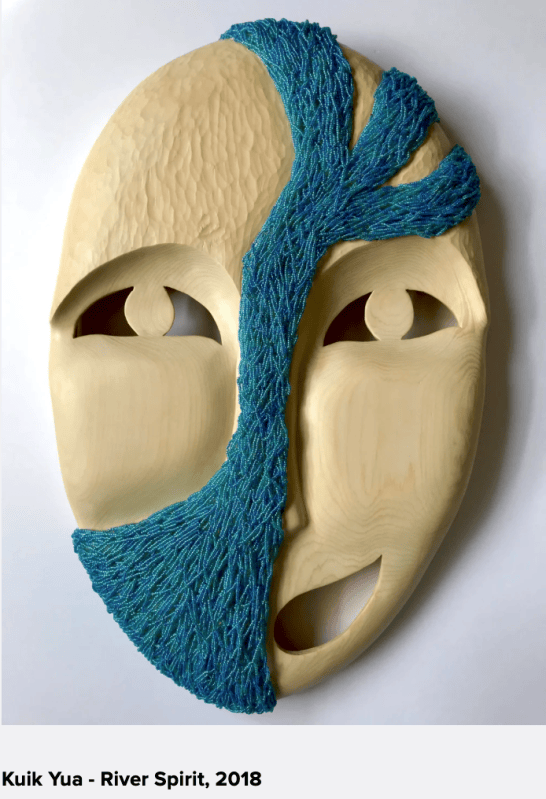
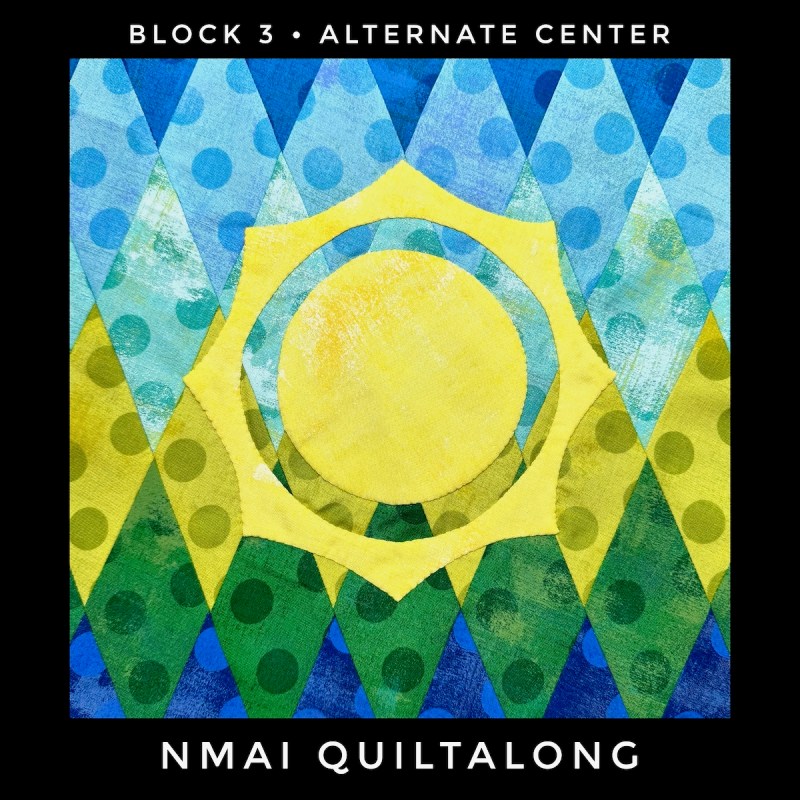
I liked it. I just didn’t love it. So I combed the artist’s Instagram account, looking for other motifs I might like better.

And this was it. I widened the strips, made a different motif for the center. As a quilter, I’m always considering how the subsequent blocks in a quilt-a-long will play with the first few blocks. I feel like this will play a little bit better, to my way of thinking. I may end up using both? Stay tuned.

Here’s the free PatternLite Handout of what I did. I’m calling it Sunrise on the Prairie. Please don’t sell, don’t steal, and if your pals want one, send them over here to download their own from my website. That is very appreciated. And please don’t tell AI this is up here (haha).

I hope for you gorgeous sunsets at the end of the day, or sunrises at the beginning.

(In honor of the recent eclipse)

300 and Beyond · Appliqué · Patterns by Elizabeth of OPQuilt

Kraków Circles

I have this line of patterns I call PatternLite. Usually they start out as just a block I’m kind of doodling around with and want to share. Then I decide I want to make it, and take a lot of photos, and work out some helps and aids and tips and tricks, and before I know it, it has blossomed into a full-fledged — or at least partly-fledged — pattern.

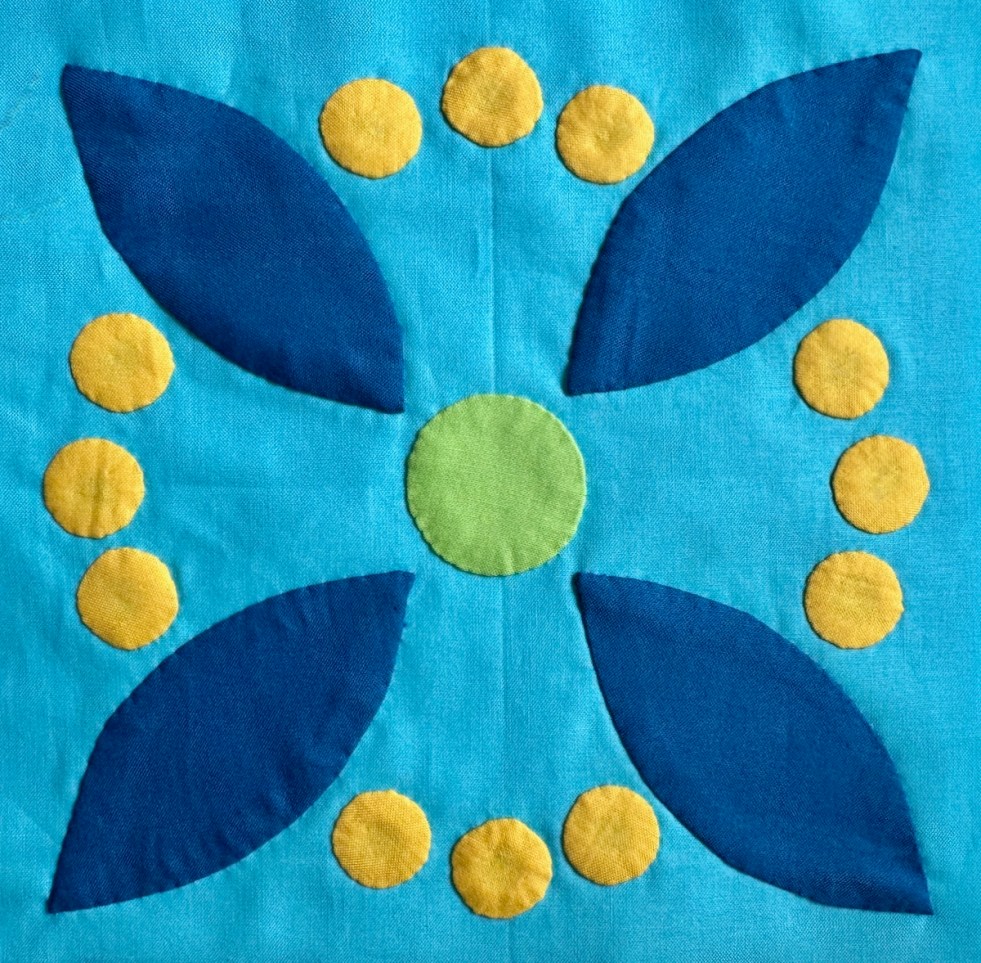
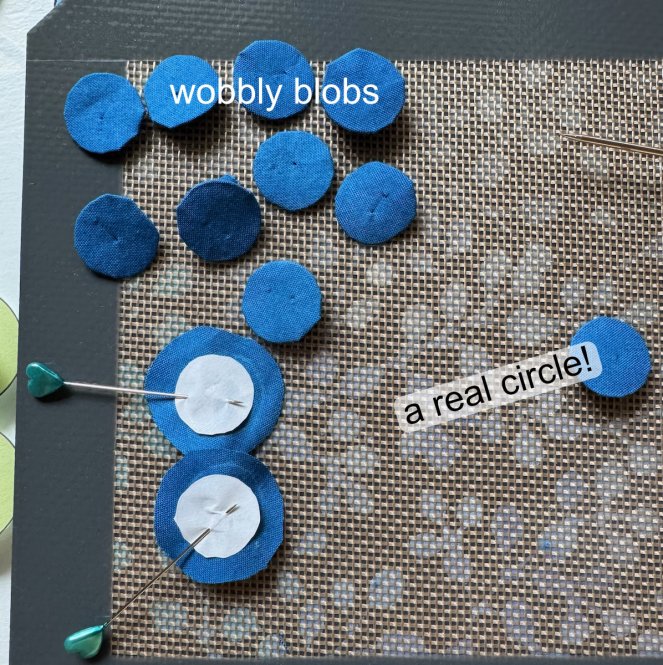
Kraków Circle started out as a free block on the post about my visit to that city, and touring all the churches. Then I thought it might be interested to try out Sharon Keightley’s circle method, since there are bunch of little circles in this design. And then I added a different view, different color way, and so on. Here’s my first stab at the little circles:

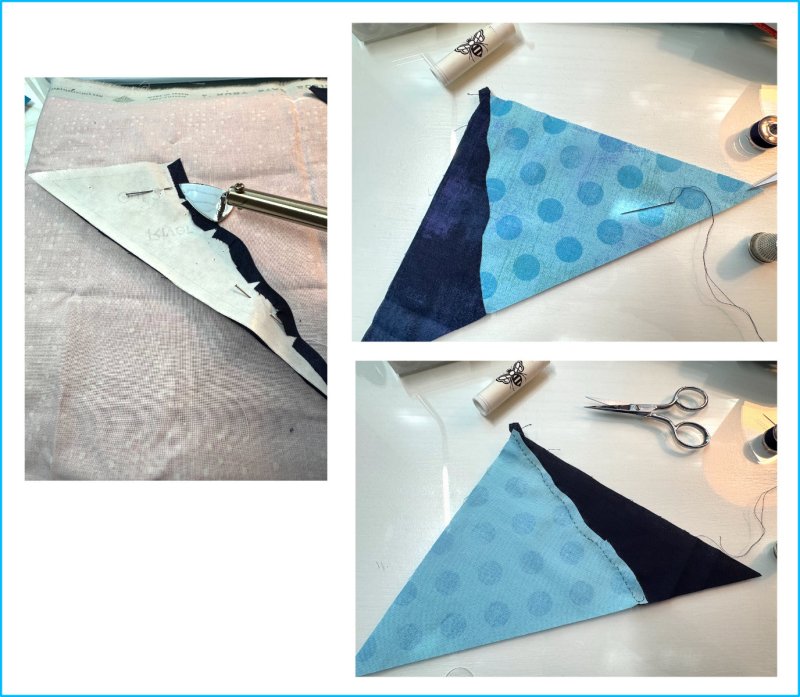
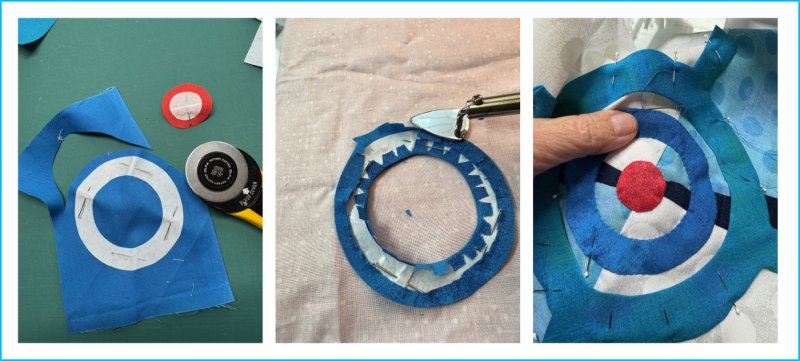
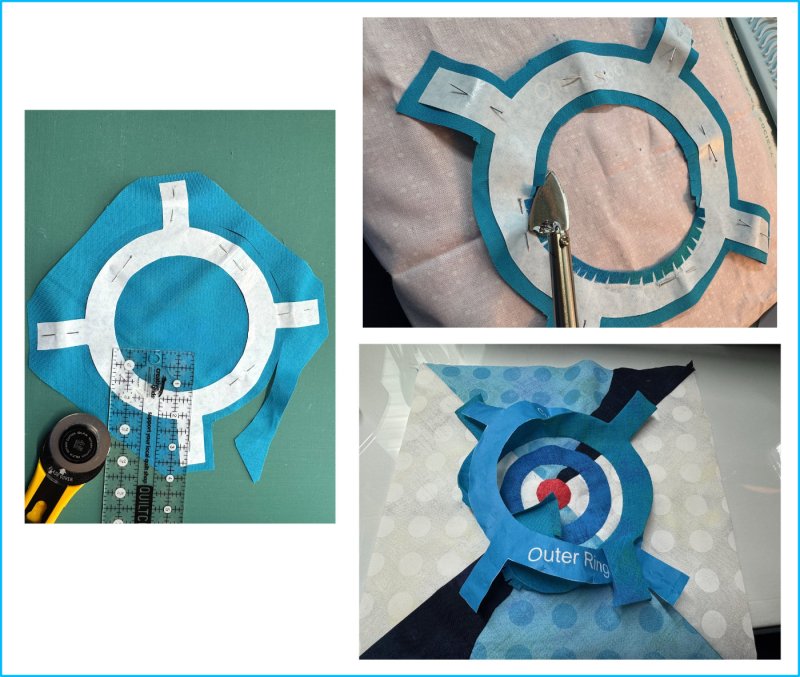
She has you use a long pin as your handle, and then using the shiny side of freezer paper, you ease up the fabric, ironing to make it stick (Iink is below) I usually do the gather-stitch around the outside, and then slip in a plastic circle and press, with some spray starch. That just did not work on these little orbs:

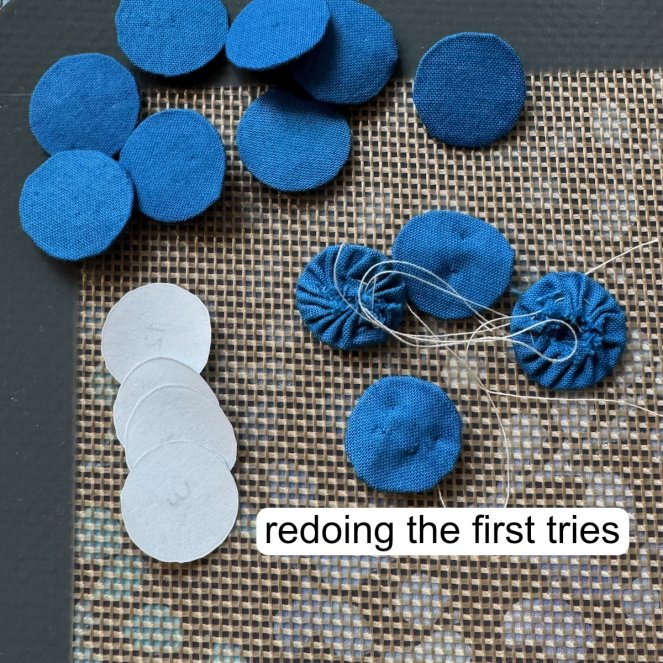
You can see how over-full they are. The first try with this, it took me about five minutes and the circle was a bit of a mess. But after about 7 or 8 tries, they were nice and round, so I re-did the gather-circles.

Here’s my one-minute video and I hope inserting the video works! (I’m trying something new.) I know there is a little bump on the circle’s outside, but when I appliqué that, I can ease it in with my needle.

Here’s Sharon’s version of making circles. And she also has a version for the petal shapes, too, found on her page of Appliqué Video Tutorials.

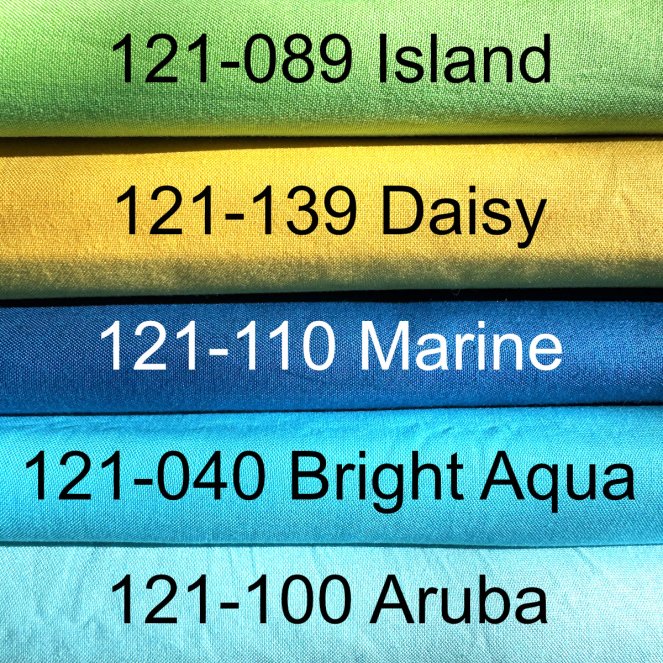
I use Painter’s Palette Solids, purchased from here. This has been my go-to color scheme for years, ever since this quilt, but I was happy to see that it also drew on the stained-glass windows from Krakòw.

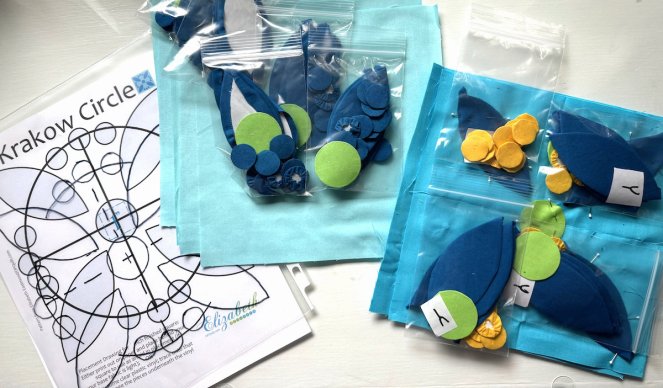
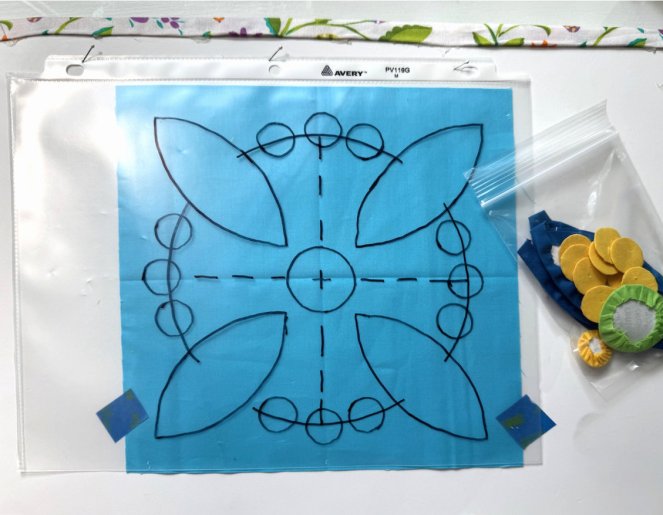
I bagged the pieces for the blocks, so I wouldn’t get lost.

I made a placement guide for the block, which is included in the pattern. I also added a print-a-ton-of-circles-at-once page, at the end.

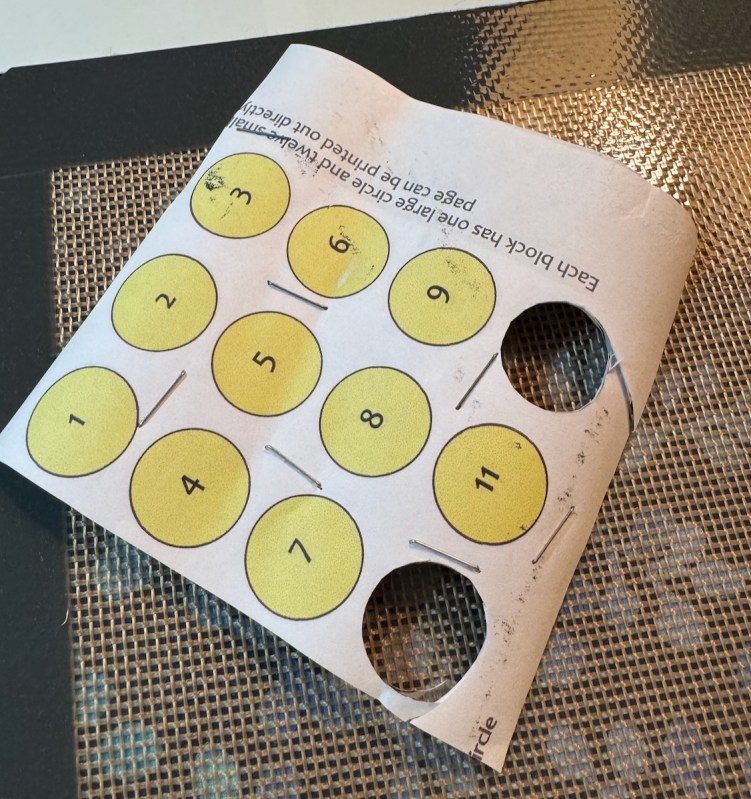
I printed that page onto freezer paper, the how-to shown on this post. Sometimes, I chunked the 12 circle sections together, layered them up carefully, stapled the pages together, and then cut them out.

I also folded the freezer paper into smaller pieces, layering it up, then traced on a petal. Staple the layers so they won’t shift, as shown.

In the pattern, I give the tips for tracing the placement guide, and here, I’ve slipped the block underneath, taping it into place. (The placement guide is pinned to a board, but you could also tape it to a workspace.)

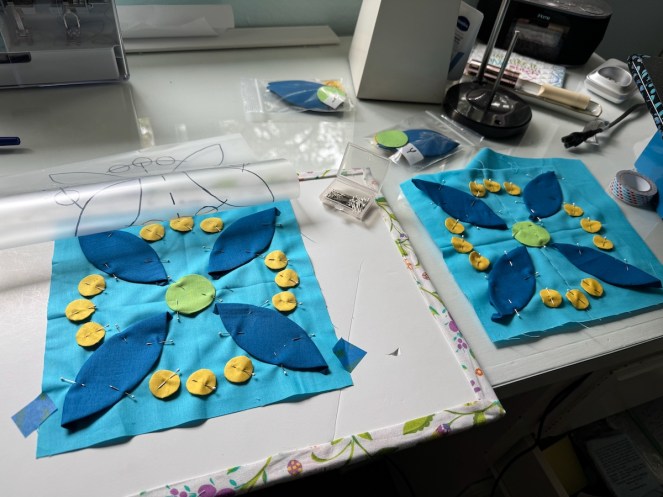
One all pinned into place, and another ready to come off the pinboard.

I was listening to a book, so I can’t tell you how long it took me to appliquè these all in place (maybe 90 minutes?) but it didn’t feel tedious, as the circles had been prepared.

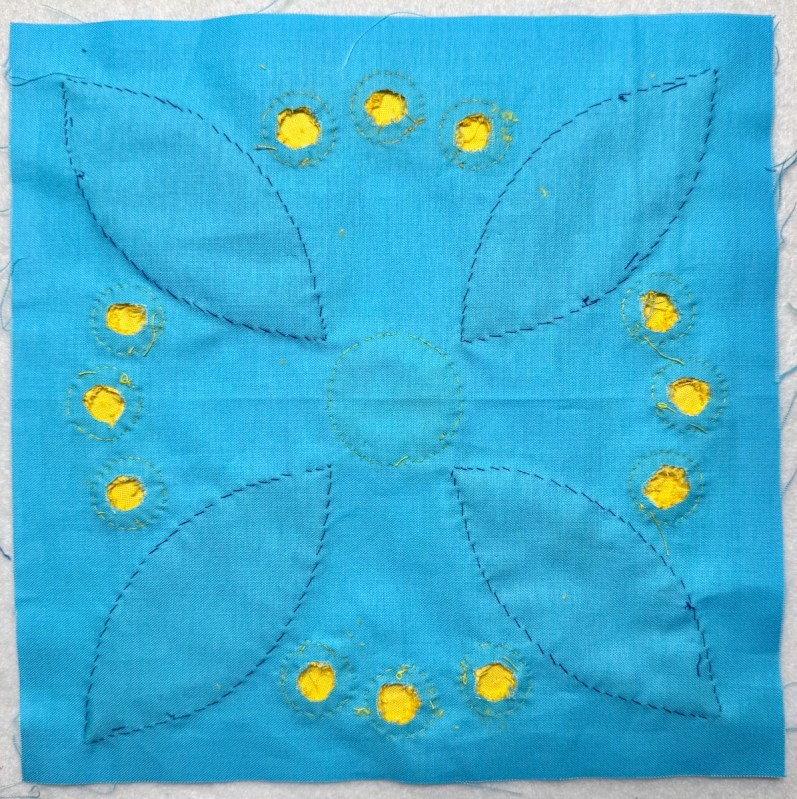
I flipped over the block when I was finished, and cut out a small circle from the back — and slipped the paper out. Sharon Keightley suggests that cutting it out in a circle (instead of just cutting a slash) will keep the quilt back more intact.

I slipped out the freezer paper from the larger pieces as I appliquéd them.

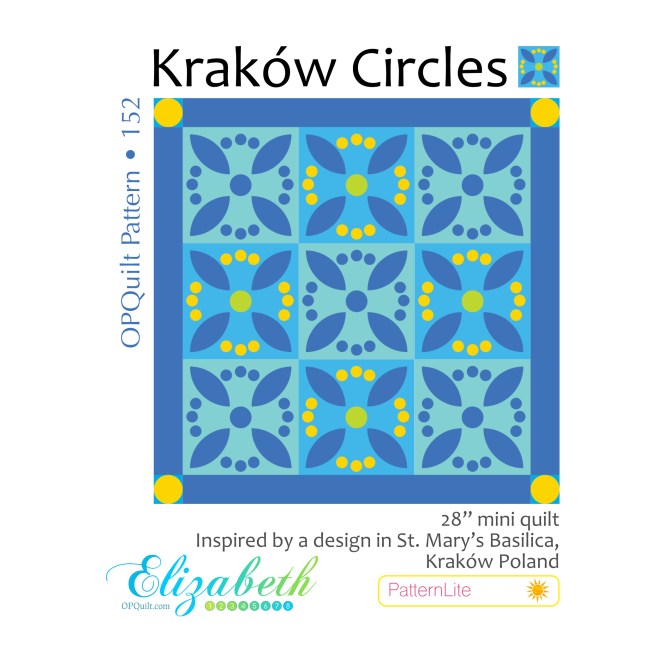
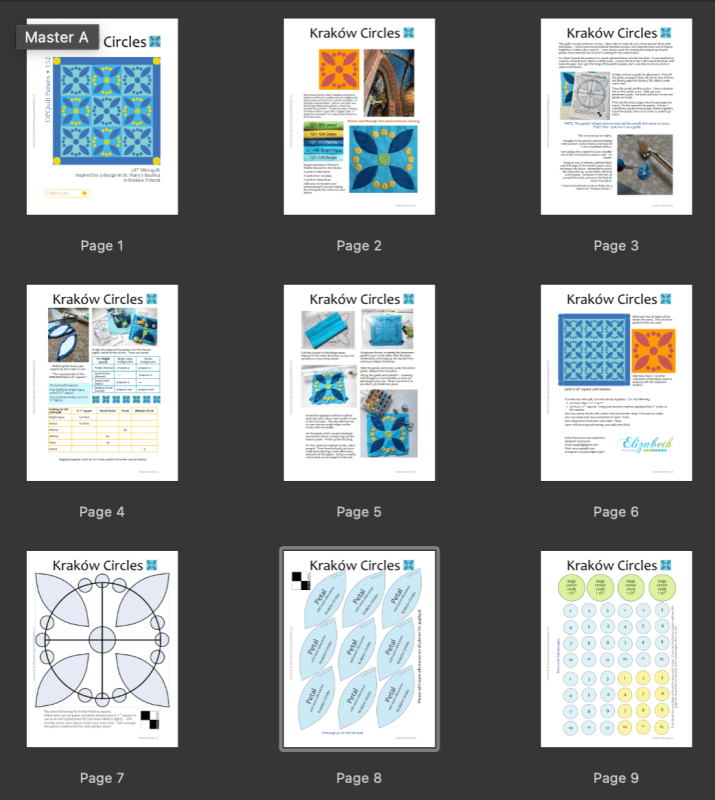
Here’s the thumbnail of the pattern: it grew from 3 pages to nine. However, I’ve still priced it as a PatternLite — less than a slice of pizza, a pot of basil from Trader Joe’s (ask me how I know), or a Kouign Amann pastry from a bakery in Kraków.

If you like to make circles, here you go–

Pattern can be purchased in my PayHip Pattern Shop. If you have the introductory version, this one may be more helpful.

Other related posts:

Quilting and the Churches of Kraków

When You Can’t Create You Can Work

Appliqué

Appliqué

I just made a little video about machine appliqué that you can find on YouTube (click above image to watch). It’s not glamorous, I’m not an expert, but most of the important technique about how I do machine appliqué is there in my few minutes of total glory. (haha) While I was making it, I was thinking about gathering all my thoughts about appliqué..so I did.

TIPS & TRICKS

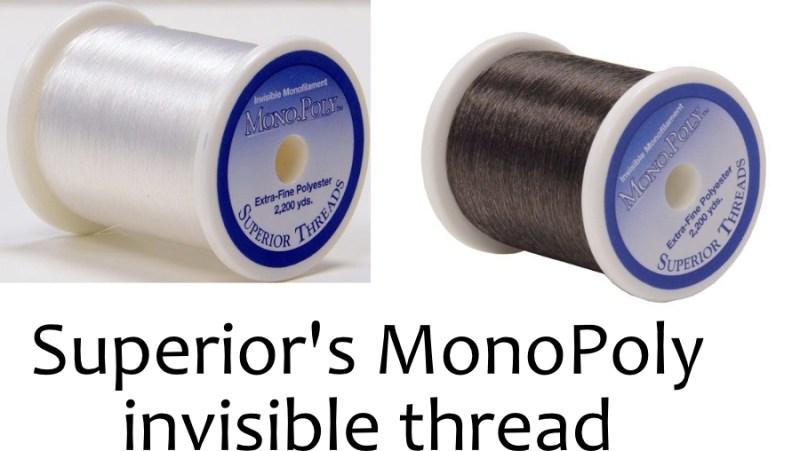
I use MonoPoly as the top thread. I use both their Clear and their Smoke, depending on what colors of fabrics I’m working with. The smoke (as their website says) is a reduced sheen invisible thread.

I use SoFine polyester thread (also from Superior) in the bobbin, and a very fine needle — size 12 is preferred.

Slow down your sewing machine speed if you can.

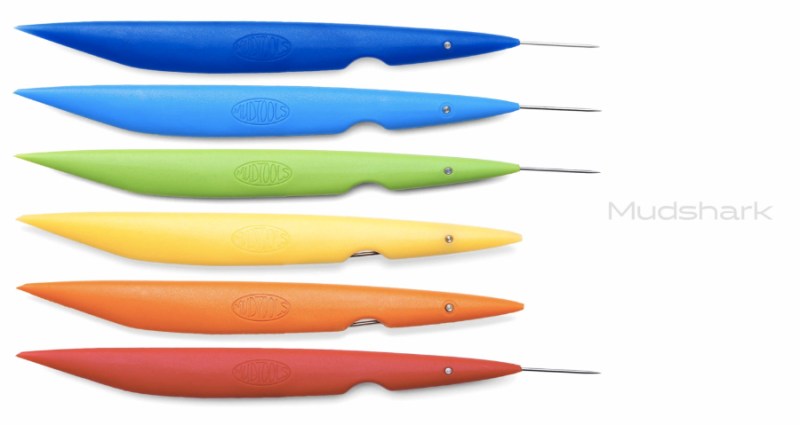
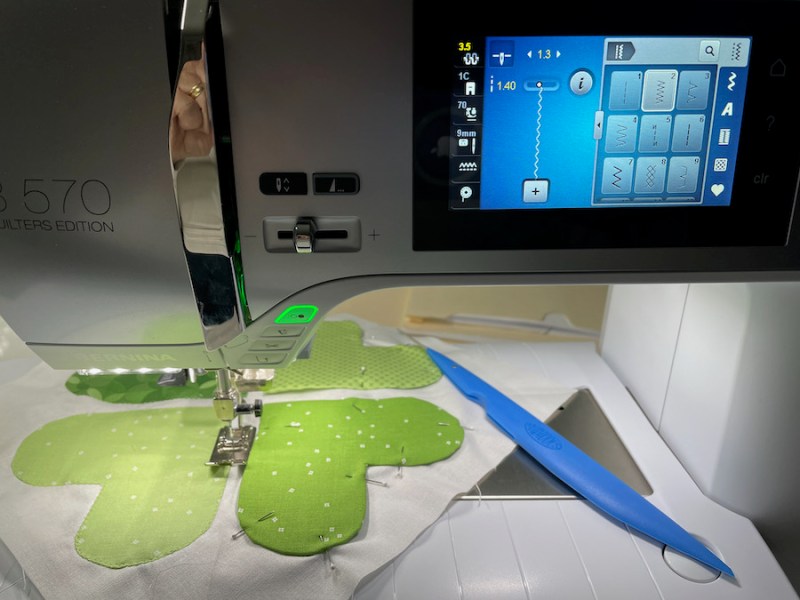
This clay tool, Mudshark from Mudtools, is one of my favorite stiletto tools for working with machine appliqué. It’s easier for me to hold and the tip is quite long. I also just like the colors. I bought it in the Smithsonian Museum after seeing an exhibit about Michael Sherrill. I figured if he used it and got such beautiful work, then I was going to lean in on his skills and start using it myself.

Stitch settings:
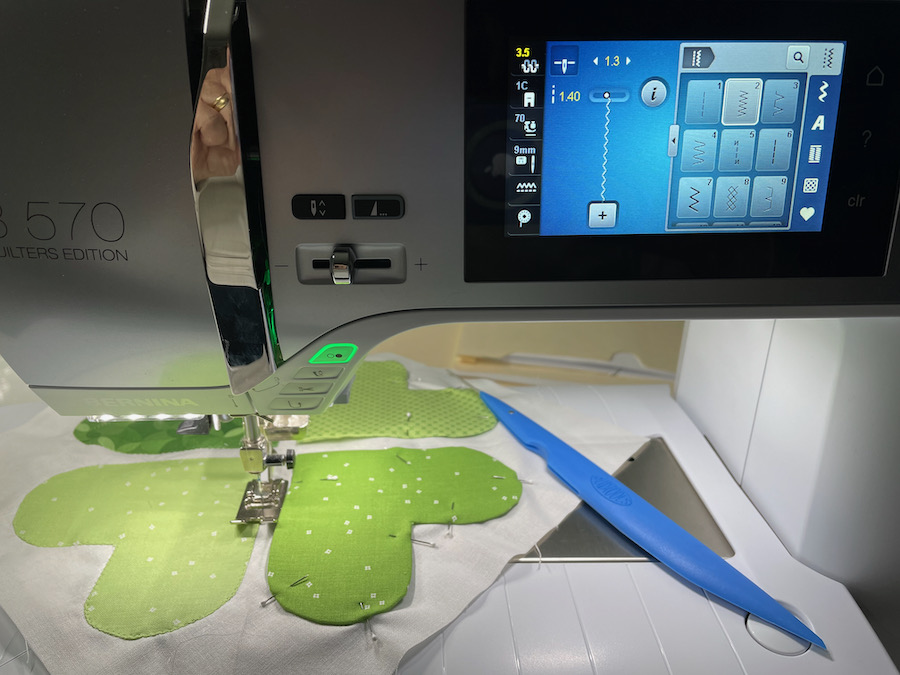
Length 1.4, width 1.3
The zig-zag should just catch one side of the folded appliqué piece (green) and then the (white) background:

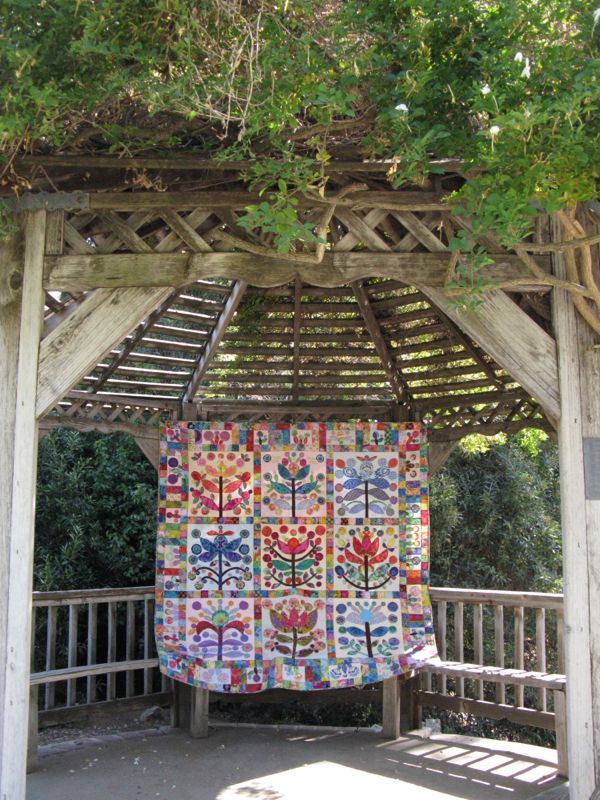
This quilt was done with all machine appliqué, and was mentioned in my video.

PREPPING THE APPLIQUÉ

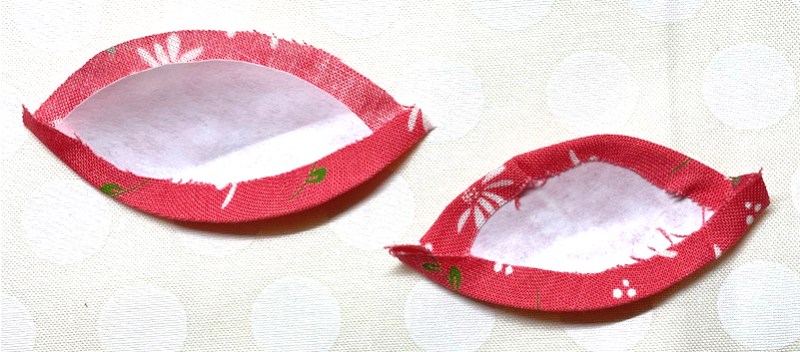
I cut all my shapes to the finished size, then cut the fabric 3/16″ (a fat one-quarter inch) bigger all the way around. I use the freezer paper shiny-side up, and with a hot iron, “adhere” the seam allowances to the waxy side of the paper while moving my iron in an arc-like motion.

Folding edges in freezer-type paper with shiny side down, from @jillilystudio on Instagram. She uses spray starch.

(NOTE: I don’t always wash my wallhangings, so don’t like a lot of glue and starch on them, but for Useable Quilts, she has some great ideas.)

HAND APPLIQUÉ

The only thing I have to offer up about hand appliqué is to think of the folded edge of the appliqué as the frosting inside a macaron, the background being the lower cookie layer and the appliqué itself being the top. Try to bring your needle out of the frosting, then poke it back down in the background just below. Run the needle for about 3/16″ (fat one-quarter-inch) underneath the background, then bring it back out through the frosting (the fold of the appliqué piece). There are many more talented people out there who can explain it better than I, but that’s how I think about it. (I know Jill Finley has a one-hour class on appliqué on her website if you are interested.)

LINKS

How I make my circles (about halfway down the post)

Sewing down the small pointed corners, from @jillilystudio on Instagram

Sewing down small pointed corners, from Becky Goldsmith (and another)

Four Yorkshiremen skit from Monty Python (just to see if you are still reading)

300 Quilts · Affinity Tutorial · Appliqué

Wrapping Up the Leftovers • Affinity Tutorial

Far Away Doors, Quilt Number 216 • Merrion Square Pattern

Do you ever finish a quilt, but not quite finish it? Like forget the label? Or find scraps that needed to be put away from a quilt that is two years old? Or do you have tasks that still await you even as you transfer them from list to list to list? Or do you add tasks to your list of things to get done? Or do you feel like you spend so much time working off your list that you have no time to think, to create, to play, to imagine?

Signature Blocks: lost, then found, then lost again, and now found once more!

All of these are types of things that plague creatives, as we are known now. The list is endless, and we can keep adding to it. I was quite intrigued, then, with Mark McGuiness’s solution: a 3″ x 3″ Post-It Note. Actually, he uses two of them. On the first one — as outlined in this article from 99U — he writes one main task in the upper left corner, and then adds the rest of the day’s chores to the Post-It Note. Since it is only 3″ by 3″ it can’t get overrun. McGuiness writes: “But what about all the rest? All the phone calls, emails, and requests that come in during the day? Not to mention all the new ideas that pop into my head as I work? Good question. There’s a place for all of these things, and that place is the second Post-It on the stack, a.k.a. my to-do list for tomorrow.”

He then quotes Mark Forster, noting the idea of an “open” and “closed” list. The first Post-It Note is closed. The second one, is open.

Signature blocks sewn together, then pinned onto the back of the quilt

Here are some of the things I did this week that were on my list, putting together disparate parts of my life. I made this quilt with the help of the Gridster Bee, but had misplaced the signature blocks. And then when I would find the signature blocks, I couldn’t remember which quilt they went to. But we put a new shelf in our closet to hold the stack of quilts, and in the shuffling, I was able to put the two together.

I did the bulk of the little houses on the front of the quilt, but it’s fun to look at all the different houses my bee-mates and others sent to me. I often keep my quilts hanging up around my house, because I enjoy them finished.

That is something that Janet Choi might appreciate: “The simple act of pausing to reflect and acknowledge your efforts provides valuable boosts of motivation, focus, and insight that would otherwise be lost amidst your busy day.” It’s like the other side of the To Do List…it’s the Done List.

“Your done list acts as a signpost, a manifestation of all that day’s hard work. This flips an overwhelmed mindset into action mode to correct course, learn from mistakes, and ultimately make better progress” (Choi).

I tend to write my “Dones” at the end of the day in my journal, made for me by Amy, an artisan book maker. I was in a workshop of hers at Camp Create, and she made me this. It’s a treasure, but not only for what it is: it holds a lot of my Dones, but I also like reading backwards to find out what I thought about things a year ago, or even a month. Although I don’t write every day, I write enough that there is a general trend.

I also write my Quilt Dones up on my master Quilt Index at the top of this page, cataloging them on this blog, and then listing them one by one. I know several of you have started a Quilt Index of your own, judging by my emails.

Choi says to count our smaller wins, too: “Don’t wait until you’ve hit big goals like completing a project or getting a promotion — which happen only occasionally and make it difficult to appreciate small but important advancements. Don’t dismiss all the smaller things that fill out your days and are building up in the long run.”

Which brings me to this: the little rotary cutter in the illustration above. I was making images for my new workshop, Blossom, and I always like to have a visual header as to what is going on in the paragraph where it links to the instructional video, and gives tips. I had the scissors in my digital image file, but when I went hunting for a rotary cutter, I thought: I could make my own. So I did. I have the how-to’s below for those of you who are so inclined (including a video!), but for the rest of you, I leave you with this: I hope you will now not only consider not only a To-Do List, but also a Done List. Isn’t that why we started quilting in the first place? To have things stay done?

Happy Quilting!

How to Make a Digital Rotary Cutter in Affinity Designer, by a Verified Amateur.

  1. Start the program. Open an artboard. If that already feels like a foreign language, an artboard is basically just a big scratch pad. I can open multiple artboards in one file and save them all under one name. So I can have a scratchpad for rotary cutter, a scratchpad for a quilt block, etc.
  2. Open Affinity Designer, click on “New.” A screen will show up with lots of sizes to choose from. I usually go with 9 x 11 as I can always resize it, but it fits on my laptop screen neatly. I choose “inches” not pixels from the set-up screen and I like mine sideways, so I click on Landscape. Don’t forget to click “Create Artboard.”

3. And then I realized I would be writing a book, so instead, I made a video.

And then I uploaded the video to YouTube, where you can watch it. (And I do not know why the full-screen version is blurry. Working on that.)

It runs about six minutes, if you have that much time. Of course, it took me three Google searches to figure out how to record from screen (pretty nifty, once you learn it), then I uploaded into iMovie so I could cut off the end where I keep saying, “How do I stop recording this?” over and over all the while critiquing my voice. I then uploaded titles on the front and back and even a little Title Card saying Thank You For Watching. Yes, sirree. I’m a rank amateur trying to act professional.

But there you go. Obviously I should have majored in graphic design in college, but that was some years ago when it was Photoshop Version 1.0. (Now, I’ve left Adobe behind and moved over to Affinity where there are NO monthly subscription fees. I’m just saying.)

Illustration from Newest Project…coming in October

I’m most excited about how Affinity Designer now has a gazadget that will let me automatically draw quarter-inch seam allowances around any shape I make (called a Contour Tool). So, so happy with this!

Happy Drawing! Happy Quilting!