I recently had two birthdays to celebrate, that are near each other in the calendar. I cut up my precious Frida Kahlo canvas fabric (made by Alexander Henry), yielding two bags from one yard.
So I wrote a little tutorial, for everyone should know how to make a bag out of fabric. Hope this helps.

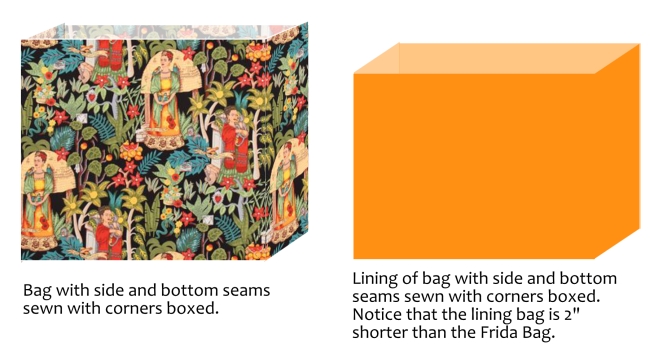
Do the same cutting with your chosen lining, trimming 2″ off the upper edge of the lining, as you want the lining to be slightly shorter than your Frida fabric.
Keeping Frida on her feet, seam the selvage sides Right Sides Together (RST), and then sew across the bottom.
Sew the lining bag sides, then across the bottom seam BUT LEAVE A 7″ OPENING IN THAT SEAM at the bottom of the bag. You’ll need an opening later in this construction process, and leaving the bottom seam with a gap will later allow you to turn the bag.

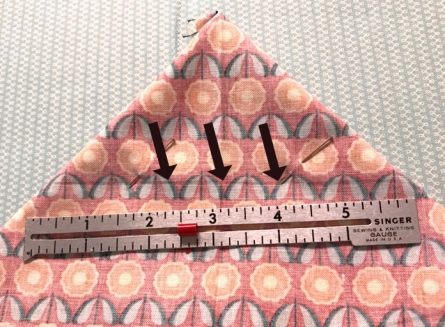
To make the bag have a flat bottom, you’ll line up the bottom seam with the side seam (where there wasn’t a seam, I pressed the side edge with my iron). When you get them lined up, pin. I went for a six-inch bag bottom, so I lined up the middle of my ruler along the seam, and drew a line.

You can see the faint pencil line here, on the lining. This is from the folded side of the bag, and you can see the ironed crease in the side, heading up to the point.

Stitch along that line, then 1/4″ away from that line, into the peaked corner.

Cut off the excess, leaving 1/4″ seam allowance.


Matching the edges, stitch around the top of the bag using a 1/2″ seam. Turn inside out through opening on bottom. Line up the bottoms of the bag and lining, allowing the Frida fabric to roll over into the inside:

I pressed the seam towards the lining fabric, into the bag.

Stitch in the ditch, just above the fold of the lining, using thread that matches the Frida fabric.

Stitch the opening in the lining bottom closed, by topstitching the two edges together. It can also be done by hand with tiny stitches.

Time for handles. On the front of the bag, find the center (matching up sides). Mark with a pin. Each bag handle is placed 3-1/2″ from the center.
How long to cut the webbing? It depends on your use and how tall you are. I wanted these to go over my shoulder, yet stay off the ground when using the handles to carry, so after pinning it at different heights to try it out, I finally cut two pieces of webbing 27-1/2″ each.
Pin them to the bag, making sure each handle stays on the same side of the outside. In other words, don’t attach one end to one side of the bag and one end to the other. The bag handles should be attached the same side of your bag (otherwise it won’t open widely).
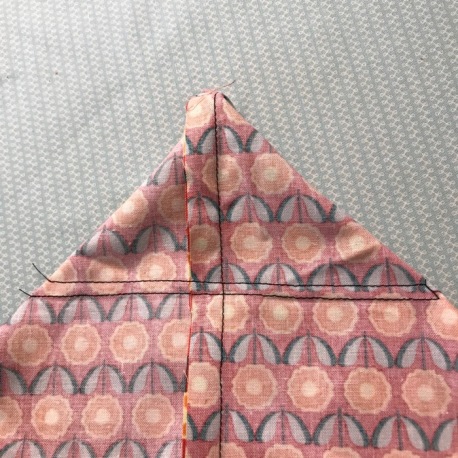
I placed the handles lower than the top edge of the bag, leaving an inch free. I then sewed them down with a cross-in-a-box design:


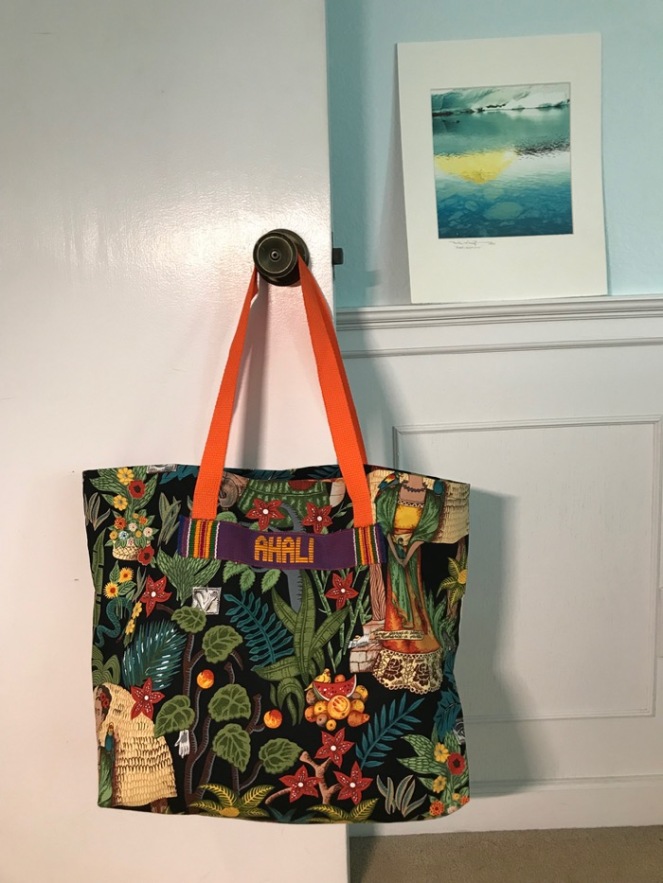
Done! I marked one side of the bag, so the user can find the “front” easily. One has Frida’s Garden selvage label (shown above).

The other one has a woven ribbon that says Ahali, which means “family relations.” (It’s for my sister.)
Now you have a quick tote, that is perfect for everyting, and because it’s lined, it’s sturdy and looks neat. It took me a couple of hours from first cut, to this photo, for both bags, but having done this multiple times, I’m kind of fast at this sort of thing. My grocery sack tutorial is a similar bag, but unlined. That site has a downloadable instruction page, if that works better for you.
![]()
I wanted to close out this post with a couple of photos from two women who attended my workshops. It’s always a delight to see how others interpret the pattern. If you have made one of my patterns, don’t hesitate to send me an photo! You can also tag me on Instagram: @occasionapiecequilt.


Discover more from OccasionalPiece--Quilt!
Subscribe to get the latest posts sent to your email.

Love the bags and yes, you ARE a whiz at this!!! And like you, I always find it so fun to see how others interpret a pattern, these 2 being no exception.
You must know I am crazy about that fabric. I like the technique of making the lining a bit smaller. Really makes for a nice finish.
Great tutorial, Elizabeth, and you can’t go wrong with an Alexander Henry fabric. That is fabulous.
Cute quilts from your students too.
Love your bags. The fabric is fantastic. I don’t know why I don’t make more things like this . . . it would such a great way to use some of my fabrics up too. Thanks for the tutorial and inspiration.
As the recipient of one of the bags (and a HUGE Frida fan), let me just say thank you again for this treasure! It’s my favorite tote, both because of the awesome Frida fabric and because of the size and sturdiness. I want to try making some of these for friends and family. Thanks for sharing your instructions!
Lovely fabric. I love that bag. Thanks for the tutorial.
Great tutorial as usual Elizabeth! That Frida fabric makes a wonderful, stylish bag!
Your bag is gorgeous – stunning fabrics 🙂
I love both your bag and your houses!
Such a nice bag tutorial! I’d make one… if I needed another tote! Honestly, how many totes does a quilter need?! 🙂 Maybe someday I’ll wear one out and have a great excuse for making this one. Thanks for sharing.
Thanks so much for your bag tutorials!
Amazing!