Totes and Purses

Frida Kahlo Tote Bag Tutorial

Frida Bag_1

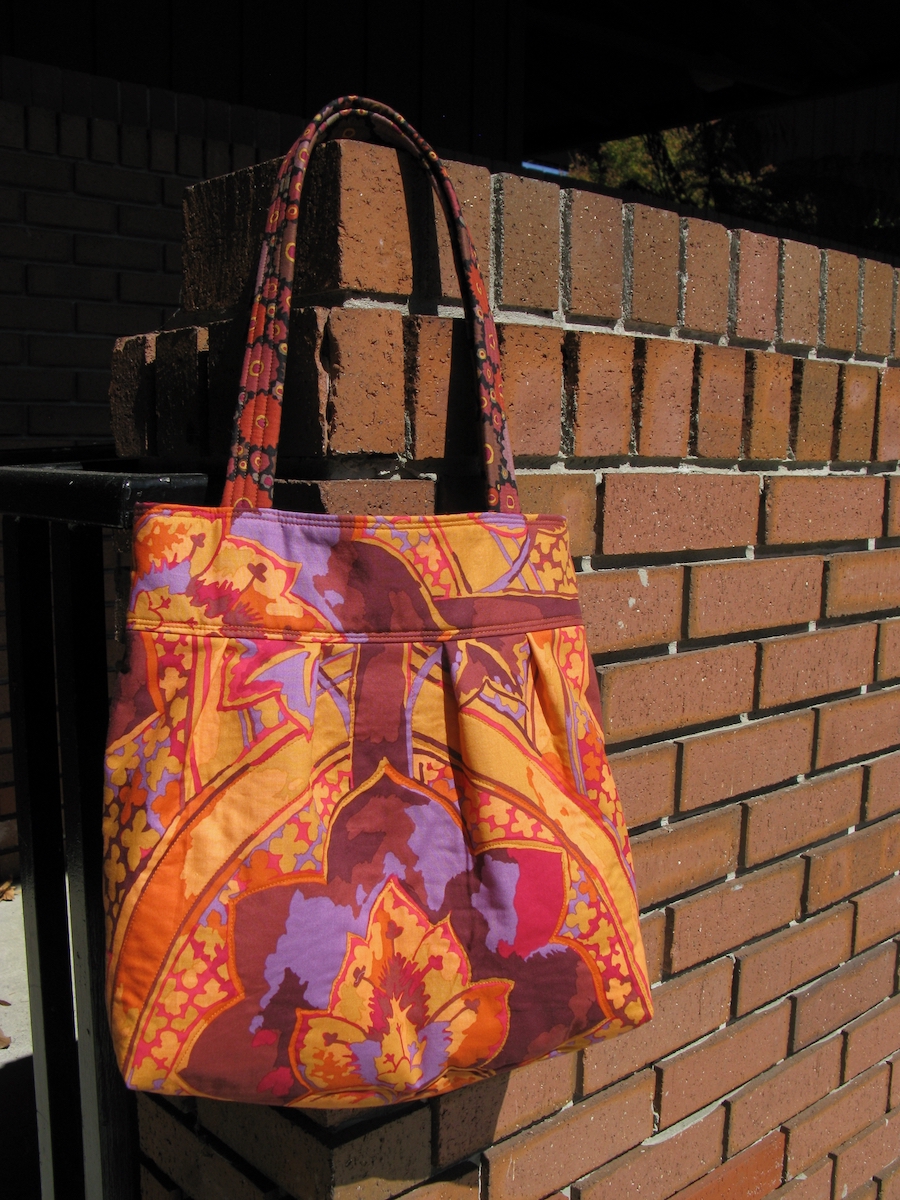
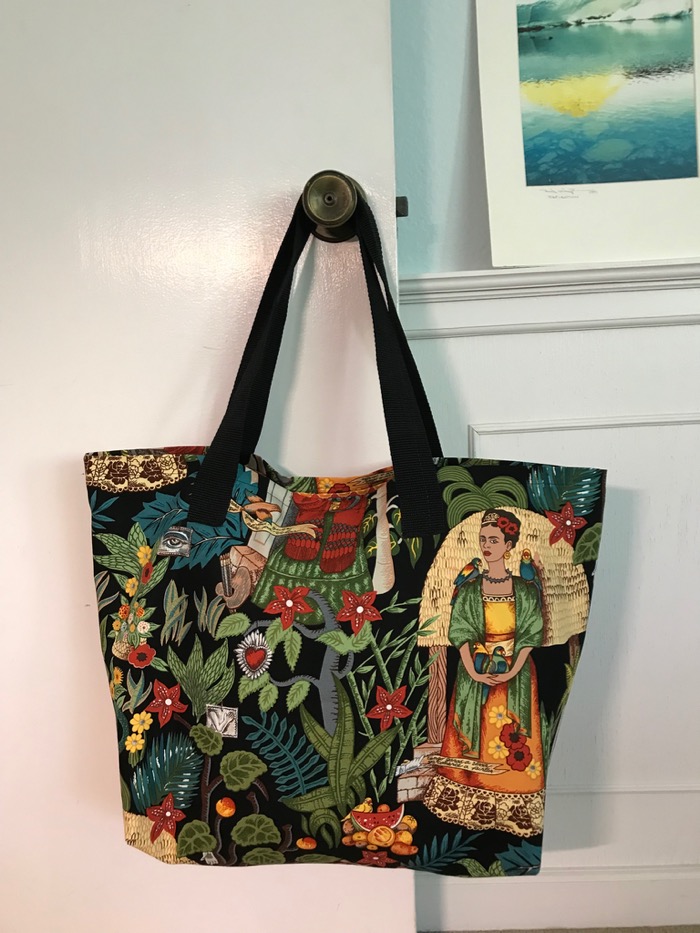
I recently had two birthdays to celebrate, that are near each other in the calendar.  I cut up my precious Frida Kahlo canvas fabric (made by Alexander Henry), yielding two bags from one yard.

So I wrote a little tutorial, for everyone should know how to make a bag out of fabric.  Hope this helps.

Frida Bag_Fabric Cutting

Do the same cutting with your chosen lining, trimming 2″ off the upper edge of the lining, as you want the lining to be slightly shorter than your Frida fabric.

Keeping Frida on her feet, seam the selvage sides Right Sides Together (RST), and then sew across the bottom.

Sew the lining bag sides, then across the bottom seam BUT LEAVE A 7″ OPENING IN THAT SEAM at the bottom of the bag.  You’ll need an opening later in this construction process, and leaving the bottom seam with a gap will later allow you to turn the bag.

Frida Bag_2

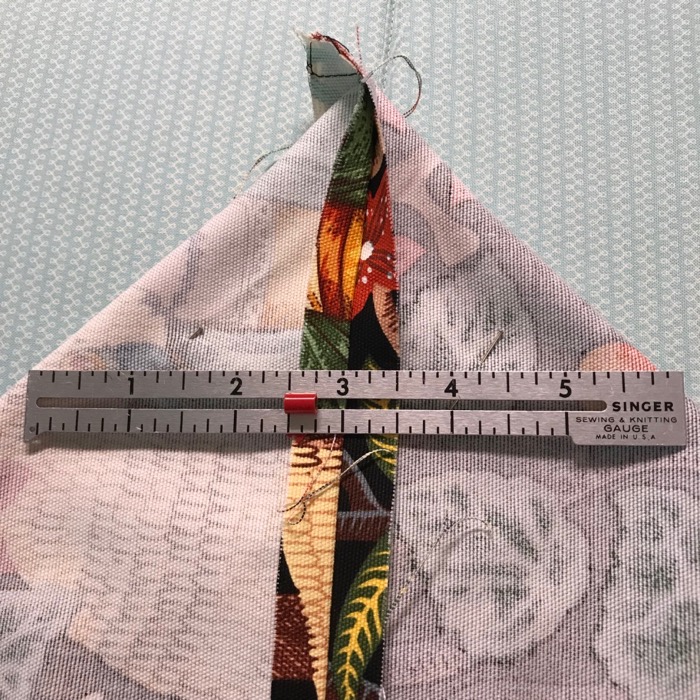
To make the bag have a flat bottom, you’ll line up the bottom seam with the side seam (where there wasn’t a seam, I pressed the side edge with my iron).  When you get them lined up, pin.  I went for a six-inch bag bottom, so I lined up the middle of my ruler along the seam, and drew a line.

Frida Bag_2a

You can see the faint pencil line here, on the lining. This is from the folded side of the bag, and you can see the ironed crease in the side, heading up to the point.

Frida Bag_2b

Stitch along that line, then 1/4″ away from that line, into the peaked corner.

Frida Bag_2c

Cut off the excess, leaving 1/4″ seam allowance.

Frida Bag Illus_2

Frida Bag Illus_2a

Frida Bag Illus_3

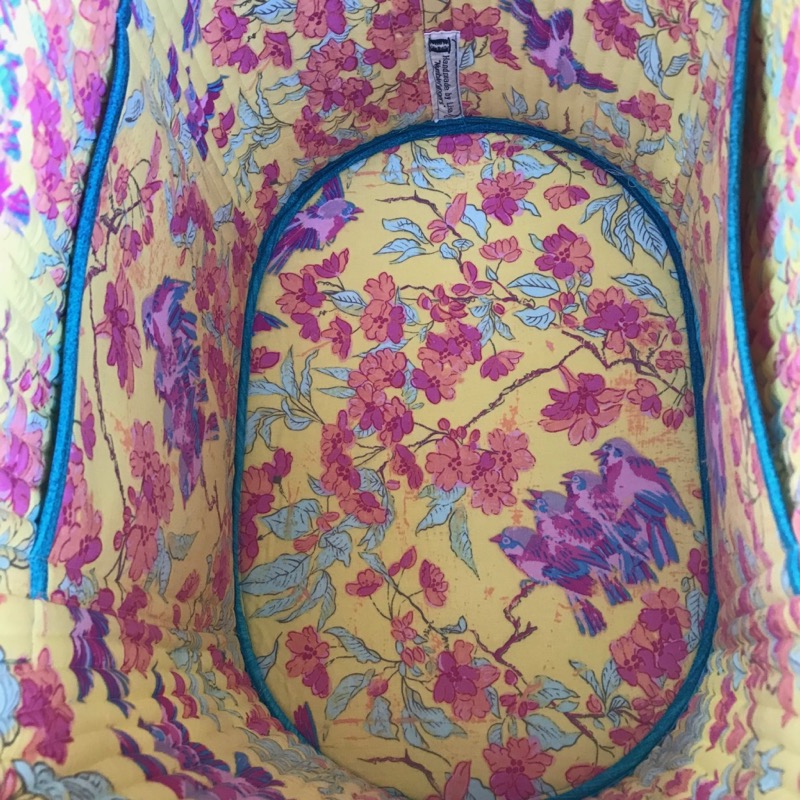
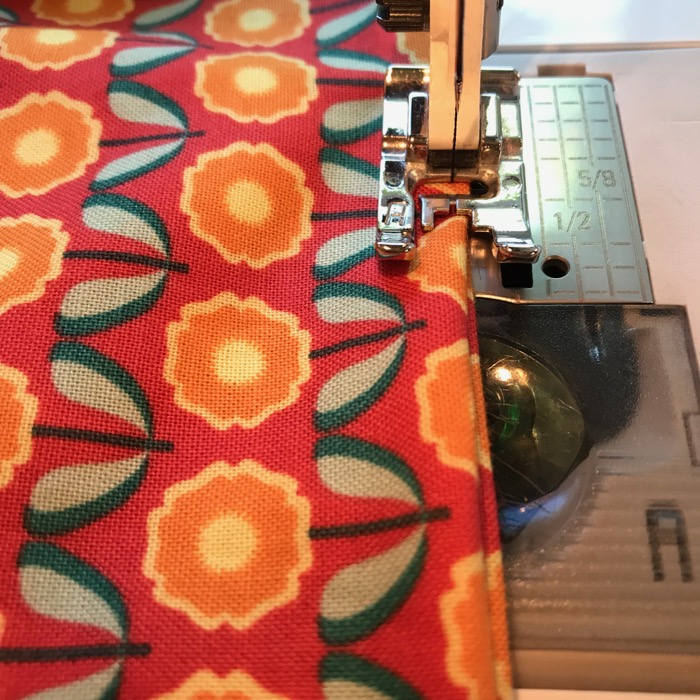
Matching the edges, stitch around the top of the bag using a 1/2″ seam.  Turn inside out through opening on bottom.  Line up the bottoms of the bag and lining, allowing the Frida fabric to roll over into the inside:

Frida Bag_3

I pressed the seam towards the lining fabric, into the bag.

Frida Bag_3a

Stitch in the ditch, just above the fold of the lining, using thread that matches the Frida fabric.

Frida Bag_3b

Stitch the opening in the lining bottom closed, by topstitching the two edges together.  It can also be done by hand with tiny stitches.

Frida Bag_4

Time for handles.  On the front of the bag, find the center (matching up sides).  Mark with a pin.  Each bag handle is placed 3-1/2″ from the center.

How long to cut the webbing?  It depends on your use and how tall you are.  I wanted these to go over my shoulder, yet stay off the ground when using the handles to carry, so after pinning it at different heights to try it out, I finally cut two pieces of webbing 27-1/2″ each.

Pin them to the bag, making sure each handle stays on the same side of the outside.  In other words, don’t attach one end to one side of the bag and one end to the other.  The bag handles should be attached the same side of your bag (otherwise it won’t open widely).

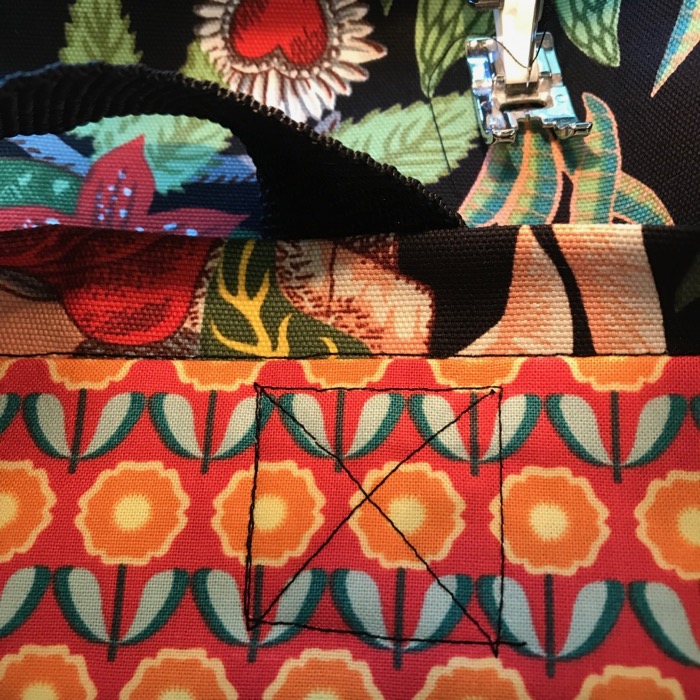
I placed the handles lower than the top edge of the bag, leaving an inch free.  I then sewed them down with a cross-in-a-box design:

Frida Bag_4a
Back, showing the stitching pattern for handles.

Frida Bag_5

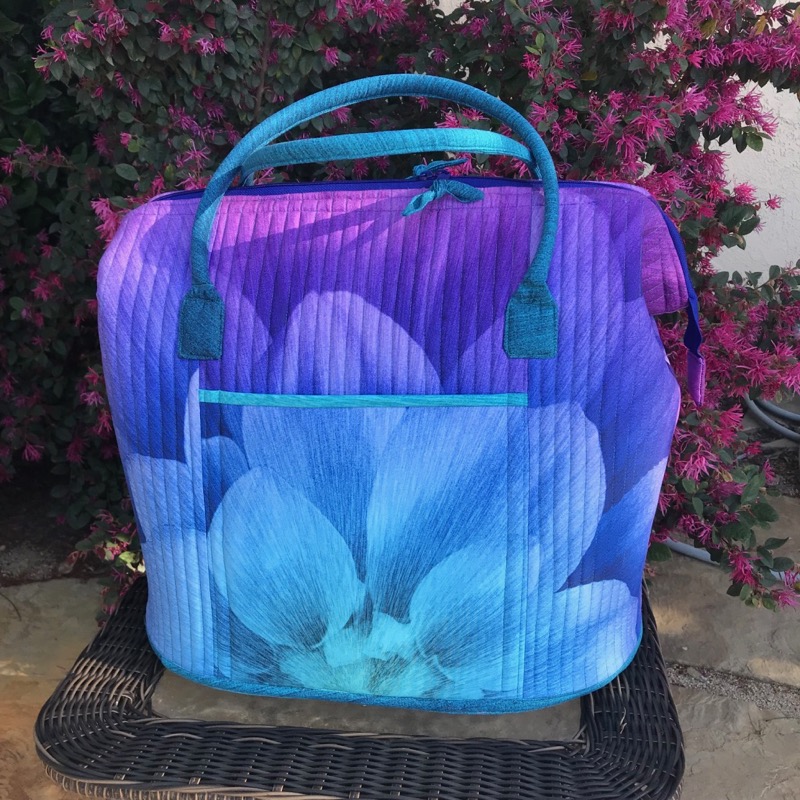
Done!  I marked one side of the bag, so the user can find the “front” easily.  One has Frida’s Garden selvage label (shown above).

Frida Bag

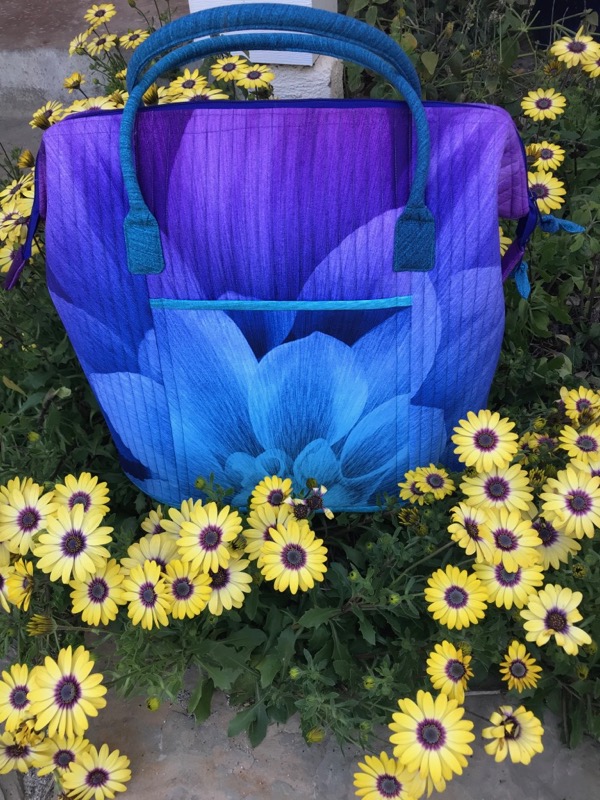
The other one has a woven ribbon that says Ahali, which means “family relations.” (It’s for my sister.)

Now you have a quick tote, that is perfect for everyting, and because it’s lined, it’s sturdy and looks neat.  It took me a couple of hours from first cut, to this photo, for both bags, but having done this multiple times, I’m kind of fast at this sort of thing.  My grocery sack tutorial is a similar bag, but unlined. That site has a downloadable instruction page, if that works better for you.

tiny-nine-patches

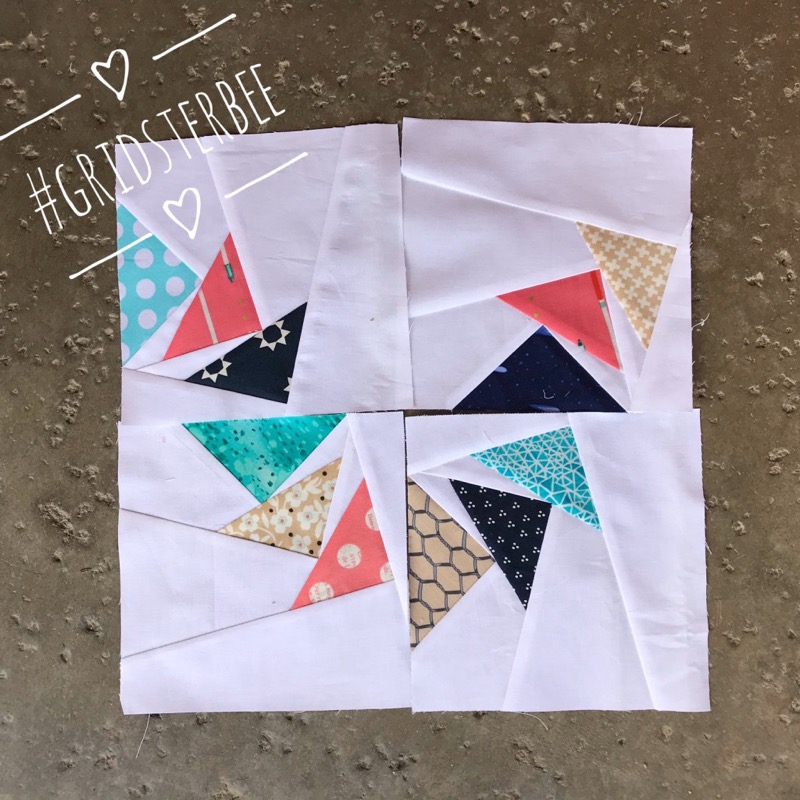
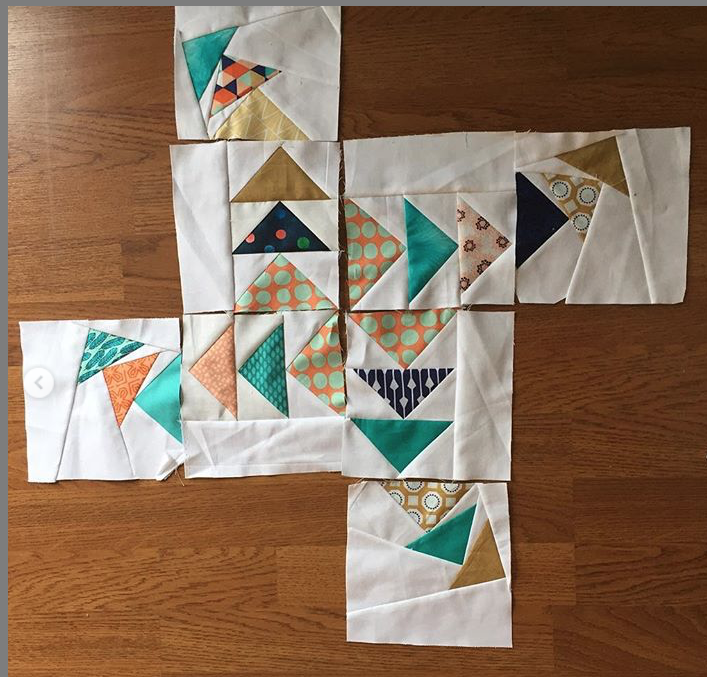
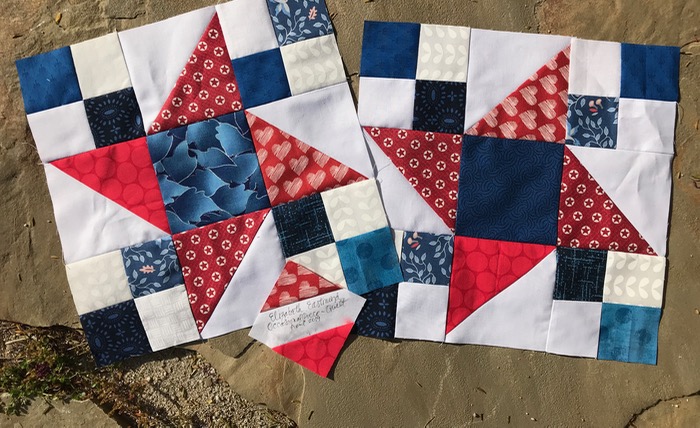
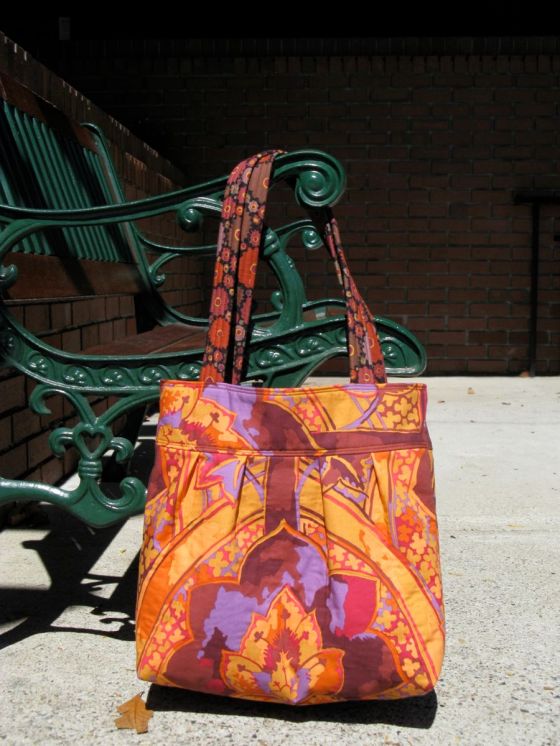
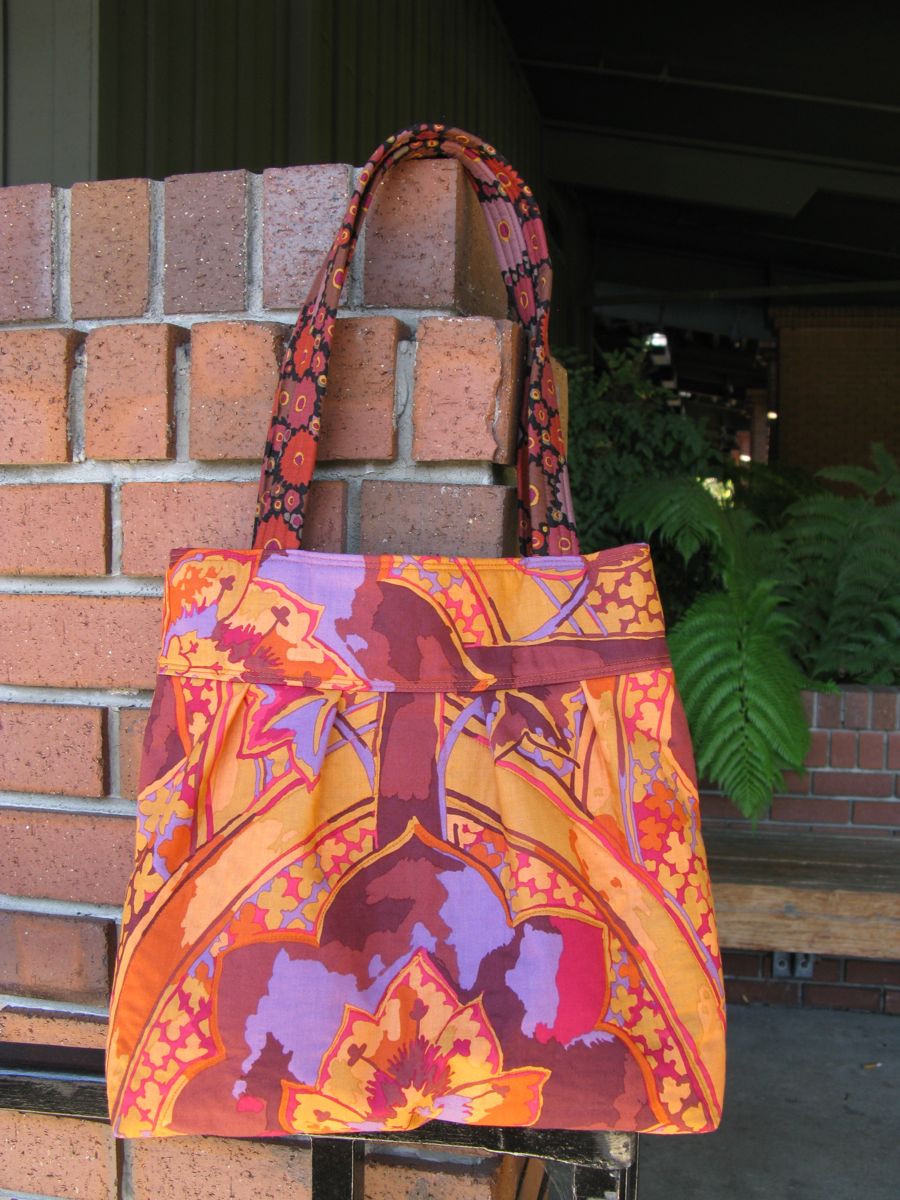
I wanted to close out this post with a couple of photos from two women who attended my workshops.  It’s always a delight to see how others interpret the pattern.  If you have made one of my patterns, don’t hesitate to send me an photo!  You can also tag me on Instagram: @occasionapiecequilt.

Sheri MSquare
Merrion Square, version by Sheri
Charlotte HomeSHome
Home, Sweet Home, version by Charlotte


300 Quilts · Gridsters · Travels · Trunk Show

Bee Blocks, Etc. * March and April *

Bee Blocks, yes.  But first:

Dream Big Bag_2

I recently asked Lisa to make me a tote bag out of a Dream Big panel by Hoffman.  I ordered everything, and the bag turned out to be a good size, one that could hold a queen sized quilt, perfect for taking along binding projects. Dream Big Bag_1

I chose a summery floral for the inside (I like bright colors inside my purses/bags, so I can find things).

Dream Big Bag

Beauty shot in the flowers by the front door.  Thank you Lisa, I love it!

March_2019 Gridsters

Now, here are my bee blocks for the Gridster Bee. Here are March’s blocks, requested by Marsha @quilterinmotion on Instagram.  We used this pattern, and it worked up quickly.

March_2019a Gridsters

If you decide to make these, I’d suggest switching up the order–put #9 on first, then #8.  It’s a sturdier constuction that way.

March_2019b Gridsters.png

But here’s the cool thing: her center will be four “straight” Flying Geese blocks, with our curvy ones being added to it, for lots of motion in her quilt.

April 2019_Gridsters Bee

Nancy who blogs at Patchwork Breeze, and is on Instagram @patchworkbreeze, asked for a patriotic block for a summer quilt.  I guess it’s not too early to get started on the  red, white, and blue, a good reminder to work ahead of the seasons and celebrations (anyone for Halloween quilts?  Christmas?).

Finally, I decided to tally up what I accomplished last year, in terms of completed quilts.  If you remember (or are hoping to forget), it was the Year of Frivols.  So here’s the totals:

• Twelve Frivols
• Three Mini-quilts
• One Baby quilt
• One Small quilt
• Two large quilts
• One large quilt that will show up in Fall 2019 Simpy Moderne

Number Twenty

And for 2019? It’s hard right now because while I can sew the tops, I can’t quilt them myself.  Quilts are only being finished when I can send them out.  But here’s the list of projects so far:

•  Plitvice (finished)
•  Chuck Nohara quilt (binding being sewn on as we speak)
• Nameless other large quilt, being kept under wraps/headed for publication
• Home-keeping Hearts (top only at this point)
• Merrion Square–there are three of these small quilt tops in circulation, and are samples at guilds where I’ll be speaking
• Basket quilt is still on the design wall, as I audition borders.

When I finish them, I’ll catalogue them, above, on the 300 Quilts list.

Speaking Teaching Events
Meet the Teacher for the Southern California Council of Quilt Guilds
Utah Valley Quilt Guild, Utah–Trunk Show and Day-long workshop
Valley of the Mist Quilt Guild, Temecula, CA–Trunk Show and Day-long workshop

If you are in Utah, they still have a couple of openings for the workshop on April 16th.  If you are new to this blog (welcome!), you can meet me digitally in my Happy New Year post.

I leave you with a few shots of our California Superbloom.  Happy Spring!

Poppies_1.jpgPoppies_3.jpgPoppies_2.jpg

Quilts

Free Pattern for Shopping Bags

As the Governor of California recently signed a bill banning those single-use shopping bags that we all get at the grocery stores, we’ve all been buzzing about what to replace it with.  There is still the paper bag, but a section of the bill suggests paying 10-cents for each shopping bag (even though Ralph’s and Trader Joe’s now offer them for free).  Whether you hate this bill or love it, a shopper still needs to come up with a way to carry their groceries home.

tote_grocery-sack2a

I made my first bags out of lightweight canvas, and figured out how to get two out of one yard of fabric. Because these are canvas, I didn’t need to put the handles all the way to the bottom seam.  However, if you are making it out of lightweight cotton, you might consider doubling up on that to make it sturdier, or yes, buying some webbing for your handles.

Whenever I use these, I get positive comments from the checkers. . . and a whole slew of awful stories about those re-usable plastic bags that some people have.  One clerk told me that he unzipped one and a whole bunch of moths flew out into the store.  Another talked about the smell of those bags that are re-used and re-used.  I think we quilters have the best possible world with our cloth bags, which can be thrown in the washer.  Apparently bags at the produce counter and at the butcher’s counter are still okay, so I don’t have to worry about those grocery items messing up the cloth bags.

Shopping Bag Pattern

I’ve written it up in a downloadable PDF pattern that is free: OPQuilt’s Shopping Bag Pattern.

Just send back some good karma, if you wouldn’t mind, and always practice good attribution, acknowledging that it’s from OPQuilt.com.  To do so, please do not post the pattern on your blog, nor print off five copies for your friends.  Instead link back here, and let them print off their own.  Thanks.

Giveaway · Quilts

Christmas Lollypop Tree Wallhanging

Christmas Lollypop Tree Wallhanging

I finally was able to stitch down the petals, dots and branches of my Christmas Lollypop Tree Wallhanging, figure out the borders (I referred to the antique Lollypop Quilt for ideas) and get it all stitched together.  Lacking: quilting, and a border, so it looks a bit incomplete, but like I always say, it’s nice to be at this point!  I think I’ve cornered the market on red and white and kelly-green and white fabrics.  Funny how our stashes will tilt one way while we’re working on a quilt, then veer into another direction when the next project comes along.  This is one thing I’ve been working on for this Works In Progress Wednesday Post, hosted by Lee of Freshly Pieced.  Thanks, Lee!

WIP new button

Earbud Zipper Pouch top

Another thing that has been in the works, but couldn’t show before is the little earbud holder.  I used Dog Under My Desk‘s pattern, and it went together pretty quickly.  I gave it to a friend, for she and I have what we call “sushi therapy,” where we get together and vent about our students (she’s a professor, too). I think between the sushi and the venting, we maintain our sanity (but this semester is really trying our patience!).

Earbud Zipper Pouch

I fussy cut out a bit of fabric that has a piece of sushi saying “You’re really really rice” and appliqued it on to the inside bottom of the pouch.  My friend laughed.

Tote Bag

And I made her a bag from my favorite pattern by Grand Revival: “Practical Bag,” with some book fabric that she gave me (I’m such a nice girl, that I’m sharing!).  I’ve made this pattern a ton of times.  I made it in New York fabric for my sister who lived in New York for 18 months on a church mission, so she could carry her groceries back home after shopping.  I made it for a friend who came to visit from Iowa and whose husband is a pastor (BTW, they just got a call to move to Brisbane, so she’ll be joining all my Australian friends very soon).  I’ve made a couple for me, and a bunch for I don’t know who else.  I originally purchased it for my daughter to make and traced off the pattern for me in case she had questions.  But soon, I bought my own and an extra.  What will I do with this?

Grand Revival Practical Bag

(They are much better at styling their photo, I think.)  So. . . I think I’ll drop it into the mail to one of my readers!  As usual, readers get one chance and followers get two chances, but leave a comment if you’d like me to mail you my extra pattern. But to qualify, tell me what you’ll make your bag to hold. . . or to who you’ll give it away to if your idea is to make it for a gift.

I can make this bag up in under an hour, and it holds quite a lot of groceries, or sewing for a doctor’s office trip, or snacks for the kids, or things to return for your errands.  I’ll use the tried and true husband-pick-a-number method of selecting someone (although if you’re very clever in what you say, I might have to override him).  Giveaway will end Friday morning when I drag myself out of bed, so make sure to leave your email so I can contact you.

And if you want to know what I’ll be doing while you write interesting things?  I’ll be quilting my Christmas Lollypop Tree and grading Drama tests (grading is NEVER done).  Thanks for reading, and Good luck!

Sewing · WIP

Summer Fun and a Tote Bag

Many thanks to Lee of Freshly Pieced Fabrics for hosting this WIP Wednesday.  Click to return to her blog and see others who are staying out of the pool on occasion, and getting some Stuff Done.

Besides going to Long Beach, yesterday my son drove up with his three boys, joining my daughter and her family of three children (who had come from Arizona for the week) and we all went swimming in a friend’s pool.  I love it when they come!

That morning, my daughter and I had made two batches of cookies and a double batch of dinner rolls, and the evening was pleasant enough to set tables outside for our meal, where we served two kinds of barbeque chicken, salad, roasted potatoes and strawberries for dessert.

And cookies.  Snickerdoodles, if you must know, as we were saving the peanut butter cookies for her family’s day trips while they are here.

Still winding my way through the Lollypop Tree forest, I started on the border blocks.  My goal is to get everything cut out, shaped and pinned before I start back to school in two (dreaded) weeks.  This is a Giant Work In Progress, for sure.  What’s interesting to me is that for several years I collected the Kaffe Fabrics for this project, and you know how long it’s taken me to work on it.  But now as I’m coming to a close on the cutting part of it (just the billion squares for the interior borders left to do), it’s like I’ve released a whole stack of fabrics back into my stash for use.  I used some of it to line the zipper pocket of the tote (below) and I can see it sliding into other projects, now that I don’t have to “save” it.  As a result, although I was tempted this weekend in Long Beach by many Kaffe fabrics, I didn’t buy any.

And you know how sometimes you just have to SEW SOMETHING?  This was my project–a tote bag. I followed a lot of the tutorial designed by Lindsay Conner (found *here*), but deviated where I wanted to. [Her blog is also fun to read as she has a lot of tutorials.]  I’ve probably made a gazillion tote bags in my life, and after you wade through a few, you figure out it’s not rocket science–just a bunch of squares and rectangles.  I had originally thought I’d make this to take to Long Beach, but got bogged down in the center section, as I wanted a divided tote bag.  The day before I left I just couldn’t wrap my head around how to do it, so took a different tote with me.  (Besides, they gave us a decorative plastic shopping bag tote for our “souvenier bag.” Can I just say how much I miss the cloth canvas bags?  This kind is so. . . plastic.)

I wanted to use up the last of this Spoonflower fabric (thanks, Betty!) and wanted it quilted to make it a sturdier pocket.  This is about where I gave up that night, as the quilting. . . well. . . don’t look at it too closely.

So when I came home, I figured out the divider, plus the pocket/placket/zipper assemblage in time to finish it for church the next morning.

Here’s the birdie fabric side of the interior.

And here’s the zipper side of the interior.

My daughter and family will be here until Friday, then I really have to do something about my class.  Really, I do.

Sigh.  Summer sometimes ends too soon.