Free Quilt Pattern · Gridsters · Tutorial

Basket Block Tutorial • February 2018 • (Gridster Bee Month for Me!)

gridsters-250-buttonx

I belong to an online bee called the Gridsters, and February is my month to choose a block that my beemates make for me.  You can find all our work on Instagram, using the hashtag #gridsterbee. 

Basket_8

I chose a basket block.

Basket_food fabrics

I also have been saving food-themed fabrics forever for a basket block quilt with the baskets full of food beginning at least a couple of decades ago, and continuing as I picked up a food fabric here and there.

I was also inspired to make basket blocks by Barb, of Fun With Barb and Kelly of Pinkadot who decided to do it together; their tutorials are on each of the links, above.  I upsized the basket block to 10 inches in size, so the making would go faster.  (You’d think with all the quilts in this house, I would have enough twin-sized, but I don’t, so I’ve already decided that’s the size it will be.)

If you want to join in with me, or Barb and Kelly, in making baskets, I’d suggest we follow their request to tag our Instagram photos with #basketswu [Baskets Sew With Us]. (Gridsters please tag them also with #gridsterbee.)

For the Gridster Bee

I’ve sent you some food fabrics; please use those for the A section of your blocks.  I don’t care what you use for the basket–it can match, it can contrast, it can coordinate, it can clash–choose what you think creates the look you want.  You can use small scale prints, large prints, florals, novelties, checks, whatever.

For the low-volume background, use these types of fabrics:

Basket_low volumes YES
They are a range of creamy-toned fabrics, without strong secondary designs.

Avoid these types:

Basket_low volumes NO

Solid in creams is okay, but avoid white, grey, tan, beige, white-on-white (I really don’t like beige for this quilt, but understand the limitations of our stashes–just do your best).  Many of the above fabrics have strong motifs and patterns, so reject those too.  Basically, I want the background to recede without being dull or same-same.

Basket Tutorial

Basket Block_ESE
Not to size, for reference only–please use the PDF link below.

Here’s my cutting sheet for this tutorial, in PDF form, but the usual requests apply here–don’t print off a million copies for your mother and your friends, but please send them here to get their own: Basket Block 10 inch_OPQuilt

Basket_1
All my basket pieces laid out.

First, make the Half Square Triangles.

[Background:  One method is from Alyce, and she has a nice chart if you want to figure out your own eight-way Half-square Triangles.  However, I also have a different chart on this post which came from Jeni Baker, who encourages the use of a bigger initial square.  That means for us (and especially if you like to trim your HSTs) you would begin with a 6″ block, which is what I’ve specified on the cutting chart. BTW, her book on triangles is a good one to have in your library. ]Basket_2
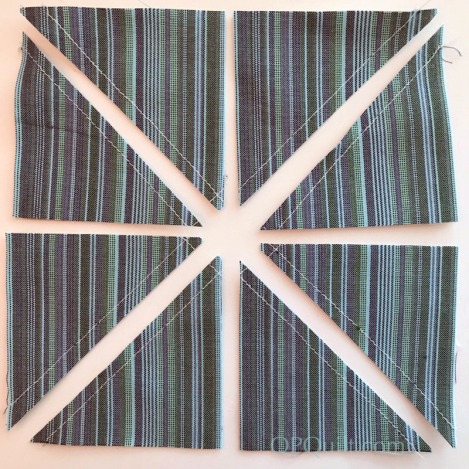
Place one 6″ background square and one 6″ basket square right sides together. Mark two diagonal lines, and sew 1/4″ on either side of the marked lines.  On the left is the pieces with the sewn diagonals.  Press it flat to settle down the wrinkles, which you see on the right.
Basket_4b
I moved mine apart to demo this; leave yours close together.

Cut on marked lines.  Now without moving your squares, cut on mid-lines, crossing the centers, as shown below.  Press, with seam allowance to the dark side, trimming out dark fabric, if necessary, so it doesn’t show through.  Trim to 2-1/2″ inches square.

Basket_3
Make center half-square triangle (piece A-1):  Place a food fabric (measuring 6-7/8″ square) onto a basket square (same size), drawing a diagonal line, then stitching on either side of that line.  Press, then cut on marked line, then press towards the basket.  You’ll have an extra center to toss into your Random Patches Box.  (You do have one of those, don’t you?)

Press seam allowance ALWAYS towards basket, to give that dimensional look that something is IN the basket.  Now trim that center to 6-1/2″.

Basket_5
Here are all the pieces, laid out.  I chose a stripe to demo, so you can see the direction the stripes go.  If you use the eight-at-a-time half-square triangle method, you’ll have no problem getting the stripes in the small half-square triangles go the direction you want.  Yes, I did cut the 6-7/8″ square (basket) on the bias, so I could have the stripes go across the unit.

Basket_5a
I made two blocks at once; one had a light center, and one had a dark center.

Stitch together the three small half-square triangle pieces; press in the direction they want to go, which is usually toward the flat triangle piece.

Basket_5b
Stitch one 2-1/2″ block onto one unit (shown in upper left corner).  It helps to arrange your square as you go, so you get everything all sorted out right.

Basket_5c
Sew the first three-unit “basket handle” to the center HST, as shown on the left.  Press seams away from basket, even though they don’t want to go there, again to preserve the illusion that something is in your basket.

Basket_6
Sew the second three-unit “handle” with the C square to the center unit, as shown.  I pressed the square C-block toward the three-triangle unit so that the seams would nest neatly when I arrived at this step.

Basket_7
Create basket stand by sewing one of your small HST to the D-rectangle.  Pay attention to which direction the triangles are going.  Stitch this first unit onto the basket.

Repeat with second HST and D-rectangle.  Sew ONE of the C (2-1/2″ squares) to ONE of the basket stand units.  Stitch this onto the existing basket.

Basket_9
And you are done!

There are lots of fun ways I can finish this basket quilt:

Basket Setting
from here

I like this setting, with all those energetic chevrons in between the baskets.

Looks like red is a pretty popular color for setting these blocks.  I have more basket ideas on my Pinterest site, if you want to see more block settings.  (I’ve been collecting these ideas for ages.)

Thanks to the Gridsters for making me baskets this month, and I hope you all have fun making a few for yourselves.

Free Quilt Pattern · Tutorial

Christmas Tree Block Swap

xmastreeswap
xmastreeswap_1

My friend Leisa saw a Christmas Tree Block Swap that was going on online, and said “Why don’t we do one like this with our group?” Sure, why not?  We don’t have anything else going on, do we? (right)

I drafted a pattern, just drawing this way and that, then made up a test block.  My graphic design guru Simone approved it, and we were off.  I transferred my dimensions to Quilt Pro, my quilt software program and here it is for you to download:

 christmas-tree-gdhrtqltrs-swap_pattern 

That’s FREE, no charge, but as usual please don’t print off one for your mother or your sister, but instead, send them here to get theirs.  Many thanks.

printer-settings

AND…as a reminder.  Please be sure to set your scale to 100%, as shown above in the red oval.

Now, the tutorial.  I apologize in advance for the pitiful lighting.  Chalk it up to working on a deadline, because our swap is in a a week and a half, and I need to get this to my quilt group for our Flash Mob Quilt Night.  (I hope they bring Christmas cookies to share…just saying…)

xmastreeswap_2

I also apologize for filling up your mailboxes with two posts so close together.  But then again, you might need this too, to spread a little holiday cheer around your sewing room.

xmastreeswap_3

This tutorial is for one block.  It took me a grand total of about one minute to make one block.  Choosing and cutting the fabrics took a little longer.  For our trees we are using clear bright tones/prints, such as green, yellow, pink, aqua, purple/lavender, orange, red.  For the backgrounds, we are using black or white prints.  For the tree trunk: something trunkish, please.  Here are all the pieces laid out. (Thank you Mary, for my cool board.)

Sew the Upper Background piece onto the tree.  Leave that tiny wedge of 1/4″ goodness at the bottom right corner (shown in the red circle), and let the top of the upper background just hang off the tree.  Stitch 1/4″ seam.

xmastreeswap_4
xmastreeswap_5
xmastreeswap_6

Backside of that piece.  Now the 1/4″ wedge of goodness is at the lower left, and the extra background is at the top.  Press seam towards the tree.

xmastreeswap_7

Repeat with other side.  

xmastreeswap_8
xmastreeswap_9

Trim off the extra point.  Press towards tree (see below).

xmastreeswap_10
xmastreeswap_11

Seam the Lower Background pieces on either side of the tree trunk.  Press towards the trunk.

xmastreeswap_12

Line up the tree trunk with the tip of the tree, to get it on straight.  I’ve left a bit extra on either side, so if you want it wonky, feel free.

xmastreeswap_13

Press all seams toward tree.  You can see here the extra I’ve left you so you can adjust the trunk as needed.

xmastreeswap_14

Trim the block to 6 1/2″ by 7 1/2″ like this: Leave space above the tree tip, roughly 3/4″.

xmastreeswap_15

Then whack off the bottom, so the total height is 7 1/2″.  This tree will finish at 6 by 7″.

xmastreeswap_16

Fussy cutting is always encouraged.

Now if you want to cut out a lot of Upper Backgrounds at once, do this:

1-Layer two pieces of fabric with wrong sides together (like it comes off the bolt).

2- Cut a square 5 1/4″ by 6 1/8″.

3- Measure up 1 1/8″ on opposite sides, and draw or cut a diagonal line.  It should be the same size as your piece B or D.

Remember that these pieces are opposite of each other, so don’t layer up your fabrics with all right sides up, or this won’t work.

xmastreeswap_final1

Here’s my first batch.  Now I’ll go do this some more.

Have fun making a forest!

tiny nine patches
200 Quilts · EPP · Free Quilt Pattern · Quilt Patterns · Quilts · Shine: The Circles Quilt

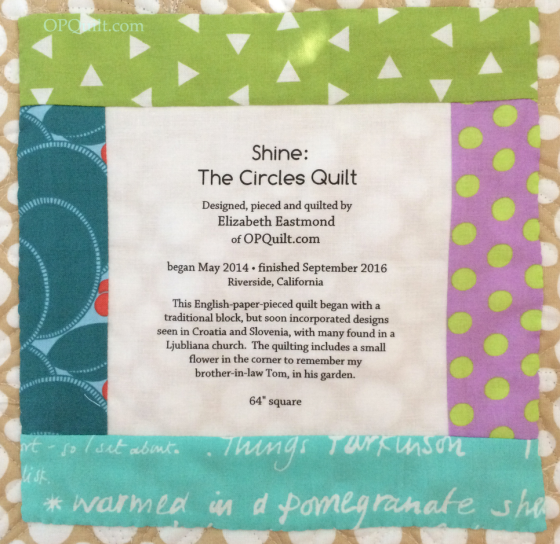
Shine: The Circles Quilt, finished

1shinecirclesquilt

Shine: The Circles Quilt
Quilt #170
2shinecirclesquilt

This quilt finally finished, I took it out for a photography session with the help of my husband.3shinecirclesquilt

I started sewing the first block in June of 2014, and finished the top a year later.  The quilting was finished at the end of September, but it wasn’t until now that I could get time to take it up to our university’s Botanic Gardens to get some photographs.
4ashinecirclesquilt

My husband’s favorite block.  As some of you know, many of these blocks were inspired by art in a church in Slovenia, as well as designs from our travels.  Most of the patterns and accompanying tutorials are free on this blog, found *here* as well in a tab labeled Shine: The Circles Quilt.  4shinecirclesquiltl 5ashinecirclesquilt

This shows the quilting.  I was trying out double batting (polyester with wool), and found it was a challenge to move the heavy quilt around on the machine.  It took me nearly 4 months to quilt this thing, as I was hobbled with a shoulder injury.  But I was able to finish it!7shinecirclesquilt_label

As I quilted, I thought a lot about my brother-in-law Tom, who passed away a little over a month ago.  He maintained a beautiful small garden in his backyard, and so in one of the corners I quilted in a flower in his memory (shown below).  Many offered advice and help while I was quilting: thank you, everyone.6shinecirclesquilt shinecirclesquilt_detailback

detail of quilting from the back

shinecirclesquilt_frontl

This closes a chapter in my life.  Lovely to see you here, Shine!

Quilts

Baskets Finished!

Basket Blocks Quilt Top

You know, I think I have had more fun with this little quilt than I have in a long time.  Of course, maybe the fact that last Monday I taught my last class of the semester may have something to do with it.  (At church this past week, I was flanked by two K-12 teachers from two different districts, and they knew practically to-the-minute how long before school let out for the summer.)

Baskets wo border

Here they are without the borders.

Border Try One

The suggestion I’d seen for a border was a piano key border, so I whacked up a bunch of 6″ wide, random-width strips and put them together.  I just couldn’t figure out why I didn’t like it.  I thought it was the fact that there were a lot of light-colored pieces in there.  So I ripped all the borders apart (which is why I have a photo of only one border–on the bottom) and took out the lights.  Still didn’t like it.

I had this older piece of blue fabric laying on the board so I could cut it up for darker “keys” for the piano key border, and pinned it up to the quilt and liked it!  Not quite enough, so I pieced in some random pieces to hint at the idea of a piano key border, and went with it.

Baby Baskets

Tutorial for the big baskets is *here.*  Tutorial for the baby baskets is in the next post.

Quilts

Pineapple Quilt Block (for Bee-mates)

Queen Bee

As my friend Susan of Patchworknplay says, I’m Queen Bee.  I wrote this post as I had both my bees,  the Always Bee Learning Bee (August) and the Mid-Century Modern Bee (November), make this block for me.

Pineapple Block August ABL

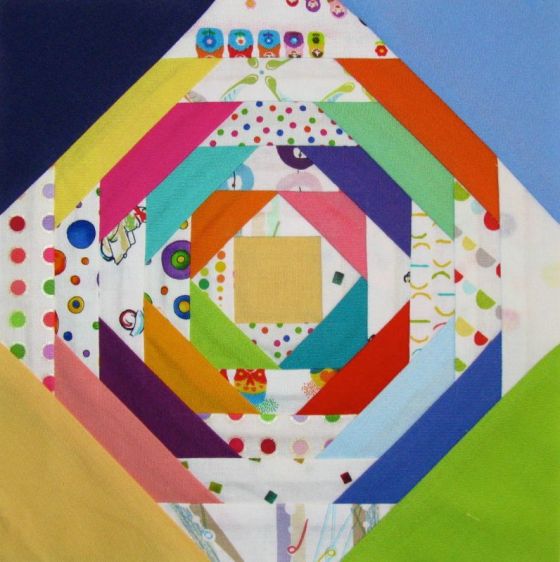
When thinking about what I wanted, I thought I’d try a Pineapple Quilt Block, but use a paper foundation piecing technique to keep everything true and accurate during the process.  This is an 8″ block when finished (8 1/2″ when you finish your block for me), and I’m using solid fabrics coupled with small print fabrics with a WHITE background — no grey, no tan, no beiges, just white.  In this bee we also mail out fabrics, and some of my bee-mates have already received theirs; I mailed them out early because of traveling and family visits in the last half of July.  Idid this as well in November for the Mid-Century Modern Bee, but for that bee we typically don’t mail fabrics, but simply provide descriptions and examples.  **NOTE: If you feel you have too many of the same prints, feel free to substitute in any from your stash, as long as the print background is bright white, and the figures are small rainbow-colored designs.  Ditto for the substituting the solids. I tried to distribute them randomly, but you know how things go.**

I’ve written up some step-by-step directions (below) but I got the paper foundation from Generations Quilt Patterns, another website with a really good tutorial on Pineapple Blocks. (They have a discussion of setting the blocks on this page.)  Their ideas and explanations are top-notch, so if you find my step-by-step confusing, feel free to step over to that site and take a look.  If you want the pattern, head over *here* and download the 8″ size of the Pineapple Quilt Block.

Cutting Chart Pineapple(Chart modified from Generations Quilt Patterns.  Used with permission.)

Using the diagram above, which is modified from Generations Quilt Patterns *here* cut your pieces to size, keeping track of which is which (solids vs. light bright prints). I cut all my strips 1 and a 1/2″ wide as I didn’t ever want to have to mess with unpicking if it went on slightly skewed.  (NOTE: for the outer corners (#38-41), sometimes I just cut a 3″ piece of fabric by 6″ piece of fabric.  I know the corner will be on the bias that way, but that’s okay with me.)

5_ Pieces Lined Up

Here they are, all cut out and ready to go (I am doing multiple blocks, so don’t get confused by what you see above).

Step One

1_Center Square affixed

Using a glue stick, dab a small amount of glue on the small square and glue it to the back (unprinted side) of your paper foundation chart.

Step Two

2_Beginning of First Row

One by one, align, then sew on the first set of print strips, using a 1/4″ seam.

3_ Beginning of Stitching Line

When stitching on this, and all other rows, start your stitching a couple of stitches before the line, and finish a couple of stitches beyond the line, so as to secure the sewing.

4_Ending First Row

I sewed on the first two, pressed them to the side, then did the next two.  I learned to pin the fabrics so as not to have slippage.

Messy Ironing Paper

I printed out your parchment paper on my Laserjet, which can leave a residue on the ironing board, so I put down a piece of paper and pressed on that.  This is the messy paper at the end of my pressing session (sorry about all the transfer stuff).

Step Three

6_Cutting and Folding_1

Fold back your parchment paper in order to trim it up.  I sketched in the first fold, above, in pink.

6a_Cutting and Folding

Lay your ruler so that 1/4″ peeks out, then trim.  Again, I used Generations Quilt Patterns as a reference, if you need to read or see it differently.

7_First Row On

All four sides have been trimmed (those fold lines look so crisp in this paper!).

7a_Stitching First Row

Here’s what the stitching looks like from the printed side.  Notice I’m a couple of stitches over the line every time.  Generations recommends a full quarter-inch over, but it tore the parchment paper too much.  Two or three stitches will be fine.

Step Four

8_Second Row

Repeat this process, using the solids this time.  At this point you can do two at a time (opposite sides, like the yellow and green shown above).  Stitch those, press out, then add on the remaining two solid strips.  Stitch, then press open.

9_Cutting and Folding

You’ll turn the paper and fold back again, as shown this time by the green line, above.  Trim as in the previous step, all four corners.

10_Second Row Sewn

It’s looking pretty cute!  I like how now I start to see blunt ends on the corners.

Step Five

11_Third Row Beginning

Add on the next row of light bright print strips, again doing two (only) at a time.  Soon you can do all four, just not yet. Trust me on this.

12_Third Row Sewn and Pressed

Press open, then trim.

13_Third Row Trimmed

One nice thing about paper-foundation piecing is how nicely the points come out and how it is all perfectly aligned.

Step Six

14_Fourth Row

Still doing only two at a time (opposites) add on the next row of solids.

15_Fourth Row Sewn Pressed Trimmed

All pressed and trimmed up.  The blunt end is becoming more pronounced.

Step Seven

16_Fifth Row Pinned

Okay, now!  You can now pin on all four light bright print strips onto your pineapple, and lifting your needle/presser foot in between to pivot the paper and move to the new stitching place, then begin sewing again.  Clip through the traveling threads after you are finished sewing.

17_Fifth Row Sewn Pressed

It’s pressed.

18_Fifth RowTrimmed

And now, trimmed.  Keep going, keeping track of which row is solids and which row is light bright prints until you only have the corners left to do.

19_Penultimate Row Sewn

Step Eight

20_Outer Blocks placed

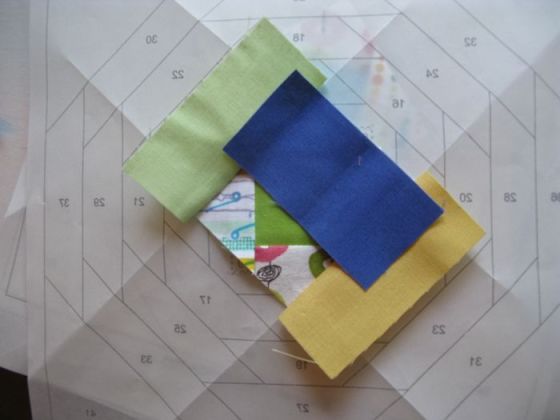
Some of you have 4 1/2″ triangles in your packet and some of you have 3″ x 6″ strips.  I show both in the following photos. To figure out the alignment, Generations Quilt Pattern uses a nifty trick of letting the point of the triangle guide you.

21_Outer Block Aligned

Line up the outer raw edges of the diagonally cut triangle, with the point centered in the square, as shown by the bright blue (above).  Stitch.

22_Outer Blocks Pinned

For the 3″ by 6″ strip, fold in half to find the center, then line that up with the center square, as shown.  Pin, then stitch.

22a_Outer Blocks SewnPressed

Corner blocks pressed.

Step Nine

23_Trimming

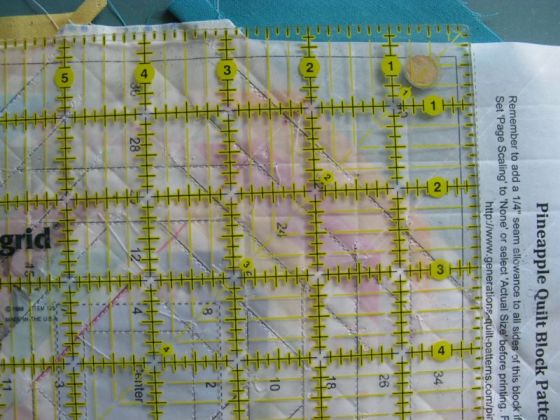
Okay, I know this ruler isn’t perfectly aligned (the phone rang right as I was going to snap the photo and startled me, and I didn’t find out until later how crooked it was). So, don’t do as I show, do as I did: make sure to only trim 1/4″ outside the solid line, all the way around.  DON’T TRIM ON THE SOLID LINE.

Ripping Off Paper

Once trimmed, turn it over and use Katie Pasquini-Masopust’s famous “Fatty Thigh” method for removing foundation papers (I learned this from her at Houston one year).  As she instructed us: lay it over your fatty thigh, and pop the papers off, starting on the outside, working in.  The parchment paper comes off so much easier for me than regular paper, so I hope you have an easy time of it.  Thank you, thank you!!  You are done!

Final Four

Here are four together.  I look forward to seeing all of yours!

–Final notes–

Boys in the Boat

I listened to The Boys in the Boat while working on this project, a fascinating story.  I’ll never look at this sport the same way again.

Parchment Paper

And the paper? Here’s a photograph of the information on the edge of my ream of paper.  I bought this paper several years ago, beginning with my Come A-Round quilt (below), a foundation-pieced quilt, and have used if for several other projects (including Scrappy Stars and I am currently using it for my selvage quilt).  It will probably last me until I die, and although not cheap (I think I paid 35 bucks for this ream) I feel like it was a great investment.  I bought mine at my local Kelly Paper store.

Come A-Round, full SM

Yep,  all those spiral dotty circles in the middle were arcs that were paper-foundation pieced on this paper.  The pattern is a Piece O’ Cake Design, titled Everyday Best.

˚˚˚˚˚˚˚˚˚˚˚˚˚˚˚˚˚˚˚˚˚˚˚˚˚˚˚˚˚˚˚˚˚˚˚˚˚˚˚˚˚˚˚˚˚˚˚˚˚

My blogging software places ads here so I can use this site for free.  I do not control the content of these ads.

Quilts

Faced Binding Tutorial

FacedBindingTitleA faced binding is applied to the front of your quilt and is wrapped to the back.  If done well, it can’t be seen at all from the front, allowing the last border of your quilt to act as the frame for your quilt, and eliminating one last design element from your quilt.  Often used on art quilts, when an additional line of a border would distract from the art, it can be also be used on our regular quilts.

kaleidoscope-top

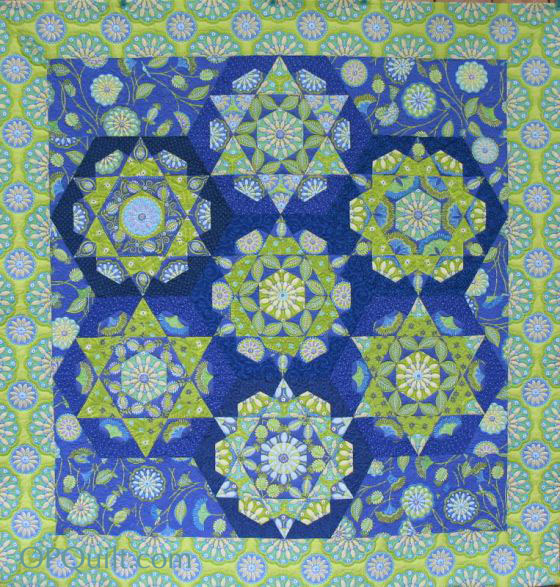
I used it on Kaleidoscope, as the printed border needed no other embellishment.

Step One: Prepare the quilt and strips
Trim the batting and edges of your quilt.  In the best world, your trimmed line falls at the edge of your fabric.  A little fudging here and there is okay.

For the binding, you’ll need four strips, one for each edge.  Measure the edges of your quilt and add 10 extra inches to that measurement.

Cutting

Cut 4″ wide strips for a medium- or large-sized quilt, and 3″ wide strips for smaller quilts.

Trim Ends

If you need to piece the strip to provide the right length, trim both ends at a right angle (make sure they are slanted the same way) and piece together on the bias.  Fold the strip in half lengthwise and iron.

Step Two: Applying Binding Strips
Leaving a tail on each side of about 5 inches, pin the binding strip to the FRONT of your quilt, raw edges even, with the folded edge of the binding falling toward the quilt center, just like you would for a regular binding. Only this binding is giant-sized, and you won’t stitch around the corners continuously.

Pinned Binding

Continue pinning the strips onto each side.  Pin the strip nearly to the end, as you’ll be leaving the last one-quarter-inch of each seam unsewn.

QuarterInch from Corner

I measured one-quarter-inch from each corner edge, and placed a pin there to remind me to stop sewing.

Stitching Binding

Stitch on the binding, using a quarter-inch seam allowance, and stopping at your placed pin, 1/4″ from the edge.

Step Three: Mitering the Corner

Pressing

Take the quilt to your ironing board and using a light touch, press the binding strips away from your quilt.

Mitered Corner2

Then lay the quilt so you can fold back the binding tails, as shown.  Work to have a perfectly straight 45-degree angle on those folds where they meet; use a ruler to help you align it, if necessary. Press.  The slight gap you see there between the folds is normal–the folds relax when you take the iron off.  It’s better to have a slight gap than to have an overlap.

Mitered corner1

Another view, but this is just fingerpressed.  While you can just fingerpress the folds, I think it’s better to get a hot iron on there so you can see the crease.  (See next image.)  Remember that you are pressing through double-folded fabric, so do a thorough job.

Unfold and align the binding strips for the first corner, making sure the pressed diagonal lines meet and folding the quilt down and out of the way.  You are also making sure the top folded edges meet.  I try not to pin this next seam to death, instead using only three pins:

Mitered corner3a

• #1–Place a pin at the outer, folded edges of each binding strip and line the creases up.

• #2–Then go to the bottom, near where it’s joined to the quilt, and poke a pin from the top crease down into the bottom crease, lining them up.

• #3–Lastly, line up the creases at the center and place a pin there.

Again, you are pinning along the crease you made when you ironed in that beautiful miter at the ironing board.

Stitch the seam.  You’ll begin stitching from the folded, outer edges and sew back towards the quilt-binding seam (at the bottom of the picture).  There’s really no need to “tack” by backstitching.  So don’t.  Just leave your thread tails long and you should be fine.

Mitered Corner 4

Trim the extra fabric to one-quarter-inch, as shown, then press the seam open.

TrimCorner

This is the backside of that mitered join up above.  Notice how the seam allowances become smaller at the point?  That’s because I trimmed them down to eliminate bulk.  Trim out as much of the batting as you can, while making sure you don’t cut the stitching. Don’t skip this step.  Just proceed carefully.  (You will be fine.)

Step Four: Understitching
Often used when attached a facing to a neckline in dress-making, understitching is a technique to join the weensy seam allowances to the faced binding, which will keep them from rolling to the front and showing on your quilt.

First, since you pressed the binding away from the quilt up above, you’ve already started on this step.  If you didn’t press at that time, do your best to press it now, going as far into the corner as your iron will allow.

Understitching

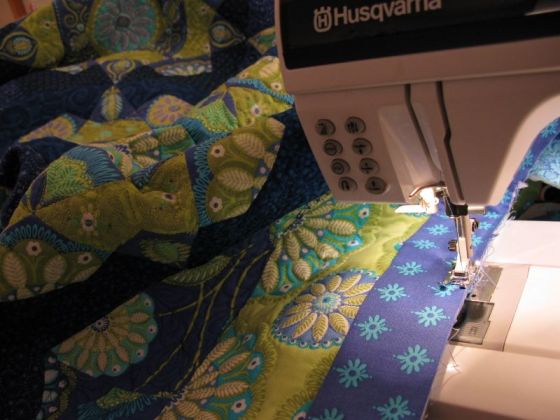
Line up your needle so you are just to the right of the binding seam.  Stitch a straight line, smoothing the binding and the quilt away from the seam as you go, keeping a light tension on the quilt/binding fabric.  Light.  The success of understitching depends on not letting the binding bunch up toward the quilt, nor wandering in your stitching onto the quilt.  Stay on the binding, smooth away the  binding and it will go as smooth as butter.

Of course you can’t sew deep into the corner, so go as far as you can and cut the thread tails long.  Now begin again on the next side.  You’re almost there.

Step Five: Sewing down the Binding

Carefully turn the binding to the back of your quilt, giving it a quick press, if needed.  Gently ease out the corners.  If you are brave and not foolhardy, you can use a chopstick to help ease out the tip.  But if you go too far, you’ll have a mess on your hands.  Proceed gingerly.

If after turning, you think your corners are distorted and look like the tips of a witch’s shoe, a little pulling at the side edges, just below the tip, will shorten that tip and bring it back into shape.  Set it with a little shot of steam from your iron, then press it with your fingers or a piece of wood until it cools.  Seamstresses use “clappers,” or smoothed wooden tools just for this purpose.  However, it’s better to lay a piece of cloth down and put your tender fingers on that, that to smash the heck out of it with a hot iron.  Never over-iron your quilts, or blocks, for that matter!  A horribly flattened block means that, to me, someone has decided to start wearing out their quilts early.

Stitching Down Binding

You’ll stitch the binding down by hand, just as you do a regular quilt binding.  Now you can clip those long thread tails on the top of the binding as you come to them.  Tuck the long tails that are on the backside of the binding up inside–no need to trim those.  If you find your miter is buckling just a little and has too much fabric, with your handsewing needle take a small tuck and secure it with tiny stitches.

All done!

Faced Binding--back

This is what the binding looks like from the back, when finished.

faced-binding-front

And this is the binding from the front–invisible!

Note: If you need to attach a quilt sleeve for hanging, you’ll create your tube of fabric and stitch it on now, aligning the top edge 1/2″ to 3/4″ down from the top, and leaving a slight bulge in the sleeve to leave room for the hanging rod.

˚˚˚˚˚˚˚˚˚˚˚˚˚˚˚˚˚˚˚˚˚˚

Return to OccasionalPiece-Quilt (or OPQuilt.com)

Colorwheel Blossom_front