
Welcome again to the Hallowe’en 1904 Quilt-A-Long.
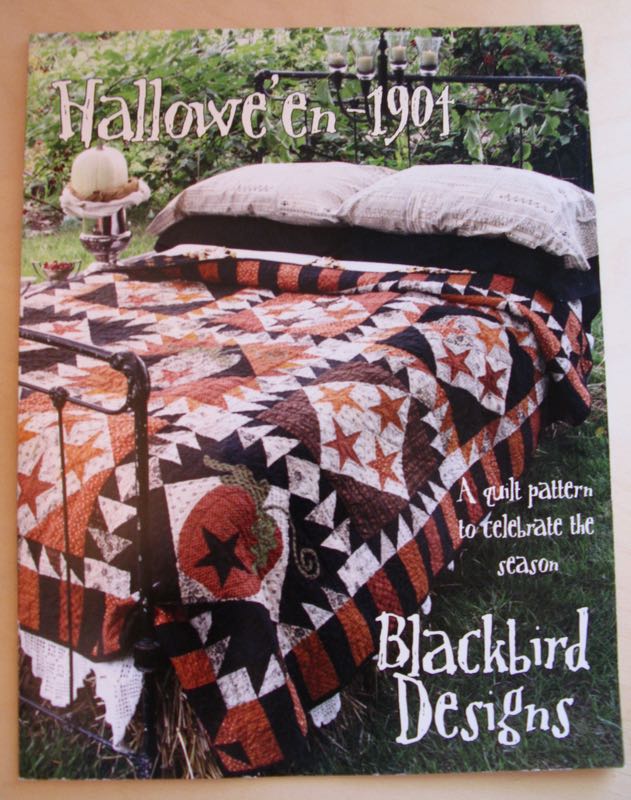
As a refresher, we are making this quilt, a pattern from Blackbird Designs. I must admit it took me a while to re-orient myself to what-the-heck-I-am-doing in this process, but I dragged out my box of stuff, found my pieces am ready to get going. (If you aren’t making this quilt with us, scroll down to read about making 8 half square triangles at one time, as well as some tips for shaping bias strips.)

And of course, it’s lovely springtime in Southern California, so that really makes us feel like working on Halloween stuff, but we agreed to work early so we could hang our quilts up at the first of October, not the last. While the original quilt has twelve blocks, my friend Leisa and I are making a quilt with nine blocks, and so have adjusted all the quantities accordingly: four blocks with appliqué and five blocks with stars.
In Step One, we gathered supplies.
In Step Two, we did all our cutting. There is a cutting chart you can download and use to guide you.
Now, in Step Three, we making the appliqué blocks with the Halloween shapes on them: pumpkin (2), pumpkin with cat (1) and moon and star (1). We’ll also talk about how to make half square triangles (HST) more efficiently, and then about appliquéing the whole thing down. Here we go.
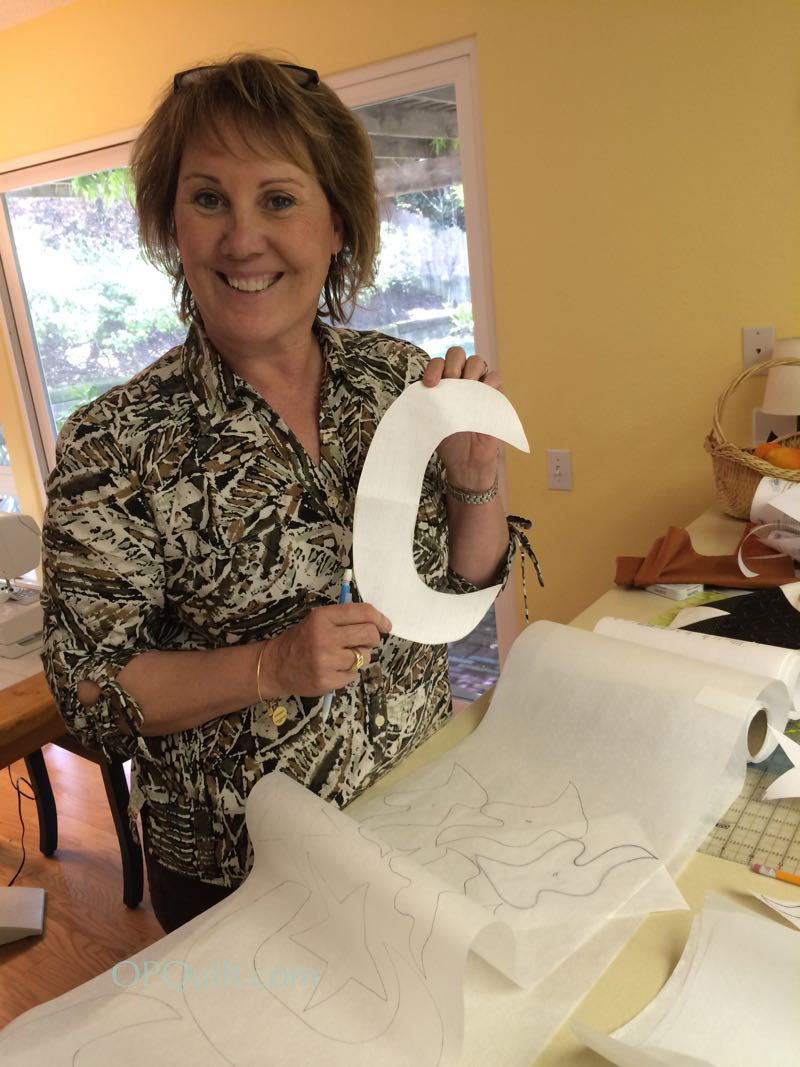
Leisa came over for an afternoon, and we started by tracing around all the templates, getting our motifs organized. We decided to add a black cat to our pumpkin, so here is the PDF file: Halloween Cat. Print it at 100%, so it ends up about six inches tall (or tweak it to make it bigger or smaller–whatever you like). We wanted the cat facing to the right, so flipped it over and traced the outline on the back with a black marker pen. Then Leisa traced it out for us on the fusible stuff.

Remember that it has to be backwards, to be facing the right way. We used Steam A Seam 2, following their directions of which paper to trace onto, and then cut the shape out loosely, after which we ironed it onto the back of the fabric. I recommend using either a pressing cloth, or a larger piece of their release paper so you don’t get any gunk on the iron.
(pumpkin leaves)
Cut out all your shapes and then set them aside.
Now grab a stack of your dark and light 7-inch squares. Layer two together, so the light is on top. You’ll be making HST eight at a time in this next step. This is not a new idea, but it’s explained pretty well *here* and *here* and *here.*
Somewhere in my web travels I picked up this chart: 
I wish I knew where it was from, because it’s a great chart with lots of sizes. If you know where it’s from (I couldn’t find it in my searches) let me know so I can give them proper attribution. [UPDATE: Katell from France wrote in to tell me it’s from Jeni Baker’s Book Patchwork Essentials: The Half-Square Triangle. I suggest you pick up a copy of her book, as it has lots of great tips for making perfect half-square triangles.]
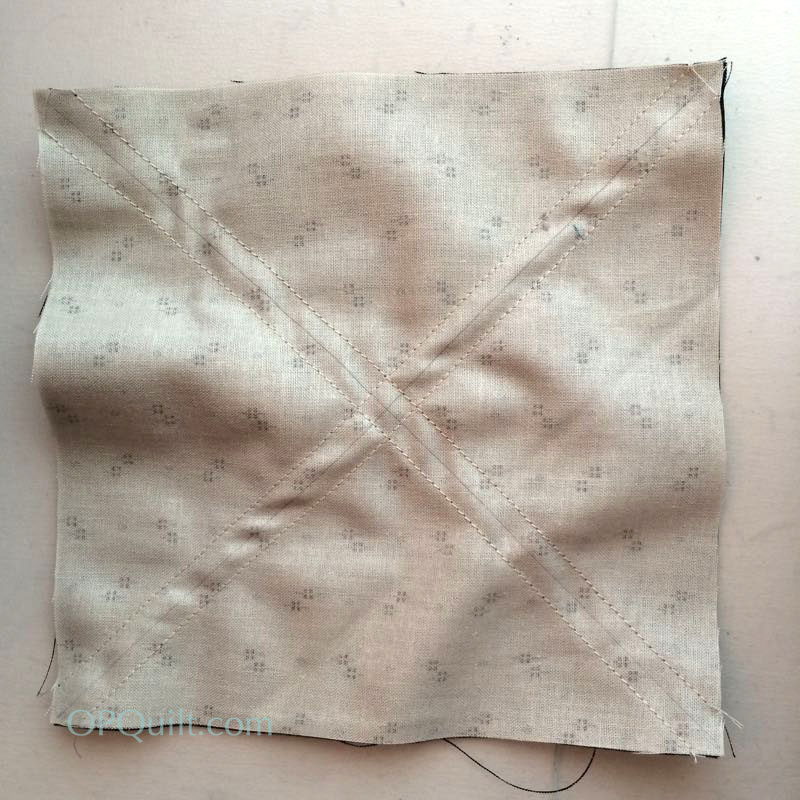
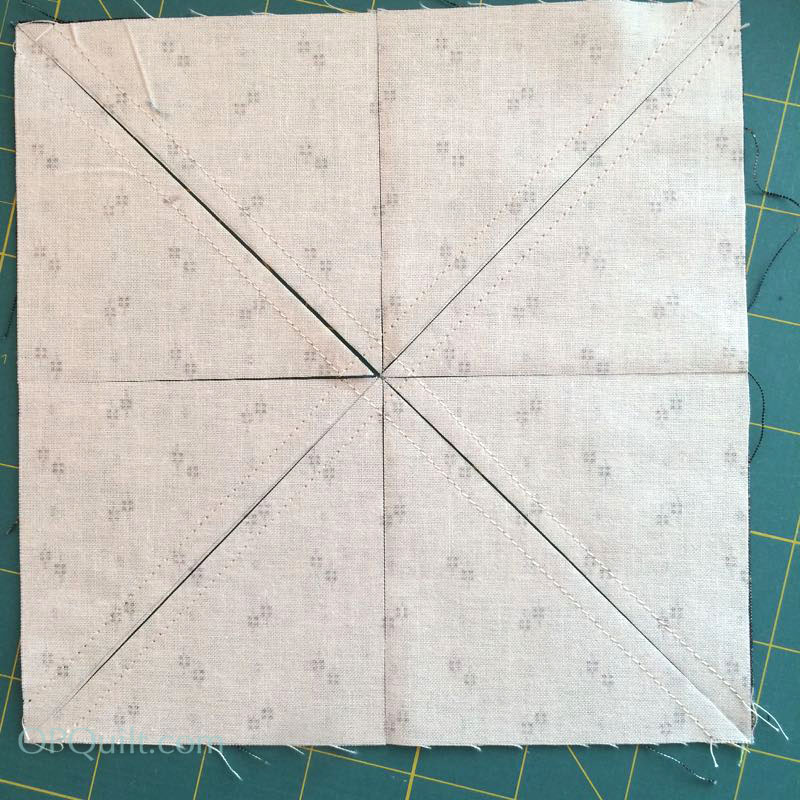
So basically, you draw two lines across the two diagonals of your block, then stitch 1/4″ away from either side of the line. It looks rumply because you’ve been sewing on the bias.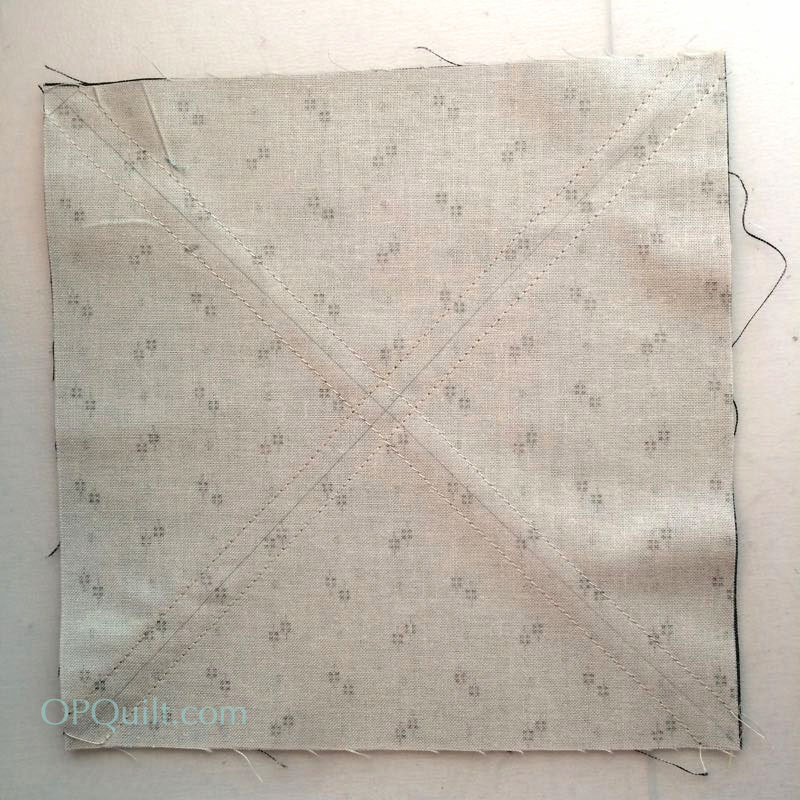
Take it to the ironing board and press and steam out the block so it lays flat, and the stitching is nestled into your fabric.
Now you’ll be cutting across the block in two ways, as shown by all these extraneous photos. I’m sure you’ll get it after seeing all these.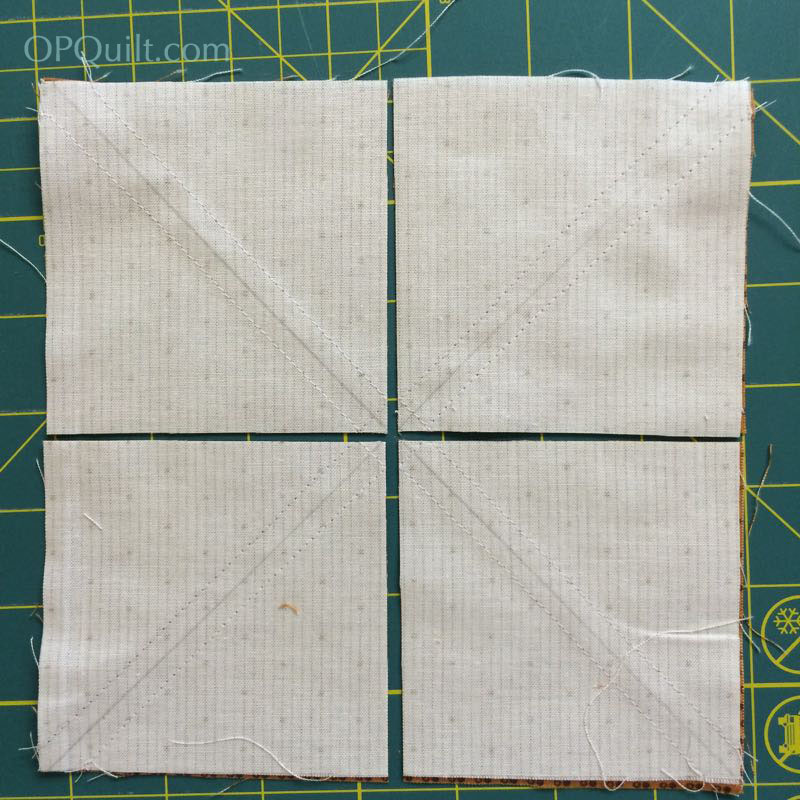
First cut side-to-side and top-to-bottom. Don’t slide them apart–mine are that way just to show you.
Then cut along your penciled lines. Again, do it while everything’s together. Mine are apart for illustration purposes only.
Take the triangles to your ironing board and press to the dark side (insert Star Wars reference here). 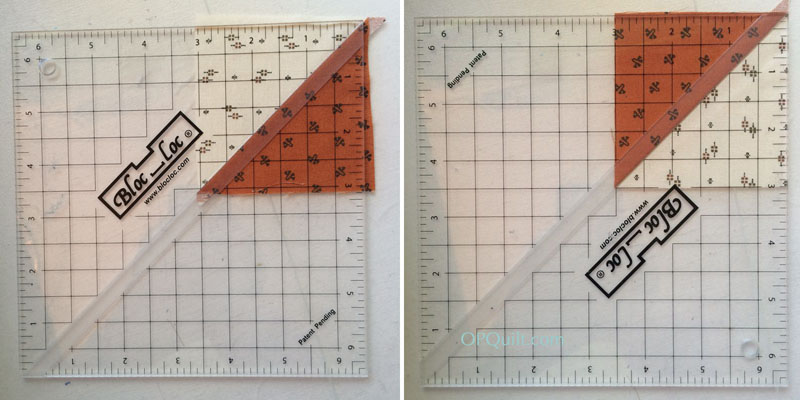
I use a Bloc-Loc ruler (6 1/2″ size) to true them up to 3 inches square; it has a groove in it that fits neatly over your seam and makes truing up much easier. You’ll need three sets of these blocks for each large block in this quilt. You’ll repeat this process, choosing different darks and different lights. Let’s do that math again.
Each Eight-at-a-Time square makes. . . 8 HST. You need 24 HST per quilt block, so you make three sets. I tried to vary my fabrics, using three different lights and three different darks (or oranges). You’ll find out why you want variety in a minute. After they are all trued up to 3″ square (all 24 per block), set them aside.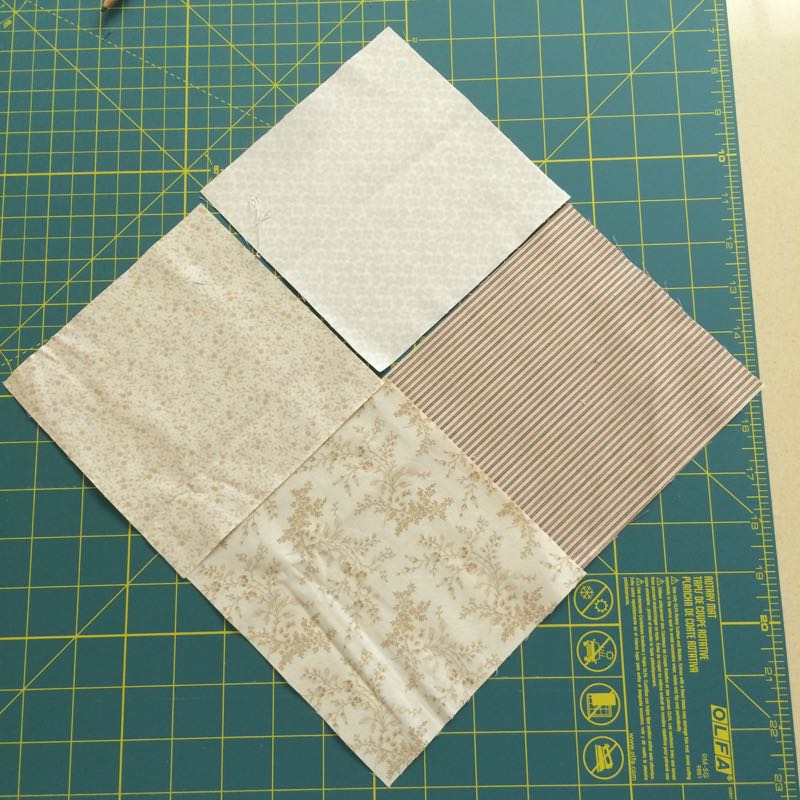
Take the smaller light background squares, and choose four. Stitch them together: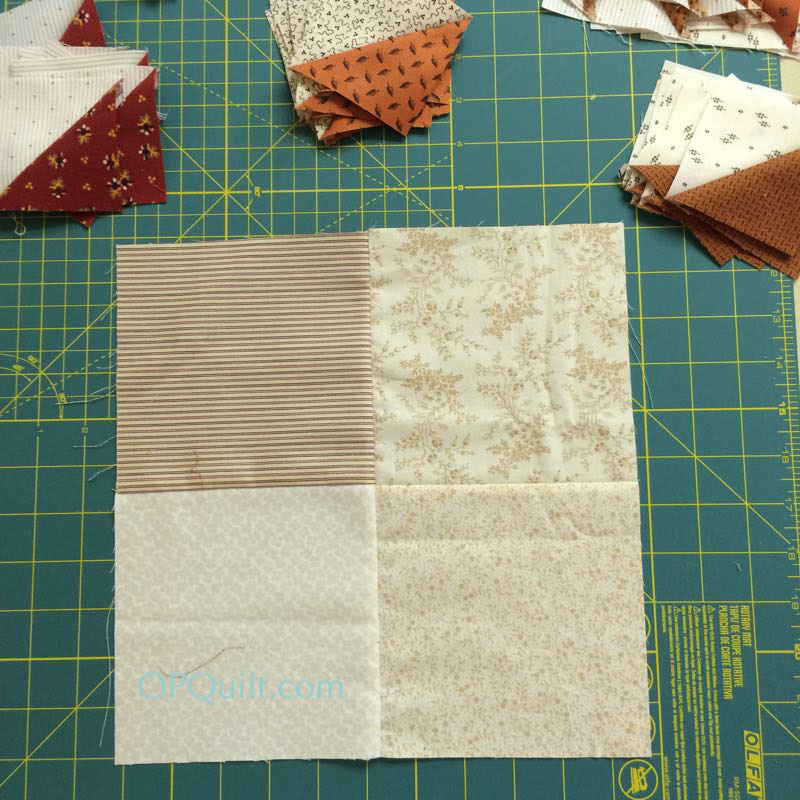

Choosing either black or orange, sew on four large triangles, two at a time, to your set of four light squares.

Grab your stack of HSTs. Starting with one set, distribute them around the block, two per side, spacing them randomly. I also put my smaller corner blocks down, so I can make sure to keep everything as random as I can (trying NOT to match the fabrics, but sometimes it happens. If it does, don’t fret).

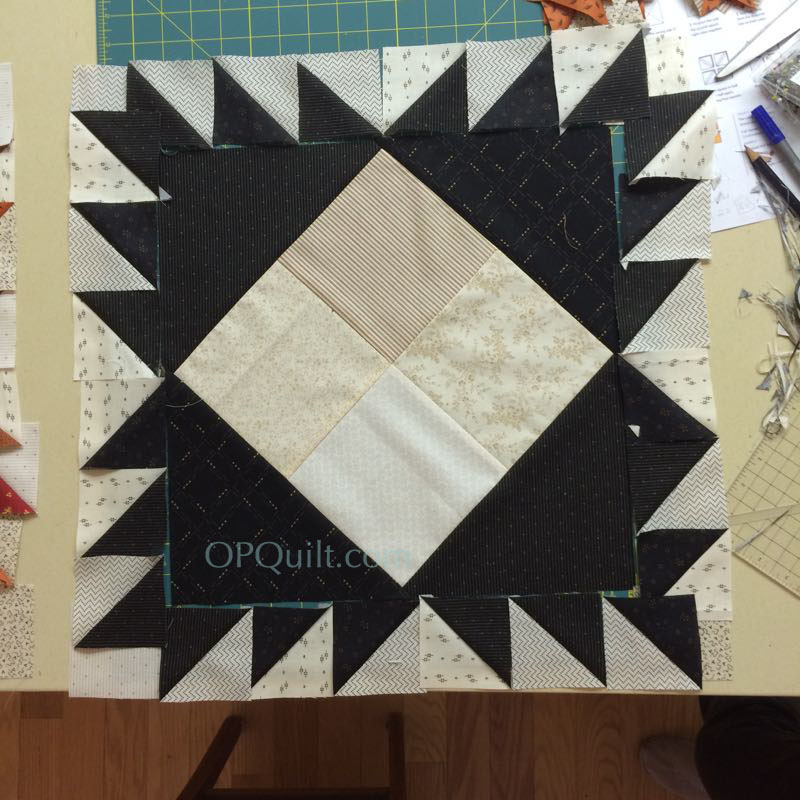
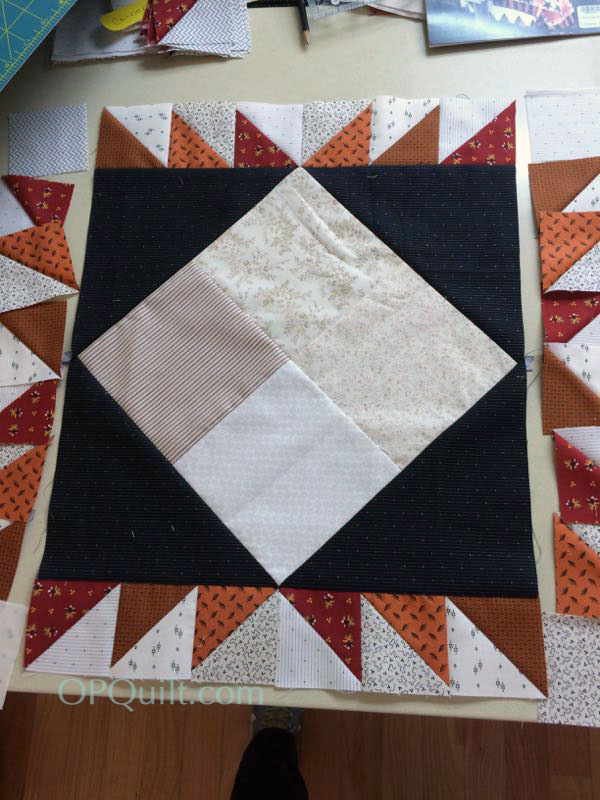
Here’s mine (orange HST) and Leisa’s (black HST).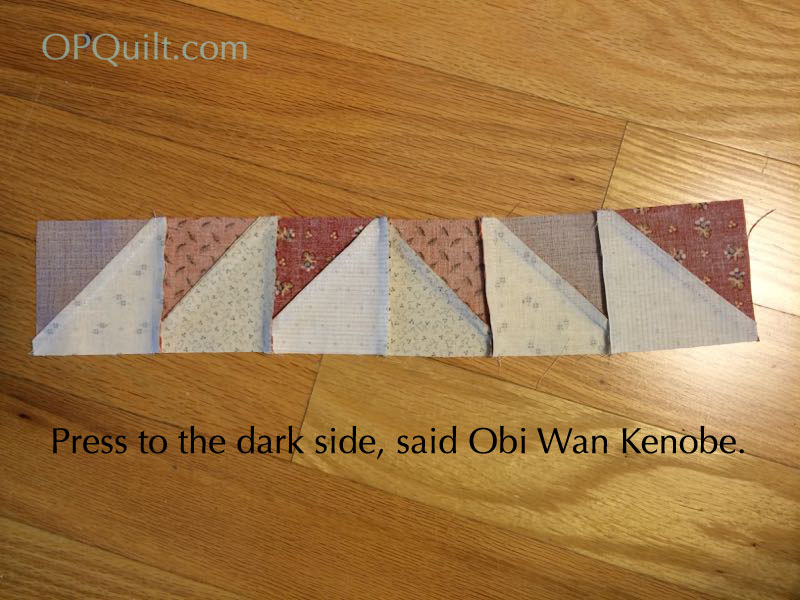
Start with the lower edge of triangles; sew them together in a strip. This goes on very smoothly if you are using a 1/4″ seam allowance when you stitch (not 3/16ths” and not 5/16s” Strive for accuracy). Press to the dark side (okay, I couldn’t resist).
Matching up that center spot, pin, and then stitch the row onto your larger block. Press toward the larger block.
Now for the side rows: pin, but add on the corner blocks on each end. Press the row’s seam allowances toward the dark side EXCEPT for those corner blocks. On those, I pressed toward the corner block, so that putting this together would be easier (the seams will nest–you’ll see what I mean). Now attach them to the larger block, matching those corner seams, and stitch. Press toward the block.

Ta-DONE!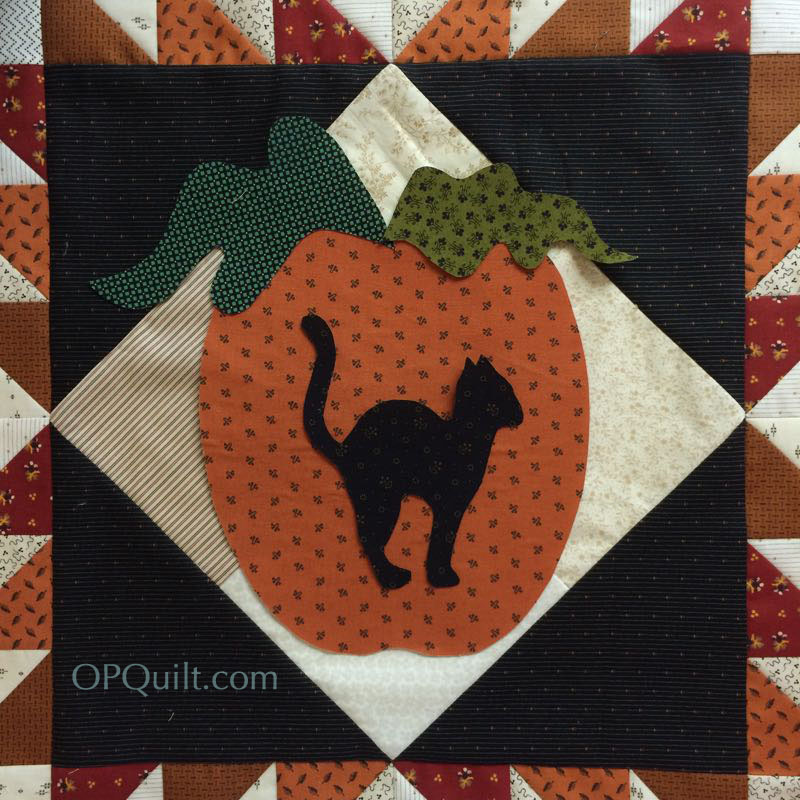
Get your cut-outs, and start playing. Remove the backing paper and you’ll find it easier, as the fusible stuff is tacky and will adhere lightly as you arrange and re-arrange.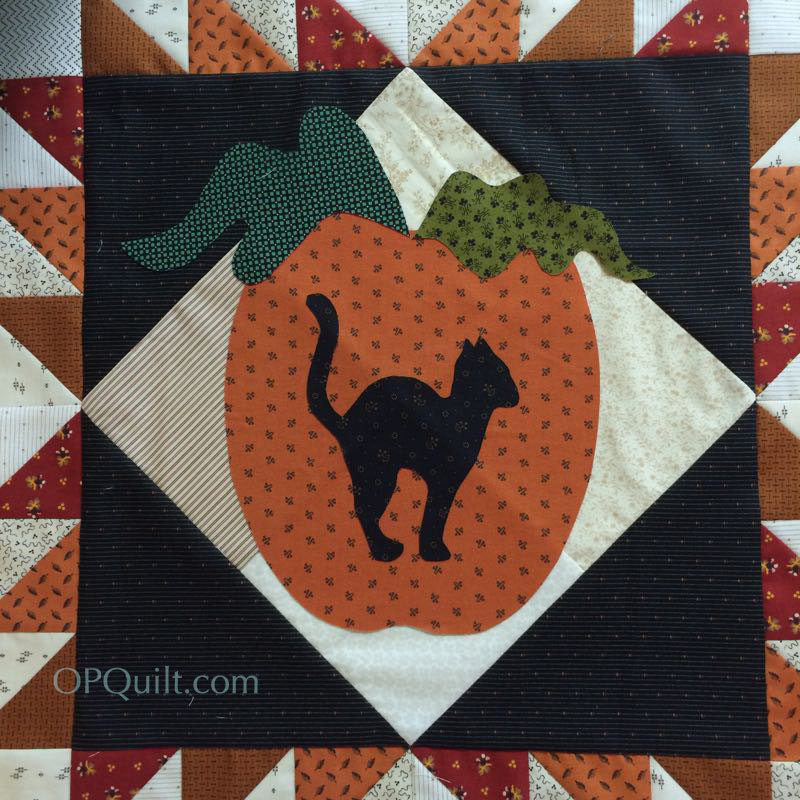
When you like where things are, fuse them to your block, following the directions that came with your fusing product (I use a cotton setting, lifting the iron on with an up-and-down motion until it’s adhered, but don’t mash it flat and sear it into the cloth. Easy does it).
Leisa’s block.
Leisa’s pumpkin in place.
Now it’s time to make that curlicue vine/stem. Cut a bias piece of fabric, 1-inch wide and at least 14 inches long. Fold it in half, with the right sides outside. Stitch in fat 1/4″ seam.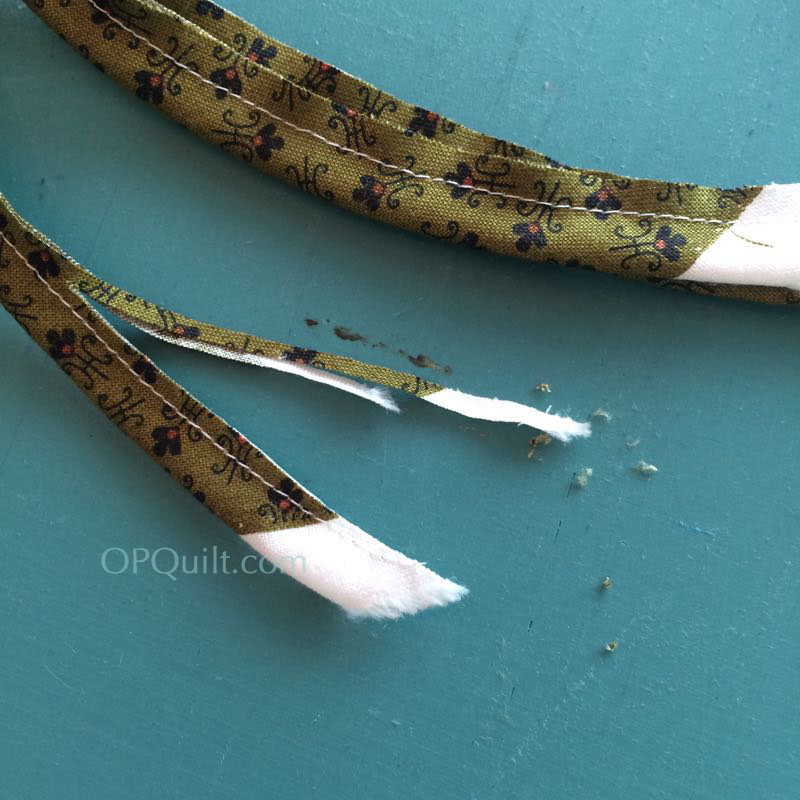
Trim the seam to a scant 1/8.”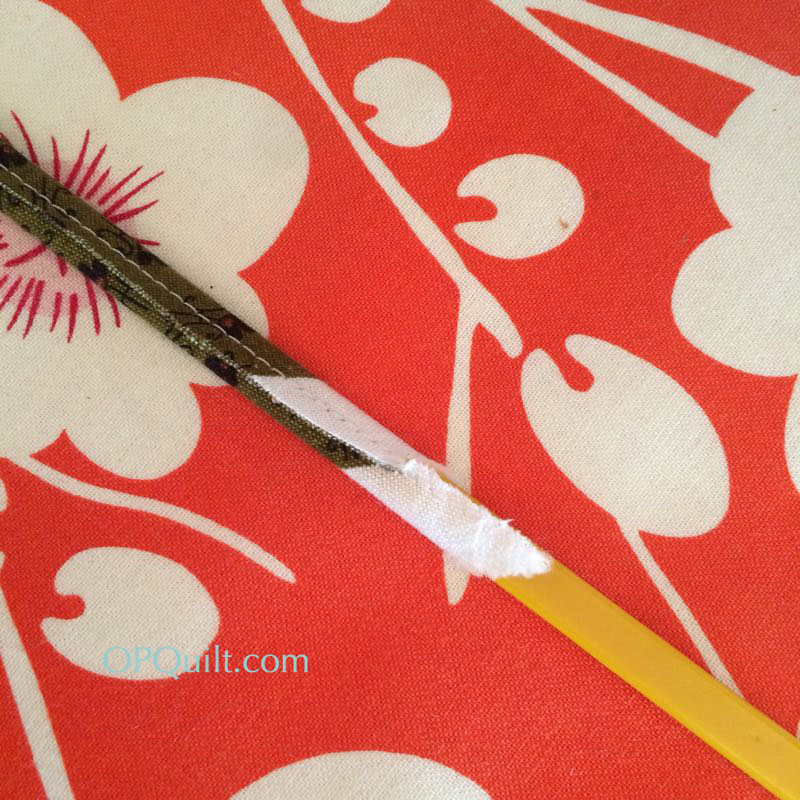
I use bias pressing bars and insert them into the tube, rolling the seam allowance to the top. Press lightly. Remove the 1/4″ bar, and press the bias lightly. You don’t want to mash it flat, but you do want to set the bias tube so the seam remains to the back side.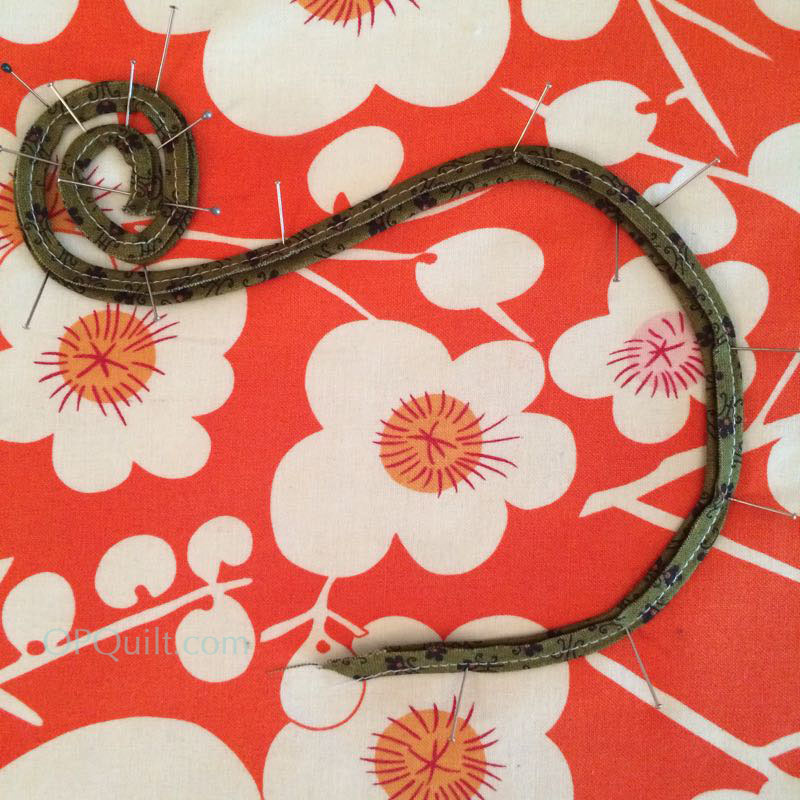
On a padded surface (I use my ironing board), coil and pin one end fairly tightly, then using the pattern pictures as a guide, loosely curve the curlicue stem the other way. Steam it with your iron, then let it cool. Remove the pins.
Drape it/arrange it/fiddle with it on your block. I concentrated more on the coiled up section, then let the curve artfully drape back to the center of the pumpkin, not worrying about how long it was. 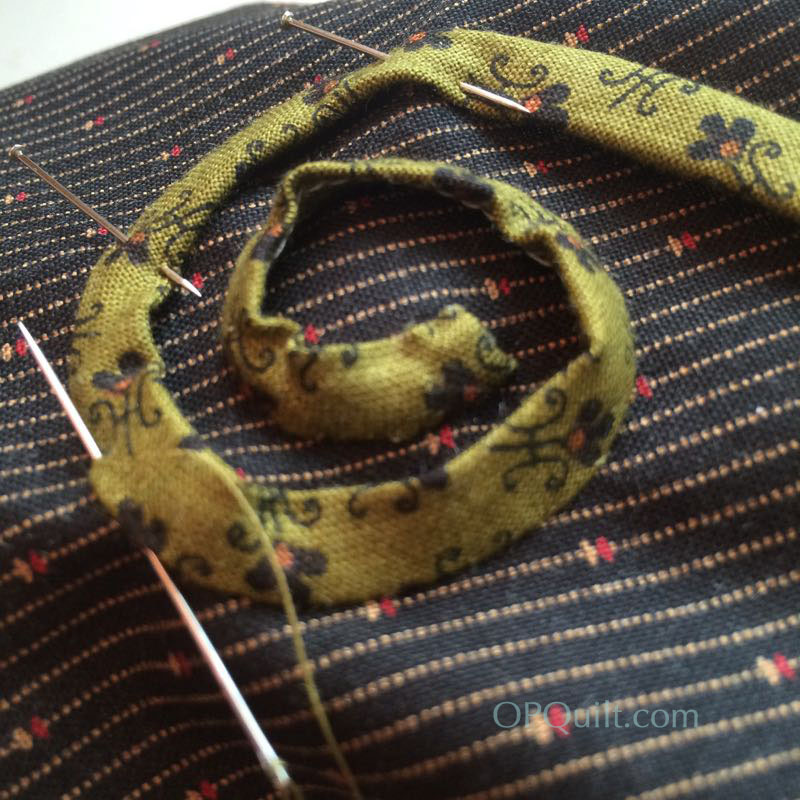
I decided to sew it down by hand. First sew the outer edge, then the inner edge (shown below), coaxing that inner edge flat with nudges from your finger and by taking smaller stitches. You are not necessarily aiming for *flat* but more for *nice curve.* After stitching it down, give it a little steam from your iron to press it lightly.

Next one is prepped up. I cut off the extra stem about 1/2″ below the pumpkin’s edge and folded this end (as well as the inner coil end) under 1/4″ and tacked the edges down.
I’m not a huge fan of machine-done buttonhole stitch, although I really like it on others’ quilts. If you are skilled at that, try that stitch. For me, I went with a medium-wide satin stitch, my needle just over the edge of the piece. 
I lifted up a leaf a bit as I got to the end, another advantage of not searing your applique piece into your fabric. I ironed it back down again after I was through.
Pumpkin is on.
Here’s my secret to getting even appliqué stitching without having the bobbin thread pull up to the top: two sheets of computer paper. It also prevents stretching as you stitch. I’ve backed all my stitching with this for years and years and years–it comes off easily, like tearing perforated paper, and makes your stitching nice and smooth. After stitching down the pumpkin (the shape at the bottom of the stack), stitch down your leaves (next layer up) and finally, your cat. In some quilts, I’ve seen a star in the middle of the pumpkin.
Well, that’s it for this step: because we’re doing nine blocks, we chose to do four with cut-out motifs. You’ll need to adjust whatever you’re doing to the number of blocks you’ve chosen.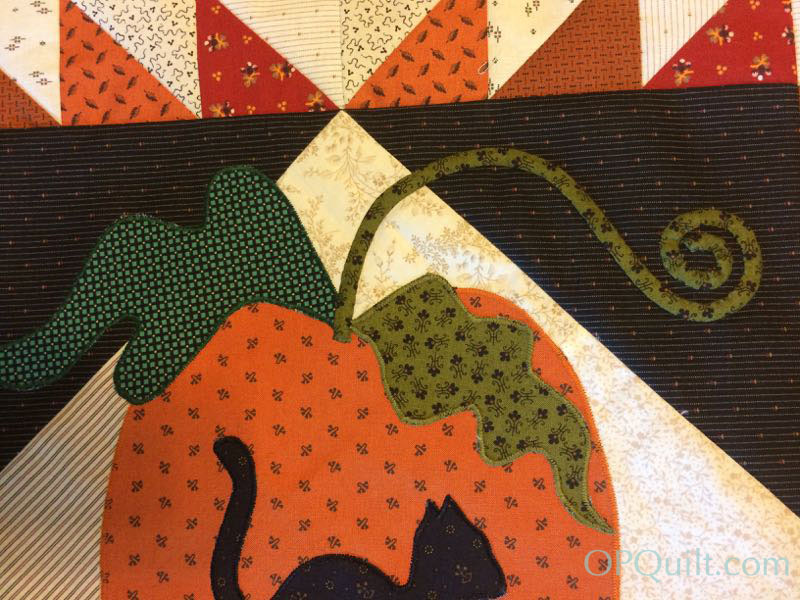
Close-up of my appliqué. If truly this bias thing is driving you mad, feel free to try Thelma’s method of drawing a shape and fusing it down.

Now I need to get busy and finish these! I have all of this month to do it in. Next post in the Hallowe’en 1904 QAL will be May 13th. I plan to finish up these three, then make scads and scads of HSTs, getting ready for the next steps. Hope you can finish yours, too!
UPDATE:
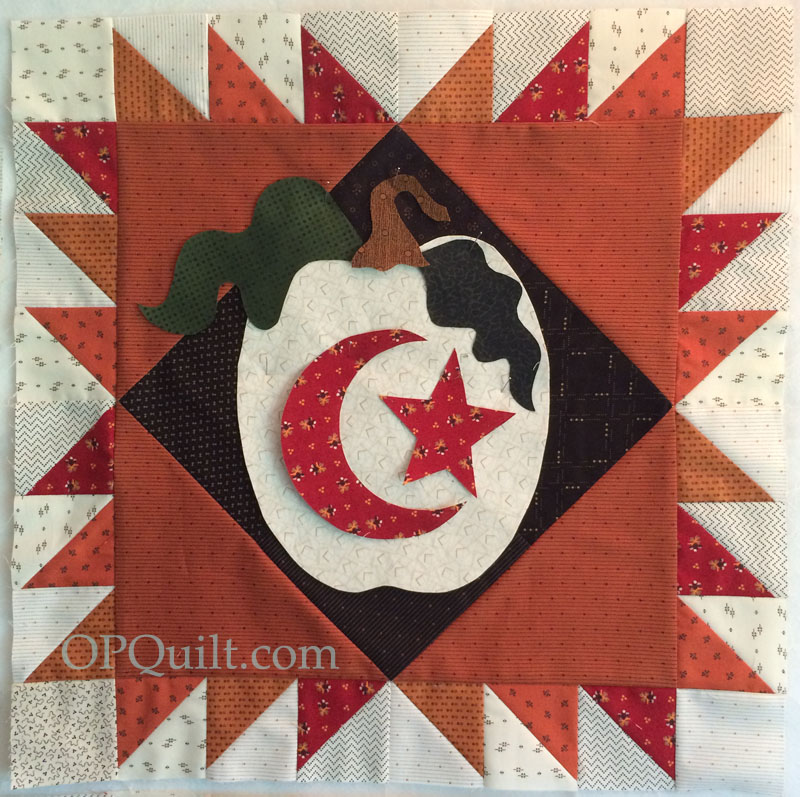
Here’s my latest block. I cut down the moon because it needed to be more round (according to my husband and I always listen to him) and I smallerized the star, then put them both on a white pumpkin. I did two layers on that white pumpkin: the fabric you see and I underlined it with some cream solid fabric so the black wouldn’t show through. I created a stem (2 1/2″ inches high), and a smaller moon and star for inside the pumpkin (PDF file of the patterns are here: StemStarMoon_OPQuilt). Print it out at 100%. I’m much happier with things now. Don’t be timid about playing around with your pieces and colors until you find what makes you happy, too.
![]()
Here’s our schedule:
Step 1 (Preparation): February 2016–buy all the fabrics and find the pattern. Mine was purchased from Common Threads in Waxahachie, TX (www.commonthreadsquilting.com). The quilt measures 90 by 90, which is too large for me, so I’m only doing nine blocks. Each block is 20″ square, and with the outer borders, that should come to roughly 65″ square. I may change my mind, but this looks good from here.
Step 2: March 2016–Cut out the quilt: the tan backgrounds of the squares, the border triangles, the smaller half-square triangles, strips for the wonky stars, but save the piano key border for later.
Step 3: April 2016–Assemble four blocks and add large appliques; use Thelma’s method (of Cupcakes and Daisies) for adding the curlicue stem. Make and add half-square triangeles (HSTs) around these blocks, using the 8-at-a-time method of HSTs.
Step 4: May 2016–Cut and make the wonky star blocks from templates and strips. We’ll be using Thelma’s method. I’m doing five blocks, so will need to make twenty wonky stars and true them up.
Step 5: June 2016–Assemble the rest of the star blocks, adding the large triangles on each corner and their HST borders. In the pattern, and in the photo above from Thelma, they are mixed up and varied, but also harmonized (some have a mix of orange and black, some have just black, some have just orange.) Make your own rules and go with it.
Step6: July 2016–Arrange the blocks on your design wall and stitch together. Cut the pieces for your borders. Make the four corner pinwheels.
Step 7: August 2016–Sew borders together and attach them to the quilt.
Discover more from OccasionalPiece--Quilt!
Subscribe to get the latest posts sent to your email.

This will undoubtedly be a fabulous quilt! I’ll enjoy the process vicariously.
SWEET! I love the addition of the black cat to this quilt! I am loving your quilt! Thank you for the tutorial on the vine and the block construction. Its always nice to see a work in progress! Thank you so much for sharing the black cat! I love it!
Your quilt blocks are gorgeous! Thank you for the pumpkin stem pattern. I think I will use that as well. The tutorial for the stem is very helpful. I have NEVER made one. I’ve got work to do! Thank You for sharing this process.
The chart for 8 HST comes from Jeni Baker blog In color Order : at least, this page is in her book!
Greetings from France,
Katell