EPP · Quilts · Shine: The Circles Quilt

SHINE Circles Block 16, EPP Sew-A-Long

Circles EPP Button

Circles 16_OPQuilt_marked
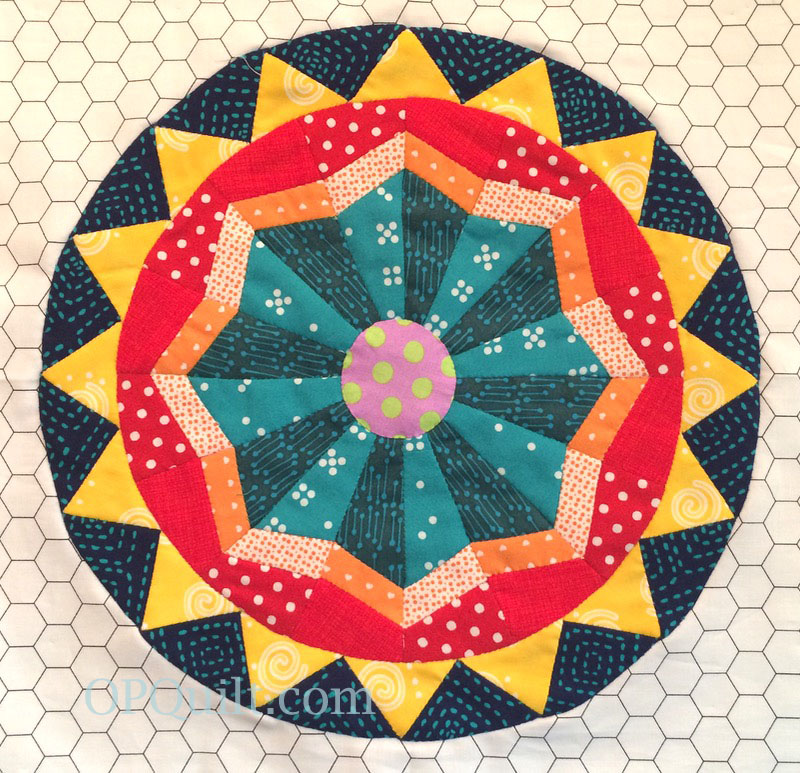
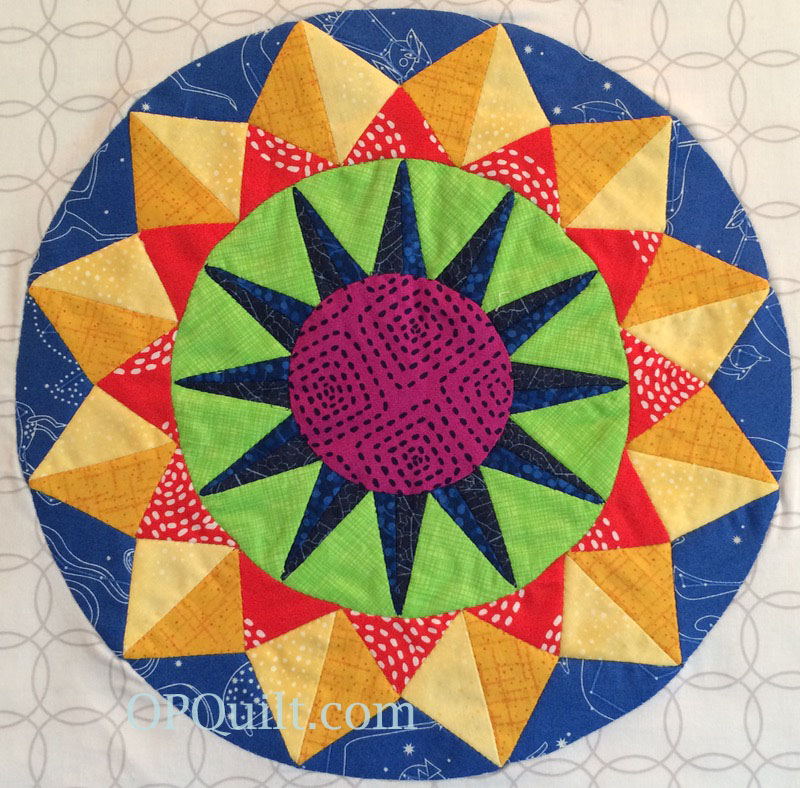
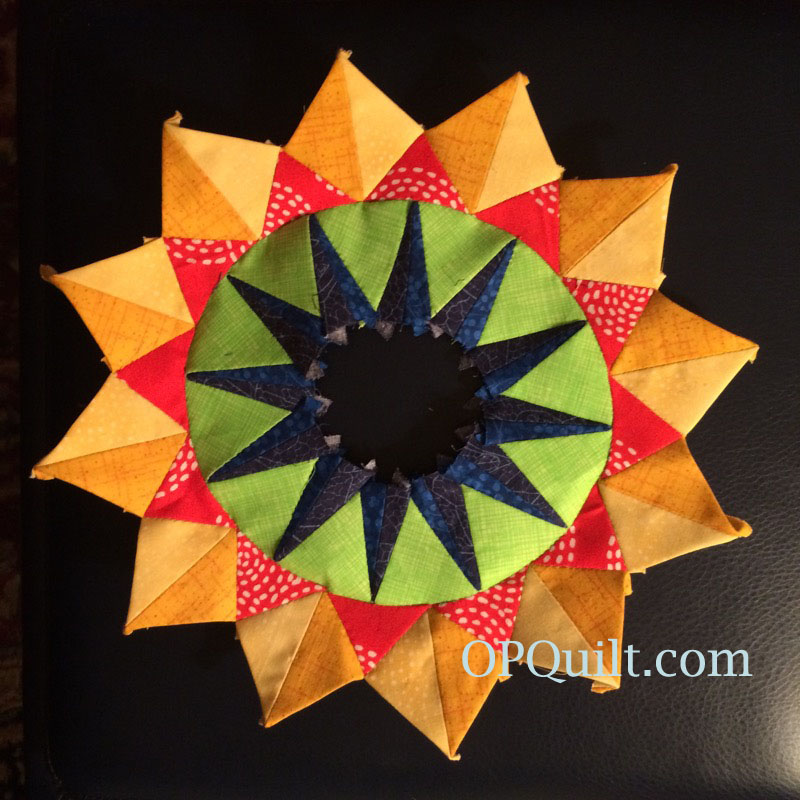
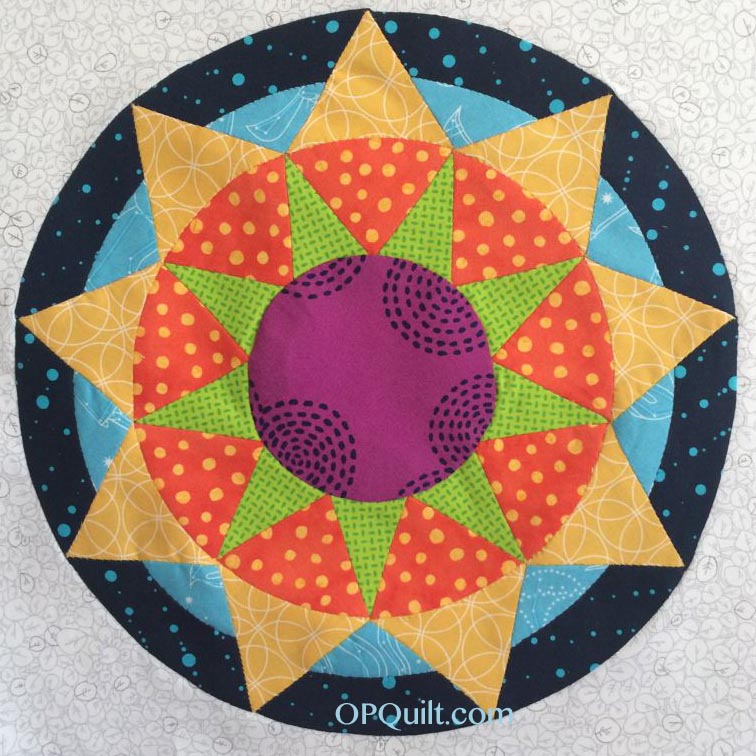
Radiating Compass Rose
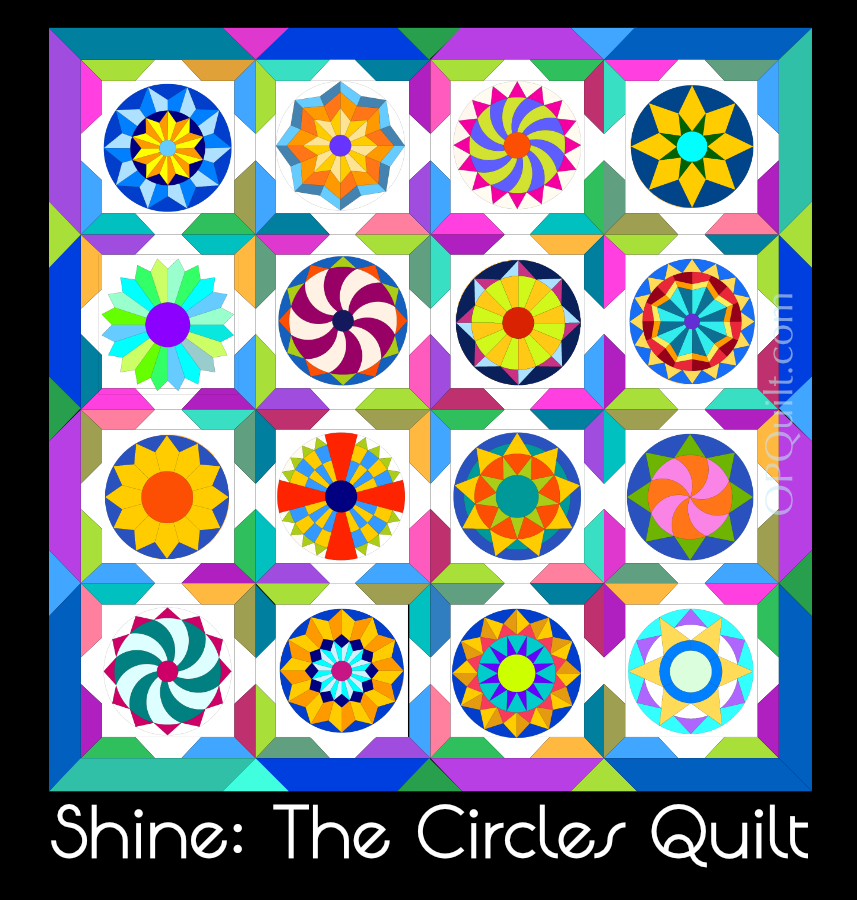
Final Block of Shine: The Circles Quilt

This is the Sixteenth and Final Block for my project Shine: The Circles Quilt.  It’s kind of a bittersweet moment, as I spent more than a year designing and sewing these blocks, and have sent them out into the world with a wish and a hope that others may enjoy them, too.  And I hope you have!

The patterns for the another set of nine circle blocks (this one included) can be purchased on PayHip, but I have left the tutorials here, as they are photo-heavy. The Finishing Instructions pattern for Shine: The Circles Quilt is also listed on Payhip.

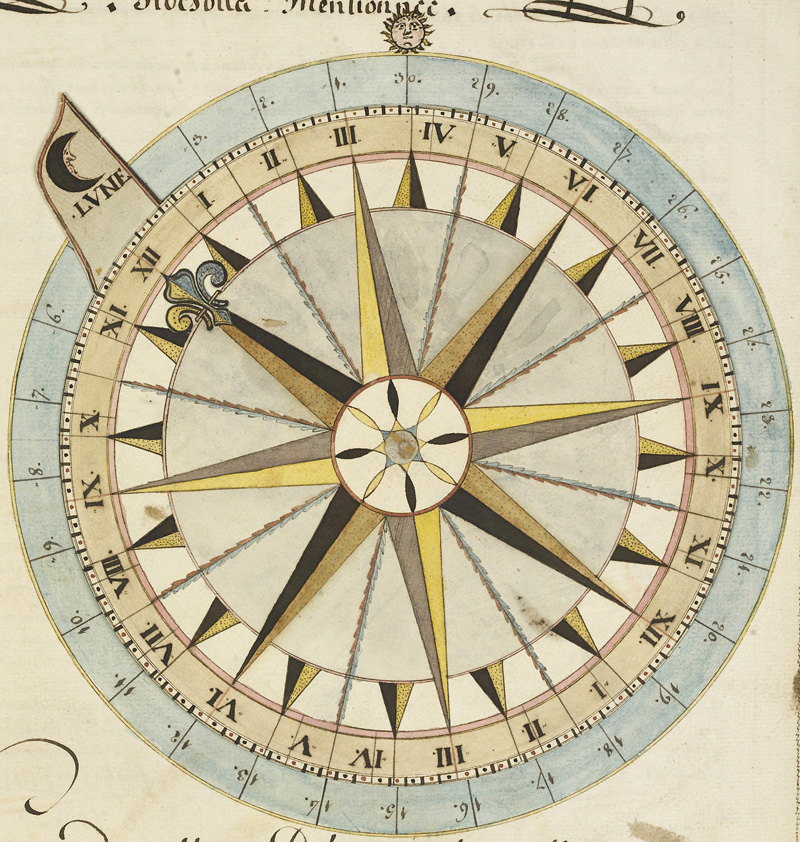
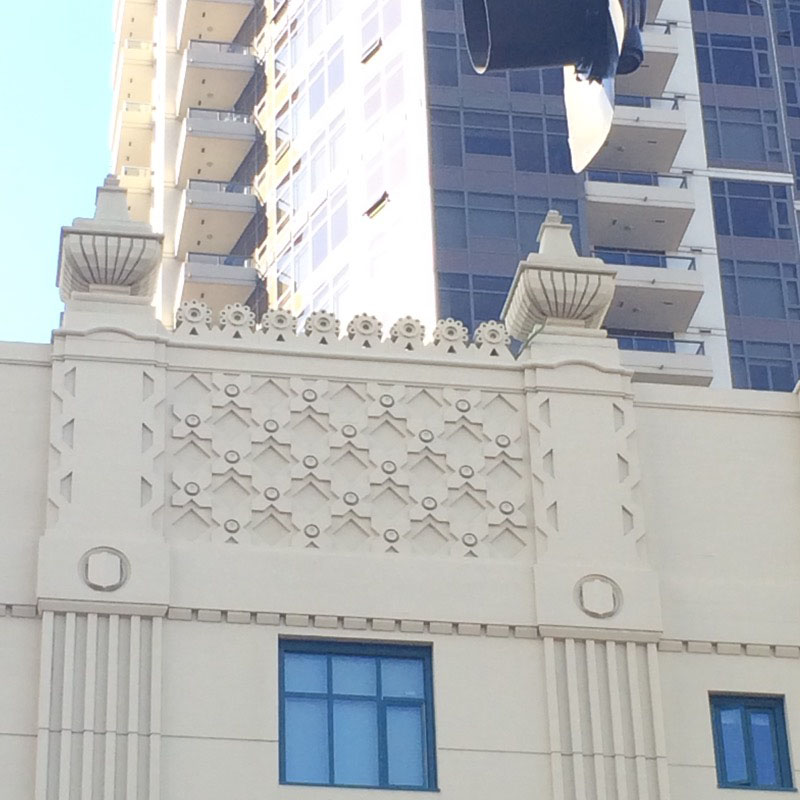
As I did for the fifteenth circle block, I based my design on the fancy compass/North designator of old maps, throwing my ideas into some quilt software, and having fun.  There are elements of other blocks in this one, with the undulating narrow blades and the small points.

EQ7 Circle 16

For this final block, I liked that this design had echoes of Circles Block Four, and that you can see a dimensionality to it.

Circle 16_1
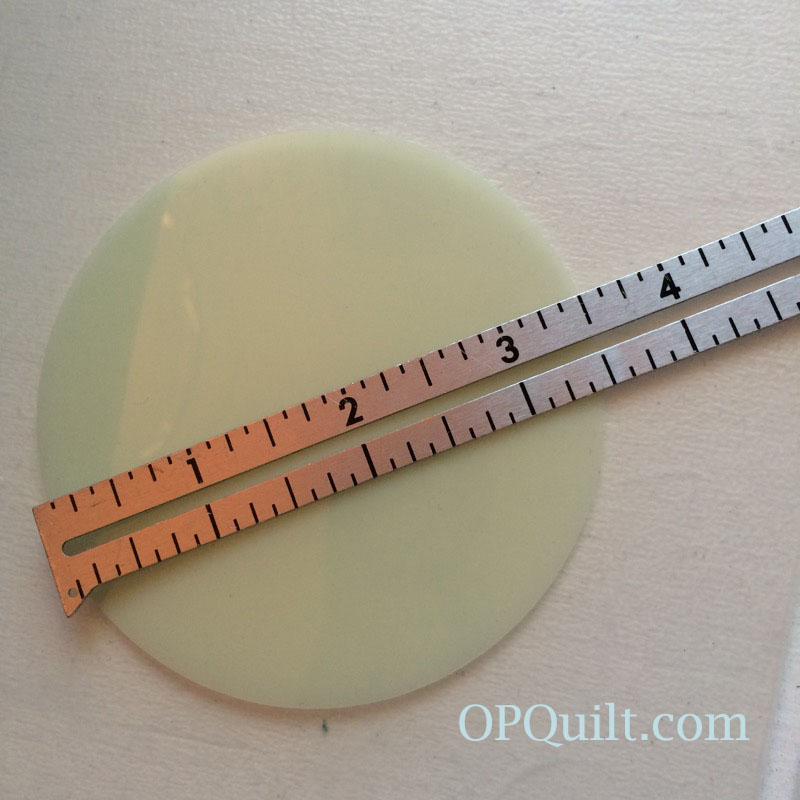
A circle leftover from another center circle for another block.  It worked great here!

Circle 16_2

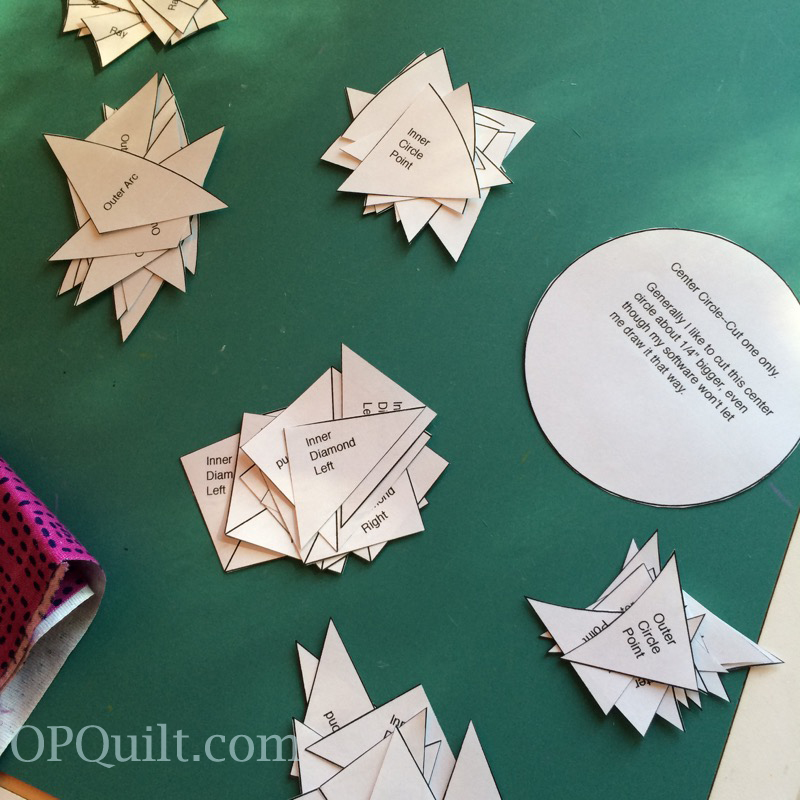
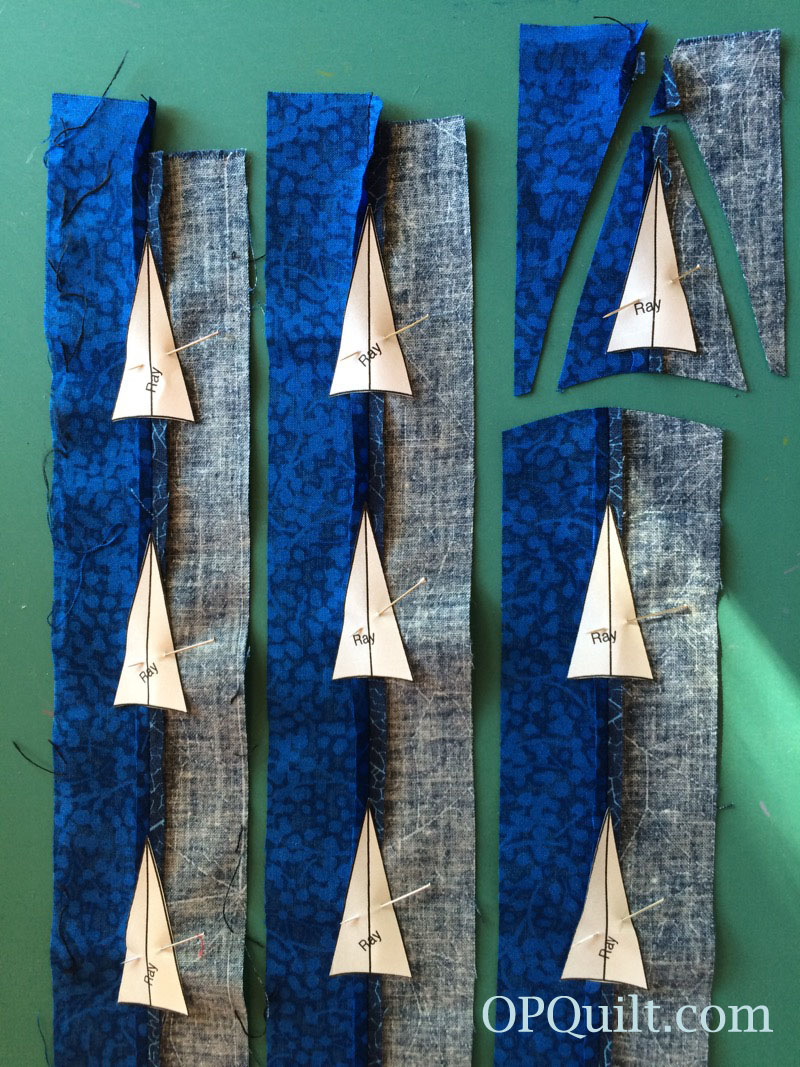
To get the blades going the same way as shown in the illustration, lay the printed side DOWN.  I include lots of tips and tricks for these circles in each pattern, so if you found this one first, head to the tab up above marked Shine: The Circles Quilt EPP to find the others.   Circle 16_3 Circle 16_4The outer points have no direction, so you can place them printing up. . . or down.

Circle 16_5 Circle 16_6All the pieces are glued down to the papers.

Circle 16_6a
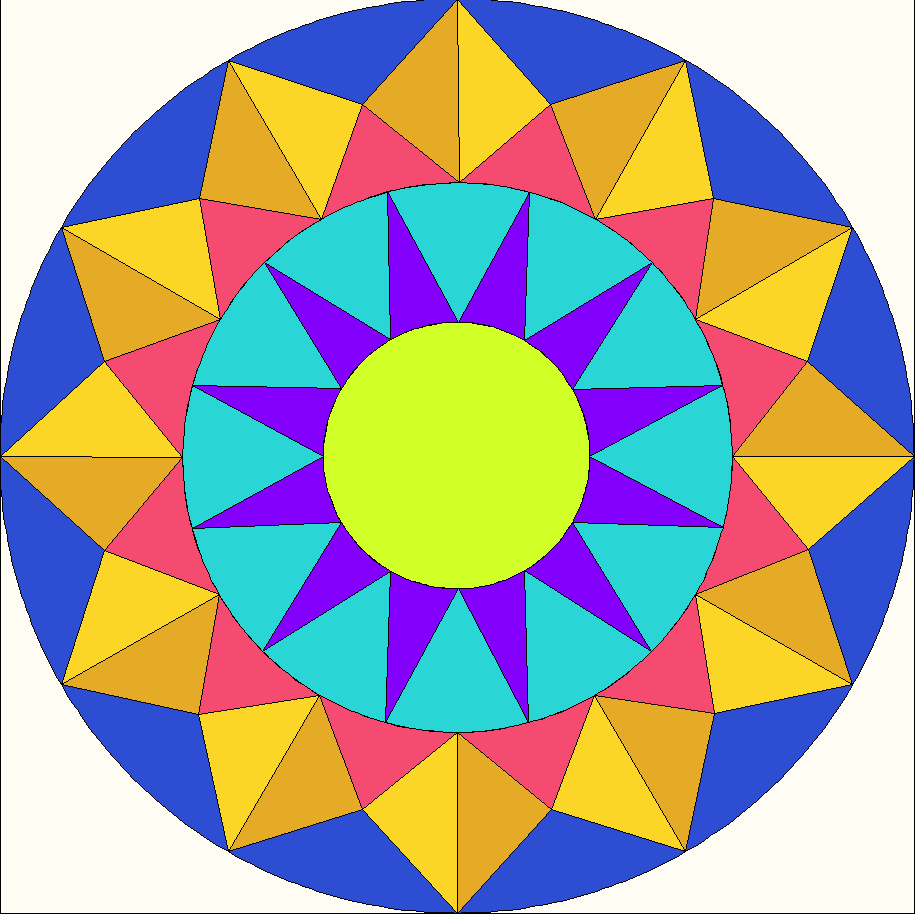
I print out a smaller version of the illustrated circle and carry it around with my pieces as I’m working on the project.

Circle 16_7 oopsPay attention to which way you sew on that first blade wedge.  This is an OOPS! on the right.  Un-sew and do it again.

Circle 16_7a

First round all sewn.

Circle 16_8

Second round all sewn.

Circle 16_9

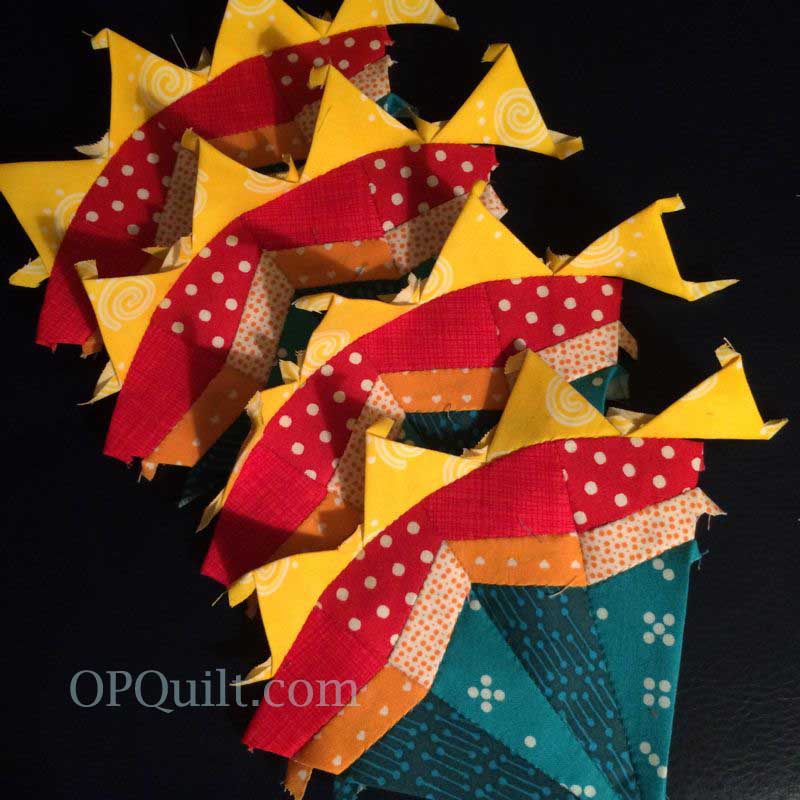
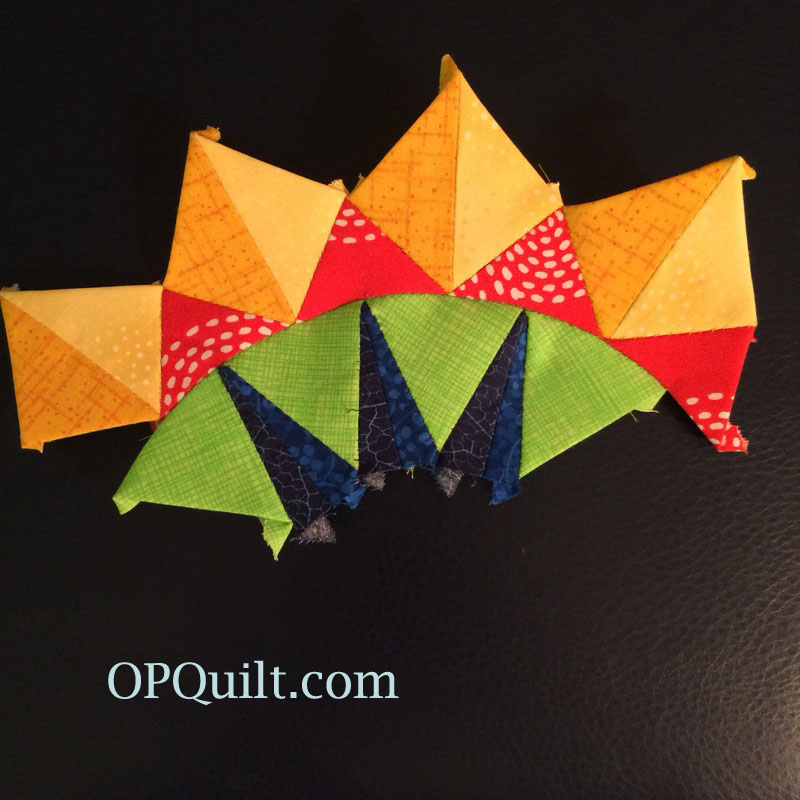
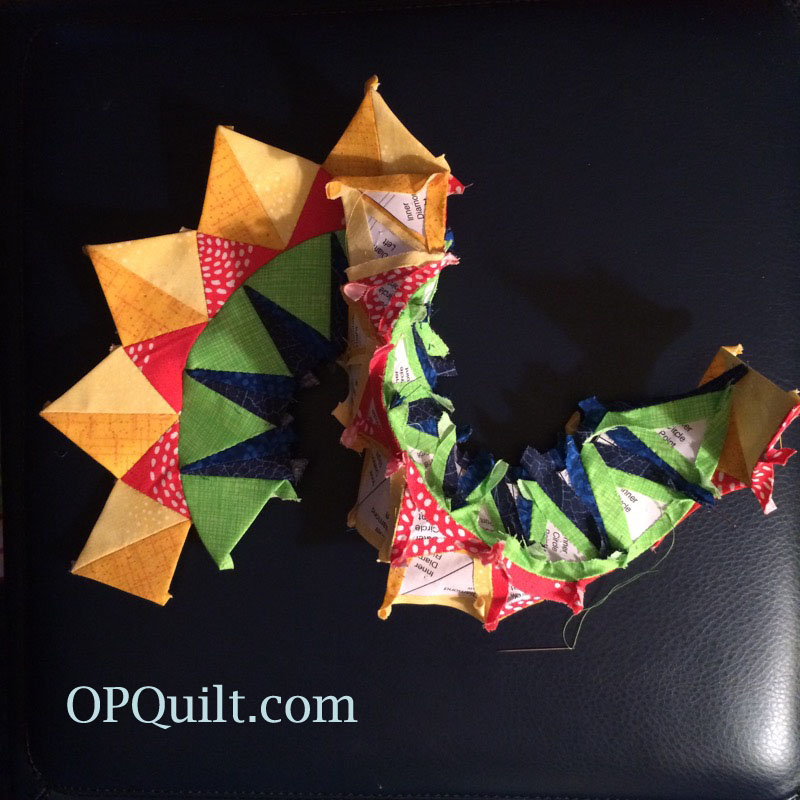
Join the blades of the rays together.  Because I have such strong color shifts in these pieces, I opted to use different colored threads in each section. Here I’m sewing the teal pieces together, then I’ll switch to other thread and join the next band. . . and the next.

Circle 16_10

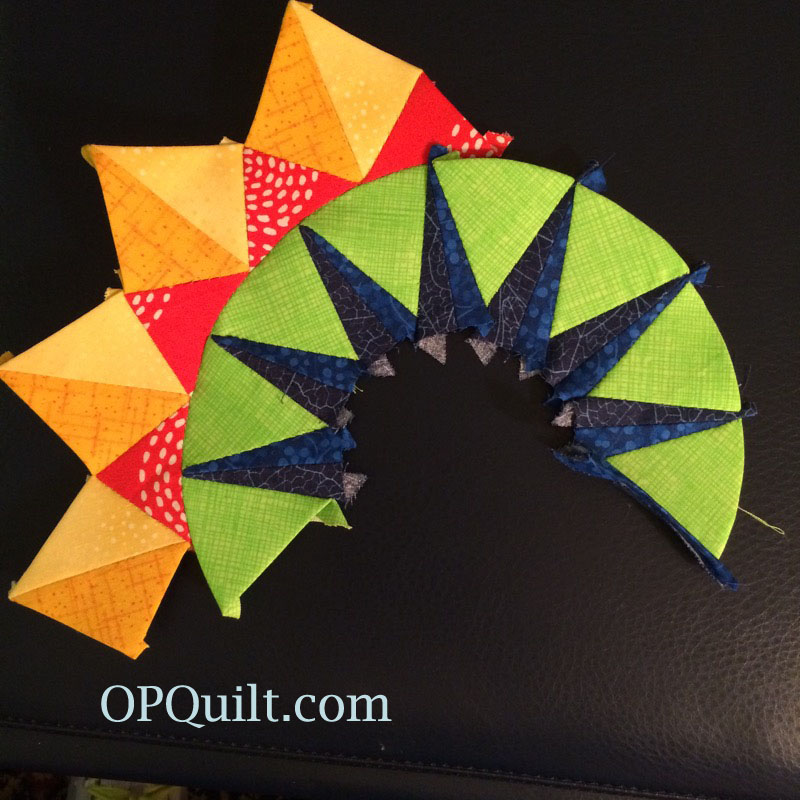
Start joining the units into pairs.

Circle 16_11

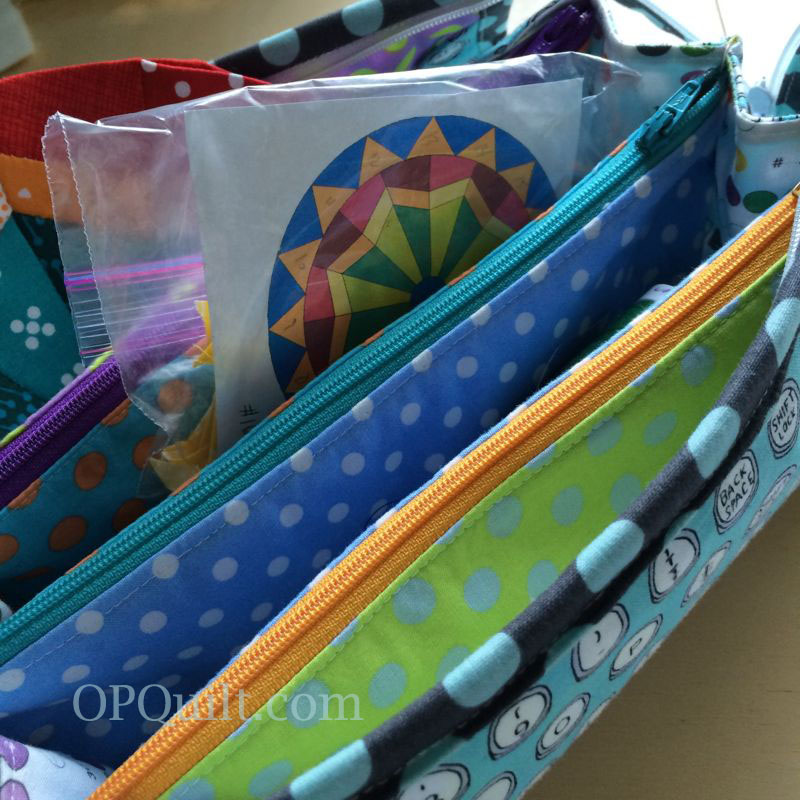
I just thought this was a fun photo of the project tucked into my regular Sew Together Bag.  Now I use the Mini Double Pocket Bag (pattern in my PayHip shop).

Circle 16_12

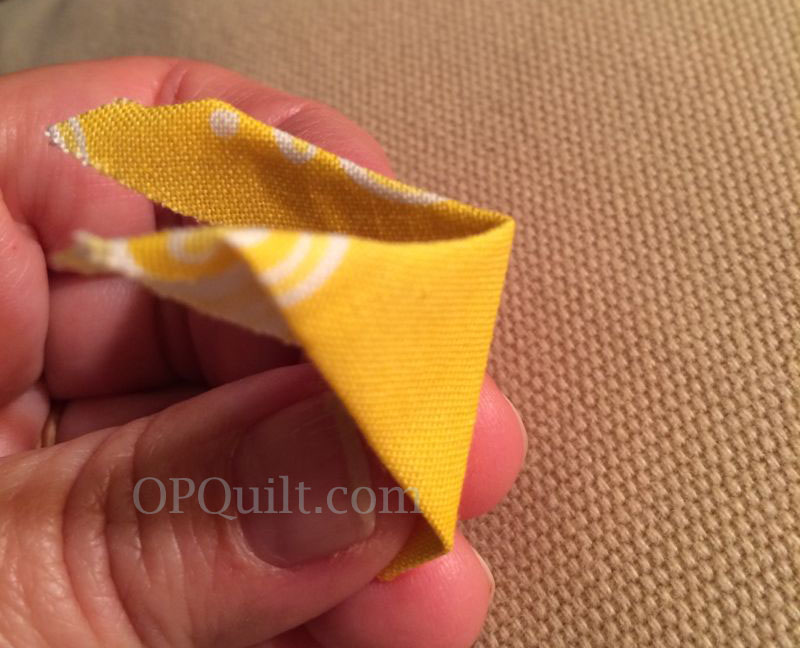
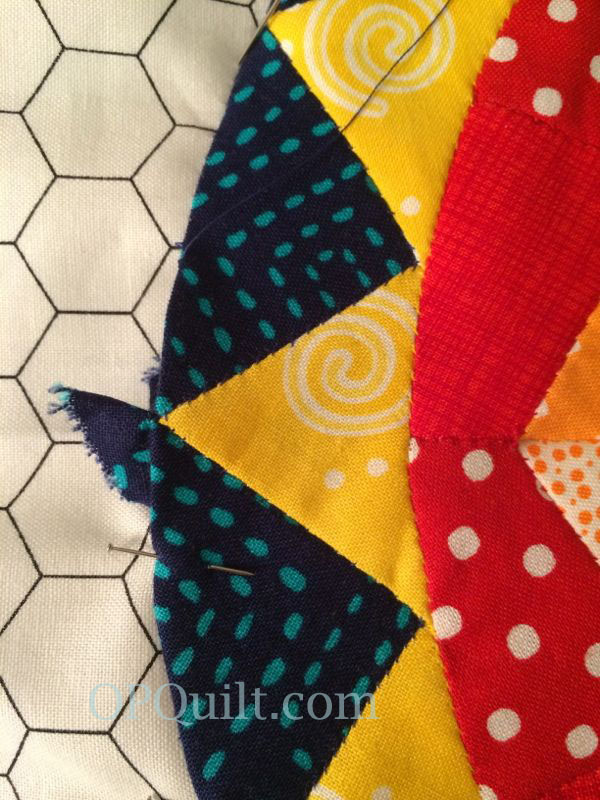
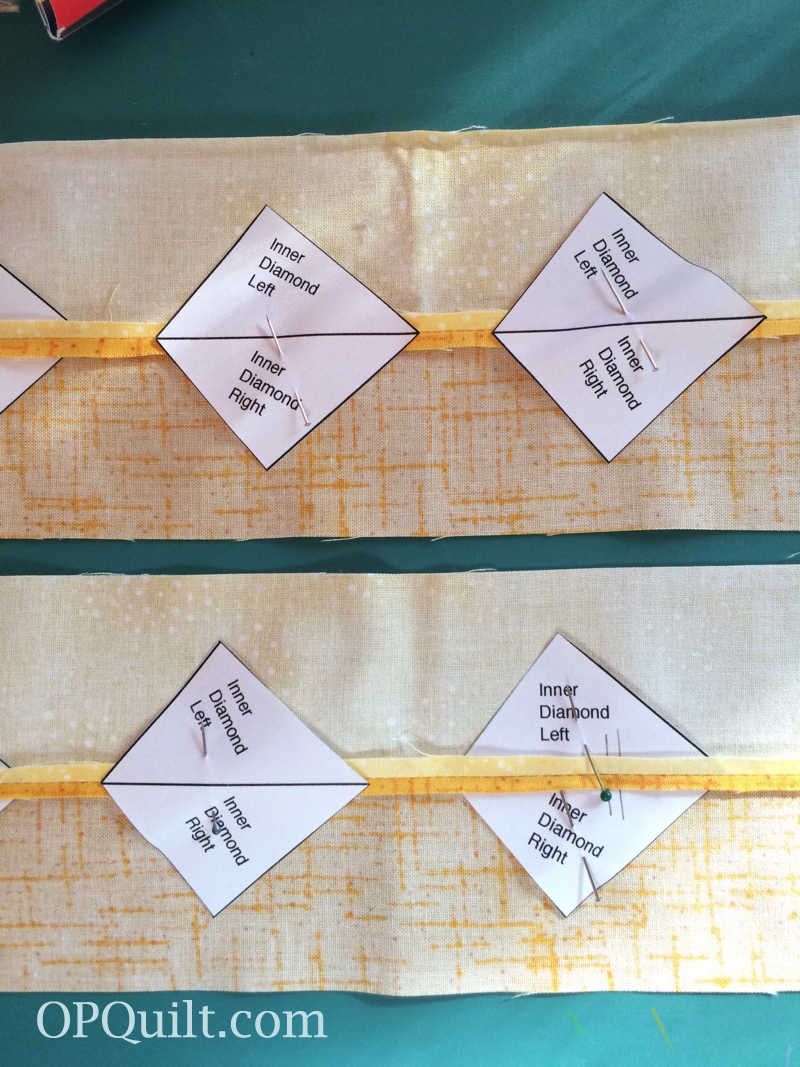
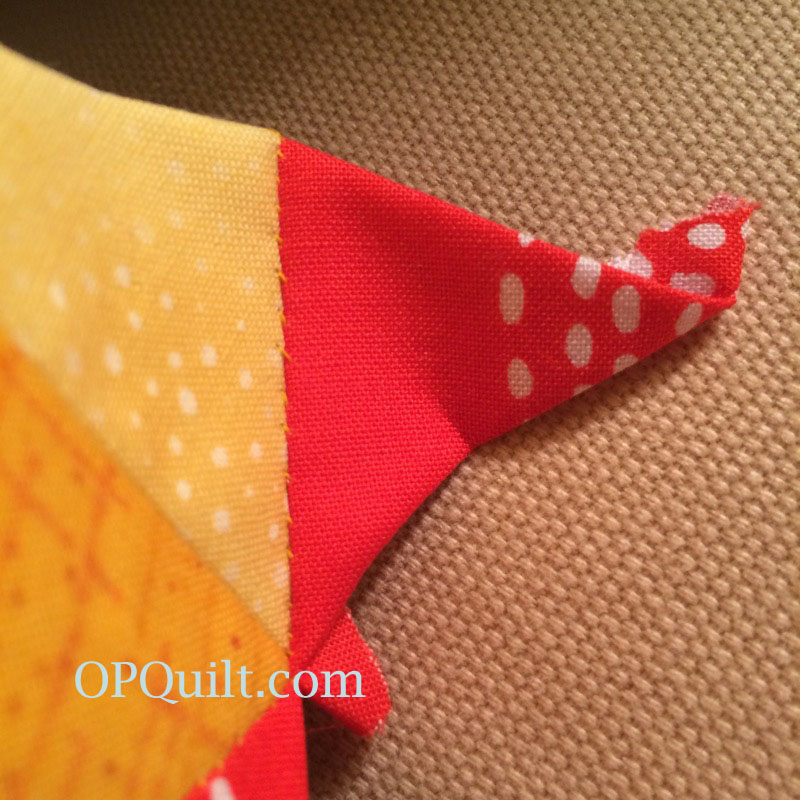
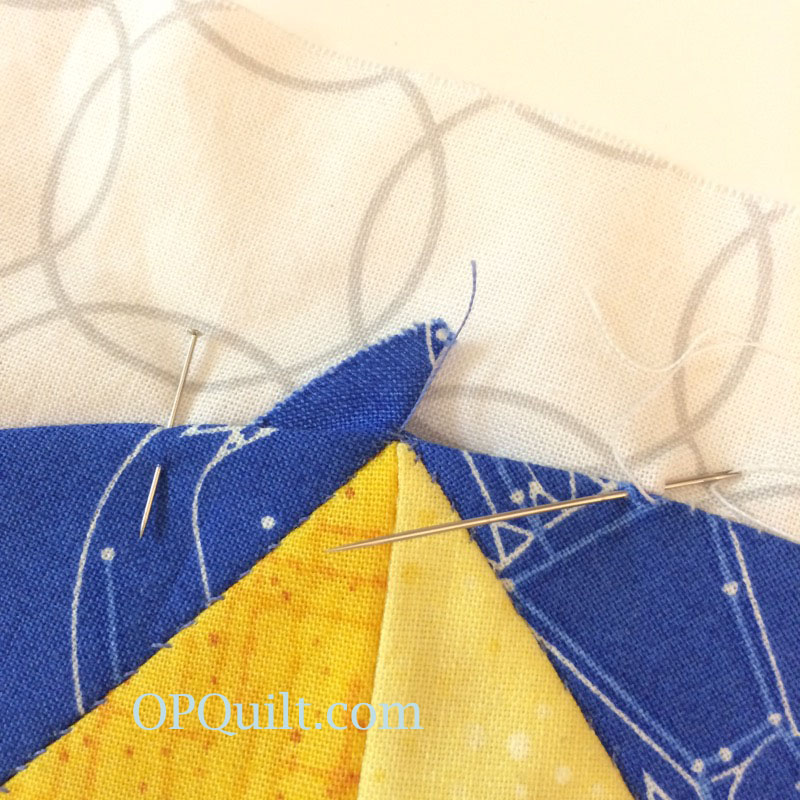
Okay, back to the sewing.  To place the points on accurately, pinch to find the center of the curved edge.

Circle 16_12a

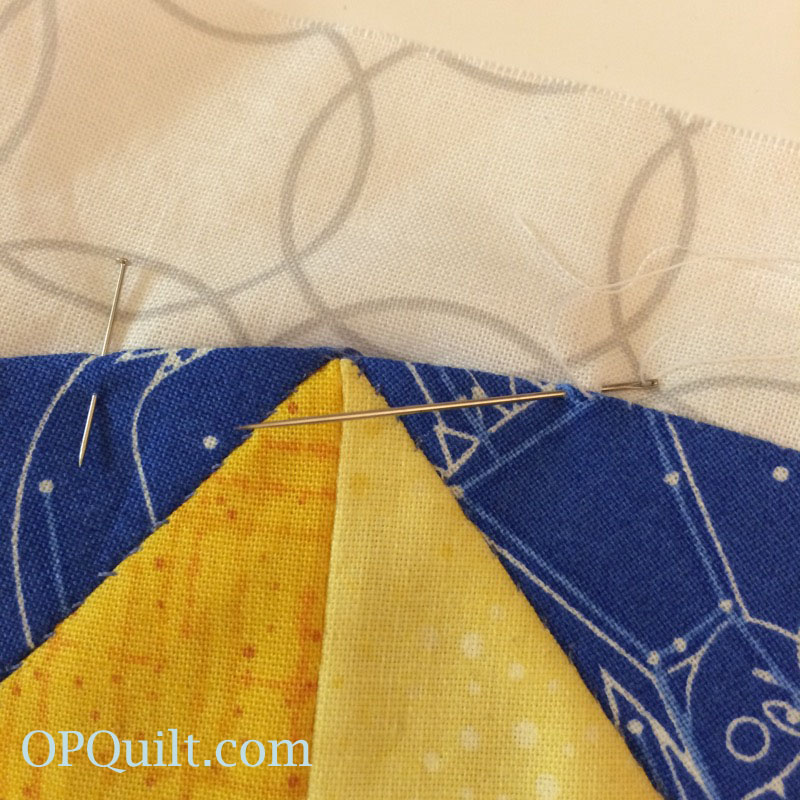
Align that as shown. I use one pin to keep it in place, but start sewing from the point’s outer corner, as shown in the next photo.

Circle 16_12b Circle 16_12c

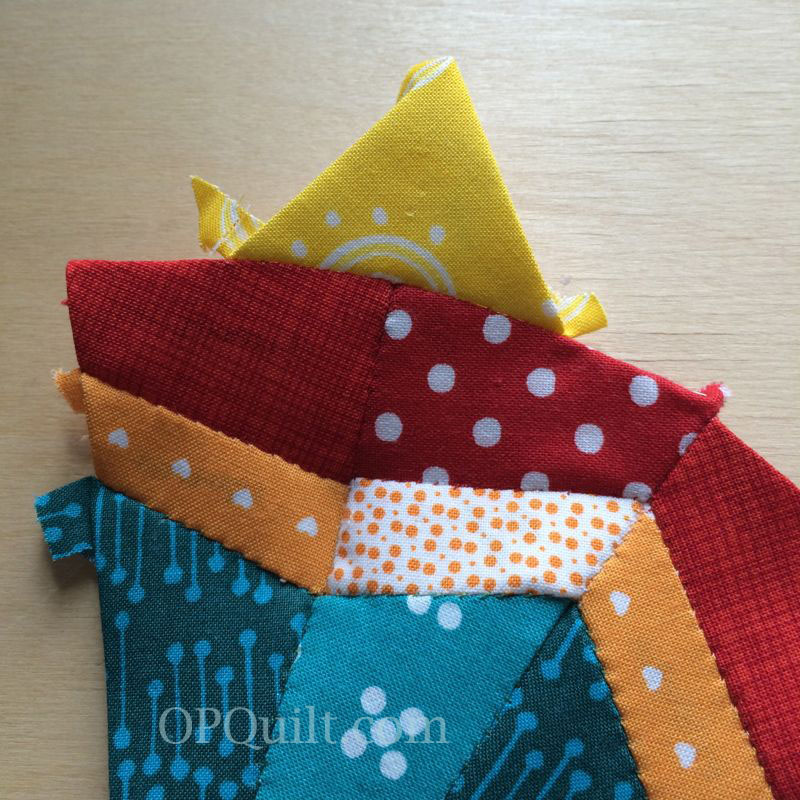
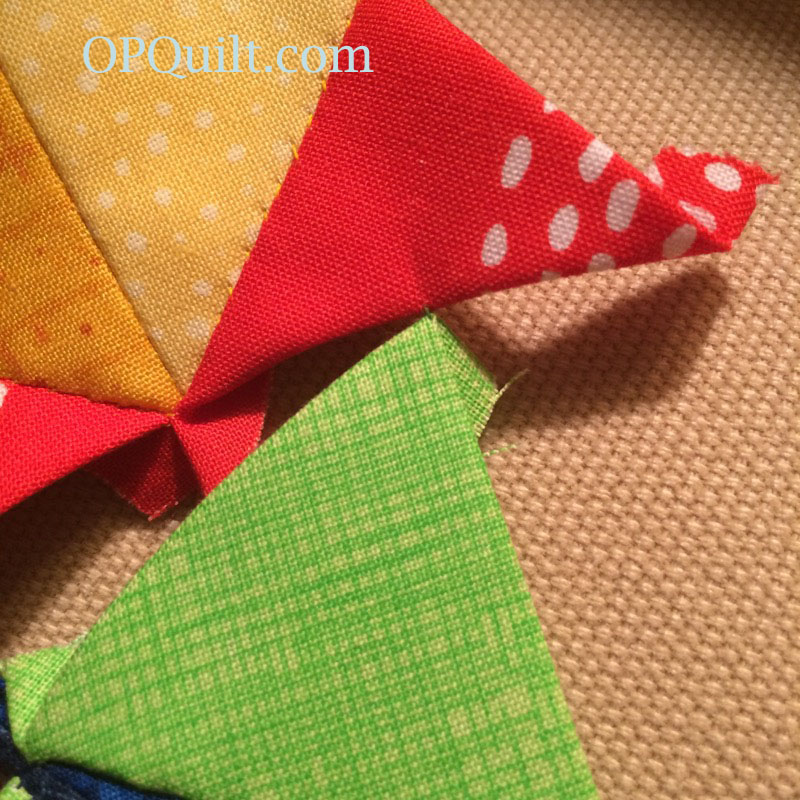
Repeat the pinch-to-find-center-action and sew on the next point.  I always take a stitch at the point corners to join them to each other.

Circle 16_13

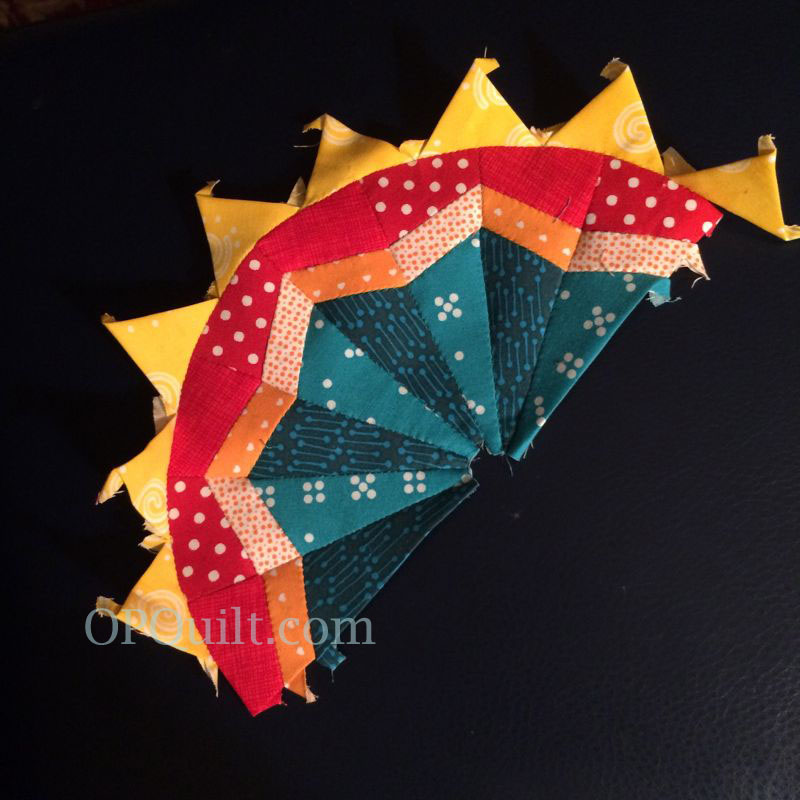
Here’s how they look when finished.  Keep going until you’ve gotten the points on all your ray-pairs.

Circle 16_13a Circle 16_14

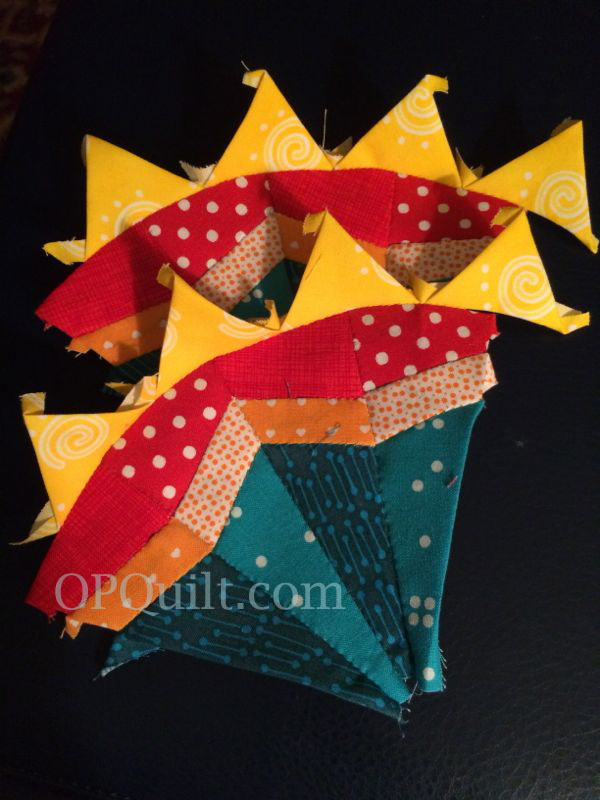
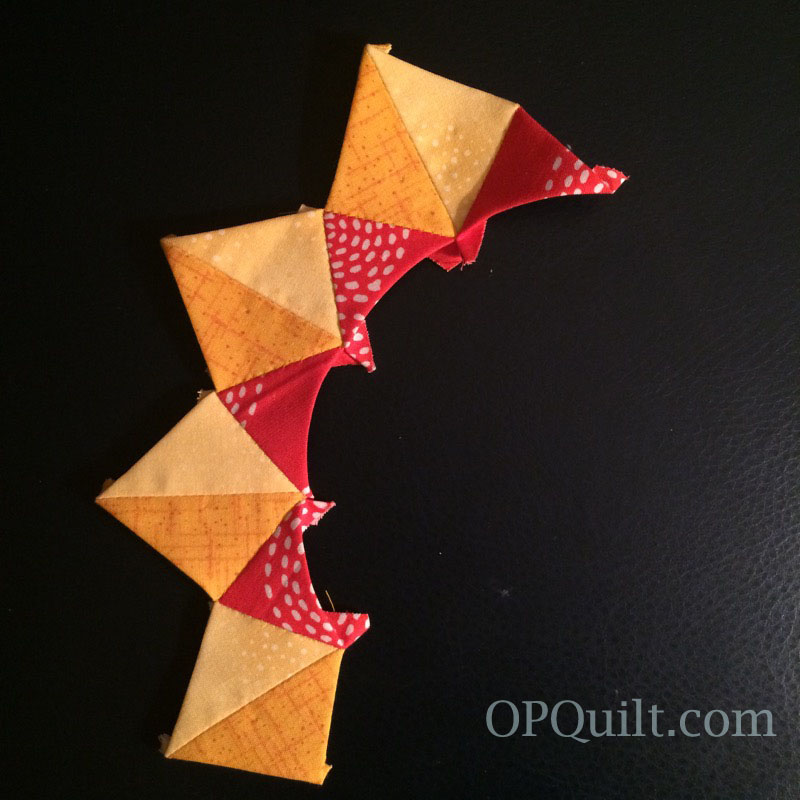
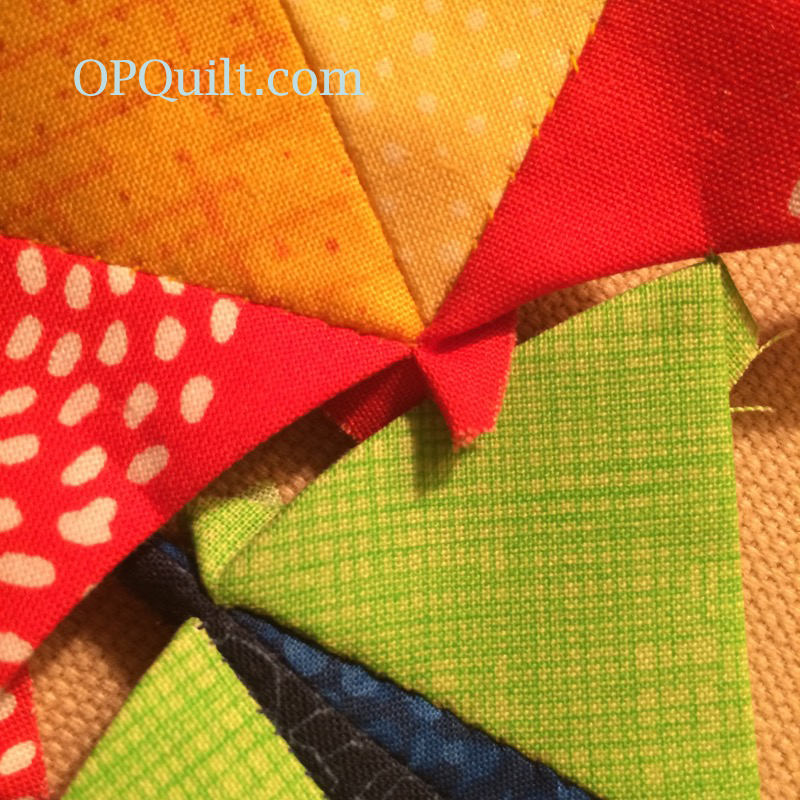
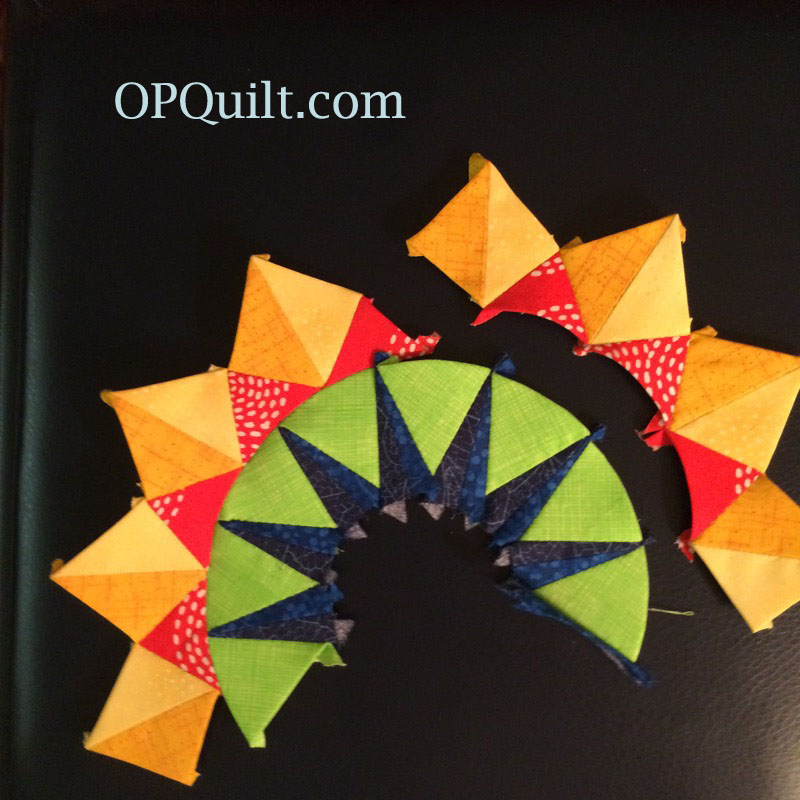
Join a ray pair together.

Circle 16_14a

Then stitch down the loose yellow point. Repeat with the other two pairs.

Circle 16_15

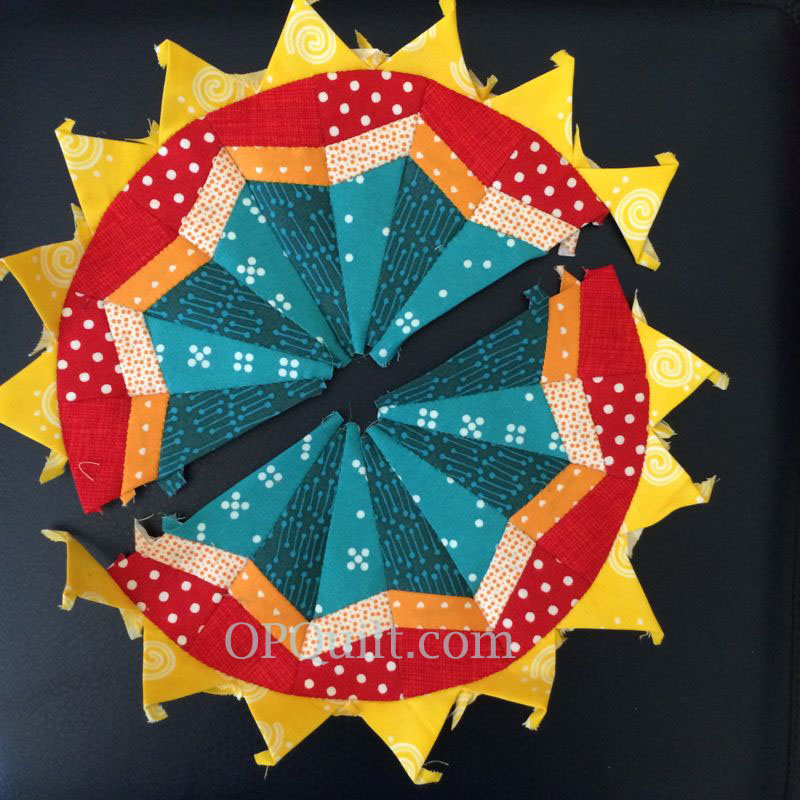
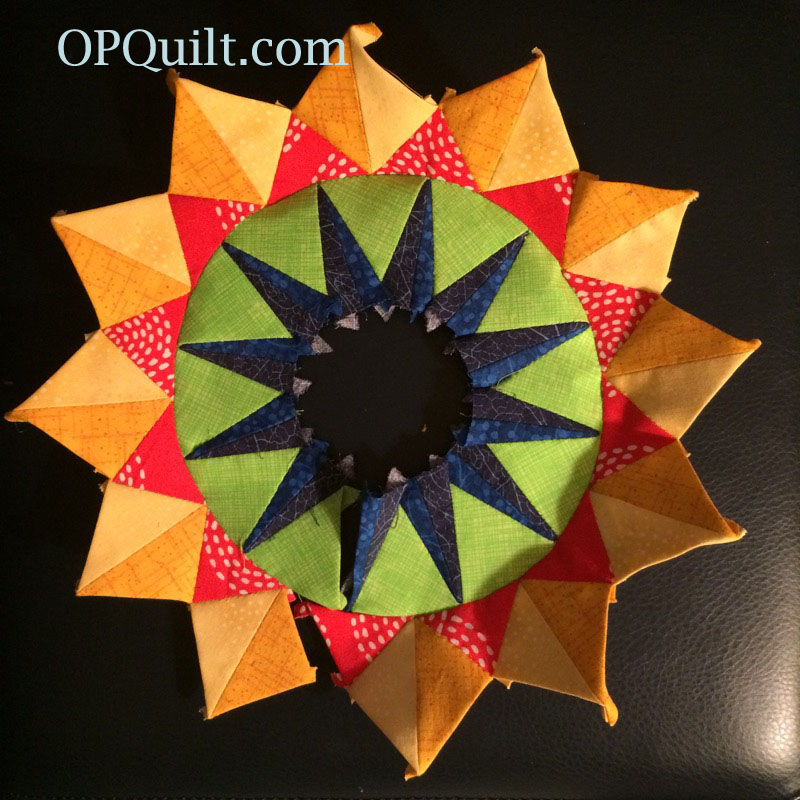
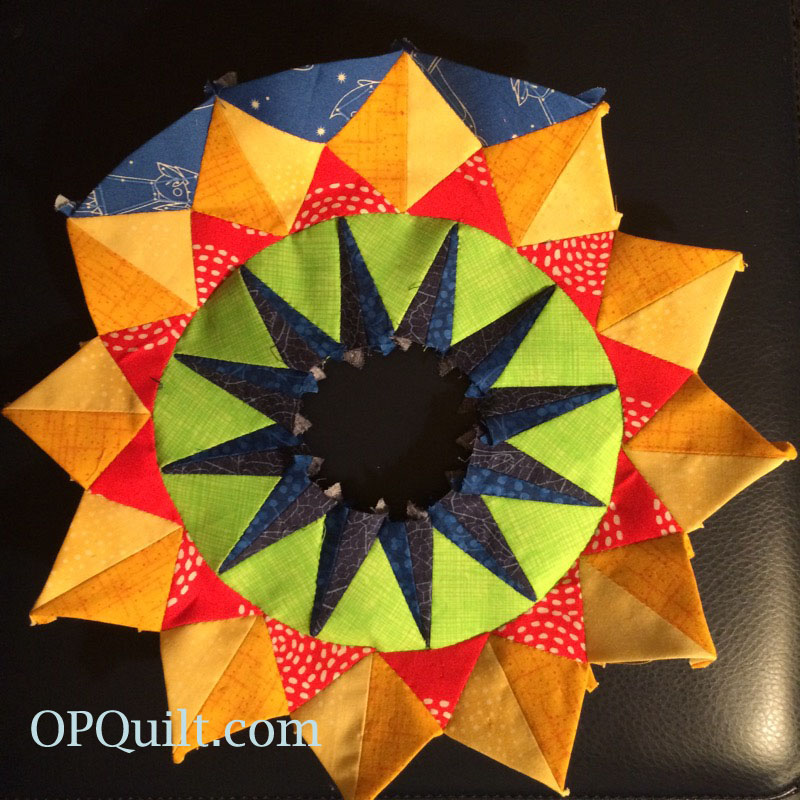
Now you are getting somewhere!  This looks great, doesn’t it?  Don’t sew the two half-circle parts together.  Yet.Circle 16_16

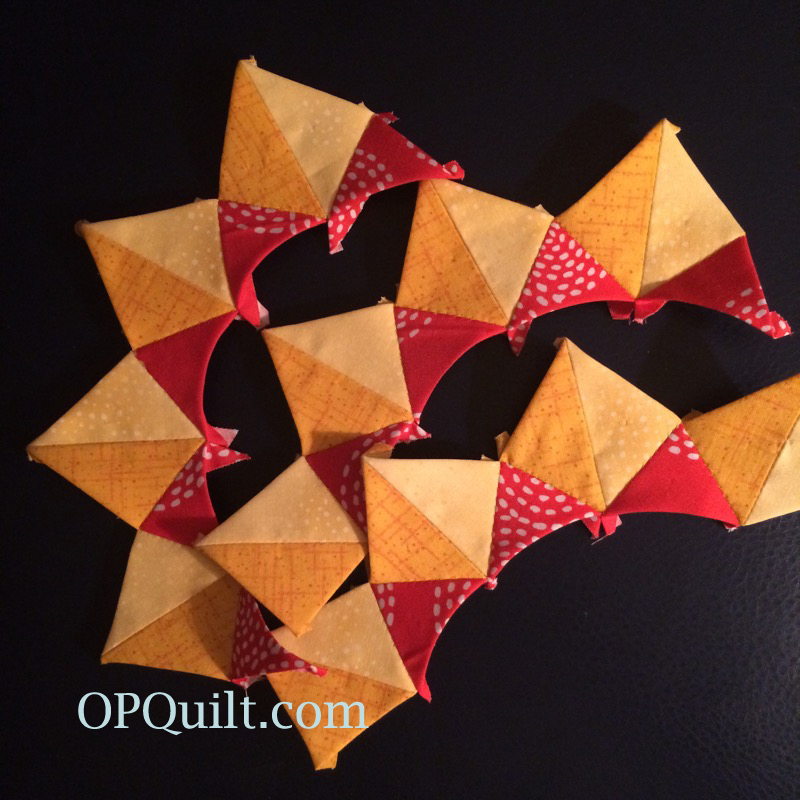
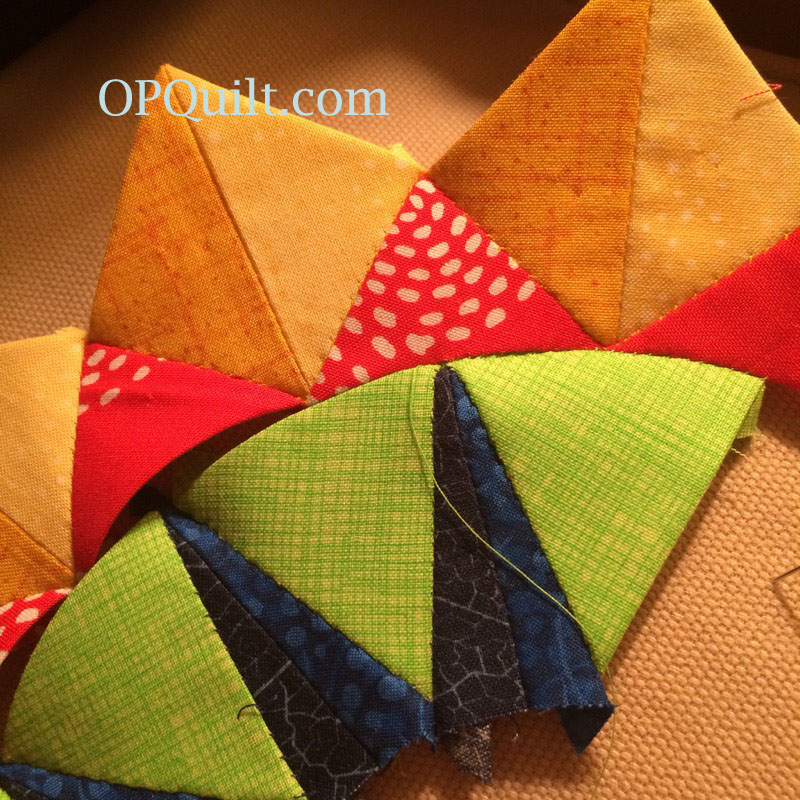
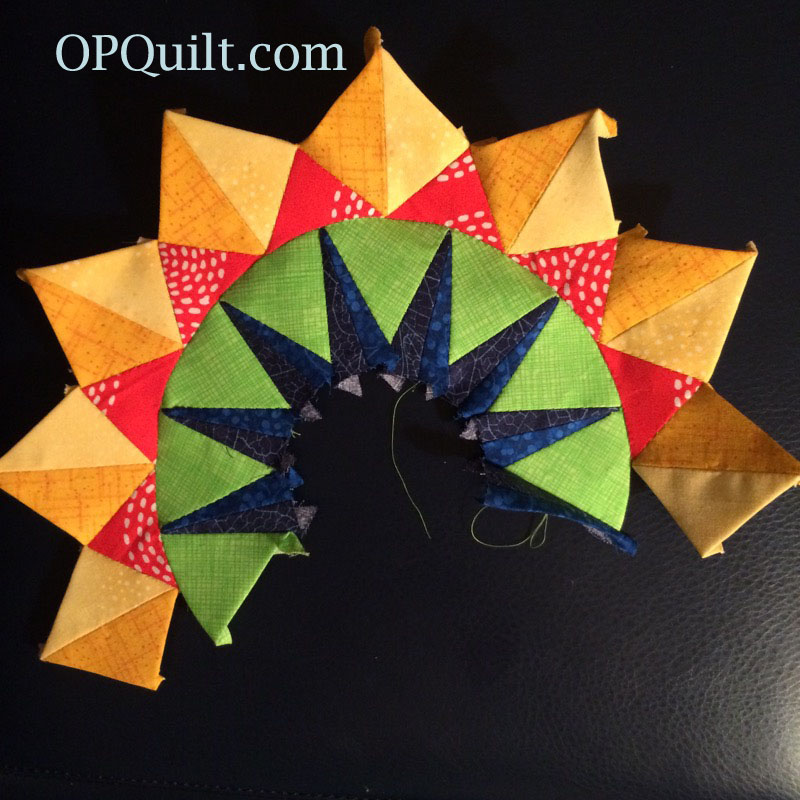
Time to add in the dark blue outer arcs in between the points. Again, I take one stitch at the outer points to join the arcs together too.

Circle 16_17

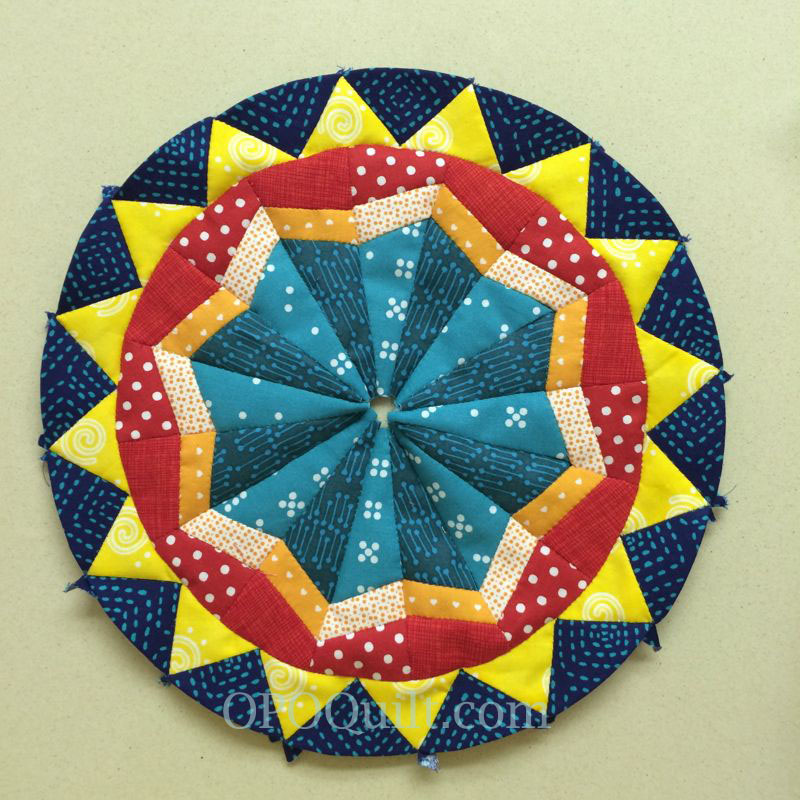
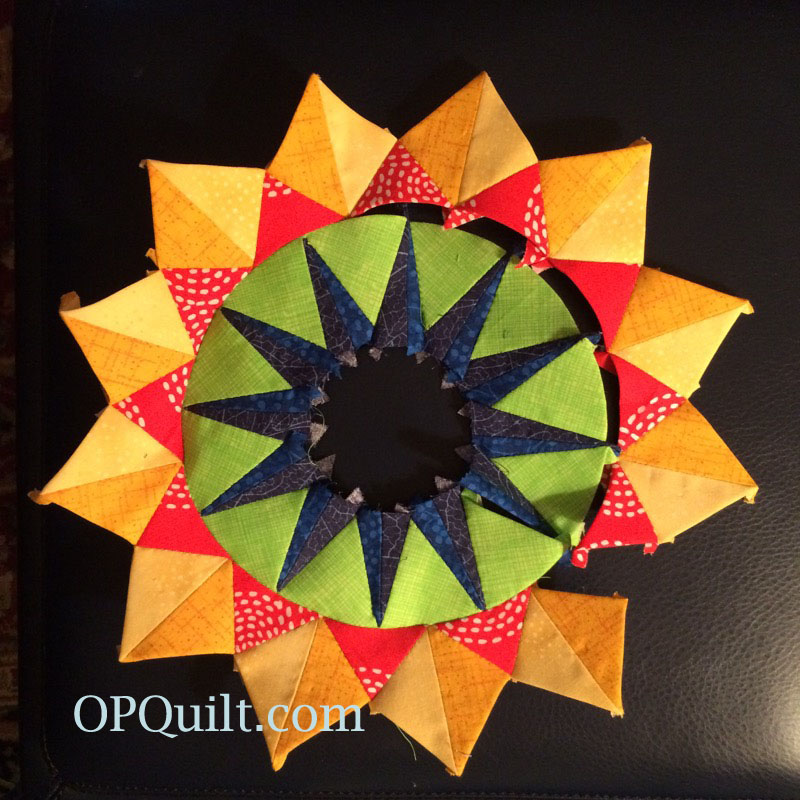
This is what you have so far.

Circle 16_18

Join the two units, sew down the yellow points, then fill in with the arcs.

Circle 16_19

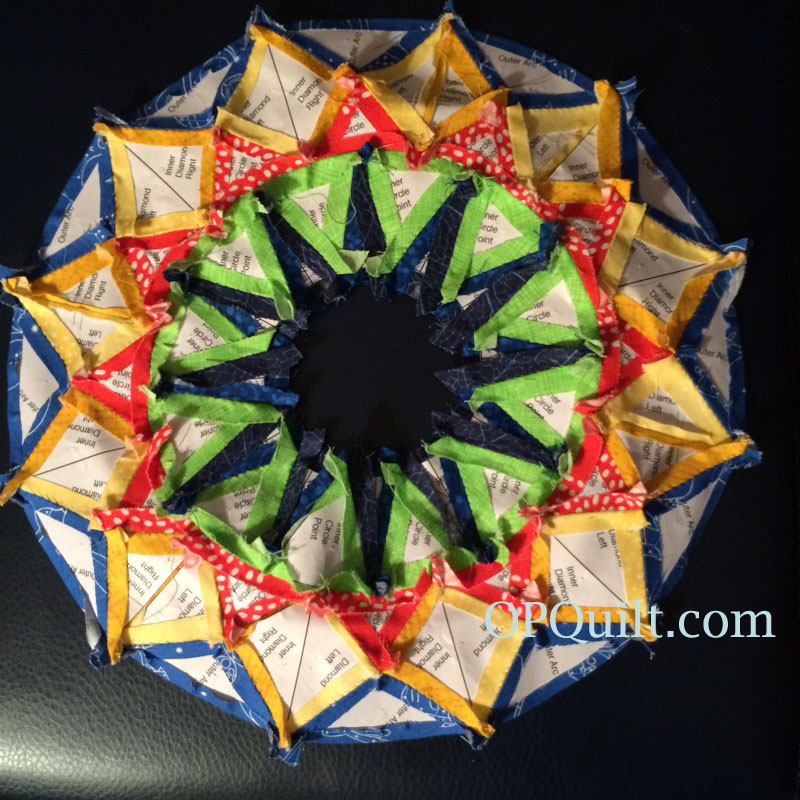
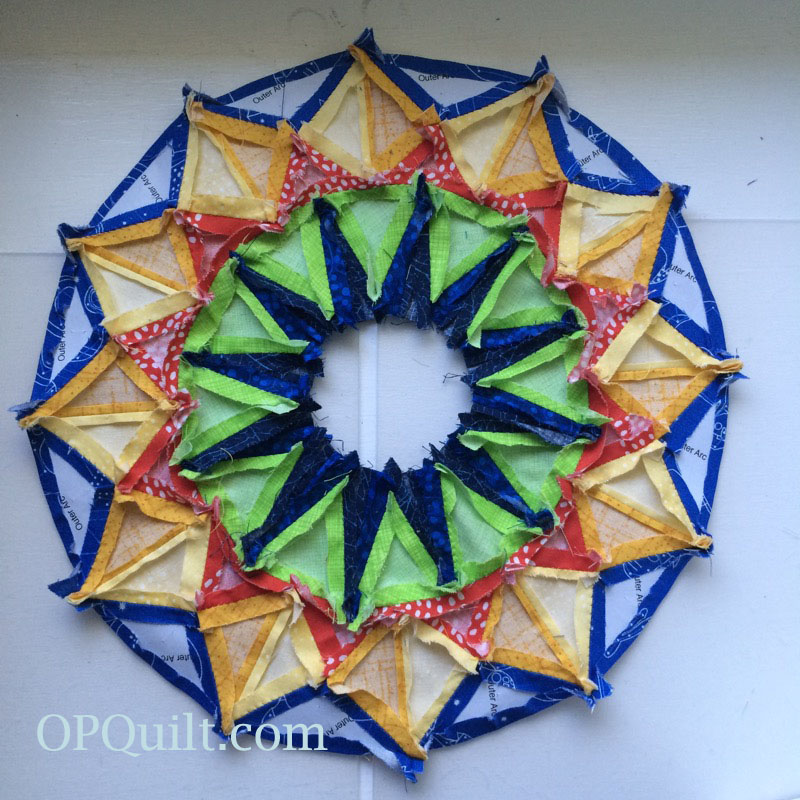
Nice work!  Here it is from the back with all the papers still in.

Circle 16_19a

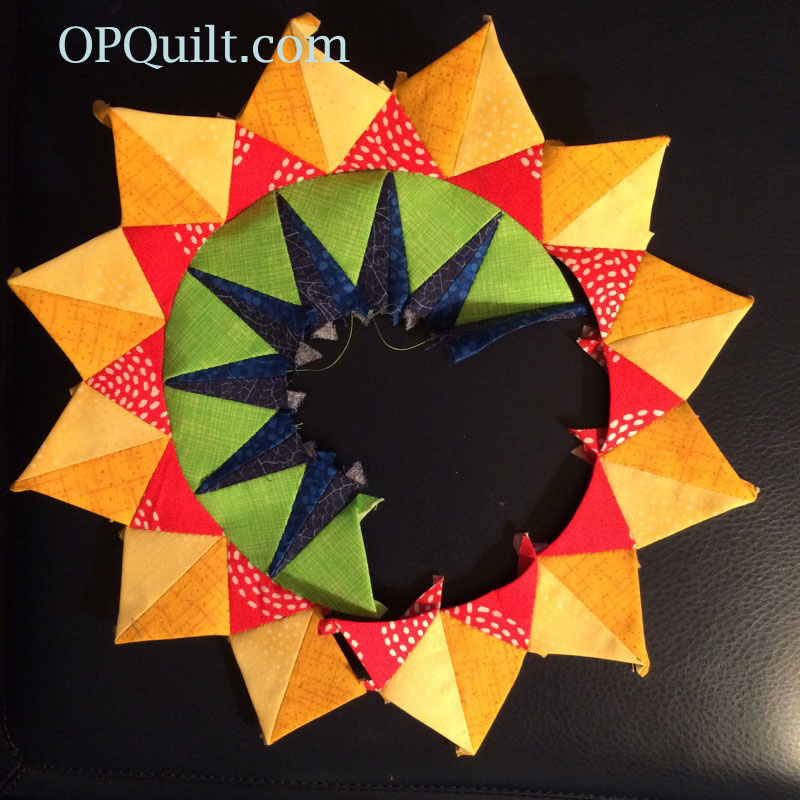
Remove all but the outer arc papers.  You’ll need those to appliqué the circle onto the background.

Circle 16_20

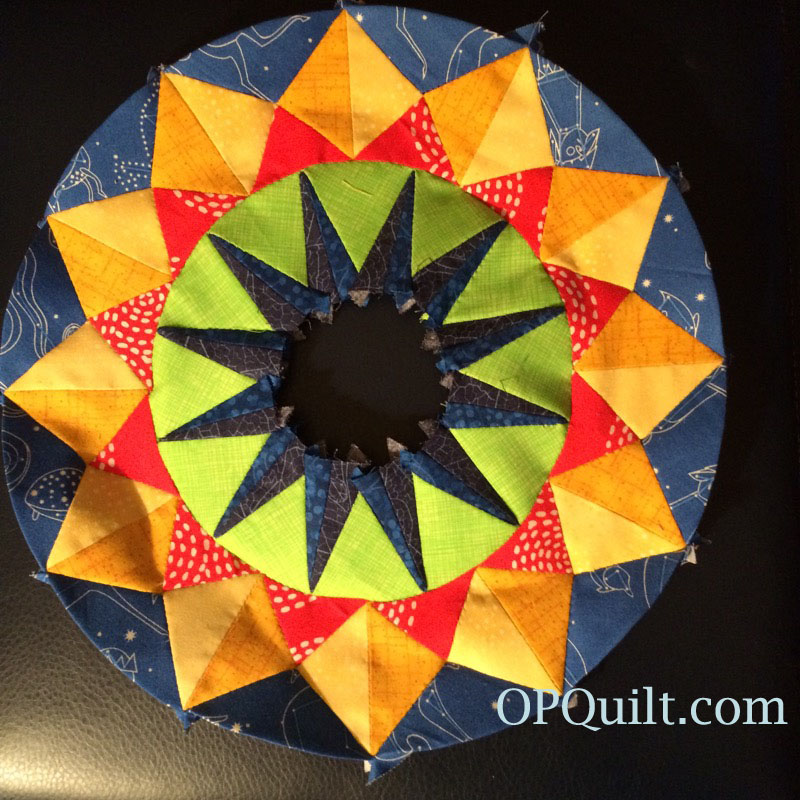
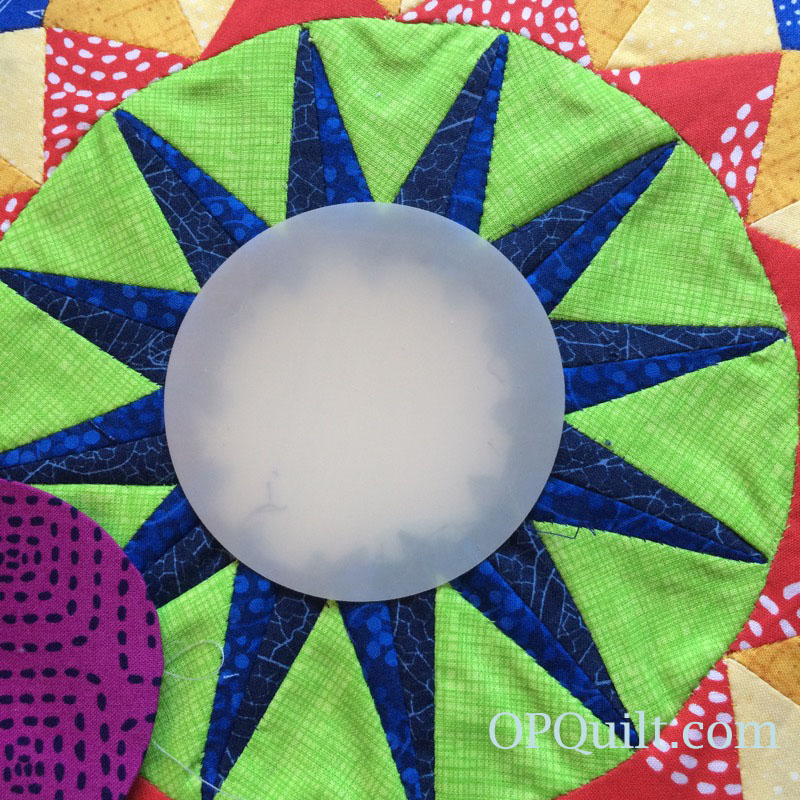
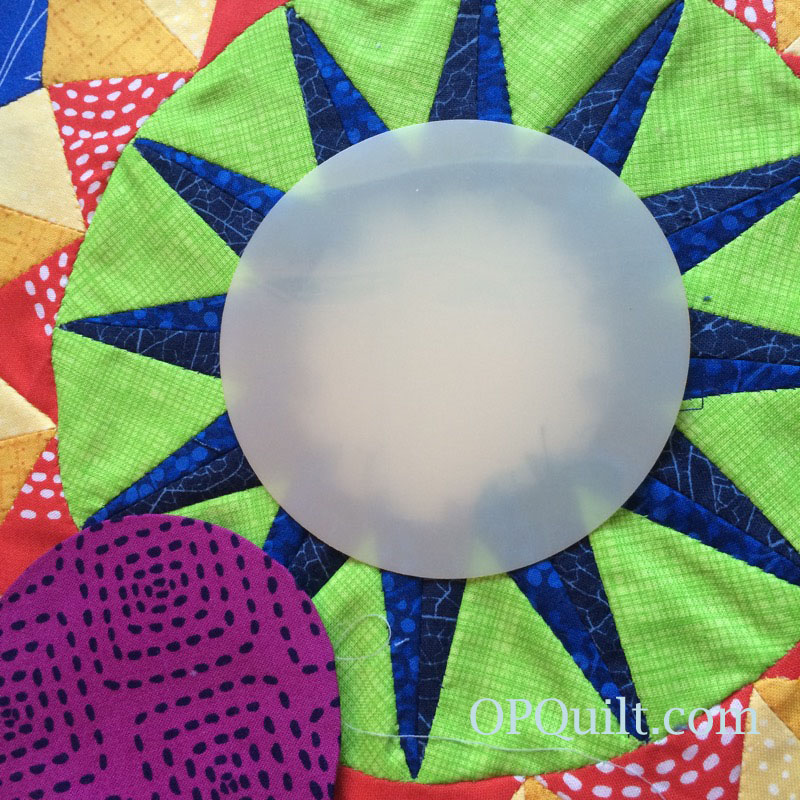
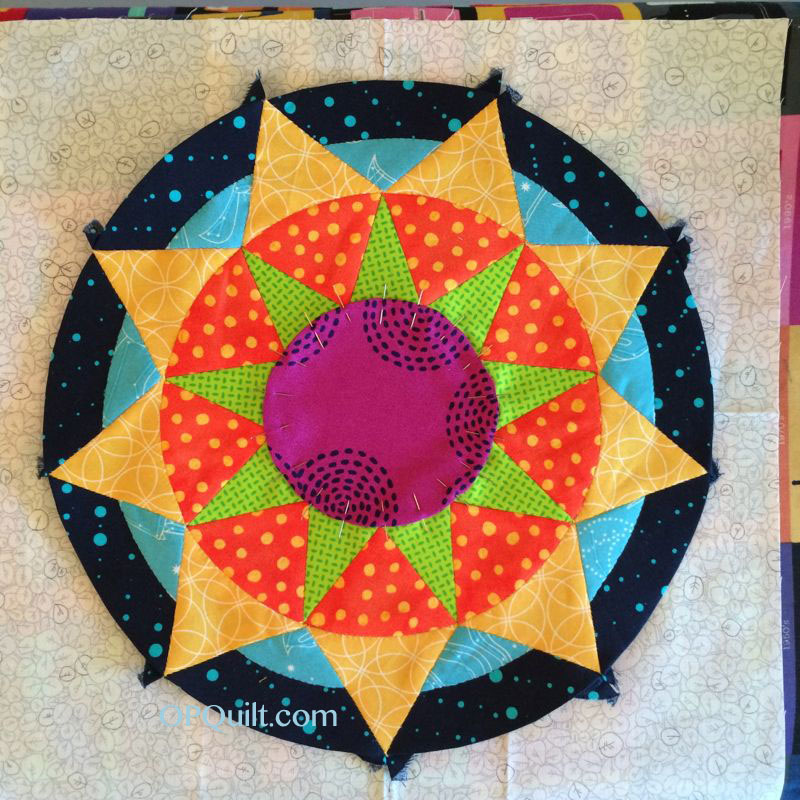
Don’t put it on the background just yet.  First appliqué the center circle, as in Circle Block #1.

Circle 16_21

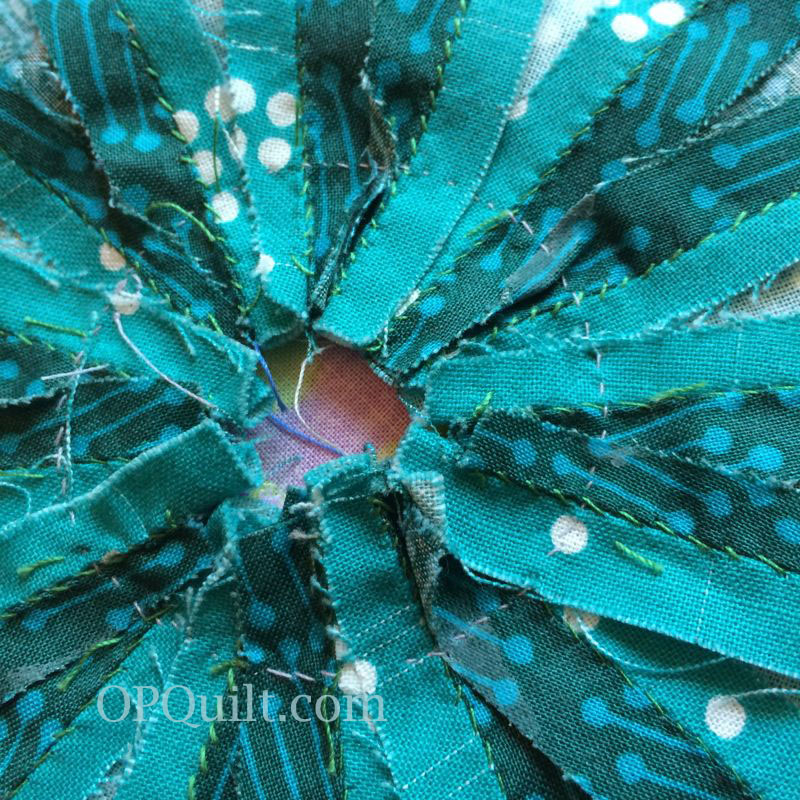
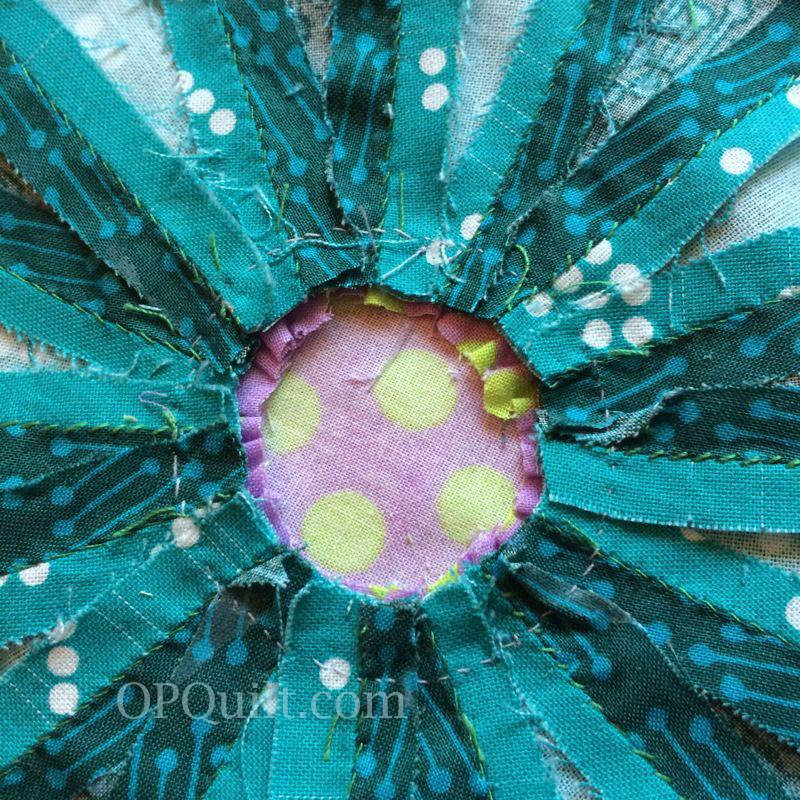
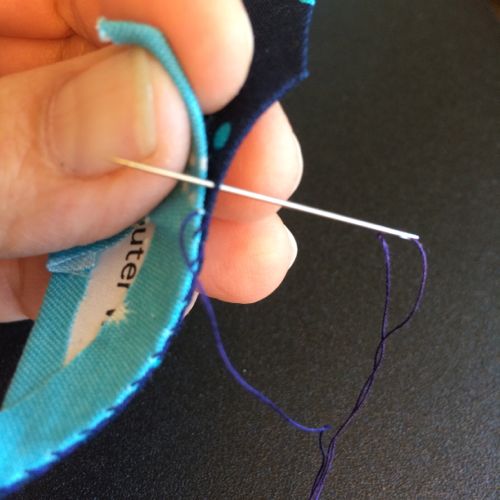
Lay your center circle over the center hole, measuring to get it on evenly, then appliqué with tiny stitches (above).  Changing the size of the center circle is just fine; I decided to make it a little bigger than I’d planned.

Circle 16_21a

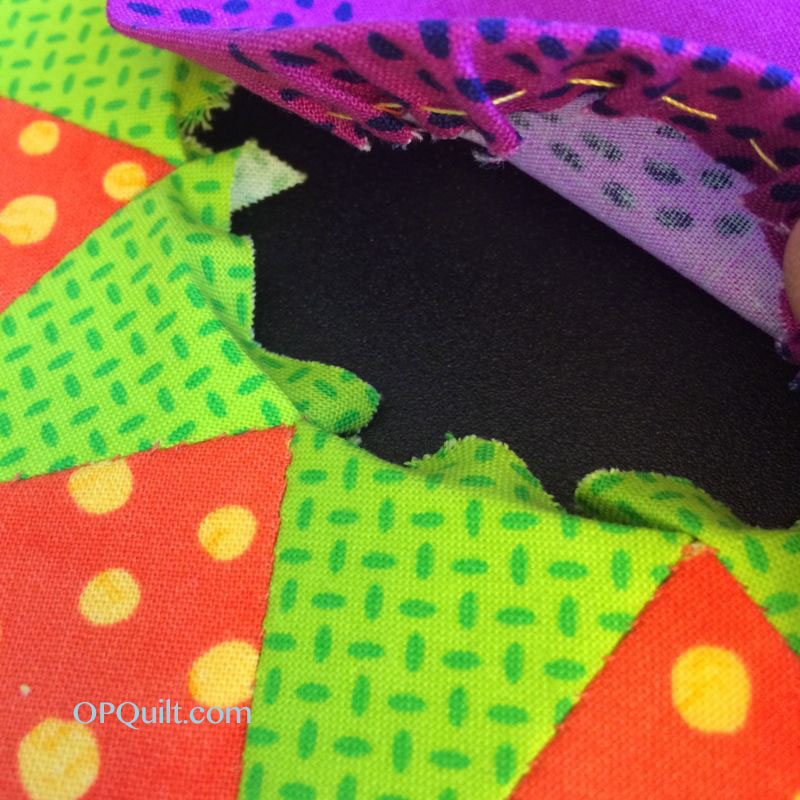
I trim out the excess.

Circle 16_21b

And then trim more excess–this time the appliqué center, leaving about 1/4″ seam allowance.

Circle 16_22

Cut a background square 14 1/2″, and as in the other circles, decide the placement of your circle and pin it down.  When you come to a place with the seam allowances. . .

Circle 16_22a

. . . first fold in one side. . .

Circle 16_22b

. . . then the other, and keep stitching it to the background.

Circle 16_trimming away background

When finished, cut away the background.

Circle 16_trimming sa

I also trim off some of the more wild ends of seam allowances, as you don’t need all that bulk.

Circles 16_OPQuilt_markedAnd you are done with all your circles!!  Congratulations!!

Shine_Quilt Top Final800

Now you can finish your quilt.  I wrote the finishing instructions in a pattern and put it up on PayHip so you can finish yours too.

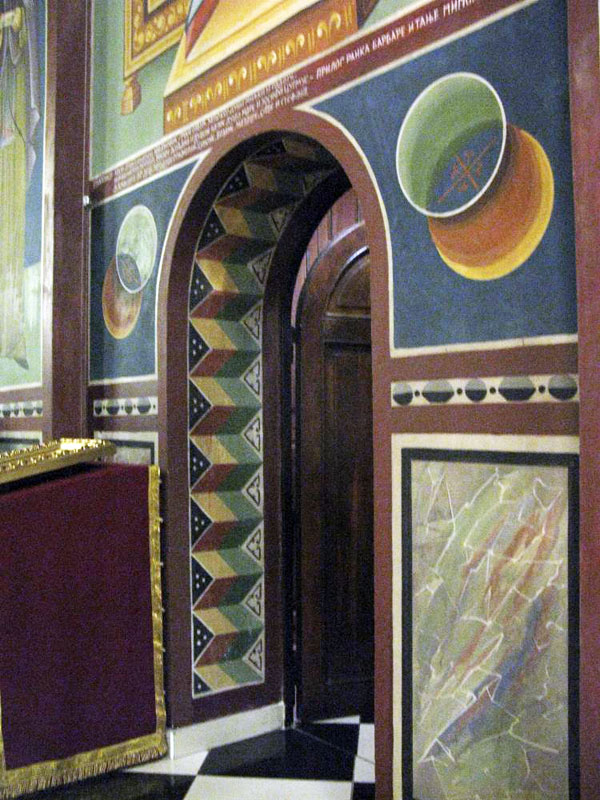
I hope you have enjoyed this series.  It all started when I wanted something to sew by hand at night to relax, but was tired of all the straight edges of hexagons and such.  Just after I started, we visited an ornately painted church in Slovenia, which inspired many of the circle blocks.  If you are sewing them, please send me a note by way of comment, or share a photo with me by way of email.  I can’t wait to see your creations!

There are now more Shine Circles in that last pattern, so you may have an entirely different quilt from this. If you make this, send me a photo!

EPP · Quilts · Shine: The Circles Quilt

Circles Block #15–EPP Sew-A-Long

Circles EPP Button

Circles Block 15_OPQuilt

Compass Rose
Number 15 of the circles blocks in Shine: The Circles Quilt

About this time, I was running out of ideas for another two circle blocks, so of course I turned to the internet, but didn’t type in “quilt circle blocks.”

Collections Bibliotheque Municipale de Rouen. Photo : Th. Ascencio-Parvy

 Instead I typed in “compass rose” as every map from the ancient days had an elaborate compass design in the corner, orientation the sea-faring ships to North, keeping them on track.  I found several I liked from those old maps, and modified them to be suitable for my quilt, and drew them up in Electric Quilt 7:

EQ7 Circle 15 w:o split rays EQ7 Circle 15 with split rays

The difference between the two is the subdivision of the spikes around the inner circle into two rays.  I liked that, but I also knew a short cut so I wouldn’t lose my mind piecing them.  If you like the solid rays in the inner circle, just don’t cut the patterns for that ray apart (but don’t cut them apart anyway. . . keep reading).

I have the final four patterns as a group up for sale on Payhip.  I will post the tutorials each month until the set is complete.  The finishing instructions pattern for Shine: The Circles Quilt is also listed on Payhip.

(Note from the 2020 Elizabeth: A new, revised pattern is coming soon, so I’ve removed the old ones from previous posts.  Many thanks.)

Print four of these out at 100% scale.  Cut them out, but count as you do this, because on one of these last patterns, I may have missed a beat or two and added an extra ray.  BUT FIRST!  To cut down on your EPP efforts, you can leave the rays and the diamond pieces together, cutting them out as a unit. I’ll show you what I mean, so please read this entire post before you snip snip snip.

Circle15_1

Circle15_2

Pull your fabrics, using a good range of colors and value (light to dark).

Circle15_3

Okay, here’s what I mean about some time-saving.  I didn’t cut the diamond apart.  You can seam two strips together, then lay out your diamonds to cut.  Here I am measuring for the diamond strip width (above, which will be 2″), and below for the rays (which will be 1 1/4″ inches wide).  I use a lighter version and a medium version of the fabric color I chose so the difference will stand out.  Above you can see the two colors, layered.

Circle15_4

Circle15_5

Seam the long strips together, then lay out your pieces, making sure that the center line of the ray is exactly on your seam, as shown.  Trim away the excess like I did in the upper ray example.

Circle15_6

Ditto for the diamonds.  However, the layout of the pattern has you cutting some apart.  No worries.  Just tuck them up under the seam allowances (as shown in lower right diamond above) and proceed cutting around them and gluing them as normal.  I made a command decision to make my seam allowances a wee bit smaller on these two pieces, as I didn’t need a full 1/4″ inch.  The seam allowances are at about 3/16″ of an inch, just a bit narrower than usual.

After gluing them, I put them in a baggie with a printout of the drawing of the block, so I can keep things straight.

Circle15_7

Since the outer golden diamonds are already sewn together (or if you constructed them more traditionally, stitch them together first, then come to this step), you can start sewing these golden diamonds to the outer orange point triangles, making sure that the curved edge of that triangle is pointed towards the eventual circle.

Circle15_8

Sew all your groups; I did a grouping of three.

While I don’t have a photo for it (where was my mind?), stitch the rays to the inner circle points (the green points in my block interspersed with the blue double-rays).  Do those in groups as well.  Now to get them sewn together.

Circle15_9

Find the lower center of the outer point, and pinch it, leaving a mark.

Circle15_10

Match it up with the outer edge of a green inner circle point, and take a stitch, as shown.

Circle15_11

Find the center of the next outer point, and put in a crease, as shown.  Line up the ray with this crease. I sometimes like to put a single pin to keep me on track.

Circle15_12

Stitch carefully, neither adding — nor subtracting — any ease, moving one stitch at a time around the arc.

Circle15_13

Keep pinching in the centers, and matching up the rays until you’ve got this set together.  Yours may look different than mine, in terms of how many rays you sewed together, or outer diamonds and points you sewed together.  But the principle is the same for matching.

Circle15_14

Stitch the next set of inner rays and points to the existing set.

Circle15_15

Join the next outer set of diamonds and outer points to the existing, as shown.

Circle15_16

Using the “pinch the center method,” join those two arcs together.

Circle15_17

Here we go again.  This time I sewed on the outer diamonds/points unit to the existing.

Circle15_18

Then I stitched the inner points/rays together on one side only.  Although it may look like it, the circle is not stitched together!!  Leave it as a giant arc on both sets.

Circle15_19

Continue the process of pinching to find the center, and matching it up with the rays.  It will serpentine in your hands as you work.  Perfectly normal and easier to do than if you had joined them both into circles.  (Don’t do that!)

Circle15_20

That outer arc seam is almost done.  I left the last orangey-red bit unsewn.  Now I’ll stitch the blue ray to the green inner point.  Then stitch the orangey outer point to that inner circle.  And last, I’ll close the outer yellow-diamond-orangey-point circle.

Circle15_21

Don’t you feel like you’ve crossed the oceans, charting by a compass and the stars only?  But look how beautifully it came together–no puckers anywhere.  Just move slow and steady.

Circle15_22

You knew I’d work that constellation fabric in here somewhere, didn’t you.  Yes, it’s my outer arcs, and I now stitch them into place.  Take a stitch at that outer edge, just over the yellow points, to hook the two blue arcs together.  Just a single stitch, to keep them together around the circle.

Circle15_23

I love seeing all the papers lined up in a row.

Circle15_24

Circle15_25

Remove all but the outermost blue arc papers, flip it over and give your circle a press.

Circle15_26

In thinking about what size center circle you’ll want, lay your Karen Kay Buckley Circle templates out on the block.  You’ll want a circle that covers the open area, but doesn’t hide the points, like the one above.  The one below is too big: it covers too much of the rays’ inner points and makes it look like something is missing.

Circle15_26a Circle15_26b

This was the dimension of circle I used.  Trace your circle on your chosen fabric, then cut 3/8″ around it for the seam allowance.  Stitch a running stitch around the outer edge, then slip the plastic template inside and draw up the thread to enclose the circle.  Give it a shot of spray starch, press it, then let it cool and slip out the circle.  I show how do do this on *this post.*

Cut a square 14 1/2″ and find the centers, as you’ve done for the other blocks.  At this point, at block number 15, you are used to doing some of the steps, so if you are joining me just for this block, I’d suggest browsing back through other Circles blocks (see tab Shine: The Circles Quilt EPP above) to learn the tips and pointers.  Appliqué the circle to the block.

Circle15_27

I always pin around, then when I get to a join area, I first fold in one side, then the other, before continuing on (see below).

Circle15_28

Circles Block 15_OPQuilt

That’s it for this block!  The tutorial for the last circle block, Block #16, will post October 1st, then our series is complete.  While you work on your blocks, I hope to work on the quilting of this quilt and have it ready to show at the beginning of October.  Have fun stitching!

EPP · Shine: The Circles Quilt

Shine: The Circles Quilt

Shine-waving

Shine: The Circles Quilt
66″ square
First block started June 2014 • Top finished June 2015

I’ve finished my quilt top and am happy to release it into the world today.  I started sewing these English Paper Piecing patterns after I’d finished Kaleidoscope and needed a new hand project.  I was also sick of straight lines, and though I’d do some circles.  Those of you who have followed along know that I took a lot of inspiration for the circles from a church my husband and I had visited while traveling in Slovenia, the art finding its way into fabric.

Shine_Quilt Top Final800

I named it Shine because of all those circles, those suns, those compass points, radiating out from the quilt.  I could see this all done up in solids, too.  I’ve seen a few of your starting your project.  Please tag me on IG (occasionalpiecequilt) or drop me an email with a photo so I can see what you’ve begun.

I’ve now completed the instructions for this quilt, and have it available for purchase in my PayHip shop, listed as Shine: Circles Quilt Finishing Instructions, so you can finish off your quilt.

The last four circles — numbers 13 to 16 — are also available as a PDF download pattern: Final Four Blocks from Shine, but because the tutorials are image-heavy, I’ve kept the instructions for the circles on the blog.  I’ve loved creating these and sharing them for free, so I hope you’ve enjoyed grabbing them and making them.

Shine Sashing inspiration

Where did I get the inspiration for the finishing?  One day when I was walking around San Diego, I looked up and saw the facade of the building and thought, aha! — those crosses with circles would be perfect in between my circles.  I ended up leaving off the circles as my quilt had a lot going on , but your quilt may be different, so you decide (the option is in the pattern).

Zagreb doorway design churchAnd the border?  I started here, in this archway from the church in Slovenia, with those triangles.  But again, I wanted my circles — and all that handwork — to stand out, so I simplified it with trapezoidal pieces in between the triangles.

Refer to the main SHINE: The Circles Quilt page, for links to each block.

Thanks for all your support and EPP love while I’ve been working on this project. Happy Piecing!

EPP · Shine: The Circles Quilt

Circles Block #12–EPP Sew-A-Long

Circles EPP ButtonCircle Block #12_OPQuiltNine-pointed Compass Rose Block

This is the twelfth block in a series of Circles Blocks.  Why circles?  Mainly because I had done some English Paper-Pieced projects and I was sick of straight lines.  And hexies, although I quite enjoy them both.  The other eleven blocks are available above, under the tab Shine: The Circles Quilt EPP.

Sometimes the inspiration in this series has come from other sources, but this one came out of my head.  And a creative mistake I made when designing another circle, yielding a circle has NINE points, whereas most any other circle you find in the world is divided up into an even number of points.  I liked it and went with it.

shine-rwb-block_12

The free patterns are now returning (Red, White & Blue version is above).  Again, I request that you not distribute them, but send people here to this website to get them.  Click to download a PDF file: 

SHINE Block 12 pattern_opquilt

Please remember to set your printer settings to 100% and check the little scale square included on the pattern.  It should measure 1″ in size. Illustrations below are with the OLD version of the pattern, so it may vary from what’s included now.

This is an easy block to sew, I think.

Circles 12_1 OPQuilt

Fabric auditioning.  This one was pretty straight forward, without any substitutions along the line.

Circles 12_2 OPQuilt

I cut out all the pieces, glue-basted them on (see earlier Circles Blocks for tip and tricks for this series).

Circles 12_3 OPQuilt

I like to print out a picture of my circle, gather the threads I’ll use, and collect everything into a ziploc baggie for easy toting.

Circles 12_4 OPQuilt

When hand sewing the curves, it’s okay to let the pieces curve in your hand.

Circles 12_5 OPQuilt

Step one: Sew the smaller “sky” piece (light blue) to the larger “sky” piece (dark blue).

Step two: Stitch the points and wedges together in groups of two (and one three) each, as shown above.

Circles 12_6 OPQuilt

Step Three: Sew the bright orange triangle points to the smaller green triangle points, in groups of two or three.

Step Four: Attach these to a corresponding yellow triangle/sky combo.

Circles 12_7 OPQuilt

Step Five: Start stitching the units together, however, not like I did above.  Keep track of where the orange/yellow units go, so they all mesh together.  It might be helpful if you lay out half of the circle when you start putting the units together, just to keep track.

Remember: I make the mistakes so you don’t have to.  (Although you can make new ones if you want.)

Circles 12_9 OPQuilt

Since EPPing center circles and I don’t get along, I appliqué them all now.  Fluff out the seam allowances on the green so you can appliqué on the large center circle. (I should have thought this one ahead.  Okay.  A new mistake.)

Remove all the papers except those at the outer edge in the dark blue (you’ll need them in the next part when you put the circle onto its background).

Circles 12_10 Point Up

This time, I pinned on the center circle first, then auditioned it on the background, a square cut to 14 1/2.”  Yes, this will give you a little extra room around the edges, handy for when you decide to finish this thing.  Fold the background in fourths, iron a bit of a crease, then align the circle with those creases.  Usually this is easy, but since this is a nine-point star, you may want to measure in from each edge to get it evenly spaced on your background..

Do you want point up on the upper edge (above), or. . . valley up (below)?

Circles 12_10a Valley Up

Yeah, okay.  You know I already went point up.

Stitch down the circle to the background, folding in the point areas as you come to them to make a smooth line.  Trim away the background, one-fourth inch away from the appliqué stitching line.

Then appliqué on that center circle.  I also like to trim away fly-away seam allowances, especially on those points, getting rid of unnecessary bulk.

Press lightly (face down on a padded ironing board is probably the best–use a light hand as they are hand-stitched and you don’t want to iron them into oblivion.  Any puckering that you see will be gone after quilting this thing, so no fretting unless you have pleats. . .

Double Sunflower

Here’s the drawing of the block in case you want to print it out for a guide.

Twelve Circle Blocks Shine.jpg
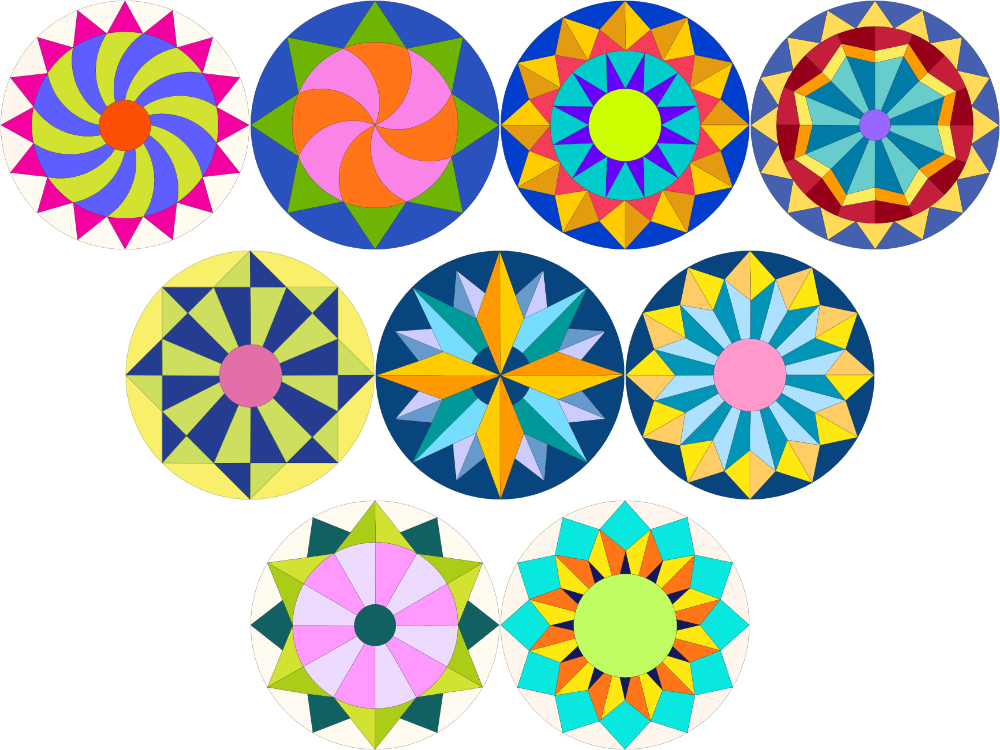
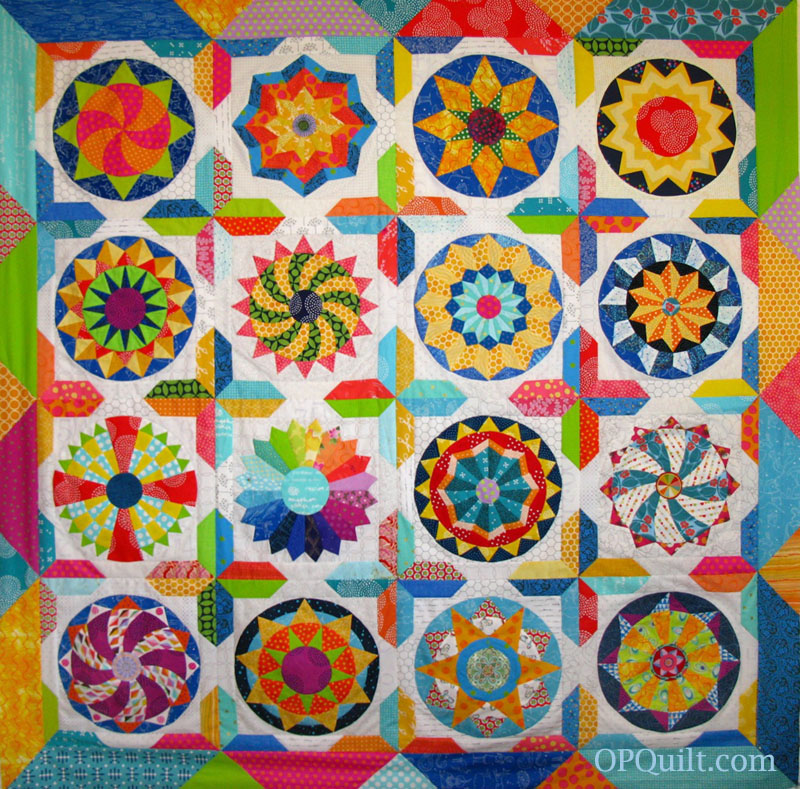
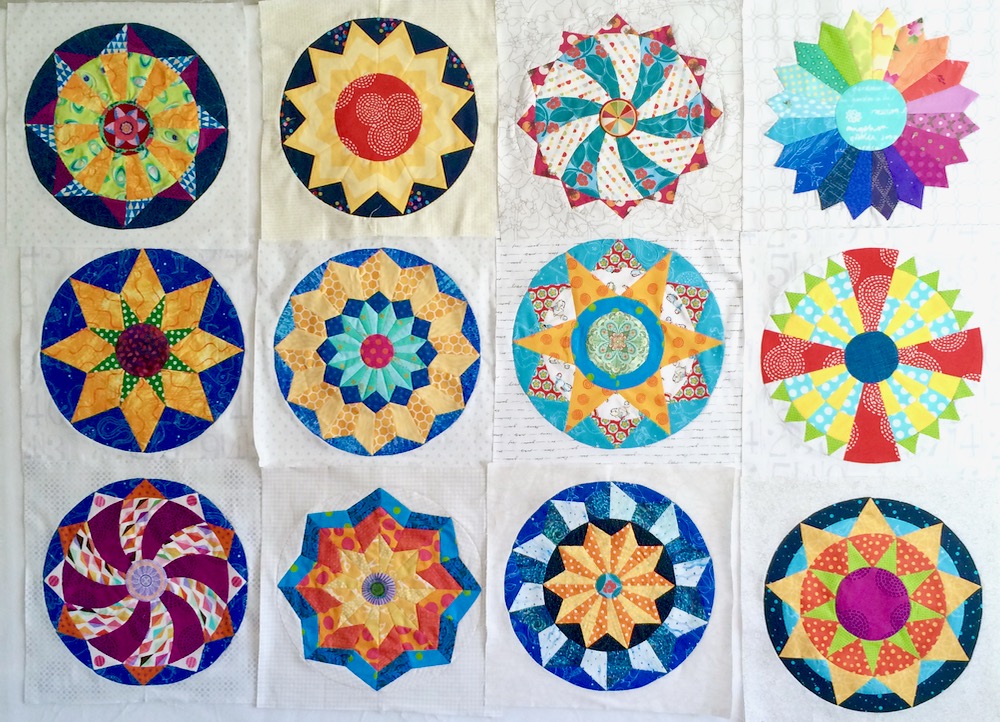
Here are all twelve circles.  You can either finish your quilt now, or keep going.

Shine Nine Extra Blocks

I have designed nine more blocks for SHINE, so you can pick and choose, and some of them are different than what is shown in my quilt.  They are available from my PayHip, my pattern site.

*Full Shine Quilt titled_final I also have a Finishing Pattern, which includes details on how to sew the inner and outer sashing, plus one bonus block. This has also been newly re-designed, but if you purchased it before, you should be able to just download a new version.

I hope you have enjoyed this series of circles as much as I’ve enjoyed creating and sewing them.  Please drop me a note as you make yours, sharing a photo or two.

IG circles blocks

Karen tagged me the other day on Instagram, and I about flipped over with happiness that someone had found these useful.  I love her colors and combos–so fun to see!

Mary_NeedledMomEPP

And here’s another from Mary who blogs at Needled Mom.  I love her colors, too–the pop of that lime in the red star points is terrific against the blues.

There are also Christmas block versions, made by my friend Linda.  You can see them in this post.

Happy Quilting!!

EPP · Shine: The Circles Quilt

Circles Block #9–EPP Sew-A-Long

Circles EPP Button

EPP Circles Block 9_OPQuilt

Sunflower, Circles Block #9

This is the ninth circle in a series of free English Paper Piecing (EPP) patterns available here, on OPQuilt.com.  I began the series because I needed another hand-piecing project and was tired from all the geometric shapes in the recently finished quilt, Kaleidoscope.

EPP Circles Block #9

RWB SHINE_9

The free patterns are now returning (Red, White & Blue version is above).  Again, I request that you not distribute them, but send people here to this website to get them.  Click to download a PDF file: 

SHINE Block 9 pattern_opquilt

Please remember to set your printer settings to 100% and check the little scale square included on the pattern.  It should measure 1″ in size. Illustrations below are with the OLD version of the pattern, so it may vary from what’s included now.

Print four copies of this page at 100% scale, then cut them out, but cutting out only one circle.  Sometimes I’ll staple them together and then cut them out, but they do shift slightly, if that bothers you.  Now that the business is out of the way, this was the easiest circle yet. . . and the hardest.  Easiest because there are fewer pieces, and they go together quickly.  Hardest because of that dumb center circle, which I tried to ease in a la EPP-style.  Mistake.  But remember that I make the mistakes so you don’t have to.

Circles9_Fabric Choices

Picking out fabrics.  Yes, these do change as you go, but since there are fewer moving parts to this circle, it was easier.  I always wait until the last minute to choose the center circle.

Circles9_layout

I print out on 24 lb. paper, which is slightly heavier than regular computer paper, so I have good luck with just gluing my fabric seam allowances to my pieces.  I explained this on Circle Block #8 if you want to take a look.  There’s something new on every circle block so far.  What’s new on this one?  Keep reading.

Circles9_piecing

I’d say this is the faster circle yet.  All these pieces went together lickety-split.

Circles9_center star

Circles9_piecing2

Adding the outer blue wedges was easy, too.

Circles9_stitching on inner circle

Now I’m starting to add the center circle.

Circles9_stitching on inner circle2

Circles9_inner circle FAIL1

Whoops. What a mess.  Now I’m taking out the center circle.

Circles9_inner circle basted down

Now I’m starting again to add the center circle, this time basting the circle into place.

Circles9_inner circle FAIL2

Now I’m taking OUT the center circle and doing what I should have done in the first place: appliqué the center circle onto the sunflower.  That’s the something new.  Don’t try and force your EPP.  If it’s not working, move to a different technique.  I had no problem with the Christmas Star block, but this one looks hacked-up, messy, bleh bleh bleh.  Sigh.  It looks much better now that I’ve appliquéd it on.

Circles9_Background markers

For the background, cut a 14 1/2″ square, then fold in half and half again to find the centers; lightly press the marks (shown above).  I love this fabric!

Circles9_AlignmentA Circles9_AlignmentB

Decision time: Point UP? (top photo) or Wedge UP?

Circles9_loosening seam allow

Before attaching the circle, make sure you’ve popped out all your interior papers.  In the photo above, I’m using a stiletto tool to loosen the glue.  I leave in the outer wedges as it’s easier to appliqué the circle onto the backing with those outer papers in.  I take them out one by one, or you can just leave them all in until you cut away the backing, then pop them out.

Circles9_star pinned on

I decided Point UP.  I’ve pinned down the circle, and after hand appliquéing it on, I’ll cut 1/4″ away from the appliqué line, and cut off the backing to be used for another project.

EPP Circles Block 9_OPQuiltAnd there it is!  Another fabulous circle.

Nine Circles

And then there were nine.  I guess you could stop here, but I do have three more . . . see you next month?

EPP · Shine: The Circles Quilt

Circles Block #8, EPP Sew-A-Long

Circles EPP Button

Circles Block 8_OPQuilt1

This is Circles Block #8 of my EPP Circles Block Sew-A-Long.

CirclesIt all started way up there on the really tall archway in the church in Ljubljana, Slovenia where I first spotted this lovely circle.

Circles Block_Ljubljana I just had to have it.  And my sweet husband helped me out by giving me Electric Quilt 7 for Christmas–the version that works on a Macinstosh.

Circle 8 block_EQ drawn

I got to work and failed miserably.  Then I got back to work and learned a few more things, and a few more things after that and above is the result. Since I have a lot of experience on QuiltPro (which I still use) I didn’t find it hard to figure things out, Googling for specific instructions when I became stuck.  I went on to design all the rest of the circles, completing the set of twelve, but you’ll have to wait for them, as I haven’t stitched them up and I like to do that before giving you the patterns.

RWB SHINE_8

The free patterns are now returning (Red, White & Blue version is above).  I request that you not distribute them, but send people here to this website to get them.  Click to download a PDF file: 

SHINE Block 8 pattern_opquilt

Please remember to set your printer settings to 100% and check the little scale square included on the pattern.  It should measure 1″ in size. Illustrations below are with the OLD version of the pattern, so it may vary from what’s included now.

Circles Block 8_pattern fits onto circle

I must admit to being a bit nervous about this new process, so I drew up a circle and then tried to fit the pieces into it, making sure that they were all the same size as the other circles.

Circle Blockk 8_New EQ patternAnd then I didn’t like how the pattern looked, so I went and redrew it (you have the latest version).

Color Variation 2_OPQuilt

Remembering the nightmare of trying to get all those points to fit into the center on a previous block, I added a small circle, and changed the pattern to the one you have now:

Circle Block 8_cutting out pattern

For this project, I used 24 lb. paper, a bit heavier than the usual copy paper (which can either be 18-lb. or 20-lb)  Print off the patterns, then stack them carefully.  Staple the pages together around the pieces, not through them.  As you cut, using either scissors or an old non-fabric rotary cutter, the pieces will be free of the stapled background when cut out. I don’t usually staple more than four pages together.  Note: Even if the bottom papers slip slightly, and don’t appear to be cut exactly on the line, the patterns are still accurate.

Circle Block 8_layout of fabric

Laying out the fabrics. This was the easiest one yet.

Circle Block 8_small points trick

I also used the technique of seaming together my two fabrics, then cutting out the pattern piece, lining up the center lines.  I’m not a purist–I don’t need everything to be hand-sewn and doing this step this way will make your circle more accurate and save you a lot of headache.

Circle Block 8_trimming sa

Trim out the seam allowances at the tip.

Circle Block 8_layout of pieces

I sometimes get confused whether the pieces should go printed side up, or printed side down, so my usual recommendation is if they are bi-directional — meaning it doesn’t matter — then it doesn’t matter.  But if you need your yellow on one side and your gold on the other and you don’t want to have to figure it out, then put the printed side down, for that’s how you see it.

Circle Block 8_using a glue stick

I tried a new-to-me technique this time: glueing down the seam allowances.  I had purchased the narrow glue stick for the The New Hexagon Millefiore Quilt Along and thought it was time to learn a few new tricks.

Circle Block 8_glue tecnique

I’d read that it was not a good idea to go all the way to the edge of the paper when glueing, that it was better to leave a small bit unglued.  Then I just smoothed the seam allowance up over the glue.  It was easier to keep the pieces centered (sometimes I put a dot of glue on the piece before putting it down, but not always) and I love how they look.  (And it saves time and energy and my hands!)

Circle Block 8_pieces all glued laid out

I laid out all the pieces and I liked what I saw.  With the glue stick, I wasn’t too worried about re-doing any pieces as it was so quick and easy.

Circle Block 8_beginning piecing

I first sewed the gold/yellow together, then added the blue diamondish-square (I labeled it as a square, but it is slightly wonky).

Circle Block 8_middle of piecing

Then I added two blue sections to that one, then started joining them all together.

Circle Block 8_interim piecing

Sometimes there is some interesting bends that go on while working.  Every once in a while a seam allowance would work itself loose from the paper but I treated it like an envelope: I licked the paper and stuck back the seam allowance.

Circle Block 8_interim2 piecing

Circle Block 8_interim3 piecing

The above photographs show the steps in how I sewed this together: pieces, then small sections, moving along to the larger sections.

Circles Block 8_back with papers

Ah.  The best sight in EPP-land: all the papers on the pieces, from the back.

Circle Block 8_papers popping out

Time for the $64,000 question: can you get the glued papers off the circle block? Yes. Here you can see they are starting to pop off already.  Sliding a seam ripper or a stiletto point between the fabric and the paper can also help loosen stubborn spots.

In my new project, I am now working with the cardstock versions of the papers for the Millefiore quilt and I’m sure the answer is the same, but they do seem to stick more to the rougher surface of the cardstock, with no papers trying to escape, like mine are, above.

Circle Block 8_detail center circle

I like to appliqué on my center circle as I think it is a cleaner business (shown here from the back).  I use really teeny stitches and stitch length, putting way more stitches in there than I do for regular appliqué, as it stabilizes the whole block and anchors the center.

Circle Block 8_detail background

As usual for these blocks, cut a 14 1/2″ square, fold it into fourths and press lightly so the creases can serve as registration marks for centering your circle.  Here’s your choice: point at the 12 o’clock mark. . .

IMG_4418

IMG_4417

. . . or not?  Try them back and forth until you settle on one.  There is no wrong or right — just what is best for your block.

Circles Block 8_EPP_OPQuilt

The block looks more relaxed with all those papers out.  I loved fussy-cutting the X in the aqua, and love-love-love this circle.

EPP 8 Circle Blocks_OPQuilt

So here they all are–aren’t they fine looking?  Until next month, happy EPP-ing! If you finish any of your circles, send them over and I’ll do a post.

Circles Block 8_OPQuilt1