
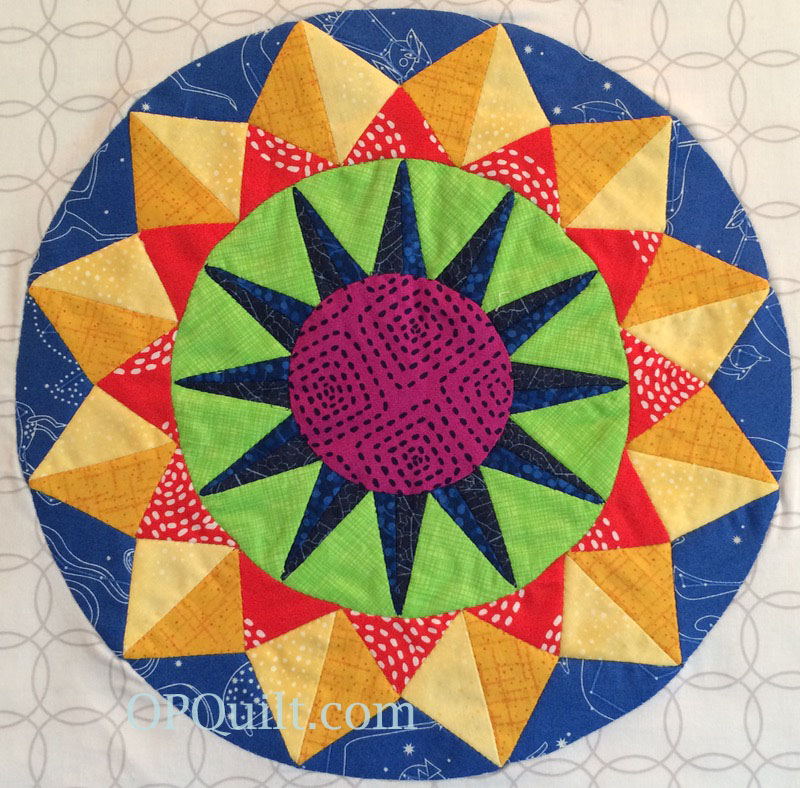
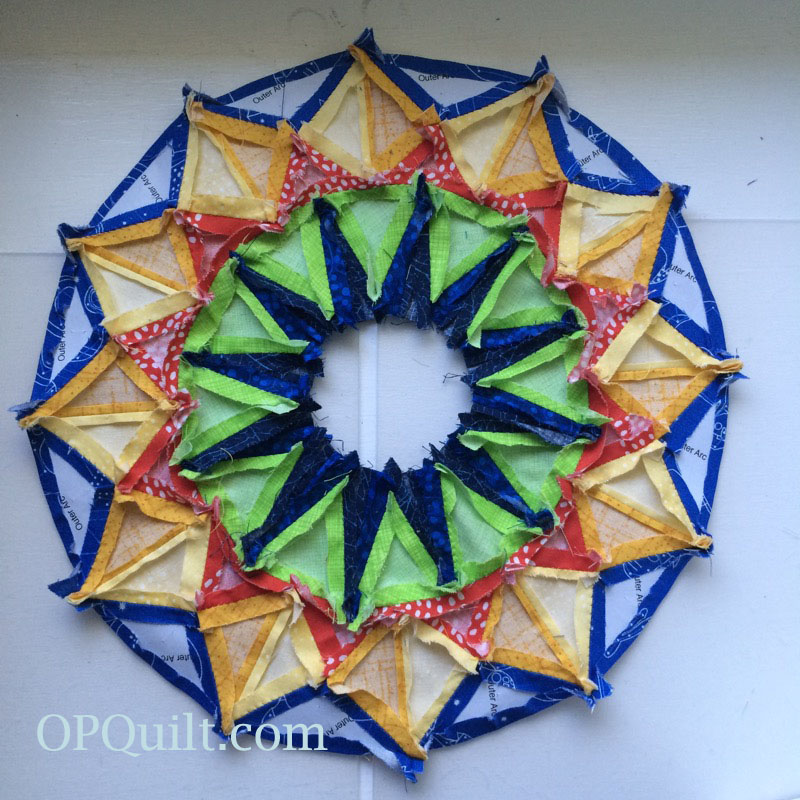
Compass Rose
Number 15 of the circles blocks in Shine: The Circles Quilt
About this time, I was running out of ideas for another two circle blocks, so of course I turned to the internet, but didn’t type in “quilt circle blocks.”
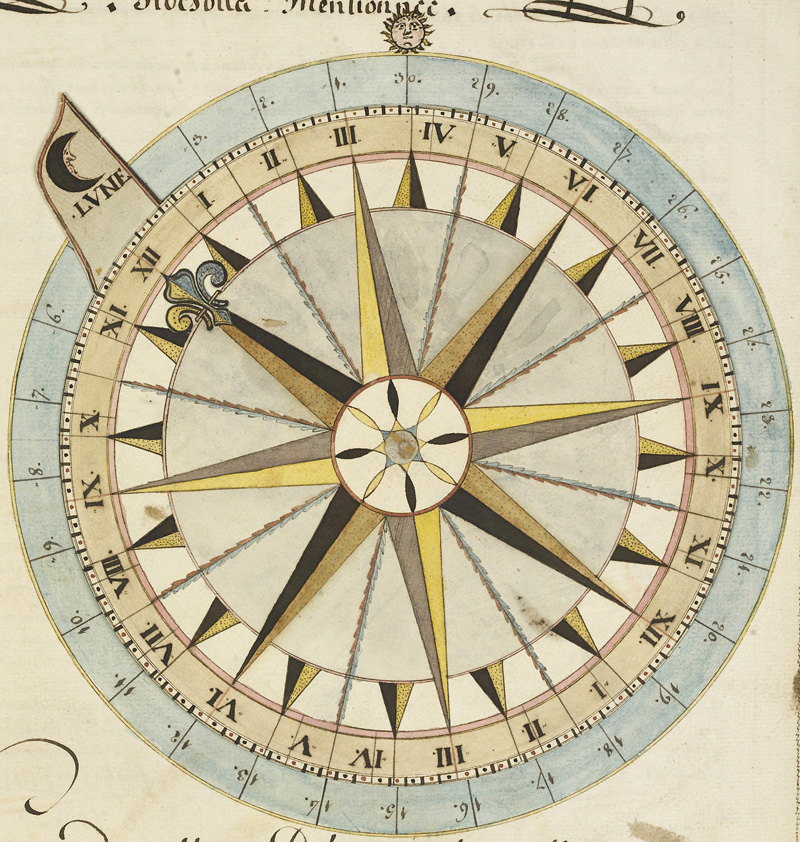
Instead I typed in “compass rose” as every map from the ancient days had an elaborate compass design in the corner, orientation the sea-faring ships to North, keeping them on track. I found several I liked from those old maps, and modified them to be suitable for my quilt, and drew them up in Electric Quilt 7:
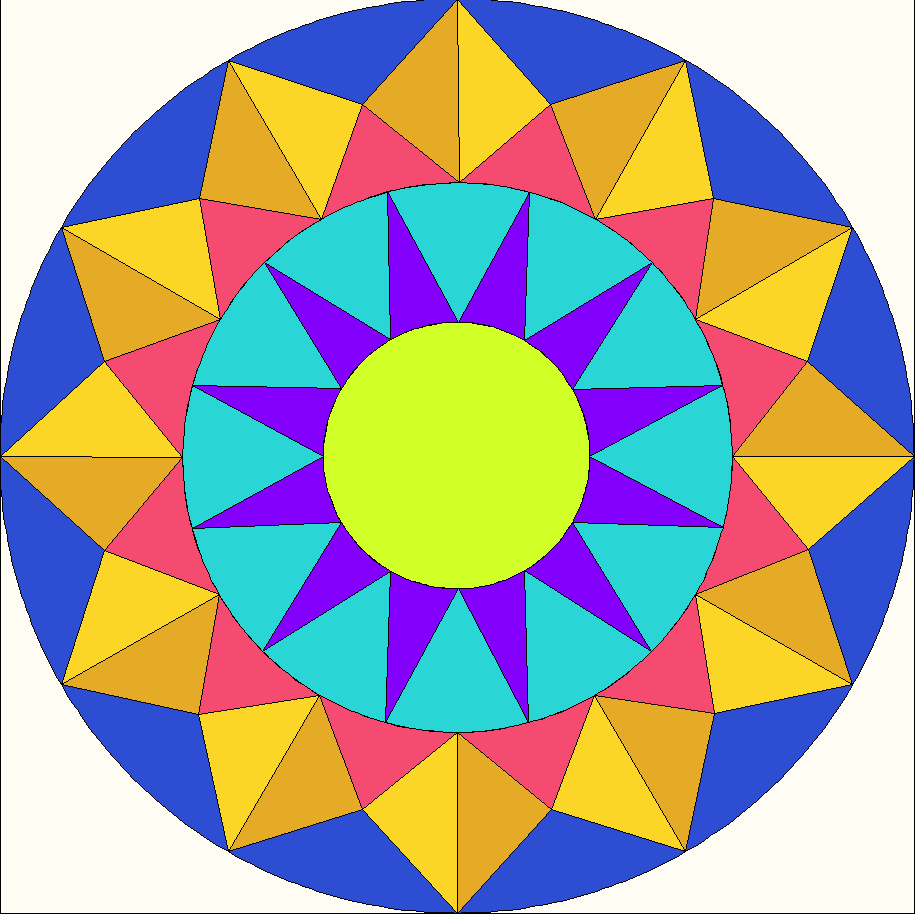
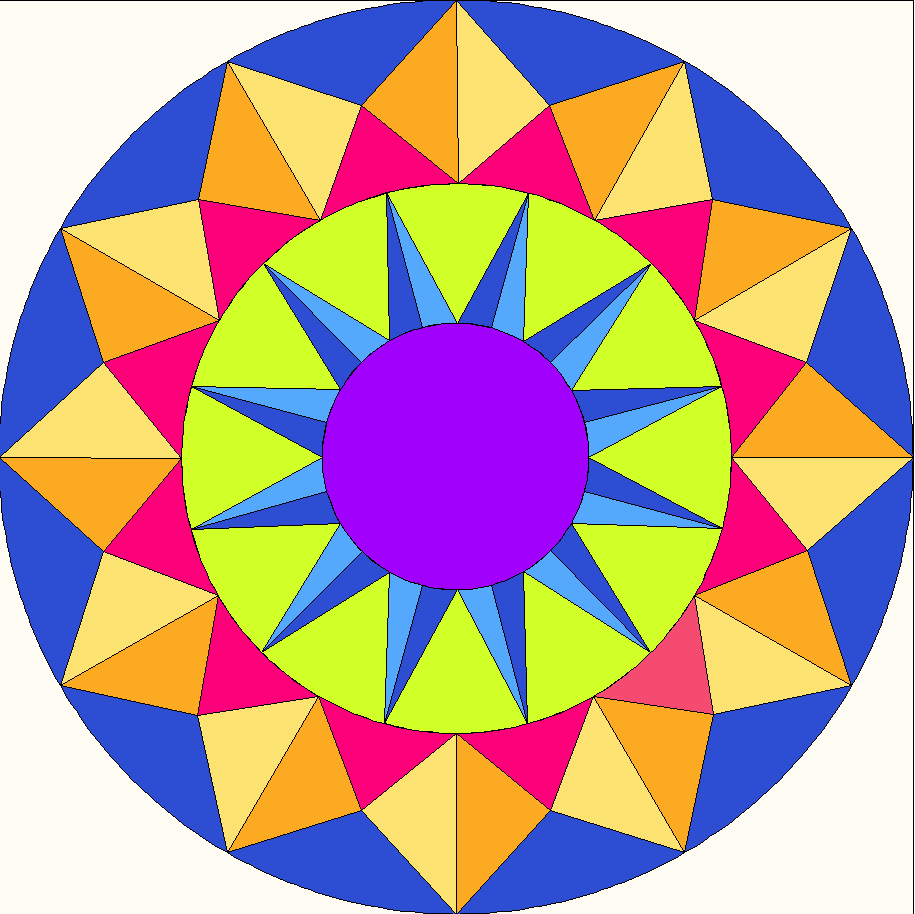
The difference between the two is the subdivision of the spikes around the inner circle into two rays. I liked that, but I also knew a short cut so I wouldn’t lose my mind piecing them. If you like the solid rays in the inner circle, just don’t cut the patterns for that ray apart (but don’t cut them apart anyway. . . keep reading).
I have the final patterns as a group up for sale on Payhip. I will post the tutorials each month until the set of sixteen blocks is complete. The finishing instructions pattern for Shine: The Circles Quilt is also listed on Payhip.
Print four of these out at 100% scale. Cut them out, but count as you do this, because on one of these last patterns, I may have missed a beat or two and added an extra ray. BUT FIRST! To cut down on your EPP efforts, you can leave the rays and the diamond pieces together, cutting them out as a unit. I’ll show you what I mean, so please read this entire post before you snip snip snip.
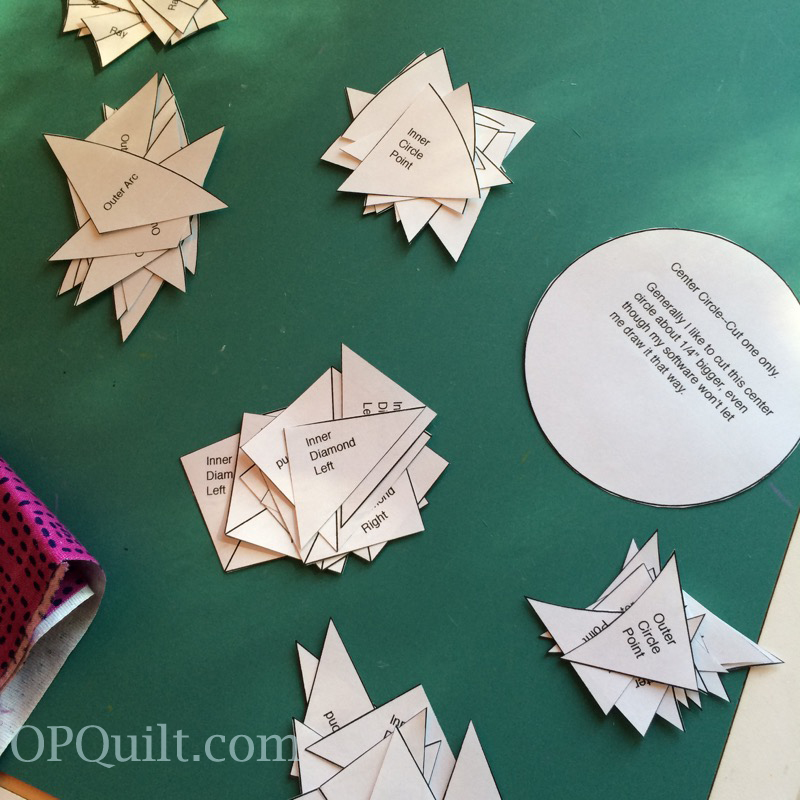
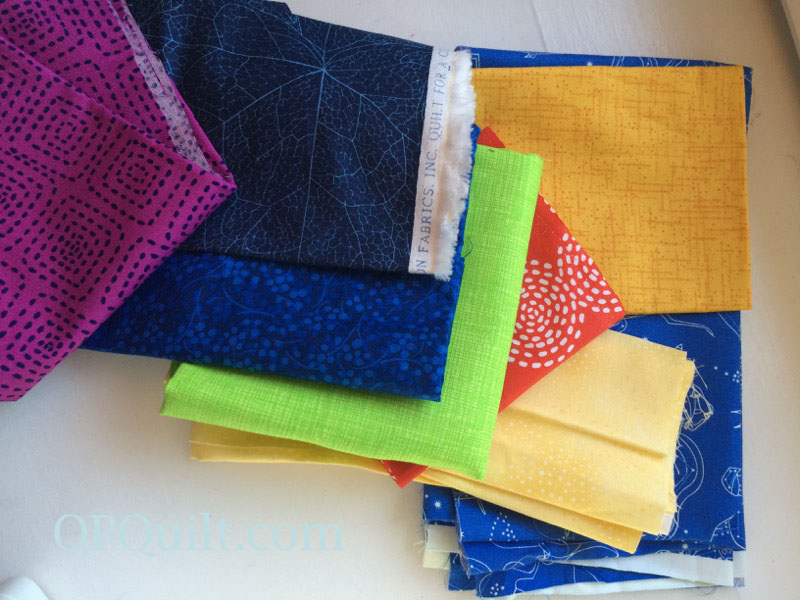
Pull your fabrics, using a good range of colors and value (light to dark).
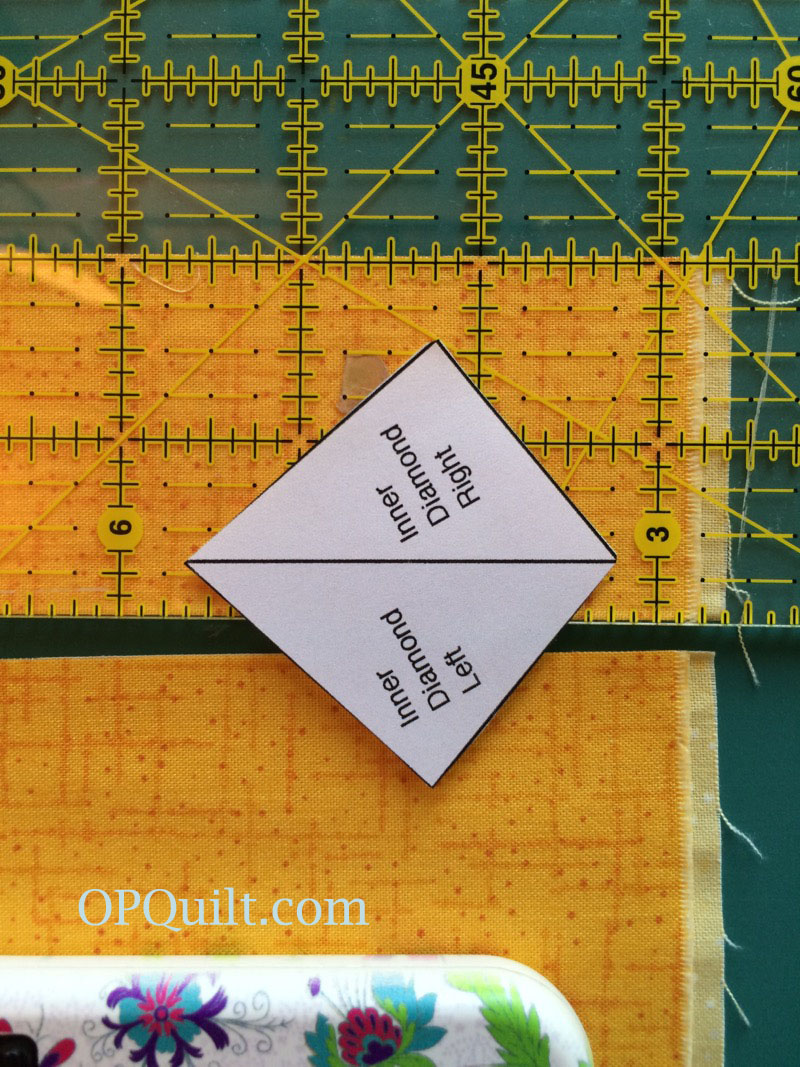
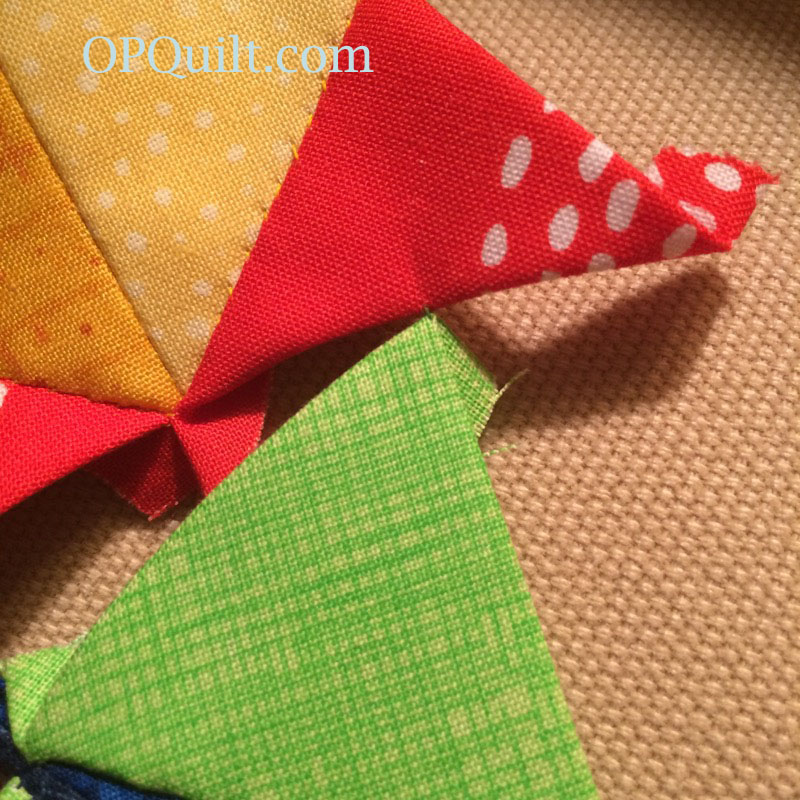
Okay, here’s what I mean about some time-saving. I didn’t cut the diamond apart. You can seam two strips together, then lay out your diamonds to cut. Here I am measuring for the diamond strip width (above, which will be 2″), and below for the rays (which will be 1 1/4″ inches wide). I use a lighter version and a medium version of the fabric color I chose so the difference will stand out. Above you can see the two colors, layered.
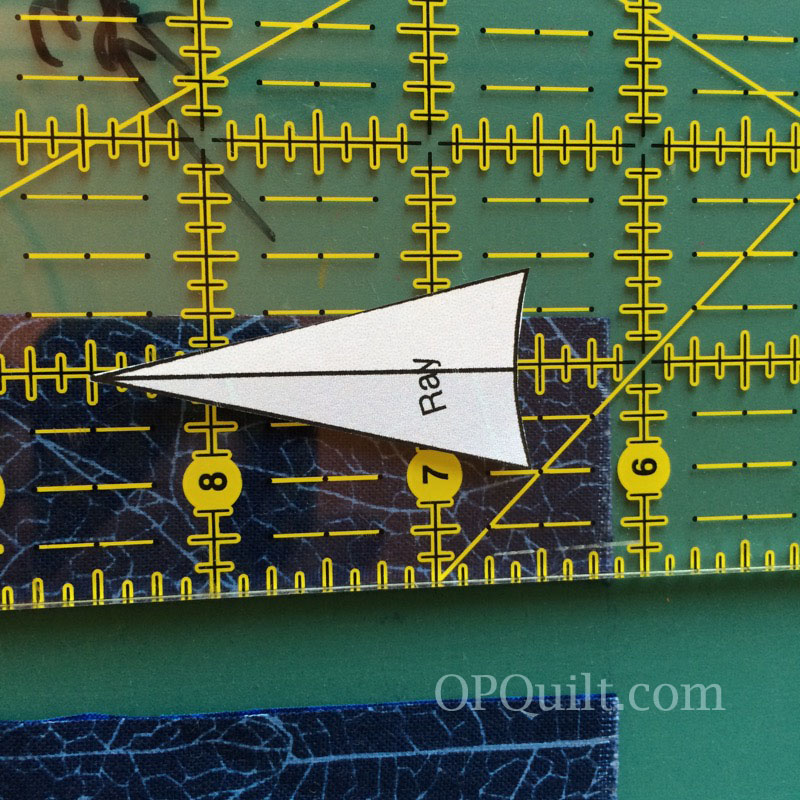
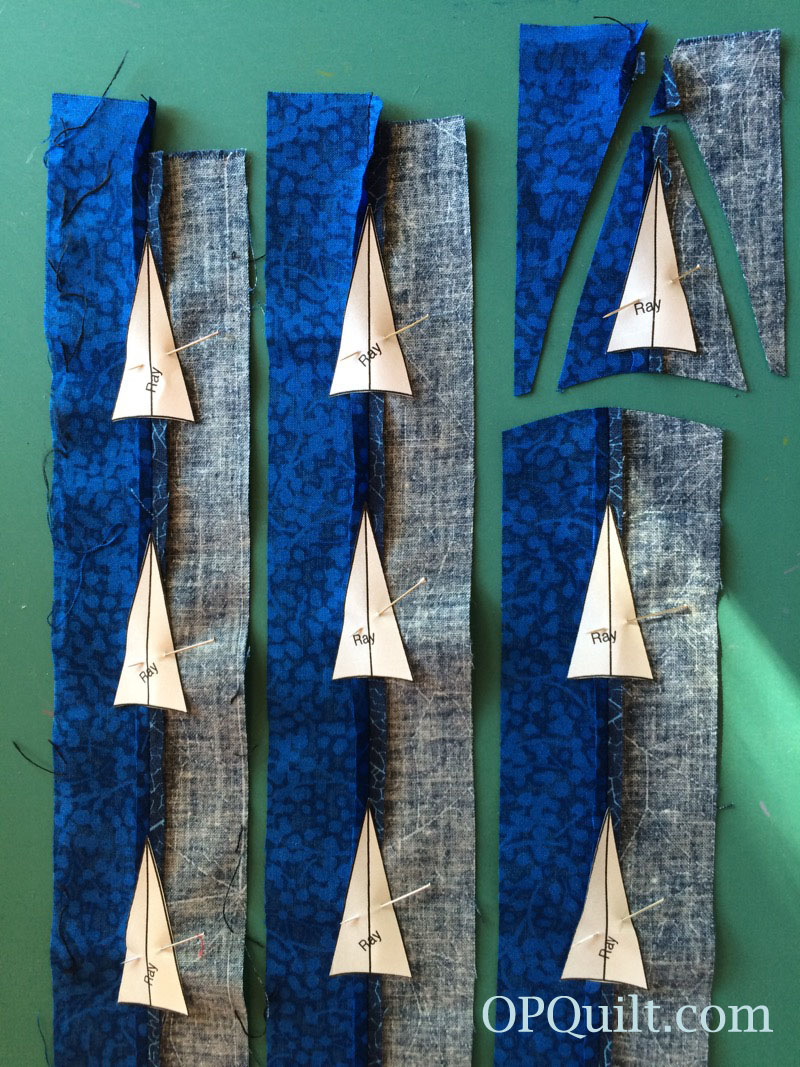
Seam the long strips together, then lay out your pieces, making sure that the center line of the ray is exactly on your seam, as shown. Trim away the excess like I did in the upper ray example.
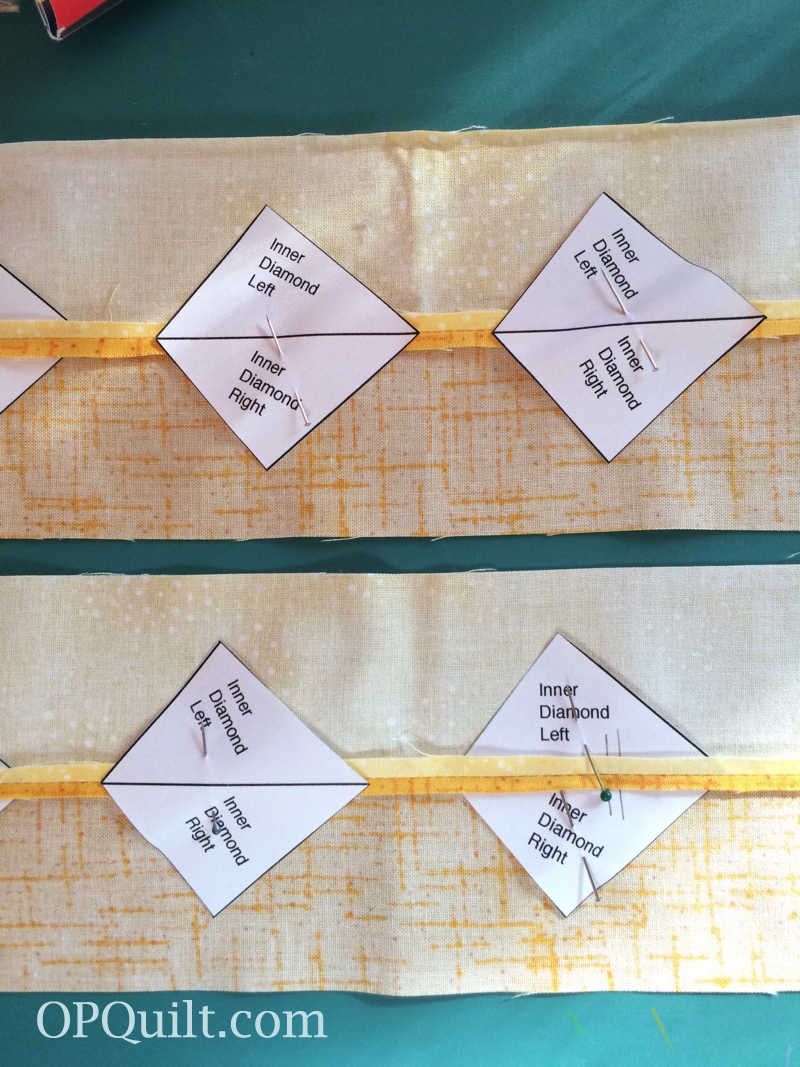
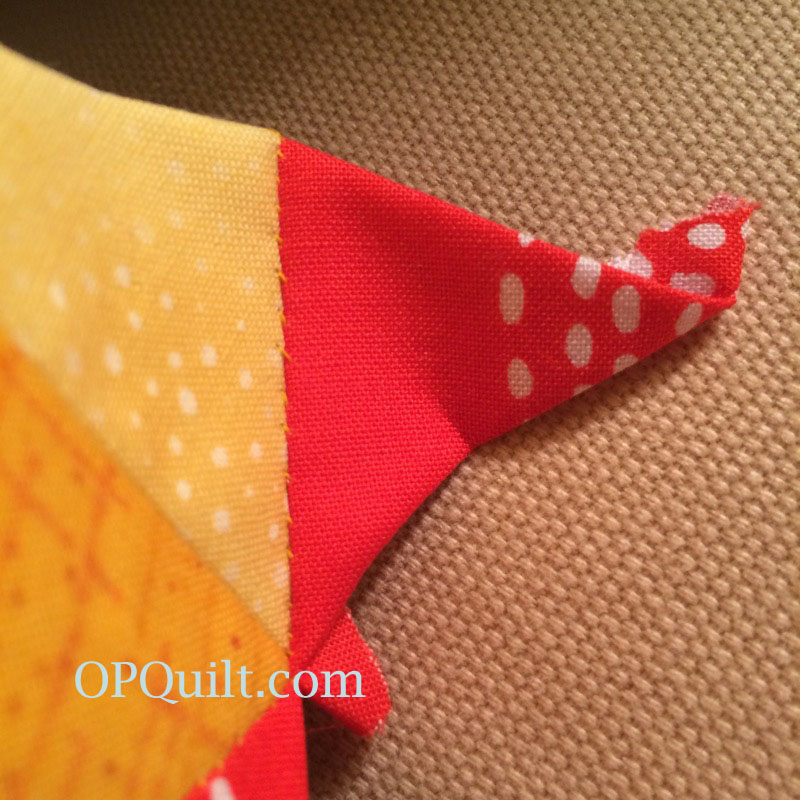
Ditto for the diamonds. However, the layout of the pattern has you cutting some apart. No worries. Just tuck them up under the seam allowances (as shown in lower right diamond above) and proceed cutting around them and gluing them as normal. I made a command decision to make my seam allowances a wee bit smaller on these two pieces, as I didn’t need a full 1/4″ inch. The seam allowances are at about 3/16″ of an inch, just a bit narrower than usual.
After gluing them, I put them in a baggie with a printout of the drawing of the block, so I can keep things straight.
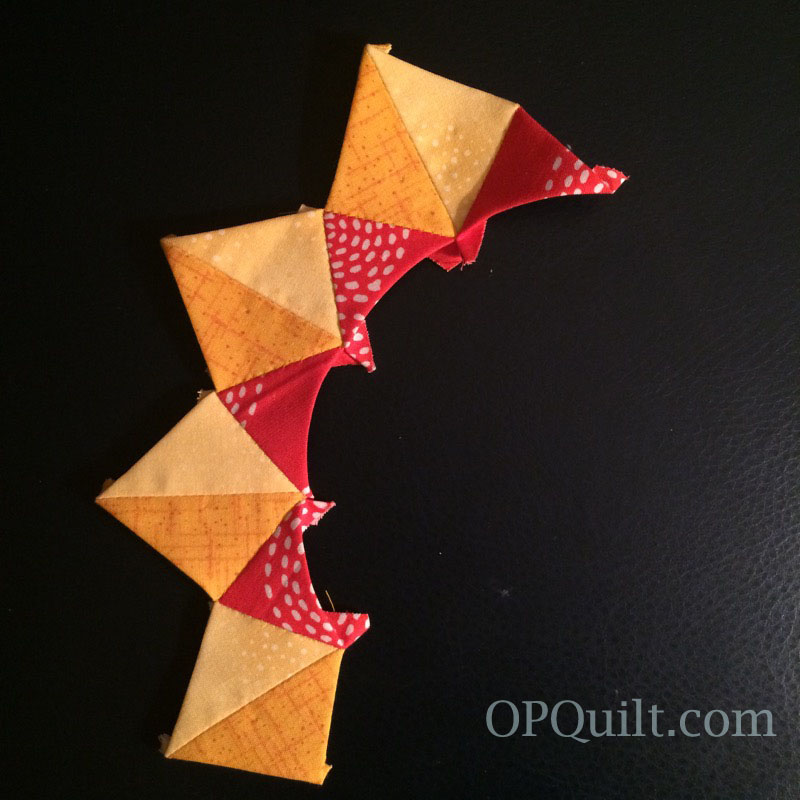
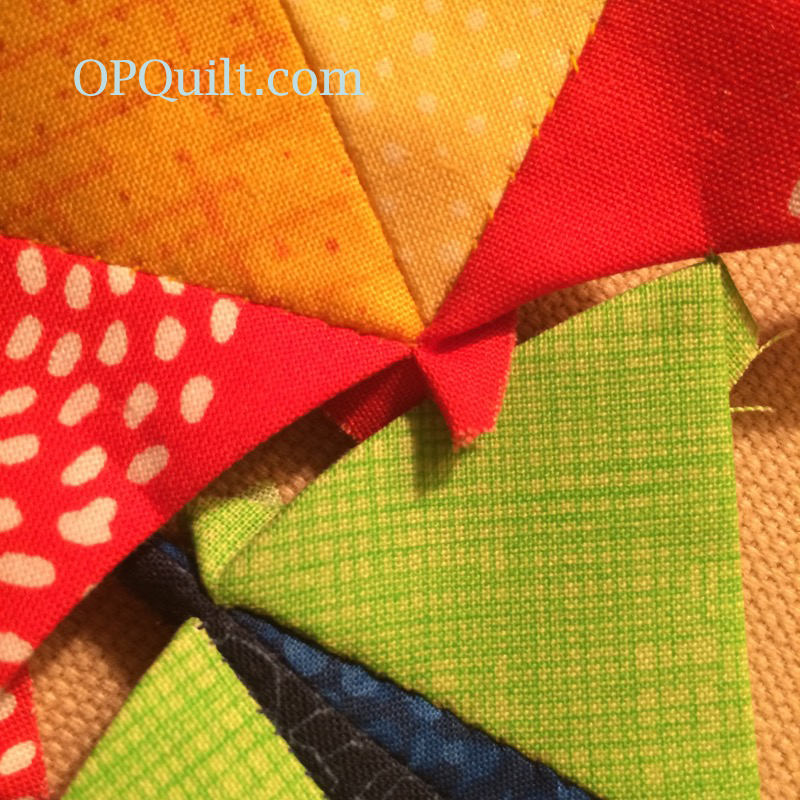
Since the outer golden diamonds are already sewn together (or if you constructed them more traditionally, stitch them together first, then come to this step), you can start sewing these golden diamonds to the outer orange point triangles, making sure that the curved edge of that triangle is pointed towards the eventual circle.
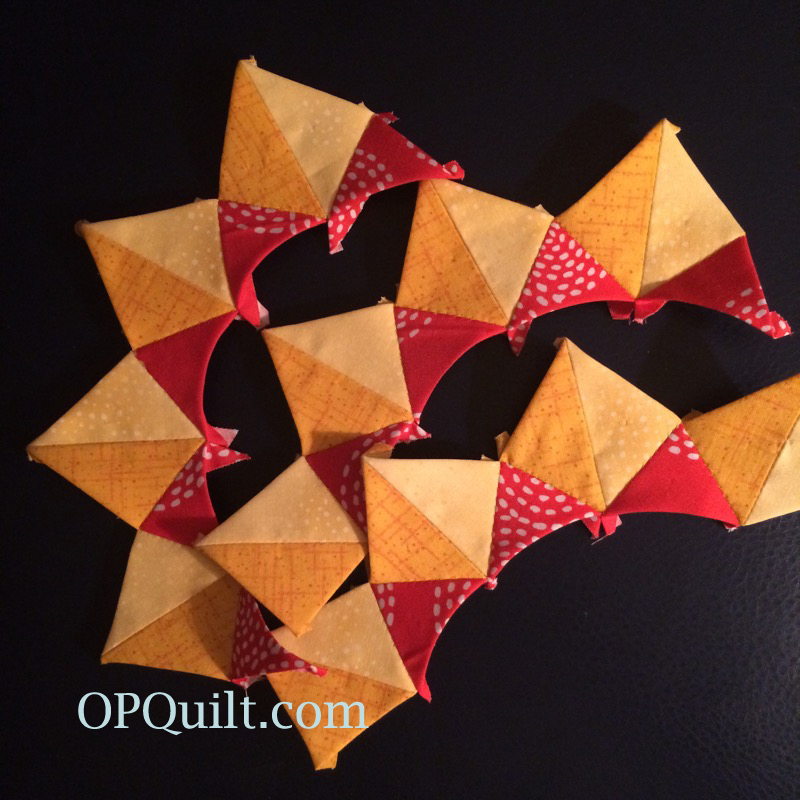
Sew all your groups; I did a grouping of three.
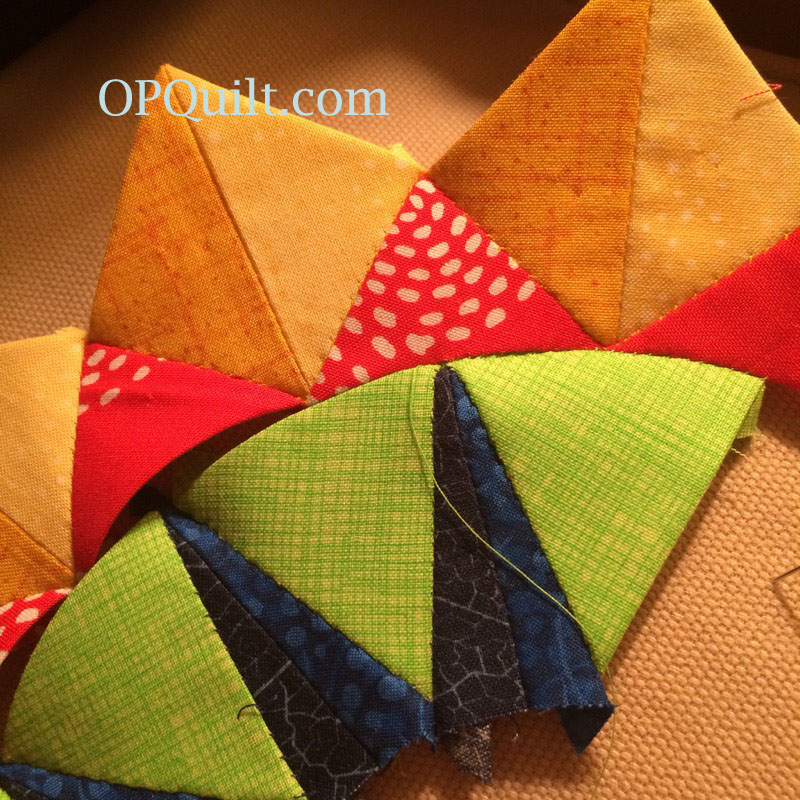
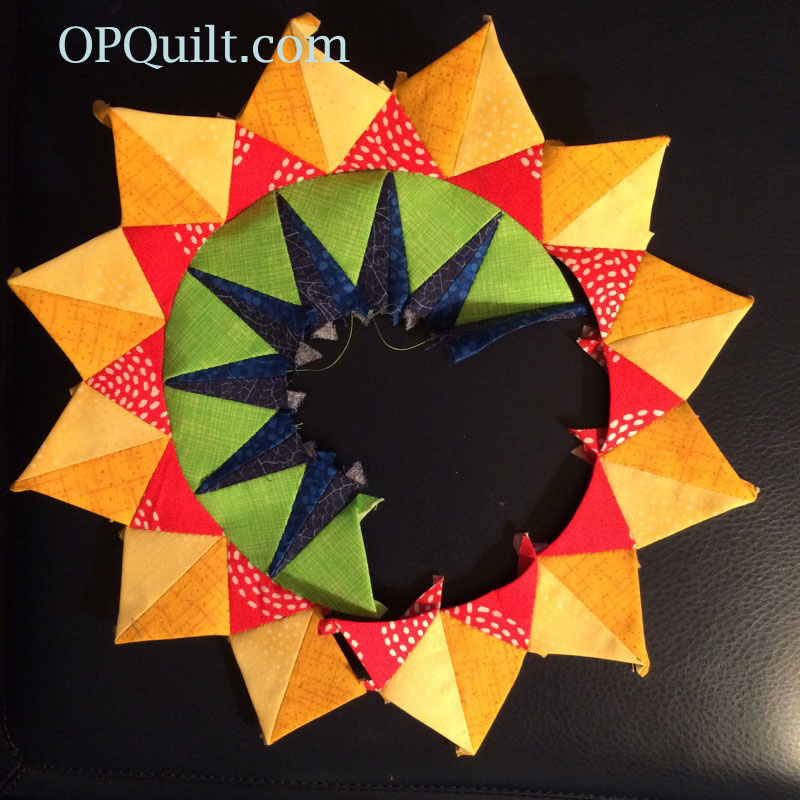
While I don’t have a photo for it (where was my mind?), stitch the rays to the inner circle points (the green points in my block interspersed with the blue double-rays). Do those in groups as well. Now to get them sewn together.
Find the lower center of the outer point, and pinch it, leaving a mark.
Match it up with the outer edge of a green inner circle point, and take a stitch, as shown.
Find the center of the next outer point, and put in a crease, as shown. Line up the ray with this crease. I sometimes like to put a single pin to keep me on track.
Stitch carefully, neither adding — nor subtracting — any ease, moving one stitch at a time around the arc.
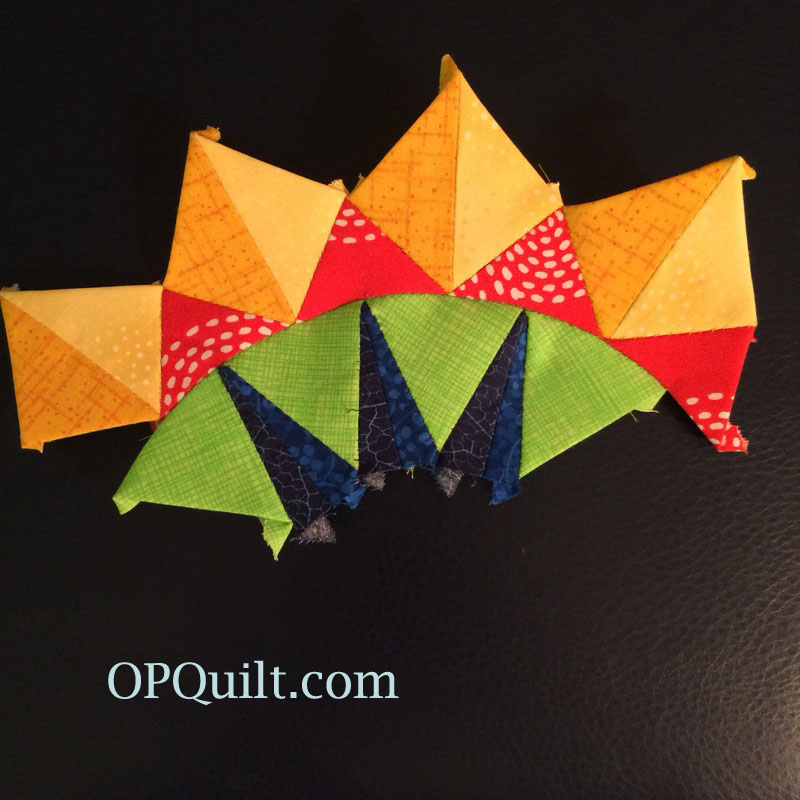
Keep pinching in the centers, and matching up the rays until you’ve got this set together. Yours may look different than mine, in terms of how many rays you sewed together, or outer diamonds and points you sewed together. But the principle is the same for matching.
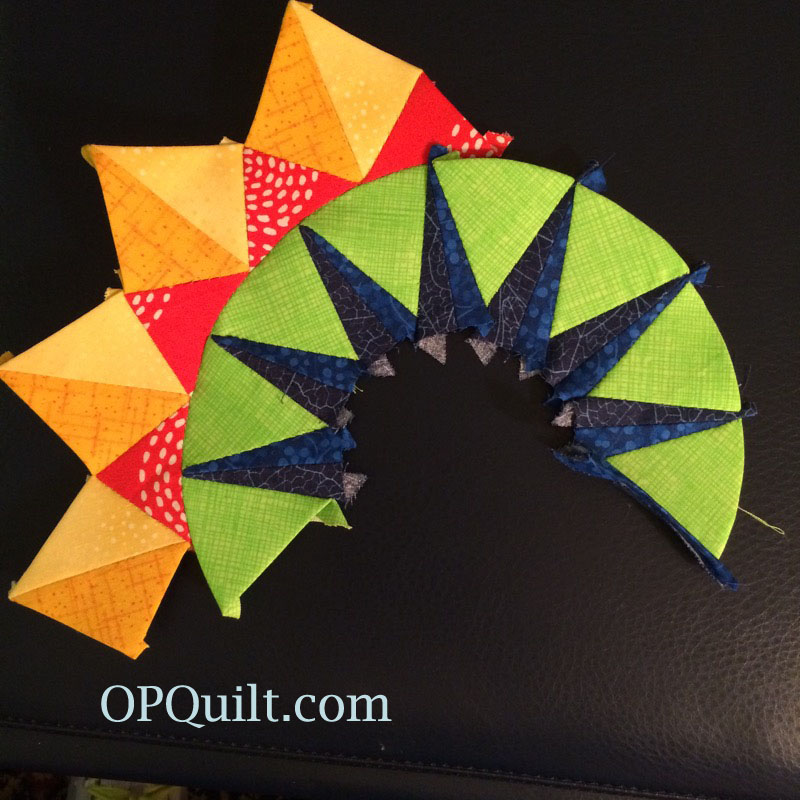
Stitch the next set of inner rays and points to the existing set.
Join the next outer set of diamonds and outer points to the existing, as shown.
Using the “pinch the center method,” join those two arcs together.
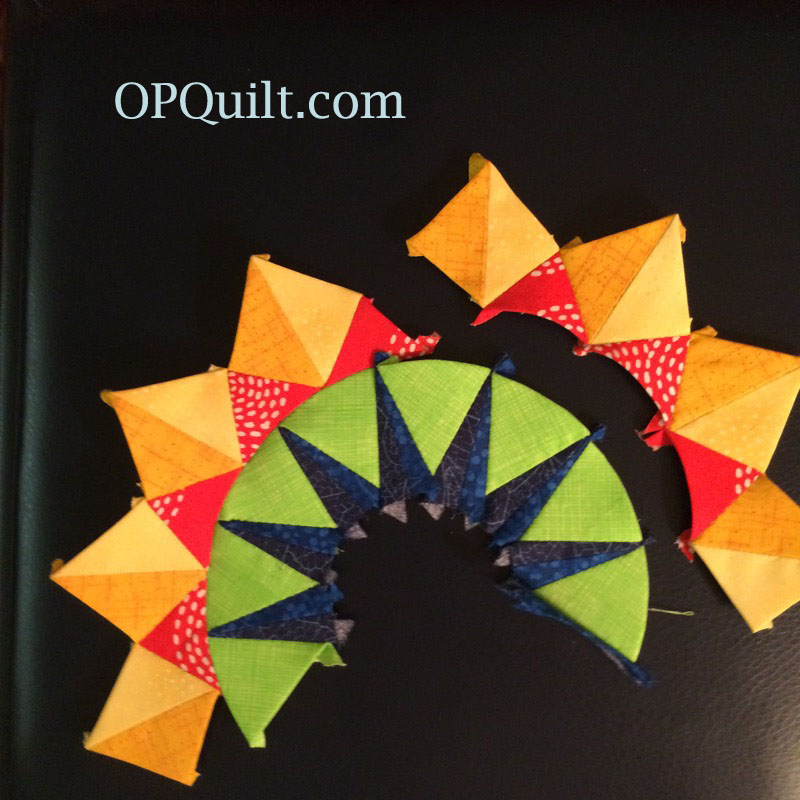
Here we go again. This time I sewed on the outer diamonds/points unit to the existing.
Then I stitched the inner points/rays together on one side only. Although it may look like it, the circle is not stitched together!! Leave it as a giant arc on both sets.
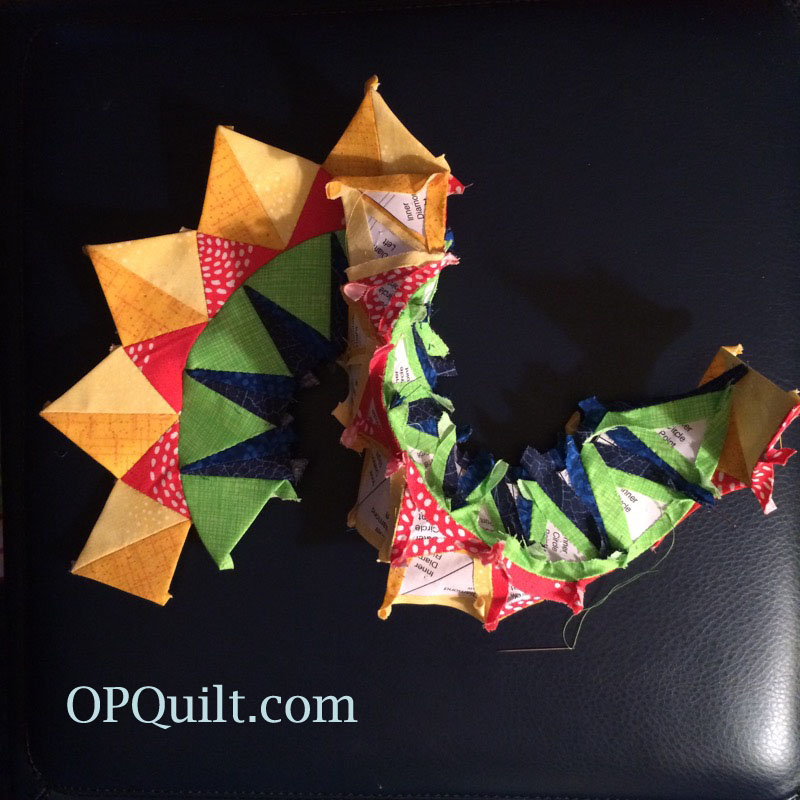
Continue the process of pinching to find the center, and matching it up with the rays. It will serpentine in your hands as you work. Perfectly normal and easier to do than if you had joined them both into circles. (Don’t do that!)
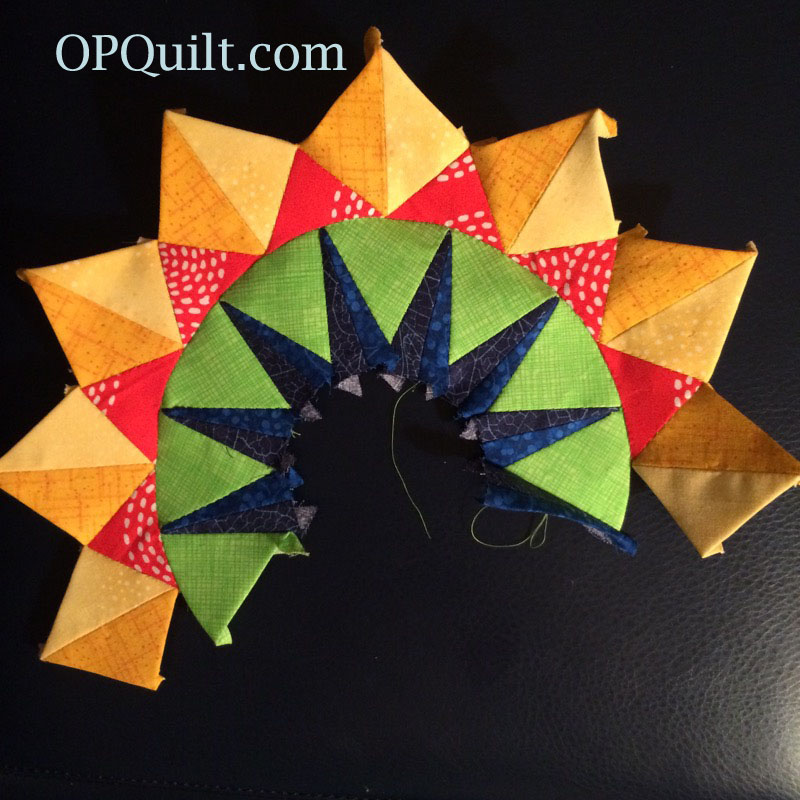
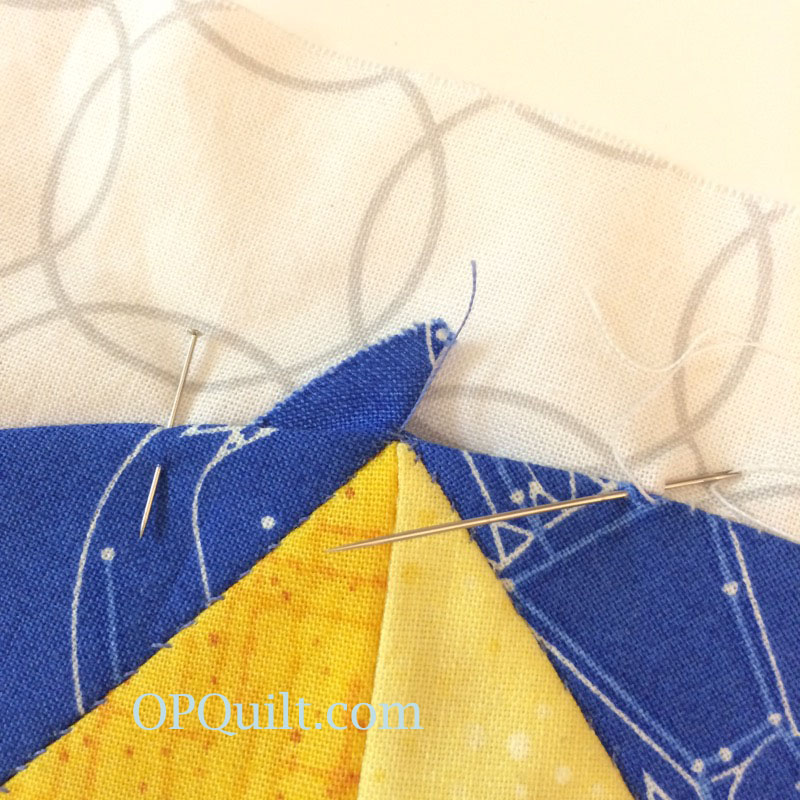
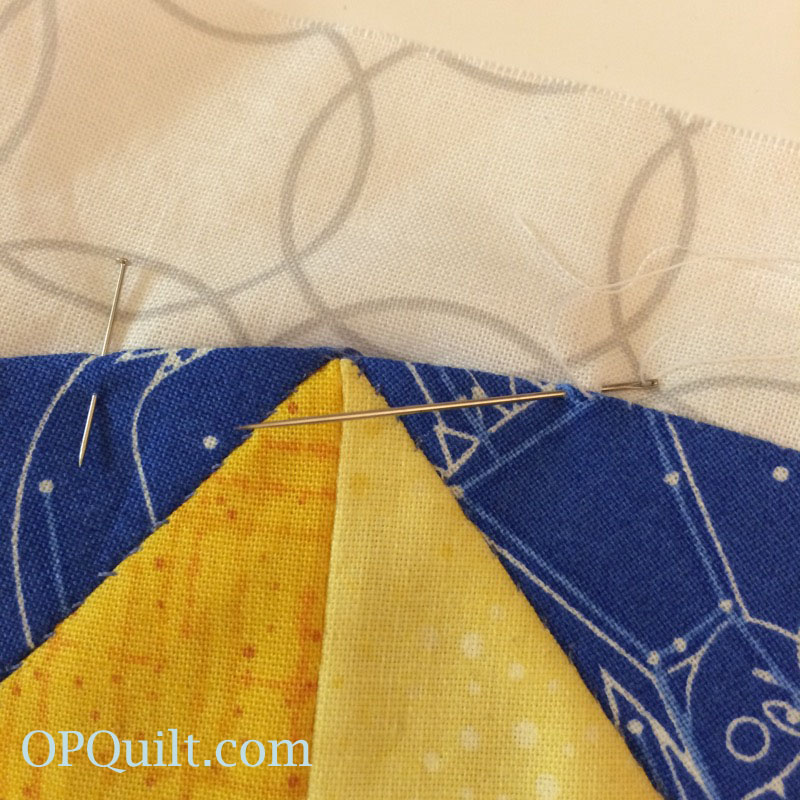
That outer arc seam is almost done. I left the last orangey-red bit unsewn. Now I’ll stitch the blue ray to the green inner point. Then stitch the orangey outer point to that inner circle. And last, I’ll close the outer yellow-diamond-orangey-point circle.
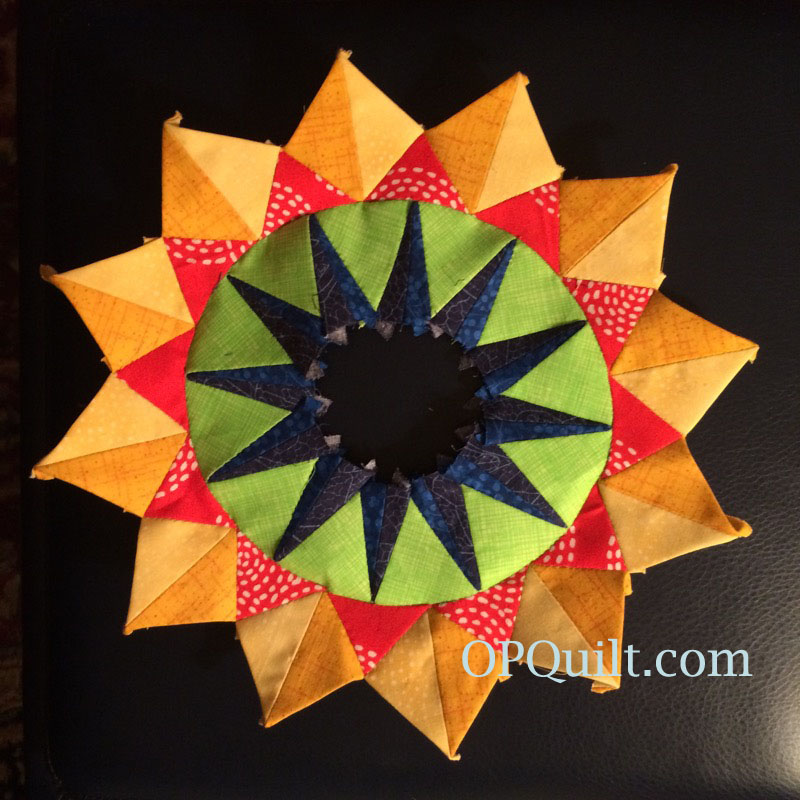
Don’t you feel like you’ve crossed the oceans, charting by a compass and the stars only? But look how beautifully it came together–no puckers anywhere. Just move slow and steady.
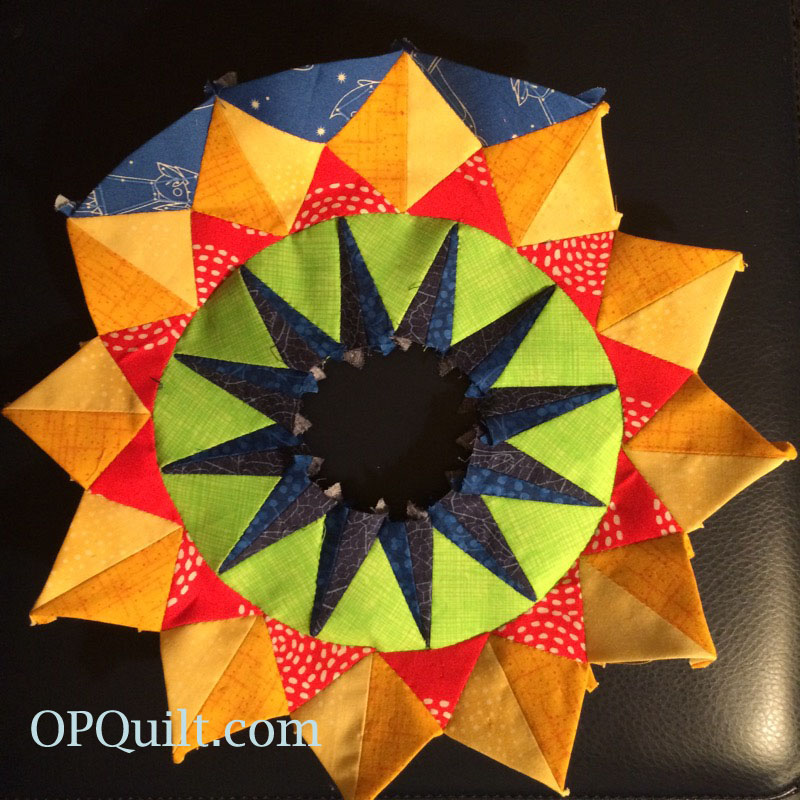
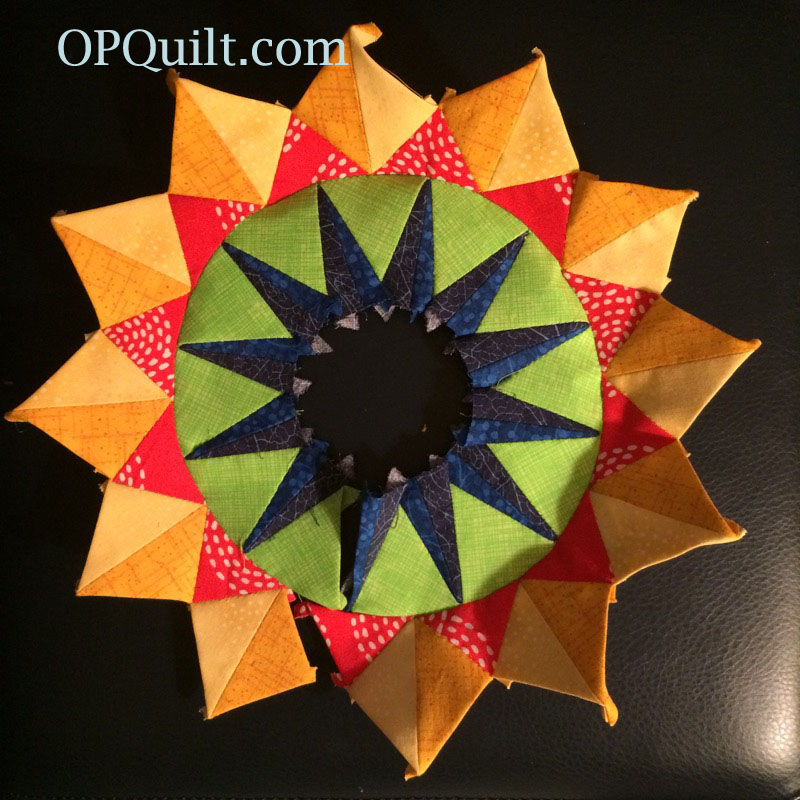
You knew I’d work that constellation fabric in here somewhere, didn’t you. Yes, it’s my outer arcs, and I now stitch them into place. Take a stitch at that outer edge, just over the yellow points, to hook the two blue arcs together. Just a single stitch, to keep them together around the circle.
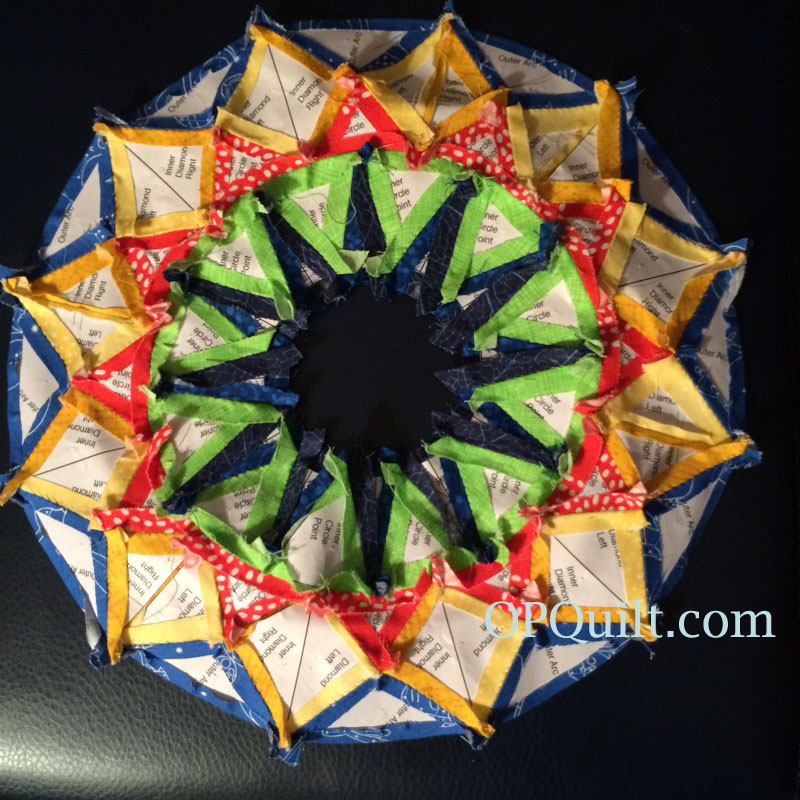
I love seeing all the papers lined up in a row.
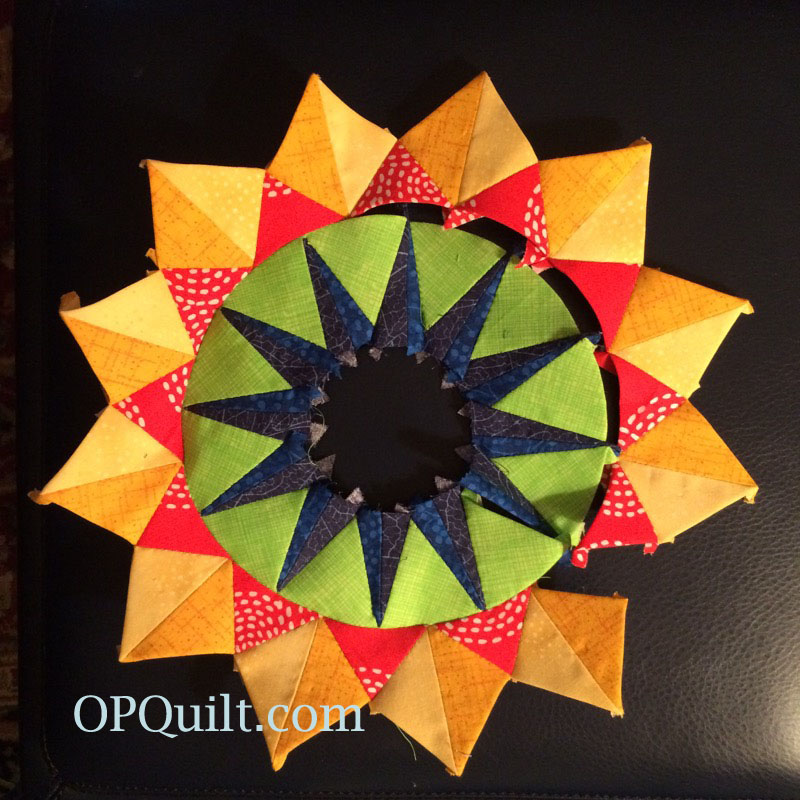
Remove all but the outermost blue arc papers, flip it over and give your circle a press.
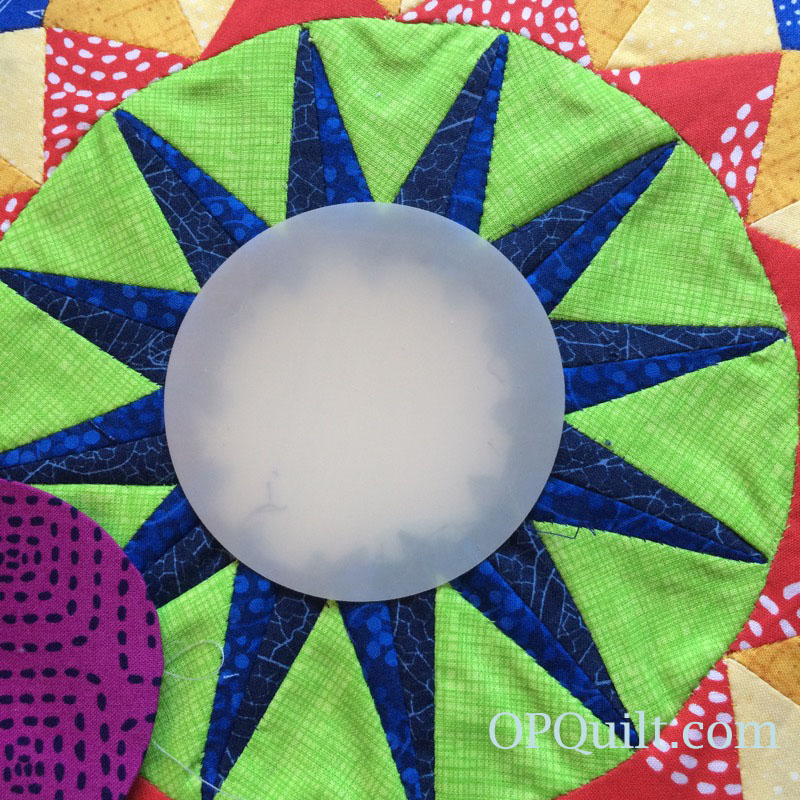
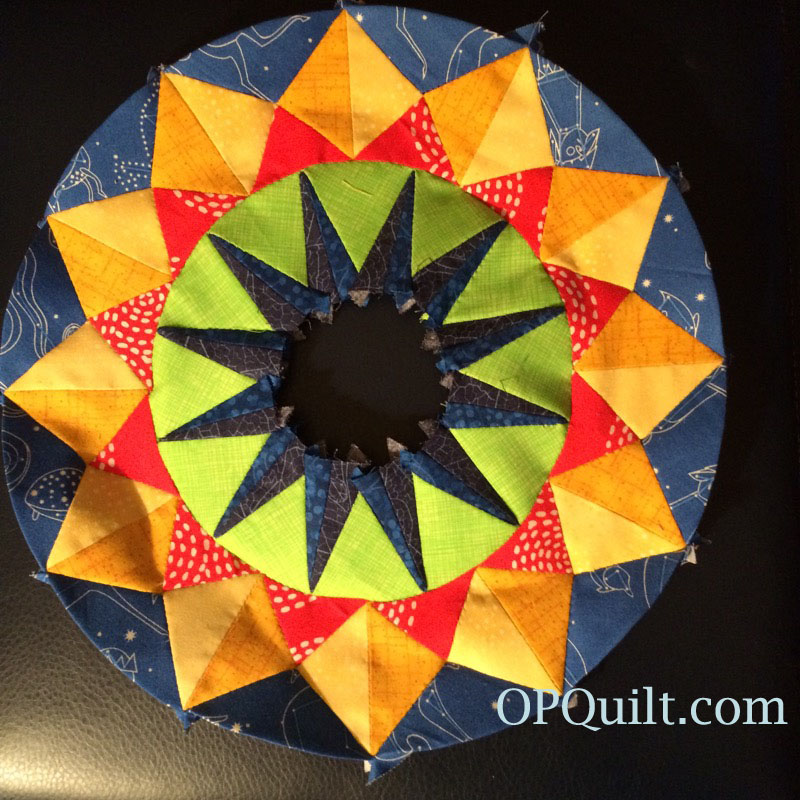
In thinking about what size center circle you’ll want, lay your Karen Kay Buckley Circle templates out on the block. You’ll want a circle that covers the open area, but doesn’t hide the points, like the one above. The one below is too big: it covers too much of the rays’ inner points and makes it look like something is missing.
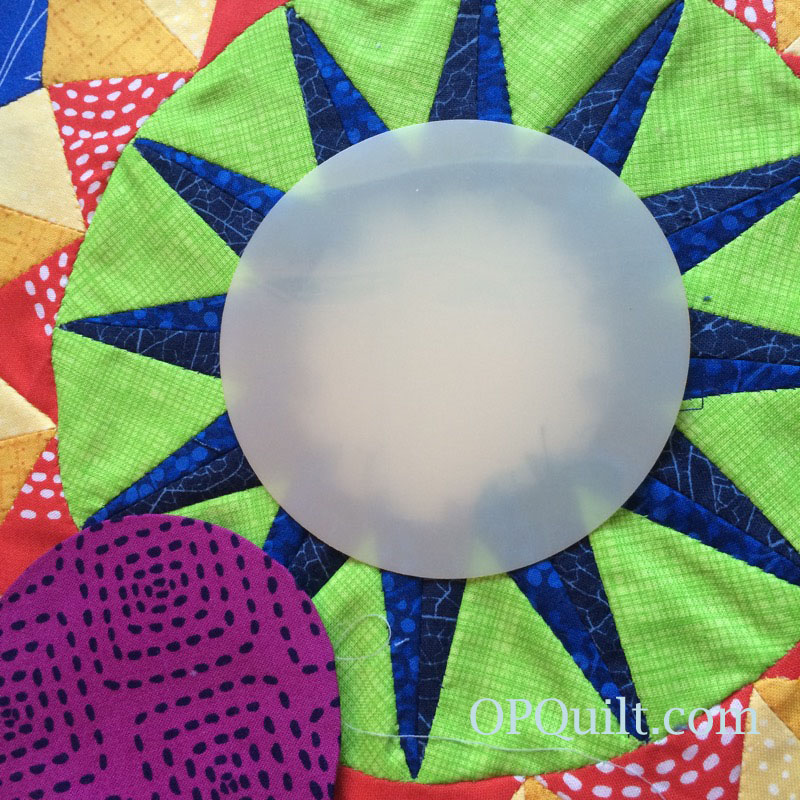
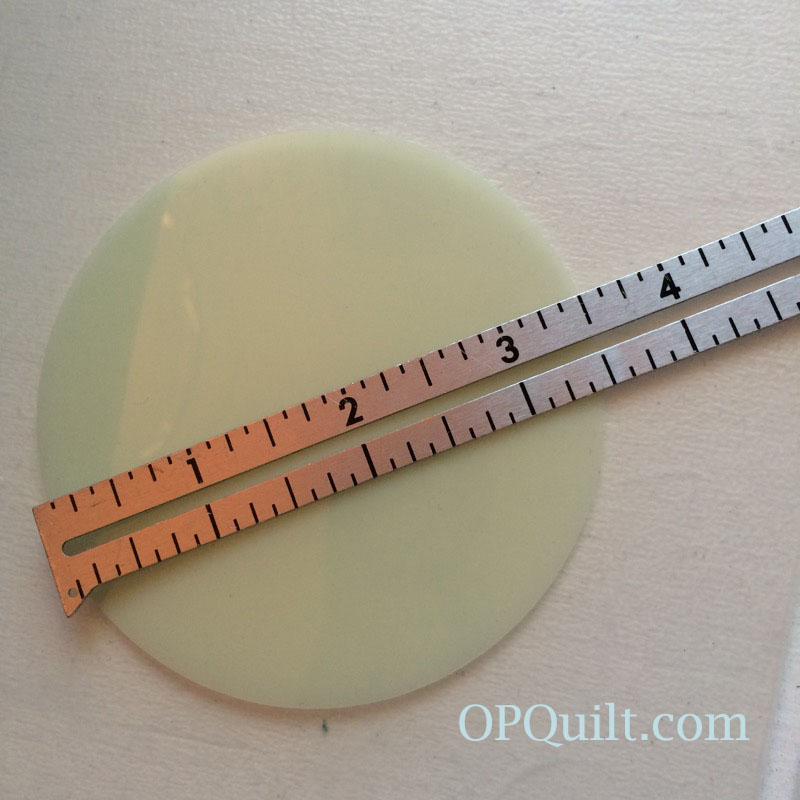
This was the dimension of circle I used. Trace your circle on your chosen fabric, then cut 3/8″ around it for the seam allowance. Stitch a running stitch around the outer edge, then slip the plastic template inside and draw up the thread to enclose the circle. Give it a shot of spray starch, press it, then let it cool and slip out the circle. I show how do do this on *this post.*
Cut a square 14 1/2″ and find the centers, as you’ve done for the other blocks. At this point, at block number 15, you are used to doing some of the steps, so if you are joining me just for this block, I’d suggest browsing back through other Circles blocks (see tab Shine: The Circles Quilt EPP above) to learn the tips and pointers. Appliqué the circle to the block.
I always pin around, then when I get to a join area, I first fold in one side, then the other, before continuing on (see below).
That’s it for this block! The tutorial for the last circle block, Block #16, will post October 1st, then our series is complete. While you work on your blocks, I hope to work on the quilting of this quilt and have it ready to show at the beginning of October. Have fun stitching!
Discover more from OccasionalPiece--Quilt!
Subscribe to get the latest posts sent to your email.

WOW Elizabeth! You sure do put a lot of time into these blocks! This one looks amazing!
These are beautiful, someday I hope to have time to EPP a project like this. I can’t wait to see what the finished quilt looks like. Thank you for designing such lovely blocks.
Gorgeous!!! And your directions/photos are totally clear and concise (as always). Beautiful piecing!!! Hugs…….
Your inspiration for this block was genius! I love the choice of colors in this one and your workmanship is perfect. This one is one of my favorites. Great work, as usual.
It’s very apparent from this thorough post, showing great detail and futzy work, that you enjoy this sort of stuff. Your milieu, for sure. I felt tired just looking at the pictures! 🙂 But I sure admire what you’ve done, Elizabeth. For all the effort you’ve put into this, I hope EPPers flock to find you on Craftsy!
This is beautiful! I can’t imagine the HOURS it took to write that tutorial up ; )
Beautiful work Elizabeth!! You are inspiring 🙂
So pretty. I have liked ALL your circles. Just a note that on your patterns it would be good to have a 1″ square scale because I need to print at 98% to get a true 100% Don’t know why but I do. So if there is a 1′ square scale to measure to I know my size is correct.
Elizaabeth, it’s getting harder and harder to choose a favorite. So perhaps I should just say that I will add this block to my group of favorite circles. Gorjuss.
Oh, my! I love this and I am happy to see you doing the two-color diamond this simple way. I have done this before and wondered why the designer doesn’t recommend doing it to begin with….and you did with your EPP. So beautiful, I’m going back and read your blog and read your blog. Thank you!
I haven’t been able to find the pdf’s for the last few blocks. Am I going blind?