300 Quilts · Patterns by Elizabeth of OPQuilt · Publications

Santa’s Night Ride • Quilt Finish

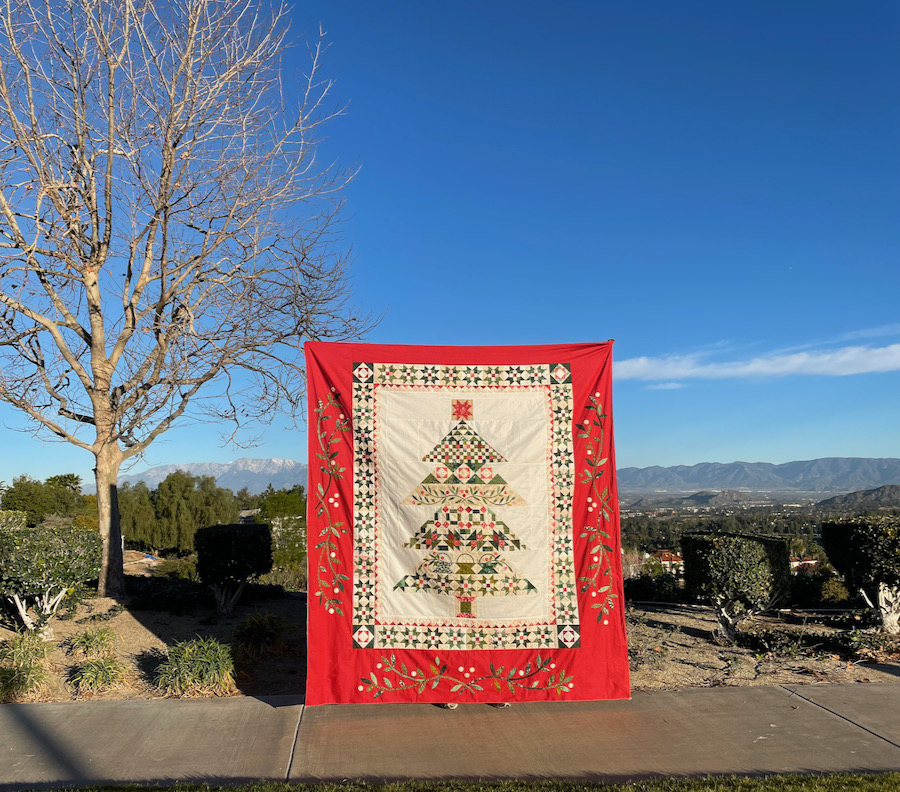
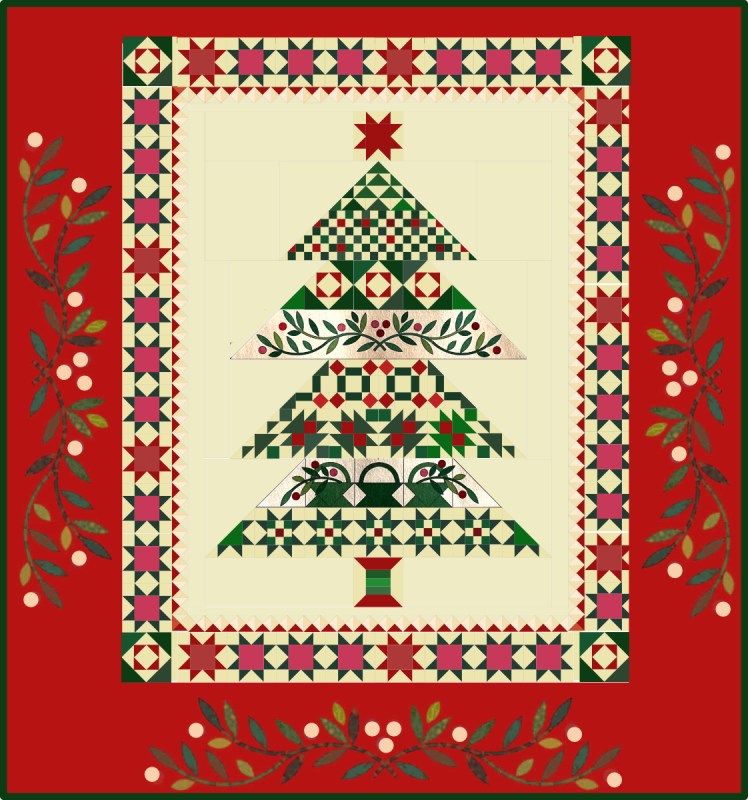
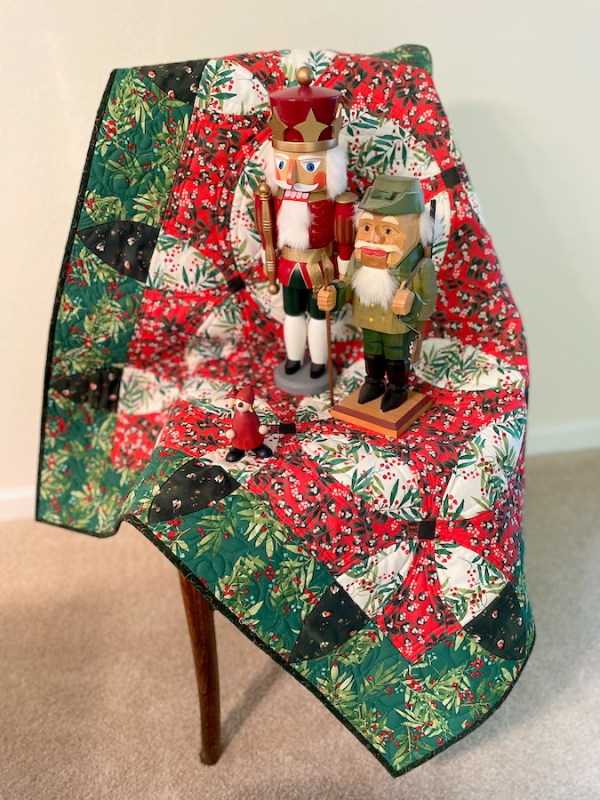
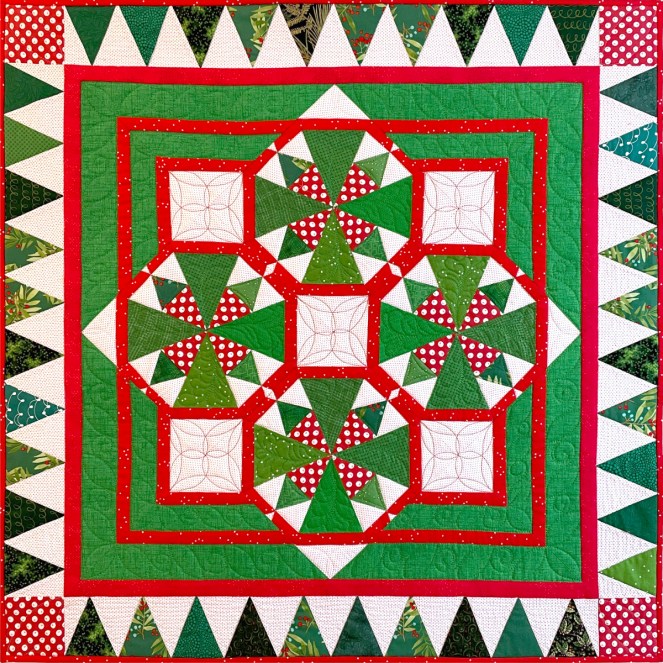
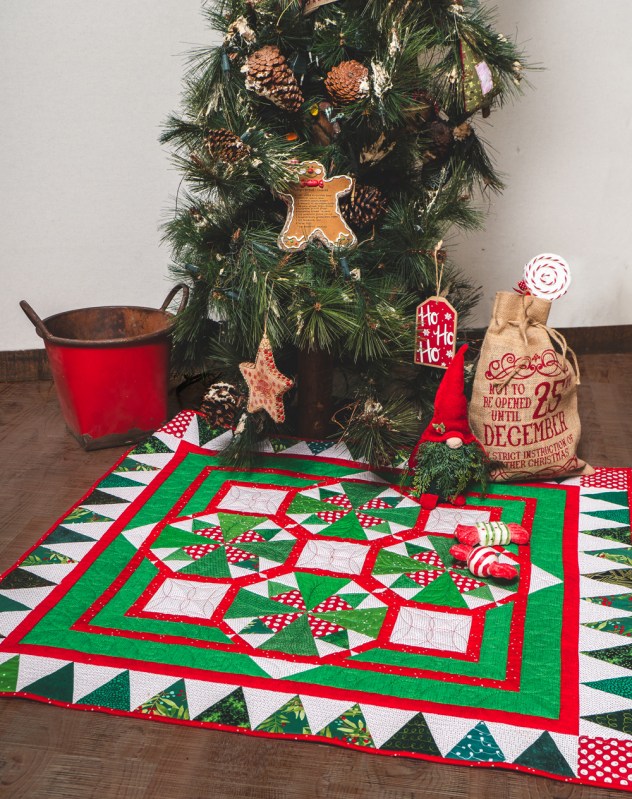
This quilt has been on quite a ride. A Santa’s Night Ride, to be exact.

It has flown over to France, to the QuiltMania people, who publish three fine magazines: QuiltMania, Simply Moderne and Simply Vintage.

It has flown home.

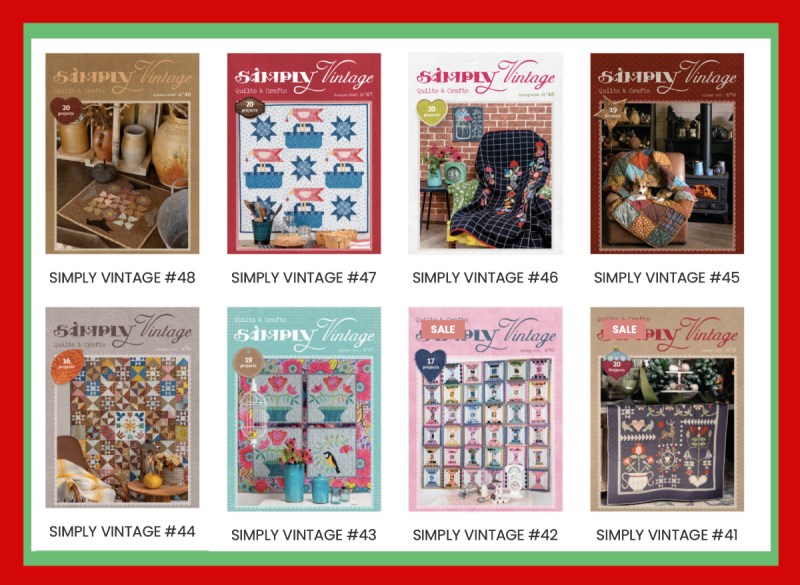
And it will be making its debut in one of the QuiltMania magazines: Simply Vintage!

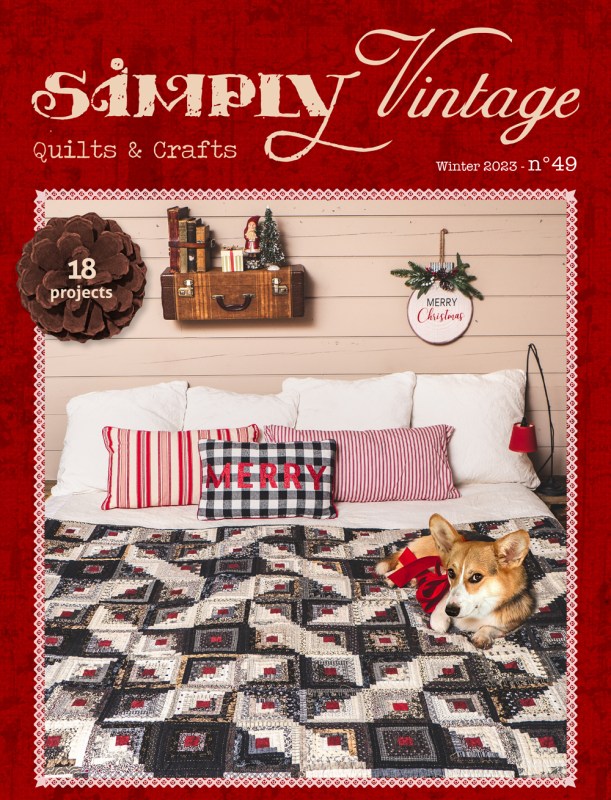
I know my friend Carol will like the Corgi on the bed. I do too! My quilt, Santa’s Night Ride will be in this issue, Number #49, which should be out about now. For those of you not aware of the THREE Mania magazines, let me introduce you to this one. While it says “Vintage” on the top, you might instead think of it as more traditional than vintage. It has a lot of our favorite quilt designs, as well as some new ones. I’m just pleased as punch to have my quilt published, and you can buy it from them directly here. Just click on the newest issue, with the Corgi on the front.

label

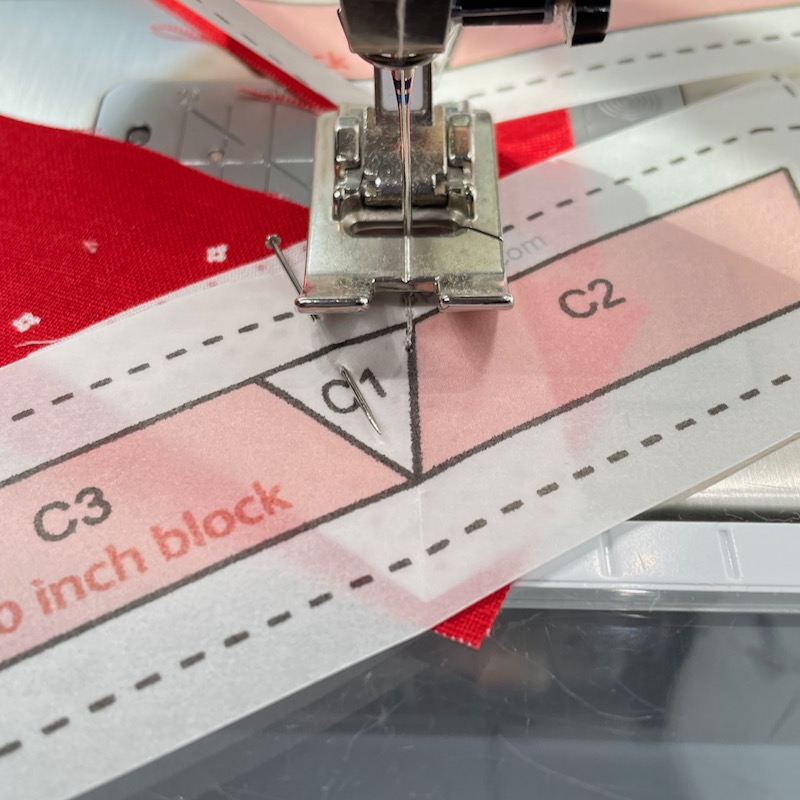
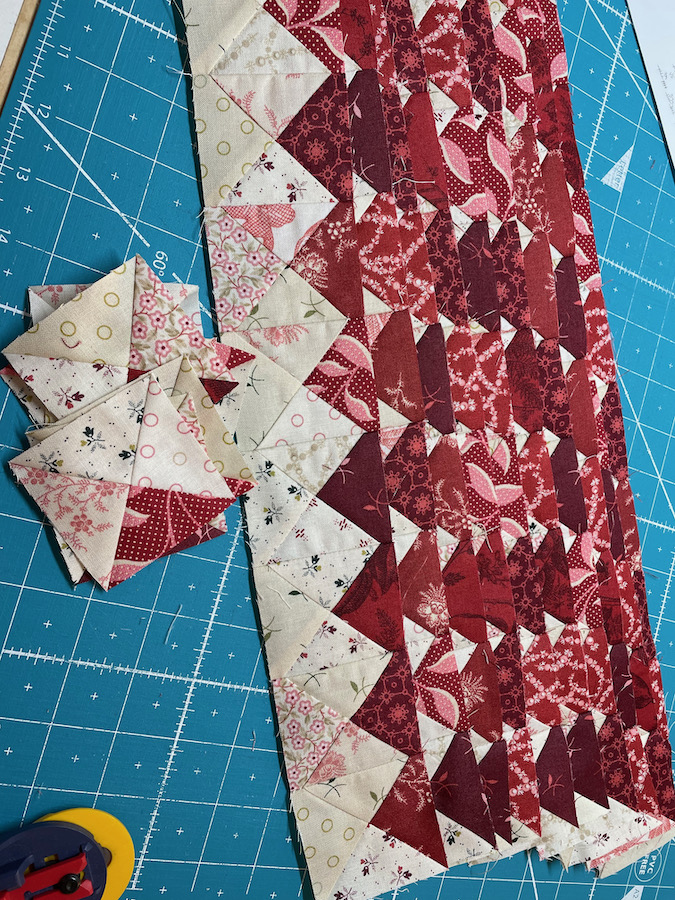
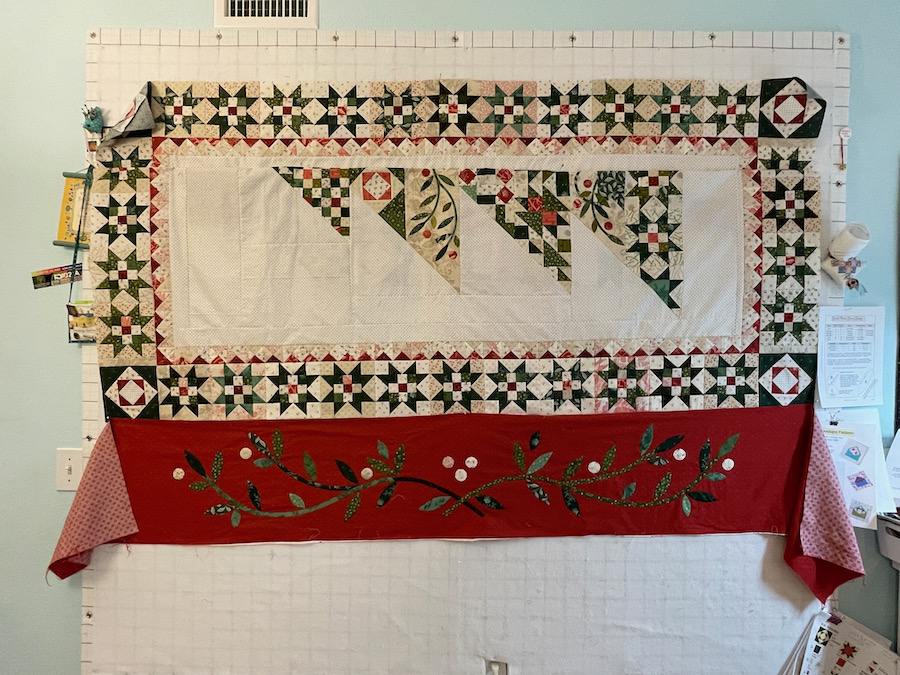
The center blocks are Foundation Paper Pieced (FPP) and they go together quickly.

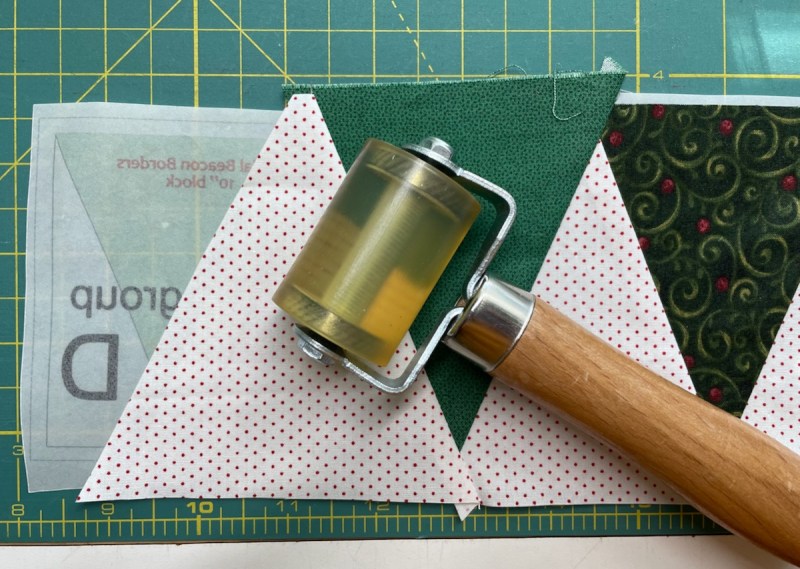
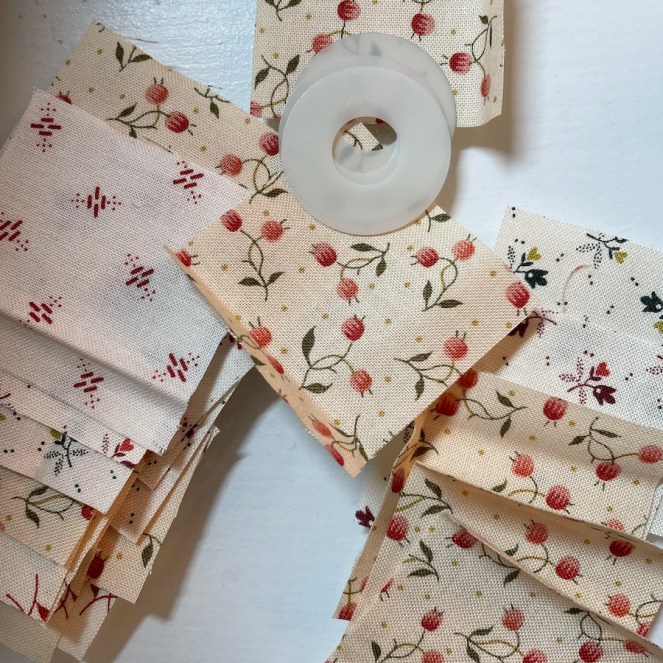
I also made the border with FPP, and here you see my favorite roller. Instead of running to the ironing board, just use this tool, an automotive tool, with ball bearings — I prefer it to the old wooden one I used to use, and it’s $cheaper$.

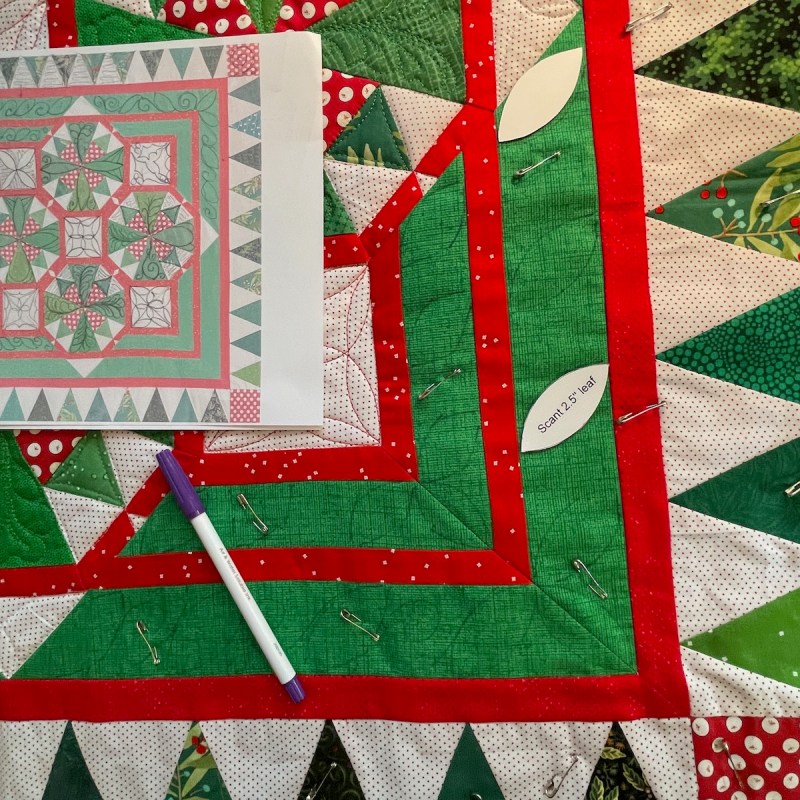
I always print out a light version of my quilt and map out my quilting. Then I will often use a disappearing pen to transfer my ideas to the quilt.

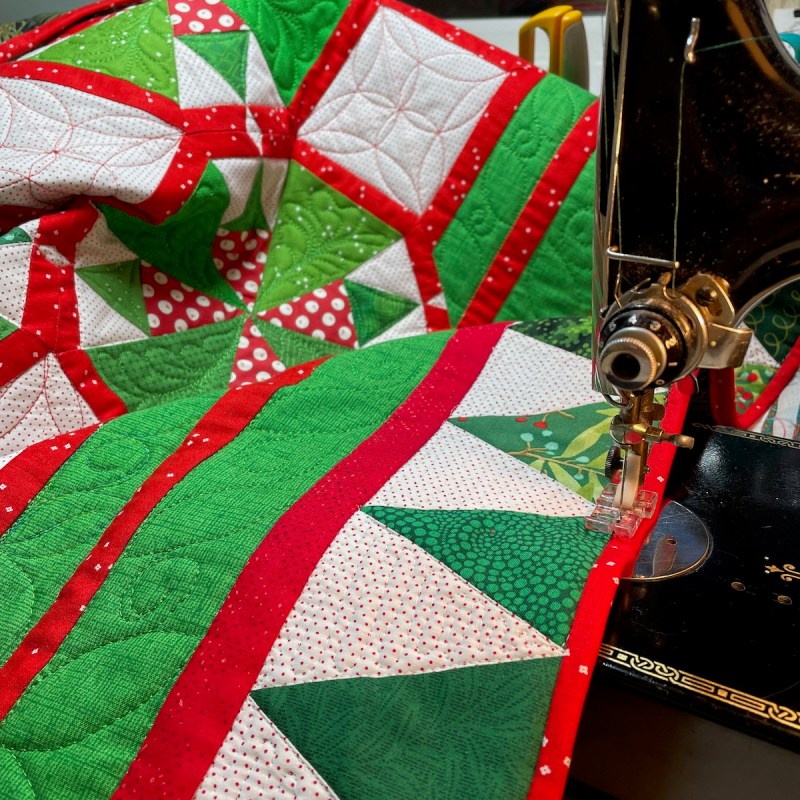
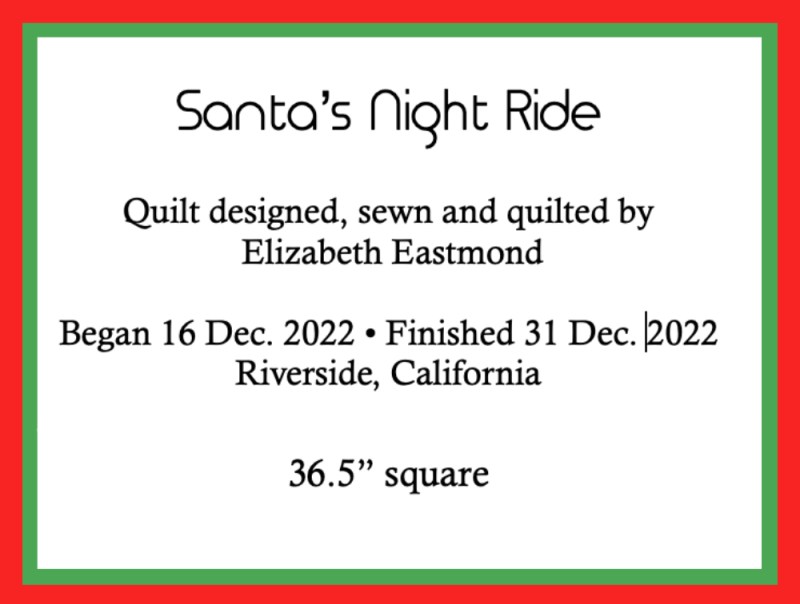
I even sewed on the binding by machine. It seems like every December, when I’m deep in the Christmas season, I get the bug to make a quilt, but I always finish it up in January. Not this one! This is Quilt #272 in my Quilt Index.

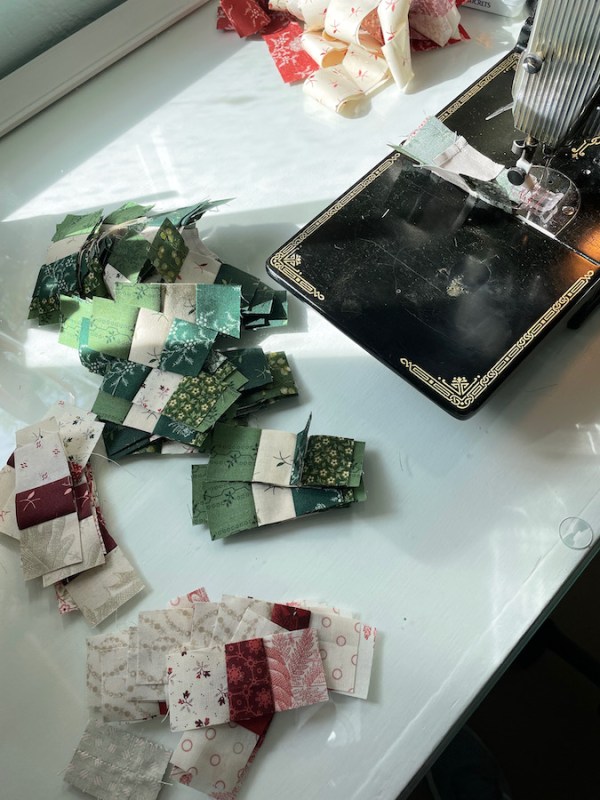
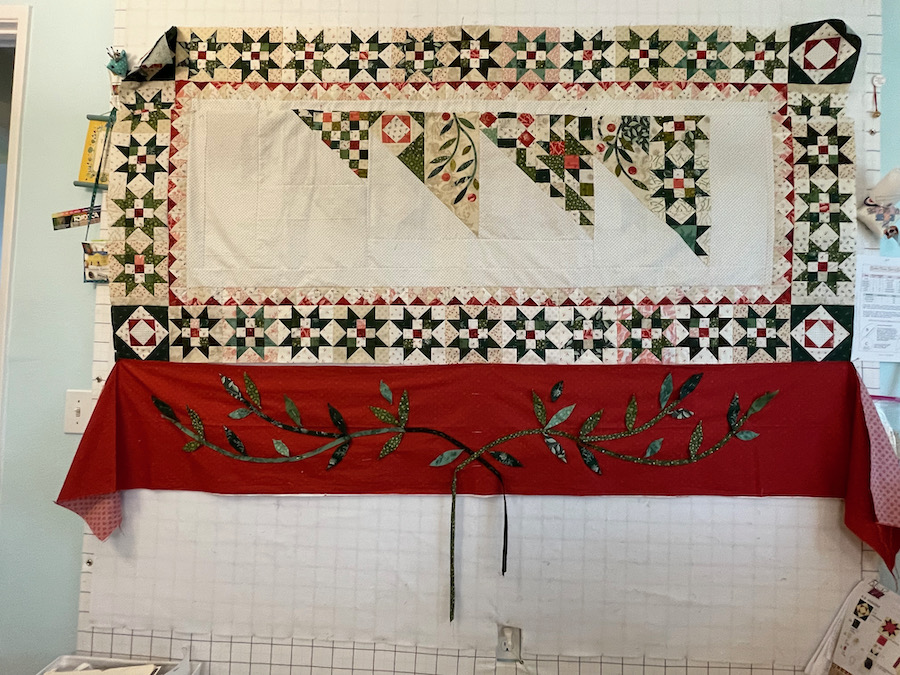
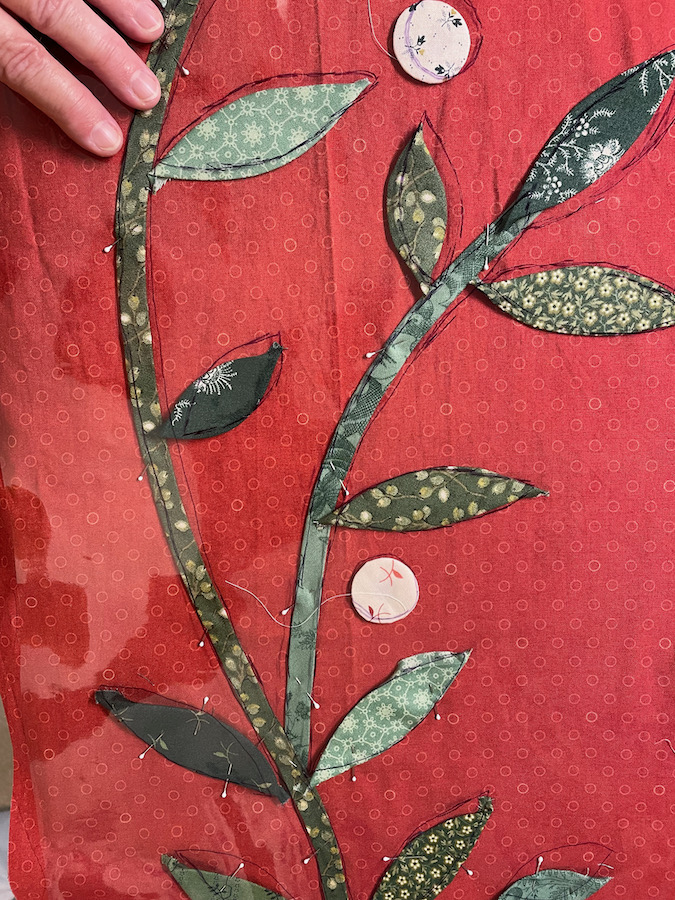
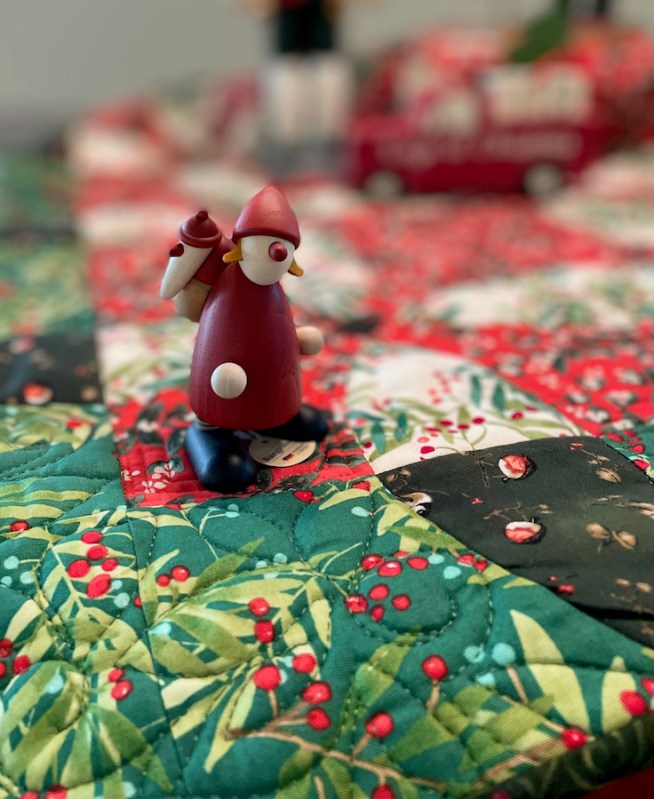
Some tips on using scraps: Keep them in similar values for the center blocks. All my blocks are different, but they “read” the same because I used the same red/white for the inner triangles, and while I used four different greens for the large triangles, they are distributed evenly throughout each block.

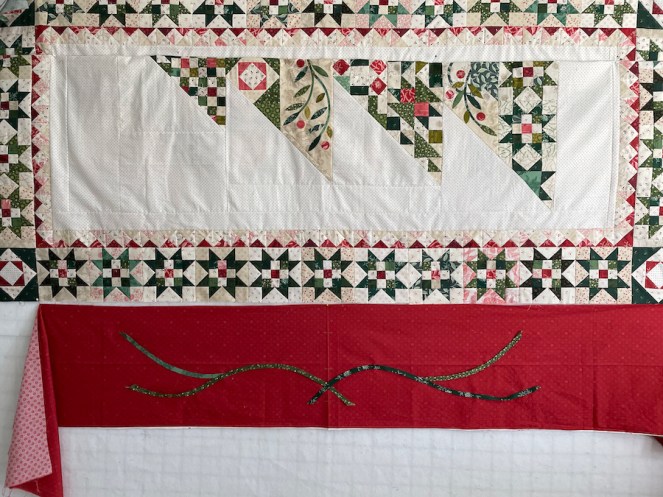
Go for one fabric for the light background for both the center blocks and the outside little tree-triangles in the border, as it helps tie the quilt together. You can see above all the different fabrics I used in the outer tree-triangles: cut loose and cut from your scraps.

This has been in the works for nearly a year, so while you may have had a glimpse or two of this small quilt, I was waiting for the day when I could share the happy news, of this publication.

Happy almost December!

Other QM published quilts:
Riverside Sawtooth (in QuiltMania)
Elizabeth’s Lollipops (in QuiltMania: a photograph from a quilt show, but I’m counting it!)
Crossroads (in Simply Moderne)

During the pandemic, I agreed to let them share my blocks with readers of the QuiltMania newsletter. The patterns have now come home to stay, and most are free (see tab, above).

Christmas Quilts · Patterns by Elizabeth of OPQuilt

Tannenbaum Top Finished!

Quilt Bio:

Not Yet Named or Quilted or given a number in the Quilt Index
Current size is roughly 84″ x 95″
Top only is completed; taking it to my quilter this week

Anguish Level–Center:

The center was pretty straight forward as all the pieces were pre-cut. A bit of heart-failure when cutting directions by the designer were off for one section of the tree. Pieced it. Did the bulk of it in two days with my friends. We started December 9, 2019 and made it to Block Four. Picked it up again on December 10, but the center wasn’t finished until a couple of weeks later. Lots of piecing, but having friends there made it fun. It was pre-covid, so we didn’t worry about anything.

Anguish Level — Borders:

Hard to gauge because now we’re two years into covid and everything feels harder (really) especially design (really really). It’s also been out of my hands for two years, so I have to re-acquaint myself with this. Anguish Level is also a bit higher because I’m trying to blend in the designer’s style with my style. My first draft is above, but I realized everything was pretty tan/beige/cream. I’m replacing a red/blue/green Christmas quilt (below) and wanted something traditional and something with RED.

Construction Report:

Flying blind, so that’s always interesting. Hardest thing is to figure out fabric amounts, so I ordered a jelly roll of greens, half yards of reds/creams, and then 3 yards of red for the borders. I ended up ordering 2 more yards of red; I just hope the approximated yardage in the pattern will be okay for most people. Fun to make Border One, really fun to make Border Two (sawtooth stars, she says!), and once I got the hang of the scale of leaves and vines and figured out how I could explain what I did, the appliqué went quickly. I am really happy it’s done, and it’s ten months early for Christmas!

More Photos/Illustrations/Yammering:

Border One is Double HSTs. I learned a nifty trick from Yvonne of Quilting JetGirl about how to cut these, which made things go more smoothly.

One of those lovely late-at-night photos, but the borders are on and the quilt is growing. I am not worried about all the piecing in the background of the tree part, but my very smart friend Laurel appliquéd down her tree onto a solid piece of fabric, instead of all those cuts. And yes, I did swap out the tan fabric in the kit for something a bit lighter.

I’m in my favorite sandbox now, with sawtooth blocks.

I like all the variety of the many fabrics in the same hue.

Moment of Truth:

It fits on the bed!

Final Border Photos/Illustrations/Yammering:

Heading deep into Vines and Leaves. I cut two template shapes for the leaves: one with seam allowances (see red line) that I use to place on the bias and rotary cut around. I also cut a massive amount of leaf shapes with NO seam allowance out of freezer paper.

Photo #1: I place the dull side of the freezer paper to the wrong side of the fabric leaf. I use the iron to press the seam allowance onto the shiny side of the freezer paper, where it mostly sticks. Photo #2: Repeat with the other side. Photo #3: Prepped Leaf. Yes, I do have to pin the shapes down and mess with them sometimes, but that doesn’t bother me.

Cutting circles. I used the plastic circles by Karen Kay Buckley; follow her directions.

I shape the bias-tape vines on an old piece of fabric atop my ironing board, so I could draw the guidelines, and pin into it while pressing the curvy shape into the strip. Worked pretty well!

See the creases pressed into the borders? I tell you how to measure these guides properly. I’m working on my design wall now, as the quilt’s kind of big and I’m trying to see how to shape these vines/leaves. It’s not hard. Just fiddly, as the Brits and Australians say.

After I arranged one set of vines/leaves the way I liked it, I used Becky Goldsmith’s plastic overlay technique. I unpinned it from the design wall and laid it on the ironing board. I had purchased the plastic by the yard from JoAnn’s, then laid it out over the first set. I traced it, and then used it as a template for the other two, working with them one by one on the ironing board, and pinning down like crazy using small appliqué pins from Clover. I nudged the pieces into place here and there; that overlay is such a great help.

Nighttime photo of all three!

The first two borders are sewn on the sides. I knew I was going to miter the lower two corners because they are more prominent on our bed. But the top border would just be sewn straight.

We took it out for a beauty shot one early morning. Thanks, dear, for holding it up!

The “snowy” photo. The only way we can look like a winter wonderland is if the spring popcorn blossoms are out on the trees.

Overall Assessment:

I’m now going to do some easy piecing for a while. Maybe even sew a skirt or two (had the fabric for longer than I care to admit). Keep working on Heart’s Garden. Enjoy Spring. Plant tomatoes.

Happy Quilting!

Other posts about Tannenbaum:

Many photos are on Instagram, and some are linked above • #tannenbaumquilt has a mix of photos

Purchased the kit at PIQF, October 2019

Christmas Reveal 2019 for the Center

Diving Back In after nearly two years

Small Updates

Note: I do have a pattern for the outside border, but the famous designer made me stop selling it (long story). I can send it to you, free of charge, if you are interested.


300 Quilts · Christmas Quilts · Free Quilt Pattern · Gridsters

Tannenbaum, in construction

Many years ago, my mother stayed up all night on the 24th of December, worried that the child she was carrying would actually come on the due date of Christmas Eve. Who would help the other three young girls? Who would get the ironing done? But I did not arrive on my due date. Nor on New Year’s Eve. But I came 12 days later on Twelfth Night, and dodged forever having my birthday on Christmas. (And she did get up early that morning to get the ironing done before she went to the hospital.) Now I share a birthday with Richard Nixon, the arrival of the Three Kings and the Storming of the Capital.

Why do I bring this up? Because Tannenbaum will most likely suffer the same fate, arriving somewhere around Twelfth Night. It’s because I wanted a longer drop on the sides, and didn’t have enough of the beige fabric (earlier version is seen here). So as long as I was playing around, what would the quilt look like with red? I quite liked it. Many iterations and consultations with my quilt gurus (I have a couple) and I ordered some more red fabric. Like me, in my almost early days…this probably won’t be done by Christmas.

Trying it out for size; I like it!

This is where I am now, with the two borders attached (big smiles), the wrinkles that will need to be quilted out in the center, and sideways on my design wall, because it’s too big now to go vertically. (In other words, it looks like it needs its make-up put on, the lipstick applied, and good blow-out for the hair. You know, like all of us in the morning.) It’s coming along.

But what has arrived?

This one’s mine…you’ve seen it before.

Several of my Piece Maker Quilt Ladies have arrived from the Gridster Bee, along with their cloth sewing treasures, like buttons and rotary cutters and topiary trees. You can read more about this project, written a few whiles ago, but basically I got the idea from Surfside Quilters, from their Blocks of the Month page. I’ve always wanted a Freddy Moran-style quilt, and now it looks like I’ll make one.

To help further this quilt along, I’ve been collecting black-and-white prints to go with other 400 black-and-white prints (dear, I’m kidding). I have discovered there’s a particular kind of black and white print that works with Freddy Moran style quilts, and I think I probably have enough now. Too much white? It bleaches it out. Too much black? A blot in the quilt. Black and white — that when you squint your eyes — turns into grey? Nyet. I think two of the prints above are perfect (on the outer edges) and we’ll see where the others may go.

In keeping with the red theme of today’s post, here’s a treat I want to try: Cranberry Lemon Bars, from New York Times Cooking.

And I’ll see this, next week. First airplane ride in over 20 months (better get it in before Omicron shows up).

But before that, we have to finish putting out my husband’s nutcrackers, arranging the lights on the mini-tree, switching out the quilts, and generally getting ready for the Christmas season. Another work in progress.

Merry Quilting!

In case you want something fun, here’s a free pattern to make this little tree on a frame, from my earlier days of pattern making; still good to go, but not quite as fancy.

And here’s the teeny tree:

More info is here.

And here’s a sneak peak of what I’m working on for 2022. I’m thinking a monthly quilt-a-long, sort of easy, no sign-ups, free patterns, work together, have fun, make a nice-sized wall hanging. And if you can’t deal with any more outside pressure to produce, it’s okay if you just want to grab the patterns and squirrel them away. That’s fine, I’m fine, you’re fine.

I also always make colorful quilts, and this one may go there yet, but I was gifted a little stack of Sherri and Chelsi’s newest line (thanks, Sherri!), and I’m starting there, because — oh my gosh — I do need a cool Valentine-y quilt. So that’s my starting line. I’ve got the first month’s pattern done, but I want to make samples, so you won’t see it until after the holidays. Maybe even by Twelfth Night!

300 Quilts · Patterns by Elizabeth of OPQuilt · Quilt Finish

Merry Christmas in August: Advent • Quilt Finish

Mrs. Claus, from Berlin, Germany
133 days until Christmas
We always have nutcrackers around our house.

Advent
Quilt Number 256 • 35″ square
Blossom (pattern based on the Flowering Snowball block)

I’m teaching the Blossom pattern in a Workshop for the Santa Clarita Quilt Guild this coming month, and in celebration of finishing all three samples, shooting and uploading five videos for their workshop and figuring out how to make fancy-schmancy title cards for the videos, I’m celebrating by giving you a coupon for 20% this new pattern.

Right now. In the pattern shop.
Use the code: Blossom20 at checkout.
Expires at the end of the month, August 31st.

Blossom, version #1: Colorbright Blossom (47″)

Blossom, version #2: Advent (35″) (see above)

Blossom, version #3: Hanagasaku (23″)
They are made with different sizes of blocks, and the pattern has these three different sizes, plus three different (original) border patterns to fit.

Here’s the full line-up, available only through the workshop. Now, since I worked all day in a medium I’m not used to (video editing), and I think I don’t have any brain cells left to think, I’ll end here.

A version of the final end title on my videos, which I think might make a nice new logo.

Happy Quilting!