
Quilt Bio:
Not Yet Named or Quilted or given a number in the Quilt Index
Current size is roughly 84″ x 95″
Top only is completed; taking it to my quilter this week
Anguish Level–Center:
The center was pretty straight forward as all the pieces were pre-cut. A bit of heart-failure when cutting directions by the designer were off for one section of the tree. Pieced it. Did the bulk of it in two days with my friends. We started December 9, 2019 and made it to Block Four. Picked it up again on December 10, but the center wasn’t finished until a couple of weeks later. Lots of piecing, but having friends there made it fun. It was pre-covid, so we didn’t worry about anything.

Anguish Level — Borders:
Hard to gauge because now we’re two years into covid and everything feels harder (really) especially design (really really). It’s also been out of my hands for two years, so I have to re-acquaint myself with this. Anguish Level is also a bit higher because I’m trying to blend in the designer’s style with my style. My first draft is above, but I realized everything was pretty tan/beige/cream. I’m replacing a red/blue/green Christmas quilt (below) and wanted something traditional and something with RED.

Construction Report:
Flying blind, so that’s always interesting. Hardest thing is to figure out fabric amounts, so I ordered a jelly roll of greens, half yards of reds/creams, and then 3 yards of red for the borders. I ended up ordering 2 more yards of red; I just hope the approximated yardage in the pattern will be okay for most people. Fun to make Border One, really fun to make Border Two (sawtooth stars, she says!), and once I got the hang of the scale of leaves and vines and figured out how I could explain what I did, the appliqué went quickly. I am really happy it’s done, and it’s ten months early for Christmas!
More Photos/Illustrations/Yammering:


Border One is Double HSTs. I learned a nifty trick from Yvonne of Quilting JetGirl about how to cut these, which made things go more smoothly.

One of those lovely late-at-night photos, but the borders are on and the quilt is growing. I am not worried about all the piecing in the background of the tree part, but my very smart friend Laurel appliquéd down her tree onto a solid piece of fabric, instead of all those cuts. And yes, I did swap out the tan fabric in the kit for something a bit lighter.

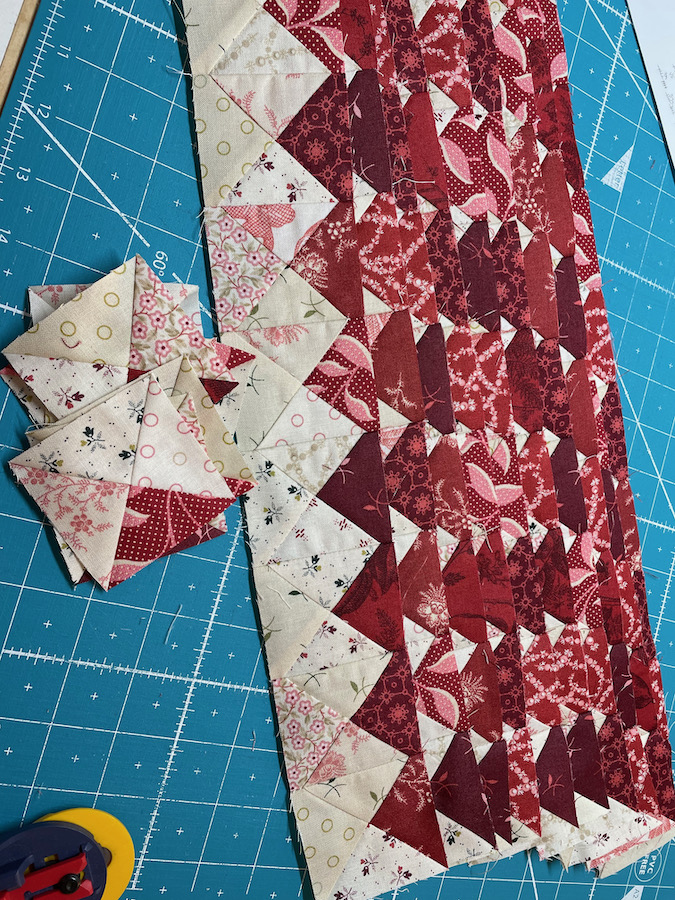
I’m in my favorite sandbox now, with sawtooth blocks.
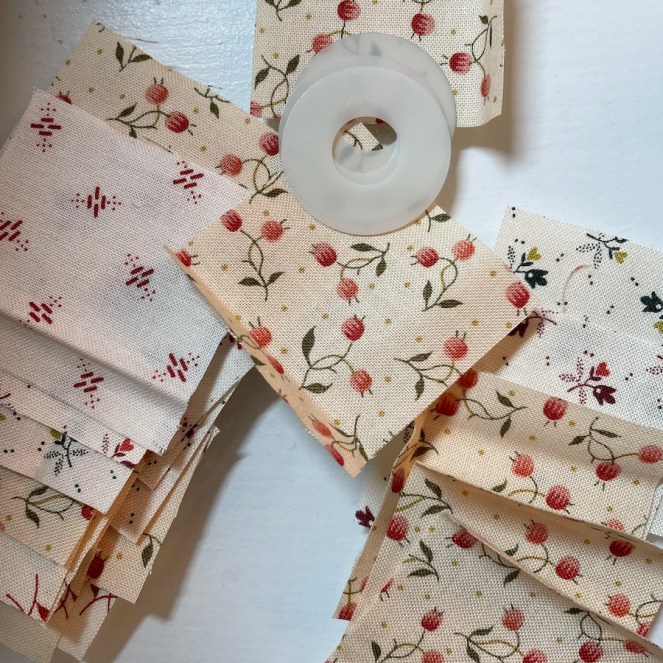
I like all the variety of the many fabrics in the same hue.

Moment of Truth:
It fits on the bed!
Final Border Photos/Illustrations/Yammering:


Heading deep into Vines and Leaves. I cut two template shapes for the leaves: one with seam allowances (see red line) that I use to place on the bias and rotary cut around. I also cut a massive amount of leaf shapes with NO seam allowance out of freezer paper.
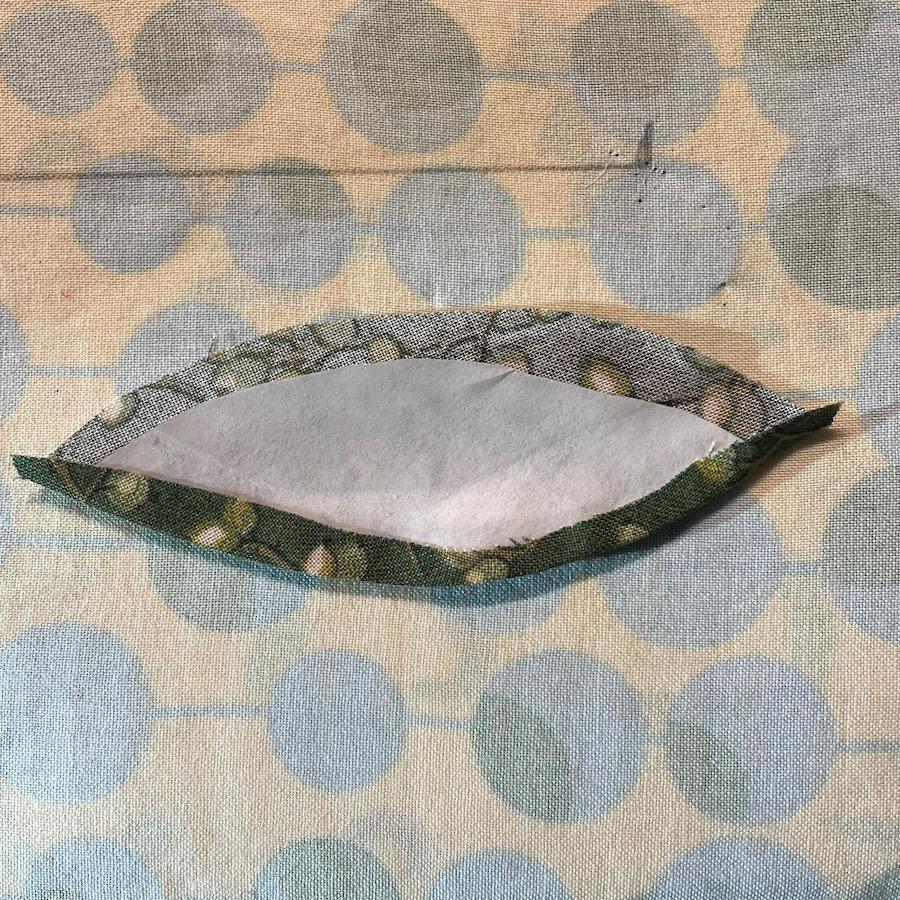

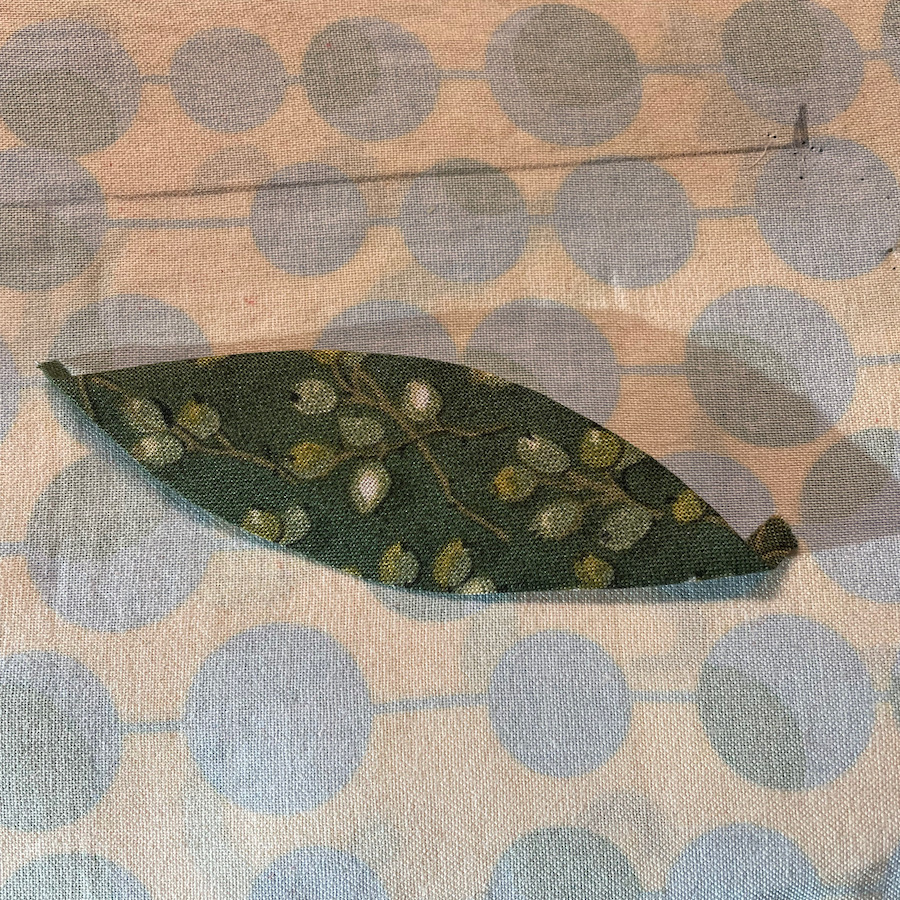
Photo #1: I place the dull side of the freezer paper to the wrong side of the fabric leaf. I use the iron to press the seam allowance onto the shiny side of the freezer paper, where it mostly sticks. Photo #2: Repeat with the other side. Photo #3: Prepped Leaf. Yes, I do have to pin the shapes down and mess with them sometimes, but that doesn’t bother me.
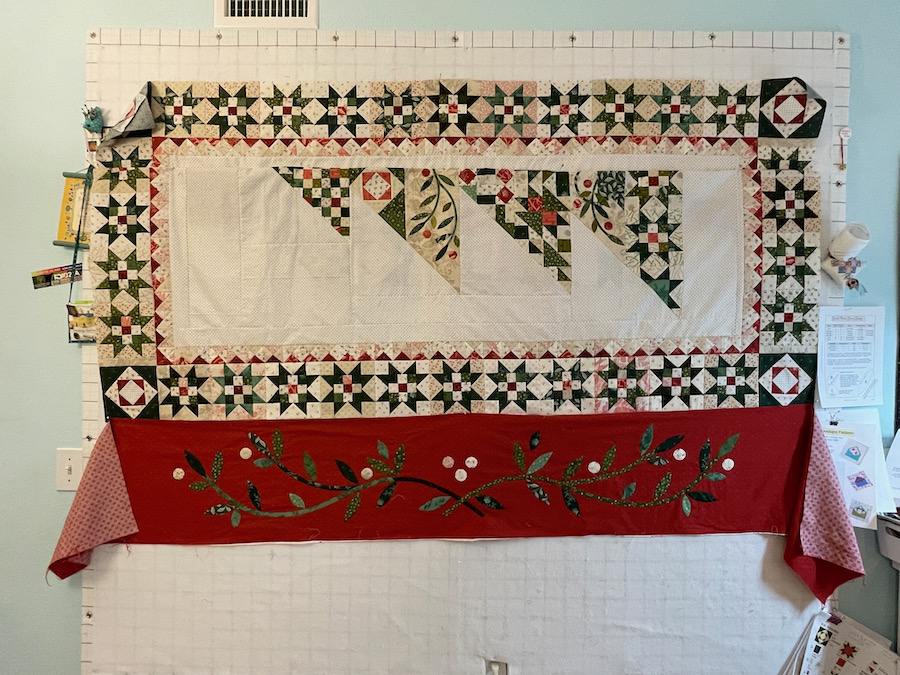
Cutting circles. I used the plastic circles by Karen Kay Buckley; follow her directions.


I shape the bias-tape vines on an old piece of fabric atop my ironing board, so I could draw the guidelines, and pin into it while pressing the curvy shape into the strip. Worked pretty well!
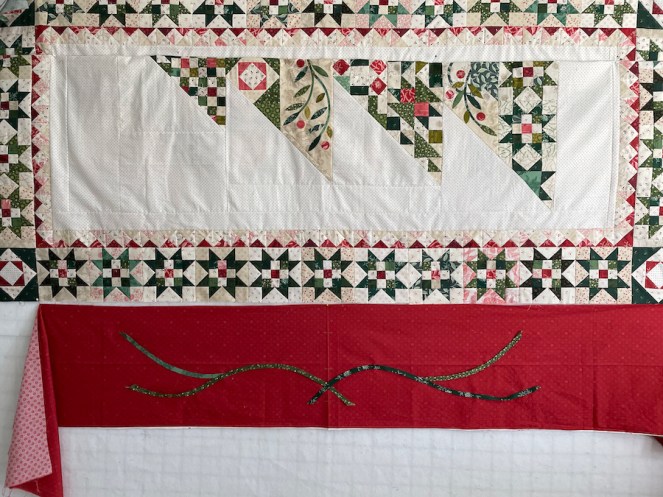
See the creases pressed into the borders? I tell you how to measure these guides properly. I’m working on my design wall now, as the quilt’s kind of big and I’m trying to see how to shape these vines/leaves. It’s not hard. Just fiddly, as the Brits and Australians say.
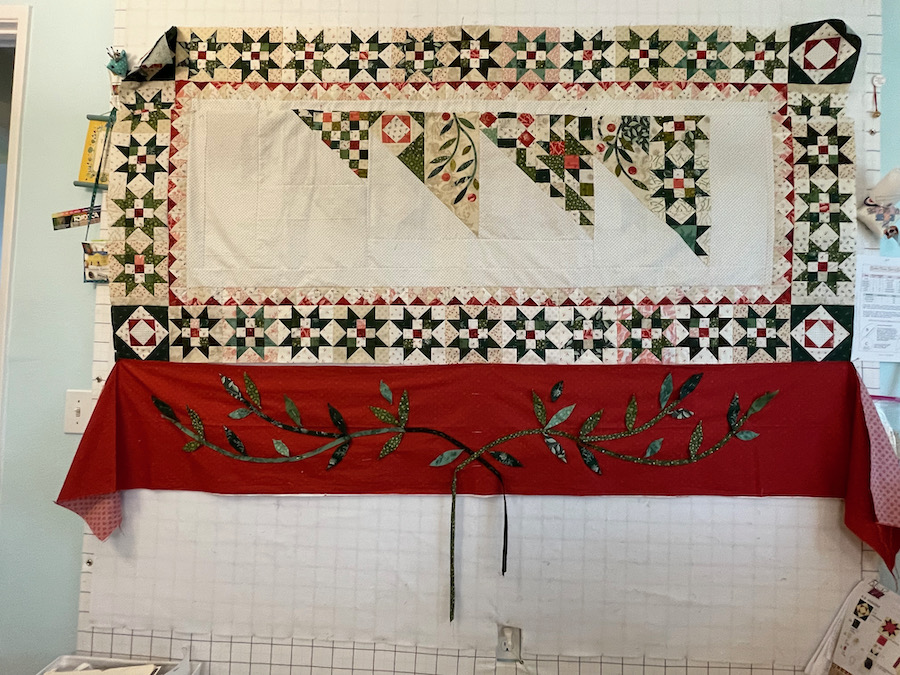
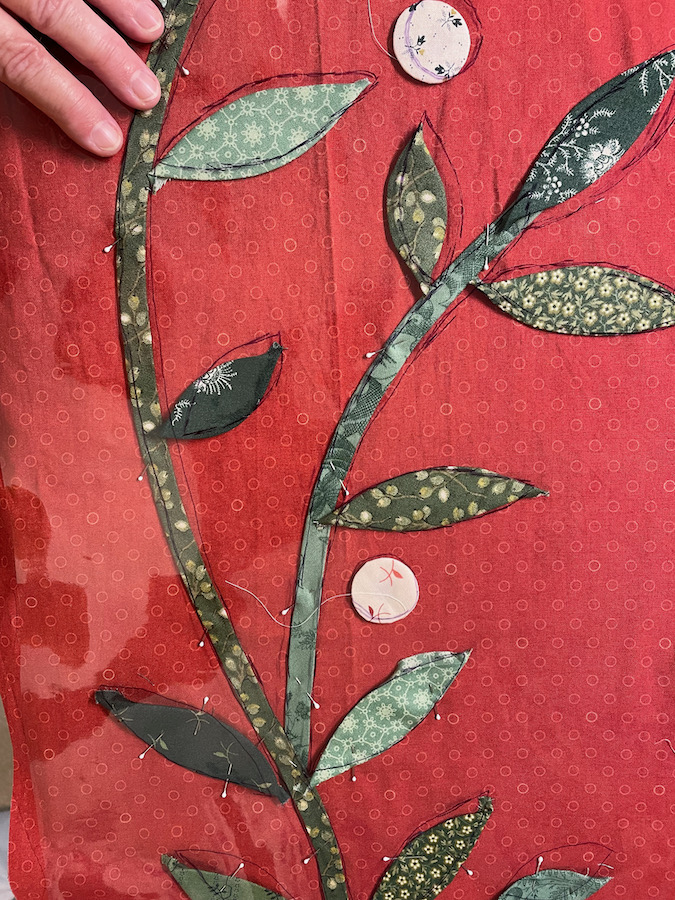

After I arranged one set of vines/leaves the way I liked it, I used Becky Goldsmith’s plastic overlay technique. I unpinned it from the design wall and laid it on the ironing board. I had purchased the plastic by the yard from JoAnn’s, then laid it out over the first set. I traced it, and then used it as a template for the other two, working with them one by one on the ironing board, and pinning down like crazy using small appliqué pins from Clover. I nudged the pieces into place here and there; that overlay is such a great help.

Nighttime photo of all three!

The first two borders are sewn on the sides. I knew I was going to miter the lower two corners because they are more prominent on our bed. But the top border would just be sewn straight.

We took it out for a beauty shot one early morning. Thanks, dear, for holding it up!

The “snowy” photo. The only way we can look like a winter wonderland is if the spring popcorn blossoms are out on the trees.
Overall Assessment:
I’m now going to do some easy piecing for a while. Maybe even sew a skirt or two (had the fabric for longer than I care to admit). Keep working on Heart’s Garden. Enjoy Spring. Plant tomatoes.

Happy Quilting!


Other posts about Tannenbaum:
Many photos are on Instagram, and some are linked above • #tannenbaumquilt has a mix of photos
Purchased the kit at PIQF, October 2019
Christmas Reveal 2019 for the Center
Diving Back In after nearly two years
Note: I do have a pattern for the outside border, but the famous designer made me stop selling it (long story). I can send it to you, free of charge, if you are interested.
Discover more from OccasionalPiece--Quilt!
Subscribe to get the latest posts sent to your email.

It turned out beautiful. Congratulations to you. I know that was a long journey. I have not made one of her quilt patterns yet. I’m waiting for a time when I have nothing else to do! LOL
Absolutely gorgeous, looked at this pattern before. Your version with the red is the best I have seen. Very tempted to make one, alas lots of projects that first have to get done.
It turned out beautifully and cudos to your stamina and vision!!!!!!!
What a gorgeous Christmas quilt, I love the red borders!
Wow! It is ‘sew’ breathtaking! I love your design and the ultimate finish. It will be such a joy to put that out next year on your bed!
OH MY HEAVENS! I hung on every word and I love the way you share your troubleshooting, as it puts us in the moment-by-moment decision making process. Such a big help. That quilt is A STUNNER!
Elizabeth this is just beautiful! How nice to have a new quilt to look forward to using next Christmas. Great instructions and tips in your post. Thank you for sharing 😉
Lovely. You mush have the patience of Job. Enjoy your accomplishment.
You did a great job making it into a bed sized quilt. I love the appliqué you added. I can hardly wait to see it quilted and on the bed.
Oh my goodness! What a lot of work!!!
The red border was a great change. I like those vine applique borders, but don’t know if I’ll ever have the patience to make one. Time will tell.
Congratulations! Another truly beautiful piece. Thanks for the summary of this journey – you’re amazing.
I just love how your Christmas quilt turned out. The red borders look spectacular and were the perfect way to finish it off for a bed size. Enjoy your easy piecing now. I’m all about easy piecing all the time. Otherwise I wouldn’t get anything done. Hope you enjoyed QuiltCon too. With each passing year I have less and less motivation to go.
Of course you want some easy piecing and gardening to fill your days, after all the creative effort and skill involved in putting this beauty together! I’m of the same opinion as Anne (Springleafstudios) the borders are just perfect! A stunning achievement!
I loved the phrase “I’m in my favorite sandbox now.” The rich red was such a genius choice. It adds SO much to the quilt! and I love the little prints. This is going to be another stunner.