

I have always wanted a patriotic mini-quilt, so before surgery, I prepped up these little stars, fused them down to 2 1/2″ squares of fabric and stitched them together in a block. I figured I could stitch on them while healing. I would use some of those pearl cottons I’d collected while doing Oh! Christmas Tree, and blanket stitch around the shapes.


The first day, all I could stitch was ten minutes. I came back to it a week later and over a few days, finished them up. Now what?
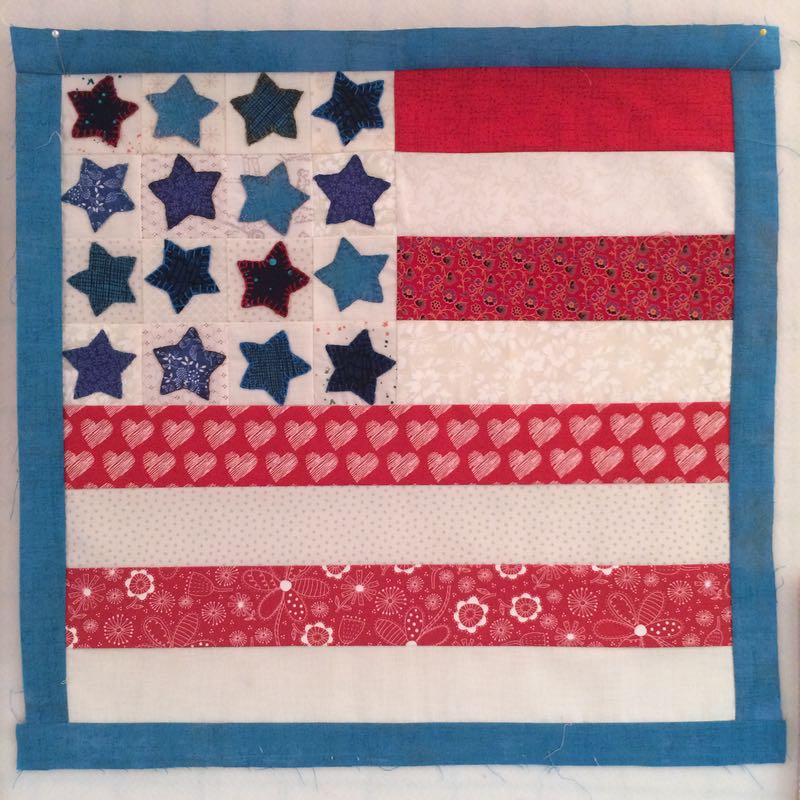
I taught my husband how to rotary cut, and we got some stripes together (short is 8-1/2″ x 2-1/2″; longer is 16-1/2″ long x 2-1/2″). I swapped out my big machine for my teeny Featherweight, and stitched them together, one-handed. At my first check-up the doctor gave me the go-ahead to do stitching, as long as I wore my sling, saying it would be “therapeutic.” Oh, yes.
Putting on these scissor-cut 1-1/4″ borders was not easy (finish at 3/4″). I’m so used to man-handling the fabric for speed, I’d forgotten how to slow-stitch, or slow-quilt, or whatever you want to call it. Before, I would grab the strip in front and in back and put some tension on it, floor my foot pedal, and force that fabric into place. Since I only have one hand available to help guide it through the machine, this wasn’t going to work.


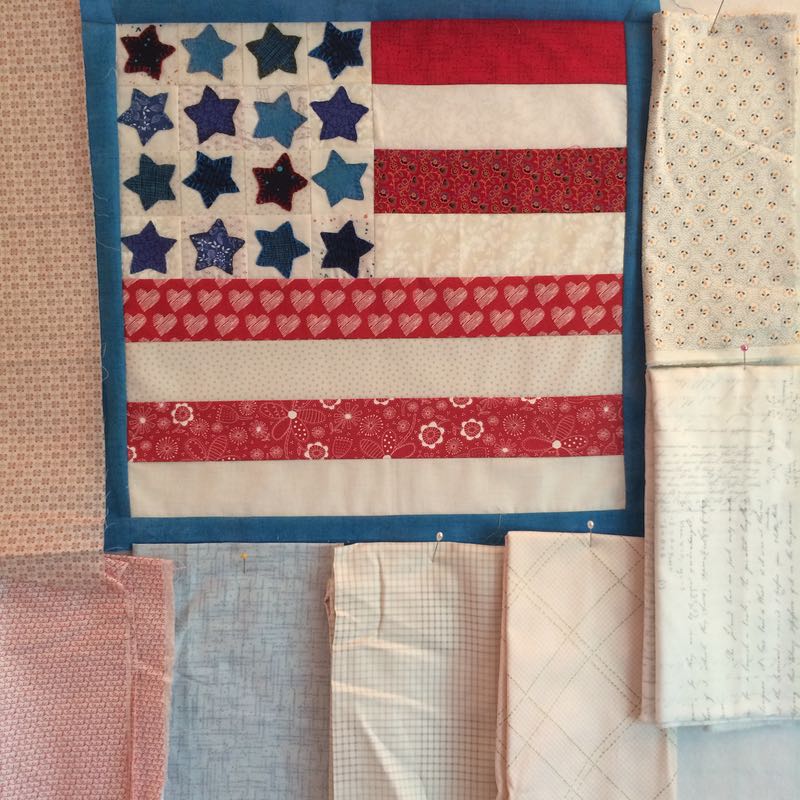
Auditioning the next border, with the realization that there is no driving, either, so no running to the fabric store if I don’t like what I have. I scissor cut the borders, laid out the little mini quilt face-up on the ironing board, and gave it a good press and smoothed it out. Next I laid the border face-down on top, and again pressed it. Since I can’t force these pieces together, I have to coax them. I pinned them together in many places, and fed the seam slowly through the machine. Flattest border I ever put on, with no puckers anywhere.
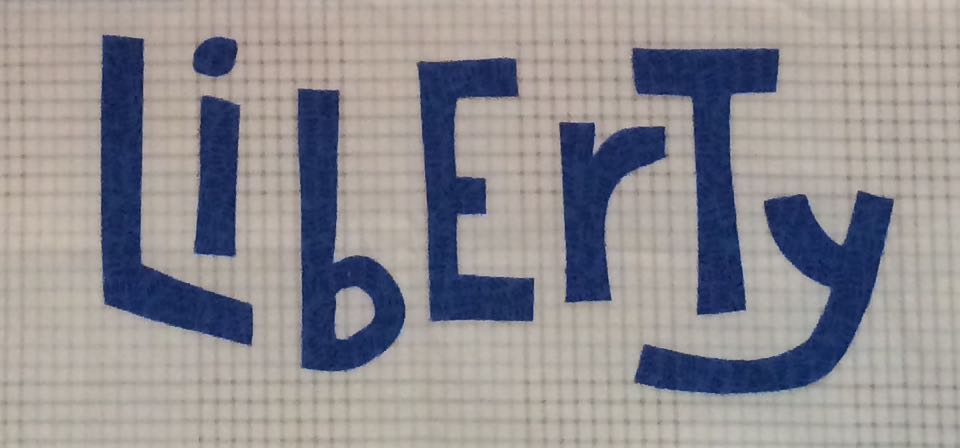
I had an old printout from the internet (couldn’t find the source when I went back to reference it) that had this word, so I drew two lines, 5″ apart, then another guideline 1″ inside the top and bottom and freehanded the letters. I fused them on to the quilt. They are about 5″ tall overall, as that outer border was 6″ scissor-cut.
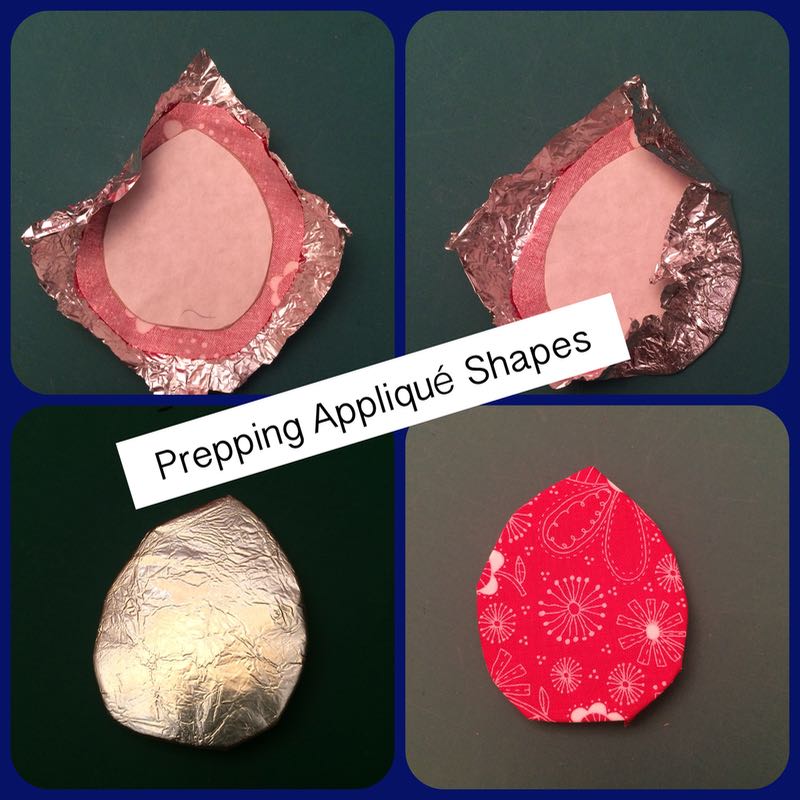
I sketched out a bud, figured out some leaves. I drew joined leaves, inspired by my love of samaras, or those joined helicopter seeds from maple trees, but also inspired by this photo [PDF of pattern is at the end of this post]. Above, I am trying Sarah Fielke’s method of prepping up shapes for appliqué. It worked fairly well.

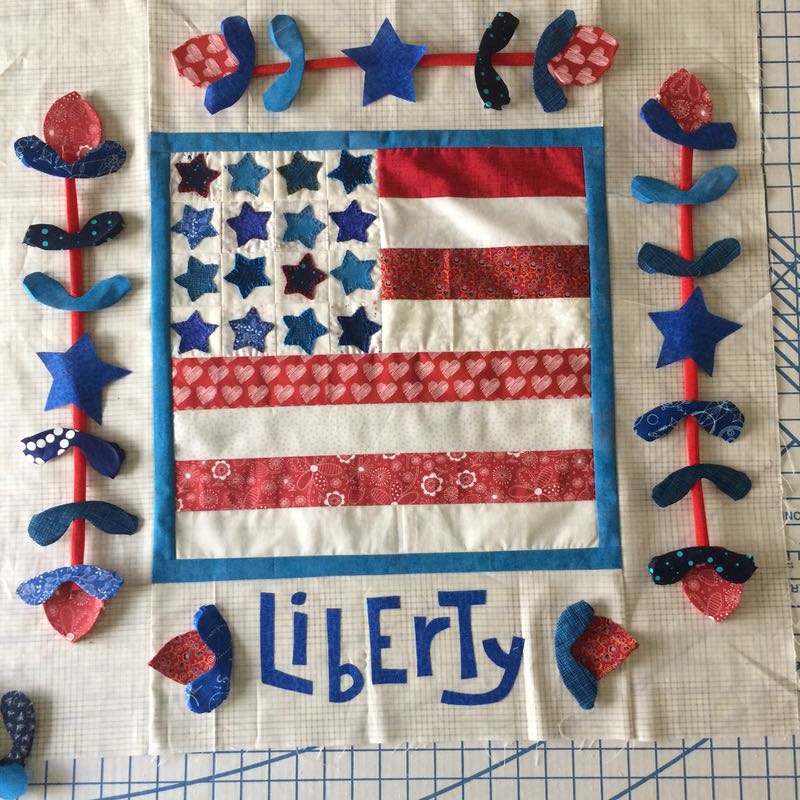
I laid out all the parts: leaves, byds (small and large), tubing for stems and more cut stars (on the pattern sheet), trying to decide if I like two leaf sets next to the word Liberty, or one. I’ll appliqué or blanket stitch down everything…then decide. Since I work in small segments of time, and ever so slowly, I might make my goal of July 4th. Here’s the pattern sheet in a PDF document.
Update: Please visit my PayHip Shop for a full PatternLite pattern.
Please be sure to set your printer’s settings to 100% so the large star will measure 3-1/4″ where noted. It contains: large flower bud (top and two sides), small flower bud (next to Liberty), joined leaf shape and the large star. You can either shrink this star for the 16 stars in the central star section, or look for a star online that will measure about 1-3/4″ to 2″ across.

Keep stitching, however s l o w l y !
Discover more from OccasionalPiece--Quilt!
Subscribe to get the latest posts sent to your email.

Look at all the effort you’ve gone to with this! Oh my! Such a seemingly long and tedious process when compared to your usual efficiencies. I’m impressed with your determination to make this, even with one hand. And interesting how you’ve embraced the process. Might be good for all of us to slow down like this, once in a while. You’ll certainly have a lovely piece when you’re done, and it will hold a lot of memories…. albeit surgery-recovery memories.
I, too, am so impressed with your determination. The little quilt is turning out to be an exercise in patience, but is looking fabulous. Sometimes it is good for us to step away from our big and efficient machines and enjoy the process. It gives us great contemplation time too.
Thank you for sharing about not only the journey of this quilt but your progress before and after the surgery. I’m glad you have the all clear from the doctor to sew and hope that your healing, and this mini quilt, continues on a steady pace.
I hope this lovely piece of work is therapeutic for you and provides not just something to do to fill the healing hours but as a reminder of your strebtand determination! The important thing to remember is to just keep going! You will finish this well before July 4th!
You did a bang-up job on the mini quilt! I chuckled when your slow-stitched border came out so flat….lol. Why are we always so impatient to get things done?
In 1998 I had surgery on my cervical spine. Had 3 vertebrae fused together. I bought a nice little cross stitch kit to work on while I was recuperating at home. First thing the doctor said to me about it was I could only do it if I was holding it up close to my chest, because stretching my arms out was bad for my neck……sigh! I was out of work full-time for 3 weeks, then 1/2 time for 3 weeks. Turns out I slept a great deal of the first 3 weeks, so couldn’t have done much stitching anyway. Who knew that having microsurgery at 52 would be so exhausting??? HA!
Keep up the good work, and kudos to your hubby for learning how to rotary cut!
xo Linda
You are the One-handed Wonder. Amazing.
This mini is so sweet!!! Great job slow stitching!
The stars were put to good use in your flag quilt.
I don’t know how you’re doing it all with one arm but it’s certainly impressive. Will make a cute 4th of July quilt and you still have a few months to get it done. Good luck but be kind to yourself.
Hooray for the Red White and Blue – and your little quilt. I love everything about it!
I’ve never seen applique prep like this. What a fun piece.
This liberty quilt is looking wonderful. I’m amazed that you’re managing with one hand but I’m glad to hear it’s therapeutic 🙂
The secret to the foil prep for applique is to make sure the edges are smooth so that the fabric underneath is smooth…hope that makes sense! I have made many 1/4″ circles this way and it works great. If you have the patience, you can make a whole bunch and just leave them to dry (versus ironing them). The tiny ones end up looking like Hershey’s kisses!
Oh Elizabeth. I have been absent for awhile but I am thrilled you are doing well. Stitching does help with many types of healing and I am so happy you are able to do your handwork. You are always in my thought and prayers.
I’m a few days behind in reading about your slow stitching but what a fabulous job you did! It’s gorgeous. I must say I like a doctor who tells a quilter that stitching will be therapeutic during recovery. That’s a dr. to be listened to. (smile)
Admire both your persistence and the quilt! Well done. Neame