

In June of this year, I made this quilt for my sister. As you can see there are lots of peaks and valleys in this thing–lots of Y-seams going both ways (some people call them Y-seams and V-seams) but really, let’s keep it simple.

They are called Y-seams because the V-part of the letter Y usually has fabric with no seam, and the tail of the Y has a seam. I’ve marked the Y for you in red in the picture on the left. The picture on the right is the other type of Y-seam. I’ll show you both.

Let’s start with the first type of Y-seam, where the “tail” of the Y is facing toward you and the “V” of the Y is underneath. Place a pin at the 1/4-inch mark through the seam, and into a spot that would be the peak of the 1/4″ seamline, if you could draw it on and imagine it.
Most beginners want to pin that seam to death. Run screaming in the other direction. The success of the Y-seam depends on the “float” of the fabric.

I sometimes will place one pin on either side of the seam, just to anchor it as I get going, then another pin or two along the starting point. Then I take out the (above) pin. I want my fabric to float — don’t want to anchor that second half of the seam too much, as I need it to pivot.

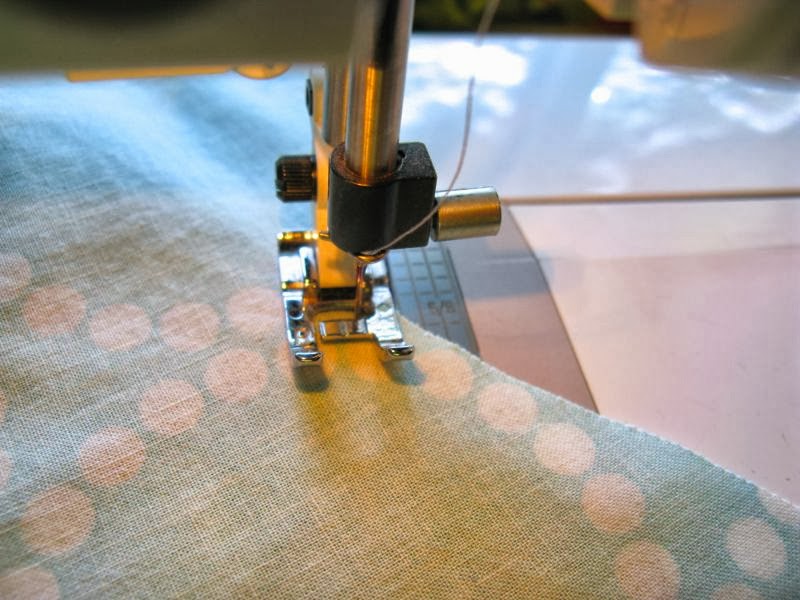
Start sewing from the left edge, as the seam faces you, using a 1/4″ seam allowance. Fold the seam toward you, and as you approach the seam, slow down and use a bit smaller stitch. You are trying to anchor the stitching a bit.

When you get to the seamline, when you are on top of the thread marking that other seam, STOP. Make a tiny stitch on top of the one before to anchor, but DON’T GO OVER THE SEAM LINE.
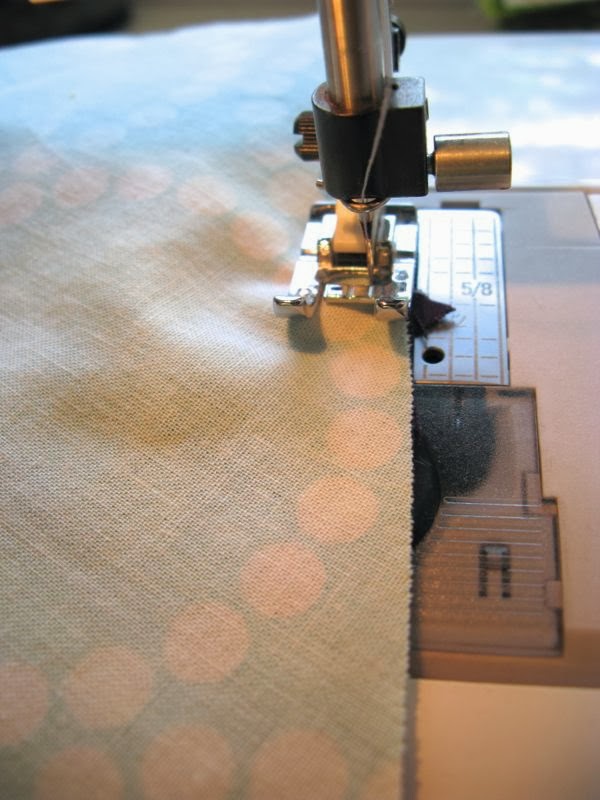
Lift your needle out of the cloth. I pulled it away to show you what I mean, but you don’t need to do that. Just give yourself a little room to smooth the (green) seam allowances out of the way, and to find the place to insert your needle again.

Re-insert your needle just on the other side. Then line up the next two raw edges, smoothing the fabric away from the needle and your presser foot. Sounds more confusing than it is. Take a few tiny stitches to anchor, then change your stitch length back to normal.
Another shot of my needle placed just on the other side of the seam allowances (which I flipped to the back of my presser foot).

Depending on the amount of cloth in your Y-seam, and if you just feel better about it, go ahead now, and pin those raw edges together and stitch the rest of the seam.

When you are through sewing, clip the thread if it is restricting the ability of the seam allowance to open up and lay flat. If you left a bit of thread there (pulled it away from the needle as in my photo above) there should be no problem.

Press, keeping the tail of the Y-seam open.
From the front, it looks like this.
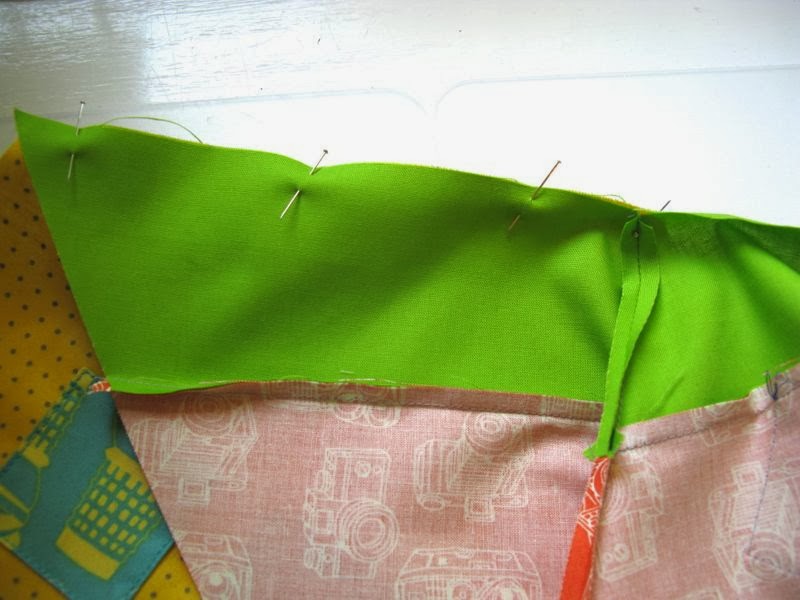
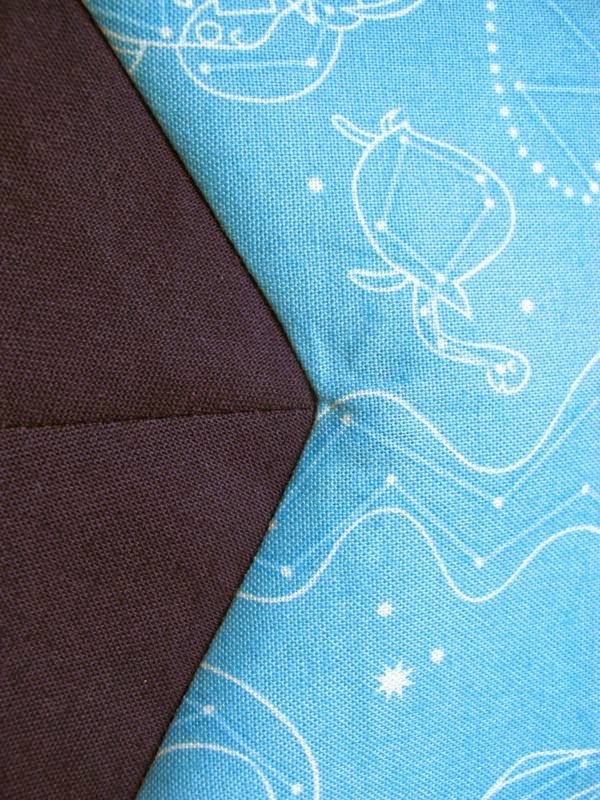
Now we’ll tackle the other kind of seam–where the seam of the Y’s tail is underneath, and you see the “V” part of the Y.
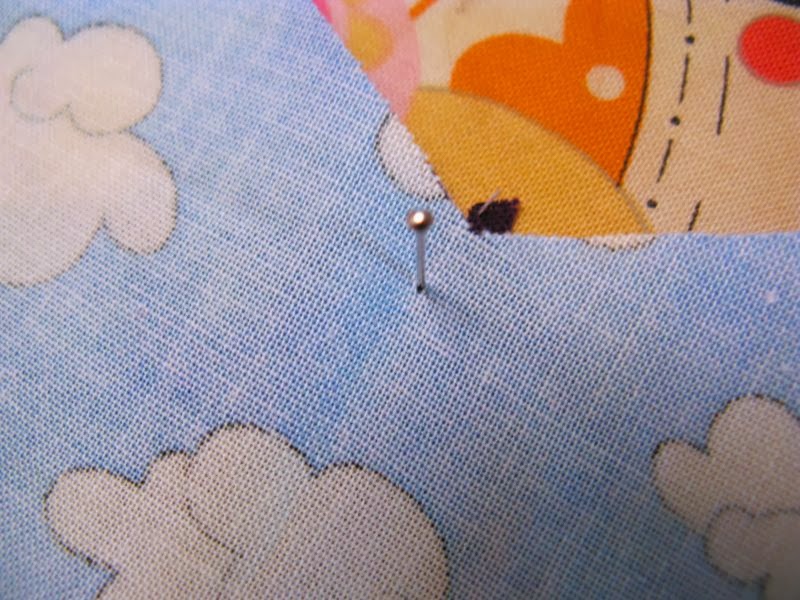
First locate the valley of the one-quarter-inch seamline and put a pin there.

Snip to within a couple of threads of the pin. Leaving the pin there insures that you won’t cut too far. If that happens, curse a little. You can sometime rescue the piece with a bit of fusible interfacing. Better to not cut too far. Half of the seam (1/8″) is all that’s needed.
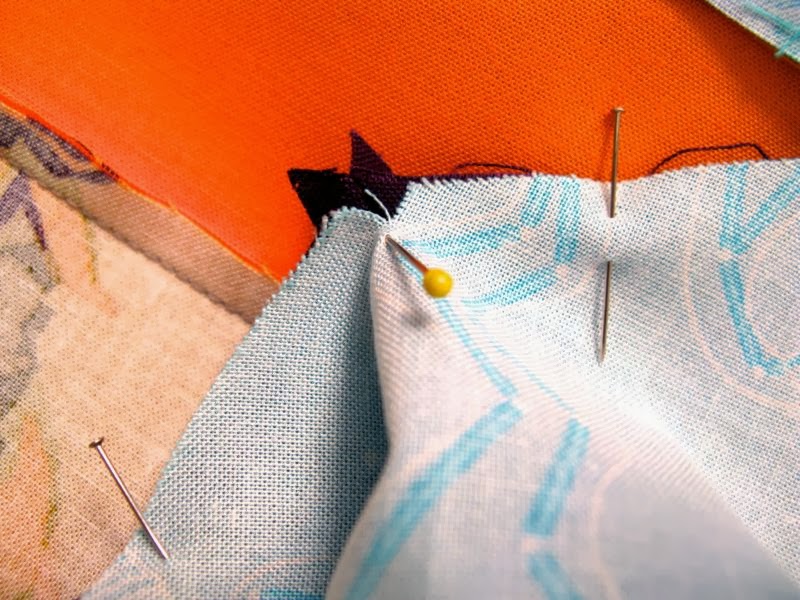

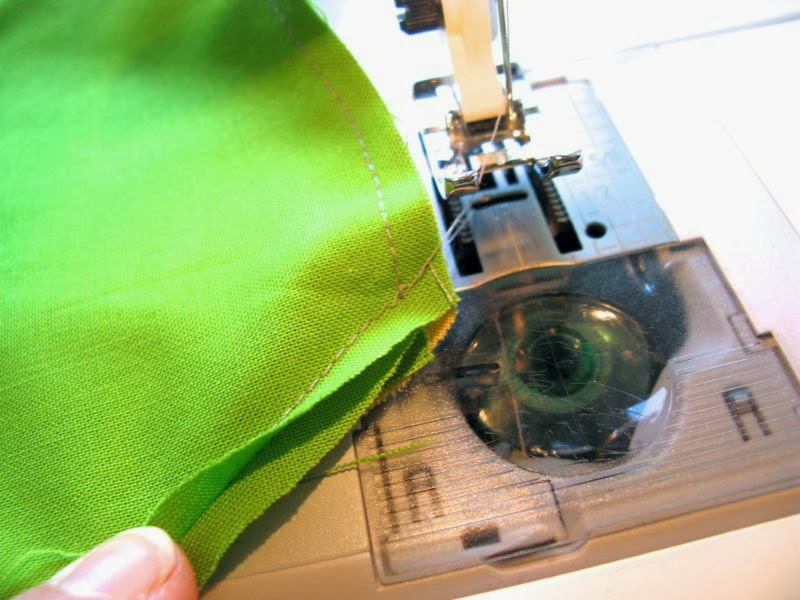
Just as in the first type of seam, start stitching from the left side of the seam, towards that center pin.
When you get to the pin, STOP with your needle down in the fabric. Remove the pin, then pivot the fabric so that you can match raw edges. Move the first seam out away from you, as you align the new sides. It may feel a bit bulky under your foot, but smooth any excess fabric out away from you.

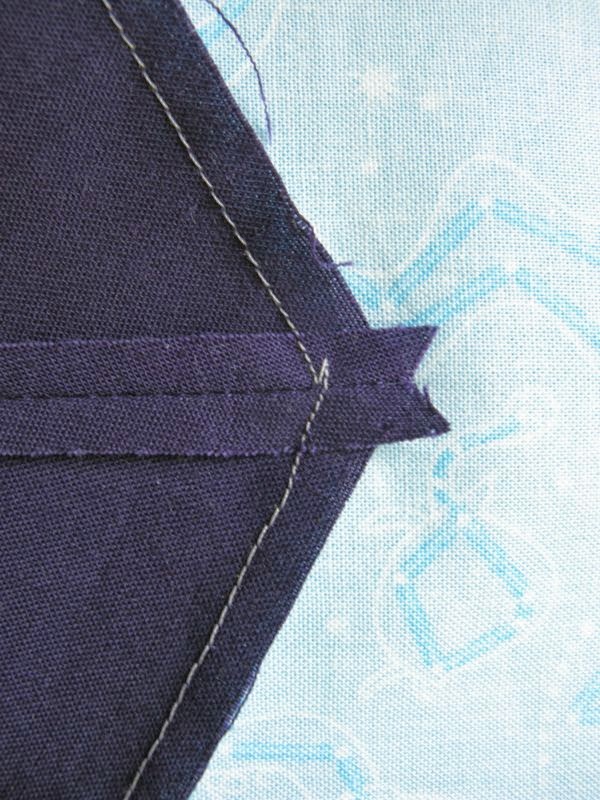
Here you can see that I’ve pivoted, repinned the new raw edges together and am starting down the other side of the seam.

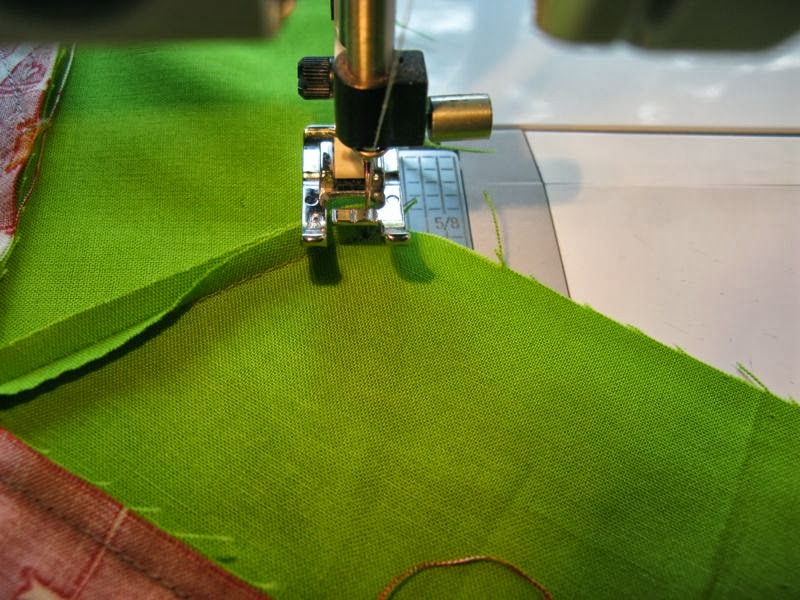
This is what it looks like from the back. That deep fold is the V part of the Y-seam.
The front. Give it light press. Resist the urge to saturate it with your pressing goo and mash it flat with your iron.
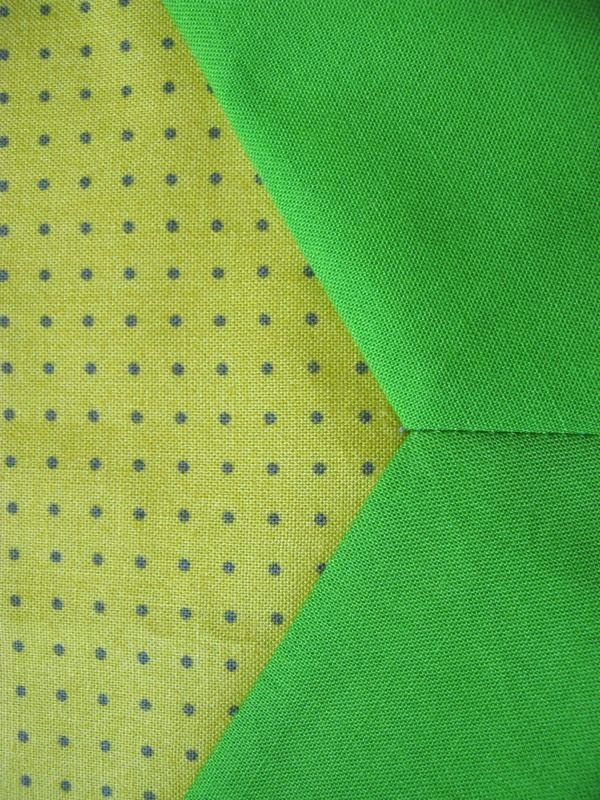
Sometimes your seam gets a little jig-jaggy. As long as it’s not too bad, it will be fine. I did the same kind of stitching process on this one: shorten your stitches as you approach the point, then lengthen them out on the other side.

A better point. All of these work fine in the quilt, because you haven’t a) stitched it to death, and b) murdered it with your iron.

You can see one type of Y-seam where I joined the green roofs to the yellow houses. And you can see the other type where I joined the purple roofs to the sky.
Now you know all my dressmaker/quilter tricks: never be afraid of Y-seams again!
One more time, thanks to Leanne, of She Can Quilt, for hosting a series of guest tutorials for the Finish-A-Long Motivational Program. (Just kidding on the name of it, but it does help get those UFOs out of the closet and onto the bed. Or wall.)
Discover more from OccasionalPiece--Quilt!
Subscribe to get the latest posts sent to your email.

Thank you for this post. I have done Y seams, but never thought of basically leaving the piece under the foot as I went ot the other side of the seam. And your quilt is so pretty.
Nice tutorial. Y seams always look so nice in a quilt if they are done well.
Sure wish I lived close enough to you to take some of your classes – I am sure you are a great teacher. Thanks for taking the fear out of this technique.
Elizabeth,
I just wanted to say thank you for your clear and easy to follow tutorials. You have such a gift for breaking things down and making them clear and easy to understand.
Happy Thanksgiving!!!
Celia
Bookmarked this for later when I have the need of y-seams. You do a great job explaining.
Very nice! I tried something way back when before I even heard of a Y-seam and it was a total mess. I intend to give it another go one day – this will be very useful! Thank you!
You are a great instructor!