Quilts

Lollypop Tree Blocks Completed


LollypopBlocksAll

All stitched down.  But I remembered in the middle of the night, that I wasn’t done stitching.

BorderBlocks

I still have the border blocks to finish.  But first, I’m going to enjoy being at this point (for closeups of the last three blocks, head to “Lollypop Trees” in the header).  I finished taking off the back of the pieces last night before I went to bed, then pressed it and put it up on the wall.  I think sometimes in our rush to have a finish, we forget to stop and smell the flowers.  So I’m stopping today to smell these flowers–even though there’s no fragrance, there’s a sweetness to the air in my studio–all these up on the wall.  They’ll cheer me on while I grade the poetry papers that came in yesterday from my students.  So, in honor of getting this far on this quilt, and this far in the semester, I leave you with a couple of haiku, bare whisps of poems appropriate to the season.

Tom Tico:

Into old pots and pans

thrown out in the backyard—

the musical rain

Harriet Axelrad:

snowflakes glued

to the kindergarten window—

no two alike

Enjoy the weekend!

Finish-A-Long · Quilts

Lollypop Trees Rise Again: Blocks 4, 5, 6

One advantage to being in a group like Leanne’s Finish-A-Long (FAL), is that you have a reason to pull those unfinished projects to the front of the line, rather than letting good solid work be upstaged consistently by the New! and the Fabulous! and the Have You Seen This Fabric Line! sort of business.  So the Lollies came out of hibernation.

LollypopTreeFour

Lollypop Tree Four.

LollypopTreeFive

Lollypop Tree block five.

LollypopTreeSix

Lollypop Tree block Six.

Gang of Six Lollypop Trees

So I’ve appliqued six to their background fabric, using the freezer-paper, then invisible thread in top spool method.

Appliqueing Lollypop Tree

I’ve discussed this in buckets of digitial bytes in other posts, but here’s a photo of me going at it.  Yes, those are teensy applique pins and when you have about 60 of them on a block (these are huge blocks), it helps that they are small so you are not stabbed to death by pins.  I also hang my sweater on the back of the chair, as they have affinity with knitted things–they get caught in the sleeves.  I use a 1.0 width zig-zag with a 2.0 length of stitch, with Mono-Poly invisible thread in the top spool (put a netting on it and you will be happier) and Bottom Line thread in the bobbin.  I also dial back the upper tension by half, down to 2.2 and use a very slender needle.  Both threads are made by Superior Threads.

My student papers don’t come in until Thursday evening, so maybe I can squeak out three more blocks?  It takes about an hour to stitch each block, and another 20 minutes to open up the back and take all the freezer paper pieces out. I know I won’t finish the quilt this first quarter of the FAL, but the very fact that I’m sewing on these trees is a benefit of signing up. I’ll be thrilled just to get the blocks done.

WIP

Now head back to Lee’s Freshly Pieced blog to see more Works in Progress!

Quilts

Hexies, Bee Blocks and Betty’s Tile Quilt

HexieBig

I finished sewing this together during the last Downton Abbey.  I love it.  But now what do I do with this?  Moving on. . .

Cindy's Block Feb

Cindy, of Live A Colorful Life, asked us to make this block from During Quiet Time’s tutorial for her turn in our MidCentury Modern Bee.  Today, after taking a nap (really, I just couldn’t go any further and I have a life where I can take a nap if I want–that’s why I am in the Mid-Century Modern group, as all of us are over the mid-century mark on the old birthday calendar), I plowed into it.  The tutorial is very clear and easy, and it was fun to draw from my stash.

SignatureBlockFeb

Signature Block for February’s block.  We are each including one of these smaller blocks along with our square.  Tutorial is from PS I Quilt, but I won’t call it a “siggy” block, for the same reason I avoid the word “veggie” (instead vegetable).

Carla Block Jan

This Churn Dash was made for Carla of Lollyquiltz, by following her tutorial.  She uses the two squares-sew the edges method of the half-square triangle.  I found it easy, but did think that the block was a little more fluid because of all the bias edges.  She calls this block Juicy Fruit, and her quilt is something to behold (click on the link to go to her Flickr photo pool).

Signature Block Jan

And this was her signature block–requested in colors from her quilt.  I ironed freezer paper to the back of the white section to get it stable enough to write on.  Okay, that’s where I’m at so far this month, but the really exciting thing was hearing from Betty just before I left last week.  She’d made up my Harvesting the Wind in her own colors and had just gotten it back from the quilters.  She gave me permission to put up photos on my blog.  So. . . here they are!

8441300197_9c442b2591_b

She used all solids, but added that pop of tangerine to really set off the tile block.  I was smiling and grinning from ear to ear, because I loved seeing what she’d done!

8442395866_632db8b59b_b

8442392012_96789c05af_b

Betty, it’s wonderful.  She’s one of the Four-in-Art members, so it’s fun to have another connection with her. I think we are Quilting Twins in some ways, and I keep trying to figure out a way to get to the East Coast to meet her.

Okay, not done yet.  I mentioned I wanted to make the Sunshine and Shadow in another colorway, this time for my grandson.  Here’s the initial mock-up for the quilt.  It looks really different in such bold “boy” colors (he likes blue, red and black but I couldn’t resist lightening it up with those white patches), but I know it will go together quickly.

ChrisQuilt1

Have a nice Presidents Day Weekend!

200 Quilts · Family Quilts · Quilts · Tutorial

Sunshine and Shadow Quilt Tutorial

SunshineShadowBlock

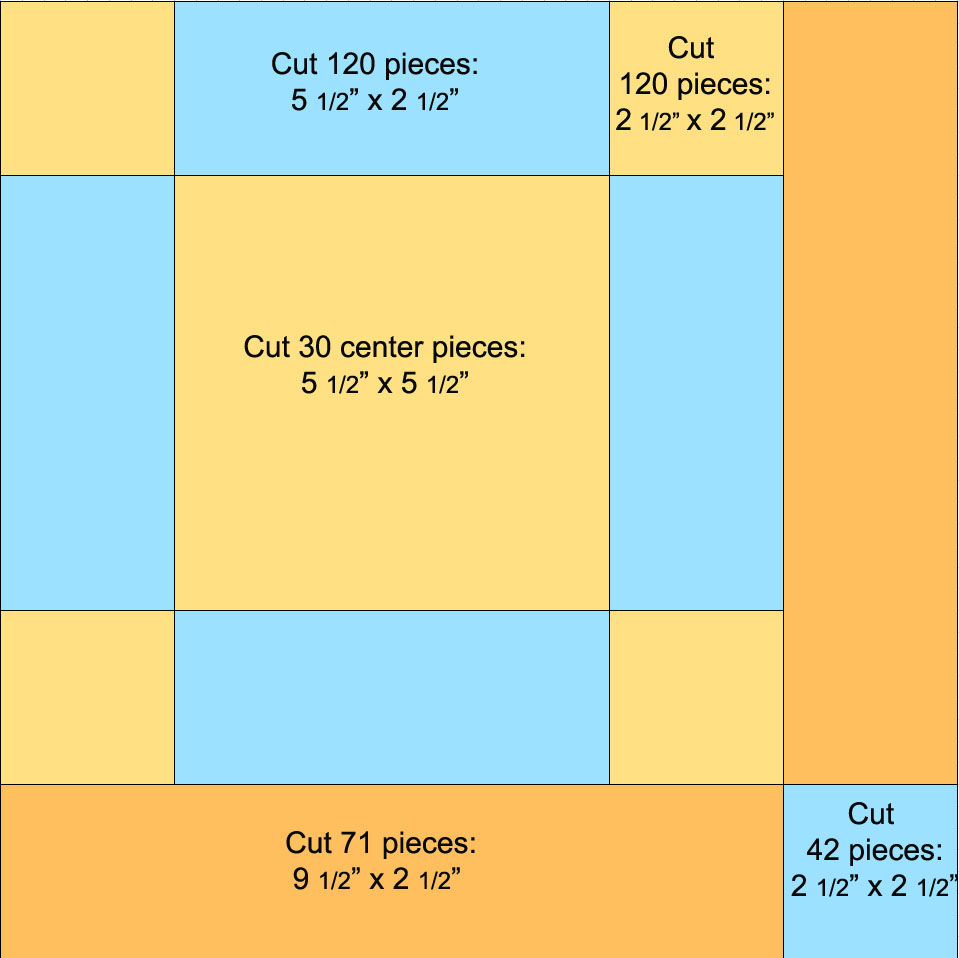
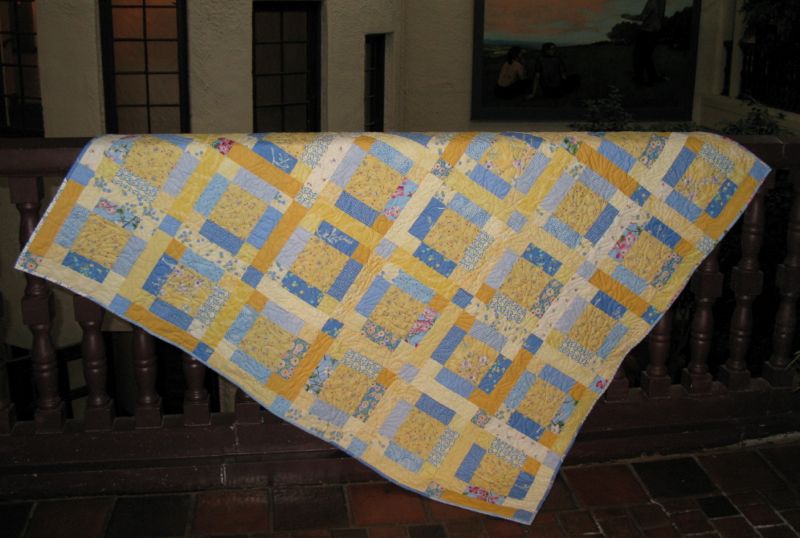
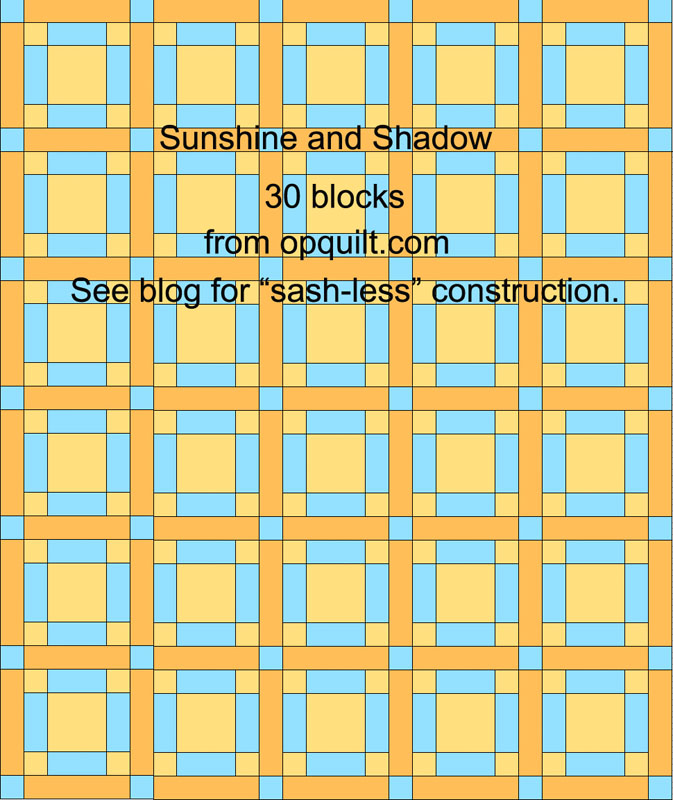
Here’s the recipe for the quilt I gave to my sister-in-law, Janice.  But I think you’ll notice how “lopsided” the block is–and that’s because I wanted to eliminate the sashing step, including it in the making of the quilt.  I also wanted to make this quilt completely from my fabric stash, so I chose colors I had multiples of, in different designs and shadings.  What is sashing?  It’s those long strips that separate blocks from each other and can be part of the design of a quilt, letting each block float in its own little world.  Many modern quilts eliminate them, but I like them occasionally.

Choosing from the Stash

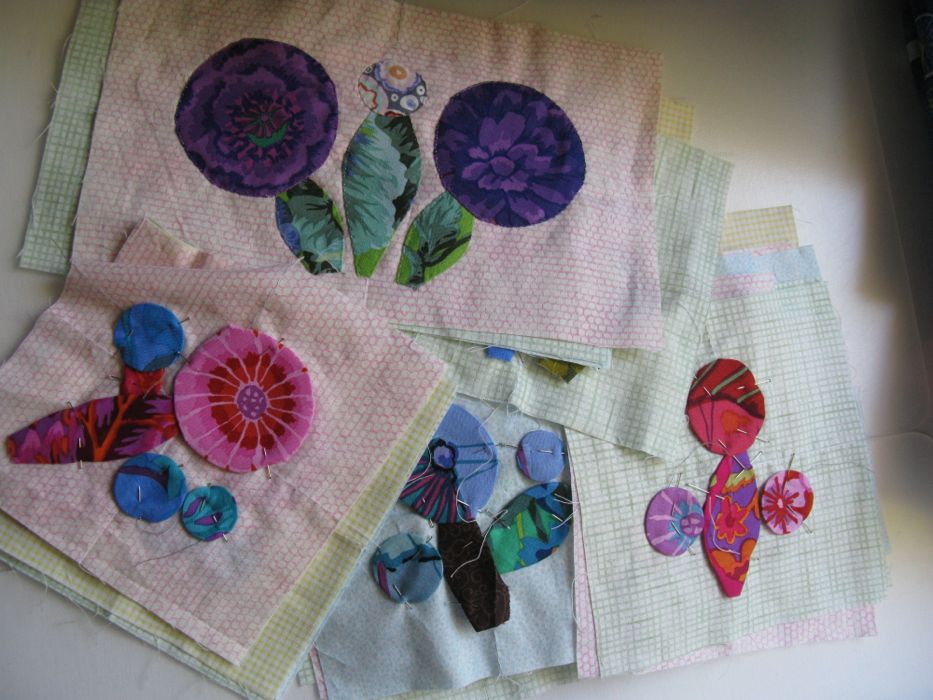
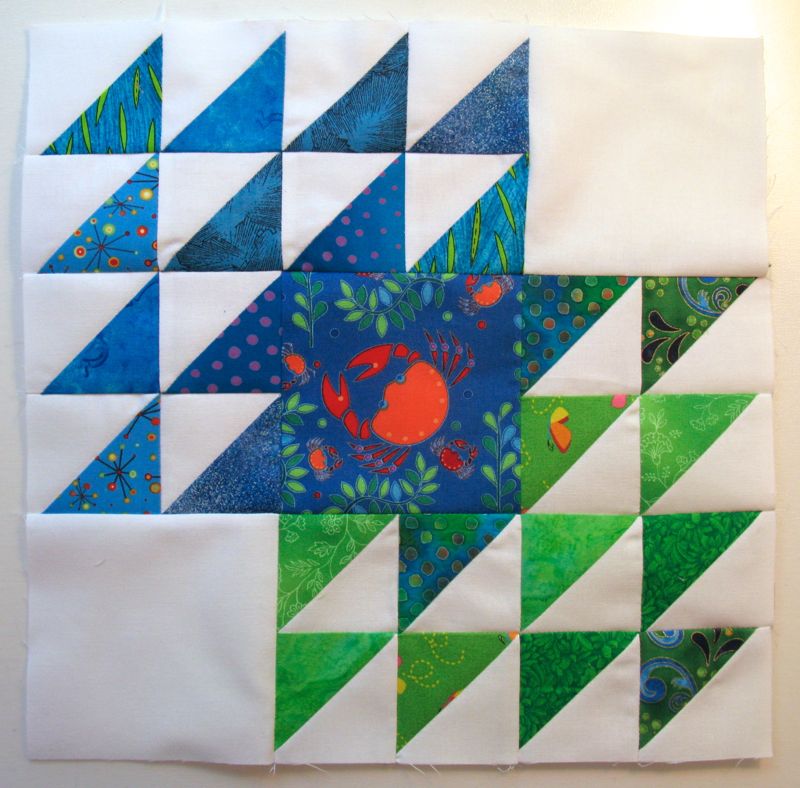
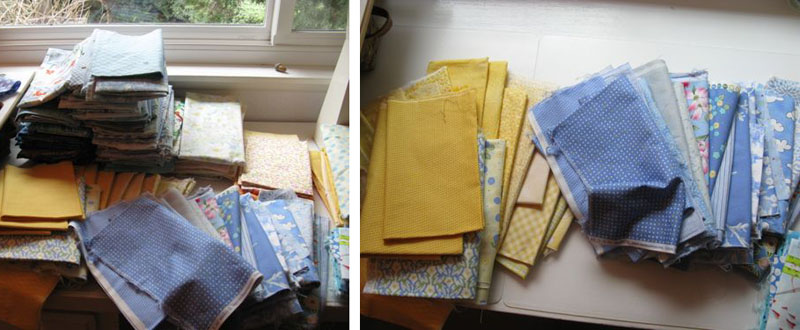
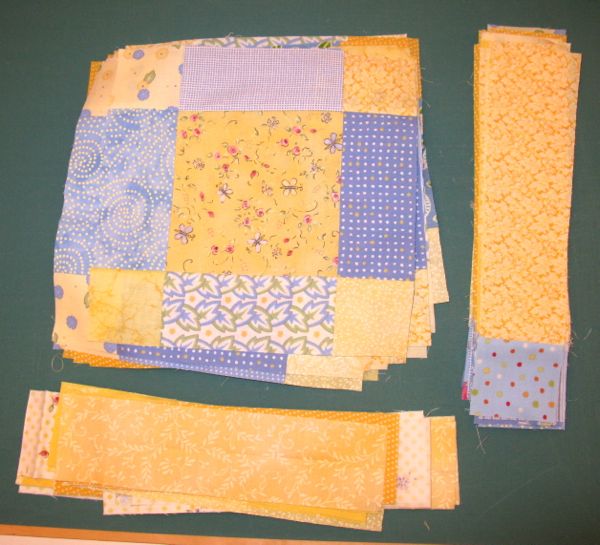
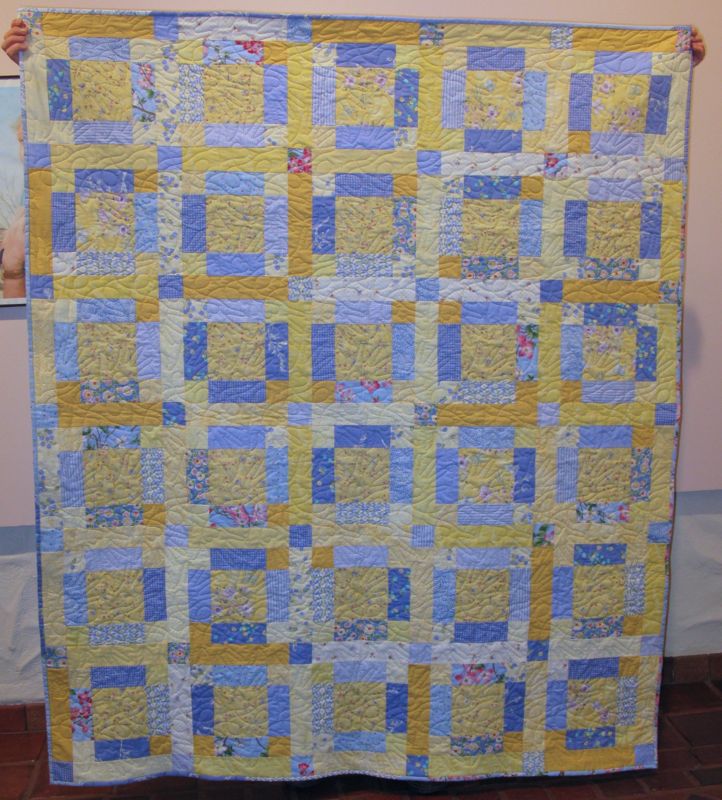
I started with the centers and cut all of them from the same line, but used two versions of the yellow flowers.  Then I pulled out a lot of different fabrics, trying to keep in the same tonality in the blues, and in the yellows, so the quilt top would be harmonious.

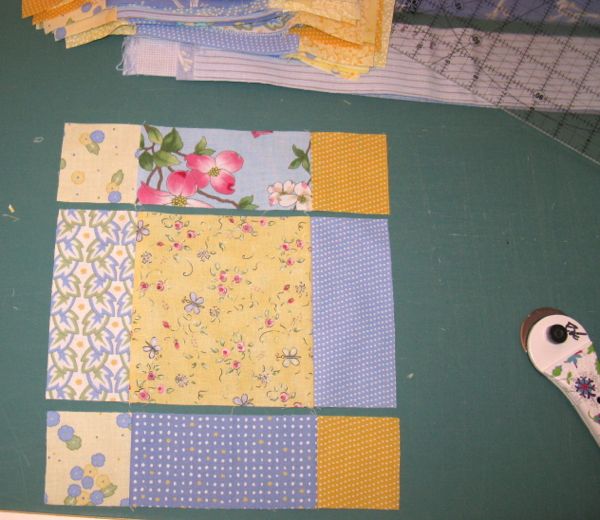
1. After cutting, the first step is to sew two blue strips on the sides of the large center block.

SunshineShadow1
2. Sew two yellow blocks on the end of the blue rectangles.

SunshineShadow2

3. Line them up.  After choosing good sets that go well together, stitch the yellow square/blue strip pieces onto the center.  I pressed the seams towards the blue, away from the yellows.  Sew the strips onto the center section.

SunshineShadow3

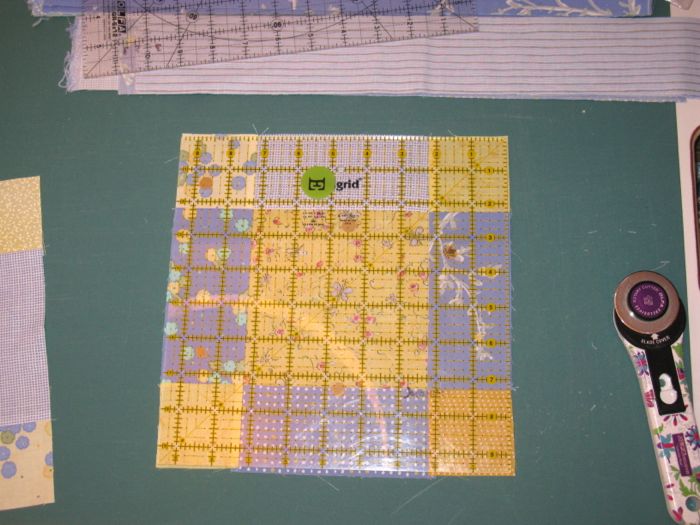
4. True up, by placing a 9 1/2″ ruler on top.  I found if I trued it up at this stage, the rest of the construction went smoothly.

SunshineShadow4

5. Sew all but one of the blue squares onto the larger yellow strips.  Then get ready to put them all together.  You won’t use all the blue square/yellow strip pieces at this point.  Just set the extras aside.  I wanted to audition how the random yellows and blue fit together, so I took one large block, a yellow strip and a blue square/yellow strip piece, making sure I wasn’t duplicating fabrics in any significant way.

SunshineShadow5

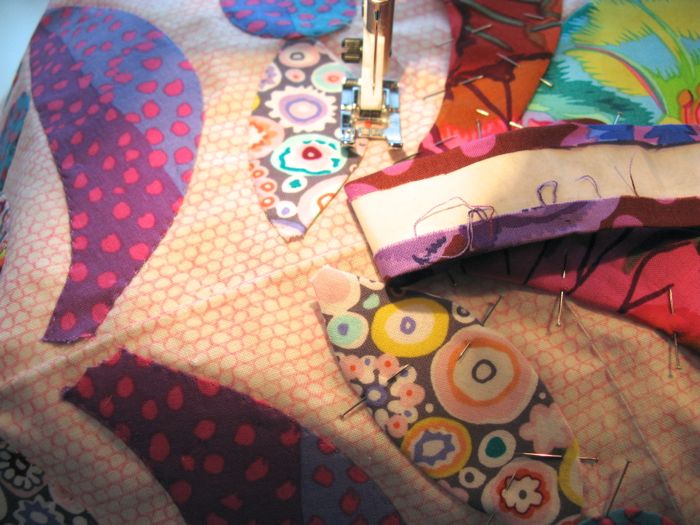
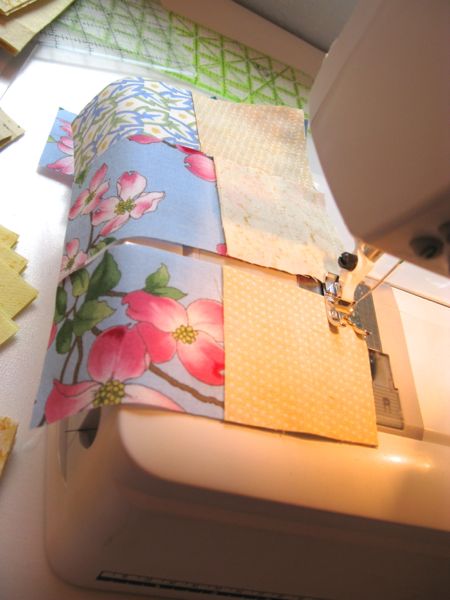
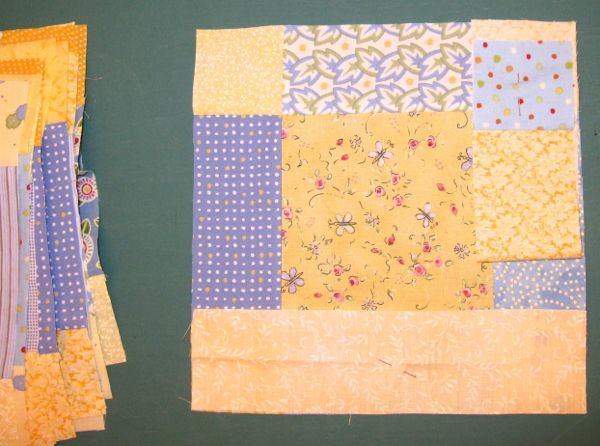
6. I pinned the yellow strip on the bottom, and folded up the other strip and pinned it to where it would eventually be sewn.  Sew on the yellow strip.

SunshineShadow6

Here it is, with yellow strip sewn on, showing that I pressed the seam to the outside yellow.

Pressing

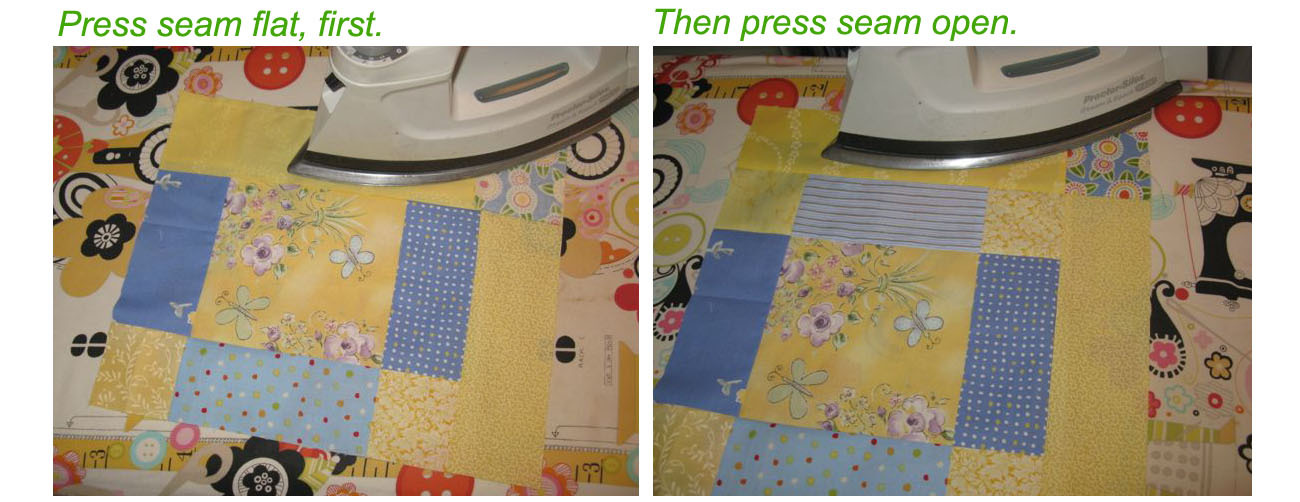
In all cases, first press seam flat to eliminate puckers, wobbly edges, then press the seam open.

SunshineShadow7

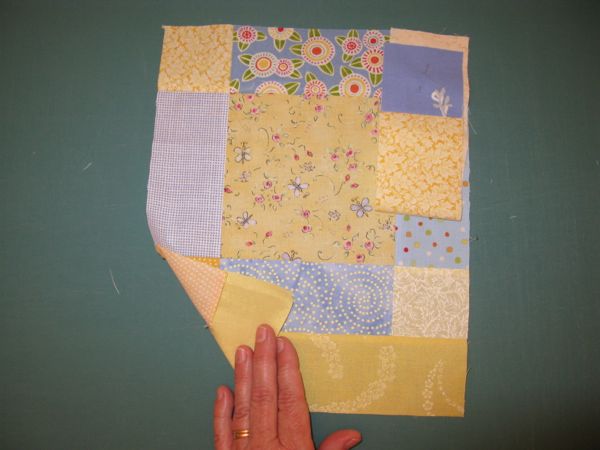
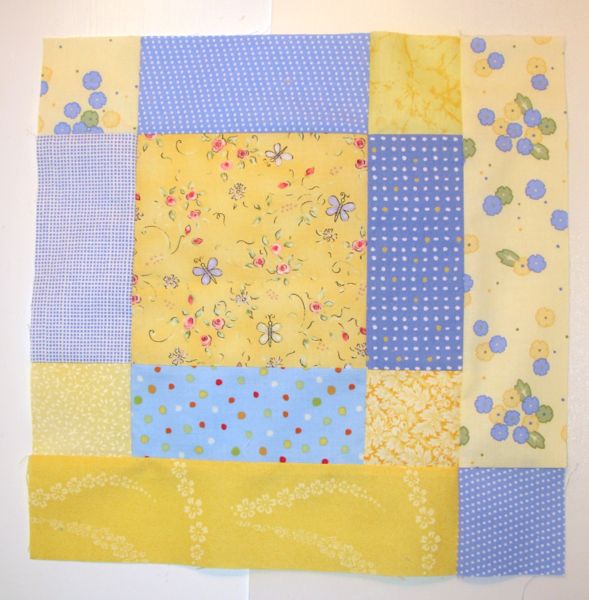
7. Sew the blue square/yellow strip piece on the center construction, matching seams, etc.  This is the finished block.

SunshineShadow8

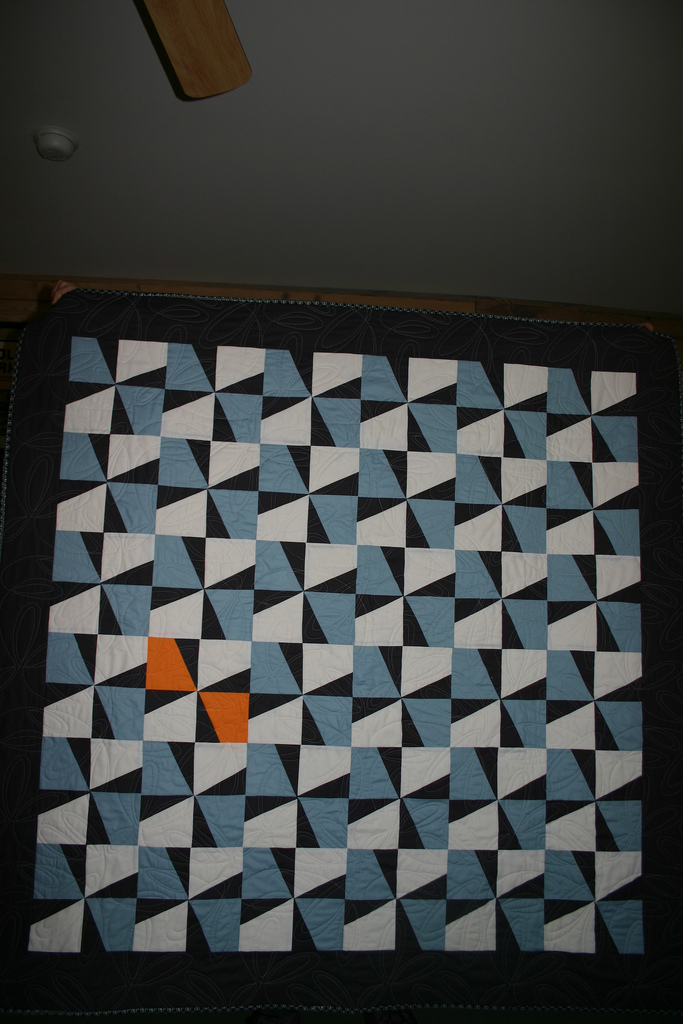
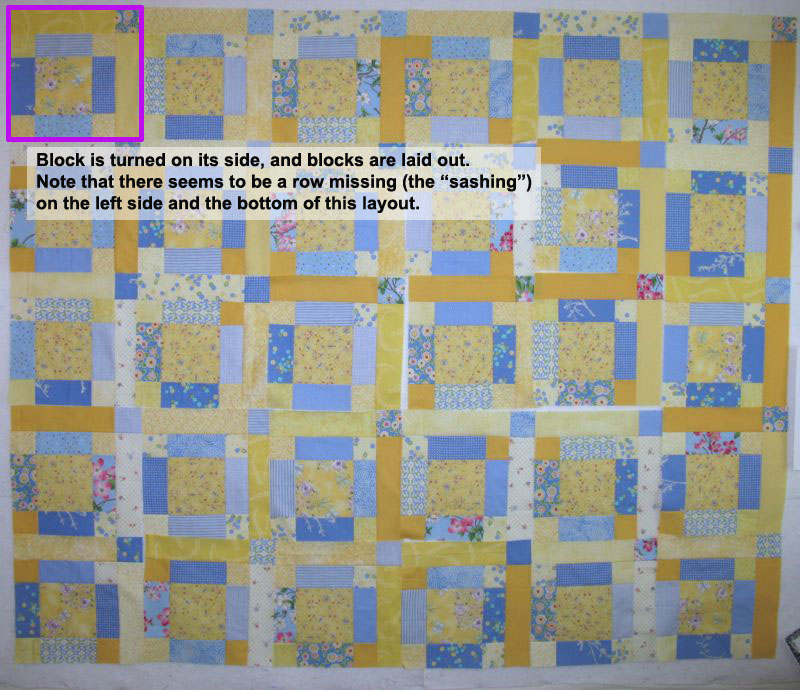
8. Because my pin wall is longer from side to side, than from top to bottom, I rotated the blocks a half turn and laid them out on the wall.  I kept using my digital camera to make sure that there weren’t too many of those darker yellow-gold pieces mushed together, as well as eyeballing a good distribution of the rest of the colors.  The quilt looks a bit strange now, because you are still missing a length of “sashing” on the left side and on the bottom.

SunshineShadow9

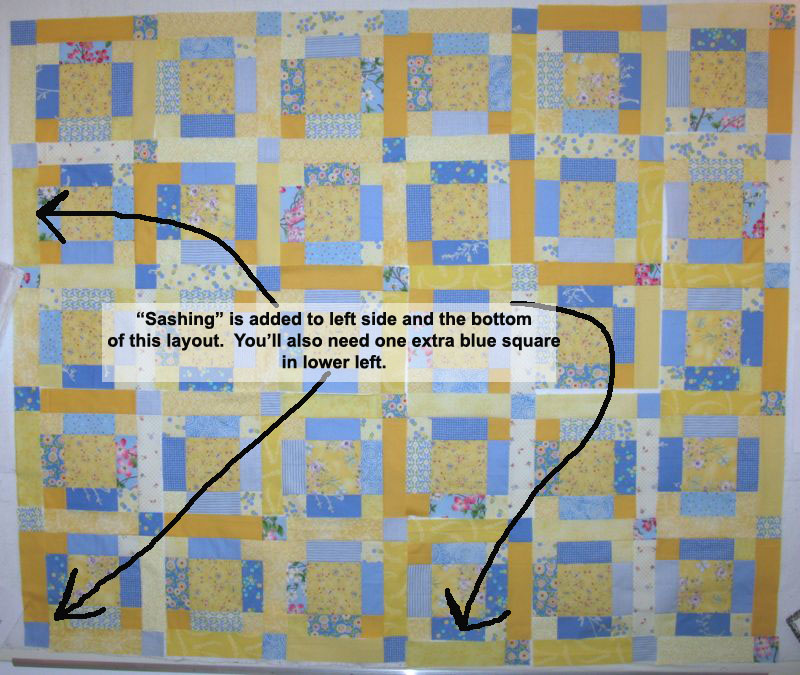
9. Because I still wanted to sew these as blocks, I laid out the “sashing” pieces, each with a blue square on them, where they should go. I laid them out, again checking for color and value distribution.  I had to sew that random last blue square onto a yellow strip/blue square piece, then I sewed these pieces onto the adjacent block.  When you replace these new expanded blocks on your pin wall, be careful not to rotate them into a wrong orientation. Use your last digital photo as a guide.

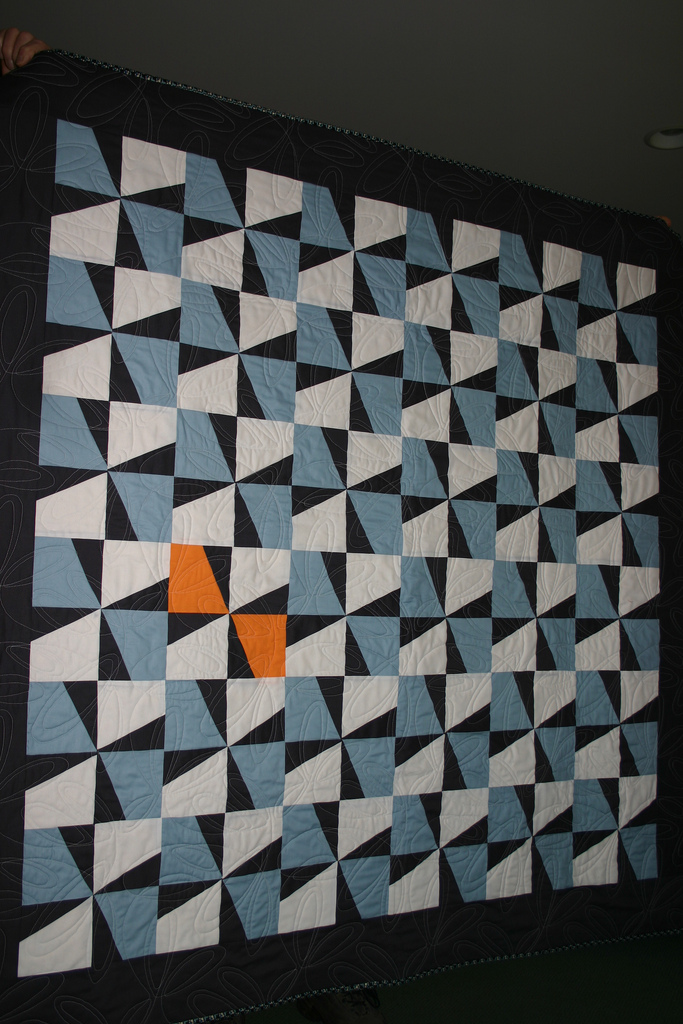
10. Put quilt together:  I put row markers (shown in *this post*) on the blocks on the left side of the wall, in order to keep track.  Then I stitched the rows together, going across.  Stitch rows together, going down, until the quilt top is complete.  I think it goes much faster (have I said this before?) because you are sewing blocks, rather than long strips of sashing.

SunshineShadow FavMuseumShot

Quilt as desired (and my favorite way is calling Cathy and having her do it for me).  I used the extra bits of blue strips I’d cut out, plus extra, to make a scrappy binding.

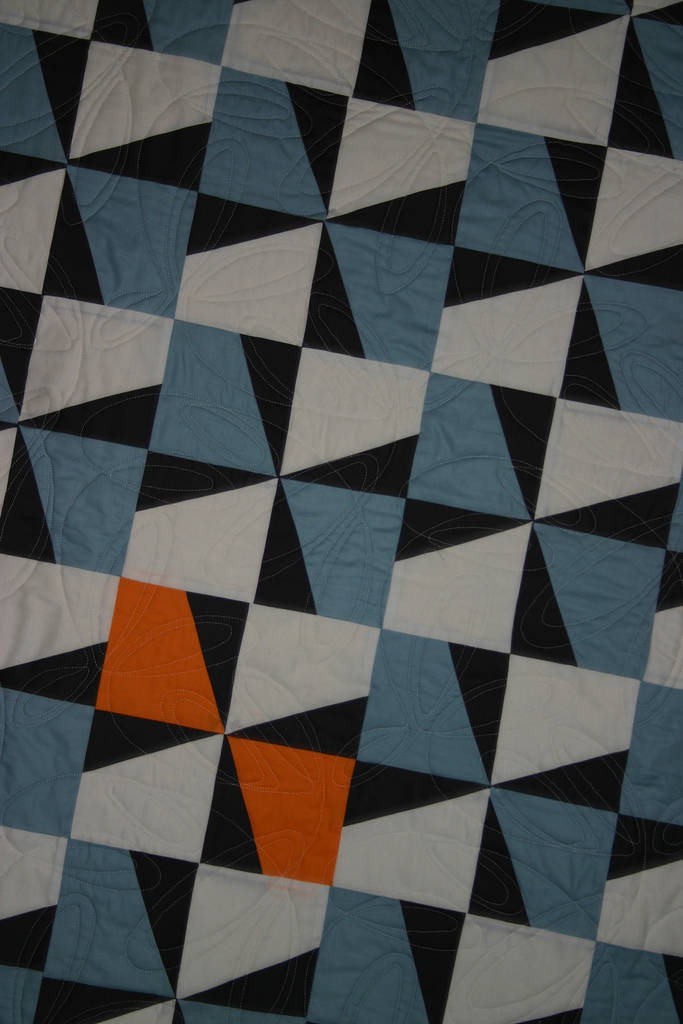
Okay here’s the honest truth: I started out with a completely different idea for this quilt and cut a whole lot of blue and yellow fabrics into 2 1/2″ strips, but realized that my time was short so I had to step up to a quicker quilt.  That’s when I had the idea of adding the sashing pieces to the block, because sometimes sashing just wobbles and stretches and becomes one pain-in-the-rear step to making a quilt.  This was was much faster, and I think the integrity of the quilt doesn’t suffer for it.  You’ll notice I tried to press to the “sashing” side always, as I think that distinguishes those pieces from the “block.”

SunshineShadowLabel

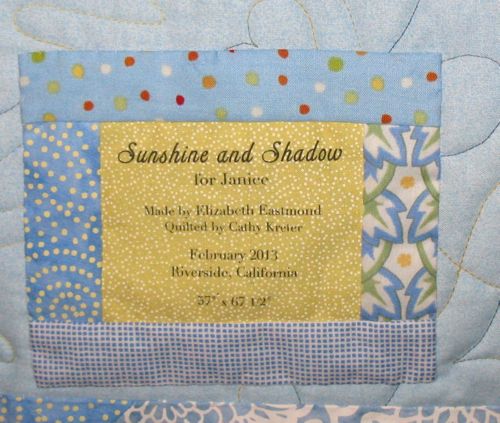
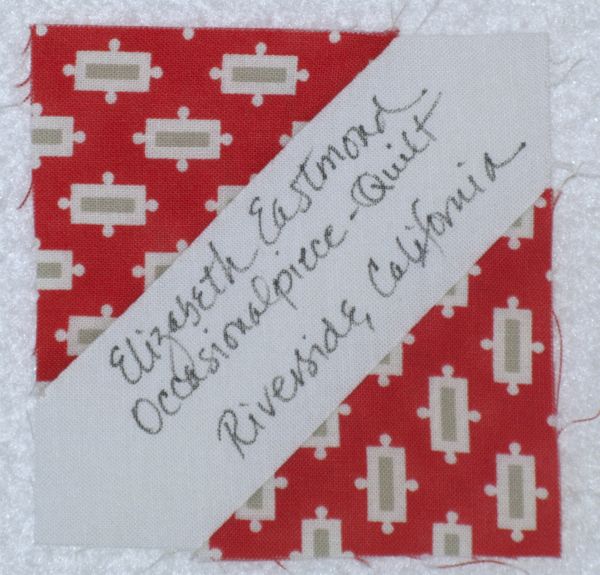
To make the label, I did the usual method of pressing some fabric to freezer paper, running it through my Epson printer (they have the best inks), bordering it, then stitching it onto the quilt invisibly around the outside edges.  I also like to do it on the inside edge of the border, where the label meets the edging.  No one can tell, but it poofs out less from the surface of the quilt if it has that second round of stitching.

SunshineShadow

BlueYellowFullQuiltwTitles

I’m actually planning to make another like this, as it is really quick, and I like the fact that I can use up my stash.

I seem to have lost a few days here, but with the weekend coming (a holiday weekend!), I hope to find time to dive into some stitching, and some blogging.