I ran across some quilt baby pictures the other day.
And a tangent: Chaucer was on to something when he wrote “The life so short, the craft so long to learn.” I’ll explain, but first you should know that we’re cleaning out, preparing for some home renovation. Or as I like to call it, #kitcheneggedon, where we are moving our entire kitchen into boxes or onto shelves, and our refrigerator out into the garage, which meant that two of our four file cabinets had to go. It was time, really, to figure out what we’d crammed into those moving metal drawers so long ago. We filled one giant curb-side recycle bin, borrowed our neighbor’s and filled his, and I was still going strong. Glance, toss, glance, toss, glance….Whoa.
Several files stopped me dead in my tracks, as they were from the first series of classes I ever took, a veritable record of my how some of my quilts were hatched (hence, Quilt Baby Pictures for the title of this post).
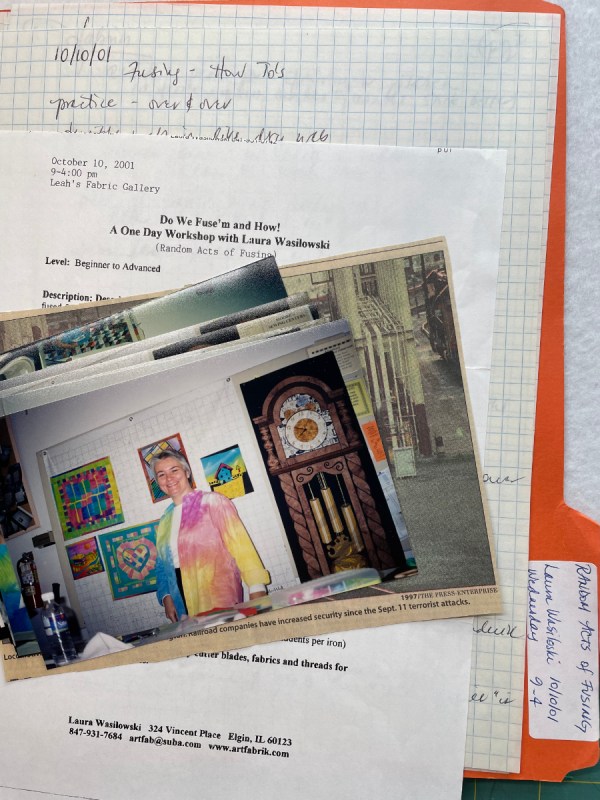
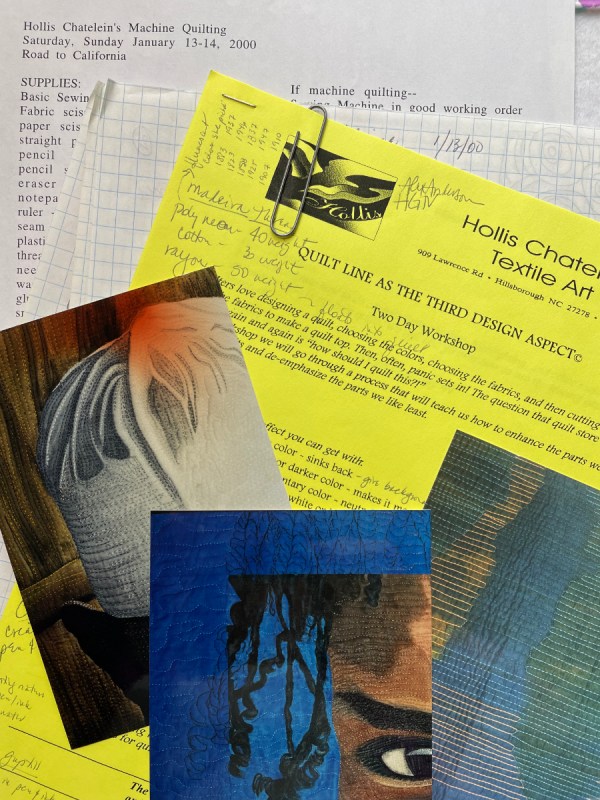
• An embellishment class which sample I promptly tossed. The redeeming factor were finding two beading needles in the class kit, which I needed. • Two Laura Wasilowski classes: one on fusing, where we learned the Chicago School of Fusing fight song and that her first iron lasted 25 years, and a second where I made a reversible jacket (which I wore for years). • Debbie Caffrey Mystery Class in which I had fun, but when I took another Mystery Class some years later (teacher shall remain anonymous) it put me off that format forever. • A two-day Jane Sassaman class through Orange County Quilt Guild’s summer Camp Watch-A-Patcher, where she kept encouraging me to go wilder, bigger, more colorful. She’s genius. • And a Hollis Chatelein class about close quilting in quilts, a vanguard in that style of quilting.
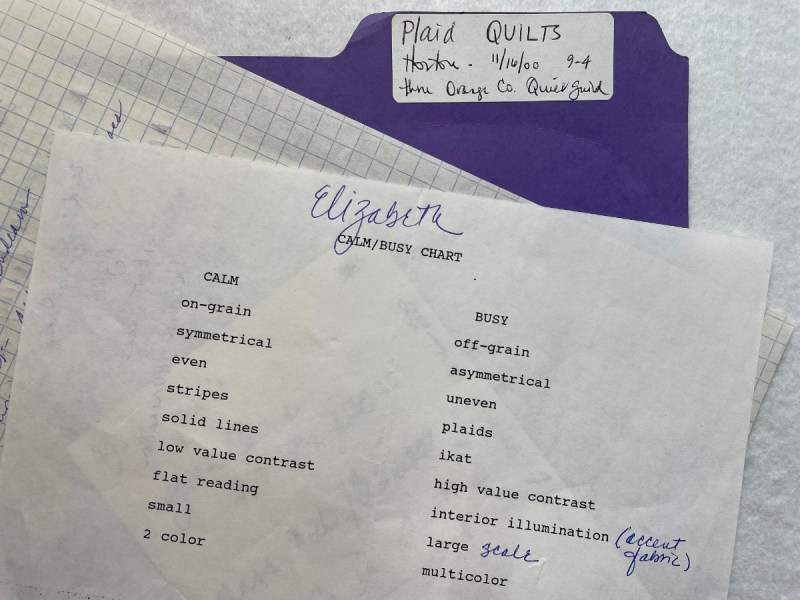
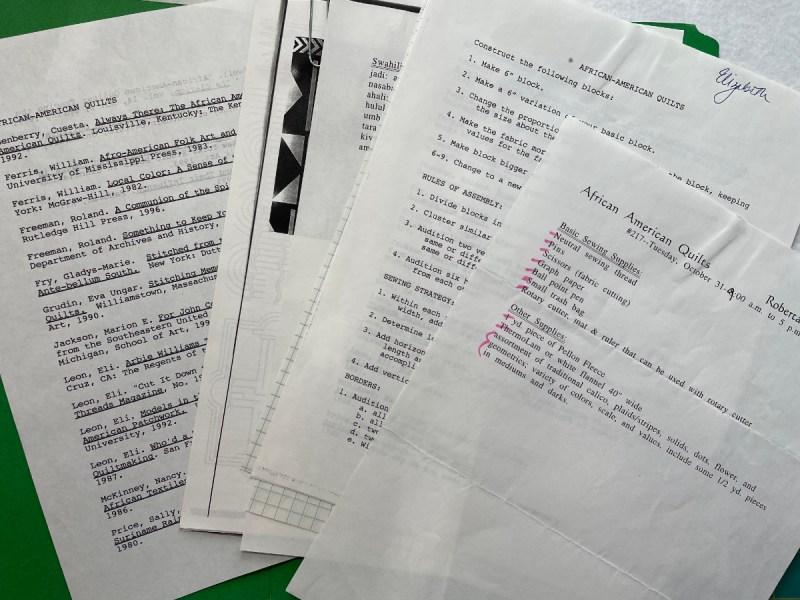
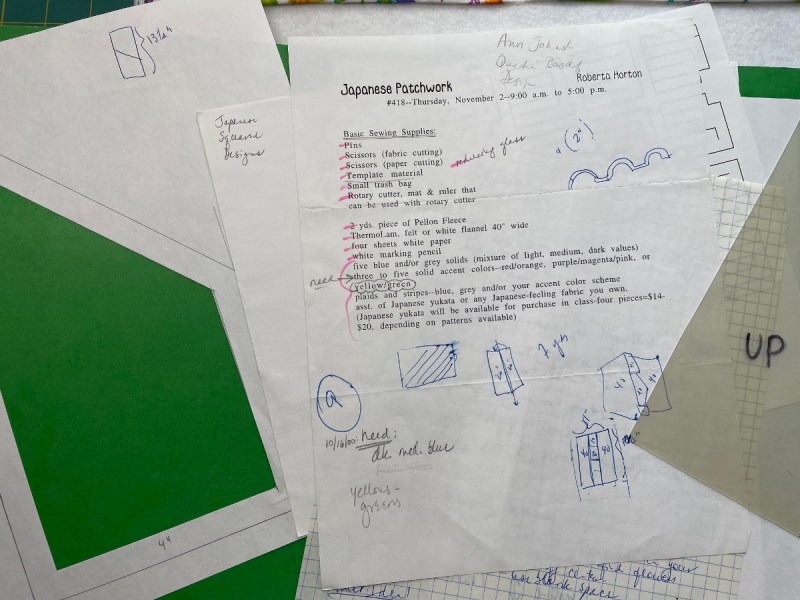
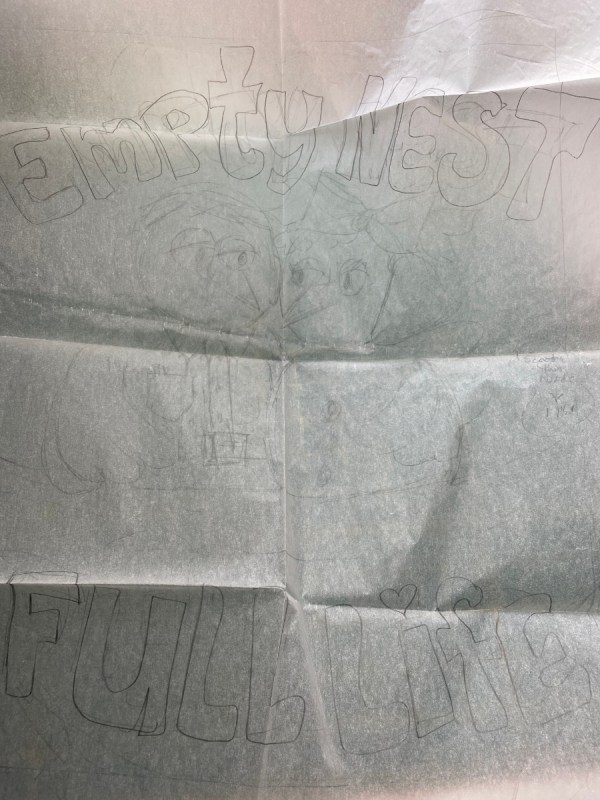
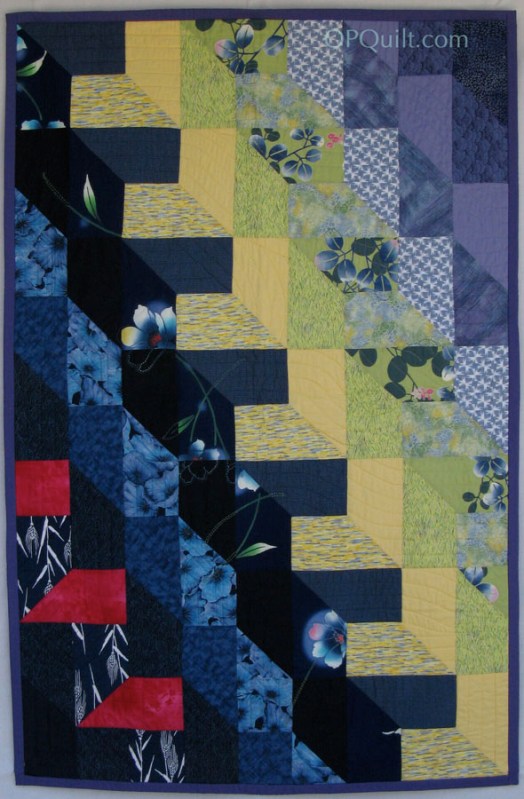
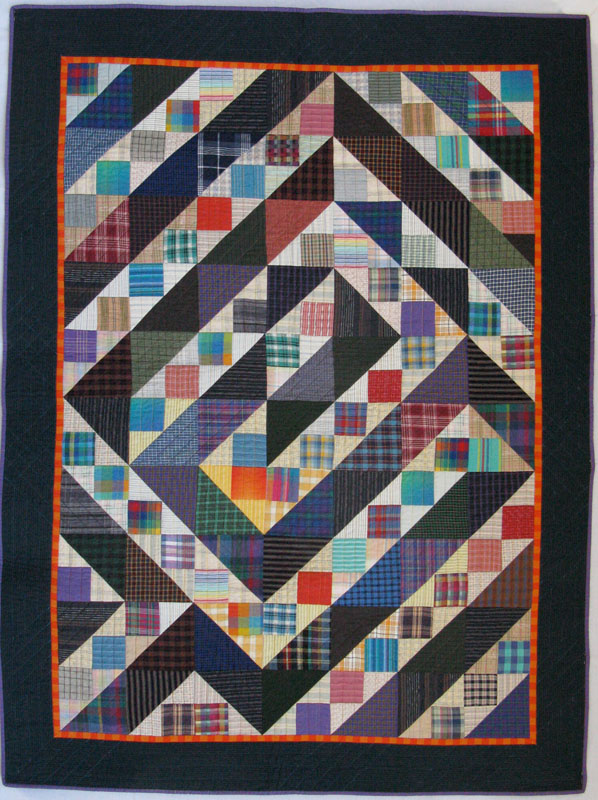
• I found three classes in my files from Roberta Horton, a personal quilting hero of mine. I did what she called an African-American quilt (or Utility Quilt), a Japanese Quilt, and a Plaid quilt. • I also took a class from Mary Lou Weidman, where I designed a quilt in honor of my last child leaving home, in honor of our empty nest. The blob on the right is the full-size sketch of the quilt:
Empty Nest, Full Life • Quilt #56 in the Quilt IndexNihondaira, #53 in the Quilt Index
This is the quilt made with the Japanese yukata fabrics; we were encouraged to take our smallish square of yukata fabric, design a shape and assemble it, while merging and borrowing it, and extending the design through sashiko or embroidery. Roberta’s classes always gave me more than I expected.
This is from a class by Jan Krentz, because I so wanted to make a Lone Star Quilt, and she knew how. I used fabric my husband had brought me from Zimbabwe (yes, he’s a keeper) and I’ve not written about it on this blog. It was named Fiat Lux, because I finished it about the time I earned my undergraduate degree after 28 years of slogging. The motto of the University of California is “Fiat Lux,” so I adopted that for the title.
Fiat Lux, Quilt #57 in the Quilts Index
I found file folders for the Joen Wolfrom class I mentioned in the last post, as well as a few others, but the file that amazed me most of all was the one that held the papers from a class with Jean Ray Laury, the grandmother of the graphic arts quilts (in my mind).
I even saved a letter she’d written to me, returning the dollar I paid for some class supplies that she ended up giving out for free. Now that she is gone, it’s a treasure newly re-discovered, once long-lost in some random file cabinet (now gone) in my garage.
While it was a treat to find all these “baby quilt photos” I’m more than happy that I actually “raised the baby” and got it launched into the world. No, there will probably never be an embellished quilt — the interest just isn’t there to place sparklies and sequins all over a quilt. But those needles will come in handy when I have to restore the beads Carol put on her block for my Ladies quilt. Yes, I’m a fan of taking quilt classes. Only once have I come out of a class feeling like it was a waste of time (and I’ll never reveal which class it was).
First, I apologize for sending out two posts right after one another. This is the nuts and bolts side of setting up a Live-Online Class, one where you will be hosting the class, but also include some online extras for the students to watch during the week while they work. If you don’t plan to do this, or could care less about knowing what goes on behind the curtain, feel free to ignore.
Zoom Codes, Zoom Tips, and Zoomzoomzoom…
Guild Evening Meeting: I suggest you let the Guild set up their own Zoom codes for their evening meeting, as they can set up security any way they like, as they know their members if they choose the Waiting Room option. This way, the presenter just has to worry about their presentation. I recommend getting the Zoom codes from your Guild about a week ahead, just to alleviate worry.
Workshop: We bit the bullet and got our own Zoom Pro access this year. I like that I can set up the access codes for this myself. Our workshop schedule went like this: Class (live): 9 a.m. to 11 a.m. Break: 11 -1 p.m. Class (live): 1-2:30 p.m.
I set up the Zoom to start at 8:30, but then got on early to put on some music and post this sign:
If you don’t know how to do this, I recommend taking the Zoom Training Course, level 2, found on their website.
I used the Advanced Share when I had to share screen (showing them how to get onto the Password Protected section of my website…read on for more details), but mostly, I kept the Zoom Gallery View up and going, except when I shared my iPad as a document camera on the cutting table.
Yes, I wear a headset. When I presented my program the night before, I didn’t use it, but by the end of the evening, my voice was hoarse. (Funny how we think we have to talk louder to reach them All The Way Over There.) One of the tips in the Zoom training I took was to wear a headset. I prefer a lightweight mono-headset, with the ear pad on only one side. I use an adapter to plug it into the side of my laptop in the audio port, as these are the headphones I use when on long calls on my telephone handset.
For some reason, the Apple Earpods don’t work for me. Whenever I use them, people can’t hear me, so it’s old school for me. I do know you can get a Bluetooth headset if you don’t like wires, or one that plugs into your USB port: do your research to find one that works for you.
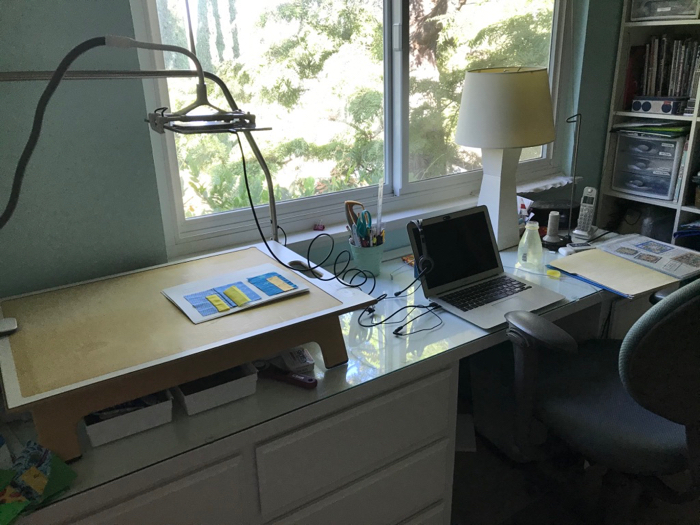
Setting up the Video Station
Early version of our set-up
I used my cutting table for the place where I recorded my videos. Equipment I would not want to be without:
Daylight Light. It covers the entire area with well-balanced light, and has dimmer settings. It can swing it out over the cutting mat if I need more light in some position. It was a birthday gift and I use it every day.
Just before starting class
Device Holder (Document Camera workaround) Initially we used two smaller tripods and yardsticks stretched across them. Clearly we needed to upgrade. We went with this gooseneck device holder, also called “Lazy Supporter.” It’s made for people to lie in bed and have their video devices held for them, but hey! it worked great for me. One end of the long arm clamped to the side of my table. The flexible arm is really strong, so it stays put when I move it into position. I learned not to bump it, though, as it would jiggle.
Document Camera. I read that some people buy dedicated document cameras, but since I have a smart phone, why not use this? This holder, made for an iPad, was a little tricky to use on the smaller iPhone, but no worries. I just slid it out of the bracket a little more. I turned the iPhone sideways (landscape) to do my videos. When I hooked up the iPad sideways (landscape) to do an Advanced Screen Share on Zoom…no go. Apparently the software is not yet available to do that, so I just lifted the device up higher and kept it in Portrait mode.
(I just read over this, and boy, what a lot of jargon. Basically I’m writing this post for someone who wants to try this, and maybe for my own reference in the future. Again, if you aren’t interested, just slide on by.)
Recording a Video and Putting it Up on YouTube
I researched what else I should make available for my class and short, technique videos were mentioned over and over. TECHNIQUE VIDEOS?? I think this was the scariest part of getting ready. I have some friends in the movie business and I knew about storyboards and editing and splicing and I didn’t want to do any of that.
made with Affinity Designer software
What I did have going for me was having taught this class multiple times. I knew what technique students wanted me to demo over and over. I knew where the tricky spots were. And I knew how to teach adults, given that I taught ten years at a community college. I have new classes coming up, and I will apply those same criteria to any new class: What will be the hard part? What is tricky? What might make the difference between a successful quilt construction experience and a total fail?
I made double my samples to work with in the videos as I had decided to do it all in one take. I recorded my demo twice, then picked the better one. On one of the four videos I made for this class, I don’t know what I did, but the video disappeared from off the phone (I was trying to edit it). So I re-did that video, but with already trimmed up samples. I hope they were sympathetic. Important: At the beginning, introduce what segment it is and what project it is (ask me how I know this).
Upload videos to YouTube and set them to Unlisted. You can set them to Private, but then you are about the only one to see them. You can research to find out the difference, if you are curious.
Setting up a Password Protected Section in WordPress
I use WordPress as my blogging platform, and they have a nifty feature: I can password-protect a Post or a Page. I opted for Page so a publication notice wouldn’t go out to my readers.
When properly set up, if an outsider wanders into the Secret Space, they will see this page. Unless they know the password, they can go no further, ensuring that your content for your class will remain protected and only your students can see it.
part of their password-protected webpage
I’m leaving this Page available to my class for a week. At the end of the week, we’ll have a follow-up session to show off quilts, talk about our experiences. After that, I will change the password, set the YouTube videos back to Private, cleaning up after myself.
I’d explored the idea of using a commercial site to upload my content for the class. There is a monthly fee, if done properly, and since I was still in exploration mode, I went this direction. Having a commercial site would be helpful if you weren’t doing a Live-Online class, but instead one where the videos existed without a teacher needing to appear.
And if you are a blogger with WordPress above the free version, you probably already know how helpful the “Happiness Engineers” are in the online chat. They’ve saved me, more than once.
Writing a Pattern
I use the Affinity Suite to write my patterns. I purchased them outright; there are no subscription fees (as in the Adobe products). I began writing patterns using a basic word processing program, but always drooled after those patterns that had nifty illustrations and pages that looked WOW. I’m not a graphic artist, but as a quilter, I do know what I want out of a pattern, and I want it easy to read and easy to find. I’m quite happy with these three pieces of software:
Affinity Photo — does what it indicates…it works with images, mostly photos.
Affinity Designer–you can make illustrations with this, moving around shapes, adding text, and about a billion other things. I barely scratch the surface with this, but I can make a decent patchwork illustration.
Affinity Publisher–It sets up a document where you can load in your text, your illustrations. I can also set up a Master Page where everything I place on there will be distributed throughout the pattern (helpful for page numbers, identifying logos, etc.).
Okay, That’s It!
I’m tired, you’re tired, so let’s stop here. I’ve tried to be specific in what I’ve used, and how I did things. If you found this helpful, pay it forward and help someone else Get the Hang of Things.
Overall, I think I may really come to love teaching this way, so I’m kind of glad the Covid-19 Pandemic forced me to learn how to do this. It’s a hybrid, for sure, but there are many positives I can see to this way of conducting a workshop. I may make comments going forward, changing how I do things, but for now, this is a record of what I’ve discovered and how I proceeded.
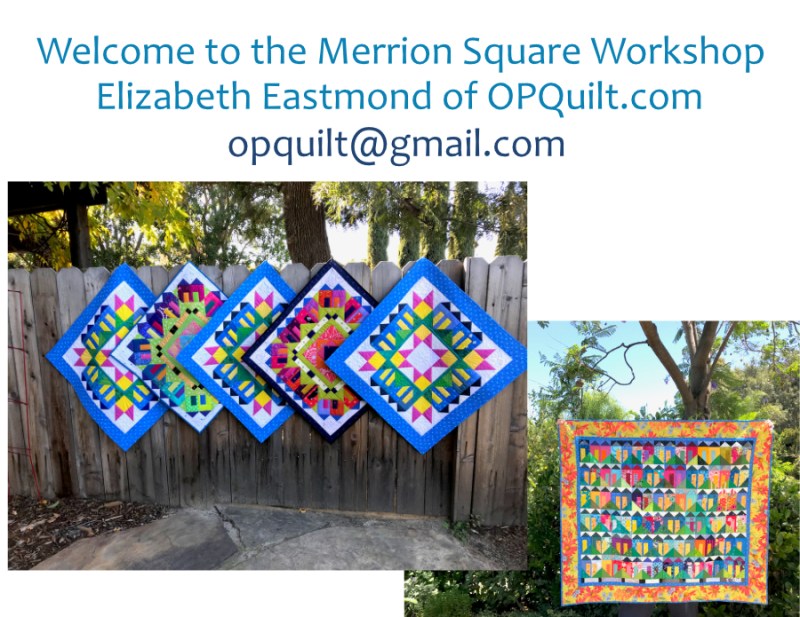
I’ll be speaking and giving a workshop locally, at the Citrus Belt Quilters Guild. The lecture, titled Abecedary of Quilts, will be on Friday morning, October 25th. The Workshop, which is a Two-for-One class (Home, Sweet Home and Merrion Square) will be Thursday, October 24th. This is my last local presentation, and the last for this year; I’m excited to meet all the quilters at the Citrus Belt Guild!
Now on to PIQF: Pacific International Quilt Festival. I’d been reading Gillian Travis’ blog for some time, enjoying her small quilts, generated from her photographs from her travels abroad. When Susan took her class at Road, and recommended it, I wrote to Gillian, asking if she ever taught in the States (she’s British). Why yes, she replied. I’m teaching at PIQF. I hopped on the computer and registered for her class.
One of the first quilts she showed us in class, was the one above, based on a visit to Burano, Italy. I had similar photos, and was really excited to make this (the above is a composite of several photos).
Gillian provided patterns for us to work on smaller versions of Burano, or smaller version of a Yorkshire Village. I chose Burano, and above you see my progression from tracing to placing to fusing down. I got so far as to fuse it to my background (the blue in the upper left corner), and right now, it’s still folded up in my bag, still unpacked. I’m looking forward to unfurling it and getting back to work on it. We pinned our class’ versions up on the wall:
Some even got to making the white frames around the windows.
I really enjoyed this class, and was happy to move from there, to her lecture that night, where we enjoyed more visions of her work and her stories. My friend Leisa and I also attended two more evening events: David Taylor’s lecture on Wednesday night, and the Fashion Show of Creative Garments on Friday night (photos are up on IG), which we both really enjoyed (especially the narration by Rachel Clark).
Leisa (L) and Tracy (R): we went around on Thursday and looked at the show together. And how about that PINK ribbon, behind their heads. Now there’s one I could covet.
Here’s the one that everyone wants: a blue ribbon.
And Tracy won this for her quilt Sew She Did, which she designed, pieced and quilted. Congratulations, Tracy!
A closeup of one of the blocks.
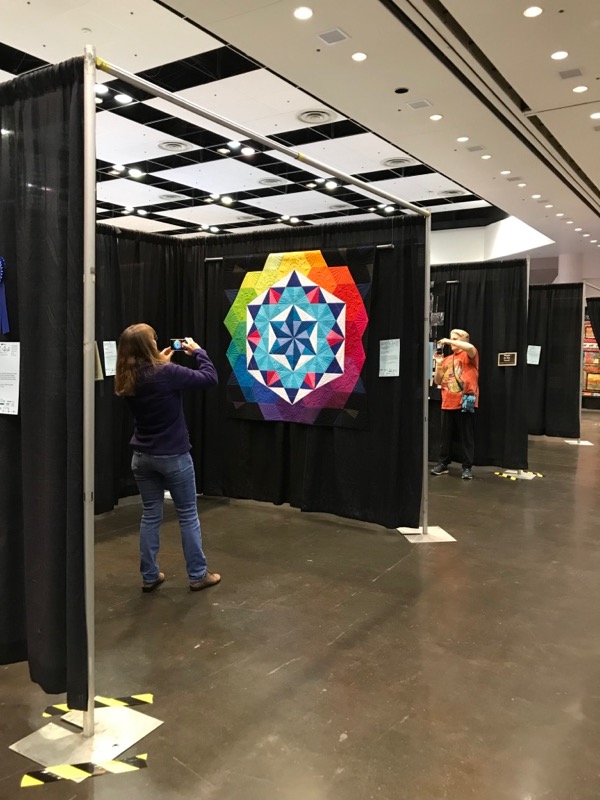
On Saturday morning, I went and said good-bye to my two quilts that were in the show. Annularity (above) was in a nice placing, all by itself in good lighting.
Ladybird (above) also was placed well, with okay lighting. I talked to one woman who gave me a full (and lovely) critique of what was going on in my quilt. It was nice to talk shop with a complete stranger. I also saw (and got a photo with) Roberta Horton, who really launched me from beginning quilter to serious quilter. I’d taken classes with her at Houston, and I was a complete fangirl when meeting her.
As someone who has traveled to Houston, QuiltCon, Road to California, Palm Springs, and Virginia shows, the last two Mancuso Brothers shows, as well as to Long Beach, I have to say that some venues have real difficulty with lighting (all the Mancuso shows and the Long Beach). The entire show felt like it was in a greenish cast, and not nearly bright enough. My husband told me he could see it in the photos I posted on Instagram. That first night, halfway through, everything all of a sudden went brighter, and I realized they hadn’t “warmed up” the lights. So none of the photos I took at the beginning are any good.
One of my quilt heroines, Tanya Brown, whose work I have followed for many years, had Cranky Claus hanging in the show, along with Life Nouveau, but they were horribly placed. She gets into Houston every time, so I was suprised where they’d hung her quilts. It made me belive that maybe the organizers/hangers didn’t know who she was? My friend Lisa has helped hang Road to California for several years, and I know the effort that show goes to in displaying each quilt to its best. Their lighting is very good, as well.
The other issue I had was that some quilts got hung that shouldn’t have been: poorly designed, poorly made, odd choice of materials or subject. When speaking with one of the Mancusos, I asked how many quilts were submitted: “Roughly 450.” How many quilts are accepted? “Those that meet our standards.” (evasive) I pressed on, asking, How many quilts are rejected? “2-5%.” So then you hang nearly everything. He mumbled something about that standards business again, but I had my answer. I did smile when I saw that their webpage listing their award winners didn’t use the photographs from their contest venue. (I saw most all of these.)
I decided I would focus on the fact that my quilts hung in the same show as Tanya Brown and Tracy Cox, rather than my quilts hung in the same show as the fleece-lamé-fur-shells beginner’s quilt, above. I was there once, at the place where this quilter was, and for many years, every entry of mine into quilt shows was rejected. I appreciate it when the judges a) limit the number of entries, and b) jury the quilts into the show. It appears that this year at PIQF there was very little jurying going on, which makes for an uneven show quality.
Last Whine: when are these older shows going to come into the modern age and put Instagram names on the placards? QuiltCon has done this for years, and it makes it easy to tag people when posting. Okay, on to the fun.
One highlight was going to the show Friday late afternoon when everyone had cleared out. We had the vendors to ourselves, and got to spend some time talking with booth vendors. We may have purchased the pre-cut kit to make Tannenbaum, but also vowed not to pressure ourselves to get it done for 2019.
We also participated in the Bernina giveaways, the vendor mall (where I saw some old favorite booths — hi Cecile!), and met and chatted with new quilters. We enjoyed the evening lectures/fashion show and came away with new projects to sew, as well as good memories. I need to go and unpack and sort and pre-wash my bright tangerines and indigo blues (I was on the hunt for these fabrics) and decide what to do with my length of kantha fabric, but I wanted to get a post up quickly, while it’s still fresh in my mind.
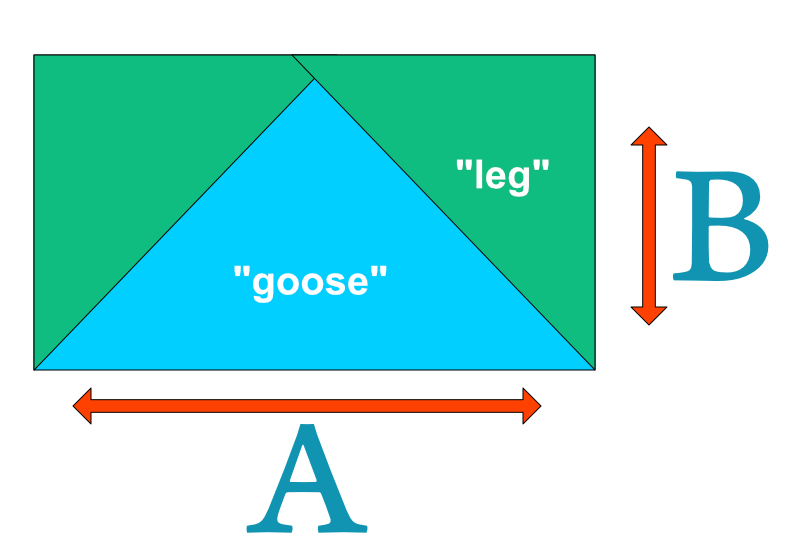
When I teach,often there seems a disconnect between what rulers students have and what rulers they need. So I thought I’d write a post talking about the basics that I wish everyone could have. [And while I’m at it, rotary cutters need a mention, too. The largest I’d recommend in a classroom size is 45mm, for a variety of reasons. I think the larger ones are less helpful, and sometimes even dangerous.]
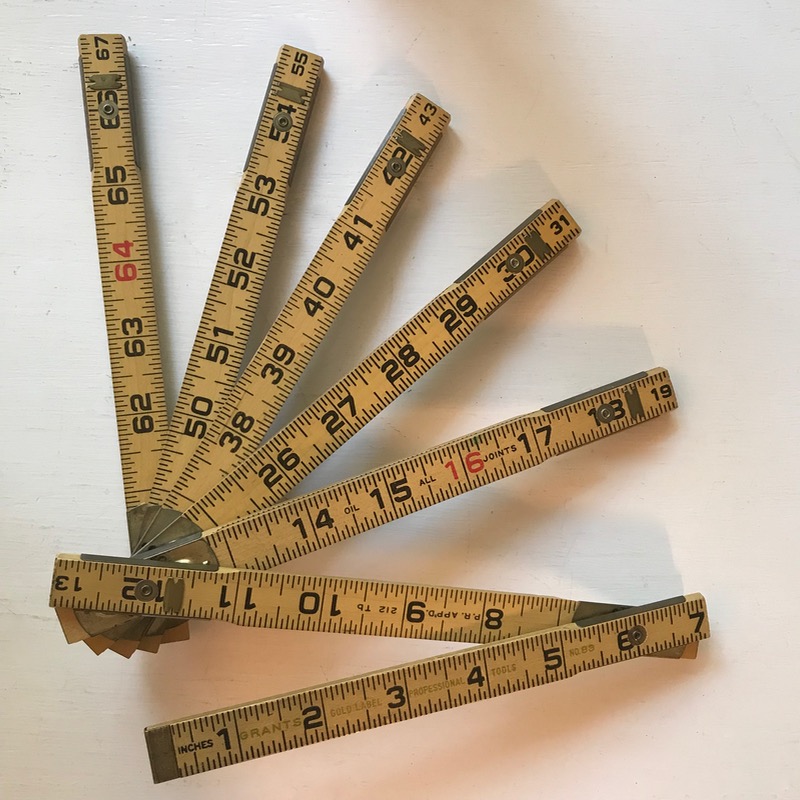
I use this folding carpenter’s ruler when measuring the width and length of quilts.
I got started on my ruler fetish honestly, when a mild-mannered shop owner named Carolyn hosted weekly class based on making a sampler quilt. And every week, she’d hold up a new ruler saying that we needed this to make the block that week. My friend Leisa and I would exchange glances, knowing that Carolyn was a Ruler Enabler of the Worst Kind: she made it so necessary, that you just knew you couldn’t go on without it. Because of this, I’ve used a ton of different rulers, and have two drawers and bin full of those plexiglass gridded items.
Tips:
Please don’t buy the cheap rulers. Take your time to accumulate these, and buy sturdy rulers, as too thin rulers can warp out of shape.
Buy rulers that have some sort of coating on the back, preventing slippage.
Please buy rulers that have accurate measurements on them, and enough gridlines on them.
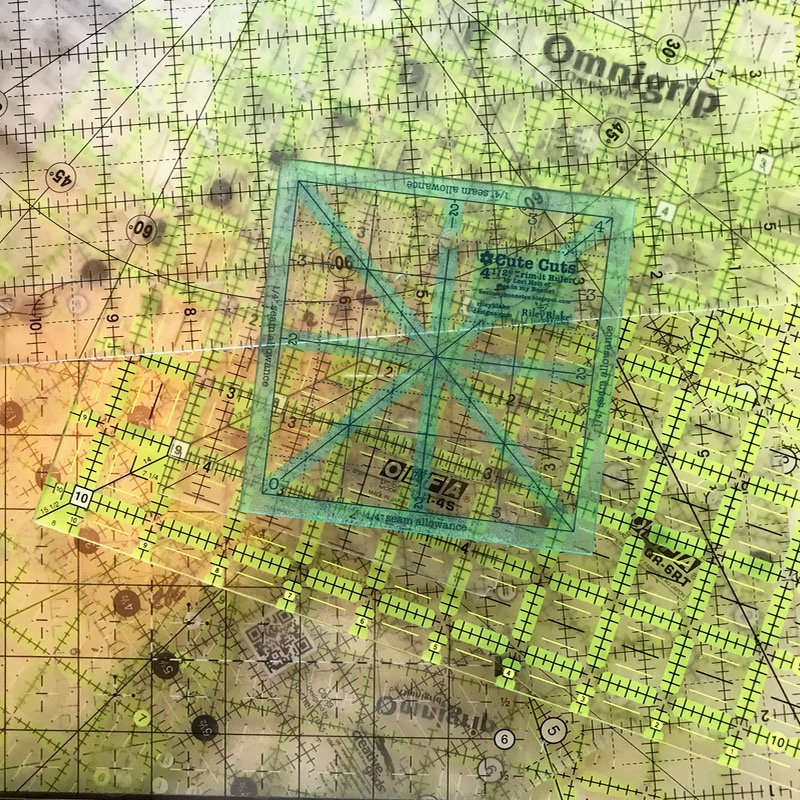
I am not partial to any one brand, but I did notice that most of my rulers seem to be from Creative Grids, Omnigrid, and Olfa.
I wish every student, every quilter had these basics:
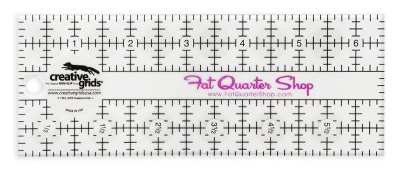
6″ x 24″ ruler
What it’s used for: large initial cuts off yardage, long narrow cuts of yardage
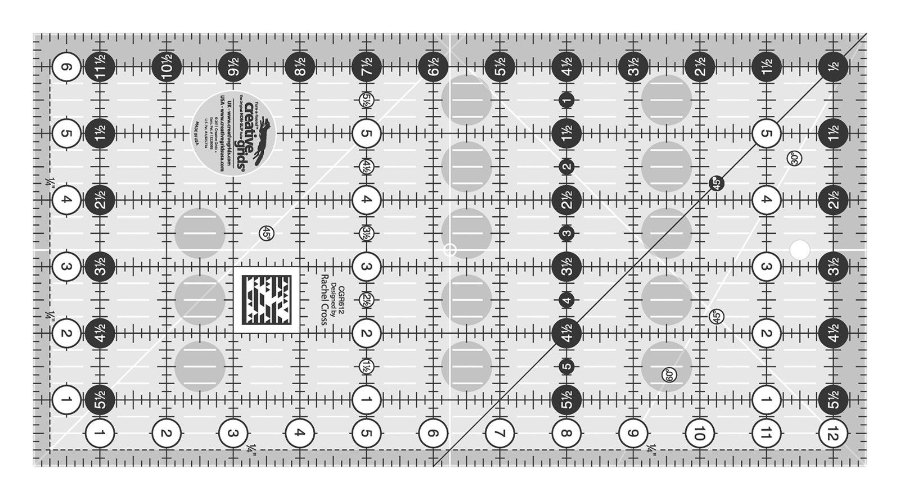
6.5 x 12.5″ ruler
What it’s used for: when working in a smaller space (some classrooms are beyond tiny, and some of our sewing spaces are too), it’s useful to fold the fabric to get the longer cuts. Also good for truing up smaller parts of blocks. Good for even-ing up sewn sections.
Caveat: some people hate having that extra 1/2″ on the edges of their ruler. I got used to it and appreciate it, but for some, it can be distracting.
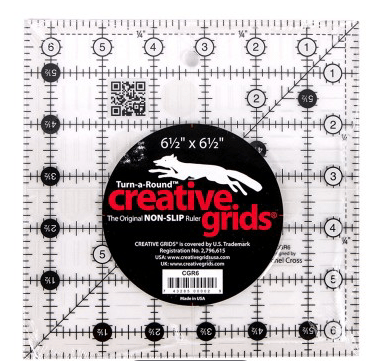
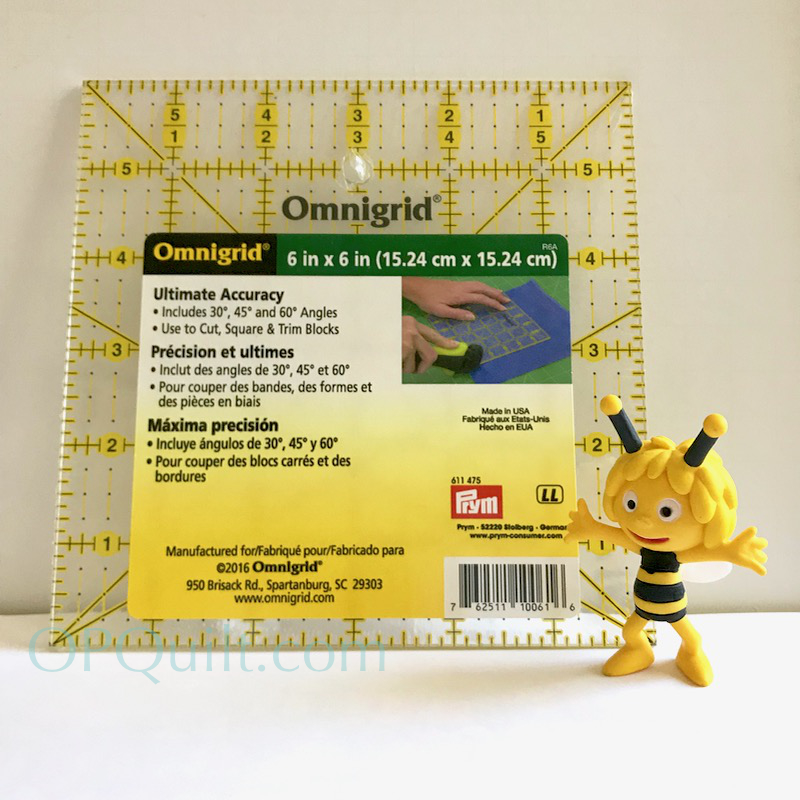
Small square ruler
With this size, you can rule the world. You don’t need specialty Flying Geese rulers, if you know how to use this. The small one is easy to flip around, when truing up blocks, and easy to use to cut smaller shapes, when scrap sewing.
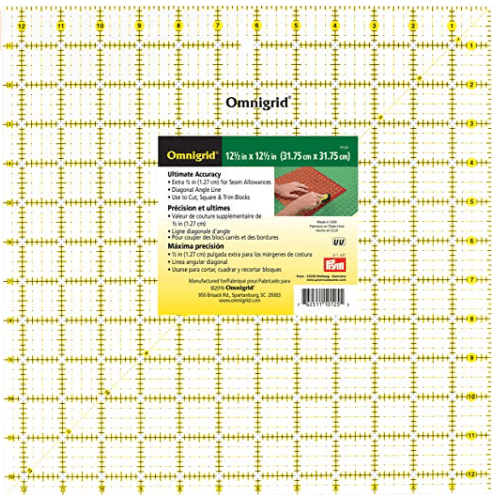
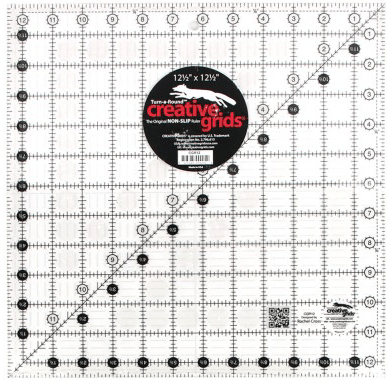
Square rulers, ranging from 6.5″ – 9.5″ – 12.5″
What it’s used for: I use the 6.5 the most, as I believe in truing up sections of a block before sewing it together. But the other sizes are great for truing up larger blocks, helping you trim your corner of quilt borders evenly. One day I even purchased a 16.5″ gigantor square ruler, and believe it or not, I do use it more than I thought I would.
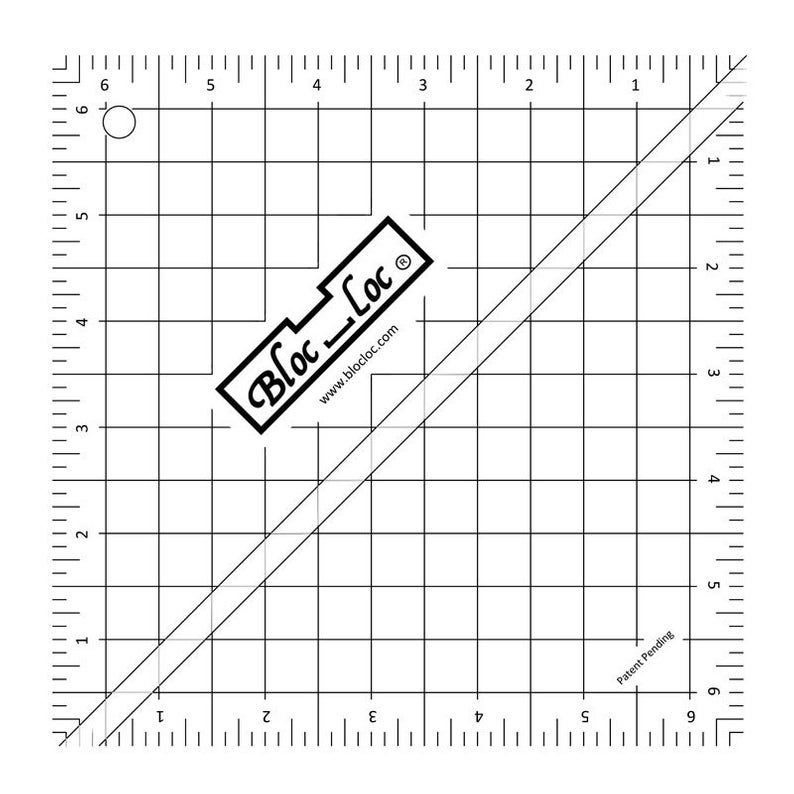
Bloc-Loc ruler for trimming up Half Square Triangles
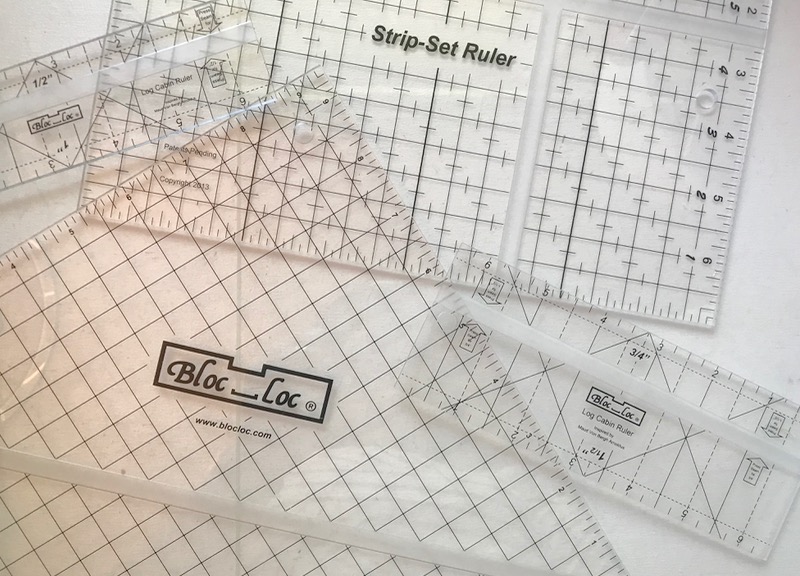
What it’s used for: Keeping your sanity when truing up HSTs. They are expensive and I rarely see them on sale. I’d start with a 6.5″ BlocLoc and invest from there. Here are some of the others I’ve picked up over the years:
Specialty Rulers I think should be in your stash:
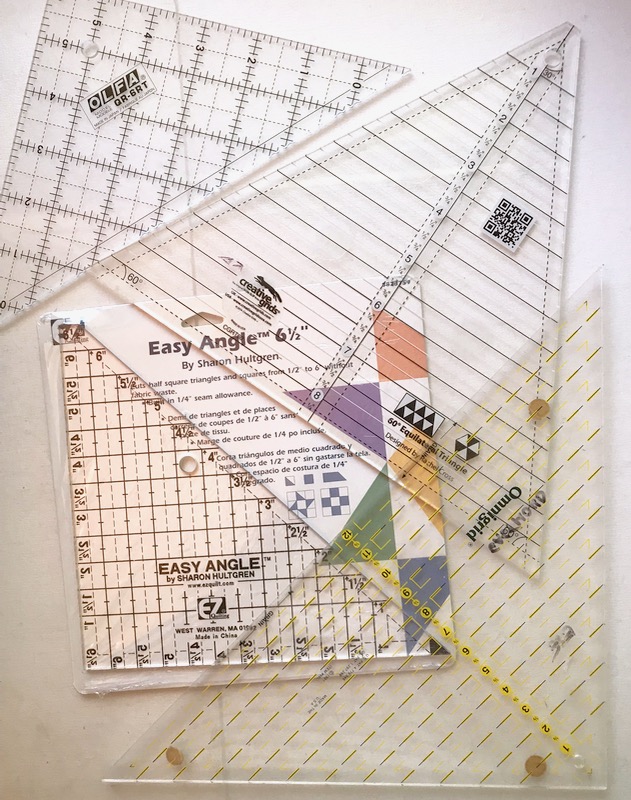
A few of my angle rulers
30-60-90 ruler
Some times, for some patterns, you need one of these, like when you make Annularity.
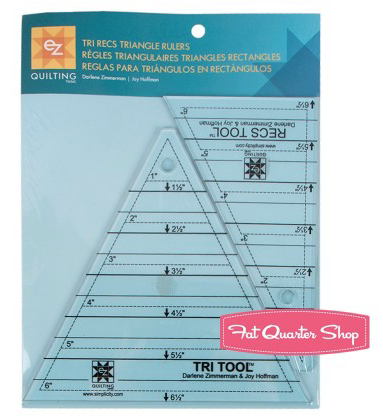
Tri-Recs ruler
If you are a traditional quilter, or jump in on one of Bonnie Hunter’s Thanksgiving Quilt-A-Longs, you may find yourself needing one of these one day.
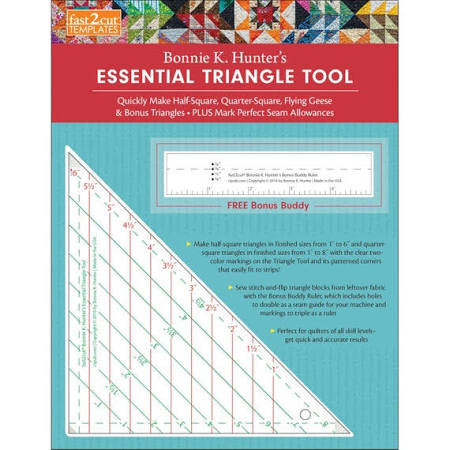
Bonnie Hunter’s Essential Triangle Ruler
I only purchased this because she said I would need it. Since then, I ‘ve used it a ton of times in making triangles, and now I consider it one of my go-to rulers.
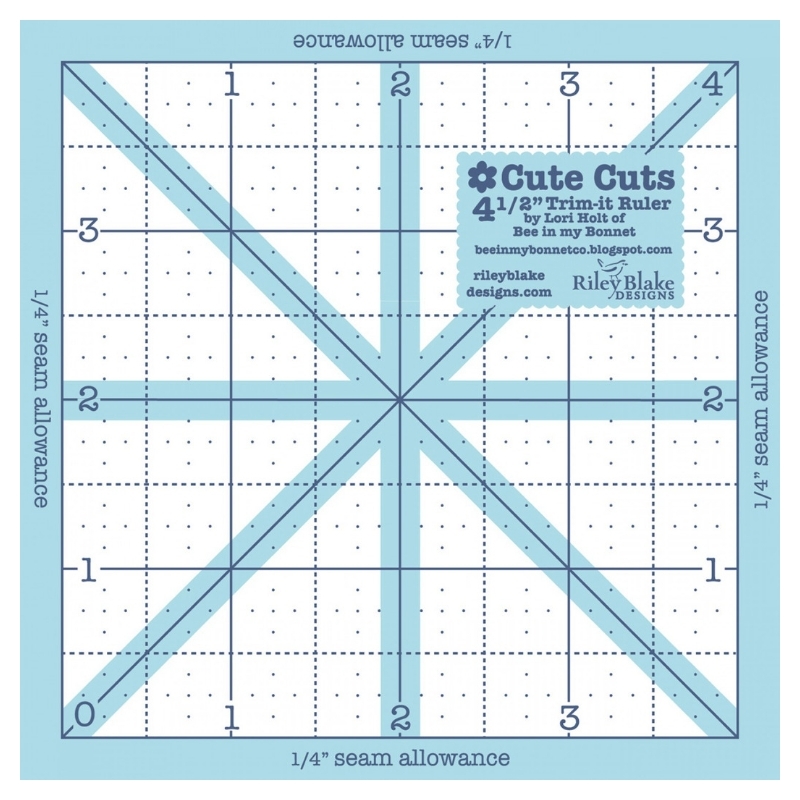
Lori Holt’s 4.5″ Trim Up Ruler. Careful. You can go broke on these, as she has them in every size from newborn to old age. I have only the 4.5″ and the 8.5″ But what makes these unique is that is is a form of a “centering ruler,” a tool I had to purchase when I studied Clothing and Textiles in college (and which I still use today).


 I really enjoyed this class, and was happy to move from there, to her lecture that night, where we enjoyed more visions of her work and her stories. My friend Leisa and I also attended two more evening events: David Taylor’s lecture on Wednesday night, and the Fashion Show of Creative Garments on Friday night (