Patterns by Elizabeth of OPQuilt

Mini Sew-Together Bag

Mini Sew Together Bag_1

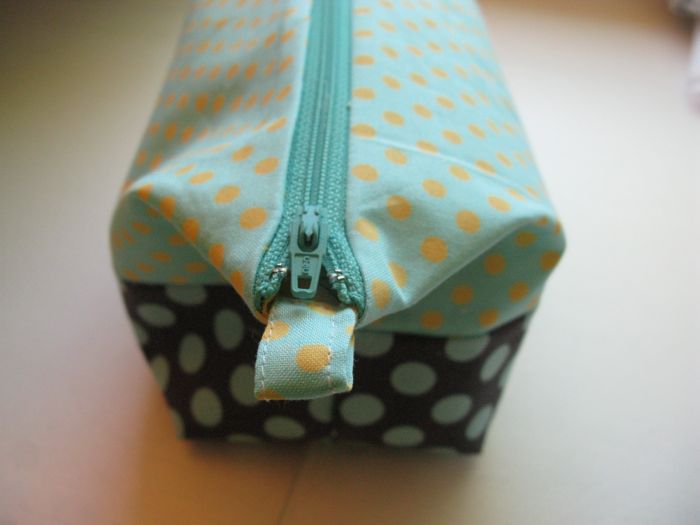
Woohoo!!  It’s a Mini Sew Together Bag!
A Mini Sew Together Bag has two pockets and is smaller than its big sister.

Mini Sew Together Bag_2
Mini Sew Together Bag_3

(Two Regular Sew Together Bags and Four Mini Sew Together Bags)

While I love my regular-sized bag, I really wanted one that was just a bit smaller.  

UPDATE:  I have re-written the pattern completely into a stand-alone pattern.  It can be found on PayHip.   

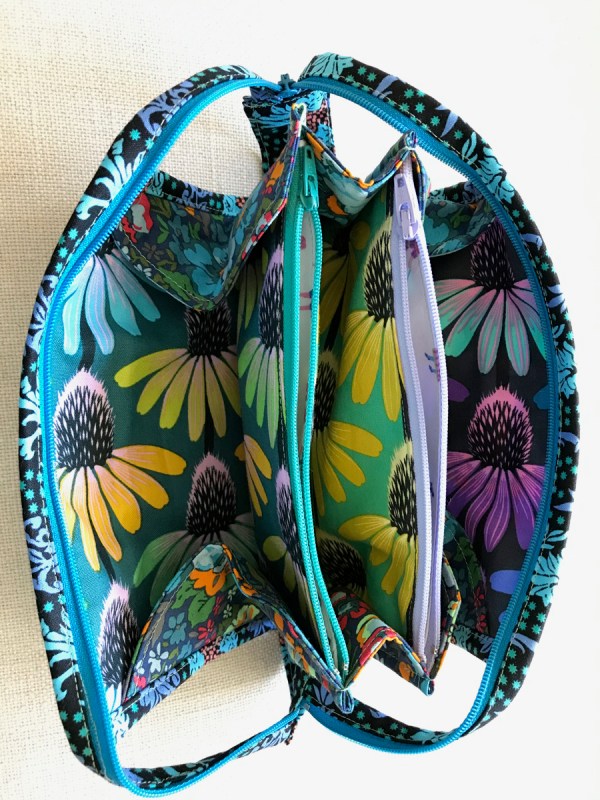
Here are some photos of the bag in process…and completed! For more information, refer to this post.

Mini Sew Together Bag_4 open
Mini Sew Together Bag_4e1

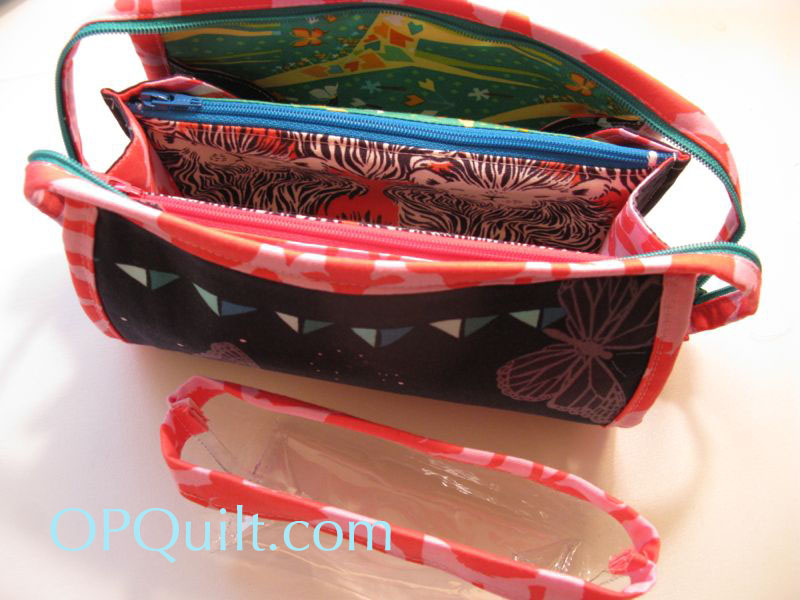
I was able to crank out four Minis in about a day and half; I think it went so quickly because I had already made a couple of the bigger bags. Before I wrote the new pattern, I had to refer to The Quilt Barn’s Tutorial when I became stuck. 

Now everything is included in the pattern.

Mini Sew Together Bag_4h zipper end
mini-sew-together-bag_tab-end1a

For the tab ends, I didn’t necessarily slide them all the way to the end of the zipper before I sewed them on (and by the way, refer to the pattern for an easier way to make them, rather than the tutorial).  Instead I played with the tab ends a bit, sliding them up and down the zipper, seeing how big of a “handle” I wanted.  Most of the time I placed the zipper about halfway into the tab end.

Mini Sew Together Bag_5

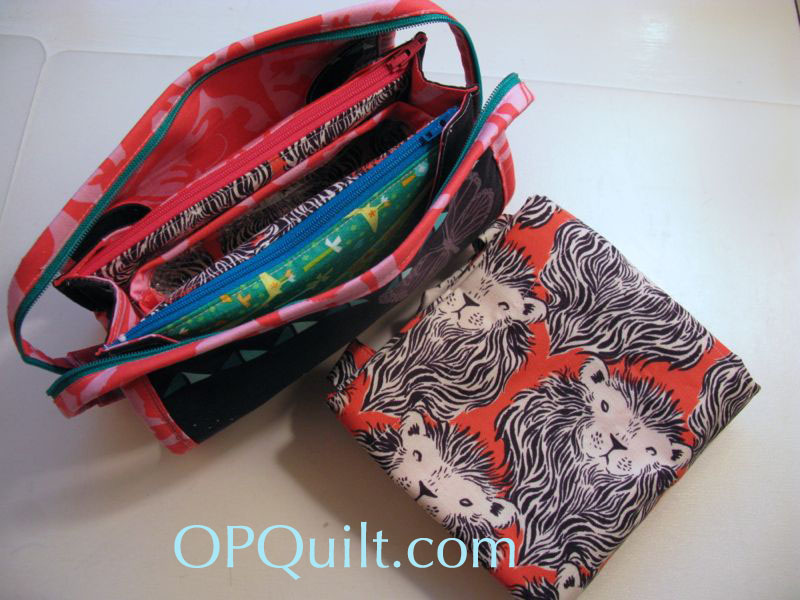
And that shiny thing in front?  For adjunct teachers who use white board markers, you know what a mess the eraser makes in your tote bags. The Community College administrators where I teach give us the white board markers free at the beginning of the school year, but we buy our own erasers. If you leave yours in the classroom, you can kiss it goodbye, so we carry the erasers (and markers) back and forth to class.

Mini Sew Together Bag_5a

To keep my sew together bag clean, I made a clear vinyl pouch, sewing a self-binding fabric strip around the top to hold my eraser.  The dimensions were 7″ by 6 1/2″ of clear vinyl; sew two folded strips along the 7″ sides, then with WST, sew the side seams.  Yes, I did a tiny “boxing in” of the bottom corner to accommodate the eraser. 

Mini Sew Together Bag_5b stuffed

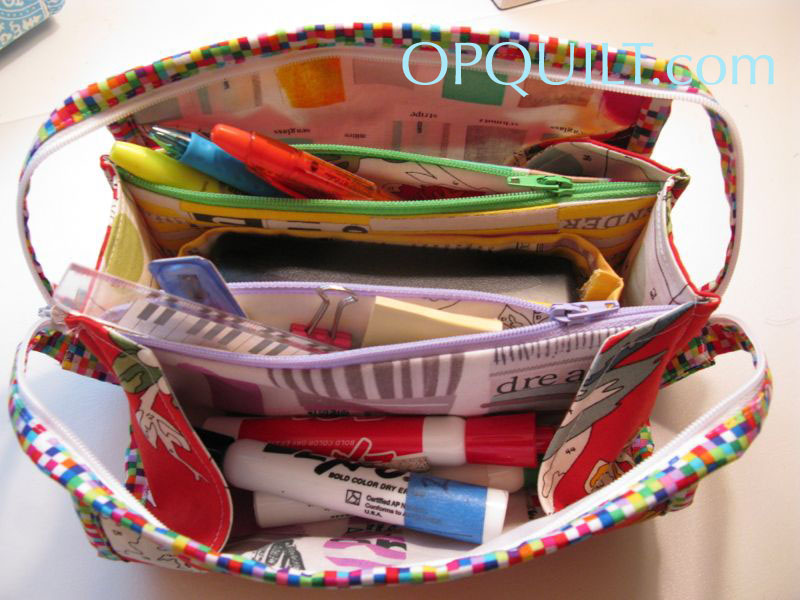
Mini Sew Together, fully loaded for school.  But this would also be great stacked with hexies, or other smaller hand-sewing projects.  Because the Mini is a smaller size, it will fit into…smaller places!

Mini Sew Together Bag_8

I also made a matching tote bag to go with this for a gift, as California will be phasing out our plastic grocery bags.  I used my Grocery Bag Tutorial, found *here.*  The usual request applies: don’t embed the pattern on your blog, refer your friends back to OPQuilt.com to download their own.  And if you Pin anything from this post, please use the correct post address. These little Minis are fun to make and fun to use, and sew up quickly for a cute and fun Christmas gift!

˚˚˚˚˚˚˚˚˚˚˚˚˚˚˚˚˚˚˚˚˚˚˚˚˚˚˚˚˚˚˚˚˚˚˚˚˚˚˚˚˚˚˚

Circles Block #6 duo

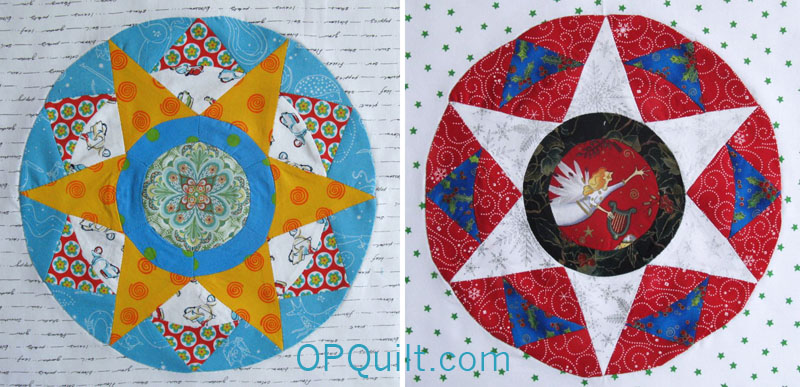
In case you are looking for the Circle EPP Quilt-A-Long, because I gave you two renditions of the block in November, we are taking a vacation in December.  Merry Christmas all you EPP-ers and we’ll see you in January.

˚˚˚˚˚˚˚˚˚˚˚˚˚˚˚˚˚˚˚˚˚˚˚˚˚˚˚˚˚˚˚˚˚˚˚˚˚˚˚˚˚

I get my zippers from ZipperStop in NYC.  There are other places to locate good quality, inexpensive zippers mentioned on other quilty blogs and in the comments (so check them out), but I can highly recommend Zipperstop, having placed several orders from them.  The zippers arrive quickly, and in the color range I like and I like the prices.

SaveSave

Quilts

Lora’s Quilt

Lora Quilt_frontTo Lora, with Love
Quilt #139

Pieced by Elizabeth Eastmond, Quilted by Lisa J (Lora’s niece and my friend)

Quilt for Lora_quilt top

This was the quilt top, and it measures 54″ tall and 43″ wide, before quilting and binding.

Lora quilt with bow

Lisa was headed up to Utah to see her Aunt Lora, so after she finished the quilting and binding…

Lora Quilt Label

. . . she sewed on the label I made, wrapped it up and took it over to Lora’s assisted living center to present it to her.  (More about Lora’s situation can be found *here.*)  Lisa and her two daughters arrived the same time as a lot of other cousins, so the room was full.  As soon as Lisa brought out the quilt, Lora began to weep.  Lisa read the label to her — more tears — and by the time they unfurled it and showed all the signatures, nearly everyone in the room was crying, too.

Lora receiving quilt

A few days later, after Lisa finished telling me the story, she gave me a big hug and thanked me for thinking up the idea of the quilt, but really, we thought of it together.  I’m really glad we did, as it obviously brought the message to Lora that we loved her and cared for her.  And we do.

AdcockLora

Lora

Quilts

Nice to See You, Christmas Quilts!

Christmas Quilts on Bed1

We have a tradition that nothing Christmas happens until after the Thanksgiving meal.  In the Old Days, when I had children at home, we’d sing Christmas carols that afternoon, a cluster of us at the piano.  Now, we turn on iTunes and listen to the songs while we do the dishes.  This is Christmas Star, #80 on my 100 Quilts List, in case you want to read more about it.

Christmas Quilts on Bed2

This morning I got out all the Christmas quilts that have been in the cupboard for a year.  It’s nice to see them again.  This is Star Mother’s Youngest Child, #108.

Christmas Quilts2Christmas Treat, #111.

Christmas Quilts1

This was about the first Christmas display quilt I made and I called it Christmas Wall Hanging.  It’s label-less, but is #15 on my 100-Quilts List, having been made twenty-two years ago.  I have made other Christmas quilts, but they’ve been passed on to others.

Wide Mouth Pouch1

I also found time to make a little pouch for a granddaughter, at her mother’s request.  It’s Noodle Head’s Wide Mouth Pouch, but I made it a little bit taller.

Wide Mouth Pouch2

Wide Mouth Pouch3I also added a tab at the zipper closure end so it’s easy to grab.  Her birthday is coming up this week, so I popped it in the mail the day before Thanksgiving.

Hope you enjoy getting reacquainted with your Christmas quilts, too!


Quilts

Home Stretch: an Illusion

final inner corner

I finished up the quilting on the inner white field (background to the petal part) and thought–“Good!  I’m in the home stretch!”  Au contraire, mon ami.

narrow inner border

The next morning I got up and marked the swoopy quilting on the narrow inner border.  Yes, I’m pathetic enough that I feel like I want to mark every stitch.  At this point I’m watching millions of hours of longarm videos, as well as domestic machine (DM) quilting videos and everyone makes it look soooo smooth when they quilt.  I am really trying, but marking also just in case.  I stitch this and as I round the final bend, I realize that my stitching is more fluid and even that in the first foot or two of where I started.  I stop, unpick that section and re-stitch it.

crochet hook trick

Migrating threads can be taken care of by inserting a teensy crochet hook in between stitches in a seam, and pulling the thread out the side.  I’m successful at this about 70% of the time.  When I try this, I vow to study the quilts at the quilt shows a little harder.  Do they have this problem?  Do they worry about it?  I go back to studying longarm photos, seeing how even their stitches are, if they have wobblies.  They do, just fewer.  Is it fair to compare?  Not really, but I do it anyway.

quilting Colorwheel Blossom

I like it best when I can just go and go and the thread whooshes through and the machine hums and the TED Radio Talks are on in the background, not making me concentrate on anything.  I hate it the most when the thread breaks, or the bobbin runs out, or I bobble too much and feel like I need to unpick it and restitch it.

Quilting outer border

I take this photo before I go to bed that night and think “I’m done.” “Not so,” a little voice says.  Something’s just not right.

overlaying paper for ideas

I put that photo up on Instagram (IG) hoping for some feedback and the answer came back: the density of the quilting doesn’t match the inner field.  I knew that.  I just didn’t WANT to know that.  I overlay some transparent paper on the quilt and sketch in what’s been quilted, then try out some more bits and pieces.  I like the simplicity of the grid the best.

marking quilt again

More marking.

quilting done outer border

A ton more sewing.

colorwheel blossom beauty shot

And I finish.

Road Acceptance 2015

Somewhere in here I found about the acceptance of my quilts in the juried show of Road to California.  I’m dancing around on the bed, jumping around the house in complete and utter happiness.  For the last few years I’ve not gotten any quilt in and then to get all three??  I’m over the moon.

removing blue marker2

A very helpful Leslie, a quilter on Instagram, coaches me through the next step of getting out the blue marks.  I find a video on YouTube where the quilter uses a sponge and a cotton swab to get out the marks.  I follow her instructions.

removing blue marker

I’d done a teensy bit of grid right in the middle to tie into the outer border.

different between marked and not marked

As I take off the marks, I can’t believe how different (and better) the quilting looks!  I’m smiling as I swab. And then. . . of course.  I see all the areas where I’d missed stitching–there is one to the right of the vine in the photo above.

Colorwheel Blossom Drying on Bed

I checked my other expert I turn to for help: Linda of Flourishing Palms, and both she and Leslie suggested laying it out and putting a fan on it to let it dry.  So I put down my two cardboard cutting boards for a stiff surface, layered it with towels, then smoothed it out to dry.  Next up is finding and fixing all those missed sections of the quilt, and then the age-old question: how to bind this?  One of my quilty friends suggested a faced binding, and I’m leaning that way, for sure.

I’m pretty pleased with my work thus far, as I see it laying on the bed in the other room.  And I’ve really benefitted from a lot of encouragement from all of you here on the blog and in Instragramland.  But as I said to a friend today, why is it that I see all the mistakes?  And do I need to unpick them and re-stitch them?  I had the same experience with my Lollypop Trees quilt–and my uber-observant husband also found all the wobblies on that quilt (I’ve asked him to not do that again–one of me is bad enough!).  Leanne suggested living with it for a while before deciding, and after a couple of months, I didn’t notice the problems.  As much.

I’ve complimented others on their quilts and in return I get a litany of all the mistakes and the problems.  I don’t want — as Benjamin Franklin said — to look for the worm in the apple of my eye, nor do I want to see those flaws that others point out in their own work.  (BTW, my father always said the correct response when someone compliments you is”Thank you.”) So what is it about human nature that only sees the flaws?  Do you do this too?

All that being said, from the vantage point of the above photo, and my forays into the next room to check on the drying, I’m enjoying this quilt.  And happy to be at this (almost) home stretch.