
It’s Four-in-Art Challenge Reveal day today, the penultimate challenge in 2017. We began this art mini-quilt group in November of 2012, and we are in our fifth year. Bette, Rachel and I have been with the group since the beginning, with additions and changes here and there. It’s been wonderful to have this to look forward to four times a year, a chance to stretch and try some new things, all contained in a mini-quilt (we are more flexible with the size now, but originally, it had to be contained in a 12″ square).

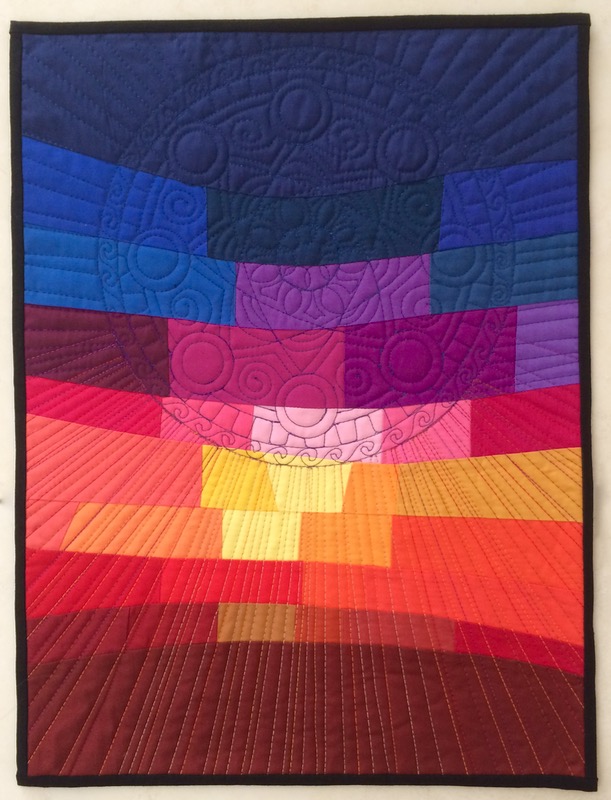
Rose Window
13 1/2″ wide by 18″ long
Quilt Number 185
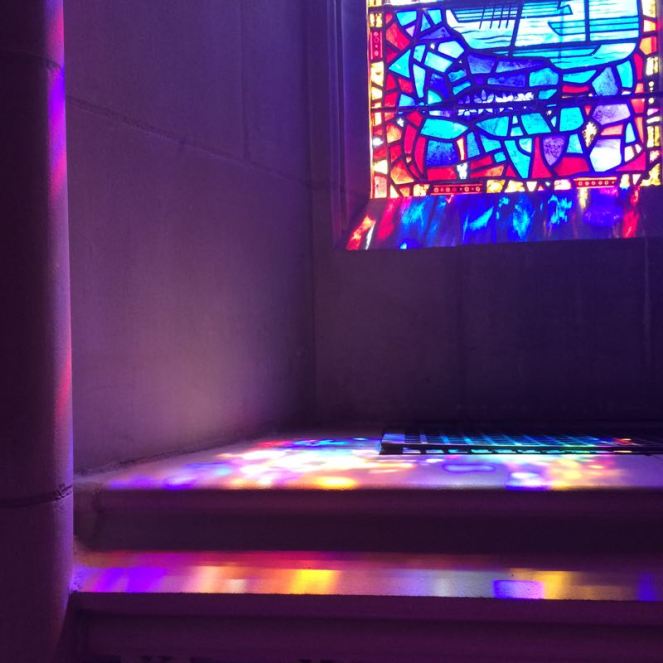
Since I chose the challenge of Stained Glass Shadows, obviously I’m in love with the highly saturated blocks of color left on the floors of cathedrals and churches when the sun shines through stained glass windows. I originally thought I’d try some figurative work, but the colors are what always catch my eye.


So I began with the warm tones, adding the layers of earth-colors as they moved toward the bottom, and celestial-colors as it moved upward.


I also knew that somewhere on this quilt there had to be a Rose Window, that enormous circular window high above entryway doors.


Then it was quilt the background, and I went with the idea of the rose window as the center, with thread-streams of color coming out from there: navy and deep colors from the top and the warmer yellow-orange-red tones as the sun filters downward through the stained glass. My solid fabrics are Paintbrush Studio Solids, and the thread is Magnifico by Superior Threads (with Bottom Line in the bobbin) with some So Fine here and there, as the color dictated.


Details of Rose Window quilting.

Back of quilt, with standard label, and added corners for easy hanging.
Please visit the others in our Four-in-Art group, and see how they interpreted the Challenge of Stained Glass Shadows:
Betty Blogpost on Four-in-Art
Camilla http://faffling.blogspot.co.nz/
Catherine http://www.knottedcotton.com
Janine http://www.rainbowhare.com
Nancy http://www.patchworkbreeze.blogspot.com
Rachel http://www.rachel-thelifeofriley.blogspot.com
Simone http://quiltalicious.blogspot.com
All of our blocks are on our blog, Four-in-Art.
Our next challenge is Illumination, and will post on November 1st.


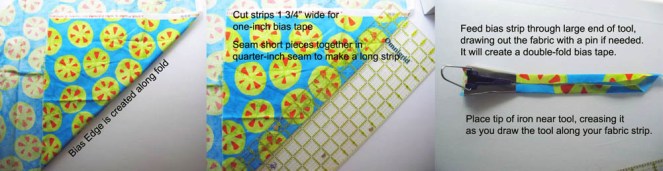 I followed the instructions, as before (old picture, above), but if you need a more detailed refresher on how to make bias tape, head here, to the


 I’ve totally revamped Rosette #8, because frankly, everyone on the Facebook page was having real troubles with it, so I thought I would have a go at creating my own hexie arrangement. I’m choosing fabrics for it now.

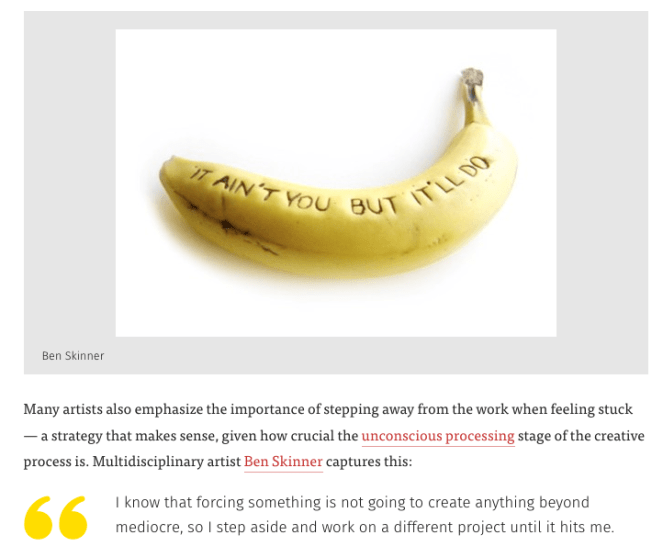
 And in case you think you only need fabric to create quilt patters, Sabrina Gschwandertner acquired a collection of old instructional films on the textile arts and has been creating quilt works of art. I will spare you the mumbo-jumbo about quilting from the LA Times, but


 The block of granite which was an obstacle in the pathway of the weak becomes a stepping stone in the pathway of the strong. –Thomas Carlyle

