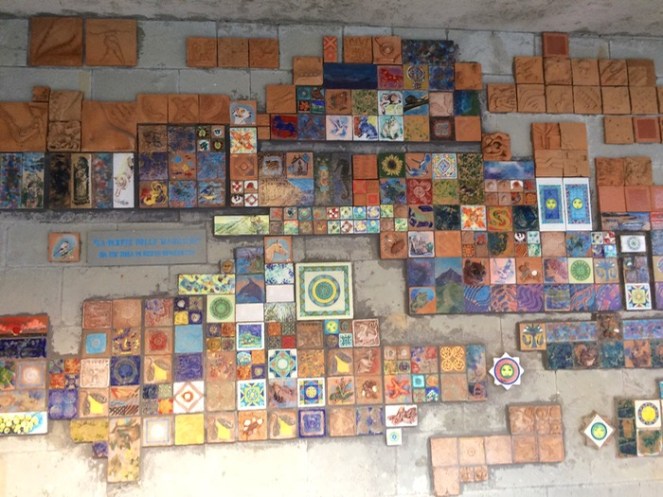
The kind folk at Paintbrush Studios asked me (some time ago) to give a demo at QuiltCon 2018. I set to wondering what I could teach in a short amount of time (20-30 minutes) that would be interesting. Shortly after they asked me, I visited Cinque Terra, Italy, and stood on a plaza in Riomaggiore, overlooking the sea (above).
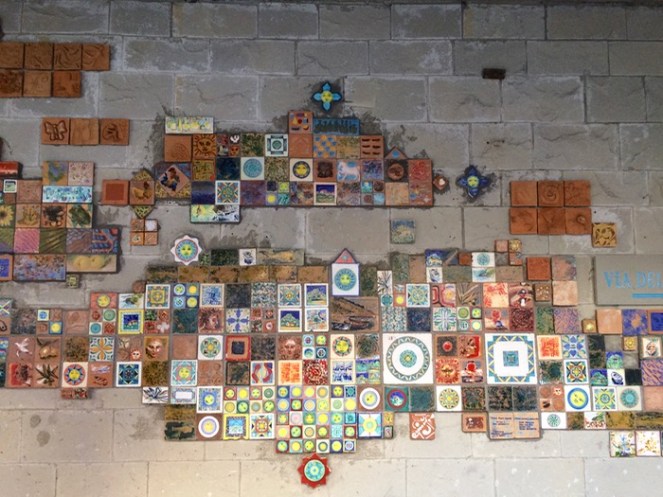
We walked down the steps, and underneath the plaza was a passageway, the walls decorated with these tiles in all sizes. It was on the way to Via dell’amore (the Walk of Love).
When I returned home and started looking at my photos, I thought about all those mini charm packs we pick up everywhere, and how they could become something along the lines of this impromptu artwork in Riomaggiore.
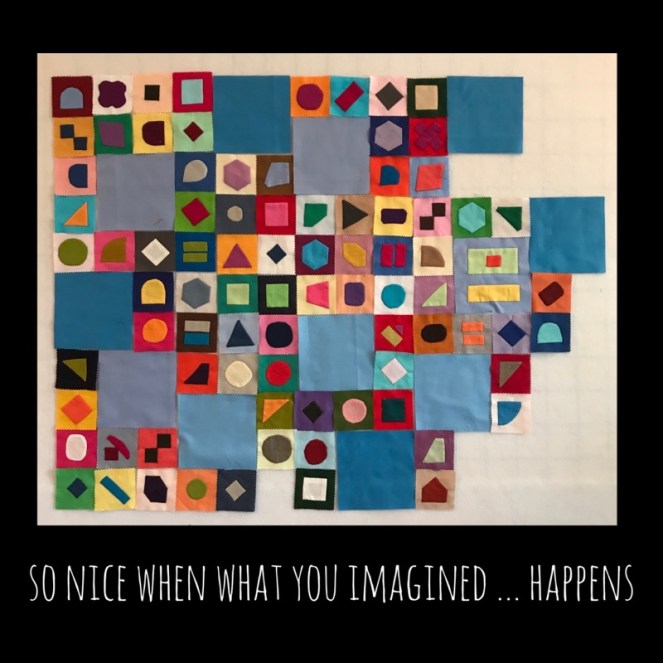
So I got out my mini-charm pack from Paintbrush Studio Solids and started pairing up the colors, trying to make the duo sing together–have a little friction together–trying to get pairs that would play against each other.
I found a worksheet online that had a whole bunch of oddball shapes, and I began trying some.
I sent away for more mini-charm packs. Once I got started, I kept wanting to make more.
And more.
I carried around a little baggie of paired squares, and did them while watching TV, getting my hair colored and while in Urgent Care one bad flu season.
I loved watching my collection grow. I would do one shape for a while, then another. I used up bits and pieces of squares. I even tried some paper-piece-wrapped hexagons; I ended up not liking them so much because the charm of these squares was in their wobbliness, their wonkiness.
And then one day, I put them up on the wall with other, larger, squares–just like the Walk of Love passageway in Italy. And wouldn’t you know it–it was really looking fun.
I wasn’t finished, but what I hoped would happen, did. I took this photo and put it up on Instagram, using the SnapSeed app to expand the edges and add the text.
Next post: the finish and the details about my demos at QuiltCon.
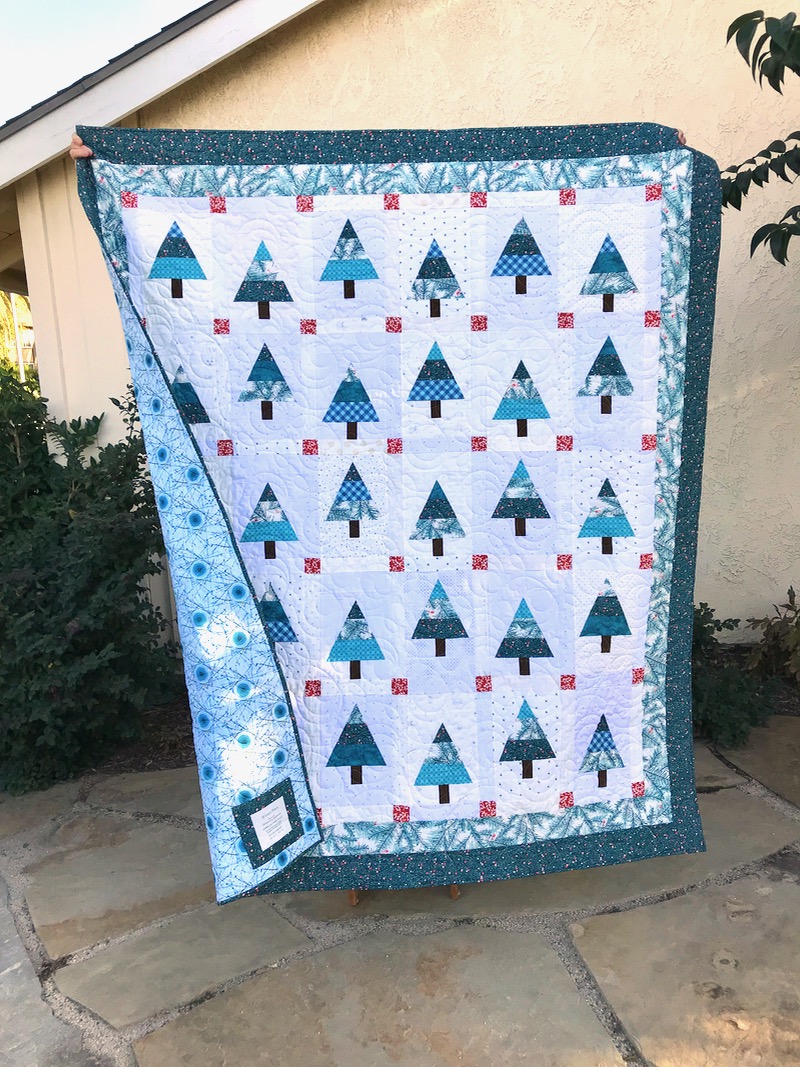
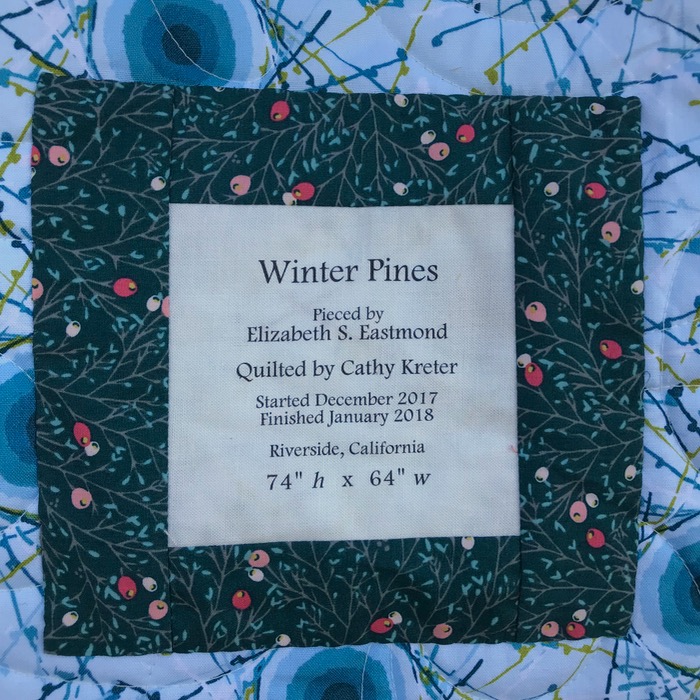
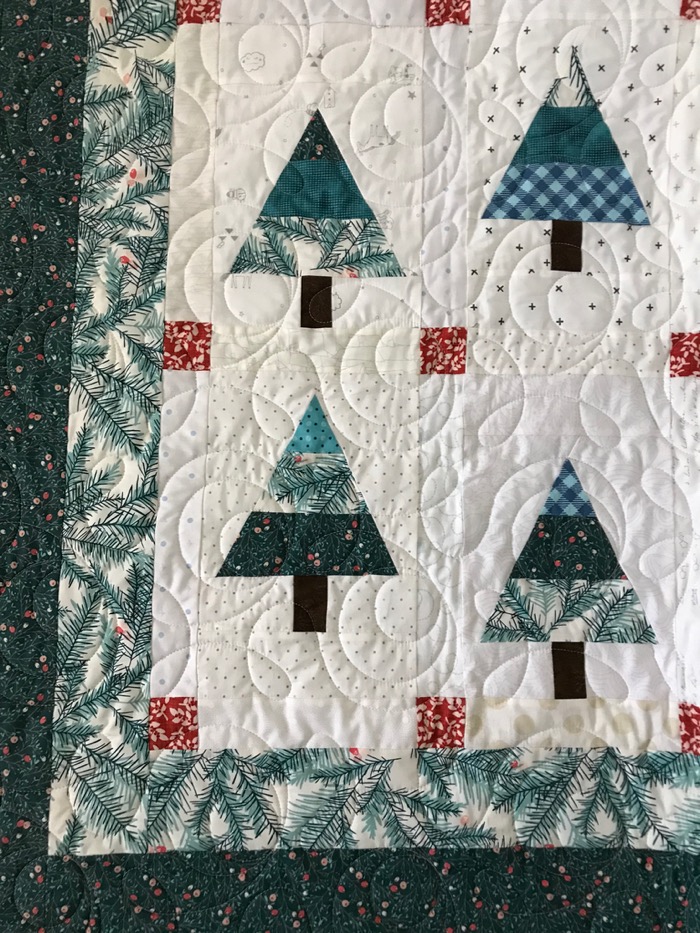
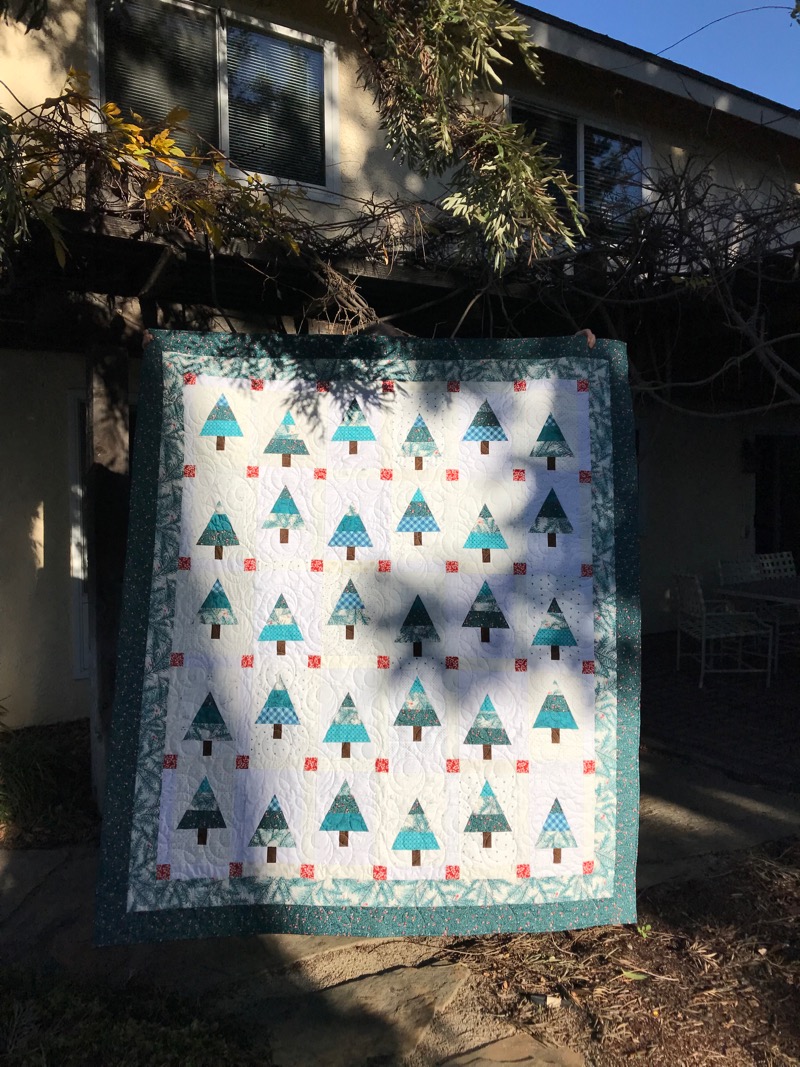
The backing is an oldie from the stash; I deliberated whether or not to use it as I was “saving it for just the right quilt” but am so glad I decided to use it. I love it with the wintery theme of this quilt — just the right colors.
My quilter did a great job, using one of my favorite edge-to-edge patterns: a swirling loop-de-loop.
I’m sewing the binding on another quilt that I’ve kept under wraps for nearly six months. It will hang in a booth at QuiltCon, so the time is getting closer to showing you all, but first I have to make the label and get that sewn on. Soon, very soon.
We’re back for another episode of Make Those Frivols! 2018
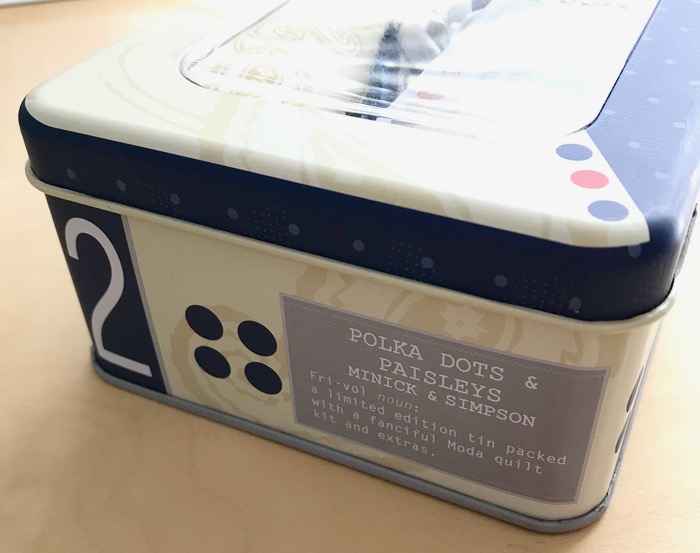
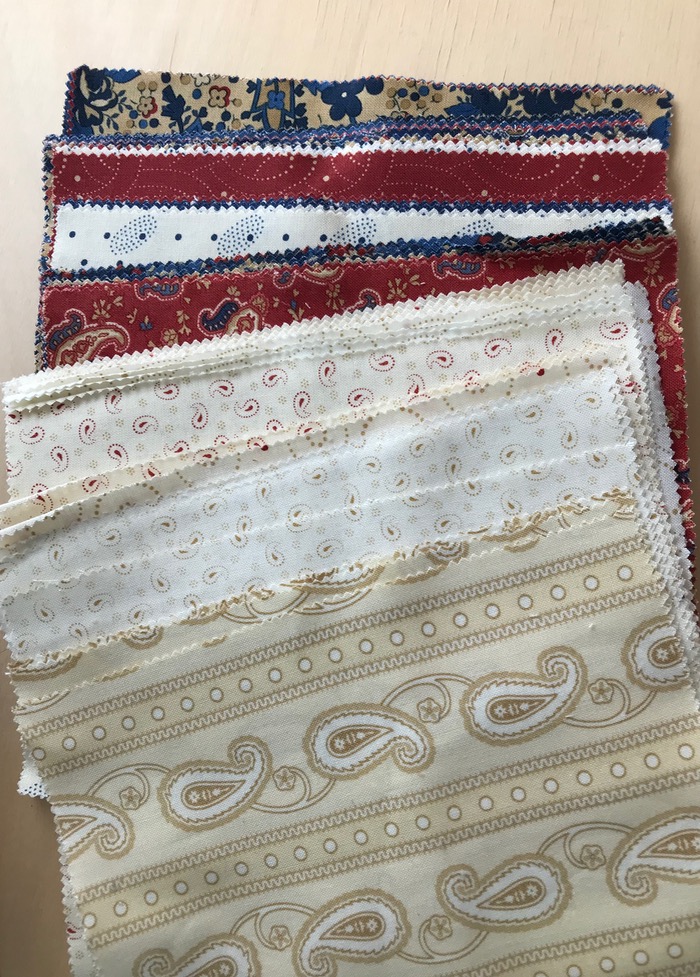
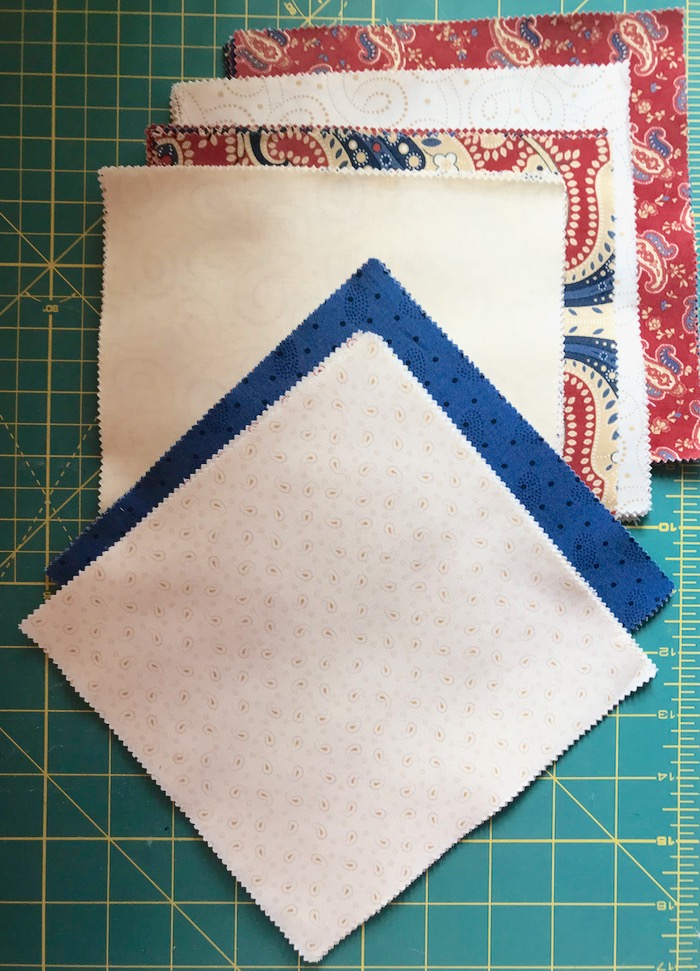
Today I’m working on Frivols Tin #2, with a line of fabrics from Moda’s Minick and Simpson.
Of course the cute little giveaway in this tin, a personalized label, was caught in a blurry photo, so the above photo came from Moda’s blog. The fabrics are traditional, but with a grouping of 7″ squares, they’ve crafted an interesting little quilt, which finishes at approximately 26″ square.
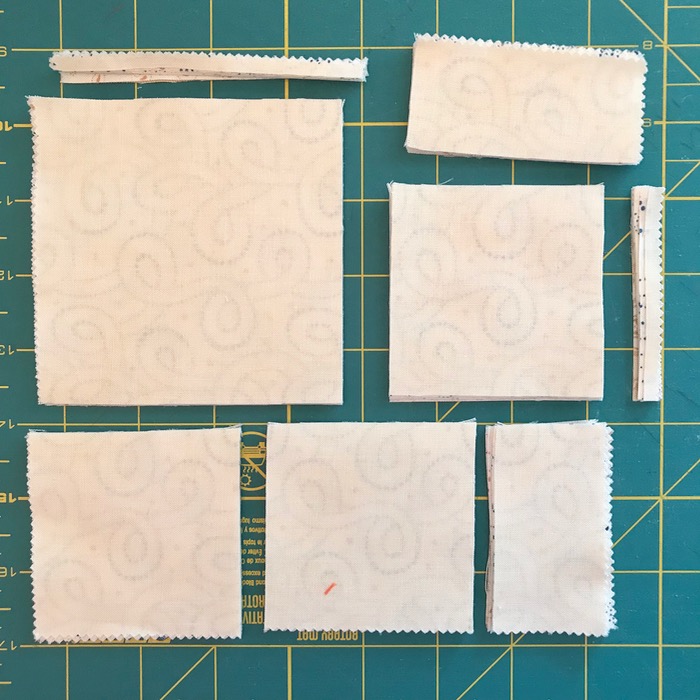
I pressed all the fabrics flat, as they had a nice little curve in them from being stored in the tin for a while. I checked and re-checked but there were no Errata posts on this tin, so I just started cutting them out.
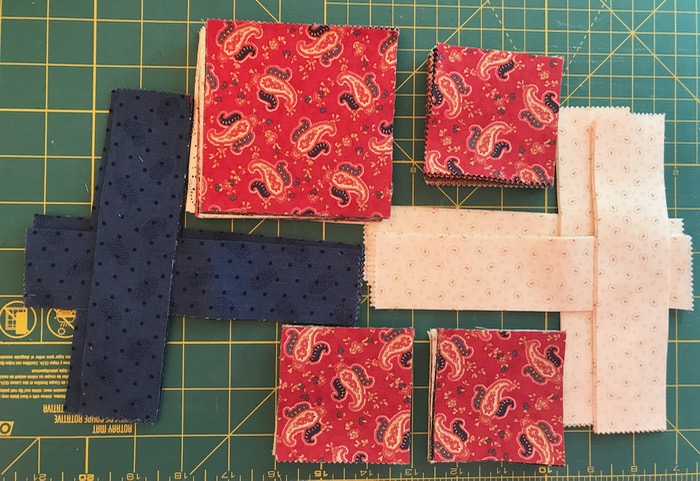
But here is your caution: The strips, above, are the dark borders and the light borders. THE DARK BORDER IS SUPPOSED TO BE WIDER. Okay, there’s my oops. I liked the look of the wider border, so after piecing as instructed (see below), I sewed another coordinating strip onto the blue to bring it wider. I didn’t have any of this fabric, but did have some navy “primitive” fabric, and it worked okay.
I did not pencil in all the center lines when sewing the half-square triangles, like they asked. I put a strip of masking tape extending out from the needle stitching line, and used that to line up for sewing. My needle position is set 1/4″ to the right, so I have to pay attention to where I line up my point so I stitch on either side of that imaginary center line.
The cream-coloredborder strips are stitched end to end, but the blue is stitched with a diagonal seam. After I sewed, I trimmed.
I pressed all the half-square triangles to the dark, but didn’t have time to start trueing them up. Getting this far gives me a good start on my February goal.
You can see the extra strip I stitched on the blue border here (the darker fabric on the left). I didn’t worry about the width of the border, figuring I would trim it when I got back to the sewing. I tell you all this as a cautionary note: pay attention to, circle, highlight, make notes to make sure you follow the cutting directions. However, since this is just a fun little quilt in a fun little tin, you can adopt a happy attitude, even in the face of cutting mistakes. Just sew another strip on and go, because I’ve paid off all the Quilt Police so no one will ever find out if yours is different than the directions.
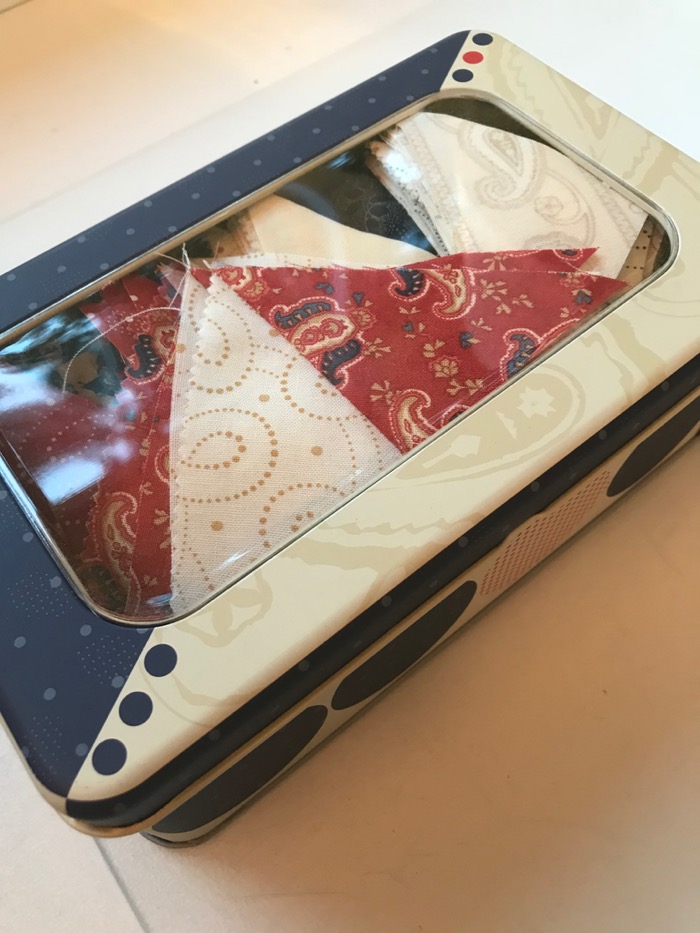
I have a tailor-made little tin to store it in while I’m away from this task — another benefit of those Frivols tins. See you at the end of the month, when I report in again on my little quilt.
I belong to an online bee called the Gridsters, and February is my month to choose a block that my beemates make for me. You can find all our work on Instagram, using the hashtag #gridsterbee.
I chose a basket block.
I also have been saving food-themed fabrics forever for a basket block quilt with the baskets full of food beginning at least a couple of decades ago, and continuing as I picked up a food fabric here and there.
I was also inspired to make basket blocks by Barb, of Fun With Barb and Kelly of Pinkadot who decided to do it together; their tutorials are on each of the links, above. I upsized the basket block to 10 inches in size, so the making would go faster. (You’d think with all the quilts in this house, I would have enough twin-sized, but I don’t, so I’ve already decided that’s the size it will be.)
If you want to join in with me, or Barb and Kelly, in making baskets, I’d suggest we follow their request to tag our Instagram photos with #basketswu [Baskets Sew With Us]. (Gridsters please tag them also with #gridsterbee.)
For the Gridster Bee
I’ve sent you some food fabrics; please use those for the A section of your blocks. I don’t care what you use for the basket–it can match, it can contrast, it can coordinate, it can clash–choose what you think creates the look you want. You can use small scale prints, large prints, florals, novelties, checks, whatever.
For the low-volume background, use these types of fabrics:
They are a range of creamy-toned fabrics, without strong secondary designs.
Avoid these types:
Solid in creams is okay, but avoid white, grey, tan, beige, white-on-white (I really don’t like beige for this quilt, but understand the limitations of our stashes–just do your best). Many of the above fabrics have strong motifs and patterns, so reject those too. Basically, I want the background to recede without being dull or same-same.
Basket Tutorial
Not to size, for reference only–please use the PDF link below.
Here’s my cutting sheet for this tutorial, in PDF form, but the usual requests apply here–don’t print off a million copies for your mother and your friends, but please send them here to get their own: Basket Block 10 inch_OPQuilt
All my basket pieces laid out.
First, make the Half Square Triangles.
[Background: One method is from Alyce, and she has a nice chart if you want to figure out your own eight-way Half-square Triangles. However, I also have a different chart on this post which came from Jeni Baker, who encourages the use of a bigger initial square. That means for us (and especially if you like to trim your HSTs) you would begin with a 6″ block, which is what I’ve specified on the cutting chart. BTW, her book on triangles is a good one to have in your library. ]
Place one 6″ background square and one 6″ basket square right sides together. Mark two diagonal lines, and sew 1/4″ on either side of the marked lines. On the left is the pieces with the sewn diagonals. Press it flat to settle down the wrinkles, which you see on the right.
I moved mine apart to demo this; leave yours close together.
Cut on marked lines. Now without moving your squares, cut on mid-lines, crossing the centers, as shown below. Press, with seam allowance to the dark side, trimming out dark fabric, if necessary, so it doesn’t show through. Trim to 2-1/2″ inches square.
Make center half-square triangle (piece A-1): Place a food fabric (measuring 6-7/8″ square) onto a basket square (same size), drawing a diagonal line, then stitching on either side of that line. Press, then cut on marked line, then press towards the basket. You’ll have an extra center to toss into your Random Patches Box. (You do have one of those, don’t you?)
Press seam allowance ALWAYS towards basket, to give that dimensional look that something is IN the basket. Now trim that center to 6-1/2″.
Here are all the pieces, laid out. I chose a stripe to demo, so you can see the direction the stripes go. If you use the eight-at-a-time half-square triangle method, you’ll have no problem getting the stripes in the small half-square triangles go the direction you want. Yes, I did cut the 6-7/8″ square (basket) on the bias, so I could have the stripes go across the unit.
I made two blocks at once; one had a light center, and one had a dark center.
Stitch together the three small half-square triangle pieces; press in the direction they want to go, which is usually toward the flat triangle piece.
Stitch one 2-1/2″ block onto one unit (shown in upper left corner). It helps to arrange your square as you go, so you get everything all sorted out right.
Sew the first three-unit “basket handle” to the center HST, as shown on the left. Press seams away from basket, even though they don’t want to go there, again to preserve the illusion that something is in your basket.
Sew the second three-unit “handle” with the C square to the center unit, as shown. I pressed the square C-block toward the three-triangle unit so that the seams would nest neatly when I arrived at this step.
Create basket stand by sewing one of your small HST to the D-rectangle. Pay attention to which direction the triangles are going. Stitch this first unit onto the basket.
Repeat with second HST and D-rectangle. Sew ONE of the C (2-1/2″ squares) to ONE of the basket stand units. Stitch this onto the existing basket.
And you are done!
There are lots of fun ways I can finish this basket quilt:
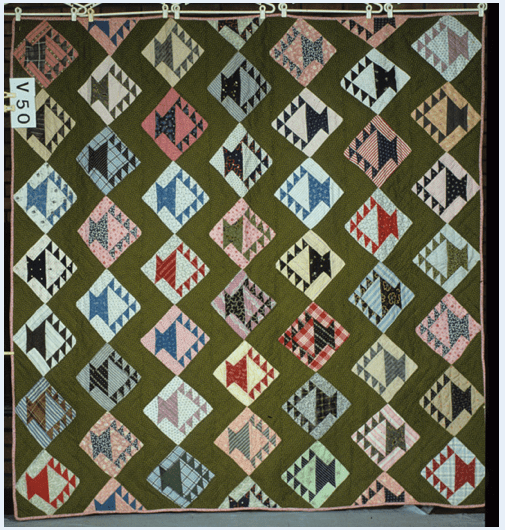
I like this setting, with all those energetic chevrons in between the baskets.
Looks like red is a pretty popular color for setting these blocks. I have more basket ideas on my Pinterest site, if you want to see more block settings. (I’ve been collecting these ideas for ages.)
Thanks to the Gridsters for making me baskets this month, and I hope you all have fun making a few for yourselves.