Creating · Tutorial

Portuguese Tile Quilt

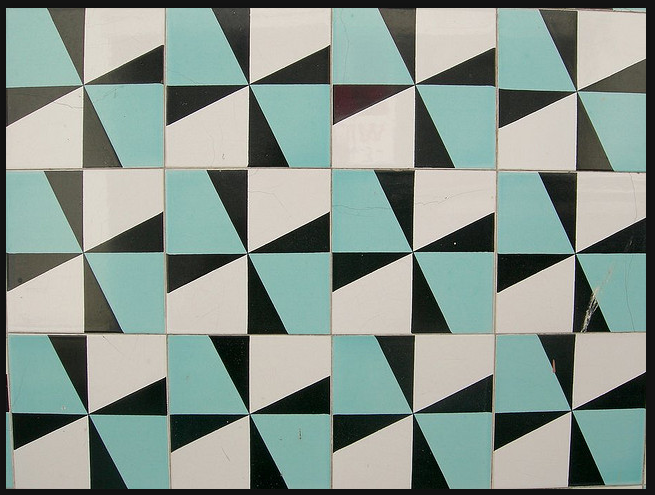
I started with this picture of some tiles from Portugal.

Then I mocked up a quilt in my Quilt-Pro 5 program.  I mapped it out with 8″ squares, set 6 across in 6 rows, with a 4″ border, yielding a 56″ square quilt.
I’m using the Madrona Road fabric, as I’m always wading into my outdated stash to try a new quilt, and wanted to take this new line for a test drive.  Because of the barn and the truck, I thought back to my days of Amish quilting and went with black for that windmill blade, just like the tile in Portugal, shown above.  Besides every quilt needs some contrast and this line reads to me, for the most part, as in the middle-intensity value range, a favorite of mine and nearly every other quilter.  (I have to work to get the darks and the lights into my stash.)

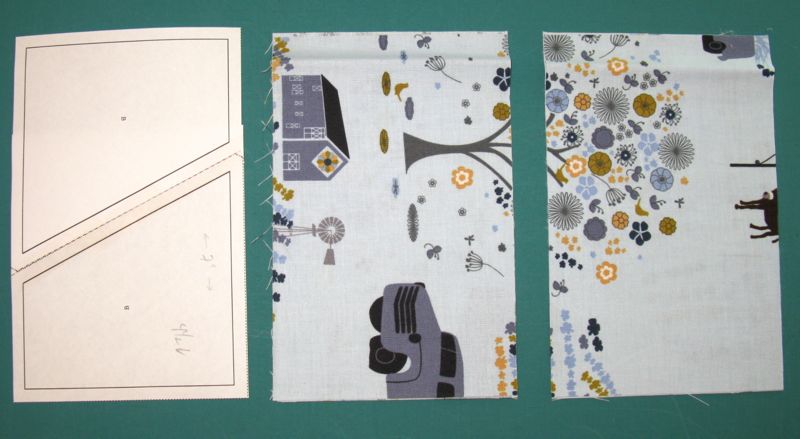
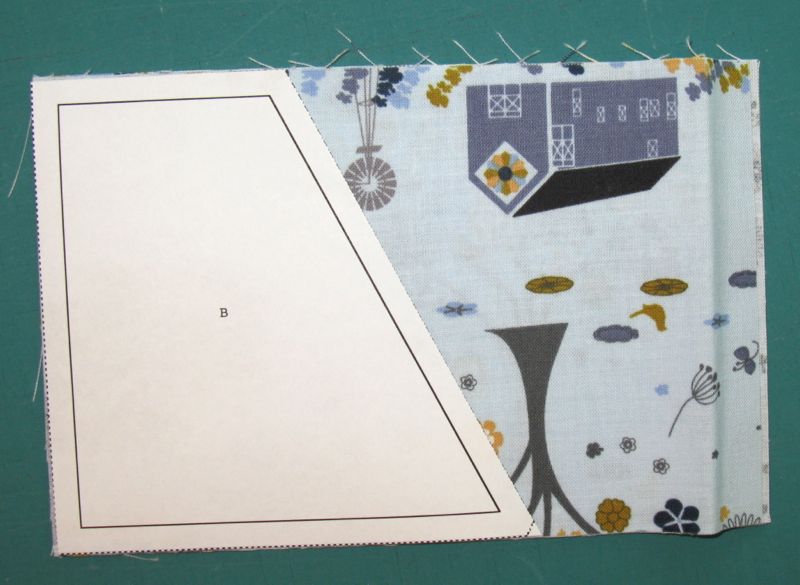
To cut out the large pieces, I laid out my fabric RIGHT SIDES UP, and cut a rectangle that was 7″ by 4 1/2″, then lay the template on the rectangle (see picture below), and sliced it into two. Here’s the template: PortugueseTileWindmilltemplateSM.

Print it out so you’ll have the pieces to use as a guide for cutting.  (Okay, full disclosure.  I at first didn’t lay the fabric RIGHT SIDE UP, and have quite a few pieces that are backwards, ensuring that I’ll be making this again. So try not to screw up like I did.)
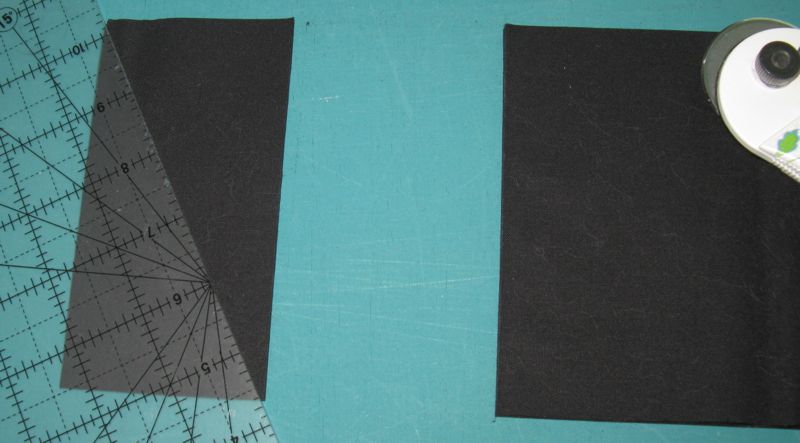
I could have either cut all the black pieces according to a template, or figured out a way to make it easier.  I went with the second.  Cut a rectangle 5 3/8″ by 2 3/4″ and then slice it from corner-to-corner, diagonally.  You will have dog ears you’ll have to cut off, if that’s a consideration for you.

Cut 72 pieces of the blue line, 72 pieces of the pink/orange fabrics and 144 black triangles (that’s 72 rectangles, cut in two).

Lay a triangle across the larger piece.  To get it lined up, put the black on top, with the left point sticking 1/4″ out over the edge.  Don’t worry about that right-hand side longer point.  Stitch.  Press towards the black.

Now lop off those points, by truing this block up to 4 1/2″ square (see below).
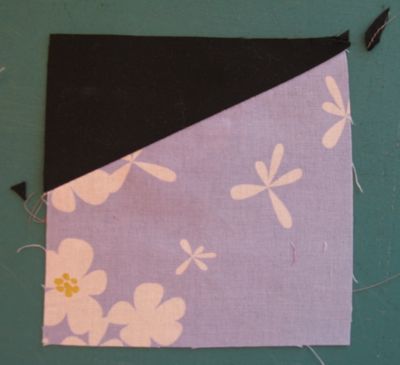
I’ve laid them out on my  pin wall.  I don’t have enough of them to do the REAL work of laying them out, because I’m headed downstairs to make some corn-shrimp-coconut soup for dinner, but I’m thinking I do want to mix up the different types of fabric within the pink/orange group and the blue group.

Thanks for you nice atta’ boy comments yesterday.  I took to catch up on the speeches from the Democratic Convention (remember, I’d assigned the watching of these to my students, so feel like I need to keep up), and cut and sewed my cloth.  It’s amazing the difference a day makes.  I liked what Betty said, that this exhaustion must be in the zeitgeist or something.  But after a break of a day, I may even feel like grading, knowing I have this little project to come back to throughout the day.

100 Quilts · Quilts · Tutorial

Village Houses: Joybells Ring in Heaven’s Street

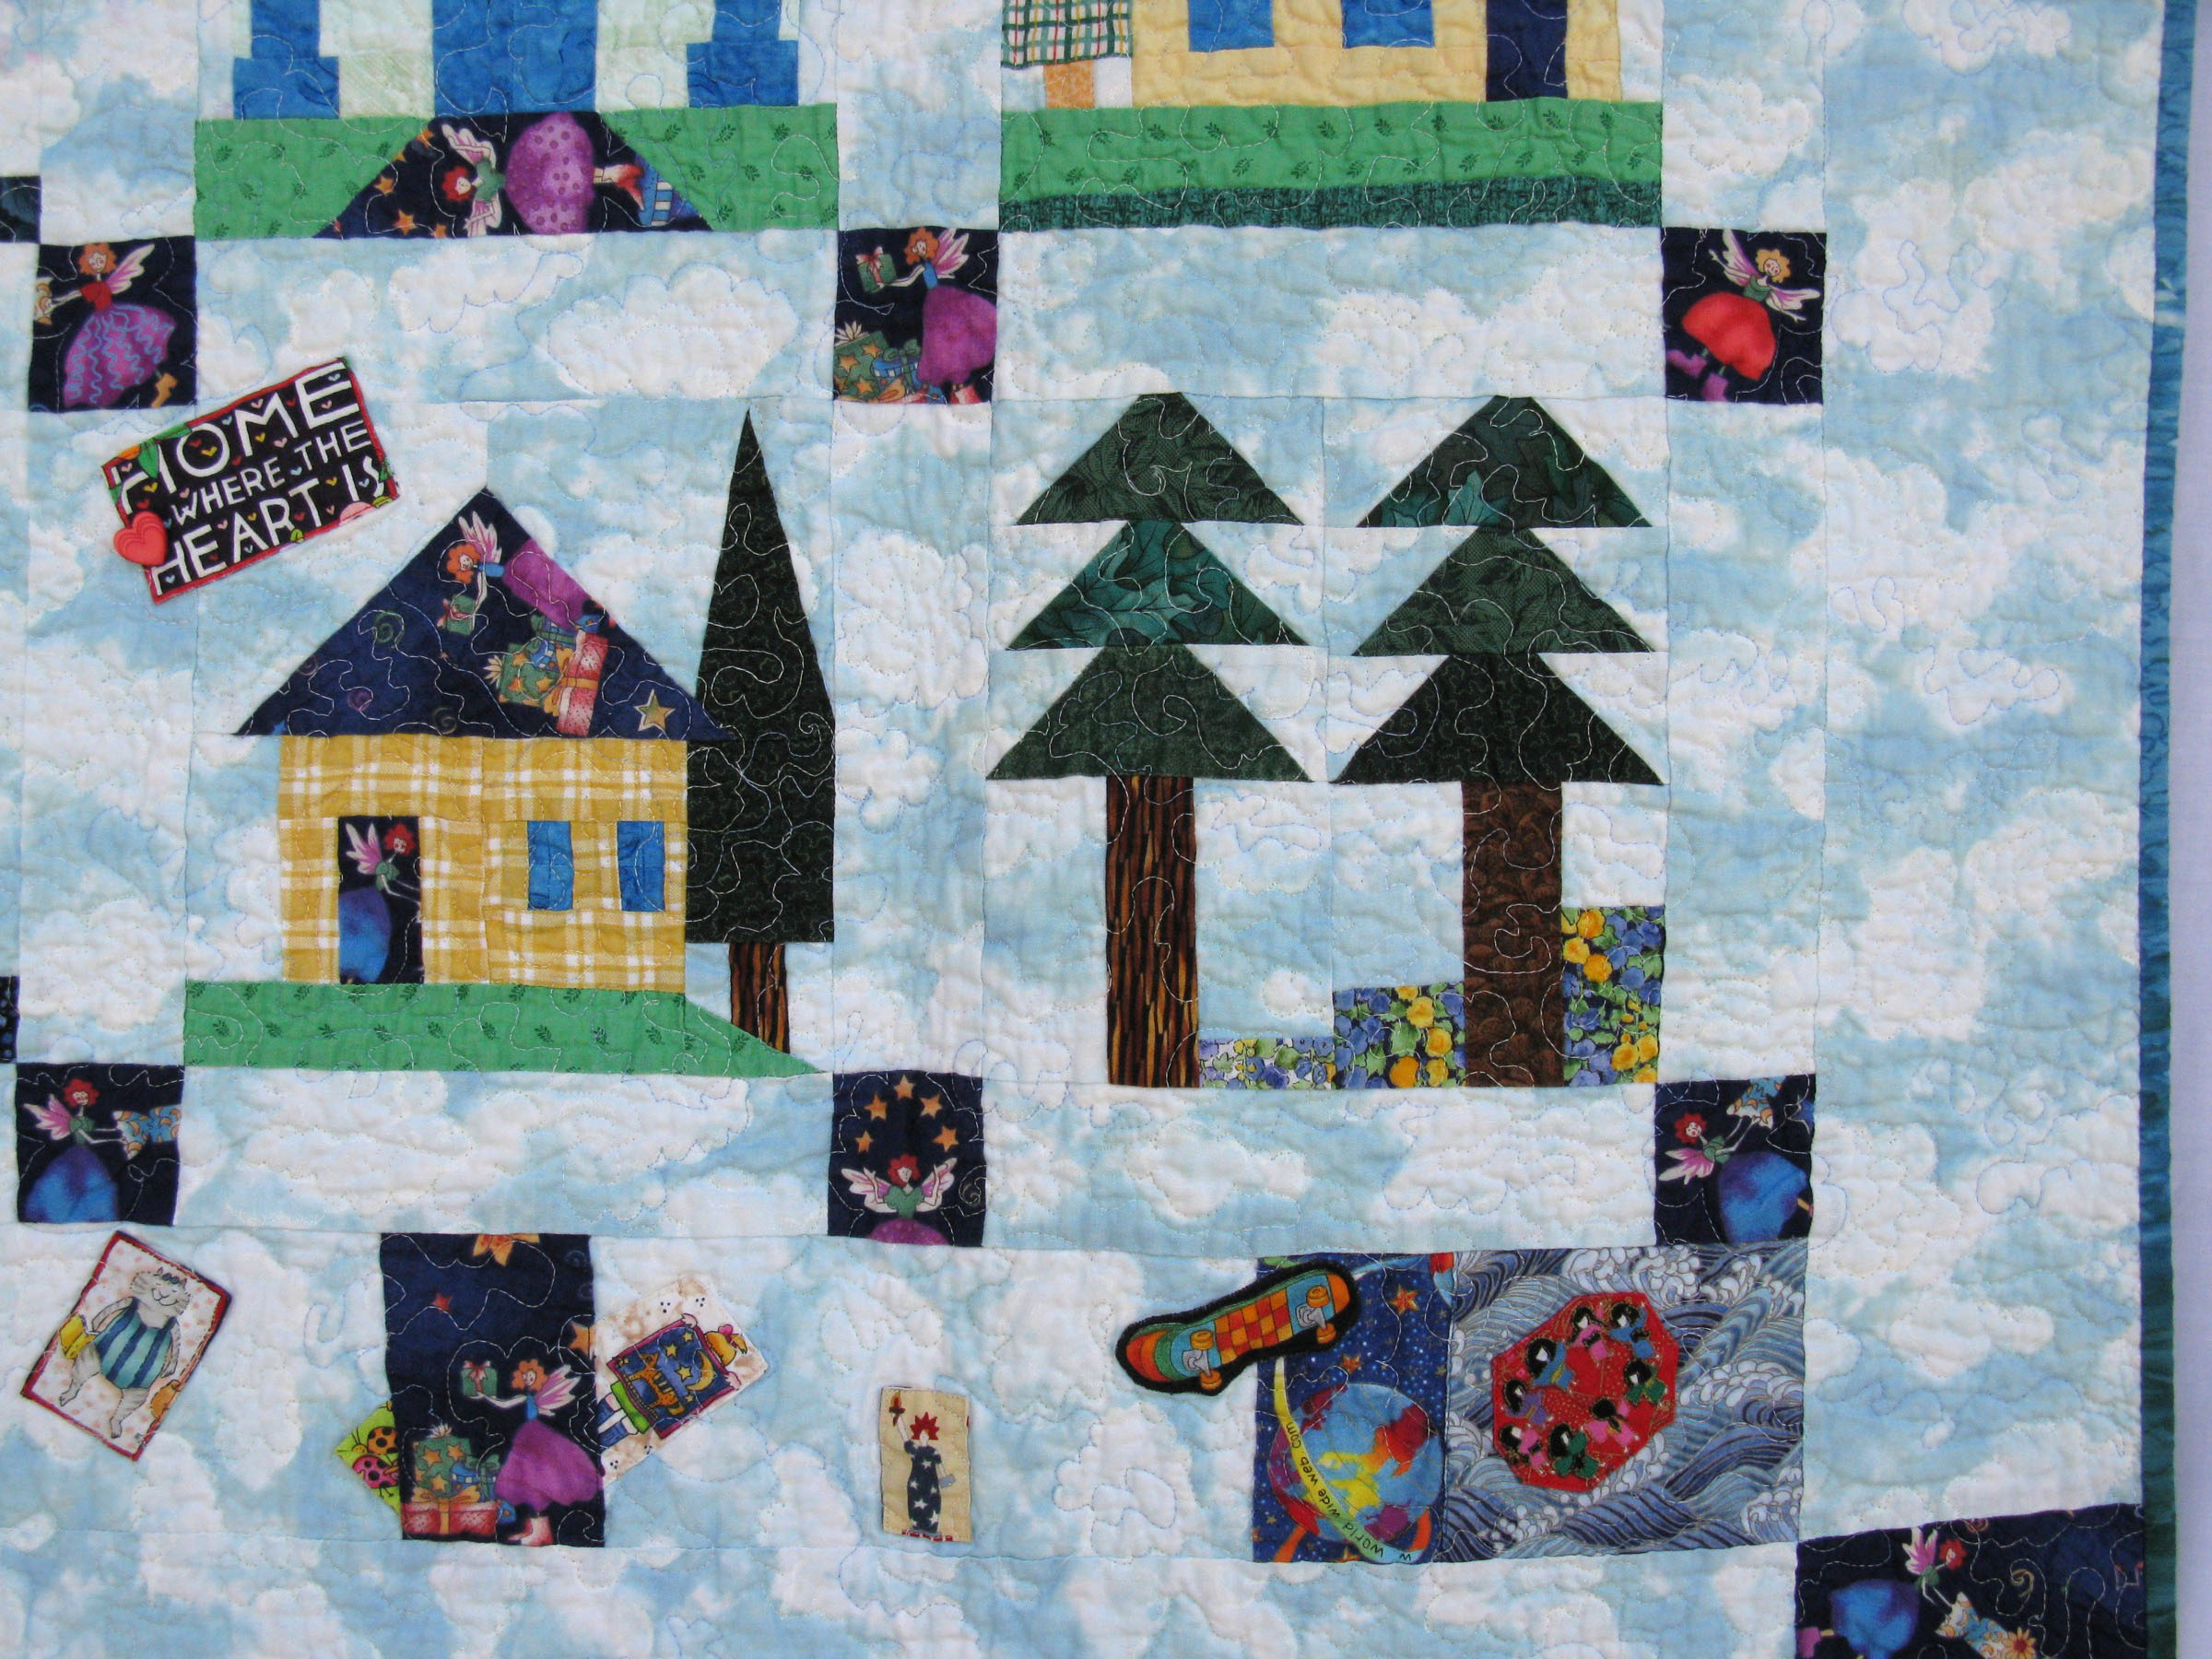
When I was at our sewing group, Lisa brought out her “house” quilt, the earliest group quilt that we’d attempted together.  You saw hers.  Here’s mine:

Quilt #28

We had the common fabrics to use of the fairy print (on navy) and the pink striped (shown in some of the houses).

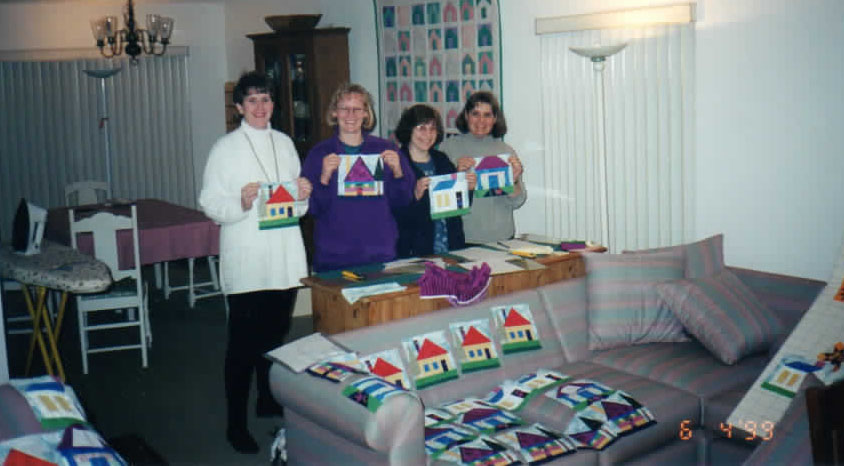
And here we are: Tracy, Lisa, Susan (who has moved away) and me, all holding up our quilt squares.  I love how they are all laid around the sofa everywhere.  And I love seeing that houses quilt in the background (#14 on my 100 quilts list, made 10 years earlier in 1988).

Detail.  I wanted it to have bits and pieces of a neighborhood so I included those things in each deep border above and below the houses.  I guess at the time it had significance, as I notice some World Wide Web fabric there (the earth globe above).  The internet was just getting popular then — seems like a millenium ago.

This one’s my house.  I guess my fairy was tired and lay down on the front walkway.

I entered into Road to California in 2000; here’s what I wrote on the entry form:

As I was designing all the houses, I tried to include a wide variety of styles, to illustrate the diversity of a street in Heaven, a celestial neighborhood that would be knit together in love and faith. In the upper and lower borders, I placed activities that the people in the houses might do: getting together with friends, outdoor activities, celebrating holidays, and of course, quilting.  The name of this quilt comes from an old saying that explains that when a child is given a home, “Joy-bells ring in Heaven’s street.”

You know those things you buy at quilt shows, like the panel above.  Whenever are you going to use them, if not for backs?

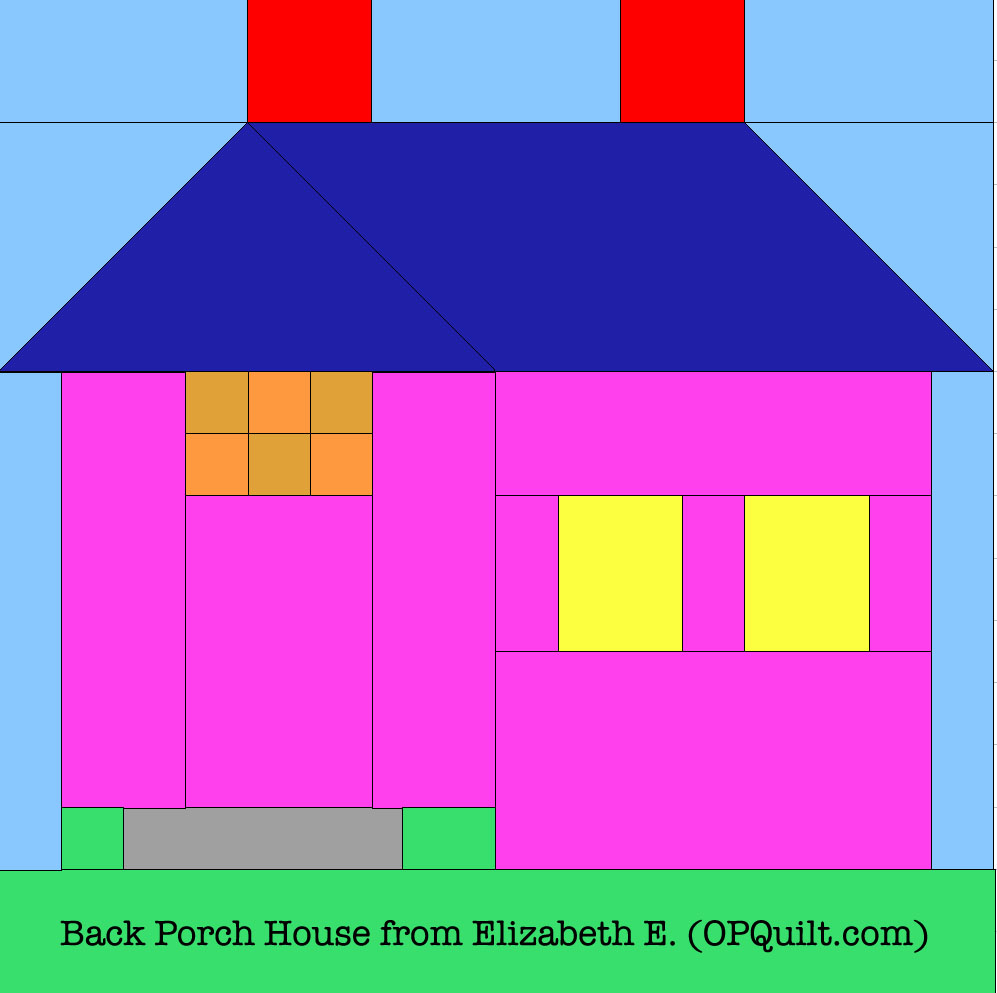
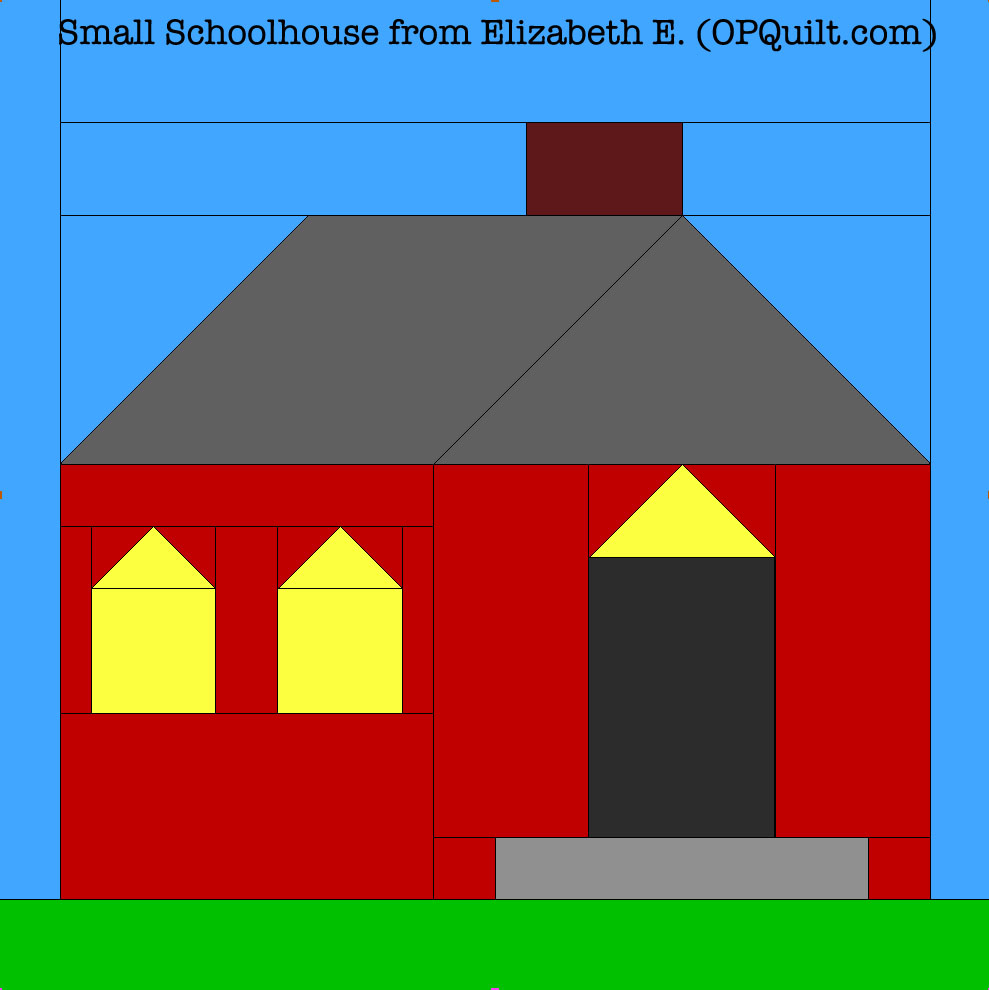
Okay, here’s a few of the houses.  The links underneath each illustration are templates for each house.  They are PDF download files, but I’d ask you to remember that since I was a novice at this software at that time, they aren’t perfect.  Some have a lot of pieces, others are more streamlined.  A mix is best, if you’re making a village.

1930s Prairie House ESE

BackPorchHouseESE

HouseintheVillageESE

RiversideAveHouseESE

SmallSchoolhouseESE

StLouisHouseESE

Classes · Tutorial

June Flowers/Tulip Tutorial

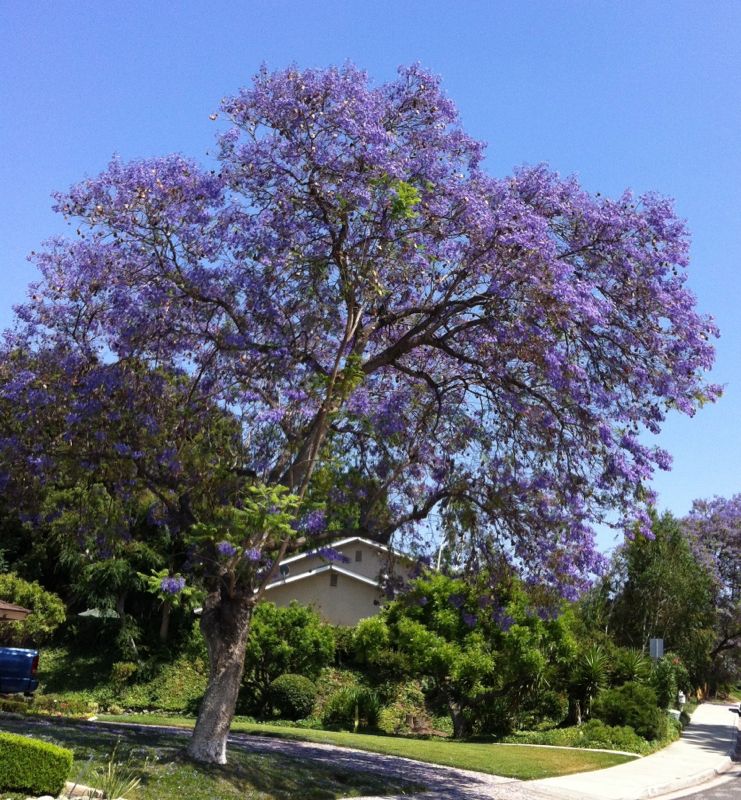
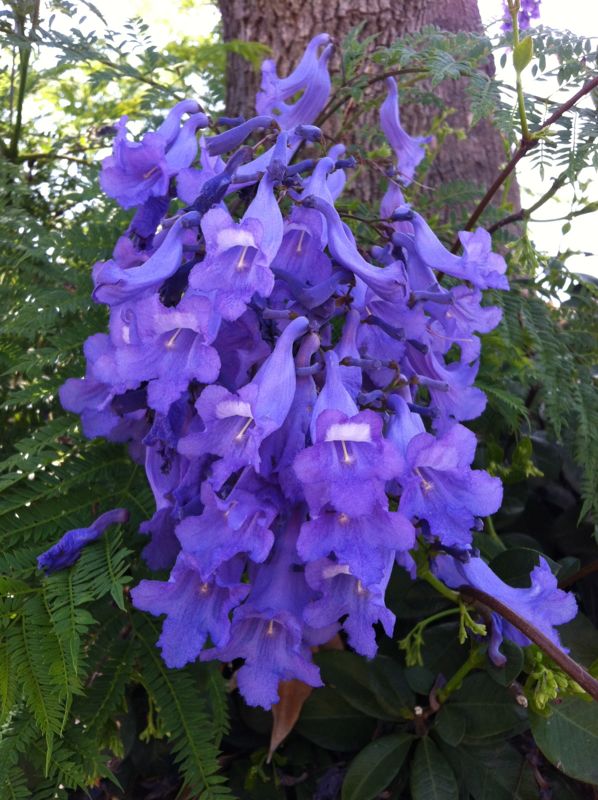
Every June the jacaranda trees put on their bluey-purple-periwinkle display of flowers, and we all wander around wondering how we got to be lucky.

And like clockwork, every June they dominate my photos — exquisitely colored blossoms on hills, around bends while the rest of the year these trees blend into the landscape.

And I’m heading to a class with Becky Goldsmith (the designer of the quilt I did last year: Come A-Round) and we’re doing a flower in class, so I chose a night-blooming plant for color inspiration for fabrics to pull.  This comes from the Sherwin-Williams paint website “Chip It,” where you load up a URL of a photo and they provide their colors.  I just like how it looks, and it helped me pull from my stash.

So when it came time to decide on a block for the Far-Flung Bee, that was easy: a flower.  I also wanted something of simple construction (9-patch) because of my fabric requrements–I wanted some fabrics with text to be incorporated into the blossom.

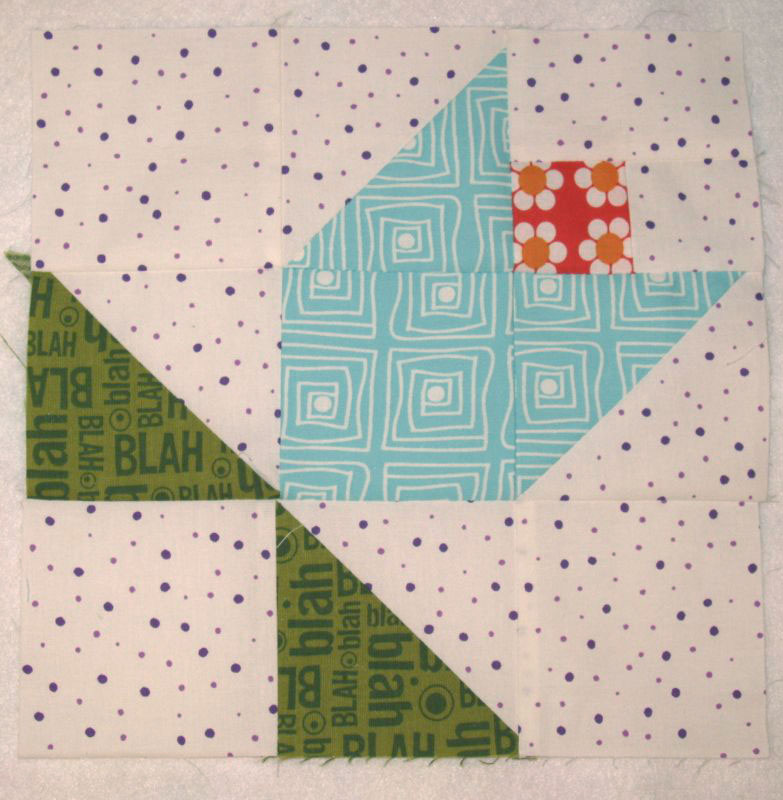
Here are two versions of that tulip/flower block, and the text fabric is used two different ways; one is in the background fabrics and the other is included in parts of the flower.  That green fabric saying Blah Blah Blah is a treasure for me as my friends Bert and Rhonda sent it to cheer me after my surgery in December.  I’ll always think of them when I use those fabrics (thanks, guys!).  So here’s how to do it.

For one 9-inch flower block:
Cut four 3 1/2″ squares–3 from the background fabric, 1 from the flower fabric
Cut four 3 7/8″ squares–2 from the background fabric, 1 from the flower fabric, 1 from the leaf fabric
Cut one 2″ by 3 1/2″ rectangle from the background fabric
Cut two 2″ squares–1 from the background fabric and 1 from the stamen fabric

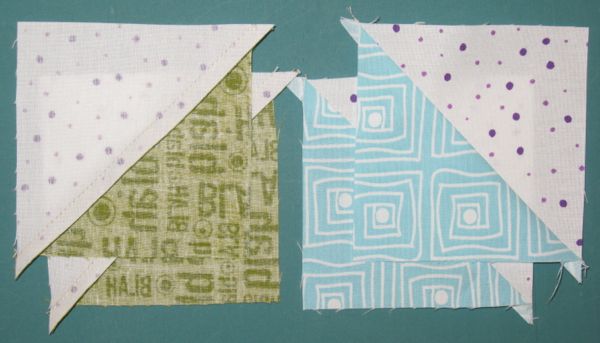
Working with the 3 7/8″ squares ONLY, place one background square on each of the flower and leaf blocks.  Draw a diagonal line from corner to corner, or if you have the Quick Quarter tool (shown above), draw a line on either side.  You’ll stitch just inside this line (towards the center), or if you have drawn a single diagonal line, you’ll stitch a SCANT quarter-inch seam on either side of your drawn line.

Cut from corner to corner, inbetween your stitching.

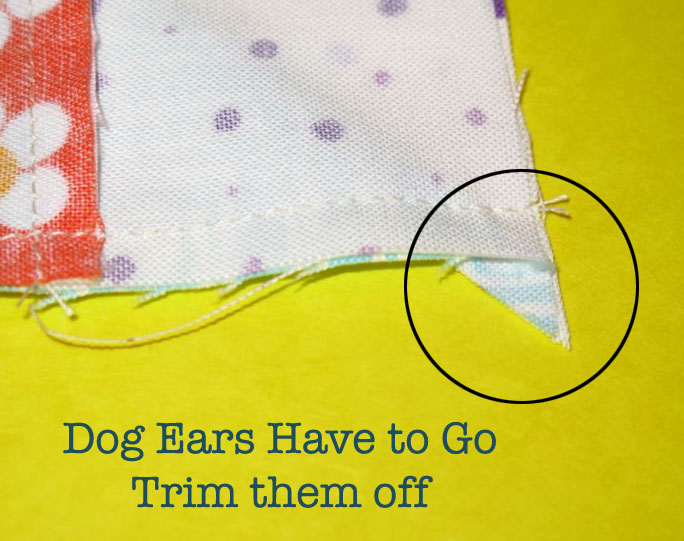
Press the seam allowance away from the background triangle, as shown.  Notice those dog ears on the corners? We’ll cut them off later.

Working with the 2″ square blocks and the one rectangle now.  Seam the stamen fabric block to other 2″ background fabric block.  If you’re like me and getting up and down to the ironing board gets tiresome, just finger press that seam towards the stamen fabric.  Then seam the rectangle onto this unit.  Okay, now go to the ironing board and press that flat.

Lay everything out. Smile, because it looks cute. AND it’s fast!  Seam them together in rows, working across the block.  Keep track of which direction that bottom leaf goes.  I did it wrong twice.

Now it’s time to trim off those dog ears.  (I actually trim them as I seam the pieces together, not waiting until a final moment, but this is just a reminder to get them off now).  I use that old fashioned tool that works so well: scissors. Snip snip snip while holding it over the trash can.

  I’ve flipped it over to show the directions for pressing.  Basically you want to have the seams going in opposite directions so they’ll “nestle” together when you go to sew the rows.  Lay it out again, the sew the final seams, joining the rows.  Double check that bottom row twice, so you don’t sew it in wrong (like I did).

You’re finished with one block.  Eat Your Vegetables, by laying a ruler over it and truing up the block to 9 1/2″.  It will sew down to a finished 9″ block in your quilt.

Here’s a mock-up of one layout, using 1″ sashing and corner squares.  I’ve also thought that since it’s based on an easy nine-patch block, that a grouping could be made of half-sized (4 1/2″ finished) blocks that could be interspersed for a more random look.  That’s for another day.

Enjoy your spring flowers!

Tutorial

FSF–iPad Cover

Okay, this was me this week.  Lost in a fog.  I even forgot to post on WIP Wednesday, which is usually like a religion to me.  Suspected sinus infection.  Exhaustion.  Suffering from What-Day-Is-It-itis.  Verified Foggy Brain condition.  But today, the sun it out, the day is pleasant and I have a mani-pedi scheduled in an hour.  All’s good.

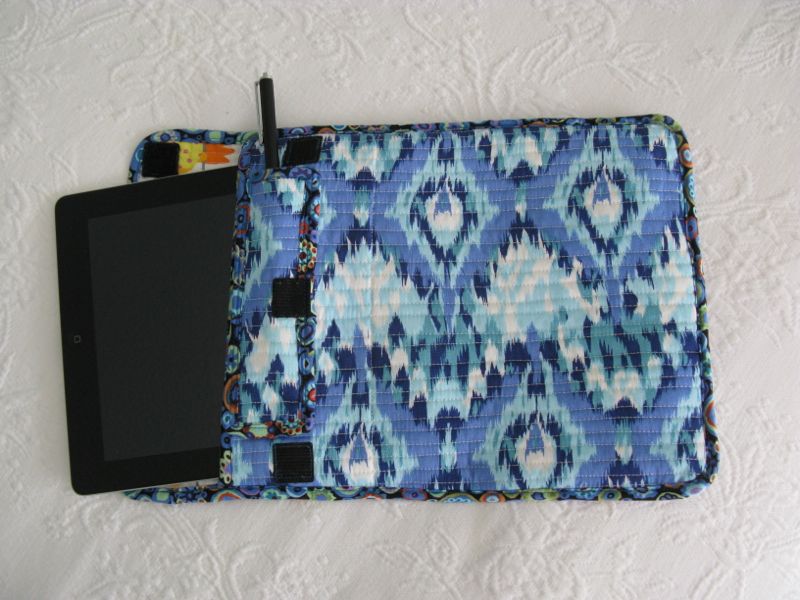
And I finished up my iPad cover.  Somehow.  A blue ikat with a little happy surprise inside.  Front.

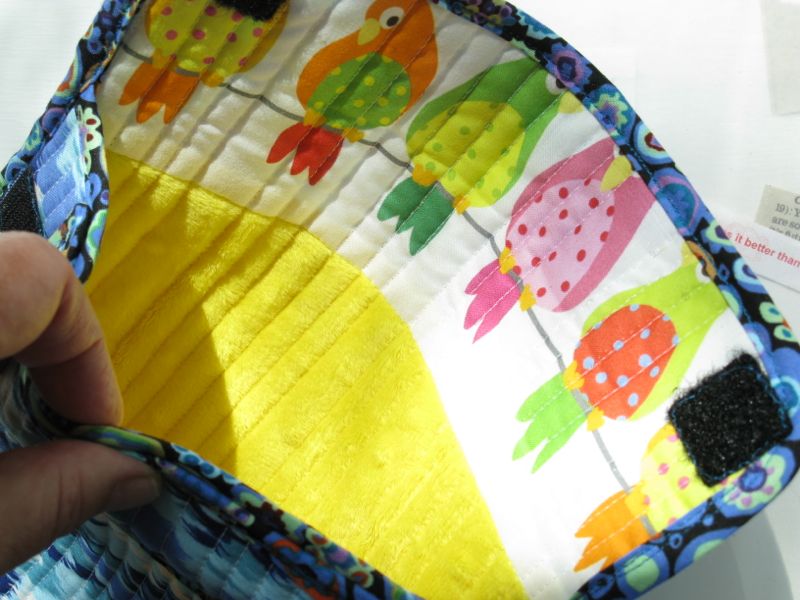
Front, with flap open and shy little orange bird looking all coy.  Like an idiot,  I cut it too close (there were some alterations after I had it quilted–double rats!!) and the other birds are peering out from underneath the bias edge binding.  But I love them all anyway.  Velcro sticky dots, which ruined a needle (you’re warned).
And the treasures peeking out: the iPad and a stylus.  Okay, I’m enjoying my iPad, but I love my laptop.  I’m sure it’s like anything–takes a while to figure it out and get it under your techno skin.

Here’s how, in a few easy steps:

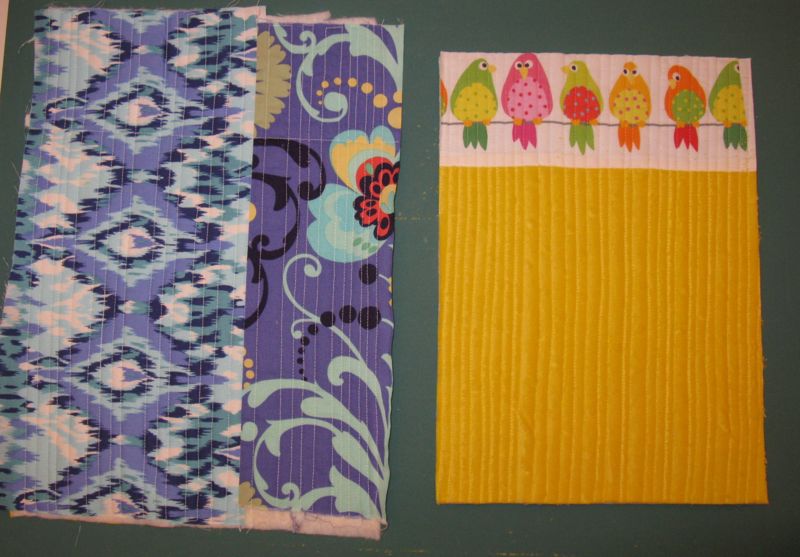
Whack off a piece of fabric (I pieced the back for a little “interest” as shown here) about 3″ larger on all sides than your iPad. The piece on the left is row-quilted in varying widths. The piece on the right is trimmed up.

I flipped over the trimmed up piece so you could see that I am lining this with some birdy fabric on the upper edge and using Minky down below.

I thought I should lay them out to show you what my final dimensions were before I sewed them together (yep, I’ve already started with the binding).

The back, which includes the extra for the flap is 13 1/2 ” tall and 8 3/4″ wide.  The stylus case is 6″ by 1 3/4″ and the front is 11″ tall by 8 3/4″ wide.  I think the “body” pieces could be cut to 8 1/2″ wide if you want a bit snugger fit.  The way it is now, there’s some skootch room (the one I made for my husband is skin tight, but he says it’s fine).

Make your binding by cutting a bias piece of fabric 1 1/2″ wide.  I seamed a bunch of strips together to make one long piece  (add up the dimensions if you must have an accurate length–I’m guessing mine was in the 45-50″ length).  Take it to your ironing board and press all seams OPEN, then press it in half along the length.  Now press both raw edges in to the ironed fold, making double-fold bias tape.  I offset the folded edges slightly, so that when I laid it against the raw edge of my quilted piece, the back would be slightly longer.

Bind the upper edge of your shorter body piece.  Bind around the stylus case.  I left those edges square.  That was a nutso thing to do, so on the back body piece, I wised up and placed  a spool of thread to mark a rounded edge.

Sew on the stylus case on the front, centering it.  Stitch around three side, leaving the side open.  I realized I would be slipping this case in and out of my school bag/church bag/whatever purse when I put it into use, so I tried to incorporate the stylus case where it would be out of the way, yet accessible.

Now line up your front, shorter piece on top of the longer, back body piece WRONG SIDES TOGETHER, leaving the extra on top (where my birds are) as the flap.  Stitch down one side, using a 1/4″ seam allowance, then across the bottom, then up the other side, stopping where the front body piece ends.

I know a lot of sewists (sewists?  can you get used to that word–I can’t! I still like “sewers”) make a “lined sack” sort of arrangement for their cases (yes, I Googled “iPad Cover Tutorial” and there are a lot), but I wanted a quilted body and a smooth interior which would be fuzz-less for the iPad.  [Once we had to make a little trip to Apple when the pocket fuzz from my husband’s pockets clogged up the earbud port.  Apparently this happens a lot.]

Begin stitching on the binding about 2″ down from the fold of the flap.  Here I’m going around the flap outer corner, and that sweet yellow bird is keeping an eye on me.  The bias binding really goes smoothly around corners.

After sewing on the bias, turn it over and try not to curse when you notice all the places that didn’t get caught in your sewing.  Re-stitch those, which is another reason why I chose a colorful fabric for my bias binding.  It hides mistakes.

I had not planned to put on Velcro dots, preferring instead to simply fold it over, but row-quilted fabric apparently has a mind of its own, and it’s comparable to a two-year old’s who wants the Skittles from the back of the cupboard.

So on they went, obscuring two of my favorite birds (rats!).  I ended up putting a third dot in the middle, hand-stitching it to the stylus case, but machine stitching it to the flap.

So now I can be cool with my ikat fabric cover.  And not worry so much.  I may yet get a black foldable cover but I looked at the ones in my local store and wasn’t that thrilled with them.  This is fine for now.

And I’m out of the fog!  Happy Quilting this weekend.