
This is the second of the three last posts for the Shine quilt done in red, white and blue, and these last three are all new blocks, found in the Nine More Blocks from Shine pattern in my pattern shop on PayHip. And yes, I know I put Block 21 before Block 20, but in spite of that I still think I’m doing pretty well these days. I have named this block Dresden Rosette, for every creation needs a name.

It all always starts with this, doesn’t it? I started Block 20 by doing the quick method of EPP, as described in the General Instructions: I pieced a couple of the fabrics together in strips, then laid out the pattern and cut/glued that to the paper. There are some tips in all the blocks, but I also think I did this in Block 19: Compass Star. Here I’ve paired up the Dresden-looking pieces:

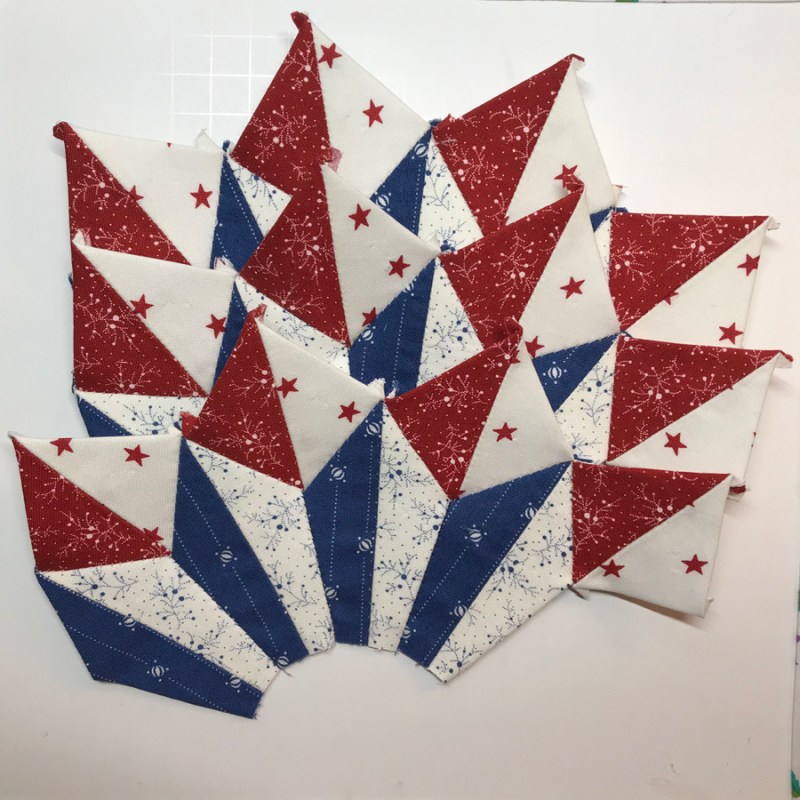
The pairs were joined up to make a foursome, then the pieced diamonds were added to them, with one extra kind of hanging out there on the end.

Nothing prettier than a Dresden Rosette. But we’re not done yet. I’ve stitched the three sets together, but if you look at the photo at about 1-o’clock on the dial, you can see I’ve left one complete seam open. Trust me when I tell you it’s easier to sew the outer wedges on, if you have not sewn it into a circle.
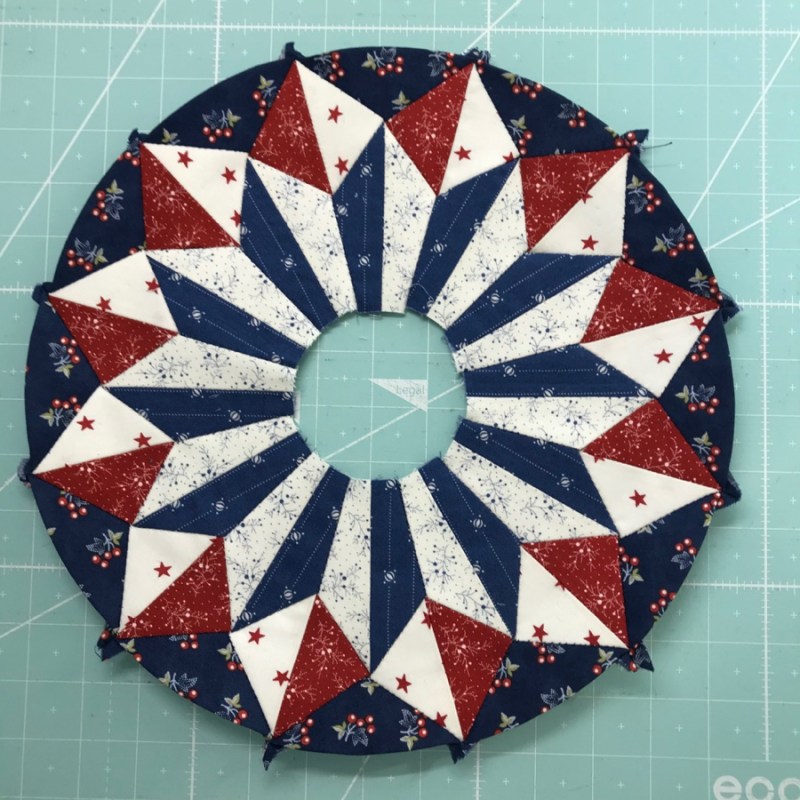
Outer Wedges: On!
Final Seam: Sewn!
Now to hunt around for a middle…

Found the middle I wanted, and now am trying to decide between the two arrangements. You can which one I went for at the top of this post.
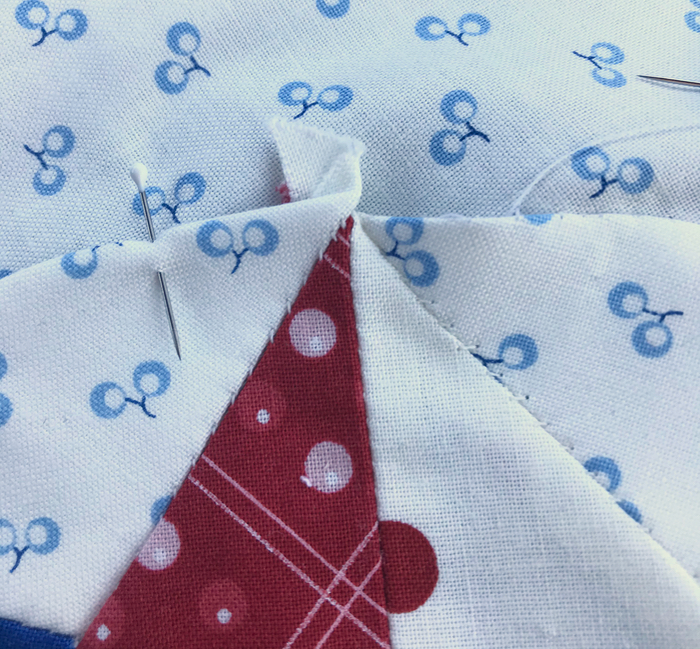
I’m sure you noticed all those little bits of seam allowances at all the tips. How do I handle those? Here’s three photos to show you. I first fold over and tuck under one side (#2), then fold and tuck under the second little bit (#3). Finally I stick a pin there, or quickly put in a couple of stitches.


After it is all stitched down, I press. First I press from the top, then I set the circle on a well-padded surface, and really give some heat and steam to those protruding seam allowances. They usually fall nicely in line.
On onward to the last of the Shine Blocks. Again, I have turned off the comments for this post, too, as I’m doing them in such quick succession. My contact info is above in About Me, if you need to send me a note.
Discover more from OccasionalPiece--Quilt!
Subscribe to get the latest posts sent to your email.
