
Flying Through a Rainbow
Quilt #152

You’ve seen this one before, but I wanted to give you the directions on how I put it together. I made this for the Schnitzel and Boo Mini Quilt Swap, the final small quilt of my four mini swaps. I know that people traditionally go over the top for this swap, but when I glimpsed into my partner’s life, I realized that she did a variety of activities and wanted to honor that by using the Flying Geese block going in multiple directions, but with a twist: I used two half-square triangles to make the block so I could work in a bunch of neutral light fabrics behind, including a fun fabric that was a bowling score sheet (one of her hobbies–she doesn’t read my blog, so I’m safe to tell).
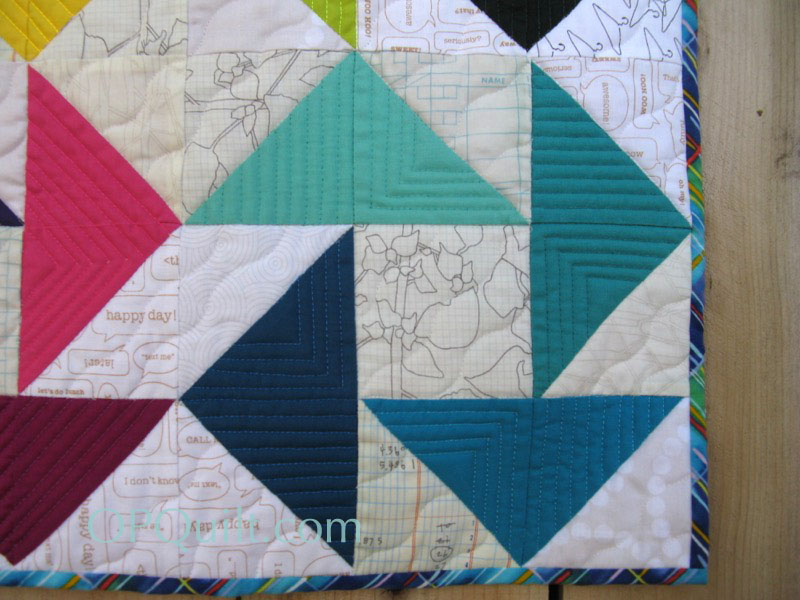


I cut a 4″ block from sixteen different solids (then sliced it in half diagonally), choosing four gradated hues from four different color families: violets, blues, greens and yellows. I then cut a 4″ block from ten different low-volume background fabrics and sliced those on the diagonal so I could mix and match the backgrounds. Yes I had some triangles left over on the backgrounds, but I wanted a variety.
I cut four 3 1/2″ center squares, then laid out all the cut pieces so I could see the play of backgrounds to the colors. After I was able to get an arrangement I liked, I stitched the two half-triangles together, pressing the seam allowance to the darker side. I trued them up to measure 3 1/2″ blocks, using the nifty BlocLoc ruler I bought at QuiltCon. It’s worth every penny, believe me.
Then I sewed each color family together as if it were a nine-patch, then trued up those four blocks. Last step is to sew the four blocks together.

I am always stumped by “how to quilt this thing.” I decided to keep playing around with the triangle theme: I traced smaller triangles in each larger one, and echo-quilted those. In each color group the triangles are placed in different places, providing a different, yet harmonious quilting design. The background was quilted in the wavy line stitch from my sewing machine. I had to dodge around the triangles a lot, switching back and forth between the wavy stitch and a straight stitch. That’s one more reason I’m glad it’s a mini: they are easy to maneuver on the machine.
So that’s the season for my mini quilt experience. It was a good experience and I had fun coming up with ideas.

Rolling Rainbow Star
Quilt #150
I did finally finish the pattern to Rolling Rainbow Star (above) and it’s now in my PayHip shop, if you want to make a great little 16″ quilt.
I do have one more mini that I didn’t swap. More on that in the next post.
Discover more from OccasionalPiece--Quilt!
Subscribe to get the latest posts sent to your email.

I really love both of these. Such pretty colors together. And I”m impressed with the quilting. If it can’t be cross-hatched, then it doesn’t get done, at least not in my house or by me. 🙂