Mini-quilt · Something to Think About

Flashback

Occasionally I attempt to clean out my emailbox, which is a vain and futile attempt to generally keep my life organized. But in this round, I found several stacks of emails regarding Quilt Swaps, a thing we did in the quilt world for a while. Some of my quilty swaps:

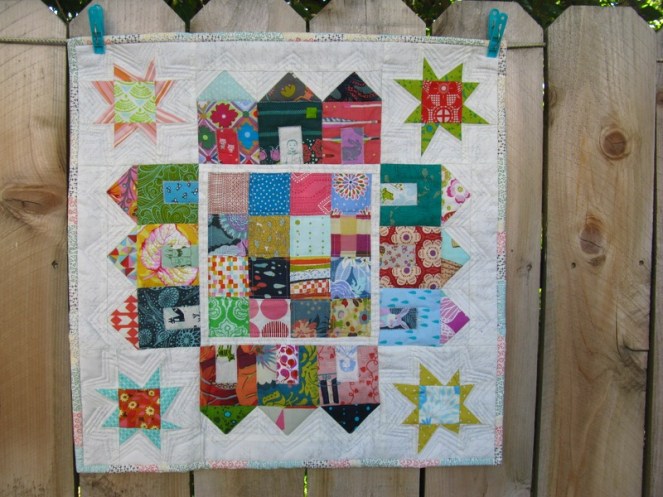
And here’s one I received:

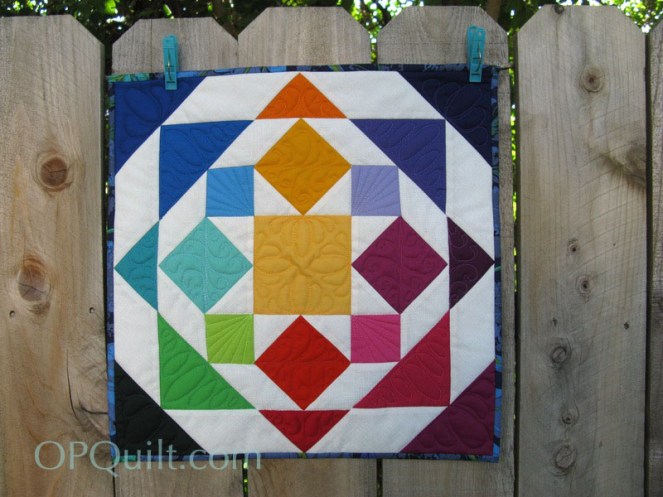
I had drafted this pattern for her in my then-used QuiltPro software, because — as she wrote to me — she could see what she wanted to do in her mind, but couldn’t get there. I sent it off to her, and she swapped this back to me. If you need a town square quilt, I have a version of this for sale on my PayHip shop, but it’s more colorful as I used a different source for inspiration.

I started to notice a trend in looking at all these quilts from Days Gone By: strong, bright colors with faded backgrounds, what we often called “low-volume” backgrounds. And lots of solids, or fabrics that read as solids. Maybe that’s why the little quilt at the top of the post felt so familiar to me when I was making it?

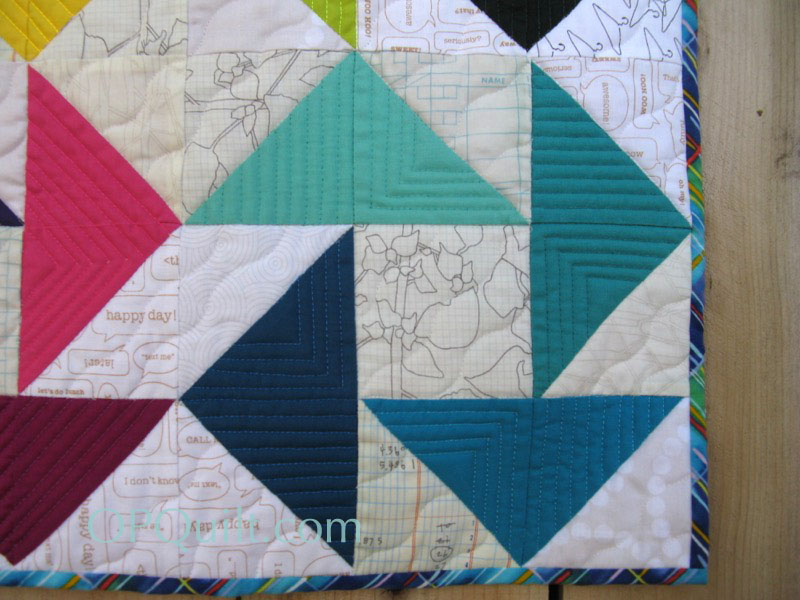
And in that mess of emails, I found a link to a post from Never Just Jennifer, detailing a “Round Trip” quilt swap that she was participating in (which is where I found links to these photos; I hope she never takes the post down). Be still my heart! Leaves! New York Beauties! Letters! Flying Geese! Low-volume backgrounds! It checked every box. But wait, here’s the quilt, a tribute to New Hampshire, at the next round, with Trees!

Yes, this was in the day before Design Walls and all that, when we just flat out quilted for fun, exploring new ideas, laying our quilts out on the floor before packaging them all up and sending them off with a book to chronicle our progress. I love that last row for the quilt with Foundation Paper Piecing!

We didn’t seem to worry about coordinated fabric lines, influencing, posting-with-polish-hoping-for-likes. We borrowed. We imitated. We sewed.

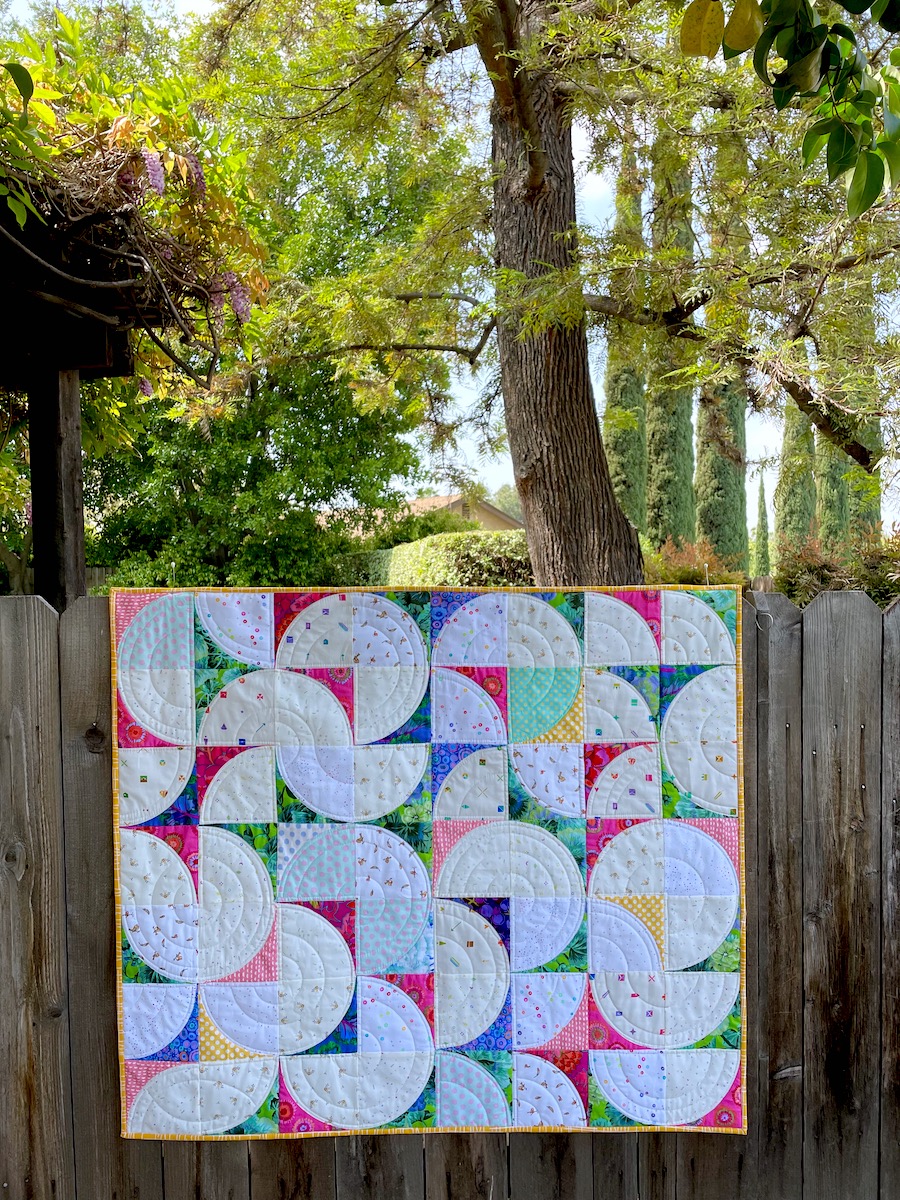
In that vein, after the final workman left the kitchen and I was waiting for kitchen-drawer organizers to arrive, I pulled out a stack of cream and black prints, and inspired by this photo from my friend Lisa from easily a decade ago, I got to work.

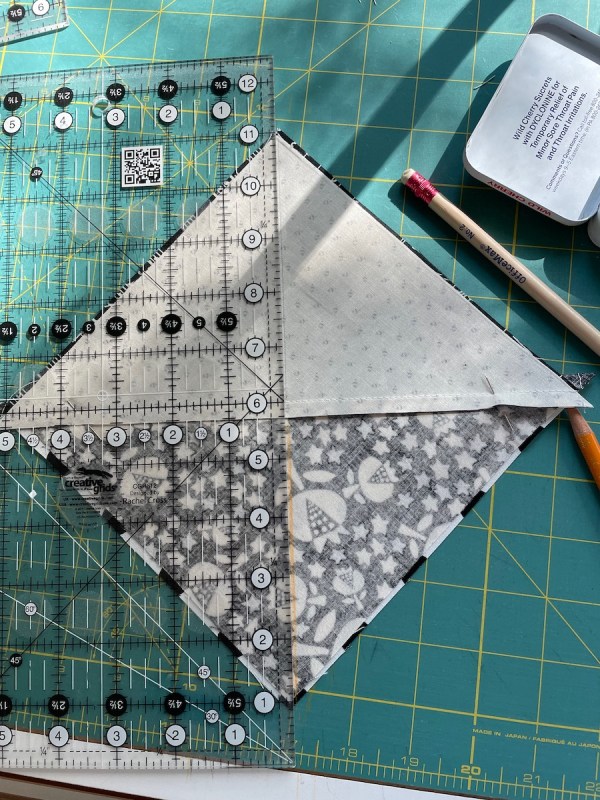
I remembered the tip from Yvonne, about placing your ruler perpendicular to the seam when making hourglass blocks. And yes, if you want a pattern, it’s drafted with two different versions, and I’m testing and it’s coming soon. But I did want to sew again with that delicious feeling of just making. Of just sewing.

You know what I mean.

Rolling Rainbow Star, and all the minis

Rainbow Gardens

200 Quilts · Quilts

Flying Through a Rainbow Mini Quilt

Flying Through a Rainbow_frontlabeled

Flying Through a Rainbow
Quilt #152

Flying Through a Rainbow

You’ve seen this one before, but I wanted to give you the directions on how I put it together.    I made this for the Schnitzel and Boo Mini Quilt Swap, the final small quilt of my four mini swaps.  I know that people traditionally go over the top for this swap, but when I glimpsed into my partner’s life, I realized that she did a variety of activities and wanted to honor that by using the Flying Geese block going in multiple directions, but with a twist: I used two half-square triangles to make the block so I could work in a bunch of neutral light fabrics behind, including a fun fabric that was a bowling score sheet (one of her hobbies–she doesn’t read my blog, so I’m safe to tell).

Flying Through a Rainbow_blue
Flying Through a Rainbow_green
Flying Through a Rainbow_orange
Flying Through a Rainbow_purple

I cut a 4″ block from sixteen different solids (then sliced it in half diagonally), choosing four gradated hues from four different color families: violets, blues, greens and yellows.  I then cut a 4″ block from ten different low-volume background fabrics and sliced those on the diagonal so I could mix and match the backgrounds.  Yes I had some triangles left over on the backgrounds, but I wanted a variety.

I cut four 3 1/2″ center squares, then laid out all the cut pieces so I could see the play of backgrounds to the colors.  After I was able to get an arrangement I liked, I stitched the two half-triangles together, pressing the seam allowance to the darker side.  I trued them up to measure 3 1/2″ blocks, using the nifty BlocLoc ruler I bought at QuiltCon.  It’s worth every penny, believe me.

Then I sewed each color family together as if it were a nine-patch, then trued up those four blocks.  Last step is to sew the four blocks together.

Flying Through a Rainbow_quiltingA

I am always stumped by “how to quilt this thing.”  I decided to keep playing around with the triangle theme: I traced smaller triangles in each larger one, and echo-quilted those.  In each color group the triangles are placed in different places, providing a different, yet harmonious quilting design.  The background was quilted in the wavy line stitch from my sewing machine.  I had to dodge around the triangles a lot, switching back and forth between the wavy stitch and a straight stitch.  That’s one more reason I’m glad it’s a mini: they are easy to maneuver on the machine.

So that’s the season for my mini quilt experience.  It was a good experience and I had fun coming up with ideas.

Rolling Rainbow Star_labeled

Rolling Rainbow Star
Quilt #150

I did finally finish the pattern to Rolling Rainbow Star (above) and it’s now in my  PayHip shop, if you want to make a great little 16″ quilt.

I do have one more mini that I didn’t swap.  More on that in the next post.