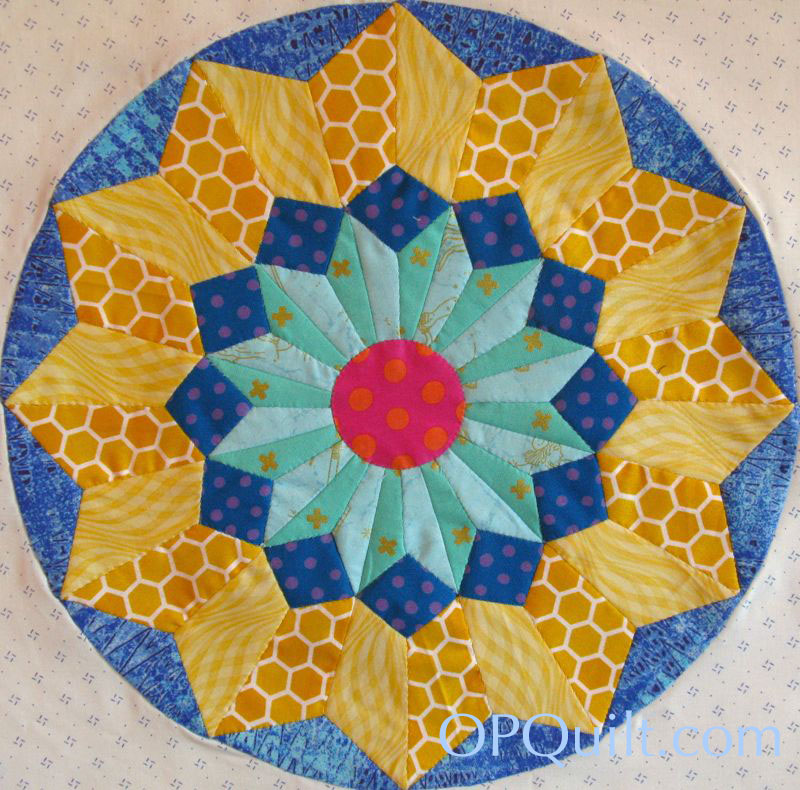
This is Circles Block #8 of my EPP Circles Block Sew-A-Long.
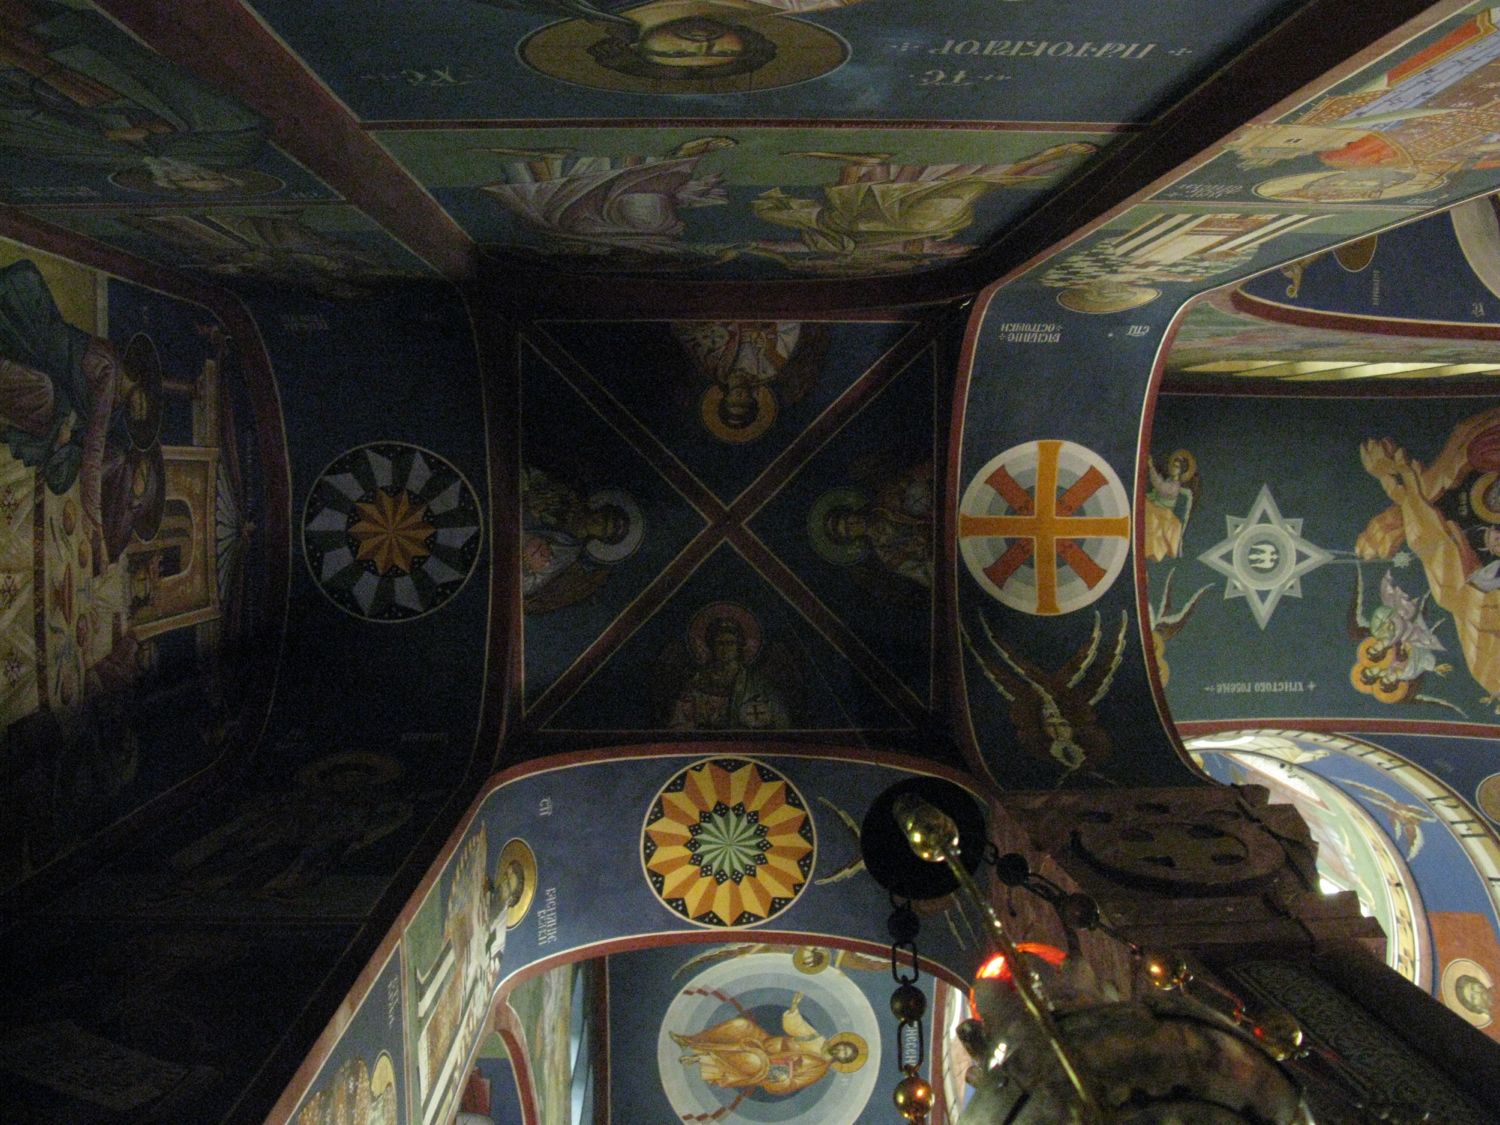 It all started way up there on the really tall archway in the church in Ljubljana, Slovenia where I first spotted this lovely circle.
 I just had to have it. And my sweet husband helped me out by giving me Electric Quilt 7 for Christmas–the version that works on a Macinstosh.

I got to work and failed miserably. Then I got back to work and learned a few more things, and a few more things after that and above is the result. Since I have a lot of experience on QuiltPro (which I still use) I didn’t find it hard to figure things out, Googling for specific instructions when I became stuck. I went on to design all the rest of the circles, completing the set of twelve, but you’ll have to wait for them, as I haven’t stitched them up and I like to do that before giving you the patterns.

The free patterns are now returning (Red, White & Blue version is above). I request that you not distribute them, but send people here to this website to get them. Click to download a PDF file:
Please remember to set your printer settings to 100% and check the little scale square included on the pattern. It should measure 1″ in size. Illustrations below are with the OLD version of the pattern, so it may vary from what’s included now.

I must admit to being a bit nervous about this new process, so I drew up a circle and then tried to fit the pieces into it, making sure that they were all the same size as the other circles.
 And then I didn’t like how the pattern looked, so I went and redrew it (you have the latest version).

Remembering the nightmare of trying to get all those points to fit into the center on a previous block, I added a small circle, and changed the pattern to the one you have now:

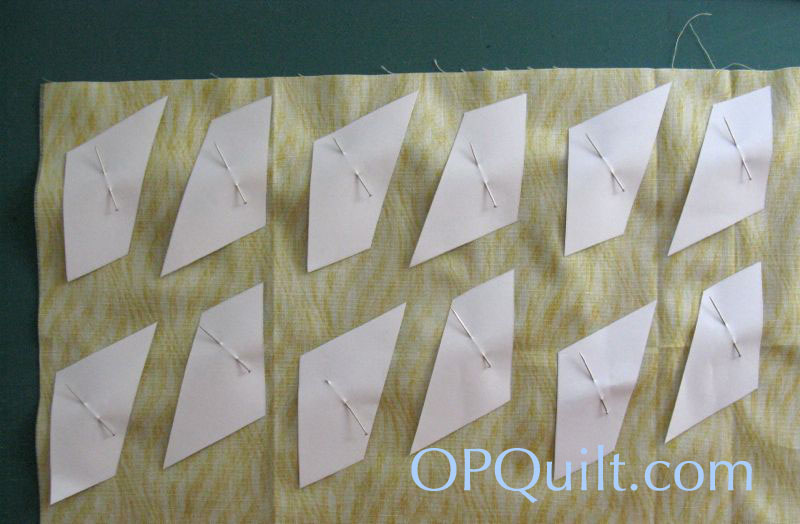
For this project, I used 24 lb. paper, a bit heavier than the usual copy paper (which can either be 18-lb. or 20-lb) Print off the patterns, then stack them carefully. Staple the pages together around the pieces, not through them. As you cut, using either scissors or an old non-fabric rotary cutter, the pieces will be free of the stapled background when cut out. I don’t usually staple more than four pages together. Note: Even if the bottom papers slip slightly, and don’t appear to be cut exactly on the line, the patterns are still accurate.
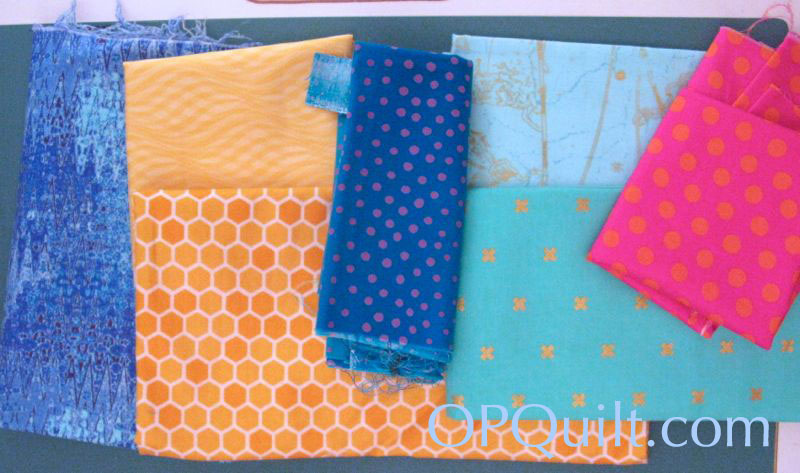
Laying out the fabrics. This was the easiest one yet.

I also used the technique of seaming together my two fabrics, then cutting out the pattern piece, lining up the center lines. I’m not a purist–I don’t need everything to be hand-sewn and doing this step this way will make your circle more accurate and save you a lot of headache.
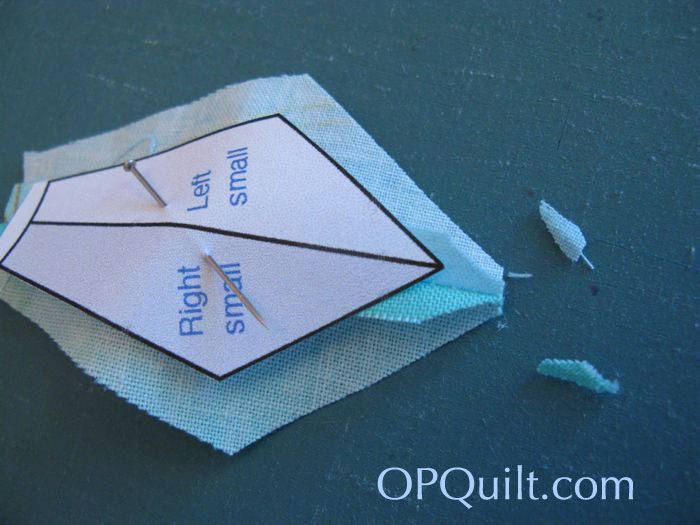
Trim out the seam allowances at the tip.
I sometimes get confused whether the pieces should go printed side up, or printed side down, so my usual recommendation is if they are bi-directional — meaning it doesn’t matter — then it doesn’t matter. But if you need your yellow on one side and your gold on the other and you don’t want to have to figure it out, then put the printed side down, for that’s how you see it.

I tried a new-to-me technique this time: glueing down the seam allowances. I had purchased the narrow glue stick for the The New Hexagon Millefiore Quilt Along and thought it was time to learn a few new tricks.

I’d read that it was not a good idea to go all the way to the edge of the paper when glueing, that it was better to leave a small bit unglued. Then I just smoothed the seam allowance up over the glue. It was easier to keep the pieces centered (sometimes I put a dot of glue on the piece before putting it down, but not always) and I love how they look. (And it saves time and energy and my hands!)

I laid out all the pieces and I liked what I saw. With the glue stick, I wasn’t too worried about re-doing any pieces as it was so quick and easy.

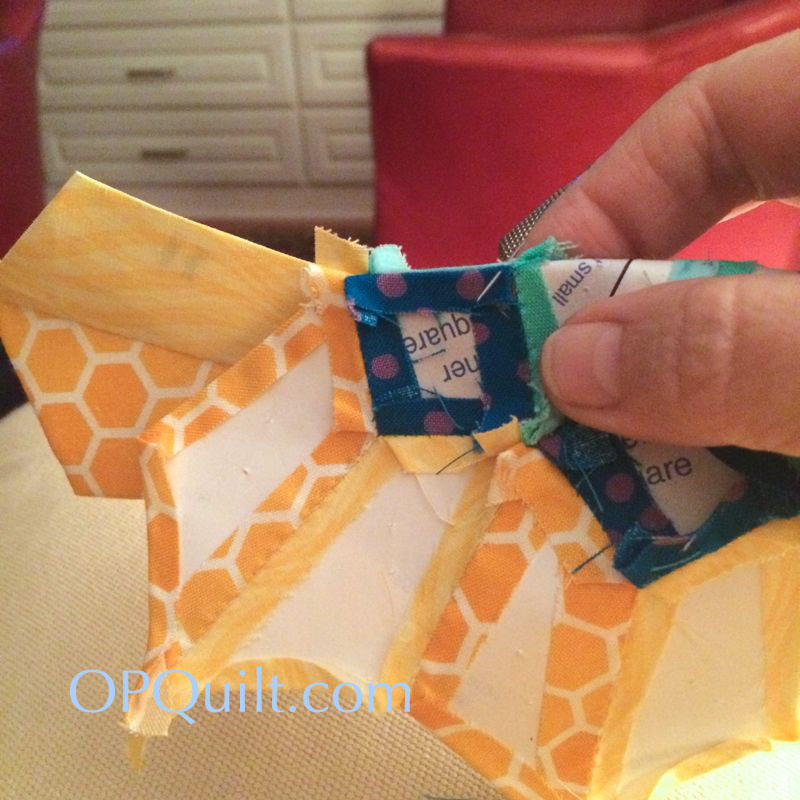
I first sewed the gold/yellow together, then added the blue diamondish-square (I labeled it as a square, but it is slightly wonky).

Then I added two blue sections to that one, then started joining them all together.
Sometimes there is some interesting bends that go on while working. Every once in a while a seam allowance would work itself loose from the paper but I treated it like an envelope: I licked the paper and stuck back the seam allowance.
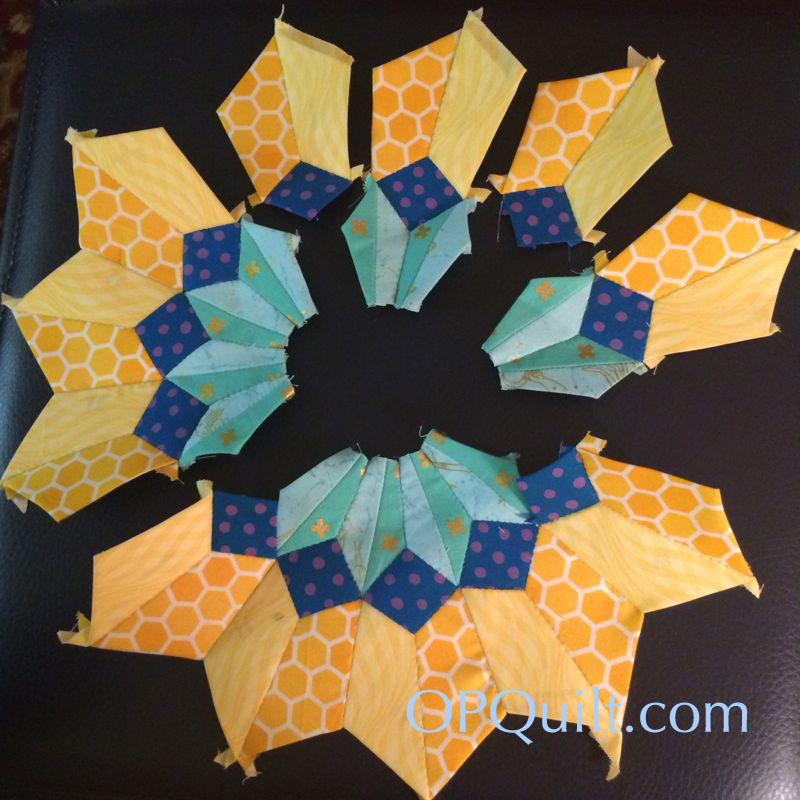

The above photographs show the steps in how I sewed this together: pieces, then small sections, moving along to the larger sections.

Ah. The best sight in EPP-land: all the papers on the pieces, from the back.

Time for the $64,000 question: can you get the glued papers off the circle block? Yes. Here you can see they are starting to pop off already. Sliding a seam ripper or a stiletto point between the fabric and the paper can also help loosen stubborn spots.
In my new project, I am now working with the cardstock versions of the papers for the Millefiore quilt and I’m sure the answer is the same, but they do seem to stick more to the rougher surface of the cardstock, with no papers trying to escape, like mine are, above.

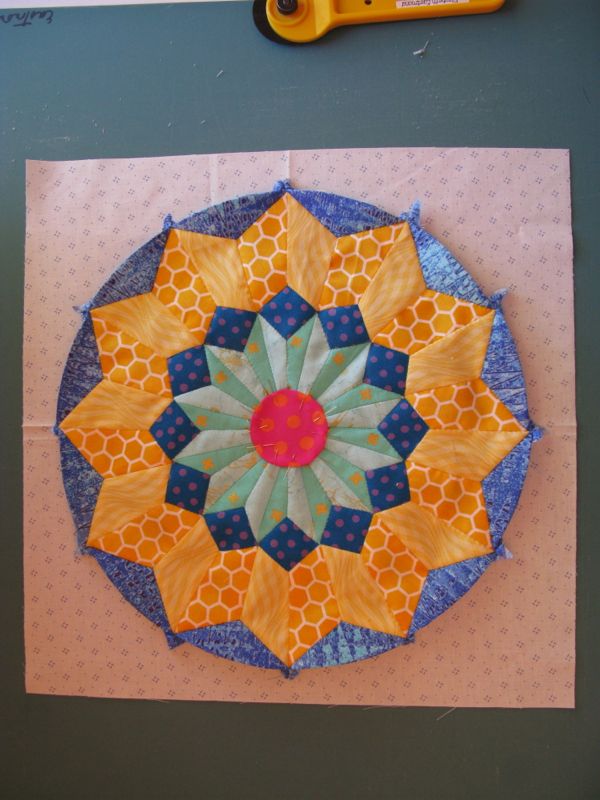
I like to appliqué on my center circle as I think it is a cleaner business (shown here from the back). I use really teeny stitches and stitch length, putting way more stitches in there than I do for regular appliqué, as it stabilizes the whole block and anchors the center.
As usual for these blocks, cut a 14 1/2″ square, fold it into fourths and press lightly so the creases can serve as registration marks for centering your circle. Here’s your choice: point at the 12 o’clock mark. . .

. . . or not? Try them back and forth until you settle on one. There is no wrong or right — just what is best for your block.

The block looks more relaxed with all those papers out. I loved fussy-cutting the X in the aqua, and love-love-love this circle.
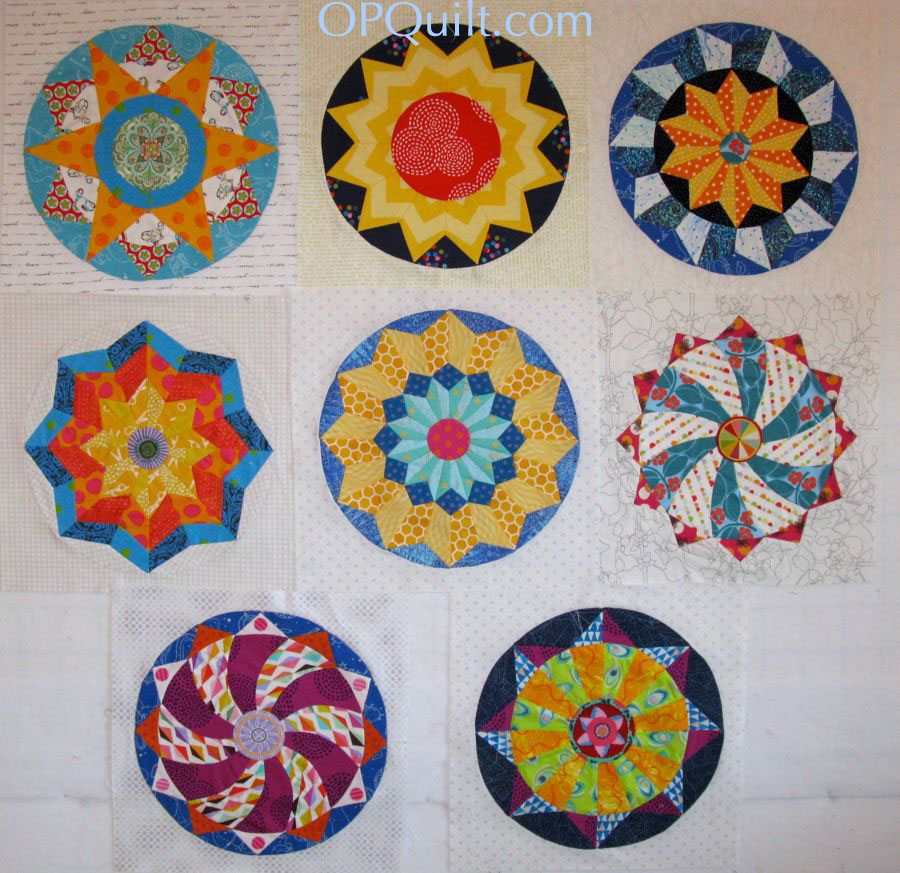
So here they all are–aren’t they fine looking? Until next month, happy EPP-ing! If you finish any of your circles, send them over and I’ll do a post.