
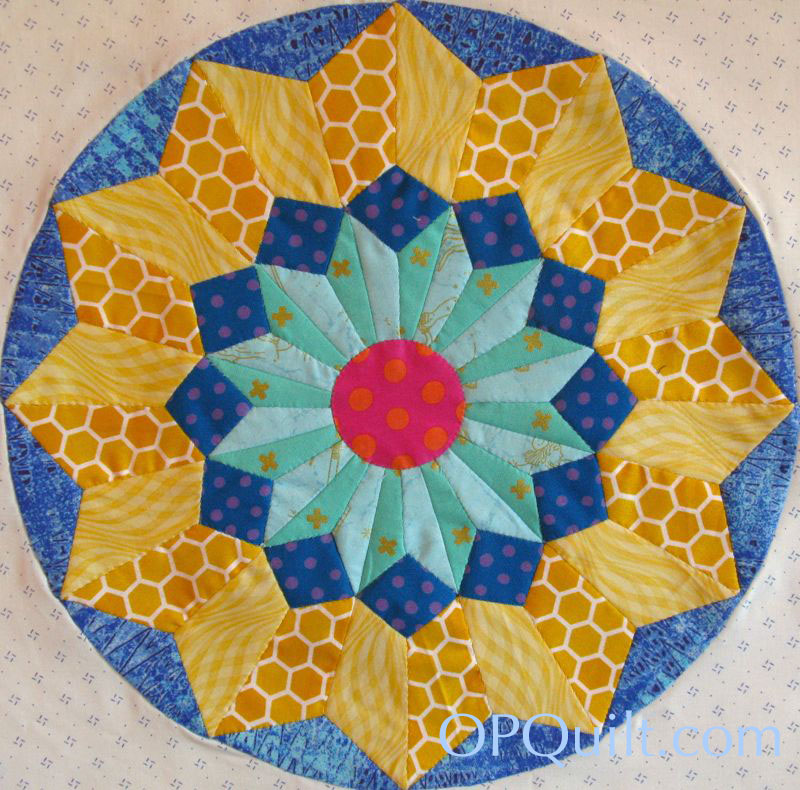
This is Circles Block #8 of my EPP Circles Block Sew-A-Long.
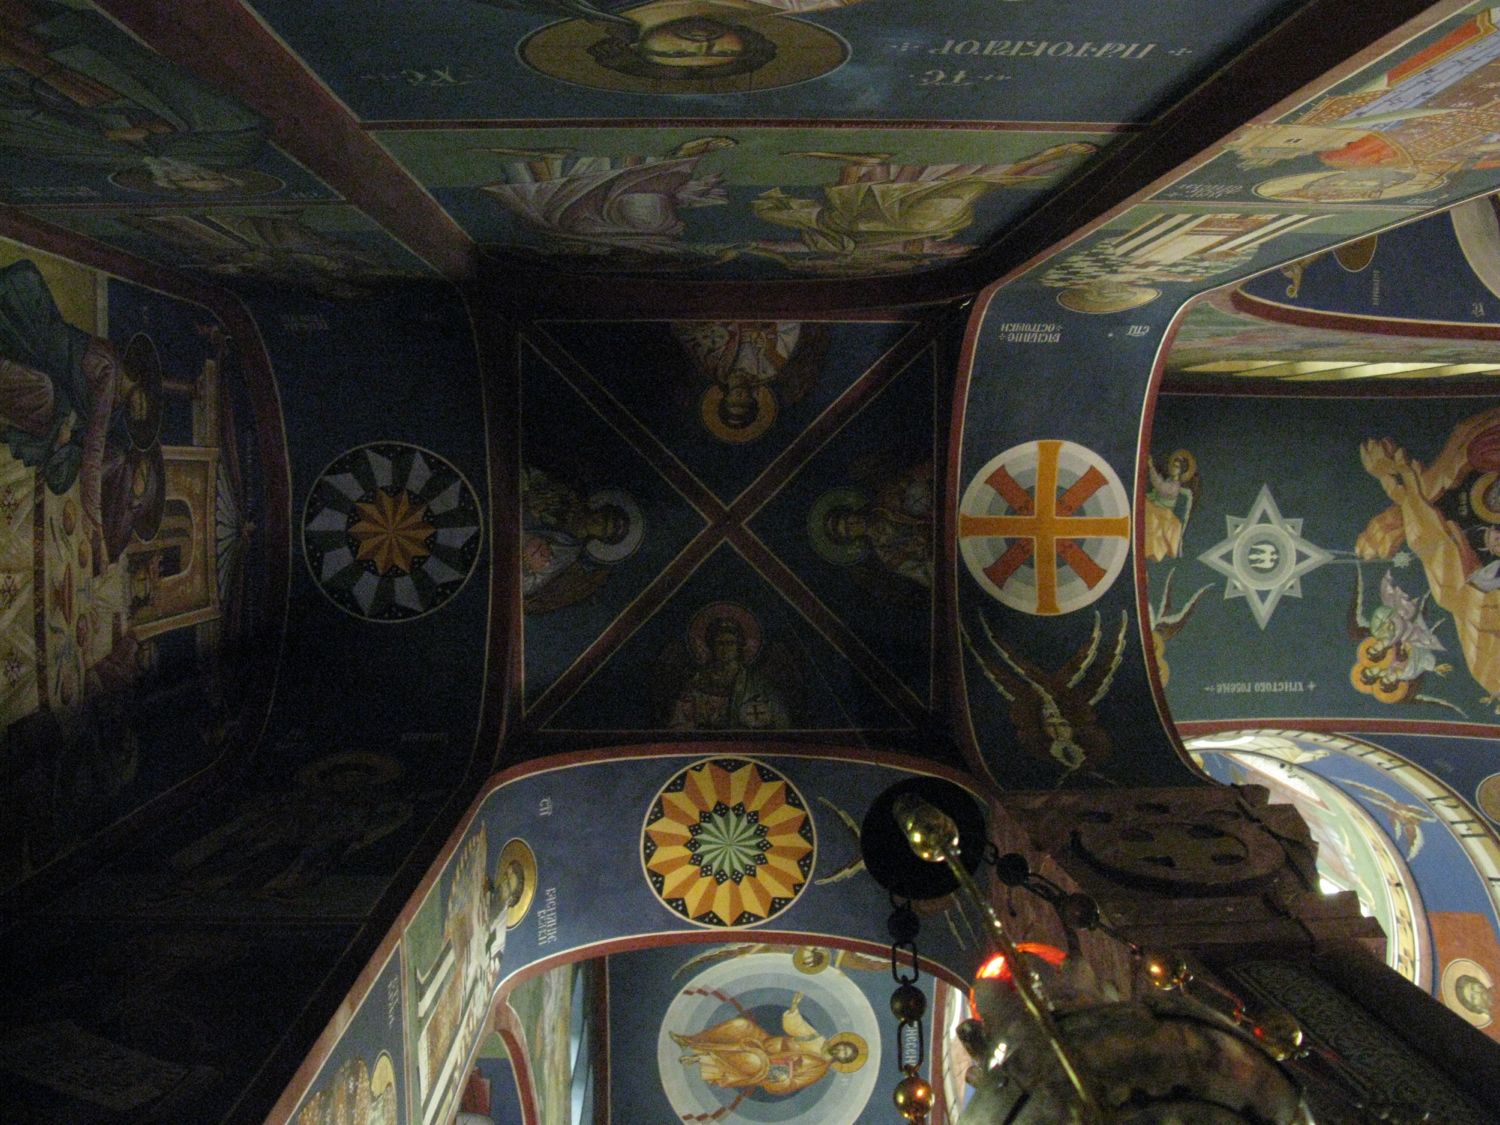 It all started way up there on the really tall archway in the church in Ljubljana, Slovenia where I first spotted this lovely circle.
 I just had to have it. And my sweet husband helped me out by giving me Electric Quilt 7 for Christmas–the version that works on a Macinstosh.

I got to work and failed miserably. Then I got back to work and learned a few more things, and a few more things after that and above is the result. Since I have a lot of experience on QuiltPro (which I still use) I didn’t find it hard to figure things out, Googling for specific instructions when I became stuck. I went on to design all the rest of the circles, completing the set of twelve, but you’ll have to wait for them, as I haven’t stitched them up and I like to do that before giving you the patterns.

The free patterns are now returning (Red, White & Blue version is above). I request that you not distribute them, but send people here to this website to get them. Click to download a PDF file:
Please remember to set your printer settings to 100% and check the little scale square included on the pattern. It should measure 1″ in size. Illustrations below are with the OLD version of the pattern, so it may vary from what’s included now.

I must admit to being a bit nervous about this new process, so I drew up a circle and then tried to fit the pieces into it, making sure that they were all the same size as the other circles.
 And then I didn’t like how the pattern looked, so I went and redrew it (you have the latest version).

Remembering the nightmare of trying to get all those points to fit into the center on a previous block, I added a small circle, and changed the pattern to the one you have now:

For this project, I used 24 lb. paper, a bit heavier than the usual copy paper (which can either be 18-lb. or 20-lb) Print off the patterns, then stack them carefully. Staple the pages together around the pieces, not through them. As you cut, using either scissors or an old non-fabric rotary cutter, the pieces will be free of the stapled background when cut out. I don’t usually staple more than four pages together. Note: Even if the bottom papers slip slightly, and don’t appear to be cut exactly on the line, the patterns are still accurate.
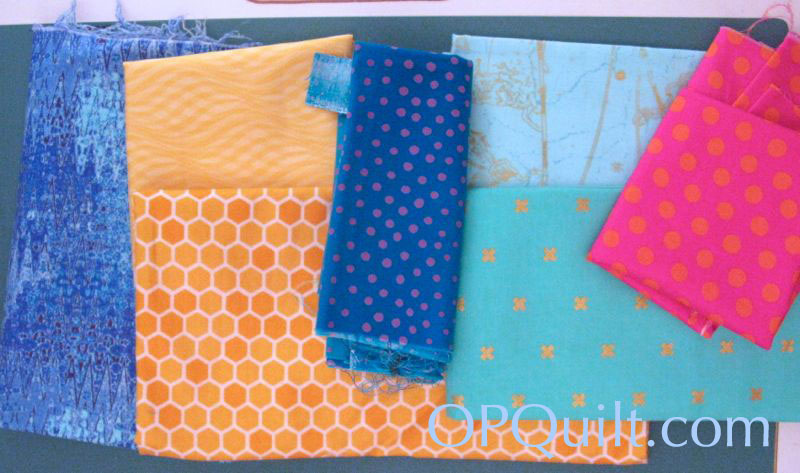
Laying out the fabrics. This was the easiest one yet.

I also used the technique of seaming together my two fabrics, then cutting out the pattern piece, lining up the center lines. I’m not a purist–I don’t need everything to be hand-sewn and doing this step this way will make your circle more accurate and save you a lot of headache.
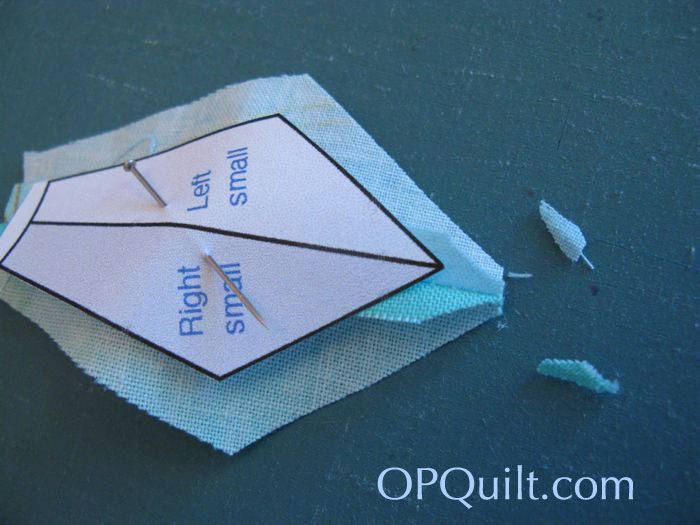
Trim out the seam allowances at the tip.
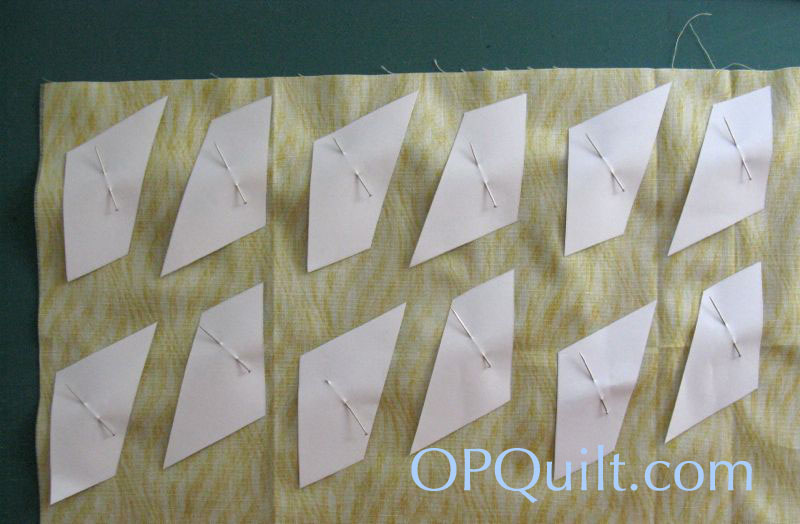
I sometimes get confused whether the pieces should go printed side up, or printed side down, so my usual recommendation is if they are bi-directional — meaning it doesn’t matter — then it doesn’t matter. But if you need your yellow on one side and your gold on the other and you don’t want to have to figure it out, then put the printed side down, for that’s how you see it.

I tried a new-to-me technique this time: glueing down the seam allowances. I had purchased the narrow glue stick for the The New Hexagon Millefiore Quilt Along and thought it was time to learn a few new tricks.

I’d read that it was not a good idea to go all the way to the edge of the paper when glueing, that it was better to leave a small bit unglued. Then I just smoothed the seam allowance up over the glue. It was easier to keep the pieces centered (sometimes I put a dot of glue on the piece before putting it down, but not always) and I love how they look. (And it saves time and energy and my hands!)

I laid out all the pieces and I liked what I saw. With the glue stick, I wasn’t too worried about re-doing any pieces as it was so quick and easy.

I first sewed the gold/yellow together, then added the blue diamondish-square (I labeled it as a square, but it is slightly wonky).

Then I added two blue sections to that one, then started joining them all together.
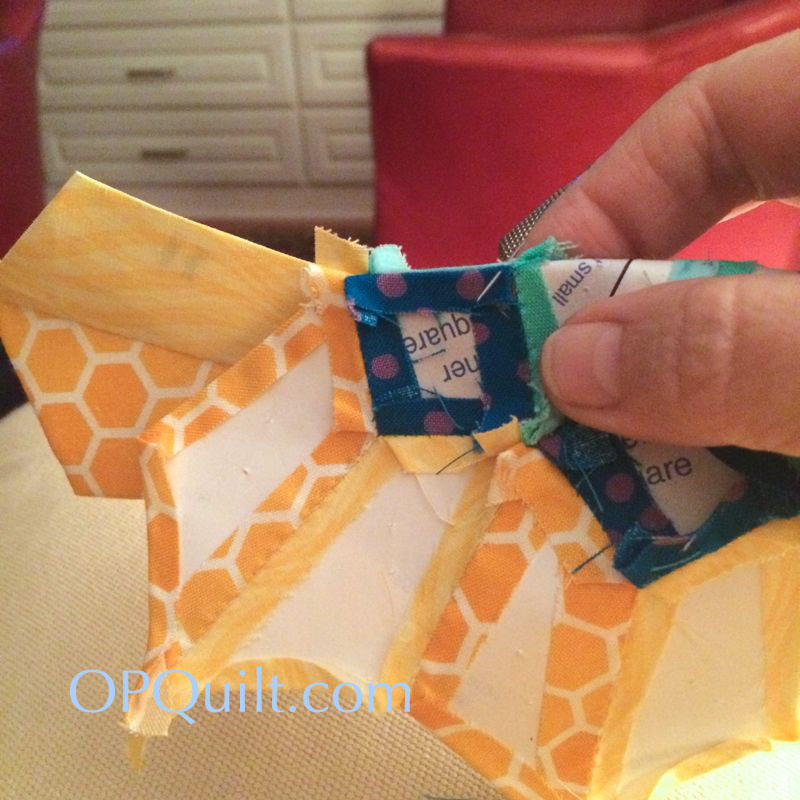
Sometimes there is some interesting bends that go on while working. Every once in a while a seam allowance would work itself loose from the paper but I treated it like an envelope: I licked the paper and stuck back the seam allowance.
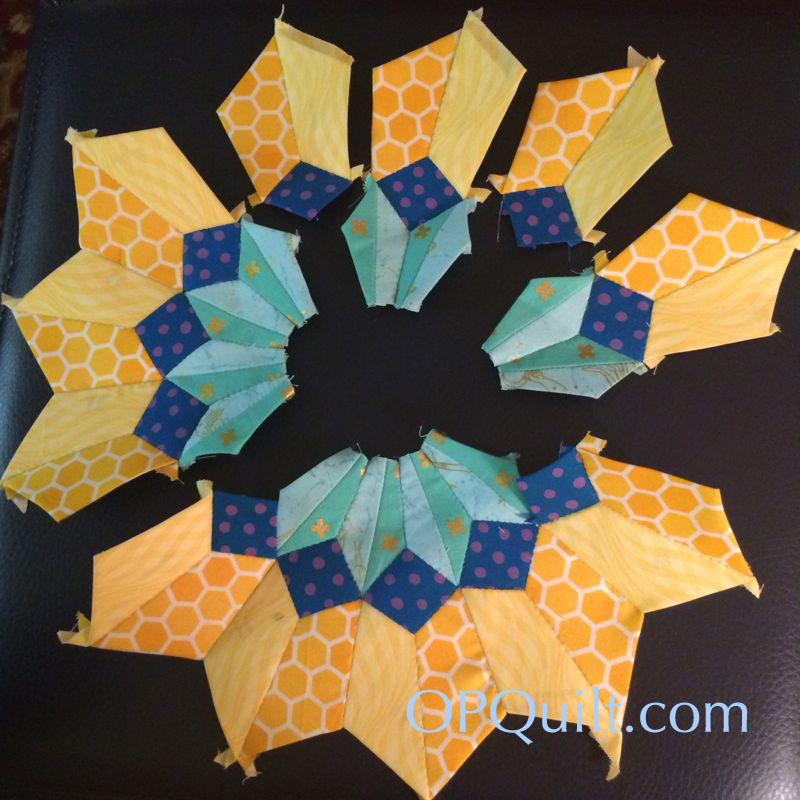

The above photographs show the steps in how I sewed this together: pieces, then small sections, moving along to the larger sections.

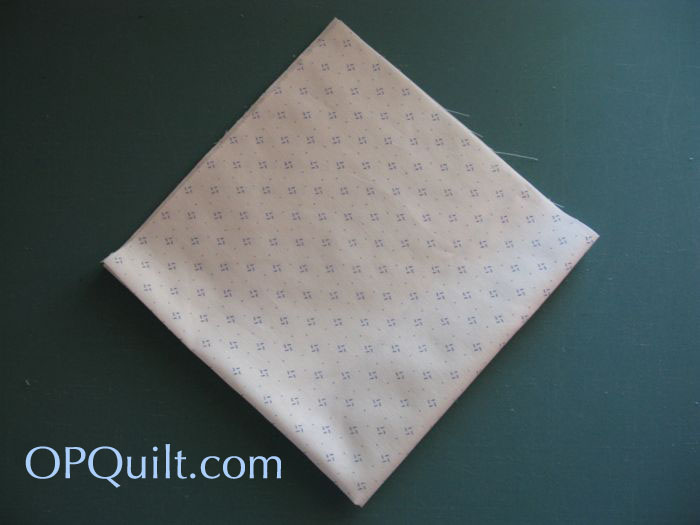
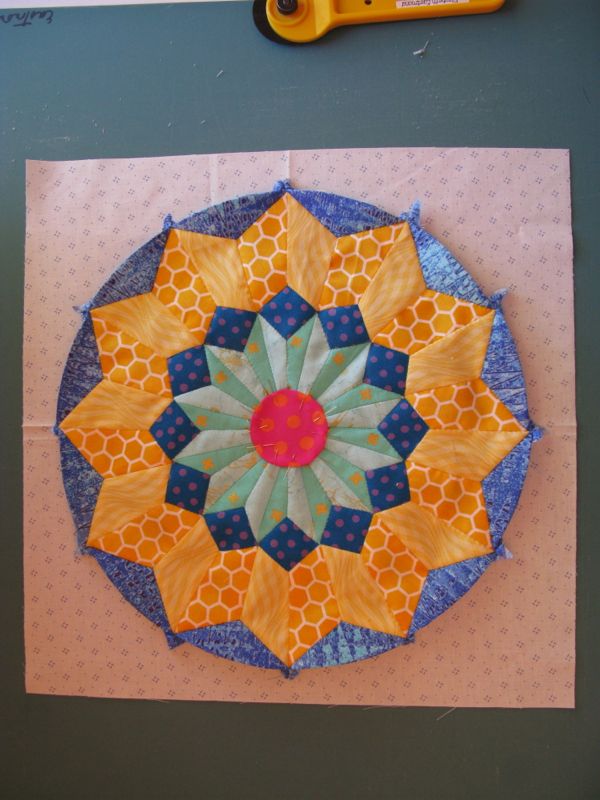
Ah. The best sight in EPP-land: all the papers on the pieces, from the back.

Time for the $64,000 question: can you get the glued papers off the circle block? Yes. Here you can see they are starting to pop off already. Sliding a seam ripper or a stiletto point between the fabric and the paper can also help loosen stubborn spots.
In my new project, I am now working with the cardstock versions of the papers for the Millefiore quilt and I’m sure the answer is the same, but they do seem to stick more to the rougher surface of the cardstock, with no papers trying to escape, like mine are, above.

I like to appliqué on my center circle as I think it is a cleaner business (shown here from the back). I use really teeny stitches and stitch length, putting way more stitches in there than I do for regular appliqué, as it stabilizes the whole block and anchors the center.
As usual for these blocks, cut a 14 1/2″ square, fold it into fourths and press lightly so the creases can serve as registration marks for centering your circle. Here’s your choice: point at the 12 o’clock mark. . .

. . . or not? Try them back and forth until you settle on one. There is no wrong or right — just what is best for your block.

The block looks more relaxed with all those papers out. I loved fussy-cutting the X in the aqua, and love-love-love this circle.
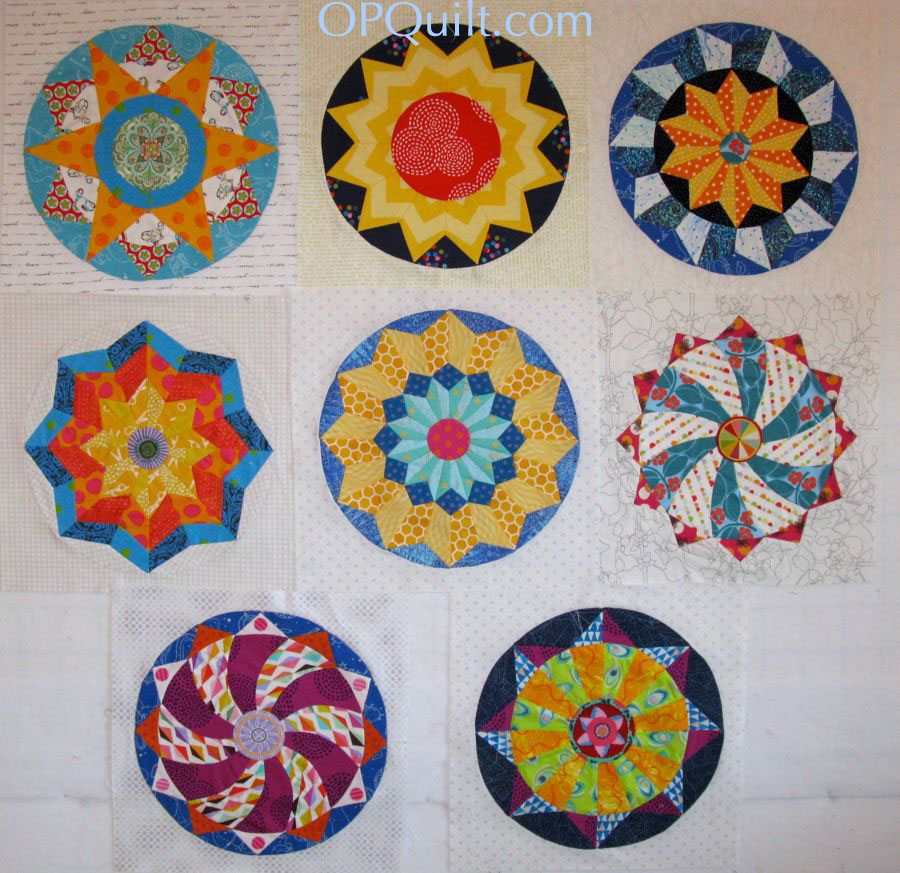
So here they all are–aren’t they fine looking? Until next month, happy EPP-ing! If you finish any of your circles, send them over and I’ll do a post.
Discover more from OccasionalPiece--Quilt!
Subscribe to get the latest posts sent to your email.

Elizabeth, I think this is the best one yet (but, then, they are ALL gorgeous)!! These lovely circles are on my bucket list. And I’m so excited for your EQ7 – a great gift!
Great block! Fun to read how you designed it. I’m going to have to get me some glue!
Brilliant seam tip, I loved seeing the process from design to finished block
I’m so terribly impressed with all the work you’re putting into designing these. I believe I see a book in your future! Are you sure you use QuiltPro… because I think your picture shows you using Electric Quilt. In any case, I’m impressed that you can design circles in your program. I’m struggling to design hexagons in mine. And I know what you mean about printing pieces and checking to see if they’re precisely the correct size. I’m trying to do a very simple design of a hex within a hex, and it’s proving challenging. I made a test block, but of course it’s curling, so I know it isn’t quite right. How I’d love to sit with you for a day and play with these ideas. Hopefully you have a few more designs up your sleeve so you end up with enough blocks for a quilt! Keep up the lovely work, and thank you for sharing!
Oh, I’m sorry! I see my oversight. You received EQ7 for Christmas, and you’re already familiar with QuiltPro. Gotcha! I’m on EQ7 for Mac and really like mine… if I could just master it!
I’m so jealous you figured out EQ7 so quick! I bought it specifically for The Gardens Of A King and could not figure out how to do a circular block. Was so disappointed and its on my list to learn how to use it, but no time so far!! I would love to be able to watch you make it work! I’m not familiar with Quilt Pro…would love to know more about it! If you are trying new papers for using with glue, try shiny photo paper. When I glue, which isn’t too often any more, I use glossy photo paper. The glue sticks, but pops right off without damaging the papers so you can reuse them. I did this for my large Hexie quilt and it worked wonderful! Love your new block!
Absolutely LOVE this EPP circle. I am wishing I didn’t have so many projects lined up already:) I will need to plan on trying this technique in the summer. Thanks for sharing your dynamo quilt skills. (Looking forward to seeing your Four-in-art quilt!)
Each block is so very pretty. I’m so impressed with your design skills
I’m a new follower and absolutely love your circles. What a fantastic documentation of your process. I hadn’t ever thought of machine sewing a set of fabrics to a smaller piece to make it easier – thank you for that tip.
This star block is great! I EPP when I travel but I’m so tired of making hexie flowers I could just spit. I think I’ll try this one! Thanks so much for sharing!
Elizabeth. This one is amazing. Can’t get over how flat it is after all those seams! I am a new convert to glue as well. Not a lot is needed and the papers come out easily. Definitely faster than pulling out threads. It’s gorgeous
Wow Elizabeth, didn’t know one could do such elaborate designs with English Paper Piecing! What a great block!
They are definitely a fine group of circle blocks – love them all!
Thank you so much for taking the time and effort to share your process. What an amazing block! What an amazing quilt this is going to be!
i LOVE this quilt block/circle. What a wonderful reminder of a great trip! Someday you need to make a Church Quilt that is full of designs borrowed from the cathedrals and churches you have seen around the world.
Wow! All of the blocks have been super and this one is as well!!
Your blocks are fantastic. You’re very clever to have designed them yourself. And your piecing is beautiful too. I love the way you’ve created the illusion of shading in this latest block. I’m doing la passacaglia, and my papers are starting to pop out already. (I’m using the bought ones from Paper Pieces). I”m told that the glue dissolves in heat and humidity, so if I have trouble getting any out I will just run the hot shower and take them out in a hot, steamy bathroom. Who knew the solution for croup is also the solution for removing paper pieces!
Yet another great circle block and I loved seeing the inspiration for this one! I tried card stock and have to say I prefer using regular 20lb bond paper.
Well gosh, Elizabeth, you’re really something with that program and all those pieces. It’s really beautiful. I love you being a stationery nerd, we must be kindred spirits.
Every time I see these blocks I want to start EPP. They are just stunningly beautiful and brilliantly done.
Your circle just keep getting better and better.
Wow, I am so amazed & impressed!
I think this is my favorite of all of the circle blocks. I’m curious about why the original isn’t quite symmetrical — it has those couple of outer triangles that dip into single pieces rather than between two pieces. Any idea why?
I have never attempted any form of paper piecing – but this has my attention as does the POTC. Count me in. I am going to at least give it a reasonable try. Thank you so much for sharing your work so graciously.