This is part two of the tutorial for the Project Folio. Click *here* for part one.
STEP TWO: Making the Front Vinyl Window

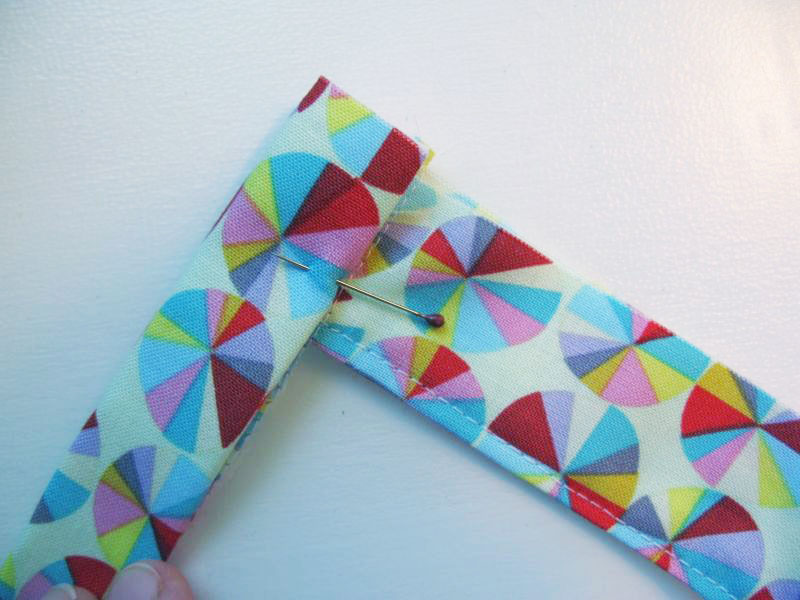
The side (1 1/2″ wide) strips go on first, on the shorter (15″) sides of the vinyl rectangle. Sandwich the vinyl between one interfaced piece of fabric and the other (un-interfaced, or plain) piece of fabric, lining up the raw edges, with right sides facing each other and towards the vinyl.
If your strips are longer than your vinyl, don’t freak out. Just center the vinyl and stitch along the long edge, using a 1/4″ seam. Carefully press the strips away from the vinyl, keeping your iron ONLY on the fabrics. Don’t touch the vinyl. You won’t be happy if you do. Topstitch on the fabric, about 1/8″ away from the vinyl. You may use contrasting or matching thread. I was whipping through these, so whatever I was sewing with was what I used for topstitching.

Trim the fabric strips even with the vinyl. Repeat on other shorter side.

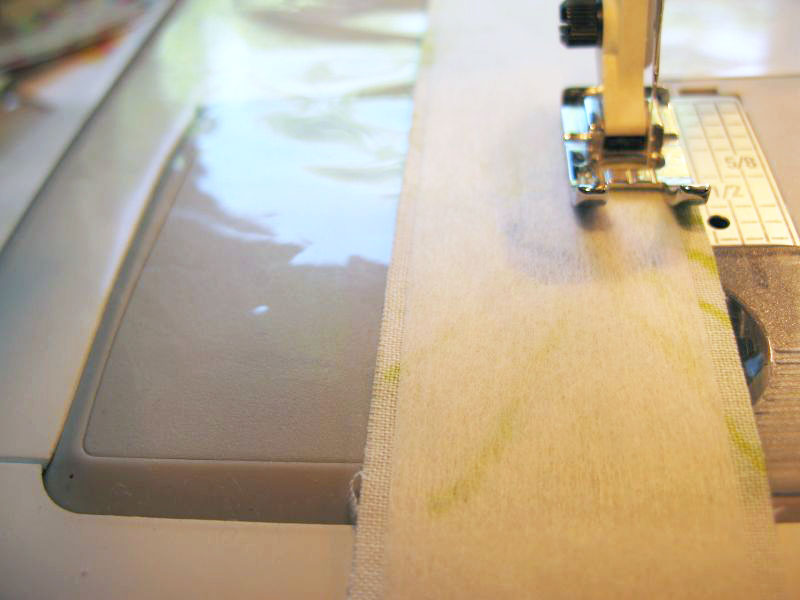
To put the upper, top strip on, sew ONE piece of wider (2 1/2″) interfaced fabric to the vinyl, right sides together. It’s easier if you put the vinyl to the feed dogs to do this step, and kind of ease it along.

Fold the long edge over 1/2″ and press. You are working on the TOP edge of the vinyl front window at this point.
Turn to the back, lining up the folded edge with the seamed edge, peeking through the vinyl to make sure they line up. Topstitch this down, encasing the vinyl edge. After stitching, if the raw edges extend beyond the existing side pieces, trim.
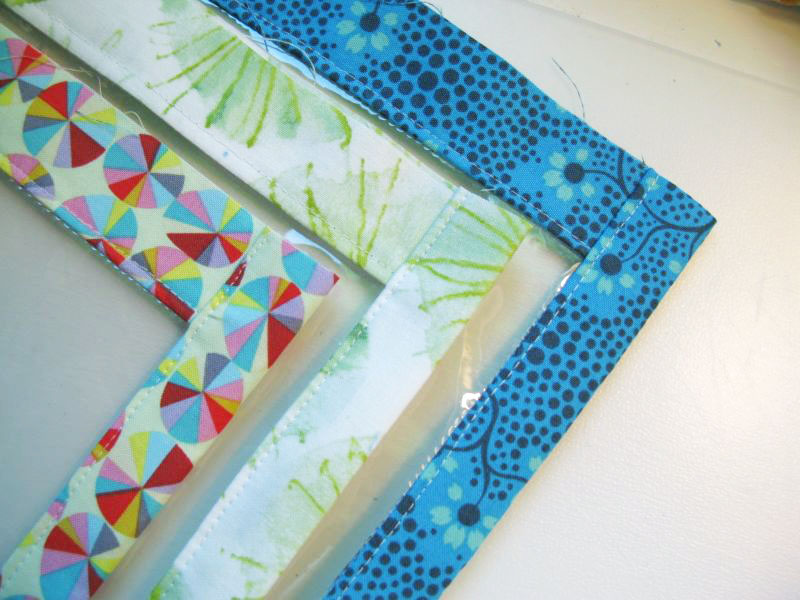
Here are all three of my folios, showing trimmed edges and stitched-down tops.
To add the edging to the bottom of this window, use the sandwich technique you used with the shorter sides. Sandwich the vinyl in between one interfaced piece of fabric and one (un-interfaced, or plain) piece of fabric, right sides facing each other and towards the vinyl. Stitch in a 1/4″ seam, then press away from the vinyl. (Carefully.)
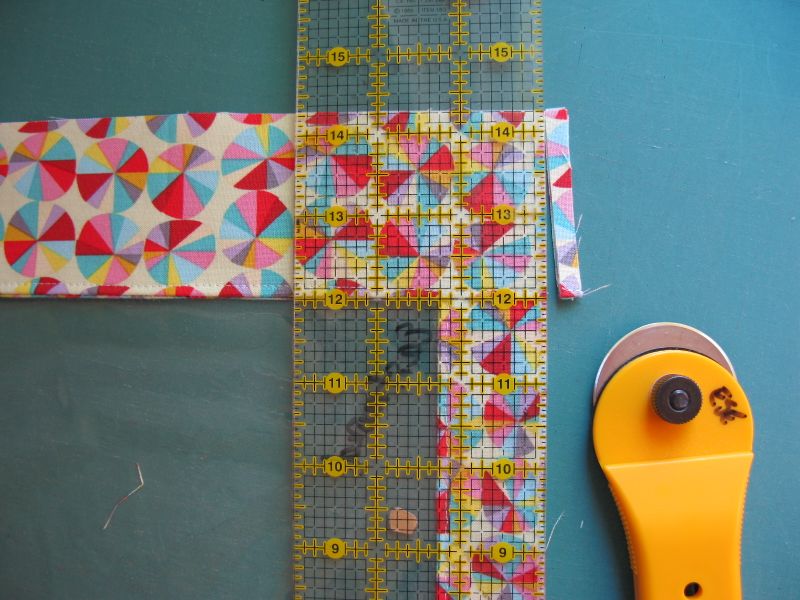
I’m trimming the excess fabric off the bottom strips in this photo.
STEP THREE: Trueing-Up the Back and Front
Confession: I had a scrap of vinyl that was slightly smaller than the desired size, but I used it anyway. But then that makes the front a different size than the back. I can fix this with my rotary cutter.
No, I didn’t obsess about cutting down the back, either. BUT! I only trued up the sides. The front is LONGER than the back, in the top-to-bottom measurement. DON’T TRIM THE TOP OR BOTTOM!!

Just lay the back down onto the vinyl window front, centering it as shown in the photo above, so you can trim the exact same amount from the sides.

I’m only trimming down the sides here. I kept the differences in the top-to-bottom and only cut the sides to be the same width.
Sides are trued up; notice longer length on vinyl window front, peeking from behind the back pieces.
Next post: Zippers!! and Finishing. And a Giveaway!!

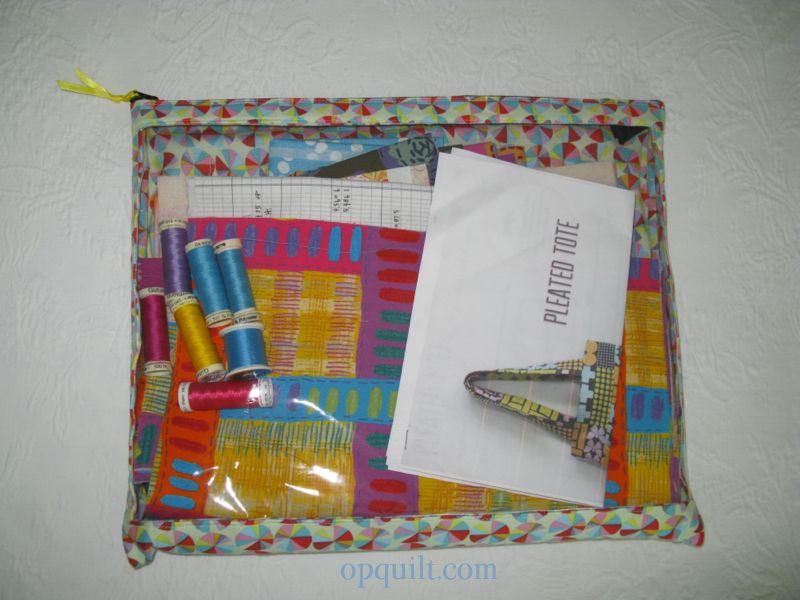
All of these folios measure roughly 11 x 17. You are more than welcome to make these for your own use, or sell them in a craft faire, but please please, don’t take any of my tutorial and copy it onto your blog. Practice Friendly Attribution, if you please, by linking back here, if you would. And please please don’t steal my content to make your own pattern, and call it your own.
Discover more from OccasionalPiece--Quilt!
Subscribe to get the latest posts sent to your email.

This is great – I purchased some clear vinyl ages ago and never got the nerve up to sew with it! Thanks for the tute 🙂
cute bags. thanks fort he tutorial – I’d love to try these!
It’s looking great. I love the laminated fabrics.