300 Quilts · Patterns by Elizabeth of OPQuilt · Quilt Finish

Sunflowers for a Daughter-in-Law • Quilt Finish

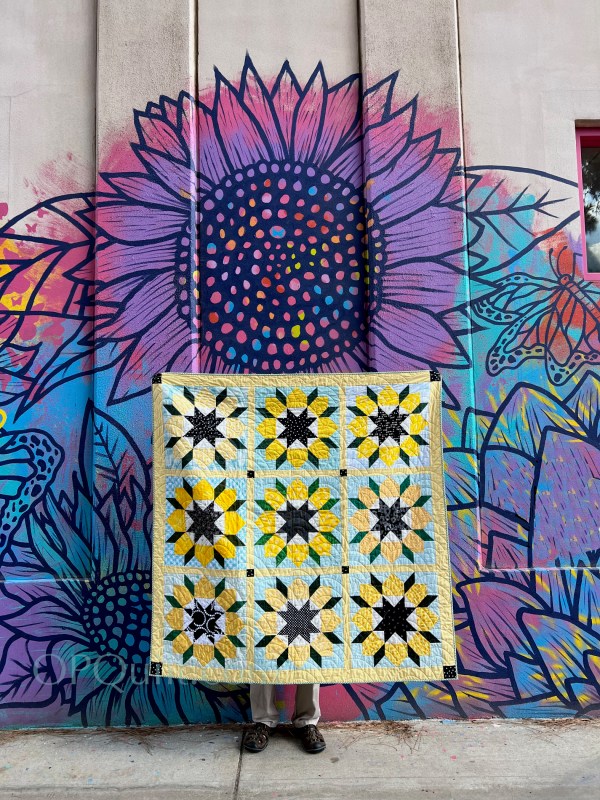
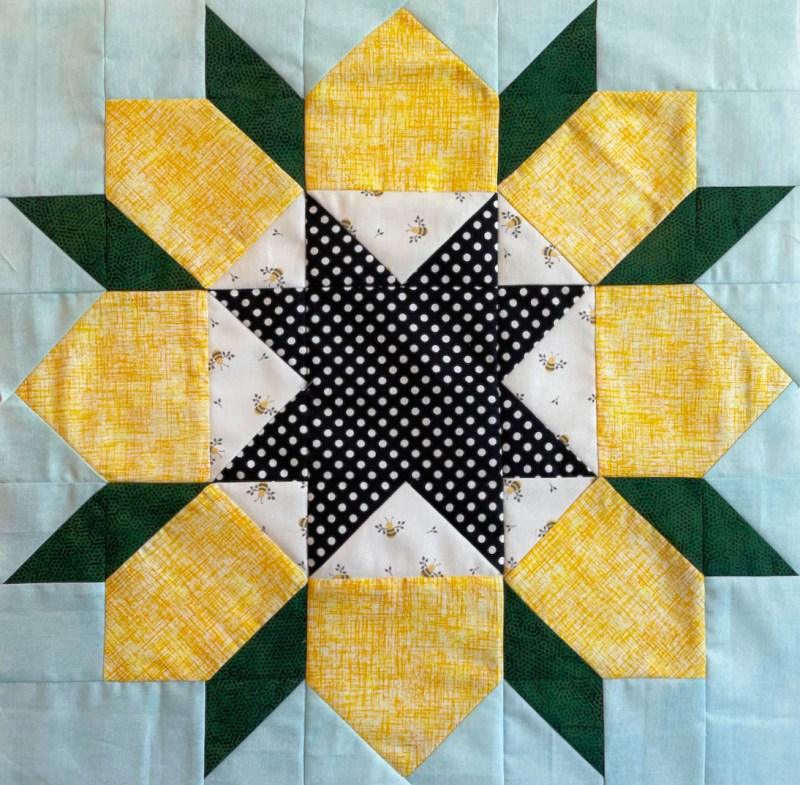
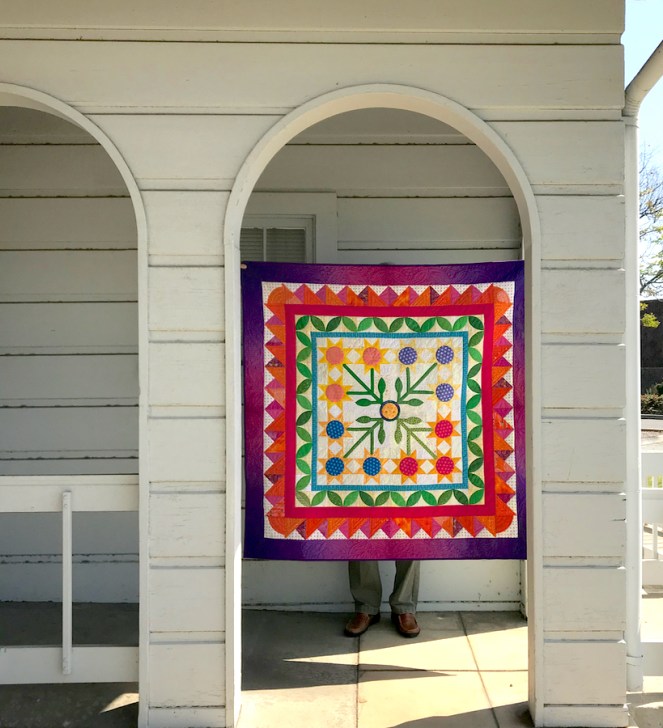
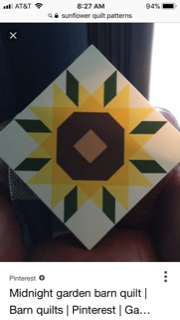
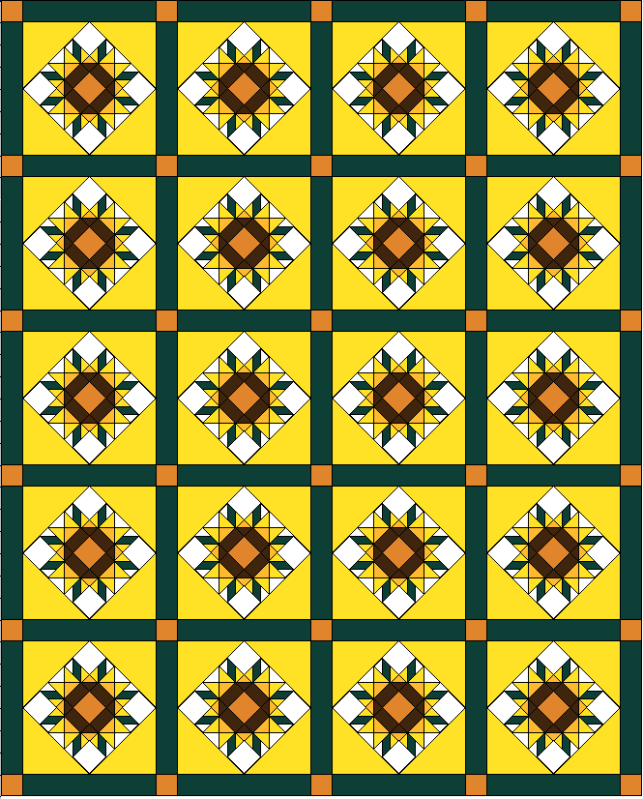
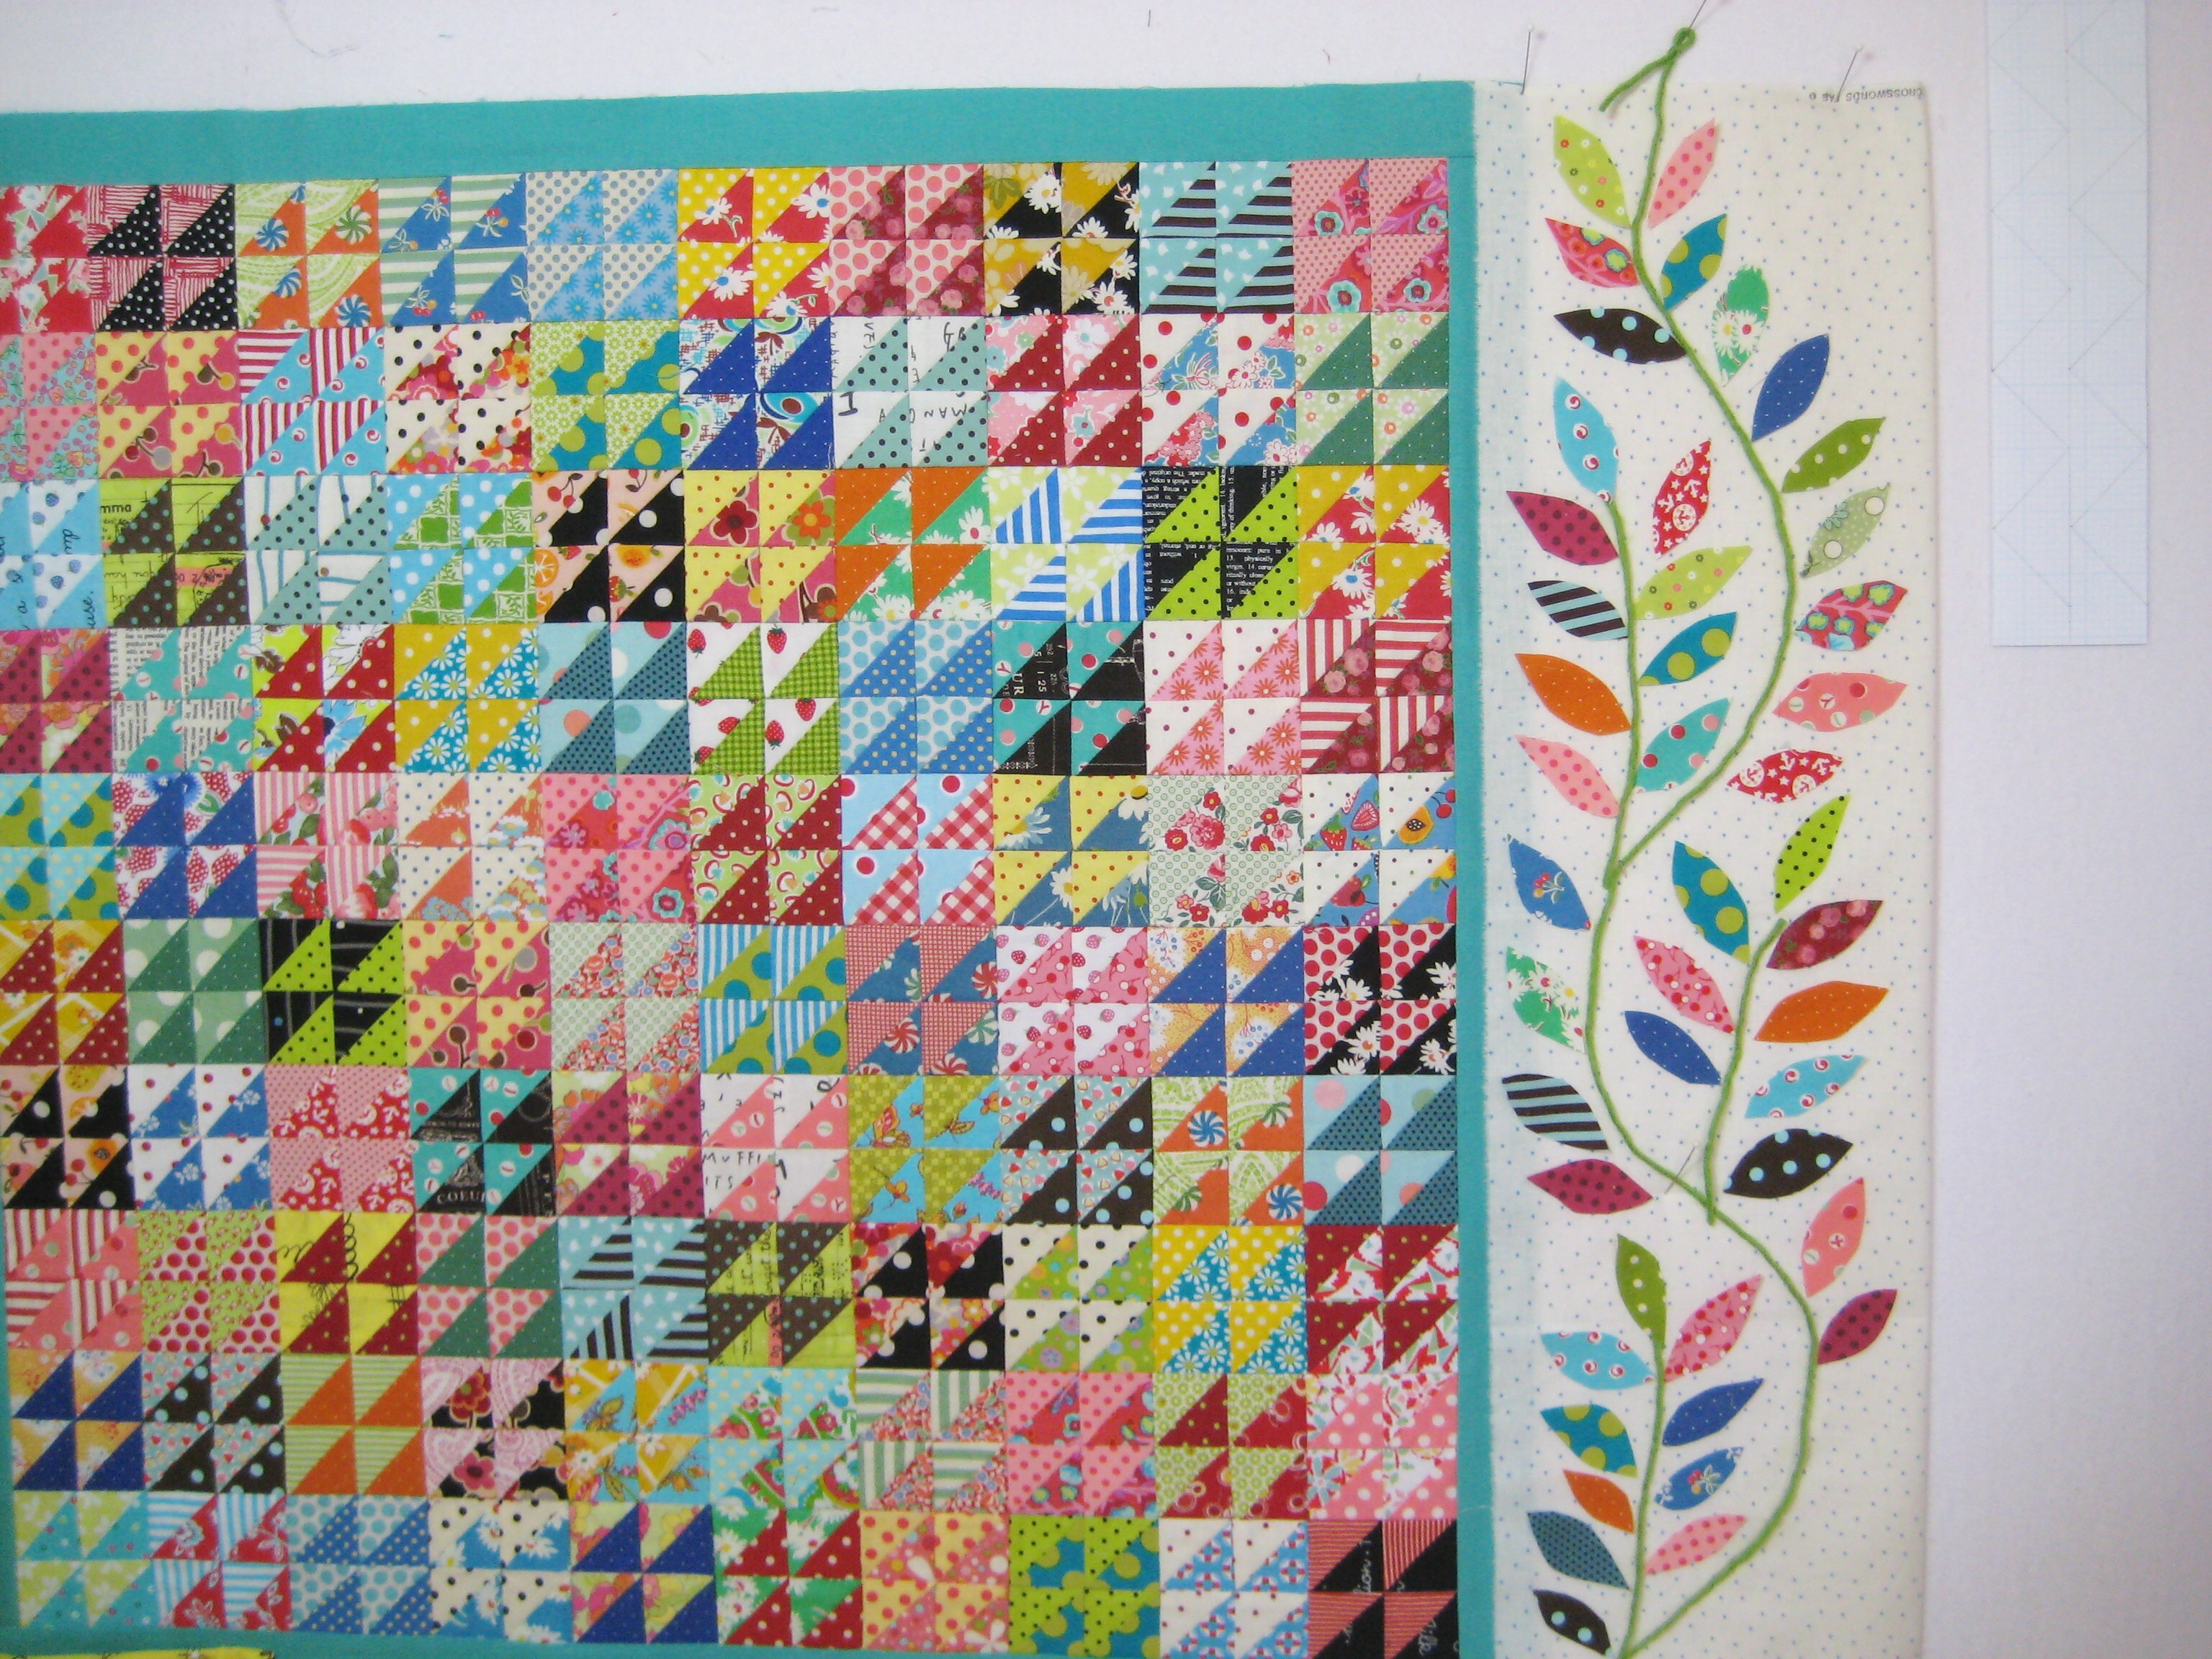
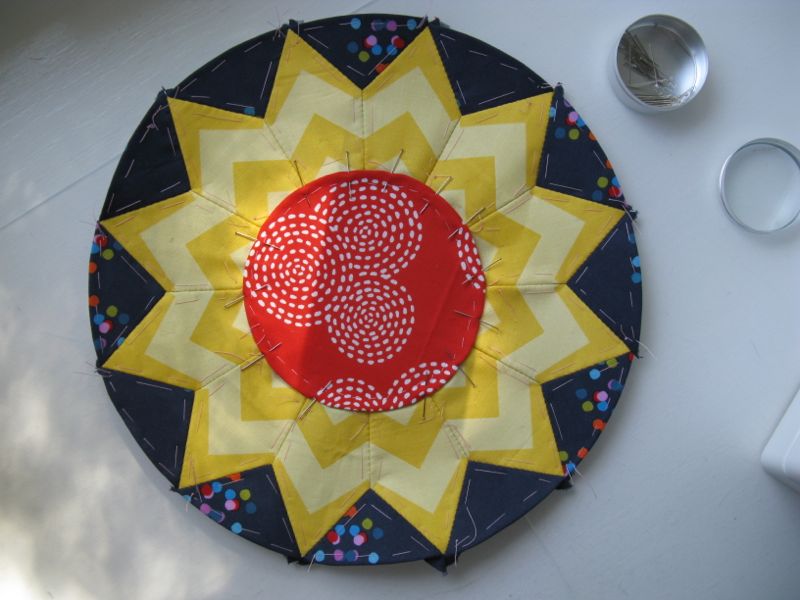
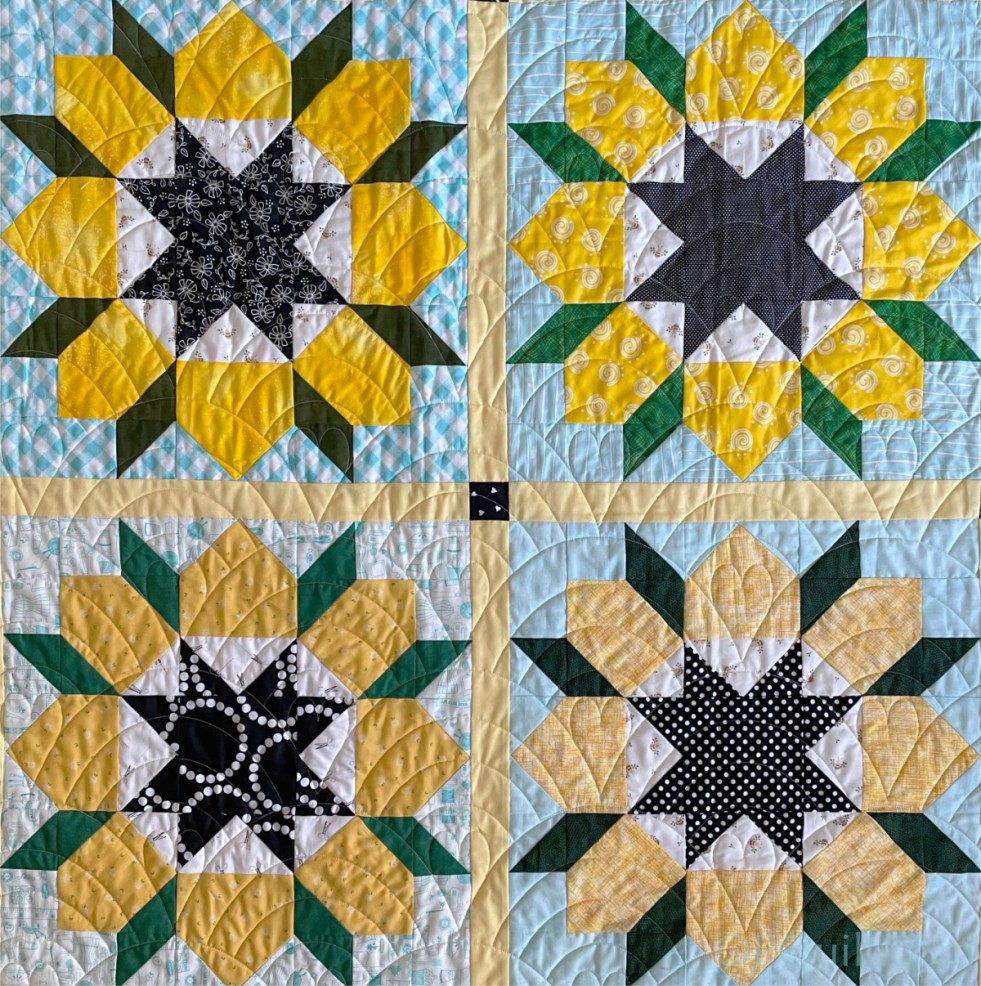
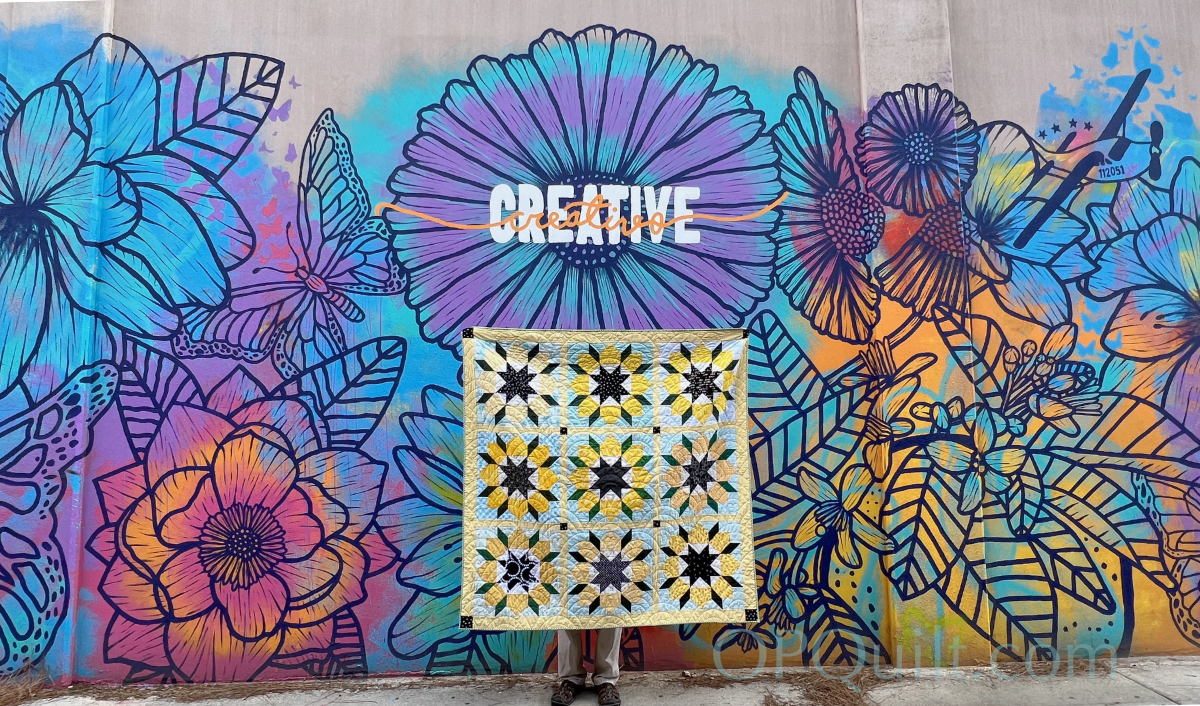
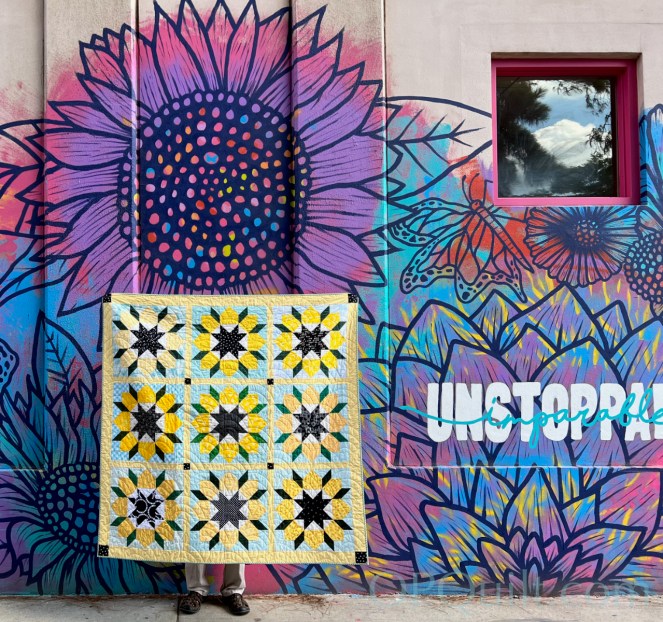
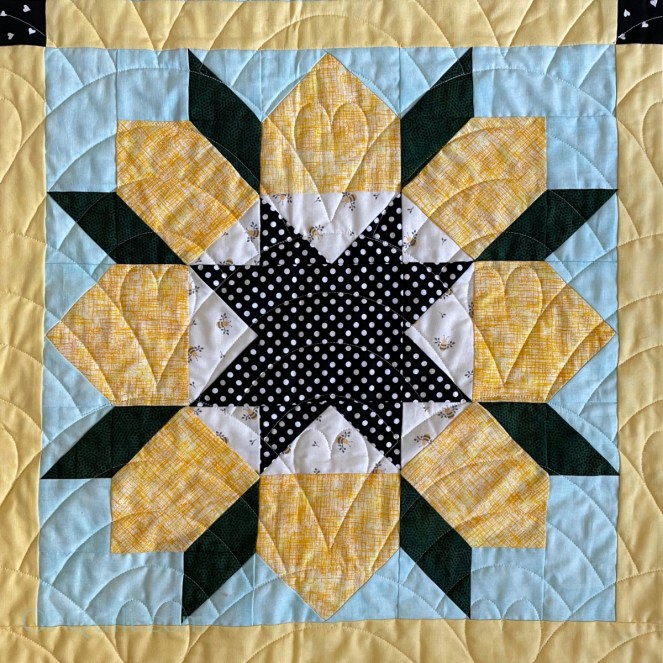
Sunflowers for Kim, Quilt #268, 62″ square

It takes a lot of steps to make a dance, a lot of pages to make a book and a lot of pieces to make a quilt.

Relationships are similarly intricate, especially the relationship between a mother-in-law (MIL) and her daughter-in-law. In my first marriage, I tried to develop a relationship with my new mother-in-law, but she and I were just too different to make it. When the son of this woman and I divorced, we made a deal: I’ll take the children to see my parents, and you you take the children to see yours. Within eighteen months time, we’d split the property, I’d met my Real Husband, and he and I married and moved to Southern California.

A few months later, I tasked the children with cleaning out their closets, and one of the kids handed me an unopened envelope from the former MIL. I opened it gingerly, and in it she took me to task for moving her grandchildren away from her, and for generally ruining most everything. I don’t know what happened to that letter, but now, thirty-plus years later, I recognize how right she was. I did move away, I did take the children some distance. But I also recognized her sorrow and from then on sent her school pictures, short notes, had the children write letters, trying to keep up a connection that her son was unwilling to do. I never saw her again in person, but mourned her when she died.

When my sons married, it was my turn. I have found in moving through the world, you either love your mother-in-law or she drives you crazy. There doesn’t seem to be too many in the middle. Sometimes we love our MILs because they raised our husbands, and we give them the respect owed to them for bringing us this wonderful human. Other times we wondered what in heavens’ name they were thinking to raise someone who _________ (fill in the blank). Sometimes we form a close enough bond that we move in sync, and there is no competition. However, mostly as a MIL, you bite your tongue. Eat your words, if needed. If the occasion calls for it, follow Emily Dickinson’s advice: “Tell all the truth, but tell it slant.”

As far as the MIL game goes, I’ve had two, one mentioned above, as well as a near-saint who was supportive and yes, raised the Best Quilt-Holding Husband in the trade (one among many of his fine talents and qualities). Between handing over my sons to their wives, as well as watching my mother and her MIL, my sisters, my friends and their MIL relationships, I’ve learned a lot. I’ve made all kinds of mistakes, but hope for forgiveness. and try to practice that as often as I can. Whatever your relationship is with your mother-in-law/daughter-in-law, there are a lot of pieces that have to come together to make it work.

I have made quilts for all three of my daughters-in-law (besides the wedding quilts); one carted both quilts off in their divorce; I’m waiting for the new love in my son’s life to let me know what she would like. I don’t know if they like their quilts, but I like thinking about these women: strong ones, smart ones, women who like to laugh, women who are partners to my sons. Women who raise interesting children, and sometimes include me in their lives, for in this new century of no social rules, I am the “away grandma” as my son reminds me and contact can be sporadic. Yes. It’s my turn.

This quilt is for Kim, a daughter-in-law who loves to laugh, doesn’t hold grudges, is a great mother, a fine partner and wife for my son, and doesn’t let him get away with too many shenanigans, while escaping when she can for hers. She always has a game ready for us to play, welcomes us to her home, and is easy to talk to. She loves sunflowers, those being the flowers she carried at her wedding, some twenty years ago. Happy Anniversary, Kim, for making me your mother-in-law, then redeeming me from that awful fate.

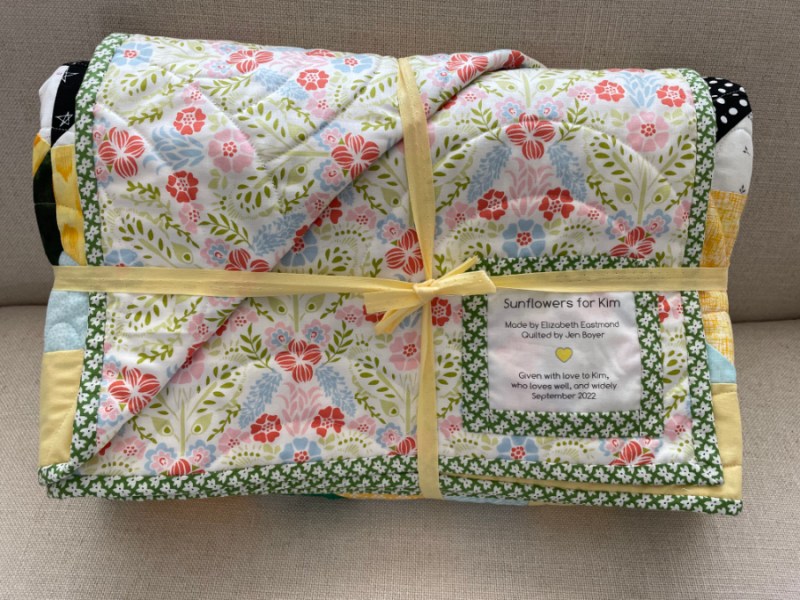
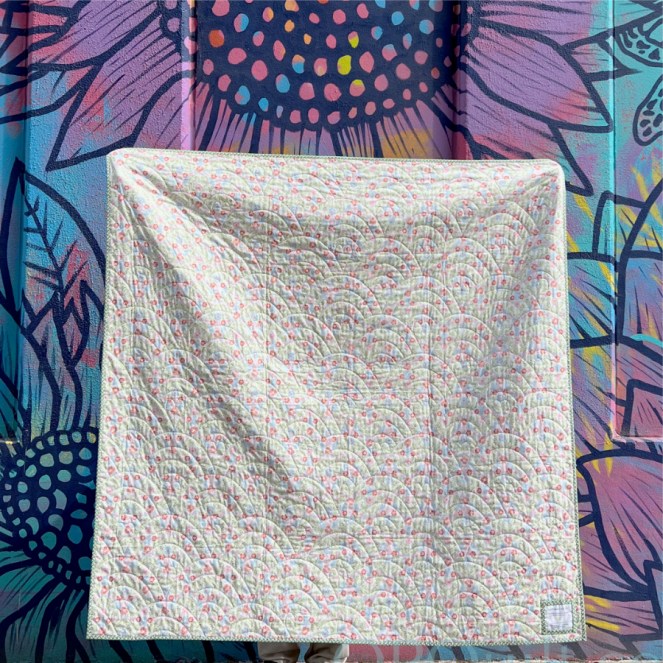
And many thanks to my Quilt-Holding Husband, who found us this wonderful mural backdrop, and to Jen, for her fine quilting using an E2E of Baptist Heart Clams.

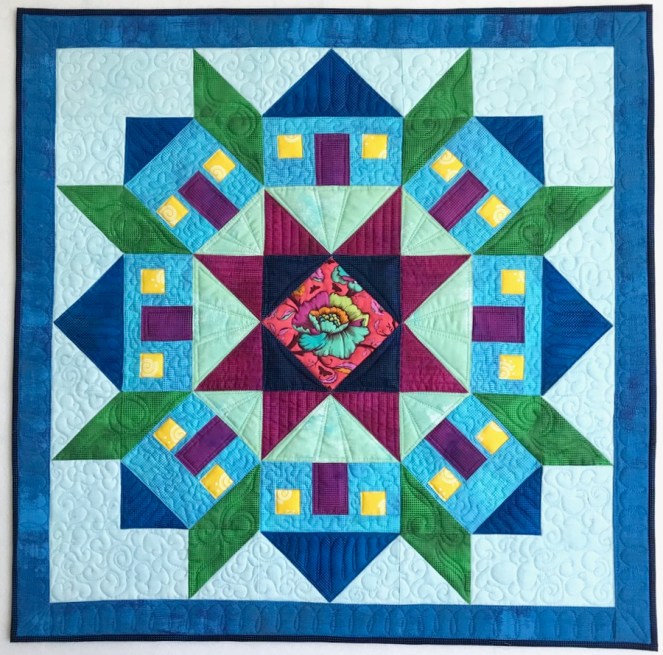
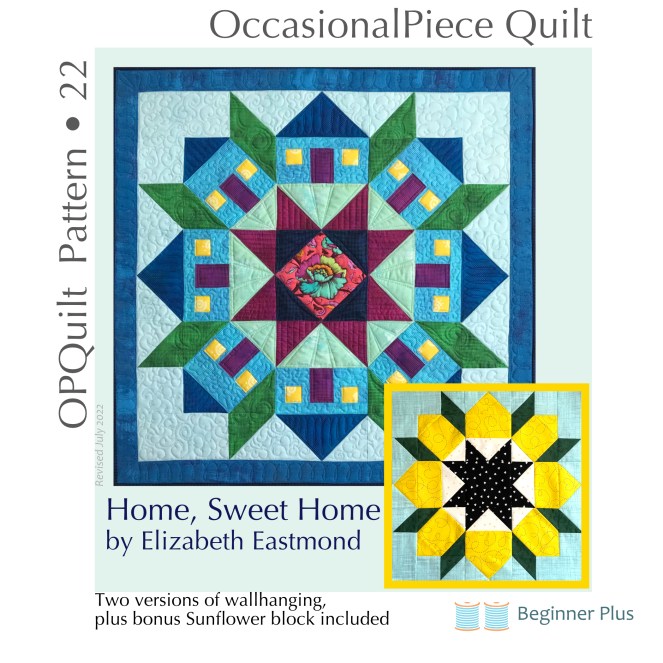
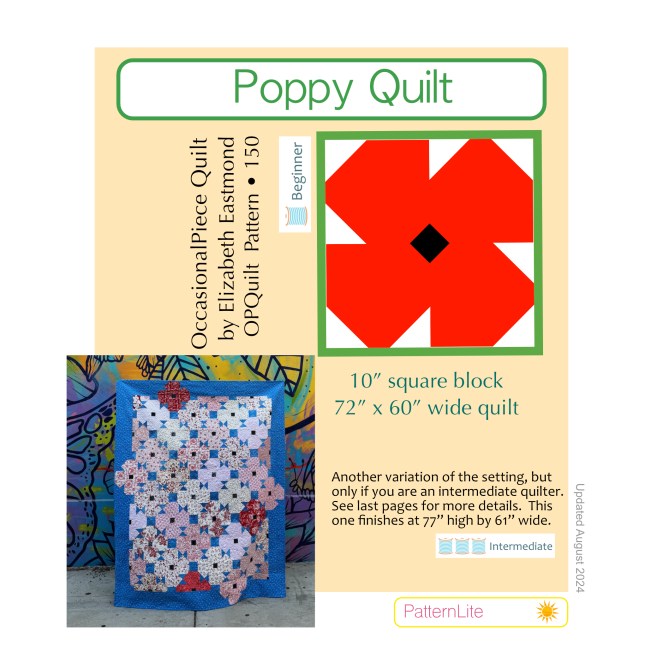
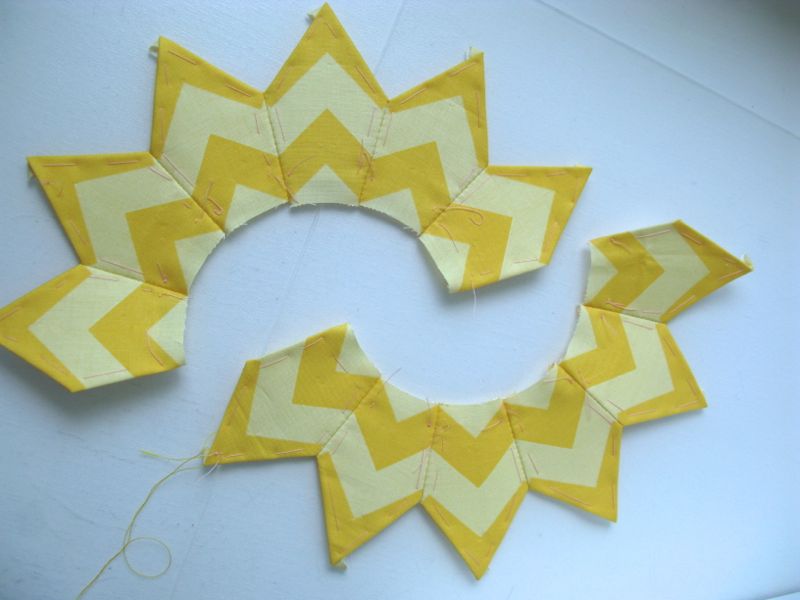
This updated pattern is found in my PayHip Pattern Shop. If you have already purchased this PatternLite Pattern, thank you. The newest version can be downloaded using the email you received when you bought it.

(PatternLite Patterns: costs less than a pumpkin-spice drink at the local coffee shop.)
Patterns by Elizabeth of OPQuilt · Quick Quilt

Sunflower Block & Other Flowers!

This block, also known as Rolling Star (Brackman 3795) has several variations that are well-known. I’ve seen this block used in multiple quilts including mine, but what amazes me is how versatile it is just by changing up the colors and the center.

Here’s a line-up from one of my Home, Sweet Home classes — the quilts are similar, but different.

I changed up the center block and added seaming for windows and doors to get this one, after I saw so many quilters turn away from the fused doors and windows, wanting to seam them instead.

Several years ago I’d written a post where I talked about making up some block ideas for my neice-by-marriage, and I still can’t believe how popular the poppy block was from that post, but of course it was a free download and those are ALWAYS popular (I don’t mind). See Notes (at the end) for link to block.

So I thought I would slide down the sunflower rabbit hole this week, and finally get the sunflower version added to my Home, Sweet Home pattern:

I put the pattern on sale (now only $7 instead of the usual $12) as a way of making it easy (no coupons to enter), and hope those looking for this pattern will enjoy it.

Home, Sweet Home with Bonus 18″ Sunflower block available here.

But the rabbit hole of sunflower blocks got deeper and I decided to do a PatternLite pattern (costing less than a Pink Drink at Starbuck’s) with a changed-up method of piecing, to emphasize the petals of the sunflower. I also added a detailed series of instructions for a Four-in-One Flying Geese block, as well as how to trim it up accurately. I put a lot more in this one than usual, but I just kept going, making blocks and having fun.

The PatternLite Sunflower! is now up in my shop.

Make some end-of-July fun!

Notes on this block:

About every other month, someone writes to me, asking if they can buy that sunflower pattern, which was an illustration on the Poppy Flower post (which was very popular in Australia). I popped it into a Google Search, trying to figure out what rando had taken off with my image, and found this:

It’s a sham website, ranking dead last in safety, in security. Don’t go there, but these guys are in the habit of stealing images and trying to sell them off to unsuspecting quilters (9 Pretty Barn Quilt Patterns for $42.88?).

Make this one, instead. It’s a lot cheaper!

Other posts about other Flower Blocks
Poppy Block and debut of Sunflower idea with the free Poppy Block download
April Flowers with a link to Totally Tulips Quilt from Missouri Star
Field Flowers with a link to Sherri McConnell’s pattern Flowers for Emma
June Flowers — a really early day post of mine, with a tutorial for a nine-patch tulip It makes me snort smile to see this post from nearly a decade ago.
I still love Blossom, which has flowering snowball flower blocks in three sizes.
Last, Sunny Flowers quilt, another PatternLite.

Hope that’s enough flower blocks for you. Since August is right around the corner, so many of mine in the garden have dried up with July’s heat. Guess we’ll just have to make them in fabric!

Italy’s field of sunflowers
Free Quilt Pattern · Patterns by Elizabeth of OPQuilt

Flowers!

My nephew’s wife, Grace, wrote to me and asked for help.  She is a young quilter, who makes awesome gooseberry jam (she shared a jar with me), so I wanted to help. The quilt was for someone close to her who had just been diagnosed with breast cancer, and she thought a quilt was needed.  I agree.

Sunflower1

She sent me the screen shot you see above, and since it was on Pinterest…and you know how much I LOVE their search engines (NOT), I thought it was easier to draft it on my computer using QuiltPro than try to find the original design (I tried…and failed…but kudos to whoever dreamed it up).  Besides, that was one of those “barn” quilts, painted on wood, not a cloth quilt.

This is what I came up with.  But I knew Grace wanted to move quickly, and yeah–all those pieces?

I thought about my Home Sweet Home mini quilt, and how she could make fewer blocks, but bigger blocks?

UPDATE: There is now a pattern for this block included in the Home, Sweet Home mini quilt pattern.

Grace wrote back.  She loved what I’d done, but now they were thinking poppies. She sent me a sample of a quilt she’d seen.  I drafted it up in my QuiltPro program, drew up a quilt.  But I thought I should test out my own pattern, so I made a Poppy Block:

Poppy block constructon1
trimming snowball corners
Poppy for Grace

I think it will be cute quilt.  This is a 10-inch block and I thought you’d like to have the pattern, too.  Each is a PDF file which you can download.

Here’s the Poppy Block:  Poppies for Grace

And here’s the quilt instructions: Poppies for Grace Quilt

It can be made in reds and greens and be thought of as poinsettias for Christmas.  Or made to commemorate Anzac Day in April, for the Australians.  Or red and white for a bouquet of posies for Valentine’s Day.  Have fun, but please don’t print off dozens for a class or for your friends–send them here to get their own free pattern.  Thanks.

About QuiltPro: they do not pay me or give me free stuff.  I started using that quilt program eons ago, and they are still going strong.  If you are struggling with the current software (I know, I have it and love/hate it too), consider trying this software, as it’s based on making shapes, not connecting lines.  I find it pretty intuitive, but as with anything, there is a learning curve–it’s just that theirs is not quite as steep.

redwhite triangles1
redwhite triangles2

Making that block added to my collection of red and white triangles (ignore the interlopers in the upper right corner).  I trim them to whatever measurement’s closest, without it being a weird number, and save them.

Every once in a while, I sew them into four-patches.

I haven’t decided yet what to do with them, but a couple of questions arise: do I include the Christmas prints?  Or do they get their own collection? (I think so.)

Do you ever quilt with “rules”?  It’s about all I remember from my beginning art classes, ages ago in college.  The assignments laid out rules to create by — an edge to the sandbox — if you will, and went something like this:

  • Take an old piece of clothing, adhere it to a canvas and paint it like something else.
  • Use three shapes only.
  • Create a composition by taking a square of black paper, cutting out some shape and using the negative and positive pieces.
  • This assignment will use only two colors, but you may use any range of those colors.

And so on.  There are many books out there in the marketplace for guided creativity, but they all start with a rule.

Sometimes I find little bags of treasures in my sewing room, with pieces inside that have been collected according to some rule.  Like the red and white triangle rule.  Or the 3-inch square rule, but I kind of think that last one’s a bit of a cheat.

HST quilt
source

About seven years ago, I saw this on Jan Burgwinkle’s blog, Be*mused, and fell in love with it.  Maybe that’s why I started making little HSTs.  (While she doesn’t seem to update her blog much these days, it’s still amazing to read through the archives.) So that’s my rule and I’m sticking with it: red and white triangles, although seeing this quilt again does make me wonder if I should break it.

EPP · Shine: The Circles Quilt

SHINE Circles Block 2, English Paper Piecing

EPP Circles #2 Block_finished

Circles Block #2: Sunshine

Here we go again, with the second block in our slow sewing, English Paper Piecing, series of circles.  While I call it Sunshine, because of the fabric I used, the official name is called Kansas Sunflower (I like it best when we quilters acknowledge the history of our blocks).  Barbara Brackman’s book shows its origin around 1928.

RWB_Block2

The free patterns are now returning (Red, White and Blue version is above).  I request that you not distribute them, but send people here to this website to get them.  Click to download a PDF file: 

SHINE Block 2 pattern_opquilt

Please remember to set your printer settings to 100% and check the little scale square included on the pattern.  It should measure 1″ in size. Illustrations of the patterns below will vary from the newer version.

This one has a large center circle, which measures a bit under 5 1/2,”  but I would cut the fabric circle for the center at 6″ diameter, because I think having the extra bit of cloth is better.  To get a smooth template to gather it up over, iron two pieces of freezer paper together, then trace the circle.  It should give you enough stability.  Or do as I did: head to your iron, and using the tip, iron it in small bites around your paper circle, then sew it to the paper.

EPP2 Circles block #1

Here’s the sketch of the block.  On the lower right you’ll notice that I colored in one half-arc green and one half-arc blue.  If you want to split yours up like that, I included just one tracing of that as an option, but you could also just cut the other arcs in half and go at it that way.  I prefer the larger outer arc. As before, in Circles Block #1, there is an assumption that you know a bit about English Paper Piecing, where you take the pattern, lay it out, then fold the seam allowances back over the paper pattern, then baste.  Others have used freezer paper, or glue.  Do a Google search if you are curious about these other ways of securing the paper.

EPP2 Cutting out EPP pieces

I wanted to use a chevron for the “petal” piece, so I fussy cut them so the chevron stripes would meet along the sides.  I pin down my pieces (since these are symmetrical pieces, it doesn’t matter whether the printed words are up or down), then just freehand rotary cut around them.

EPP2 Pieces Laid Out

Auditioning everything.

EPP2 Arcs Basted and Stitched

After basting the seam allowances down to every pattern piece, I stitched the petals together in two groups of six.  Then I sewed the arcs in between those, as shown below:

EPP2 Setting in Outer Arc

EPP2 Stitched and Center Circle Pinned

I stitched those two flower halves together, then the last two arcs, then laid on the center.  I don’t know why I chose this orangey-red; it just spoke to me.  I had already basted the seam allowances down so I just arranged it on the petals and pinned it down.  I appliquéd it onto the petals, and that’s when I discovered that maybe a 6″ diameter circle might make you happier as it’s a scant 1/4″ overlap in some places.  Then the fun part: taking out some of the papers.  I released the center circle basting threads and the petal basting threads and took out those papers, but left the papers in the deep blue outer arcs.

EPP Circles #2 Block_finished

I’m putting the photo in again, because now you have a decision to make: do you want those four seams in the outer pieces to line up with a point?  Or to be offset (like mine)?  I went back and forth and decided I didn’t want it so busy–I liked the slightly off-kilter look of not having points dead center at Noon, Three, Six and Nine O’Clock.

EPP2 Sewing Diagram

I don’t think there is any easy way to get those four outside pieces on.  This is how I do it: I stitch the seams between parts #1 and #2 to get two pieces hooked together, then pin it about four places around that the #1 arc of the outside circle.  I begin at the lower center  (XX) and stitch around that 1/4-arc, stopping one inch short of the next seam allowance.  Part #2 is just flapping in the breeze.

UPDATE: After doing a couple of circle blocks I found I liked it better using a 15″ square and appliquéing on the circle.  See Circle #3 for information.  Your choice.

Then I go back to where I started stitching (XX), and stitch the other side (#2), using a few pins where needed (not too many, or it’s ouch-ouch-ouch).  I then seam together pieces #3 and #4, and repeat the process.  As I draw near to the #2 piece, I thread a different thread, do the seam between #2 and #3, then tie it off.  I go back to the thread I was stitching with before and then finish it off.  Repeat for 1/4-arc #4.

I just reread this, and if you are confused, I don’t blame you.  It’s just hard to navigate those pieces when they are backed with paper, and I get tired of fighting with them.  I suppose you could just seam all four outside corners together, then pin and appliqué it down like you did the center circle.  I don’t think there is a wrong way or a right way to do this.  Have fun and let me know what works for you.

EPP Circles Block 1 and 2

Are you worried about the fact that my circles aren’t matchy-matchy?  Sometimes I was worried about that too, but then in the previous post I noticed that there was such a variety of circles and colors in a couple of those quilts, and calmed right down.  Keep going.  Keep stitching.  Have fun.  Next circle block comes up around the first of August, right after our Four-in-Art Reveal of Contrasts.

I’ve started a tab with all the blocks and their posts, for easier reference.  By the way, there is no big deadline for any of this; I think I’d have a heart attack if I had one more deadline.  I just wanted a project to put in a little box and carry with me on car travels, on vacations, and while I collapse in the heat at night on the sofa to watch a good movie. (And given that it will take me several months, I may be curling up under a quilt in the cold, still hand-sewing.) Just know that it’s here if you want to make some circles, or a pillow, or need a hand project that is an alternative to 5,000 hexagon papers.  If you do decide to make one, or several, send me a photo and I’ll put it up here on the blog.  Have fun sloooow sewing!

Circles EPP Button