
This month the block is a tad more difficult, but my primary motto on these things is “I Make The Mistakes So You Don’t Have To.” Here we go.
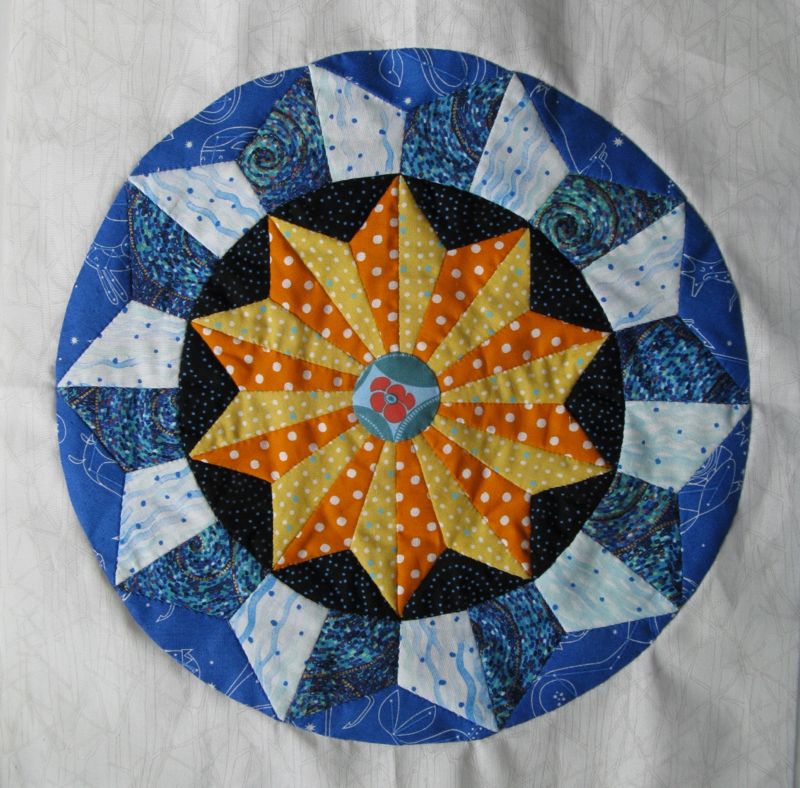
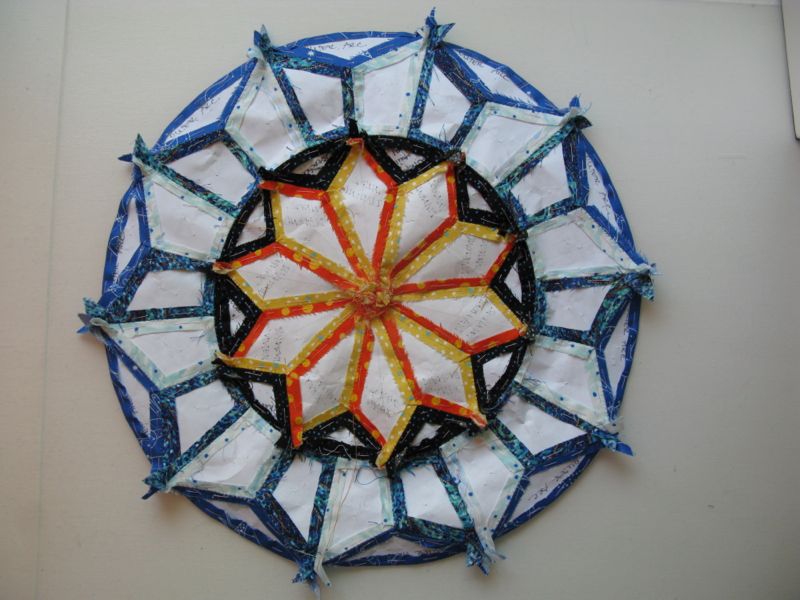
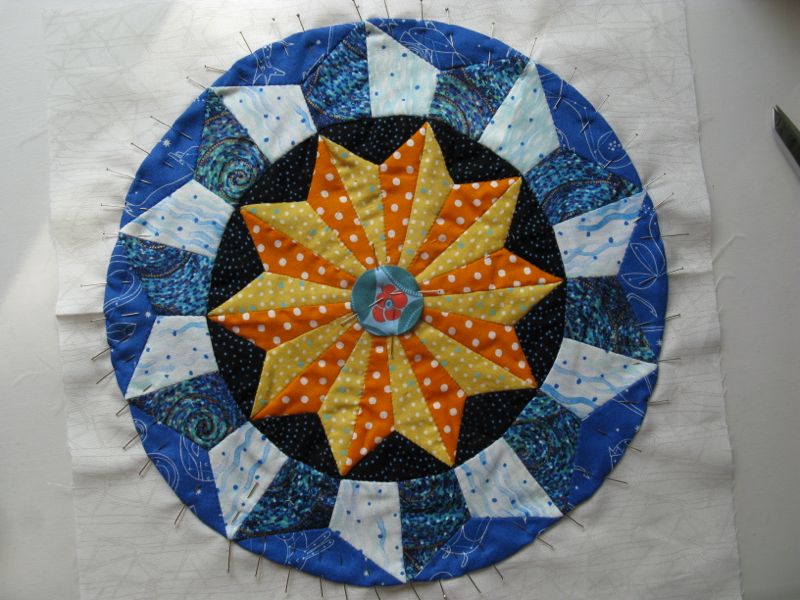
And where did the inspiration for this block, titled “Ljubljana” come from?
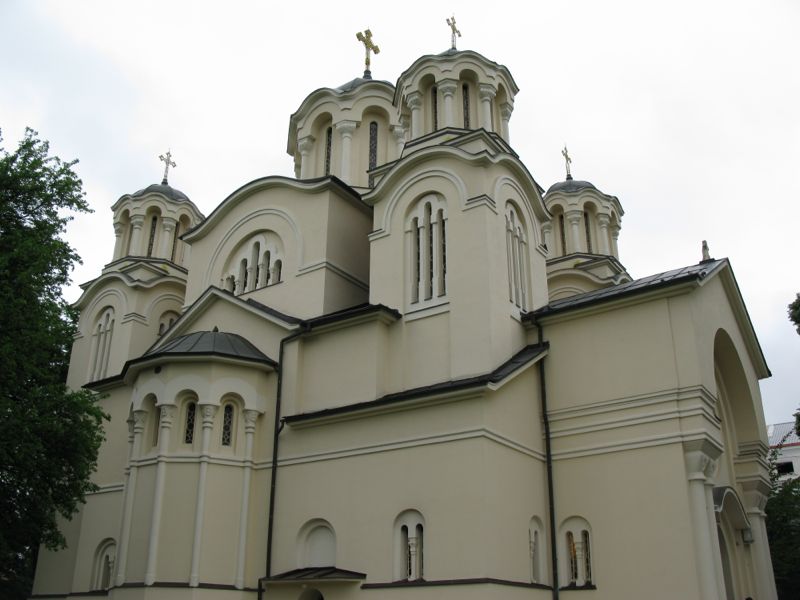
From the Serbian Orthodox Church in Ljubljana, Slovenia, which is beautifully painted on the inside (see blurry photo below), and has rich colors and lots and lots of circles. We recently visited that country, and my husband was under strict instructions to photograph any and all circles, so we gathered quite a few ideas.

The free patterns are now returning (Red, White and Blue version is above). I request that you not distribute them, but send people here to this website to get them. Click to download a PDF file:
Please remember to set your printer settings to 100% and check the little scale square included on the pattern. It should measure 1″ in size. Illustrations of patterns below will vary from the newer version.
I print out the number of sheets I need for each, then staple the stack of 3 or 4 or 5 together all over in the spaces. ALL OVER, staples everywhere in between the pieces. Then I can cut them out as a group without the paper shifting.
Please read through the entire post before beginning, as I give out helpful tips and tricks.

Choose your fabrics for your circle by laying them out so you can see the combinations up against each other.

If the pieces have a certain direction or shape and I want to reproduce the picture above exactly, place the paper with the printing FACE DOWN on the fabric, then pin.
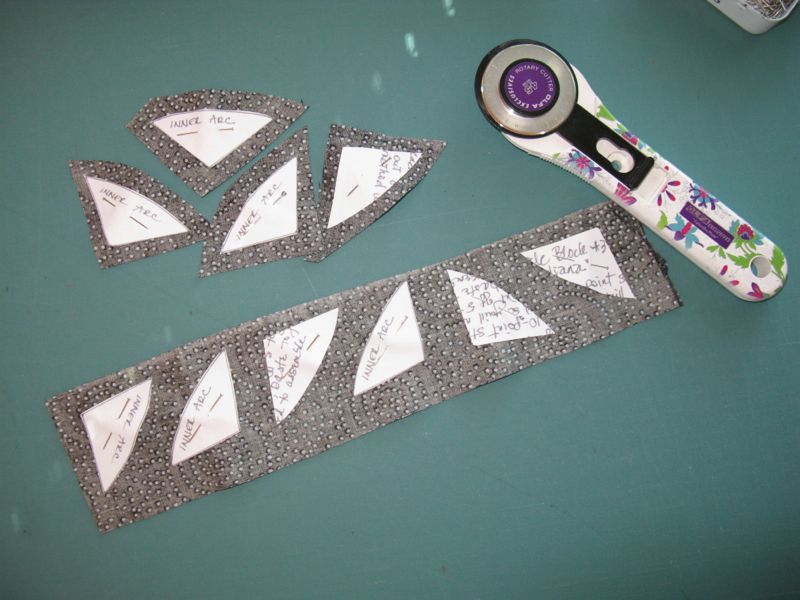
If the pieces don’t matter (like the symmetrical small arc, above), you can place the pieces either printing UP or printing DOWN, or a mix. I don’t care, nor should you. Notice that I just curve around them with my rotary cutter, as you don’t have to be so precise on that quarter-inch seam allowance for English Paper Piecing (EPP). Just get sort of close to that quarter-inch, but not less than. I pin through each of my pieces, then I fold over the seam allowances a side at a time and baste them down with that icky thread from the back of my sewing box. (I’ve got to use it up somehow.) I make sure the beginning knot and the ending tail are on TOP of the piece, not on the paper side. This is good stuff to do while you watch television.
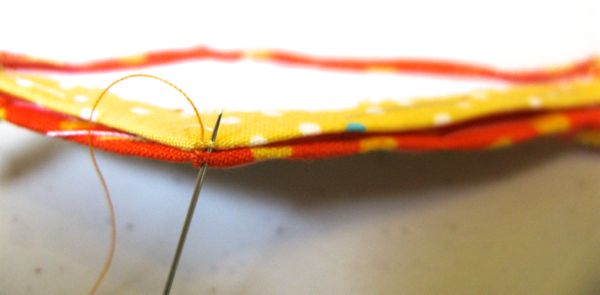
The basic idea of EPP is to sew your basted pieces together. Begin by matching up a corner. I slide my needle into the corner between the paper and the fabric seam allowance so my knot is buried inside.

EPP is basically just a teeny overcast stitch. Take only a thread or two on each side when sewing the sides of your shape together.
I sewed the first center together half-diamond shape by half-diamond shape. (More on that first thing, later.) Then sew all the shapes together.
But let me tell you about a cheater trick that will be helpful.
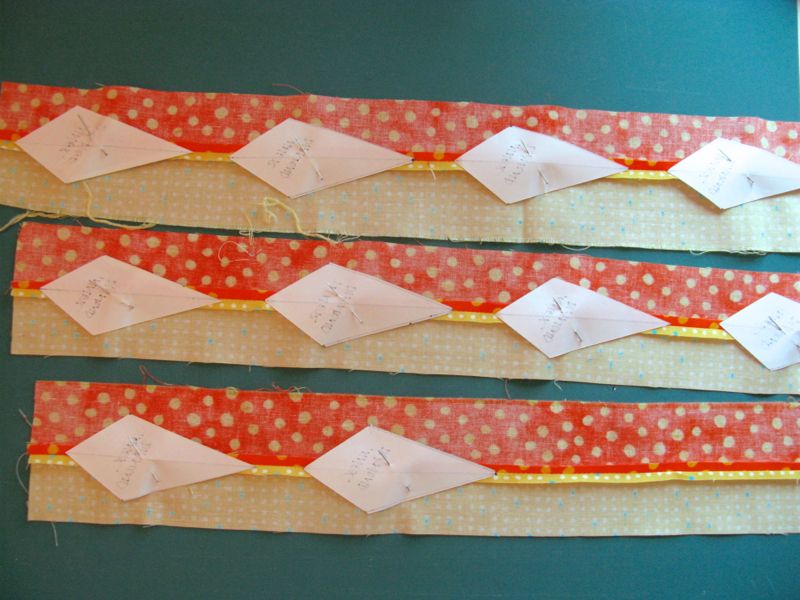
First seam together on your sewing machine the two fabrics for the diamond, then cut apart into segments (below).


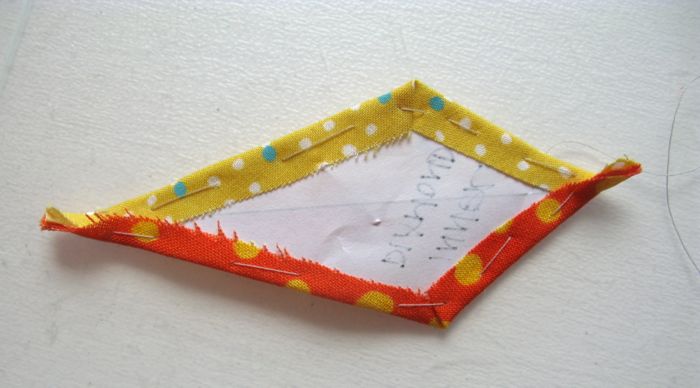
Before basting the fabric onto your paper shape, trim down the edges of the seam allowances beyond the edge of the paper. I hope that doesn’t sound confusing; see above for illustration. Those two little slivers came from the seam allowances. I’m just trying to get bulk out of the process and this won’t affect the structural integrity any.
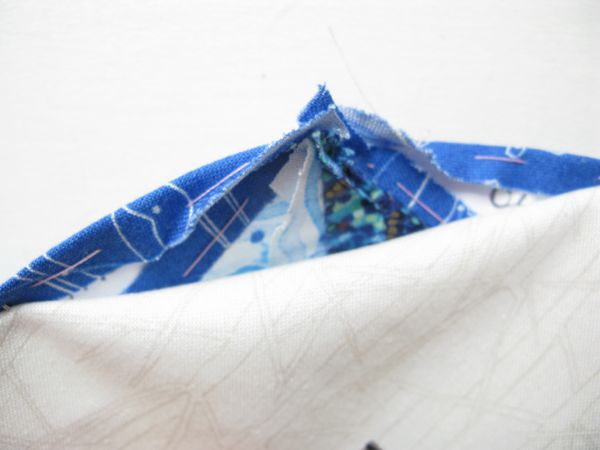
It’s okay to let the corners extend. No need to hammer everything down.
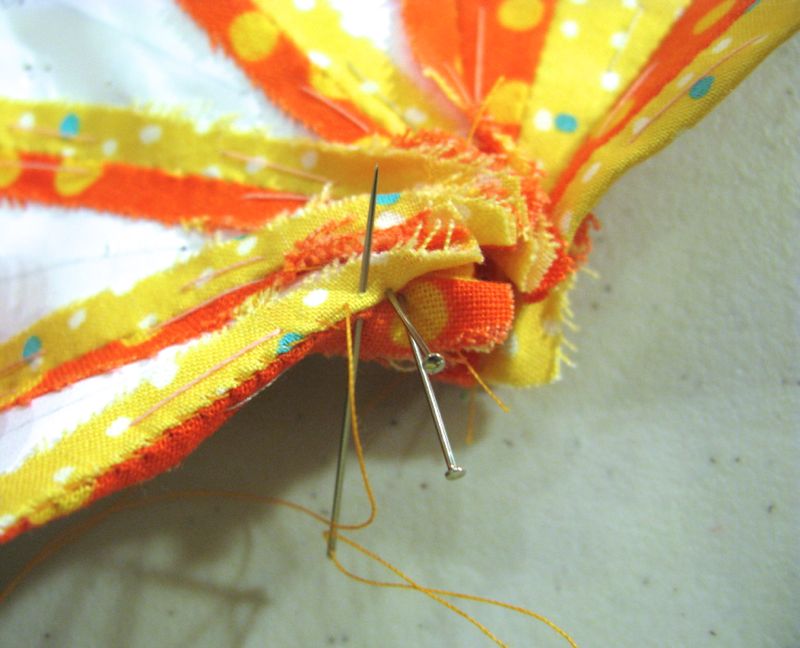
Use pins as you need to to get control as the pieces get narrower. I always take a double stitch at the end of my seam, then take the needle through the loop and draw it tight to secure.

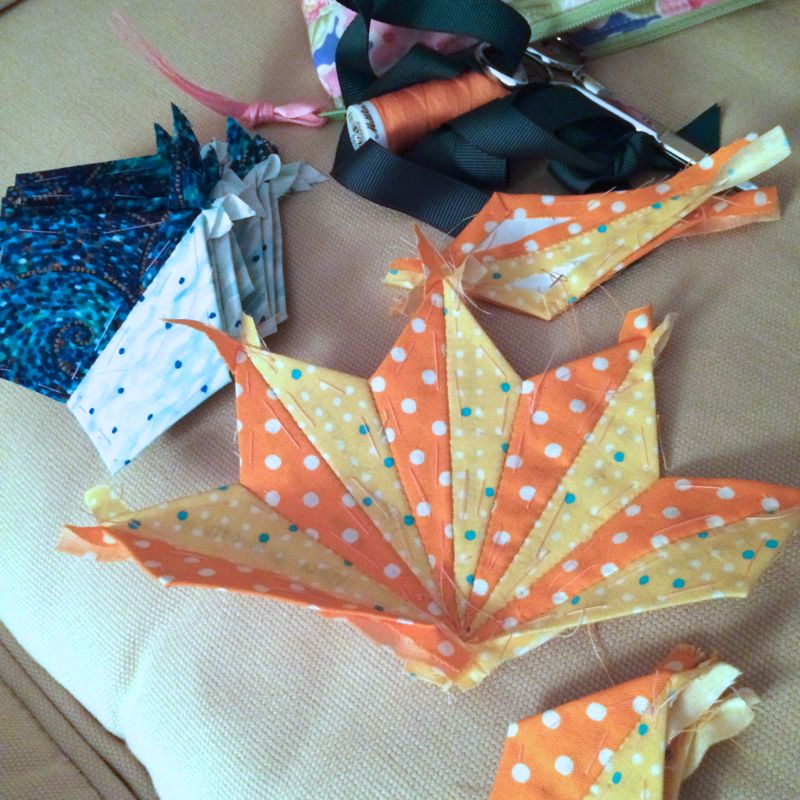
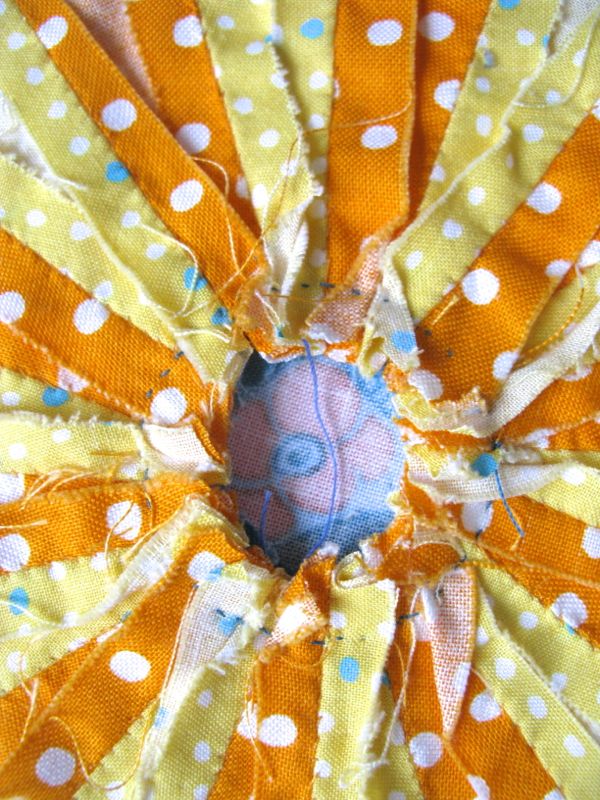
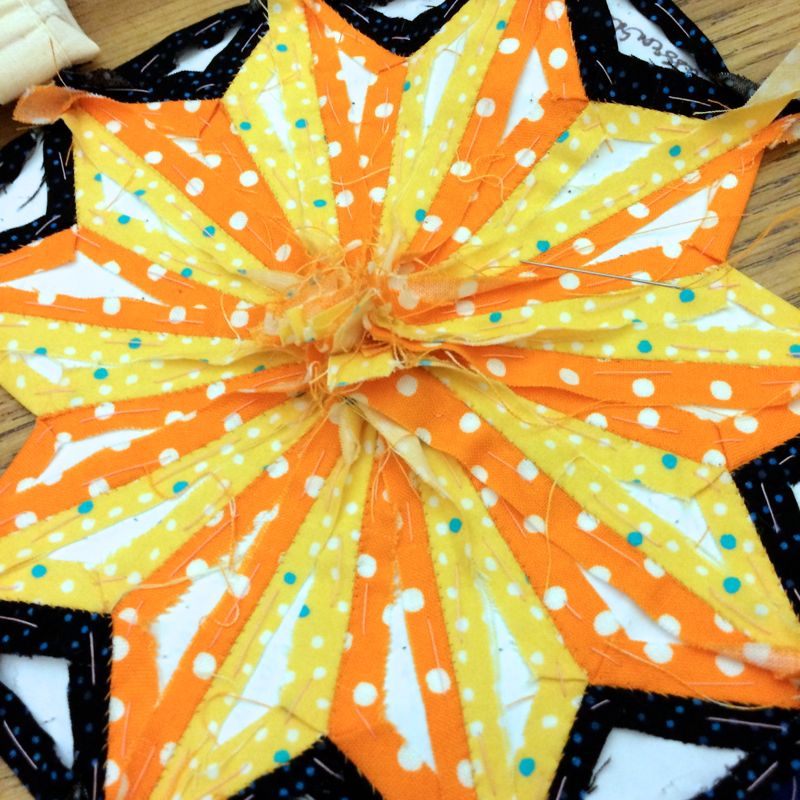
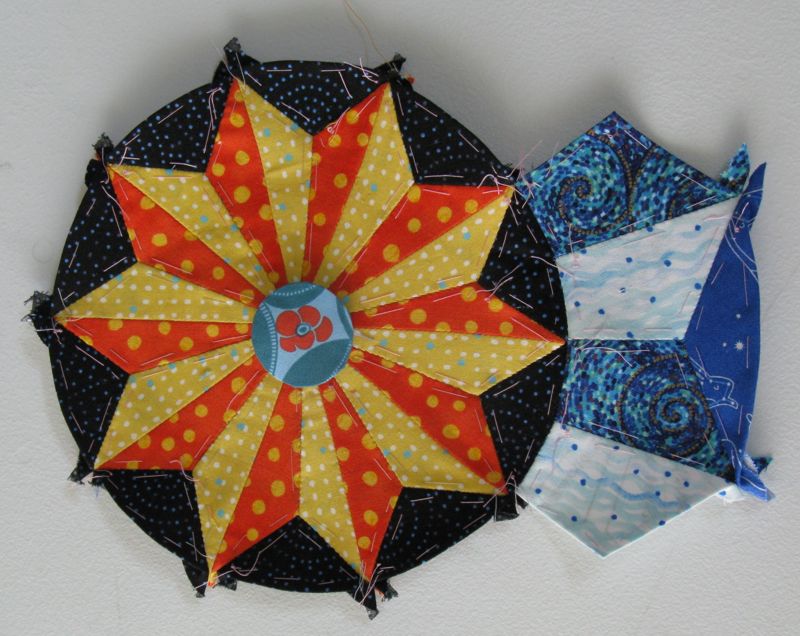
Yes, it will look like a volcano but we’ll be taking care of that later, so no worries. I then sew the dark smaller arcs onto the circle of diamonds.

I stitch the left and the right sides together into groups of two. I have done this next part two ways. One way is to sew groups of two onto the inner circle (you see them above in the background), then afterwards stitch the sides of those together. Another way is to sew all the two-part shapes into a large circle, then attach that. I use pins to keep the intersections lined up.
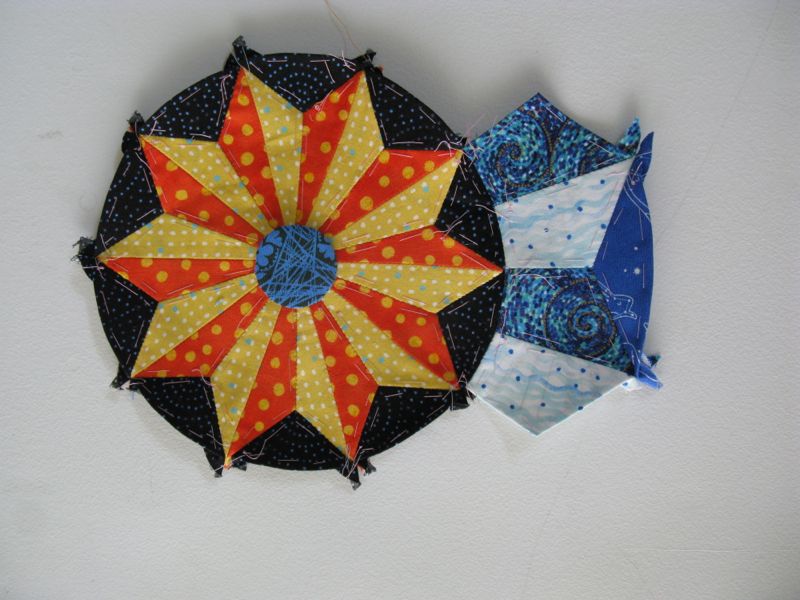
 Everything sewn together, from the back. I’m sure you noticed that this time I didn’t include the four corner pieces on the pattern. I decided to try putting this on the backing a different way. Take out all but the outer arc of papers. Take out the papers by releasing the basting threads from the front, then popping out the papers from the back. You can see it in the photo below.
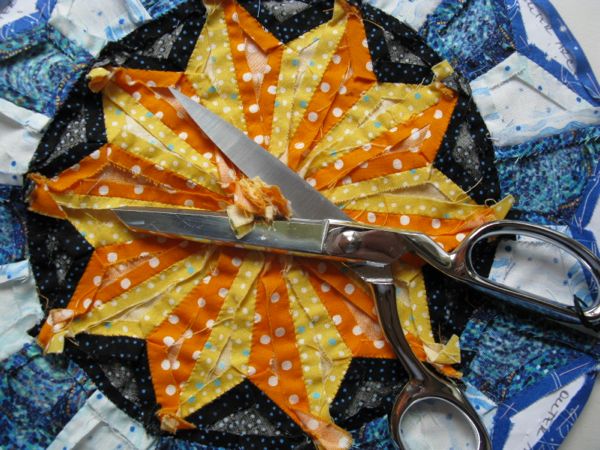
Then, cut off your volcano top, or, as we call it around my sewing group — getting rid of the training bra effect.

Then trim out the center a little bit more. Just not too much. I just want it to lay flat.
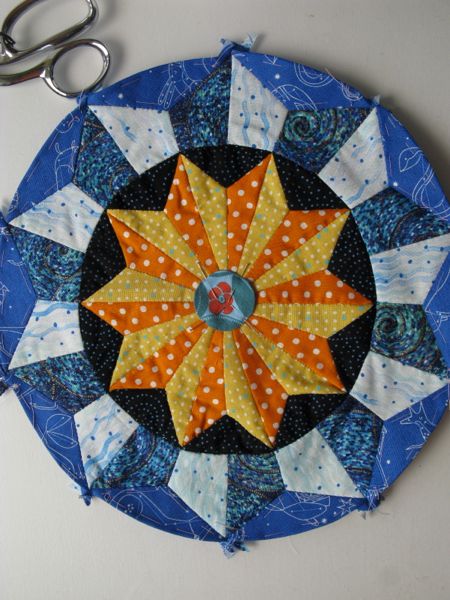
Pin your little circle on for the center.

Fold a 15″ square of background fabric into quarters, then press to leave lines for placement. Start pinning the circle to the backing, using the pressed lines to get it on straight and even. This background square is a bit oversized and will be trimmed down in the finishing steps.
As you get to that place where all the seams come together, trim down the seam allowances like you did with the diamonds, getting rid of bulk to help the edge to lay flat. I pop out the arc papers one by one as I go, but you can also take them out later (stay tuned). Proceed carefully, trimming and pinning, and smoothing out the edge to create a nice circle.
Using an appliqué stitch, attach the circle to the backing.

After stitching the circle on, trim out the backing, leaving a quarter-inch seam allowance, then take out any remaining papers.

Using a smaller-than-usual stitch, appliqué on the center.
Then turn it over and carefully cut away more of those volcano-y seam allowances, again leaving a quarter-inch seam allowance. Press everything lightly, using steam. There are a lot of pieces and a lot of grain lines to deal with, so you don’t want to kill the fabrics with too much handling, although the block is very sturdy.
You’re done! And congratulations, it’s just as beautiful as the one in Slovenia.
~~~~~~~~~~~~~~~~~~~~~~~~~~~~~~~~~~~~~~~~~~~~~~~~~~~~~~~
And now I’m going to tell about all the mistakes and problems I had, just so you know that I test sew each block before putting up the pattern. If you have found places that need tweaking, please leave a comment and I’ll work on it.
I have actually sewn the block twice. Here’s how the first one’s center ended–with a definite volcano center. Actually more like a chrysanthemum, I think. So I thought it was my pattern, or the way I did things, so I remade the yellow/orange diamonds, as described above, by seaming the fabrics together first.

I tried to smooth it out by twirling it with my thumb. Yeah, what a mess.
 Still a mess even though I sewed on the outer arcs. What was needed was a design change, like adding the center circle to the design. Even though the fine artists in Slovenia can paint the center of the circle to a distinct point doesn’t mean that fabric will allow us to do that.
So I took off all the outer little dark arcs, and started again. Here comes the next mistake. I got it all done, and cut the square for the backing and just about died when I saw that the hand-sewn EPP circle was tooooo big for the backing. AAAGH!

I went back to the pattern and measured, and sure enough, I’d drawn it too large. The yellow lines are the new re-drawn lines. I re-drew the pattern, re-cut all the outer pieces and arcs and started again, but used the first series of yellow/orange center diamonds, as I didn’t want to take apart the completed Ljublana Circle Block.
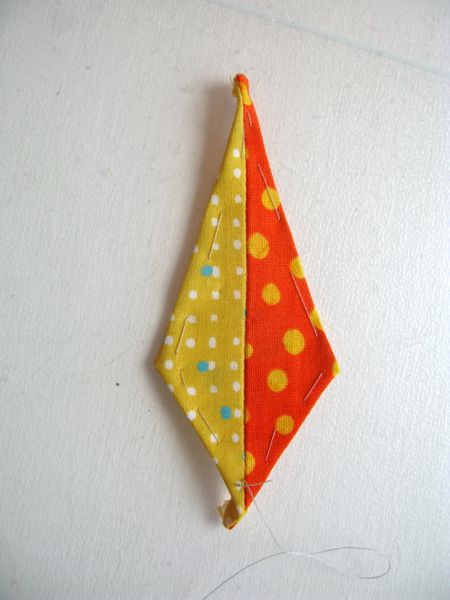
That’s when I hit on the idea of seaming the two colors together first to cut down on bulk.

But I still had that hump in the middle. Still have to make a design change with the center circle.
Here I’m auditioning center circles for the other block that was too big. I like the top one in person, but the bottom one in a photograph. I ended up recutting and sewing the correct size block so still have the large circle to make into a pillow or to put on the back. You, too, can audition center circles once you are finished to see the different looks they give to your block.
I hope my story of my mistakes and do-overs hasn’t confused you. The accurate pattern is up there in PDF. If you are following along, send me a photo of your finished blocks and I’ll throw them up here for everyone to admire. I know this one has a lot of moving parts, but once I got the quirks out, and used the shortcut for the diamonds, it went quickly. Have fun!
Discover more from OccasionalPiece--Quilt!
Subscribe to get the latest posts sent to your email.

It’s beautiful, Elizabeth! You’ve been inspired, and it’s so nice of you to share that with us. Lovely instructions too. It looks like a must-make. Thank you for the PDF.
Amazing! What a wonderful memento of your stay in Ljubljana. You are so talented.
Beautiful! I too, am making a circular EPP quilt design right now. Take a look at my blog if you are interested! Your block is so pretty! I need to find the other two in your posts!
Your work is so amazing! I love that you shared your entire experience.
That is gorgeous and all your “mistakes” are ones I could see myself making!!! You have much determination and patience (stubbornness??)…..possibly a tad more than I!!! LOL!!!! Thank you for a wonderful pattern!!! Hugs………………………..
That is really beautiful! Your EPP is so perfect. Thank you for sharing the pattern.
What a great tutorial. I am just now exploring the hexies and incorporating some trapezoids and equilateral triangles with them. Now I see even more possibilities. But you sure did make me cringe when I saw the scissors and the volcano photo. But it did what was necessary.
Stapling the sheets together. Clever!
It’s lovely!
Great job with a hot mess of a block center. I admire your will to figure it out, I would have tossed it in the rubbish.
Just stumbled onto your quilt a long. I have been itching to do a circle quilt too. I printed off your patterns (thank you for sharing) I am behind obviously lol. But am going to try to catch up . These blocks are so pretty! I like the idea of doing the hand piecing as well!