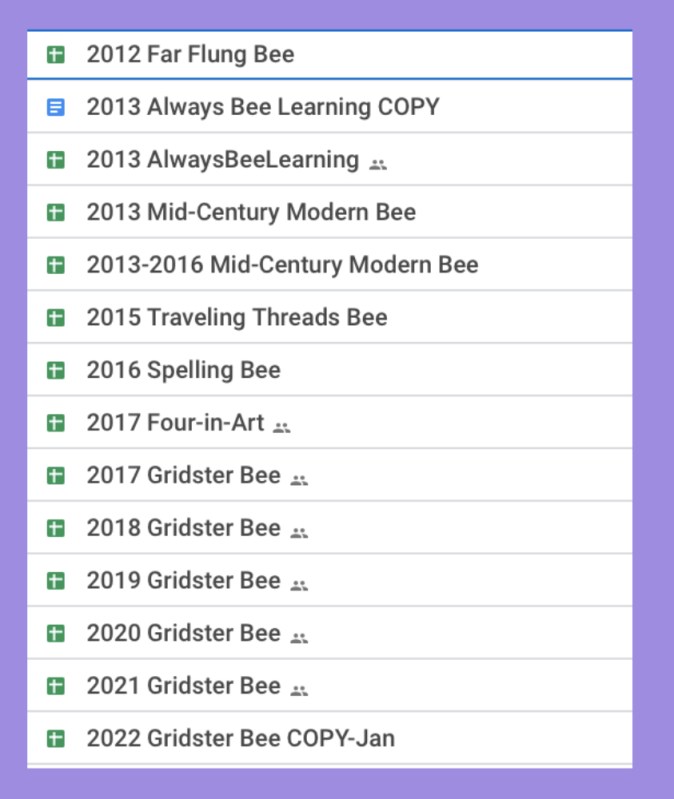
Well, my bees, at least. I recently stepped down from leadership of the Gridsters Bee, but Melanie and Patti (listed alpha order) are the new leaders, and they let me tag along and help out so I won’t go through withdrawal. So as I was organizing, shifting, cleaning out my Google Drive, the list ended up like this:
I’ve participated in fifteen quilt bee groups in the last ten years, often simultaneously. My life has been richer for this and I’ve met so many wonderful quilters. (I’ve met a few cranky women, too.) I met one whose house burned down during the bee and we all donated money to help replace her stash. I’ve met someone who did professional roller skating. I’ve met women like me and not like me. I’ve met quite a few people in Australia, in Canada, and all over the United States. Many others are on Instagram — I love the connections we’ve made and the friendships that continue.
I’ve received some beautiful blocks, some blocks I had to reconstruct and some blocks I couldn’t do anything with at all, but were so interesting, I saved them. Sometimes people put my blocks in their quilts and sometimes they didn’t. I’ve made several Ayumi envelopes, multiple versions of Dresden blocks, and bazillions of HSTs.
Here are some of the logos of some of those bees.
Occasionally I see new bees forming online and I want to say — yes! jump in! make for each other! You’ll learn what blocks you want to make yourself, and you’ll learn which blocks you never want to make again.
At the end of my five years with The Gridster Bee, I put together a slide show of quilts from many of our members, and it was one of the final events of my 2021. I loved that even in spite of the pandiddle (stole that one from Carol — a beemate), at least a dozen of us were cutting and sewing and quilting. Add that to the letters you’ve written telling me about your projects, your intentions for making and I’d say we all made it through the last couple of years in reasonable shape. If you want to see a great array of quilts and blocks, click on our home on Instagram, and enjoy the eye candy.
And here is the launching of Gridster Bee 2022, with a lot of very talented women.
The first blocks were for Patti, who chose Ayumi’s Envelope Blocks (and here, too), but with a twist. We added larger borders on the sides, and chose fabrics that denote romance or love. I had fun choosing.
I’ve drafted up a lot of the Sew-A-Long quilt, and am now making the sample out of Sherri and Chelsi’s fabric, Sincerely Yours. Coming soon. The post-Christmas blahs grabbed me for a while, and of course, we had to eat up the chocolates people brought us. Then there was the going through the ornaments, followed by lifting the holiday boxes up into the garage rafters. Mopping the kitchen floor and cleaning the bathrooms await.
It’s nice to take the advice from my friend Allison who made this for me, since I was leader of Gridsters for a few years. It’s a treasure, with great advice.
I am the Queen Bee this month for the Gridsters Bee, and thought and thought and thought of what I could do. I happened on this design while surfing the blogs, and something about it just made me smile. Since I am one month post-op on my interminable rotator cuff repair recovery, I realize that it’s probably because I just needed some happy-cheery-goofy-fun in my life.
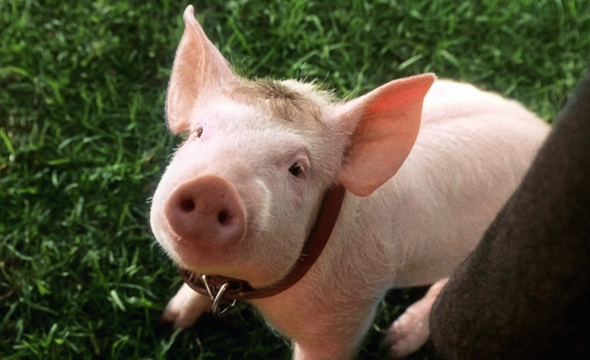
Yes, I made the tutorial and wrote it all up before I went in to surgery, perhaps anticipating the need for something happy-cheery-goofy-fun. To start us off, here’s something to get you in the mood for making my block this month (stop it about 3:00):
For those of you who can’t see the link, it’s from the movie Babe, The Gallant Pig, completing his “sheep” trials. (Go to the blog if you want to see it.)
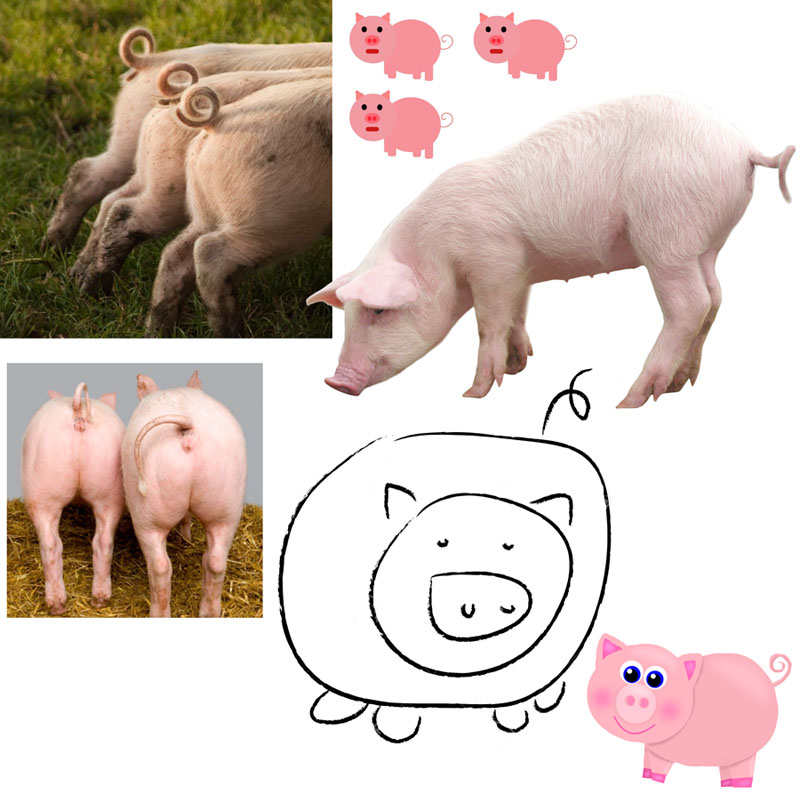
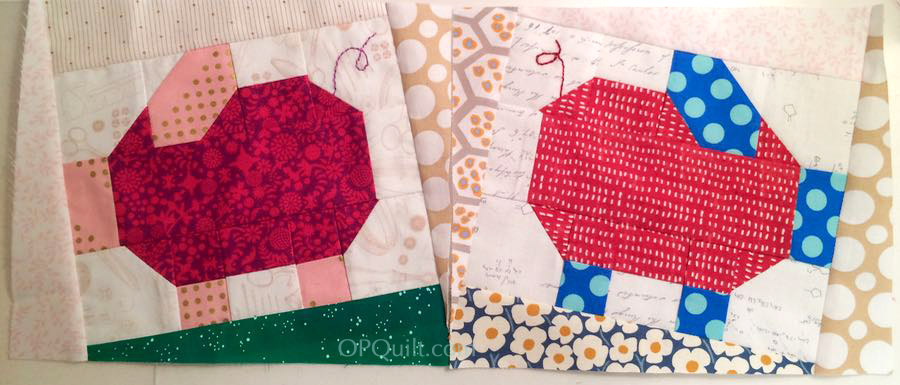
Yep. Somehow little piggies have gotten in my heart and under my skin and I want a whole quilt of them, although I may add a barn or tree to break things up. I first found them on Gayle’s blog, Mangofeet, where it says she is a bonafide farmer. She found them on Sally’s blog, The Object of Design, which is where I found a tutorial for littler guys. And I found Gayle, by following a link from Bonnie Hunter’s Quiltville’s Linky Party for her En Provence mystery quilt. Connections everywhere!
Before I leave all the attributions, please visit Sally’s tutorial page, where she has other tutorials for bunnies and fish and all sorts of creatures.
But mine are slightly different, both in size and in style, so I wrote up atutorial for what I want. Since they are small, I’d like you to make me two, if you wouldn’t mind. I used Gayle’s post for inspiration (also look *here.*). To make it easier on yourself, make them both the same, but if you get adventurous, it’s okay to flip the orientation of the piglets, or make one going up and one coming down. But really, keep it simple so you aren’t calling me names in the middle of this process.
Again, while Sally has a tutorial (linked above) and she is the designer of this block, I changed up a few things (like the dimensions), so please follow along and make my piglet according to my tutorial. The piggies are all scrappy, but I do need:
sky–a consistent low-volume or “background–no need to make them the same fabric, but the do need to be the same lightness: pale blue, cream, white, tan, low-volume with grey/tan/etc. prints. Avoid prints with too dark of text or design so that it throws it to a muddy tonality. Some background prints are fun and will make the quilt more sparkly. It’s okay to mix up the borders, but I’d probably stick to the same fabric around the piglet.
body–a medium value fabric: small print or geometric, floral, Kaffe, but avoid fabrics that look “splotchy” when cut this small (such as cutting a giant polka dot in half)–generally anything in your stash. Have fun. Make me some colorful piglets.
ears, feet, snout–a darker-toned fabric that stands out from the body fabric
tail–embroidery floss/Perle cotton to match your piglet, to embroider the tail. Pattern is not given for this, but below are some piglet tail ideas. Please use a back stitch. More info in the tutorial.
Gayle showed hers on a tilting grassy hill, which I like quite well, so that’s what I’m asking you to make for me. Copious amounts of photography and images and text follow, but really it isn’t too hard. The following directions yield one piggie, so cut everything out double, out of two different piles of scrappiness.
Lastly, I follow standard print journalism standards: the caption in UNDERNEATH the image (MQG had theirs backwards on their award-winners page and I was so confused!)
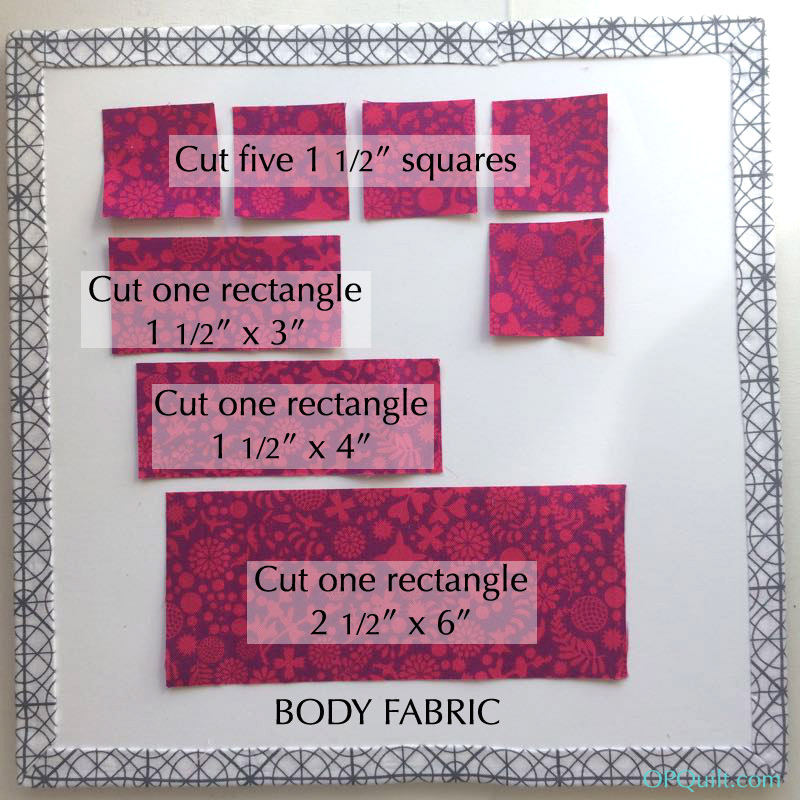
Cut the background (sky).
Cut the body fabric.
Cut the accent pieces of snout, ear and feet.
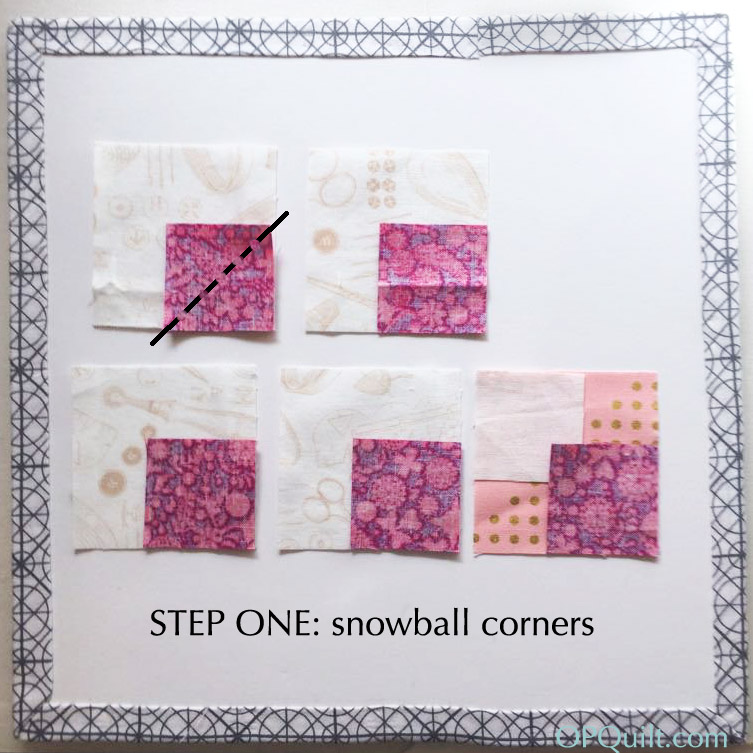
Step one is to snowball body fabric onto the background fabric, using the 2- 1/2″ square pieces of background and the 1 -1/2″ square pieces of body fabric. Then the last snowball is a double: use one 2- 1/2″ square of accent fabric and snowball on one 1 -1/2″ square of background and one 1- 1/2″ square of body fabric. Press the snowball corners to the dark side, and trim after pressing. With the double-snowball, you’ll press one square’s seam allowance toward the accent fabric and the other toward the body fabric.
Step two is to gather the other pieces together: Line up the 1 -1/2″ x 4″ pieces in body and background, AND the 1- 1/2″ x 3″ pieces in body and accent. Place on the front accent piece (snout) and the back background piece on the large body piece (lowest piece).
Step three: sew the strips together and then press to the dark side on the top one. I don’t care which way you press the bottom one, but I went towards the dark as well.
Now cut those strips in half. Exactly. The top strip set (A) will yield two with body and background fabric that will measure 2″ across. The bottom set (B) will yield body and accent fabric that will measure 1 1/2″ across.
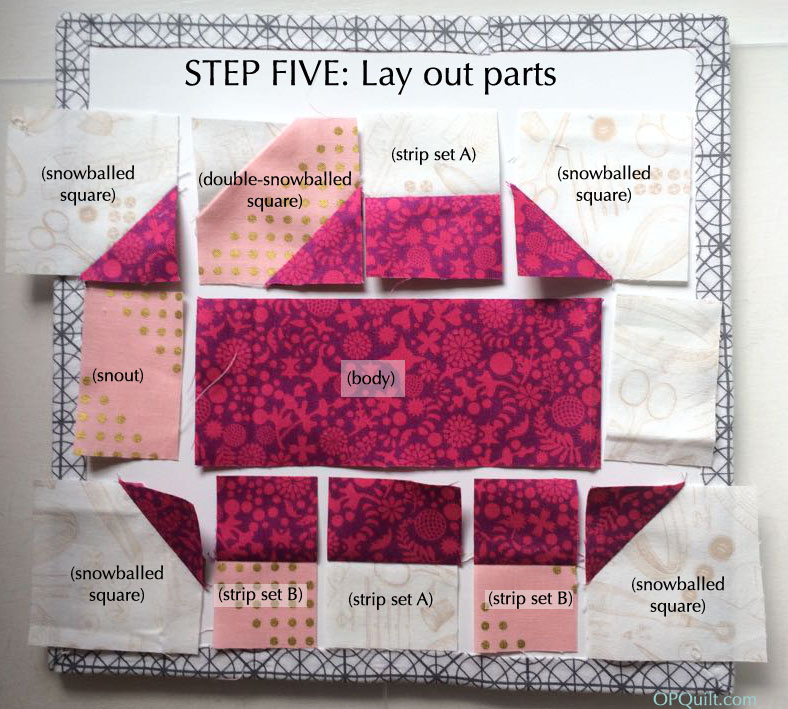
Step Five is to lay them all out. If you were going to make a reverse-direction pig, you’d need to fiddle with that ear (double-snowball) piece to sew that up differently, otherwise, everything else is the same/can be moved around. (See second pig at the end.)
Sew the top row together, then the middle and yes…sew the bottom row of pieces together. Pressing instructions are in a minute, but generally press towards the dark. PLEASE DO NOT PRESS THE SEAMS OPEN.
Babe!!! Babe!!
This is how I pressed the seams. I just realized I pressed the legs the wrong way. Oh well. Either way is fine, but just not open. [NOTE: I show it correctly in the second pig, at the end.]
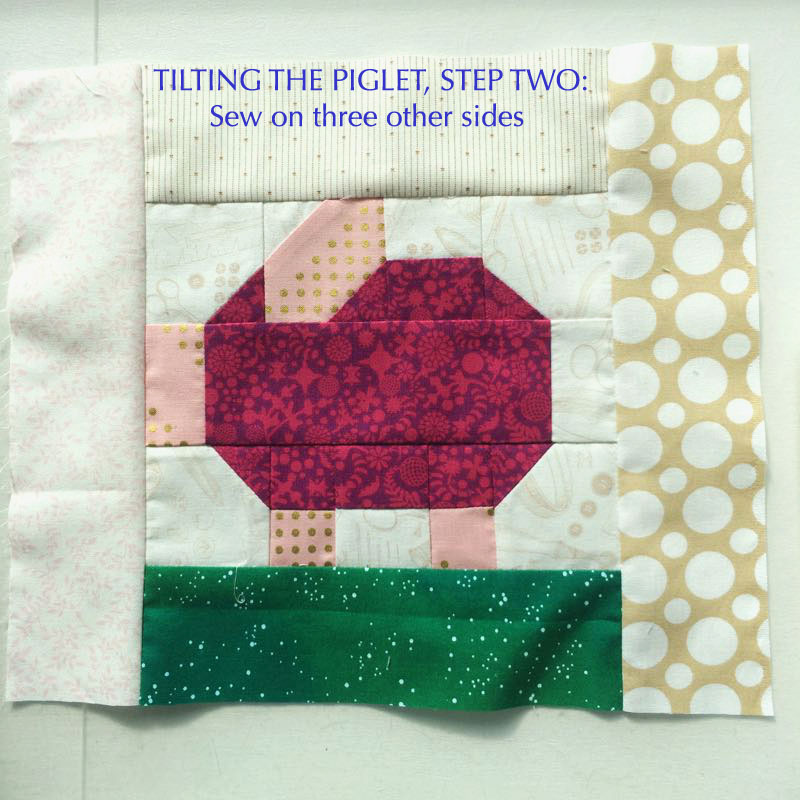
Time to tilt this little guy. Start by sewing on a 2- 1/2″ strip of ground–can be green for grass, or flowery for a meadow, or brown for forest floor or purple for Outer Space. It just has to have contrast to the background and side strips.
Sew on three side strips, by FIRST sewing on the top, then the two sides, all 2 -1/2″ wide strips.
UPDATE FOR MY BEE MEMBERS:
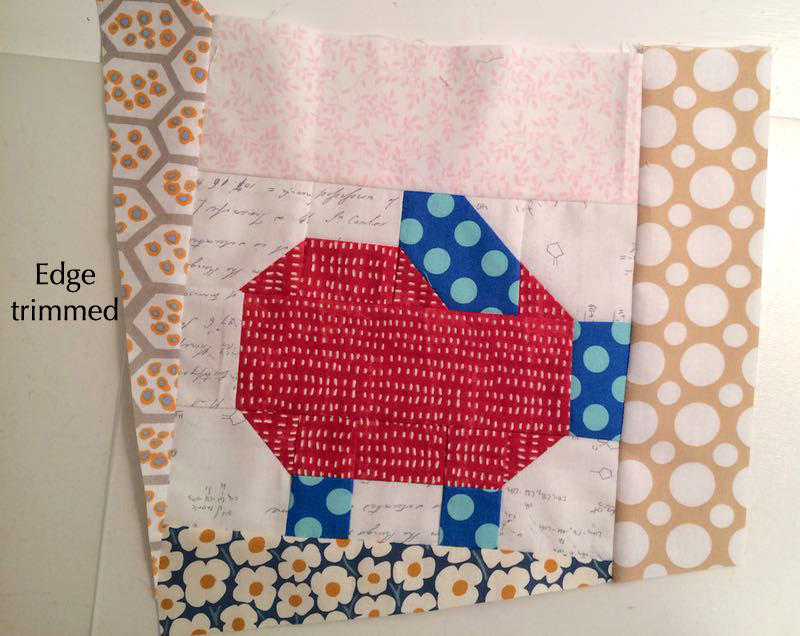
Please do not trim. After sewing on borders, just send untrimmed, untilted.
Now back to our regular programming.
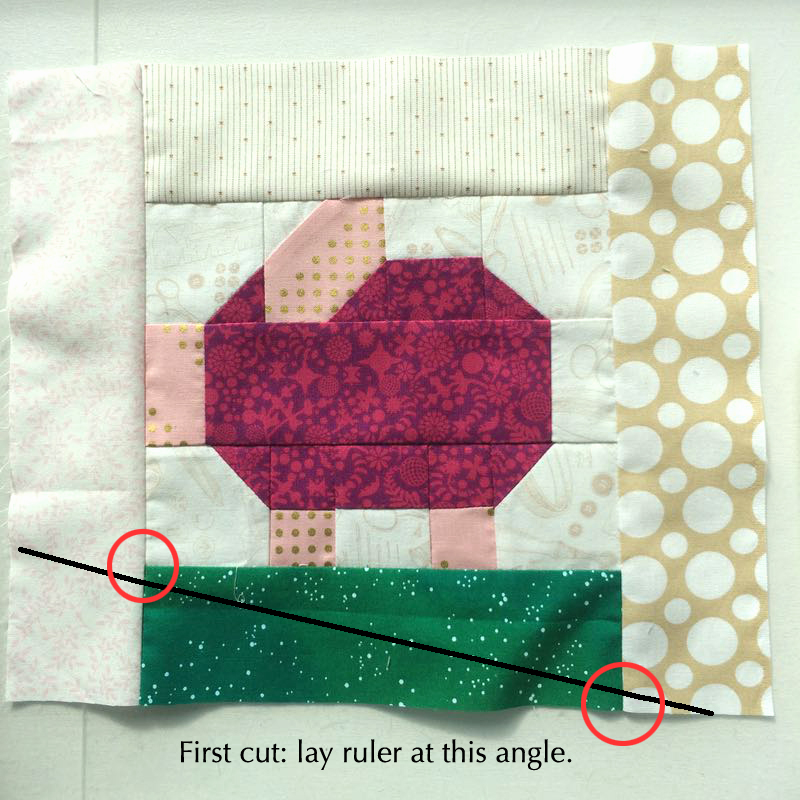
Now to cut. Please check the areas in those red circles to make sure you are leaving 1/4″ seam allowances (one above the line, one below the line). Lay your ruler with the edge along the black line, above. Cut.
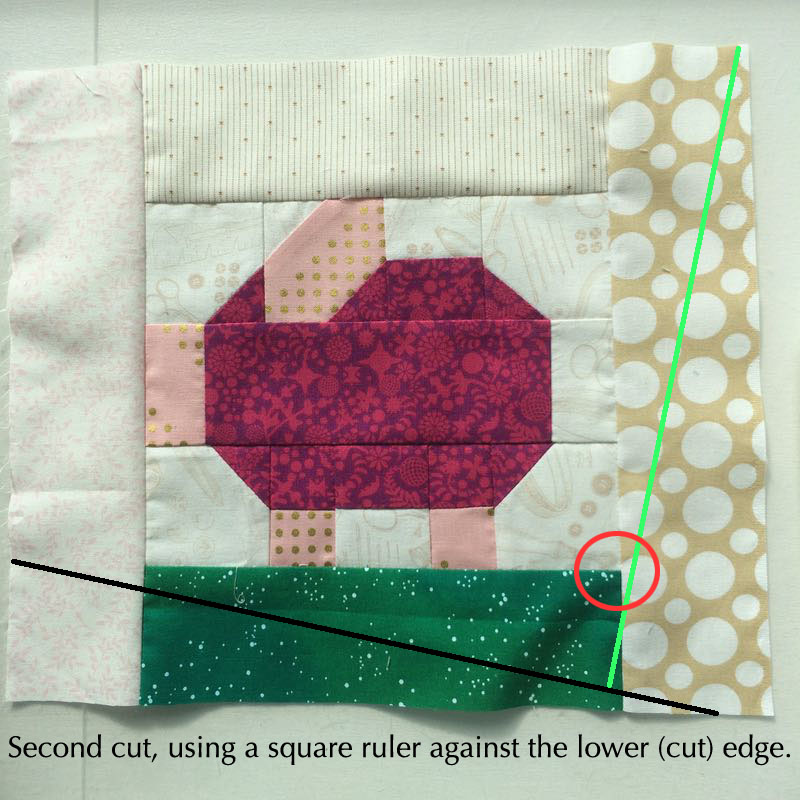
Now lay a square ruler at the bottom (newly cut) edge. Now play with the adjacent side it a bit, making sure to leave that 1/4″ in the circled area. Cut.
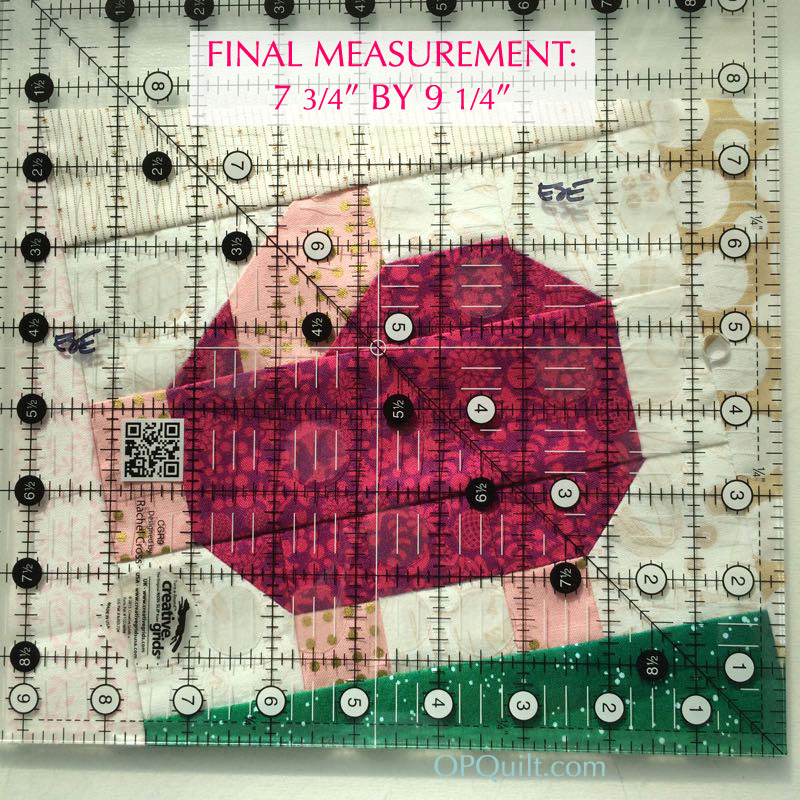
Now think about it as a beginning rectangle. Turn the piglet 1/4 turn clockwise so that the newly cut green line is at the bottom of the mat and the black line is to your left. Measure over 7 3/4″ from the black line; cut.
Measure 9 1/4″ up from the green line; cut.
Tilt the pig back to a proper vertical and it should look like this:
The piglet’s rectangle will measure as shown above: 7-3/4″ high by 9-1/4″ wide..
Again, this is the most important corner when you cut for the tilt. It’s so the ground will look merged together when seamed.
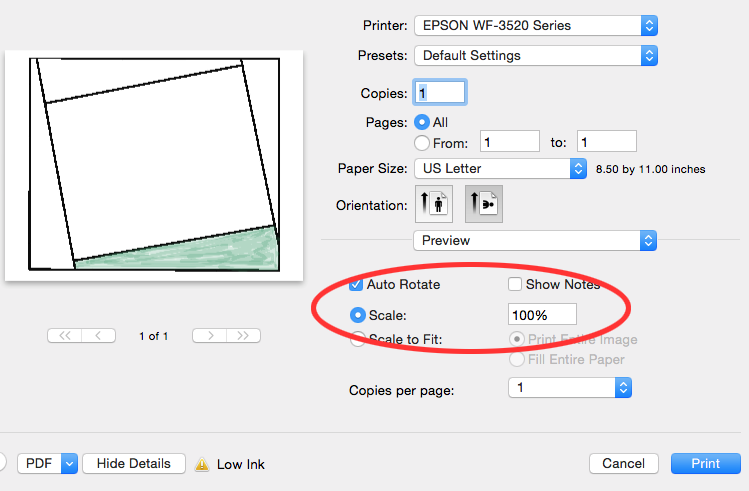
I made you an overlay, if you are nervous. Download the PDF file: piglet-tilt-overlay1 and print it out on vellum paper, or make a template out of this (too much trouble, I think). It will help you get the right angles.
Please print it at 100% or you will again find yourself cursing.
If you are really truly too nervous to cut this pig, send it back to me untrimmed and when I get better, I’ll be happy to trim it up.
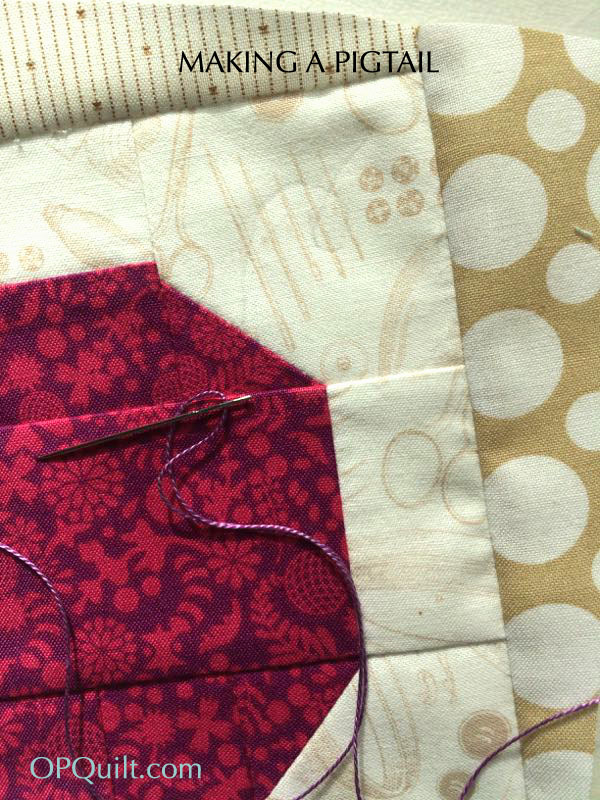
Now let’s add the pigtail. Draw on a squiggle, originating from the pig’s backside edge. My drawn line is really faint, above because I don’t want to have to figure out how to get the pencil off. Sometimes I’ve just eyeballed it. Sometimes I’ve just scratched it in. See the picture at the top of the post for pigtail ideas.
Tie a knot in your perle cotton (I used size 8, but 5 or 12 is fine, too) and bring it out at the fold, at the beginning of your drawn line, hiding the knot in the seam.
Take one stitch (#1) and then skip a stitch, coming out as shown in the photo on the left. Now put your needle in the same hole as where you came out on your starting stitch (#2) and backtrack and stitch that empty place, which will put you on the road to backstitching the piglet’s tail on.
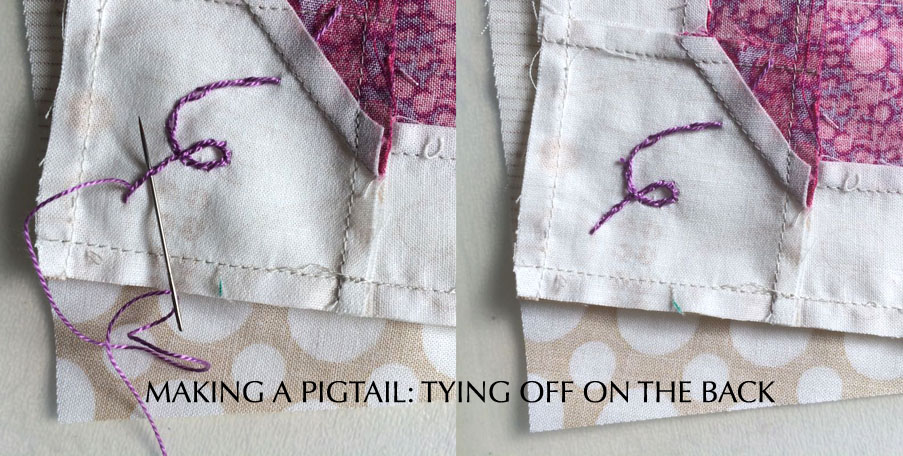
Insert the needle in the last stitch and pull it to the wrong side.
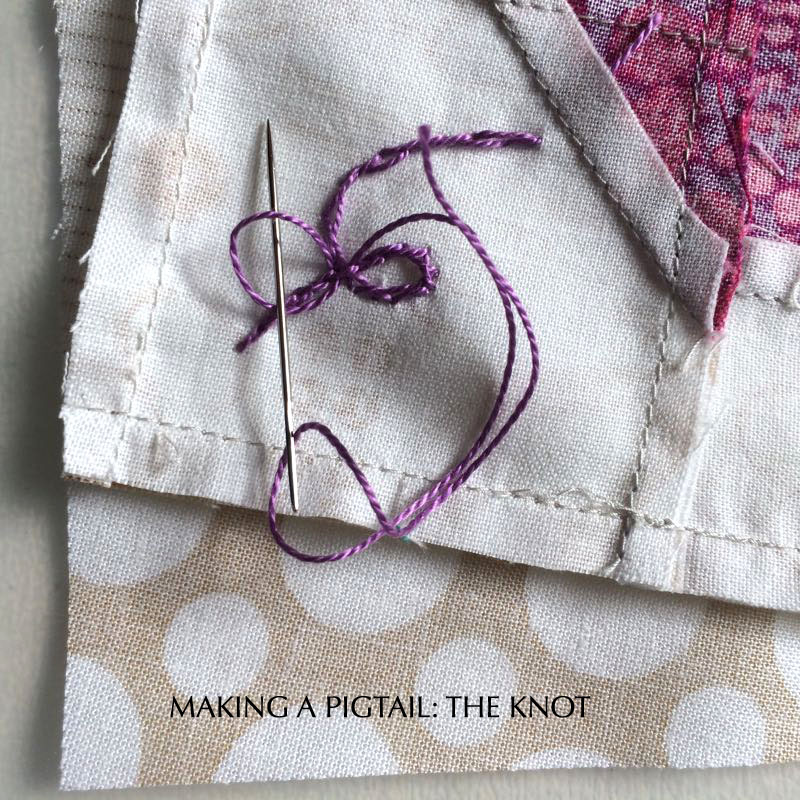
On the wrong side, weave your thread down from the top , then make a knot (below) by making a loop and drawing your needle through it. Continue weaving your thread for one or two more stitches, then cut it off.
Okay, let’s do it again, but with the pig flipped to the other side.
You can see how the ear needs the double-snowballed corners switched.
And the back, showing the pressing, this time with the correct pressing for the legs.
You have to think on this step: do you want your piggie going uphill? Or downhill?
I voted for downhill since I already have an uphill.
Here’s how I laid my ruler, keeping an eye on those 1/4-inch seam allowances.
Now you can see how I use my square ruler to find the next edge.
It’s really straight, even though the photo doesn’t look like it.
I put the ruler on as I described above, and worked it until I had the correct measurements of 7-3/4″ by 9-1/4.” I ended up trimming off a slice of a previous cut to get those dimensions. Then I do the tail.
Here they are together, but not sewn together.
That’ll do, Pig.
Thank you everyone! I look forward to a whole farmyard of little piggies, running around my design wall. While I attribute all these ideas to two very fine quilters: Gayle, of Mangofeet (she is hilarious to read) and Sally of The Objects of Design (who has made a stunner of an En Provence Mystery Quilt), all the photographs and instructions above are my own. Please do visit their blogs to see all the fun piglets that are running around there.
Four years ago, Cindy and I sat at this computer and designed this logo for a bee she was starting. She brilliantly gathered up a coterie of quilters, all over the age of 50, and I helped her with the spreadsheet, organization, and the design. Some members have come and gone, but as I am one of the original members, and since 2016 is our last year together, I thought I’d do a wrap-up of blocks and quilts.
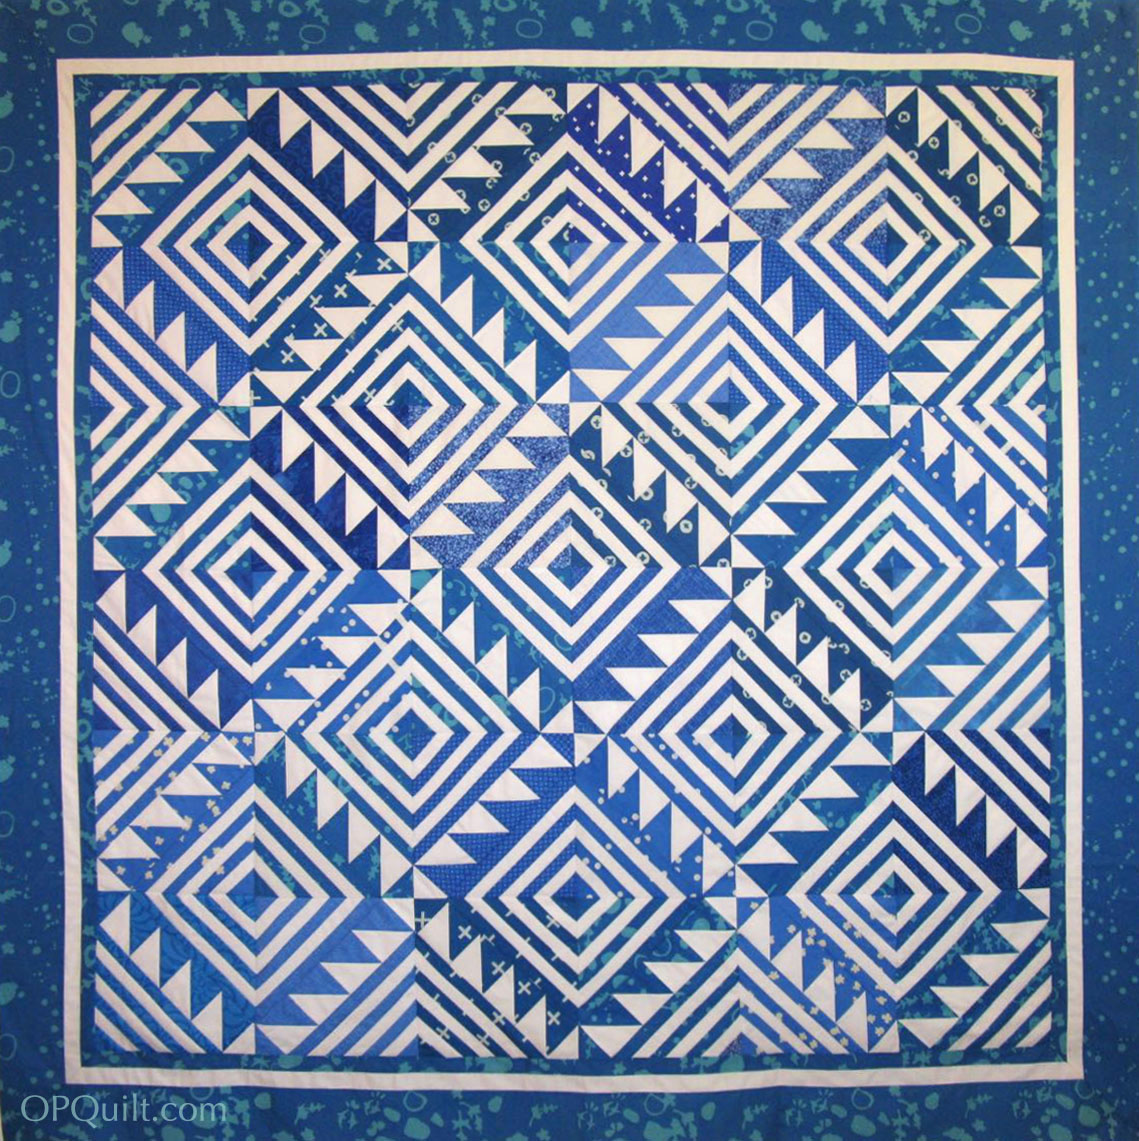
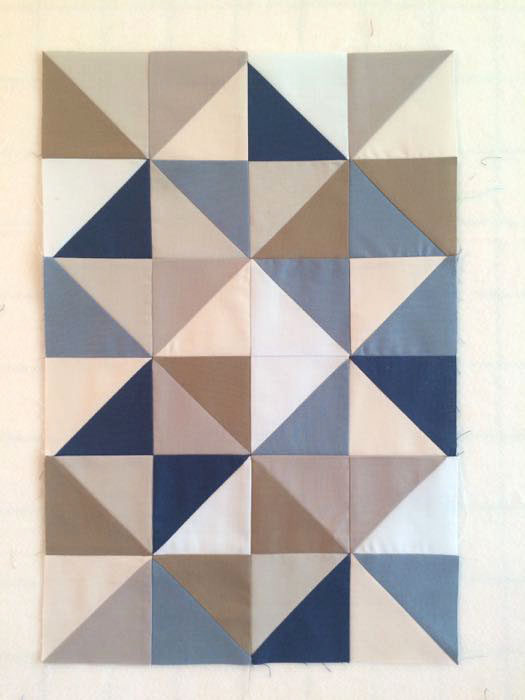
January 2016 was my month and I asked for blocks to make the above quilt, titled Riverside Sawtooth.
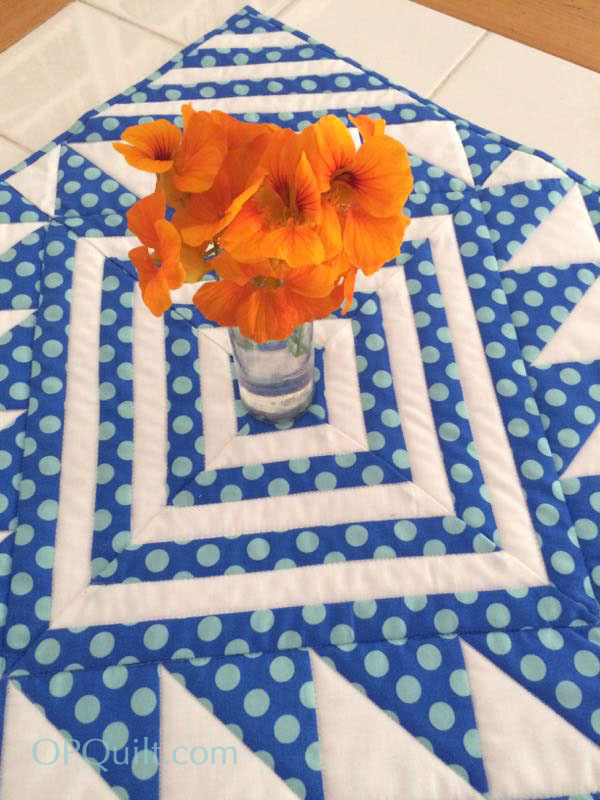
I used my sample blocks to make this little table topper.
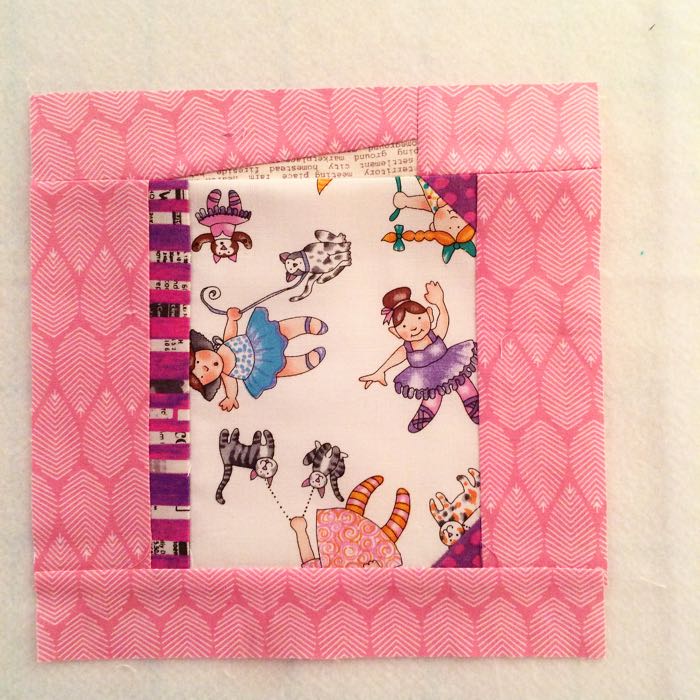
February was Cindy’s turn, and she asked us all to make little books.
I chose ballerinas because I knew this was headed to make a quilt for her granddaughter.
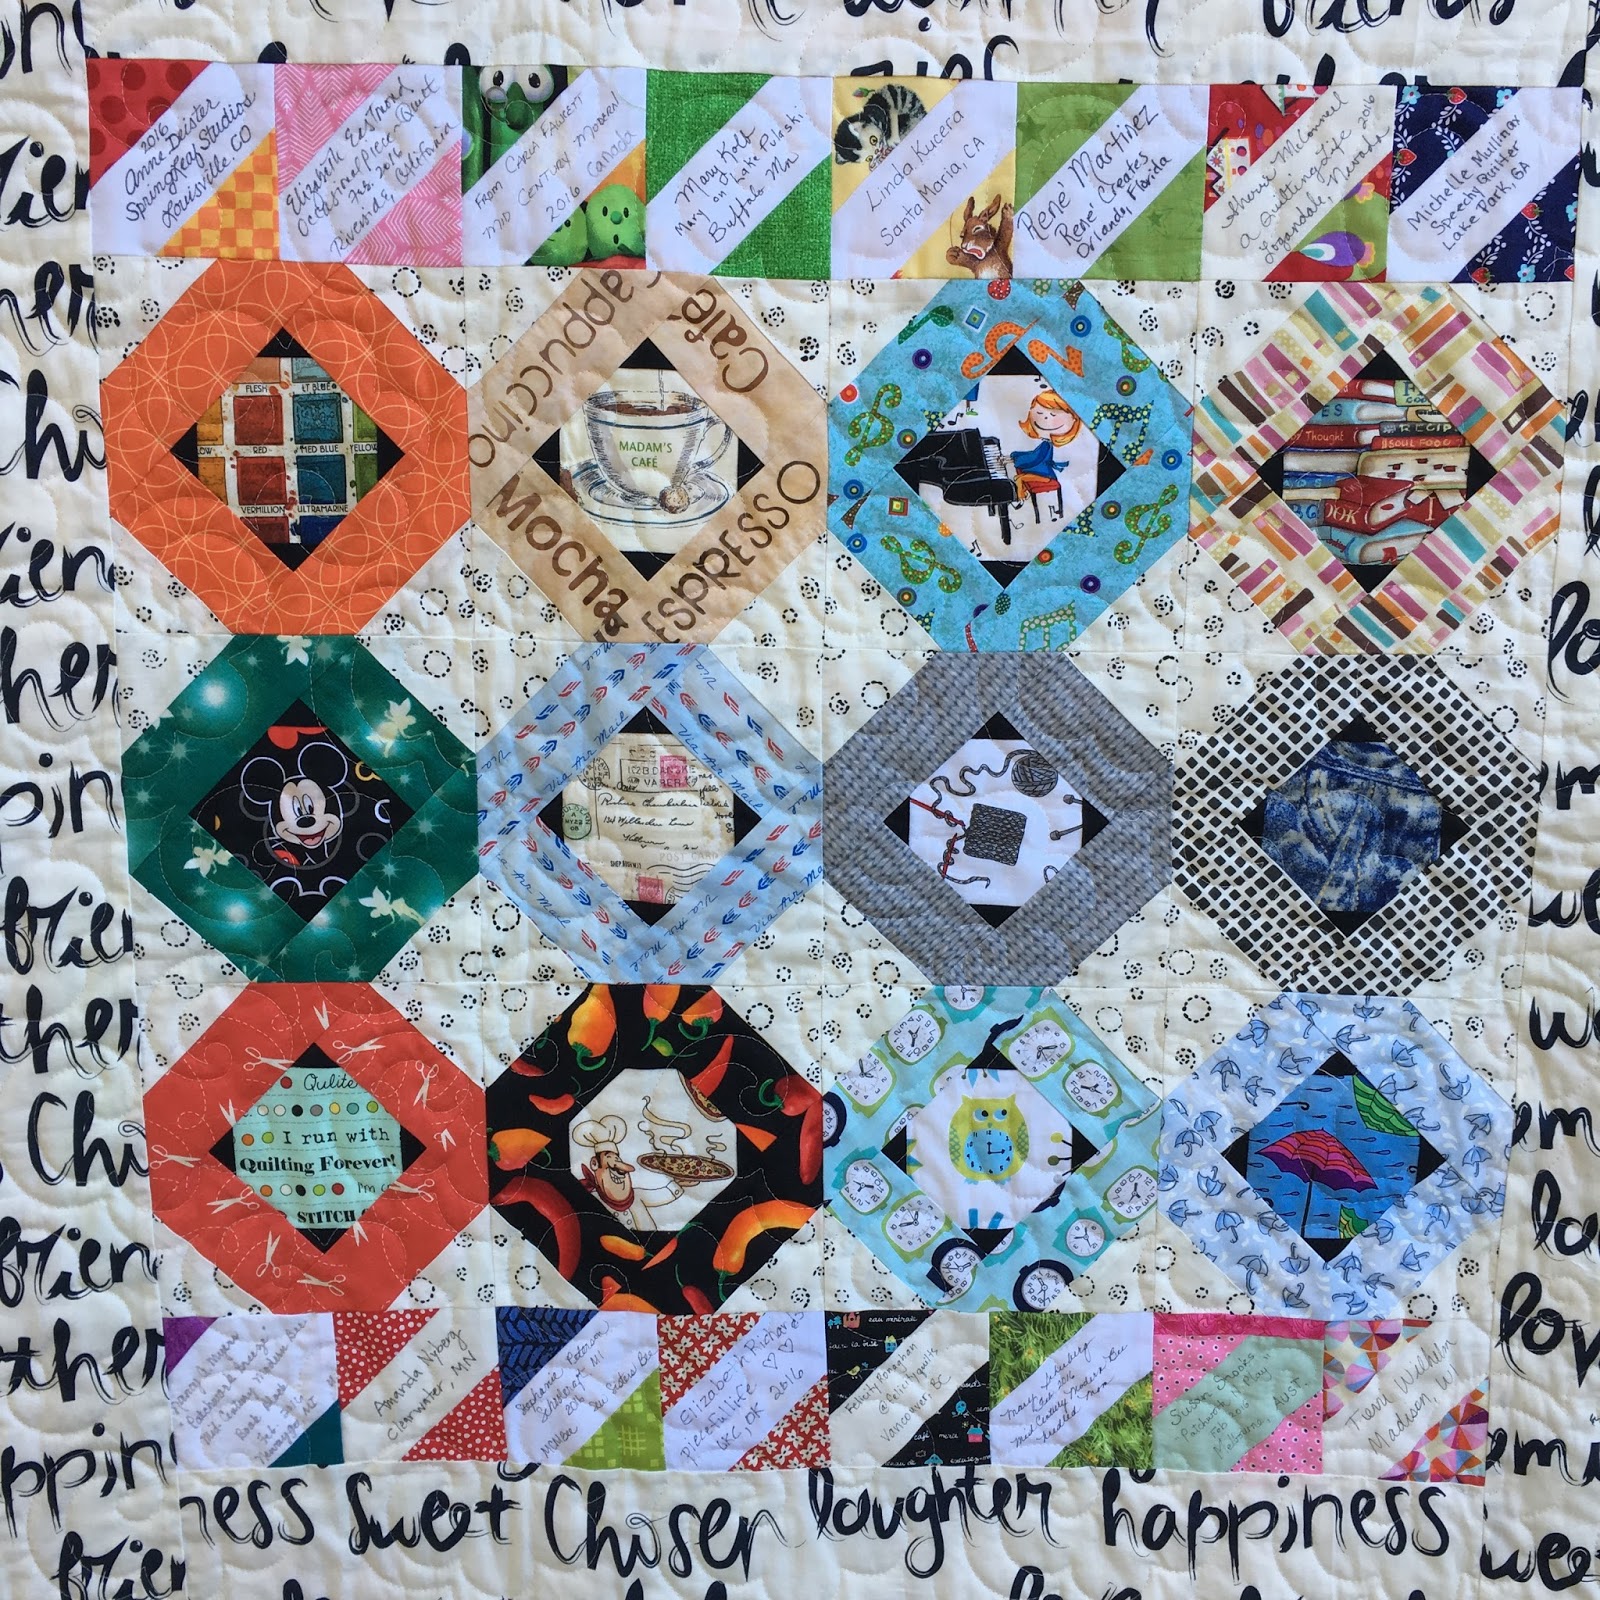
She arranged all our signature blocks on the back with some fussy cut blocks that were representative of her, so her newest grandchild could associate these cute blocks with her grandmother.
The quilt is like a library of books!
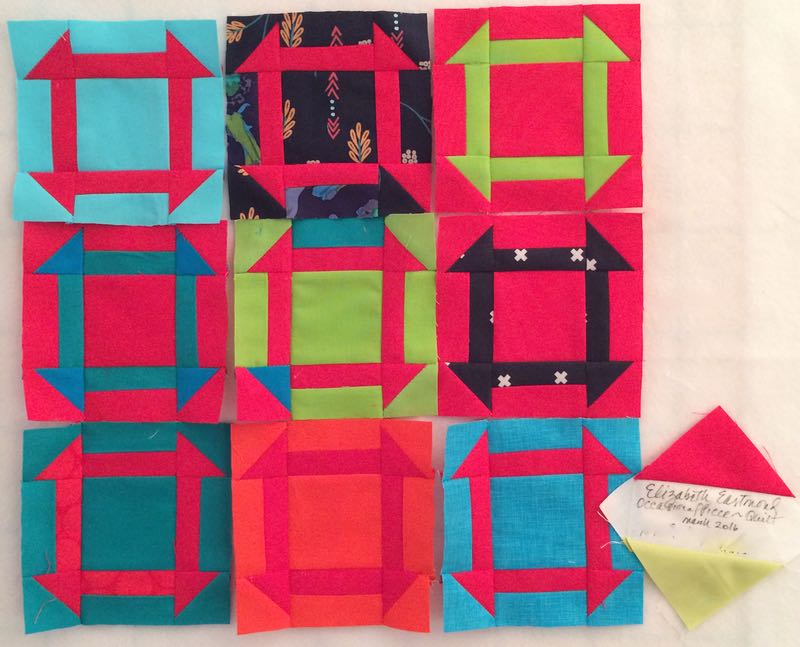
March was Linda K. we were ready for some bright colors.
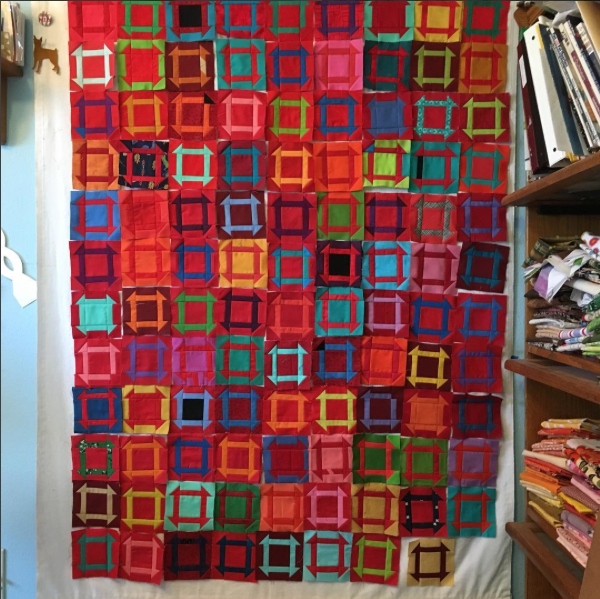
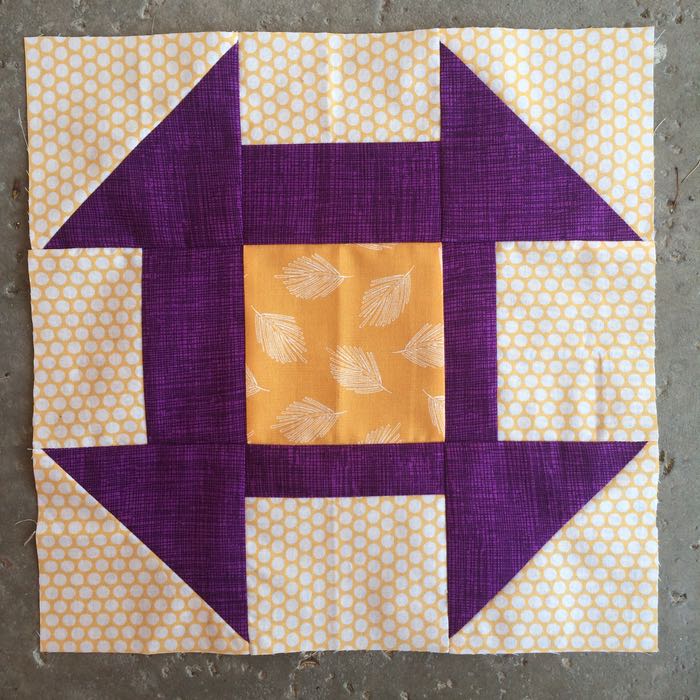
She asked for 4″ churn dash blocks in fun colors, with a few “oopses” in the construction of the blocks to make it interesting. I switched around some of the corner blocks and substituted in another block of color.
These are all the blocks, arranged up on her design wall. Those colors just pop!
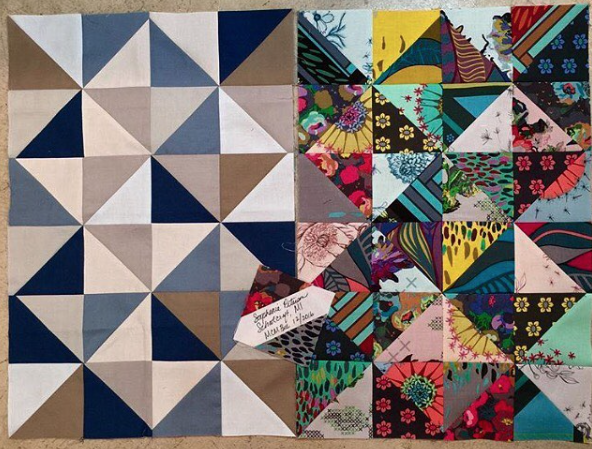
Stephanie had April and was interested in having us make blocks representative of the windows at her daughter’s school.
The idea was to make a raffle quilt to benefit the school, but it was sold before the raffle could be held, so I’m hoping she keeps the blocks we sent her and makes a quilt for her daughter.
They do look like multi-paned windows, sparkling in the light. She sent us Paintbrush Studio Fabrics to use, and I have to say again how much I love those solids!
Once again, in May, we made churn dash blocks at the request of Carla F. but with a twist: they could be subdivided up inside the 12″ square requirement to add interest.
I made one jumbo block. She asked for something skewed as well, so I made two sides skinnier.
This is quite an array of sizes and shapes, and should be an interesting quilt, or a good start to something fun.
Rene kept it simple and fun for us in June, asking for Raspberry Kiss blocks (tutorial found *here*).
The collection is here. Rene is one of the quilters involved with the Pulse Heart quilts, and she has been incredibly busy this year helping with that project. Click *here* to see them delivering the quilts to the first responders on the scene. It’s a really sweet video with all those quilts. Rene is about 2:44 if you want to see her in action.
Sherri, in July, asked us for scrappy Log Cabin blocks to add to a quilt she’d already started. I don’t have a picture of all the blocks, but I’m sure it will be terrific.
Here’s a screen shot of some of the other blocks that our group made for her.
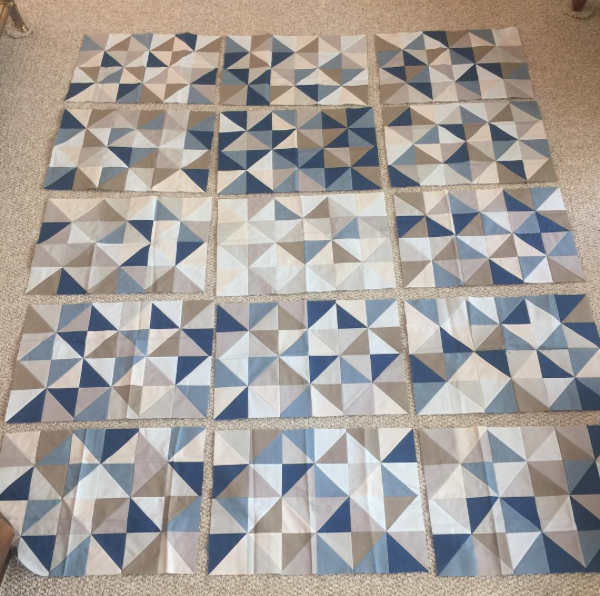
Mary, for August, found a quilt she liked on the Robert Kaufman website, called Woven Pattern, and wanted us to make blocks in the color of the beach: sea and sand.
She laid them out on the floor at my request, and I really love those colors!
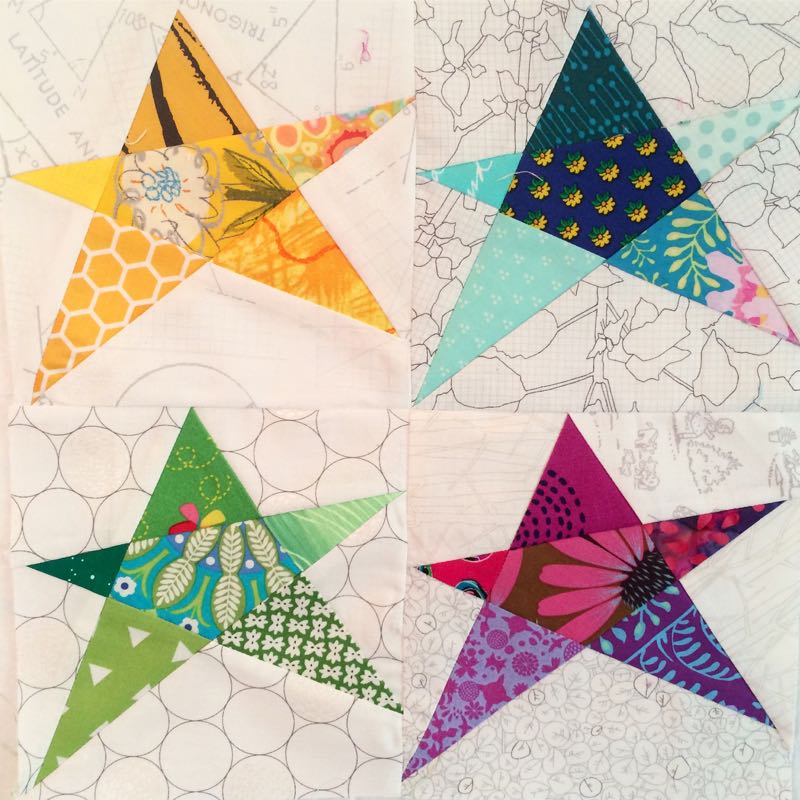
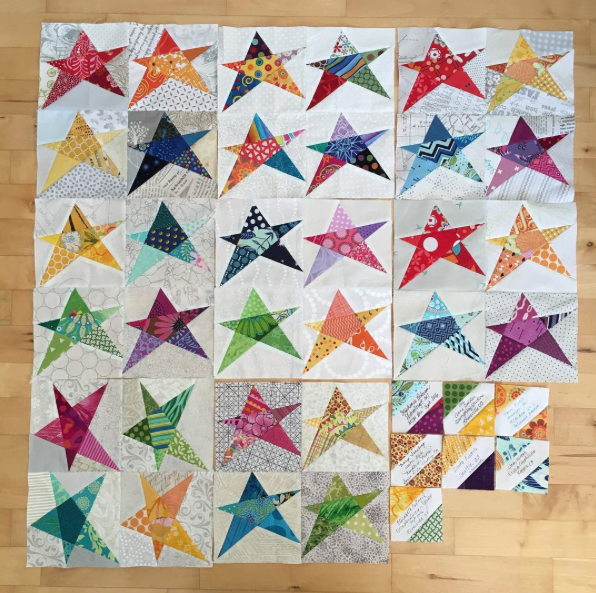
Mary K. is a star-lover and always has great blocks for us to try. September’s Confetti Star block was no exception and the pattern can be found *here.*
Isn’t this a great layout of stars? We made each other signature blocks, and you can see them laid out in the lower right corner. And yes, there are 12 of us in this bee; sometimes we have forgotten to send them along. She asked us to make the signature blocks two-toned, rather than just out of one fabric. [Here’s a post with another one of Mary’s choices for stars, also including a free pattern.]
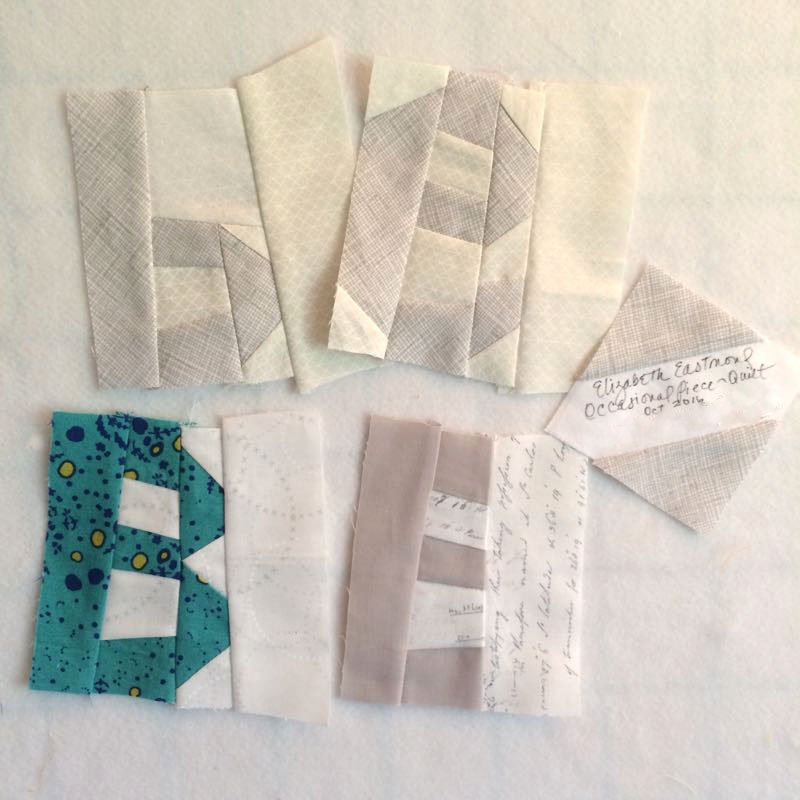
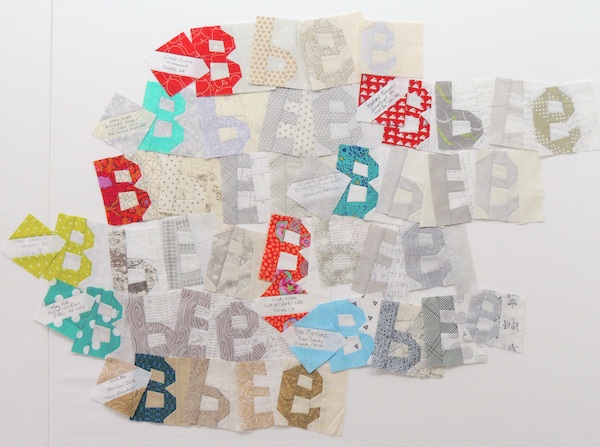
Roaring into October found us making B’s and E’s for Anne’s choice.
She asked us to do one in a color we wanted to and the rest in “barely there” sort of colors, but with enough contrast to distinguish them from the background.
I can hardly wait to see wait Anne’s imagination conjures up from these letters.
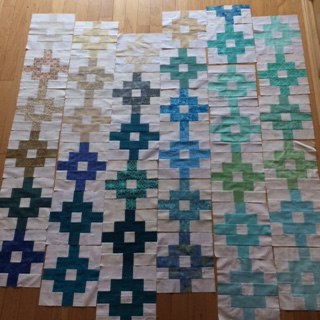
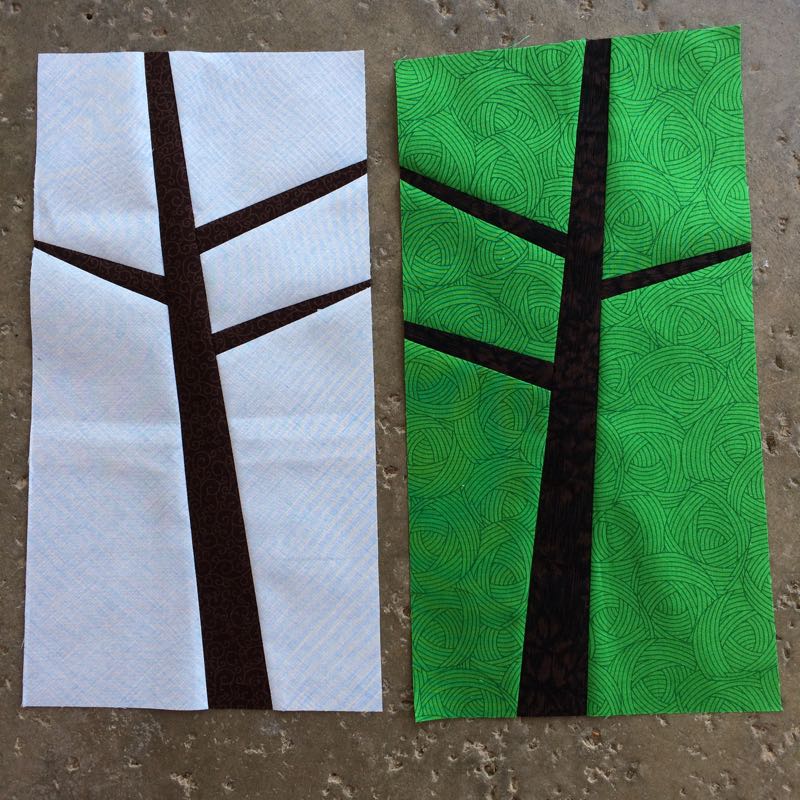
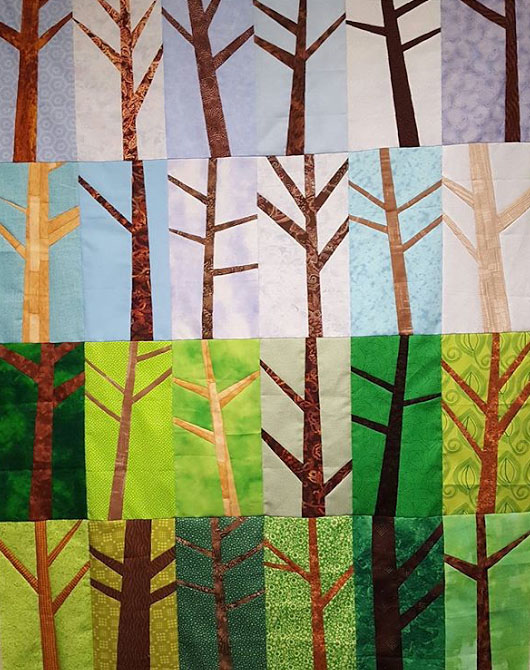
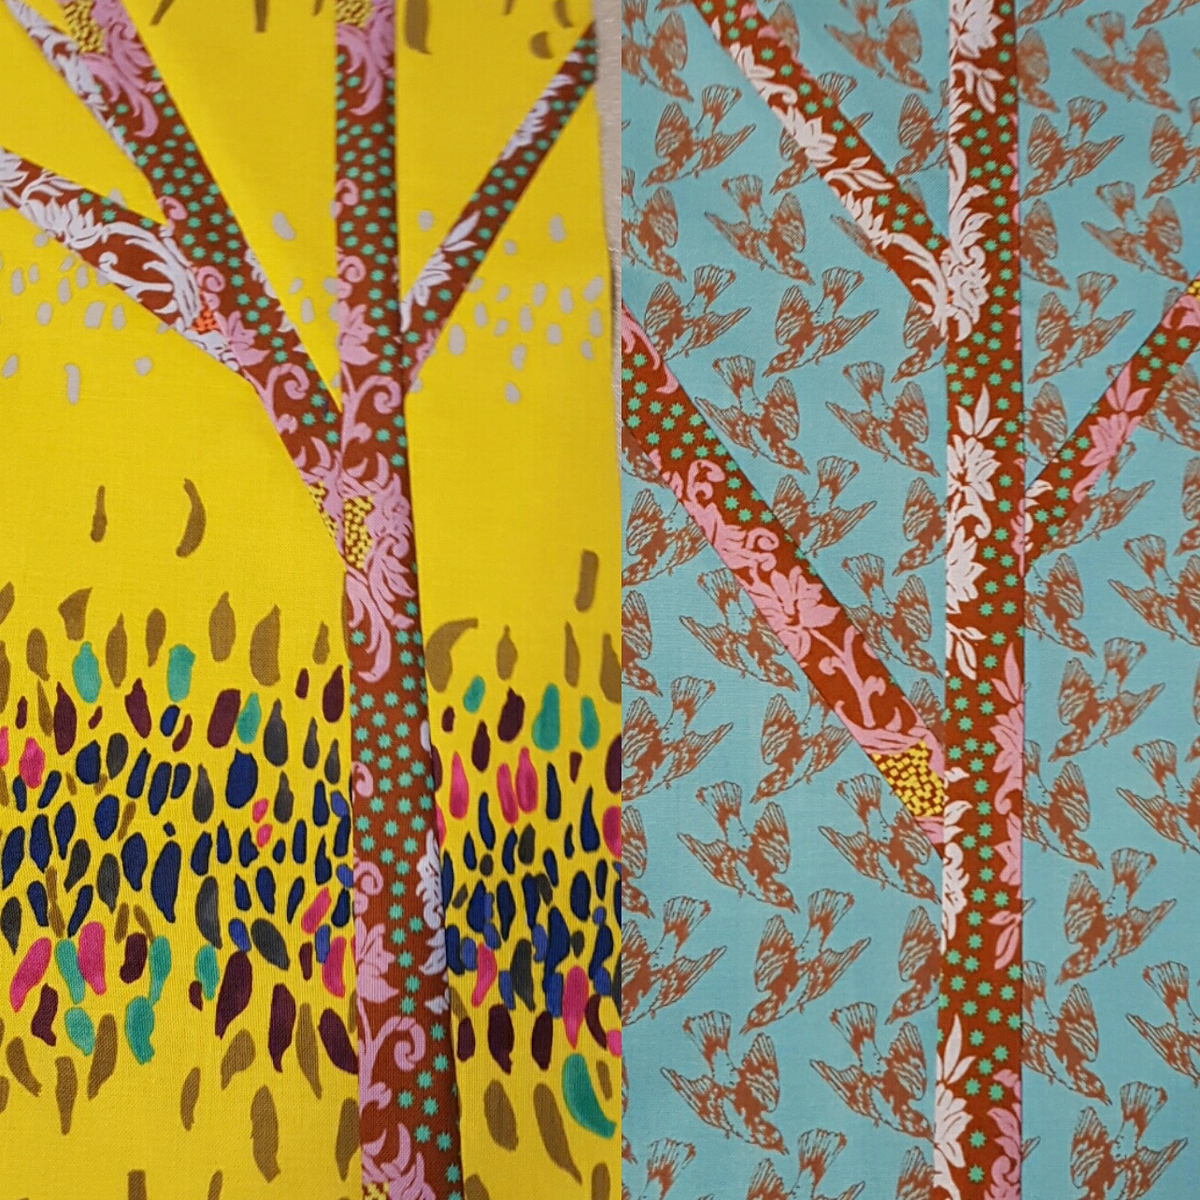
Fittingly for November, Nancy asked us to make these leafless trees, in sky color and green.
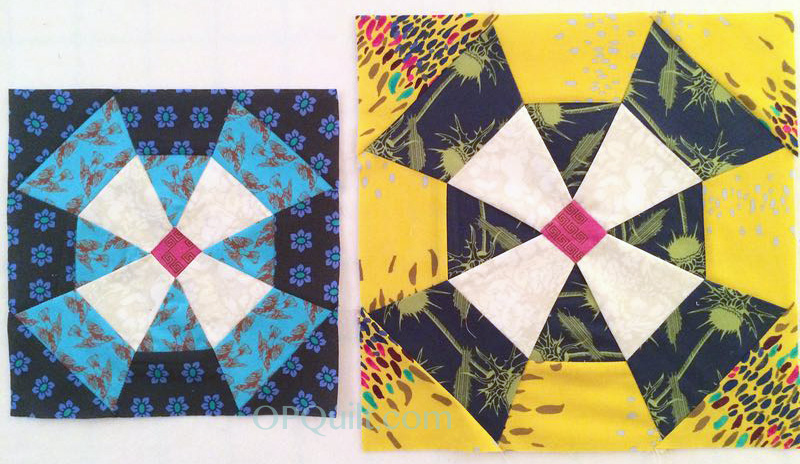
Lastly, for December Elizabeth R. asked for us to make blocks out of Anna Maria Horner fabrics in the blocks we requested.
Since my choice (the Riverside Sawtooth block) doesn’t look good unless there are four of them, she gave me permission to make something different, so I enlarged a Chuck Nohara block and made her two.
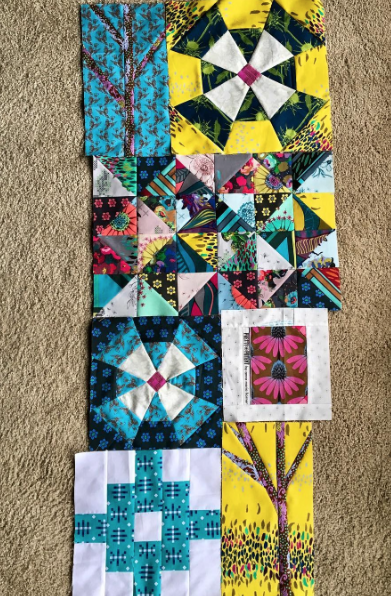
Here’s the composite (so far–people are still sending in their blocks). But while it’s stunning, and makes me want to make a quilt only out of AMH fabrics, some of the genius is in seeing how different the blocks are from the originals:
Nancy’s tree blocks become transcendent in this new fabric.
And Stephanie’s window-pane triangles completely change character in the different fabrics. There’s a great lesson for us all to learn–sometimes we don’t have to change our blocks or patterns, but instead think outside the box on our fabrics.
Other wrap-ups are found here and here. Our blog is here, and since we all know whatever we put up on the internet stays until someone takes it down, you can find many of our blocks up there on the blog.
So, thank you all, to the Mid-Century Moderns. It’s been fun!
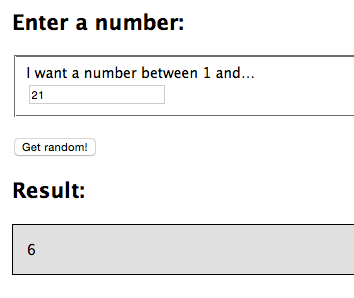
Because my husband is busy this afternoon recovering from our trip (see below), I used an online generator to pick a winner today for the felt, and it’s Elizabeth (what a great name, eh?) who goes by catskillquilter. Congratulations, Elizabeth! I’ll be in touch to get that sent out to you. I have two more giveaways lined up in the next couple of weeks, one courtesy of Uppercase Magazine, and the other from the Steam A Seam people (that one’s on June 13th–in conjunction with our continuing Hallowe’en 1904 QAL). I’ll have some great news as well about that fabulous pattern.
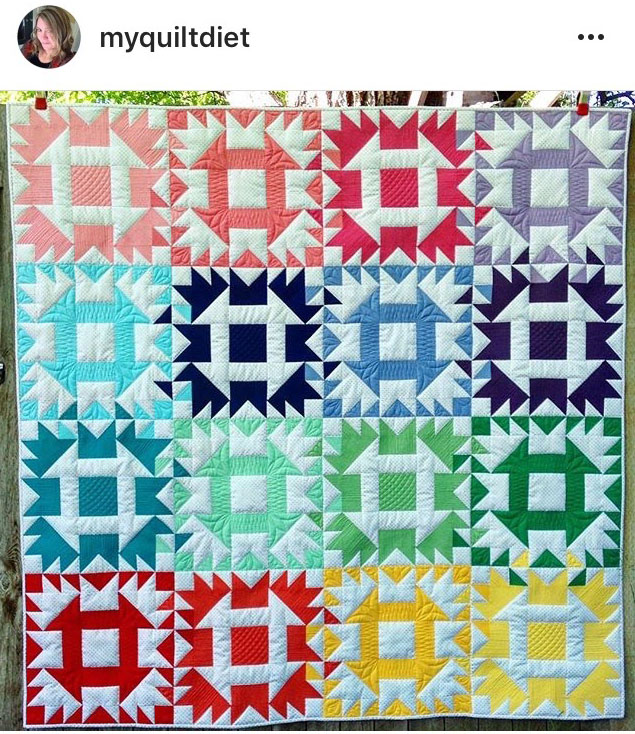
Here we go, first with quilt blocks from our Mid-Century Modern Bee: Carla of Grace and Favor asked for a modern churn dash block, saying she likes mustard and plum. Above is my block, but I was tempted by this, from @myquiltdiet:
I thought it would be fun to try, but Carla said “Too much work!” I could hear the laugh in her voice, so I smiled and went with tweaking the center bars to give it a bit of a twist. I hope she likes it.
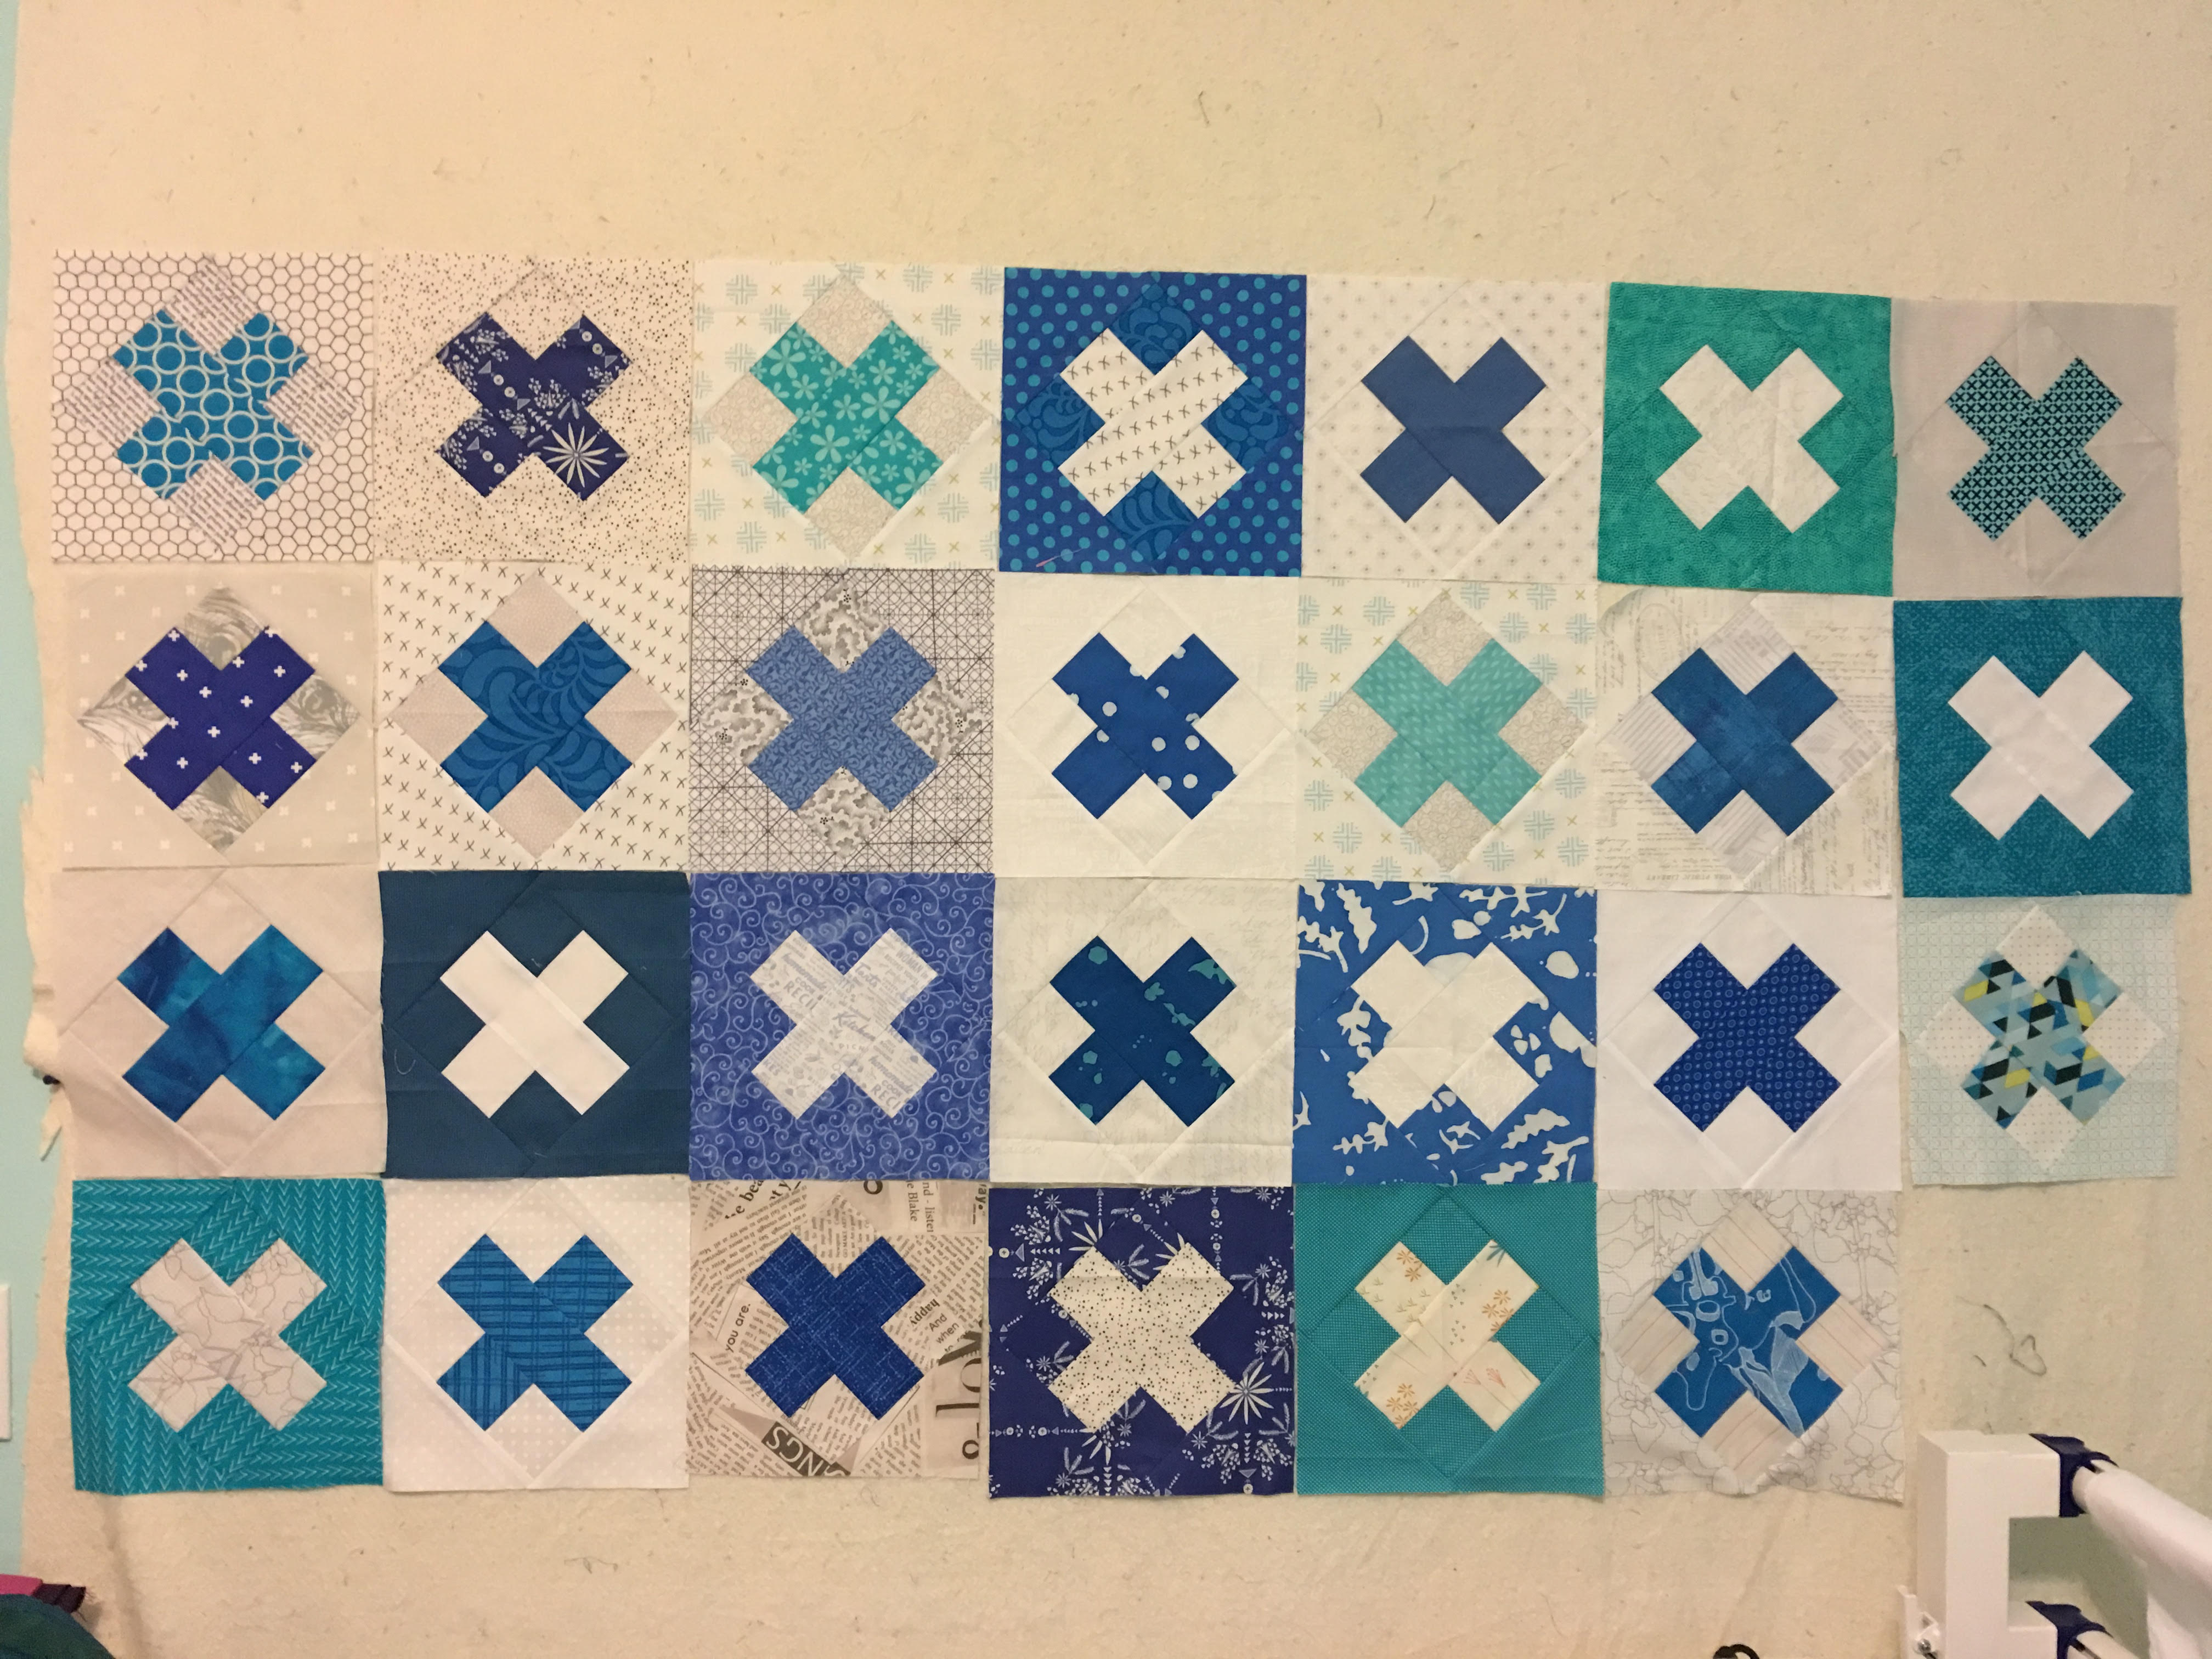
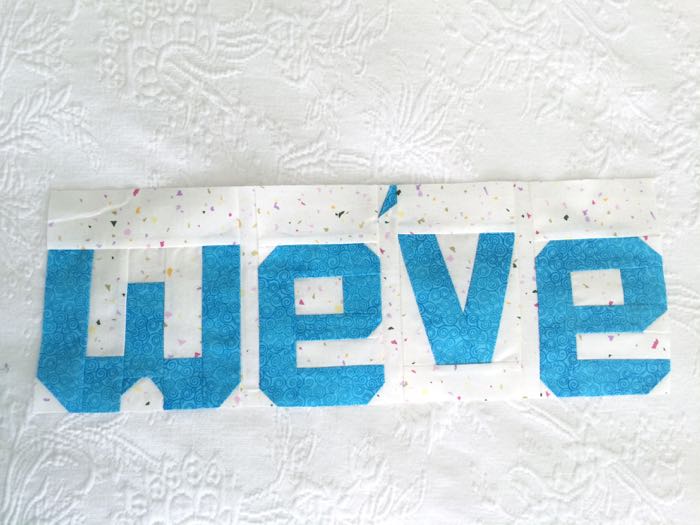
In our Spelling Bee Quilt Bee, Susan of PatchworknPlay asked for words to make up her saying, which she’ll reveal on her blog. I first took three words with “w’s” but then Simone had none, so I gave two back, leaving me with the above.
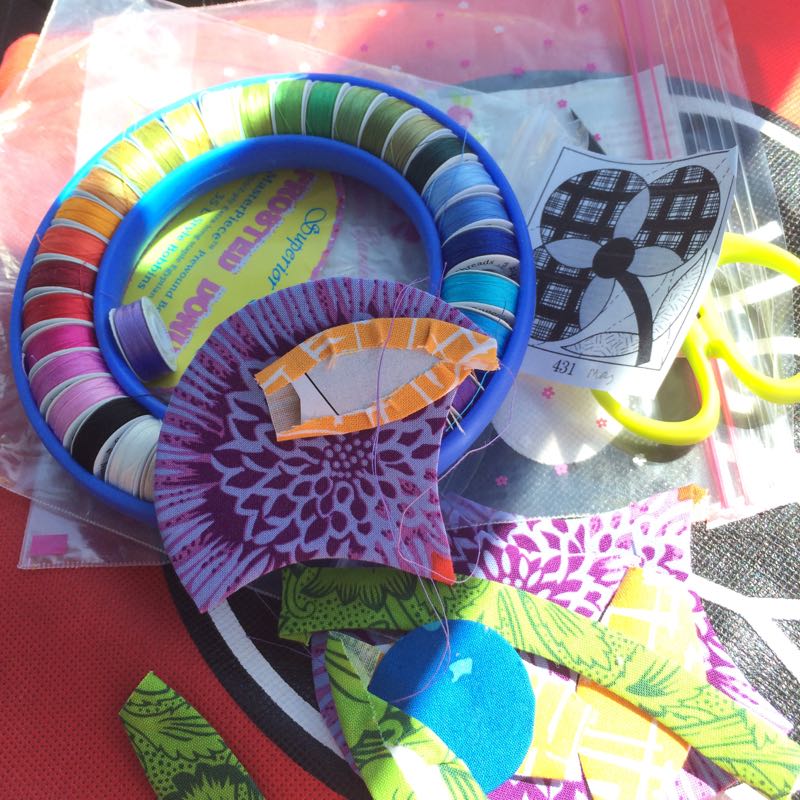
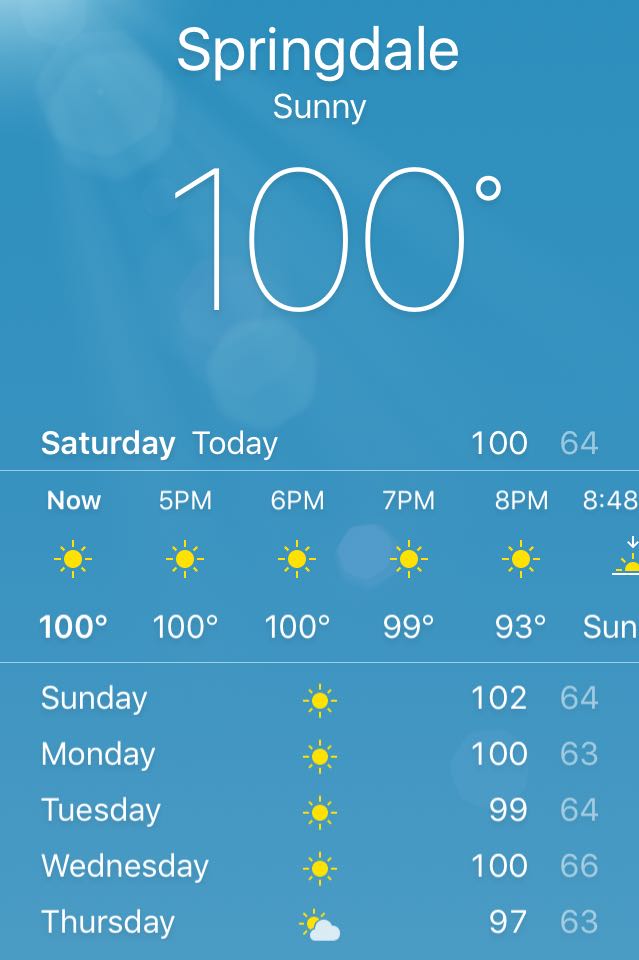
Since NOT staying at home seems to be the thing I do the best lately, we headed out Friday for a mini-reunion with my husband’s family in Zion National Park, about 7 hours away. You can tell who has been coming there for ages (this makes about trip #20 for me) as we say “heading to Zion’s” as if there’s a possessive element there. (However, I do feel like it’s “my” park.) To try and catch up with my patchwork, I took some Chuck Nohara blocks on the road, stitching them in the car and in the park.
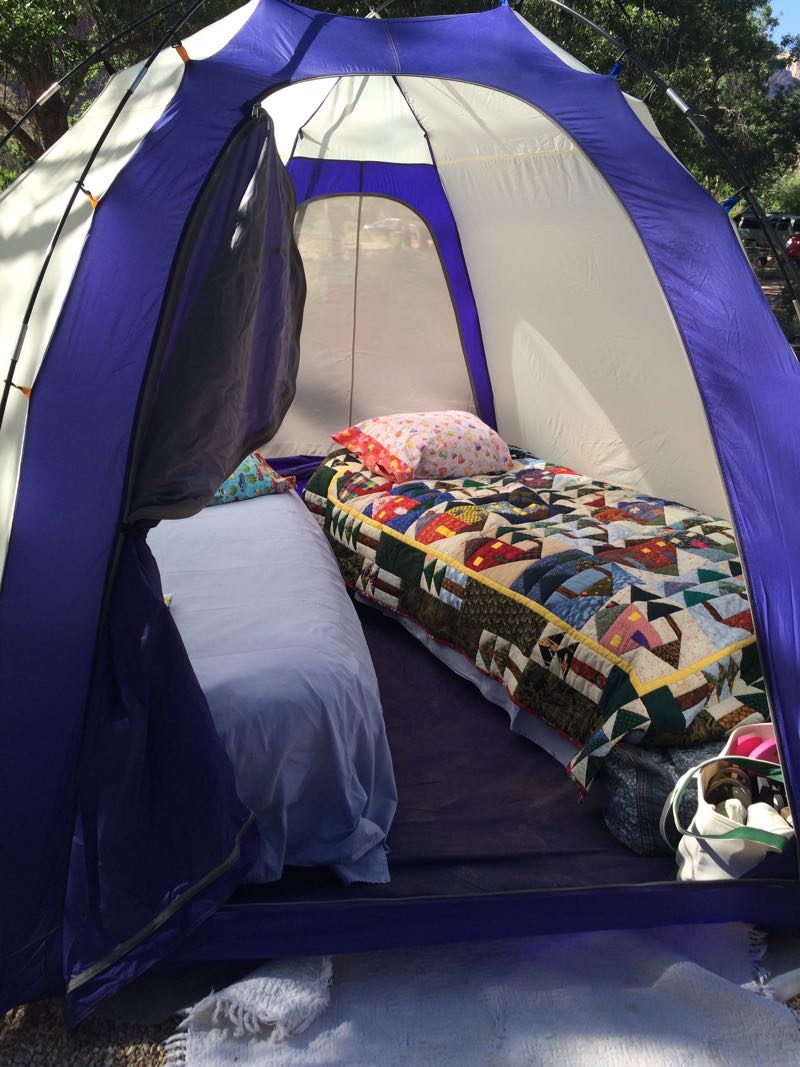
We invested in new air mattresses this year, twin blow-up beds, and those of you who have slept on a queen air mattress with another person while it slowly deflates all night long, know exactly why I replaced our aging air mattress. It also helps that my favorite camp quilt, Hearts in the Pines, is made for a twin. The pattern is out of print, but you can find the blocks in this previous post. My husband’s bed later on got a green nine-patch, but he left it off because it was. . .
…pretty dang hot this weekend. Snapshot was from the next day, where it turned out to have a high of 103 degrees F (about 40 C.)
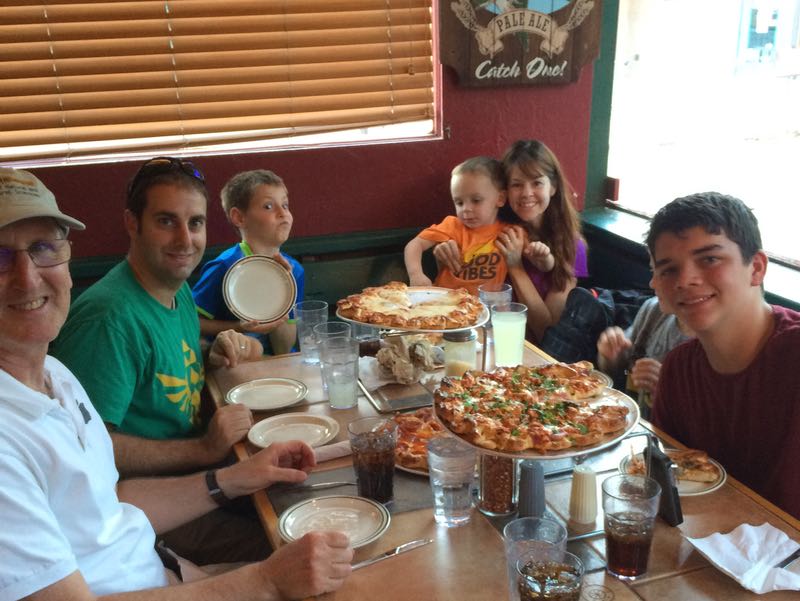
My husband and I, my son and his wife and boys always go out to dinner at Zion Pizza and Noodle Company the first night, as we all love their pizzas, and who wants to cook after setting up camp? I love their scallopy crusts.
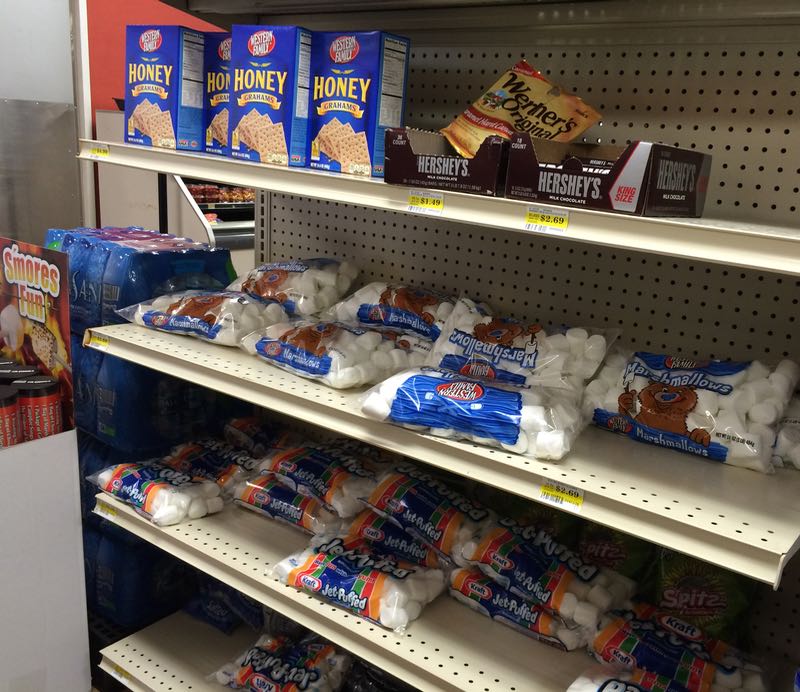
We were tasked with getting the S’more supplies. I cracked up when I saw a whole section just dedicated to this.
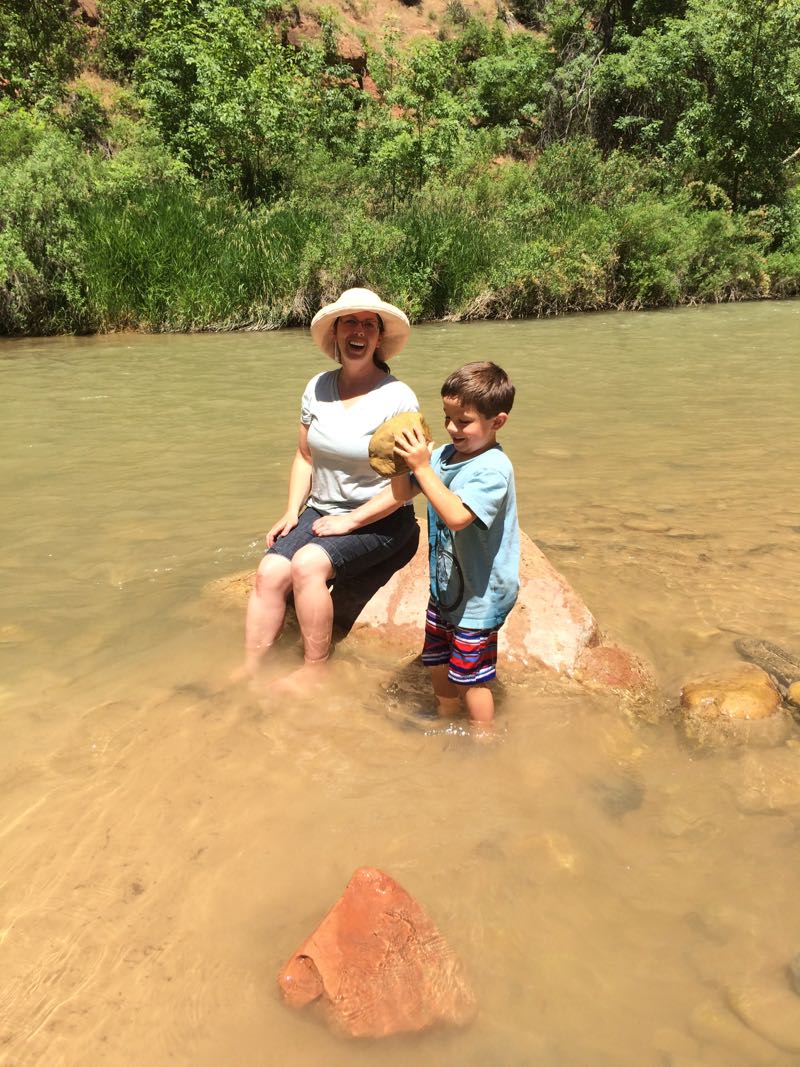
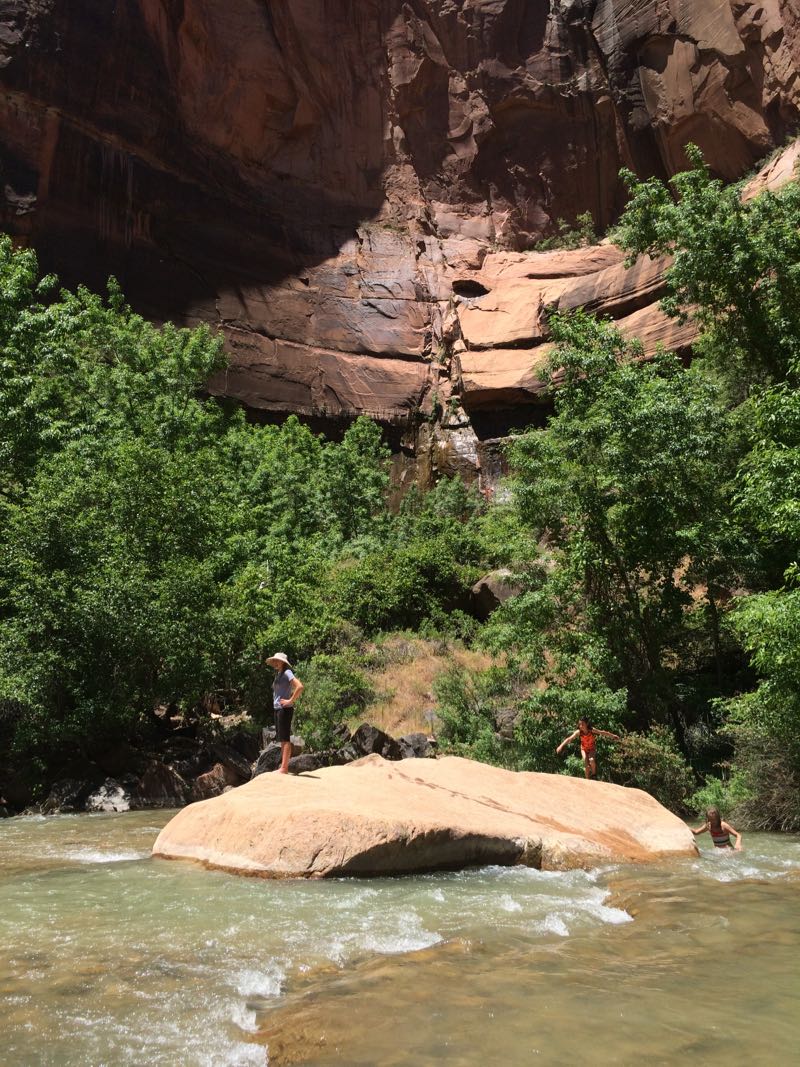
We rejoiced to have my husband’s niece (shown here in the Virgin River with the youngest of her six children) join us. Several weeks ago she underwent surgery for a brain tumor, and while under anesthesia, had a stroke. She awoke to a mostly paralyzed left side and has undergone significant physical therapy just to be able to walk with occasional hesitation. But she’s walking! She’s our own little success story, and she and her husband and family are our very own heroes.
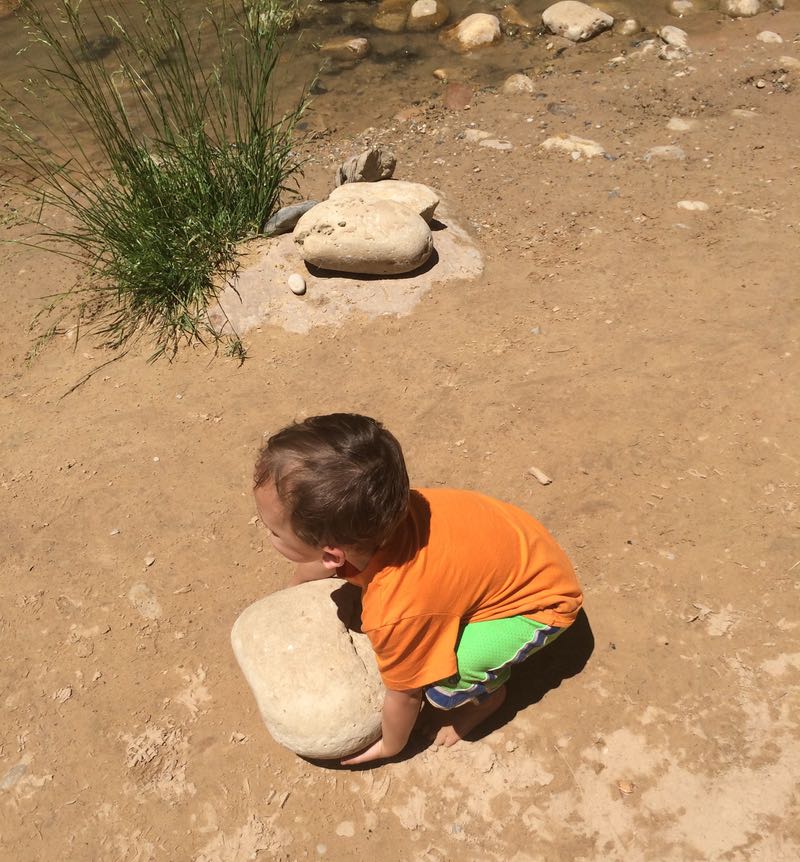
Throwing rocks in the river was great entertainment for my grandson and the other small cousins. (No, he couldn’t lift that one.)
I left the river early because it was too hot, and went back to camp. I picked up my Chuck Nohara stitching, sitting quietly in the shade, watching (and chasing away) the squirrels. All of a sudden I hear a sound directly behind me, and using the reverse camera on my phone, caught this shot. One of the other little cousins came running over, saying “Bambi’s here! Mom, Bambi’s here!”
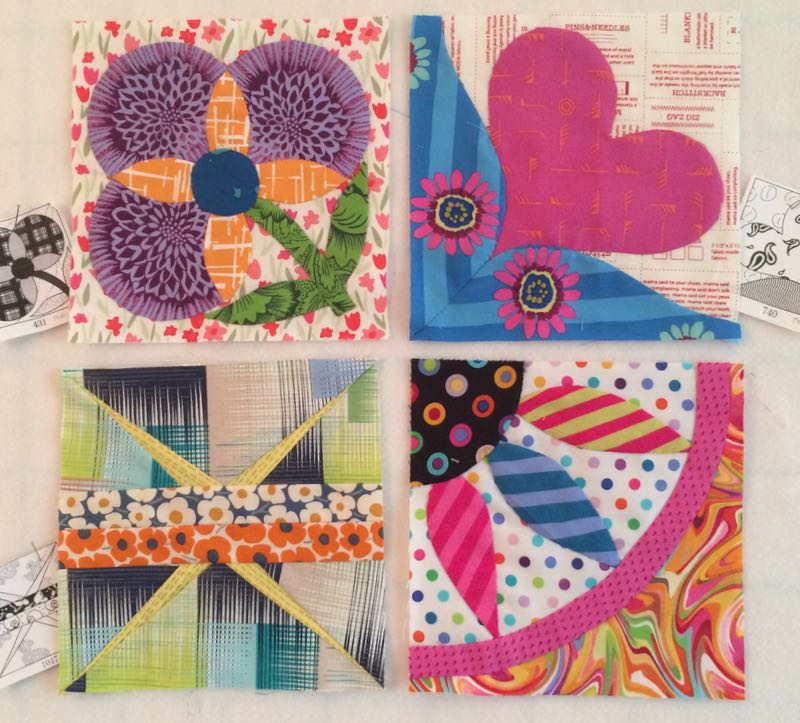
Because of the above sitting quietly, I’m all caught up with my Chuck Nohara blocks from April and May: