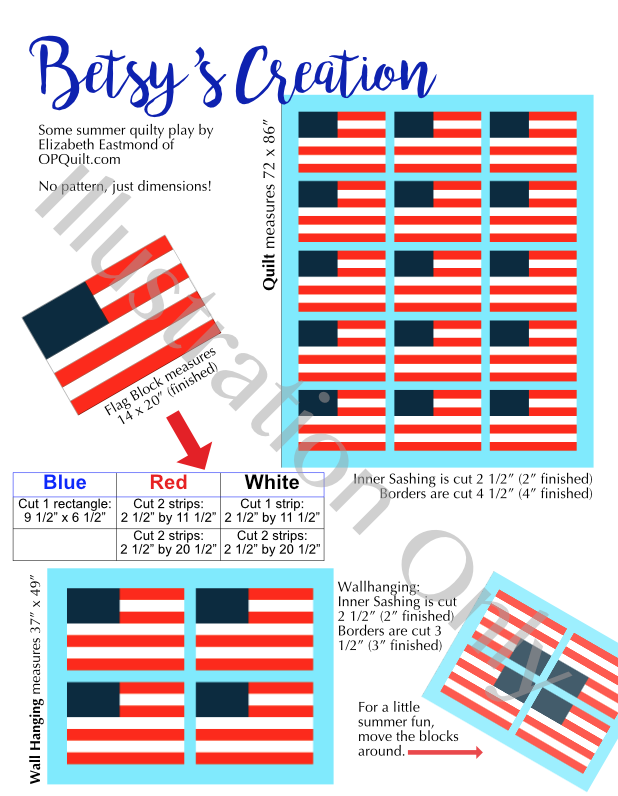
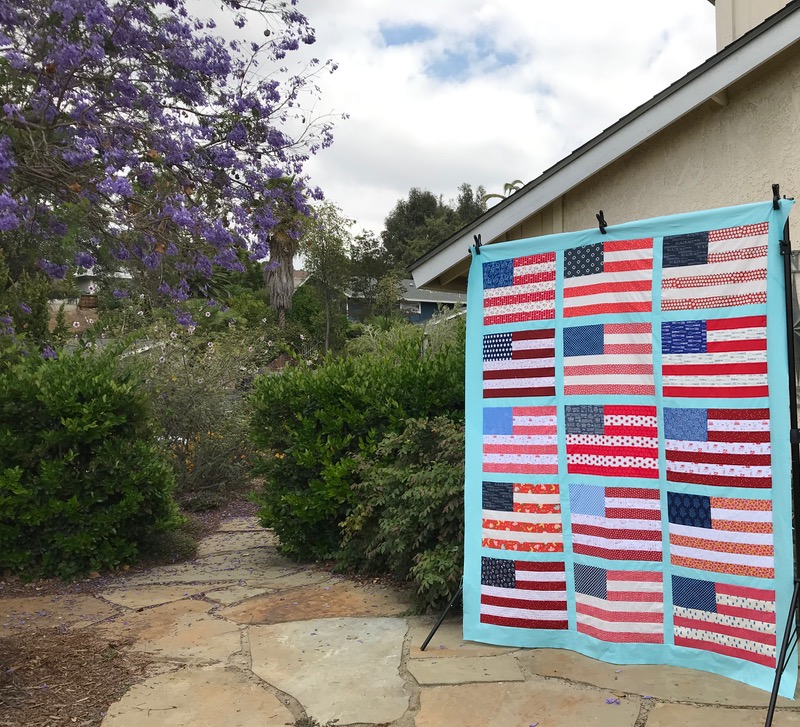
Last week in another post, I threw together a fun little worksheet about how to make a flag quilt, then got busy and not only made this quilt top, but also a wallhanging:
It’s a just a worksheet and assumes you know how to put together a quilt. Why did I have enough for a quilt and a wallhanging? Seems I had a bit of a miscount, excited as I was to be cutting into all my reds, and whites and blues. I overshot my mark of 15 sets.
I put each strip set on my design wall, then added a blue rectangle to coordinate.Progress!
I mixed them around until I found an arrangement I liked, putting four to the side for the wallhanging, then sashed and bordered them with the light blue. I used Painter’s Palette Solids in Aruba (121-100), available from Keepsake Quilting, if your local shop doesn’t carry it.
Then I went outside and fought the breezes to get these few shots.
I did all the cutting, the sewing and fighting-the-breezes-for-a-picture in three days. I tell you that so you know it’s a quick quilt to make. I’ll hang the smaller version in our front hallway in July, but the larger one will be quilted and tucked into the car for fun picnic blanket getaway events.
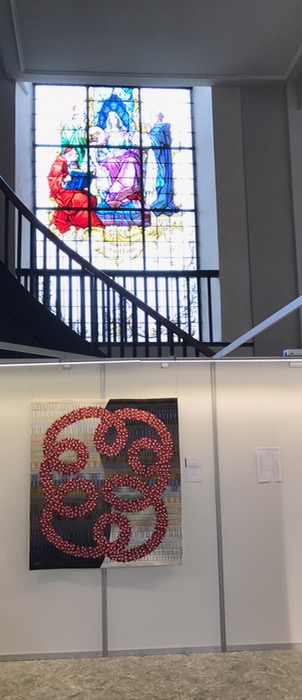
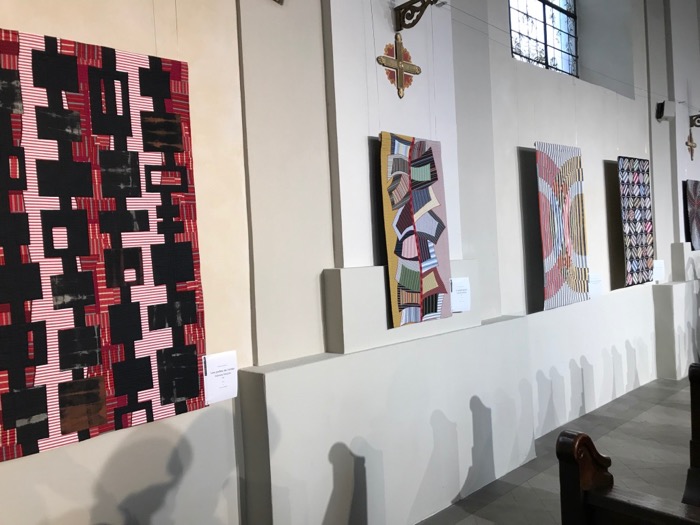
Moseying along the main street, we headed to Site #7, the Eligse St-Louis, where I wanted to see the French quilter Gabrielle Paquin. Previous to this, in my hotel room in Geneva, I had previewed all the exhibits, looking up the artists and deciding which ones interested me. Paquin was one of them.
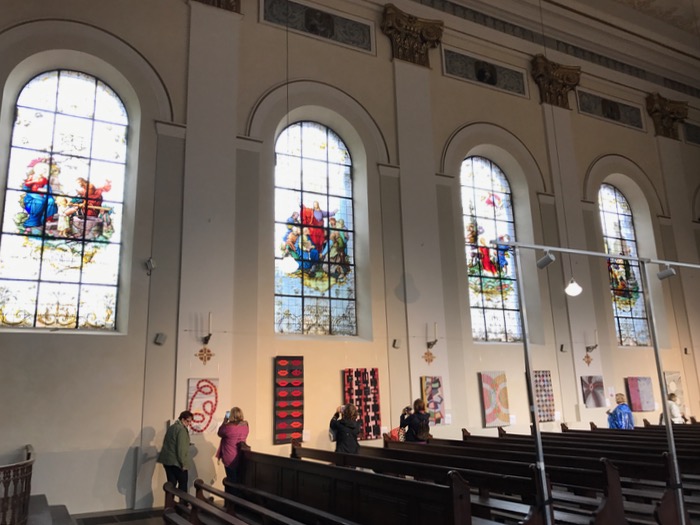
I had seen photos of previous years’ exhibits, and the fact that many of them were in churches. But it just doesn’t prepare you for the juxtaposition of the sacred and the quilting, the symbols of religious life coupled with the themes and ideas and colors and patterns of the quilts along the sanctuary walls. It was wonderful.
She spoke some English, and agreed to pose with me. Check out her sweater.
“For several years, I studied drawing and painting in a school of Fine Arts, my first vocation, and since then, I practice painting as an amateur. Simultaneously, I realized traditional patchworks inspired by American models large format of the 18th and 19th centuries.
“This practice evolved towards the contemporary patchwork and the textile art that I have been practicing assiduously for ten years, thanks to a constant inspiration and stimulated by the numerous exhibitions proposed with selection by a jury of artists and curators of museums.”
Spring, 2016.
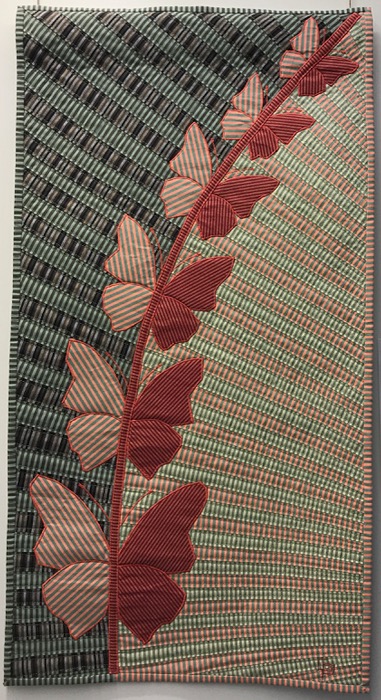
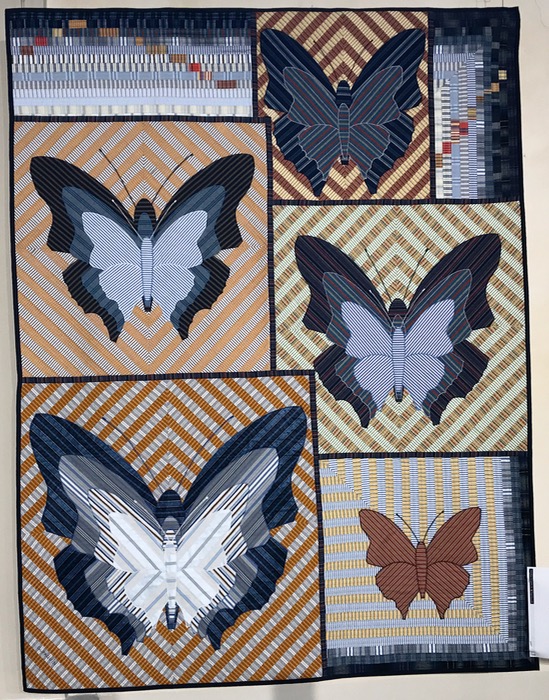
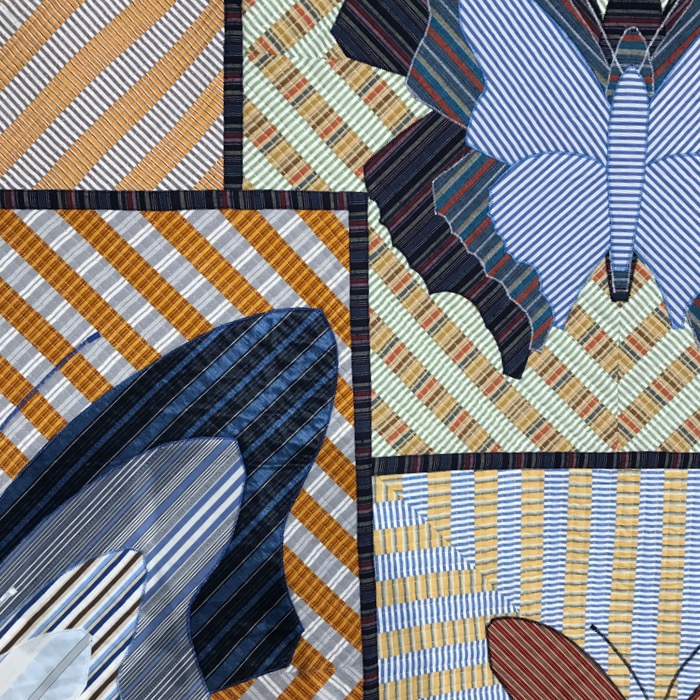
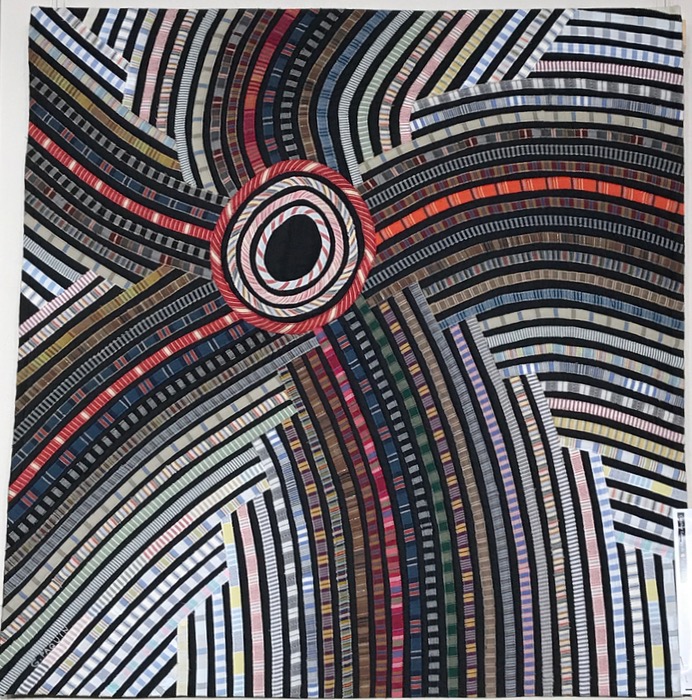
You can start to get a sense of the materials that Paquin works in: striped cloth. In this one, she uses larger pieces that her usual strips, and has appliquéd them down to the background with a satin stitch on her machine. I like her small monogram in the lower right corner.
Twilight and Stripes, 2008 (?)Detail.
I didn’t quite catch the name of this one (top, and detail, bottom), but it shows her use of her striped material. I kept wondering if she cut up old shirts, or old clothing, or haunted fabric shops to find all these variations.
In/Out, 2017.Detail.
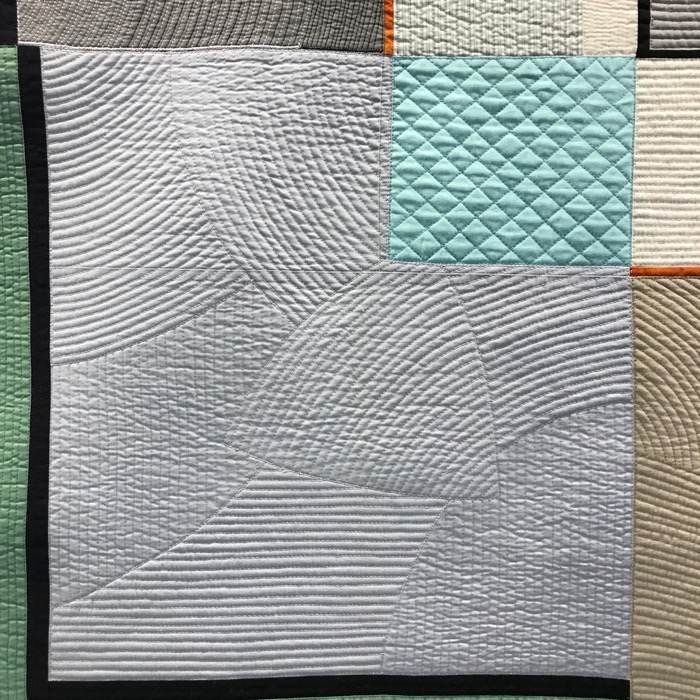
I was impressed with the quilting on this piece, as it gave me great ideas.
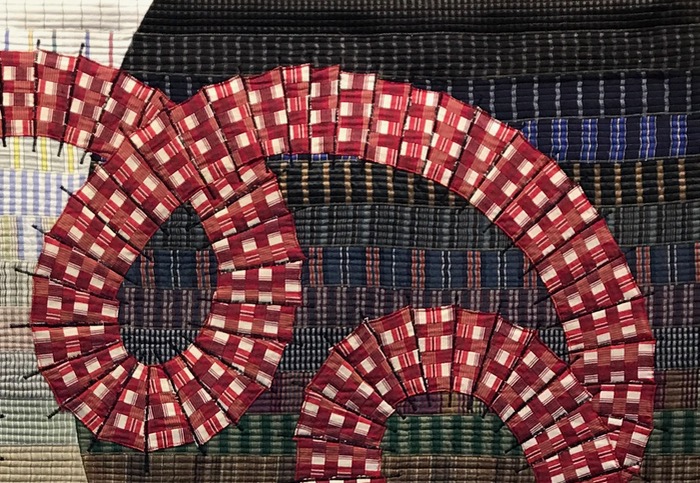
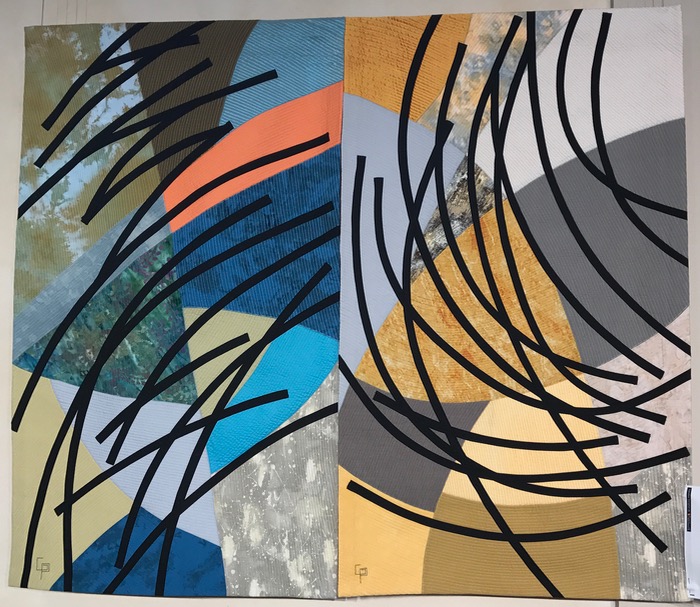
Flight II, 2015.
All the placards were in French, so I’m using Google Translate to write them in English, plus heading over to her website where she has some of these quilts.
Detail.Detail.
She has found so many ways to use this fabric; I didn’t include all her quilts in this series, but many of them.
Two Black Sisters, 2016.Storm II, 2012.
What a huge impact the simple reversal of value (light-dark) can make!
Looking towards the back of the church. She is sitting there at the table with the white tablecloth, waiting for people to come and talk with her.
R-évolution, 2017.The Eye of the Cyclone, 2009.
We call cyclones “hurricanes,” and after this year, can definitely relate to the eye of such a storm.
This title says something about a spider, and it was pinned up to show the creature responsible for this exotic web.
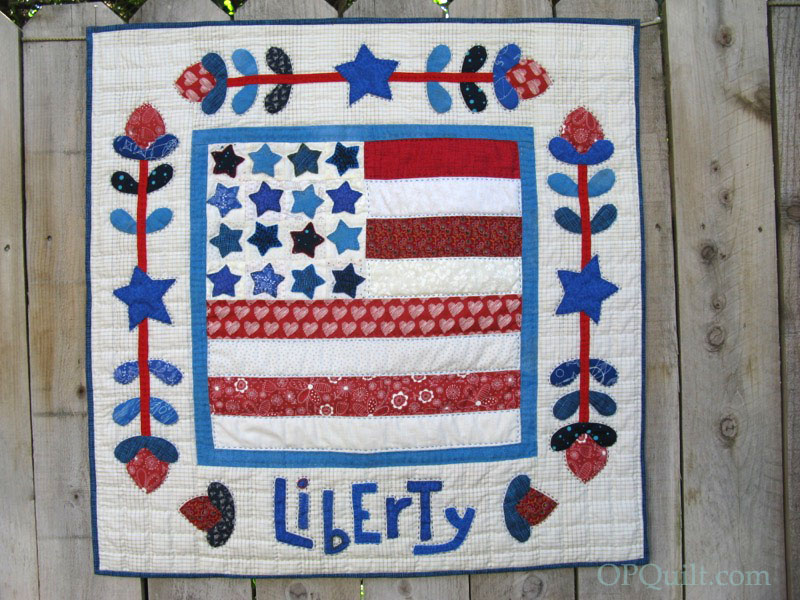
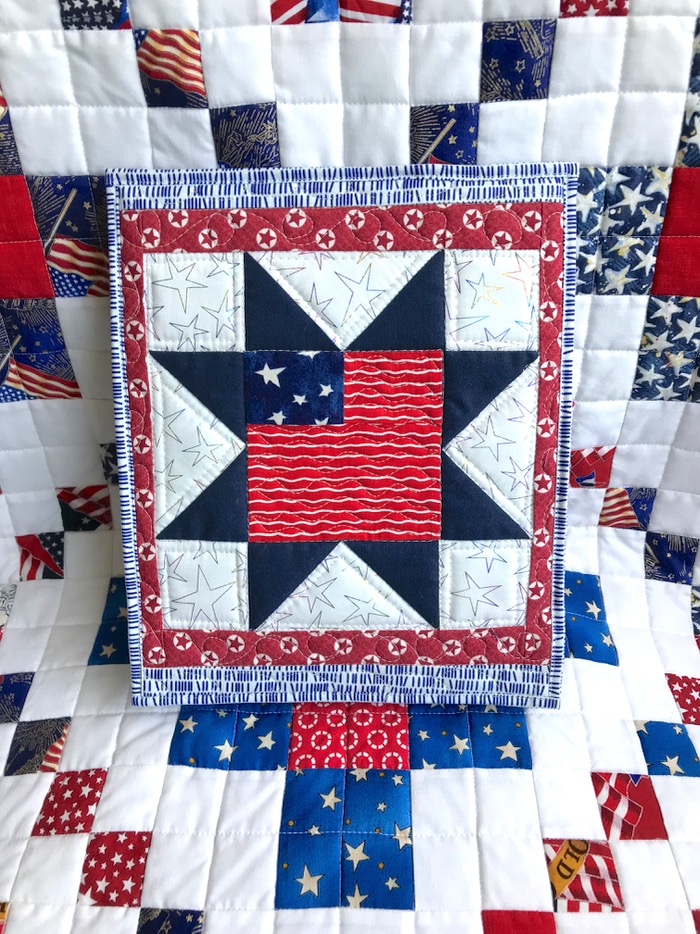
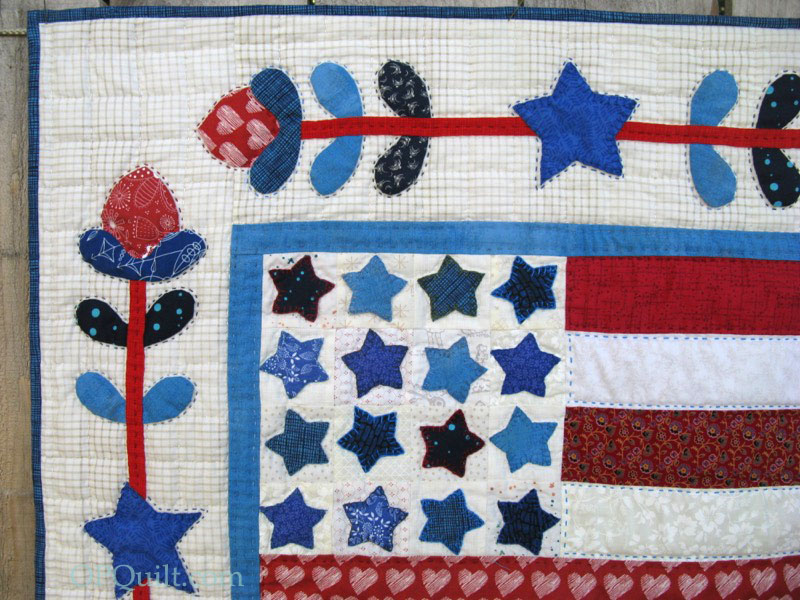
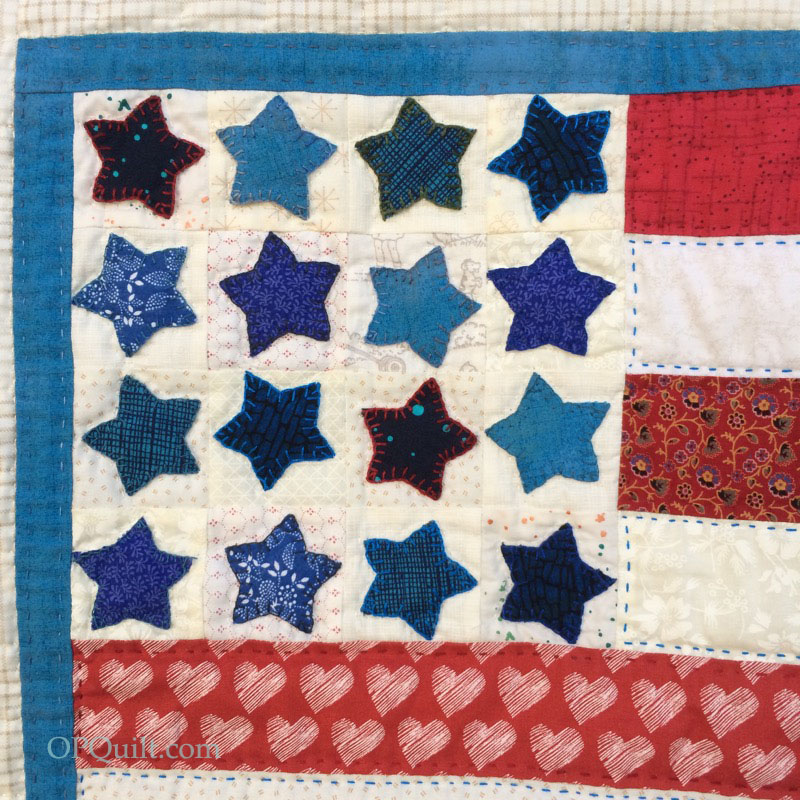
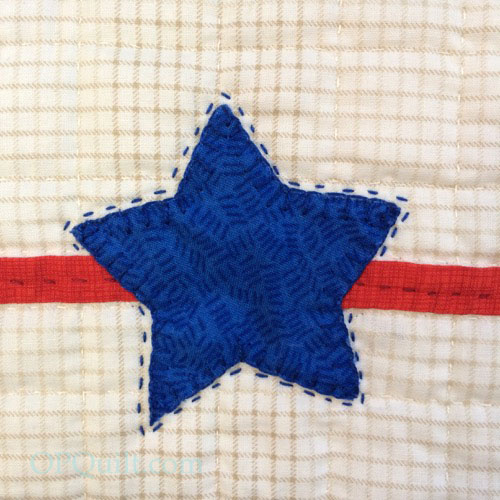
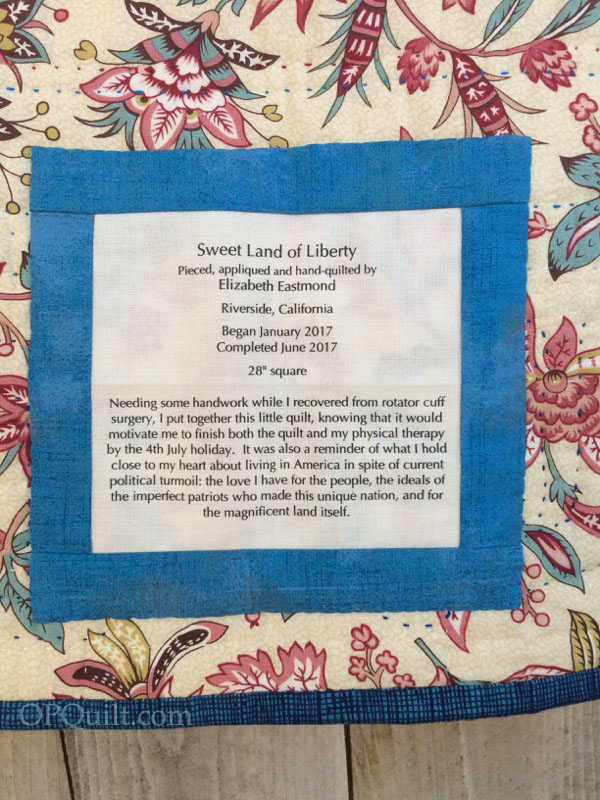
I started this in January, prepping up the stars and beginning the hand-blanket-stitching a couple of days after my rotator cuff surgery. This was a bright spot during that time, keeping me focused as I moved forward through different steps of what I was calling my “Liberty USA” quilt.
My friend Susan of Patchwork N Play, in Australia, is always hand-quilting her quilts, and I wanted to try that, too.
So I rustled up some patriotic colors of perle cotton from my Oh Christmas Tree quilt, and went to town…well, riding on a pony and all that, because it took some time to do this.
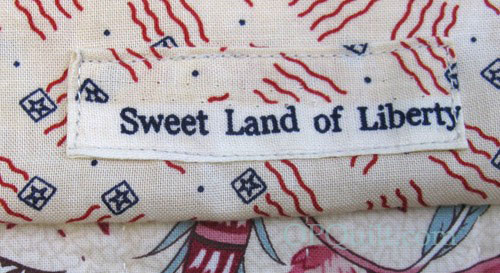
I cut some fabric for the rod pocket this week and on the selvage, I saw this. Perfect for my title, I thought!
It’s up there, stitched onto the rod pocket in the upper right corner.
I listened to Hamilton, the novel, last year and one take-away for me was how imperfect our early Founding Fathers were, but what a magnificent thing they created as they pulled together and figured out our country and its laws. They had patriotism in its purest form: e pluribus unum, out of many, one (our country’s motto). I try to keep that ideal in my head every year as I celebrate our Independence Day.
And yes! I finished the quilt by my self-imposed deadline of July 4th, so that’s great news.
(You’ve seen this photo before…)
This makes three red, white and blue quilts for me.
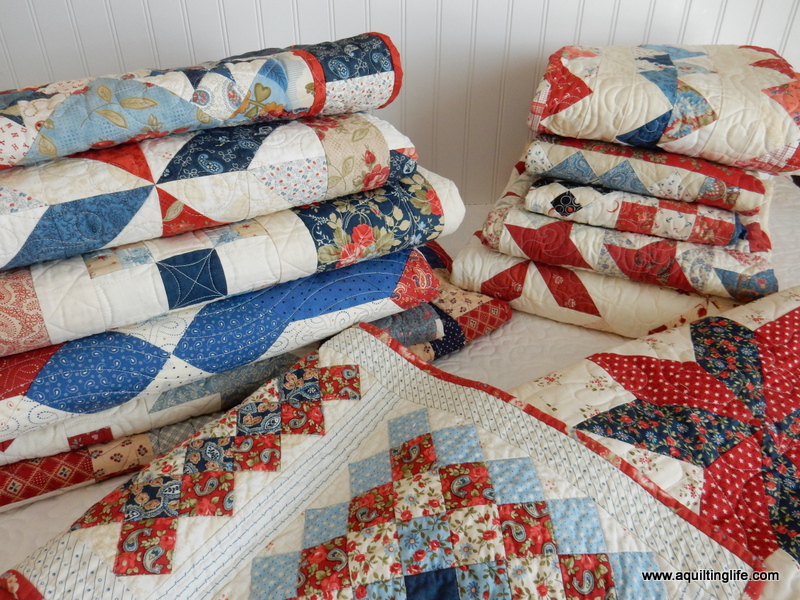
I’m way behind my friend Sherri, of A Quilting Life, who has over a dozen in this collection. Head over to her blog to get a tour. I’ve got to get busy to catch up with her!
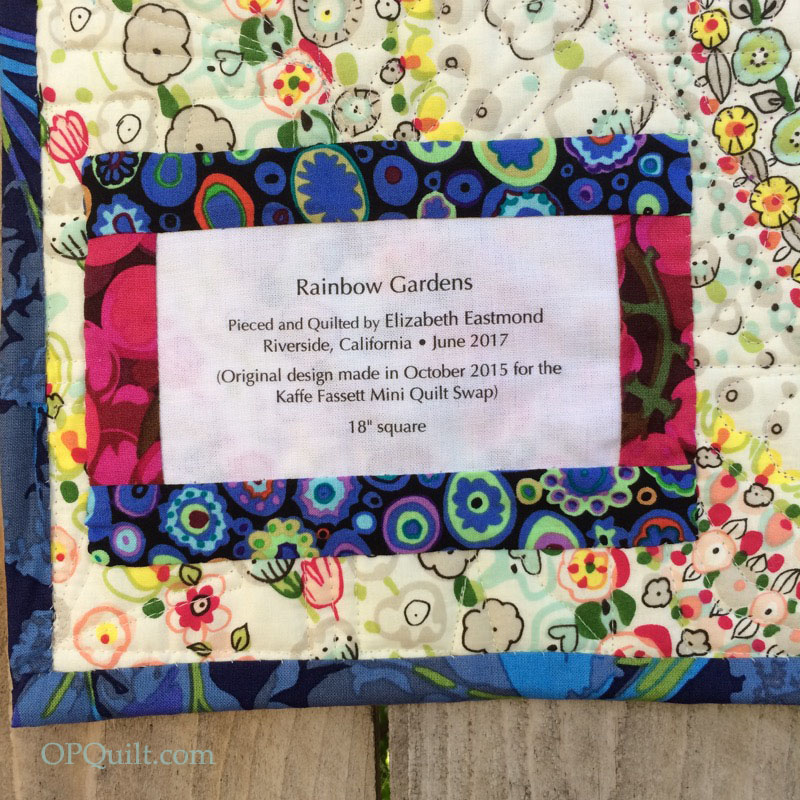
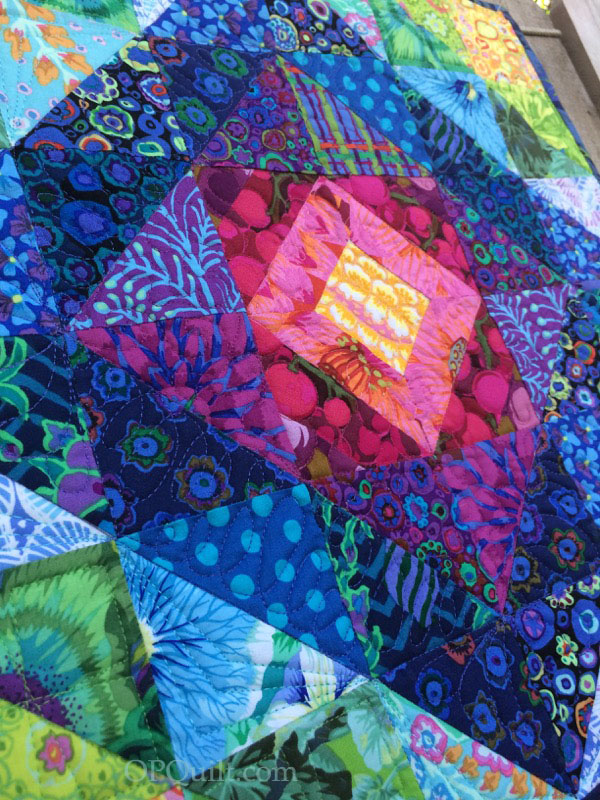
Rainbow Gardens (the original) was made for a swap back in 2015, and I always wished I’d kept it for myself. So this week I did the next, best thing: I made a new one.
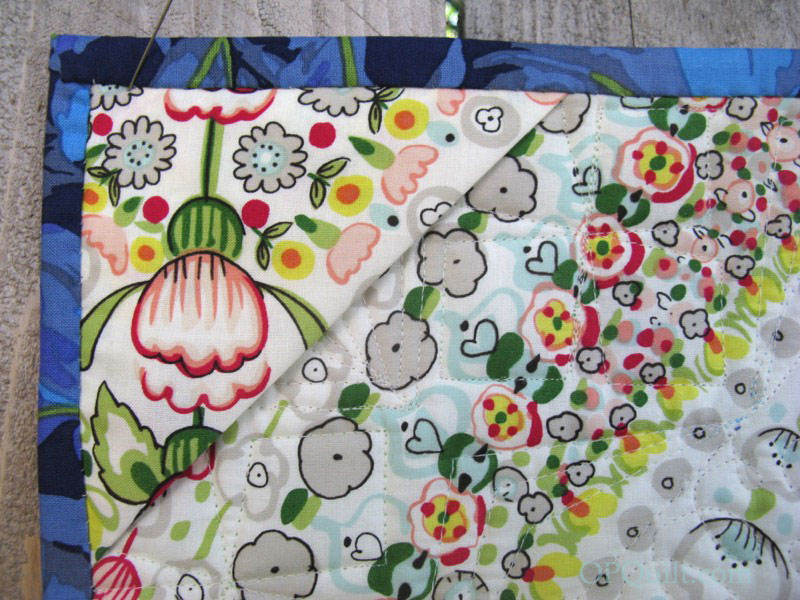
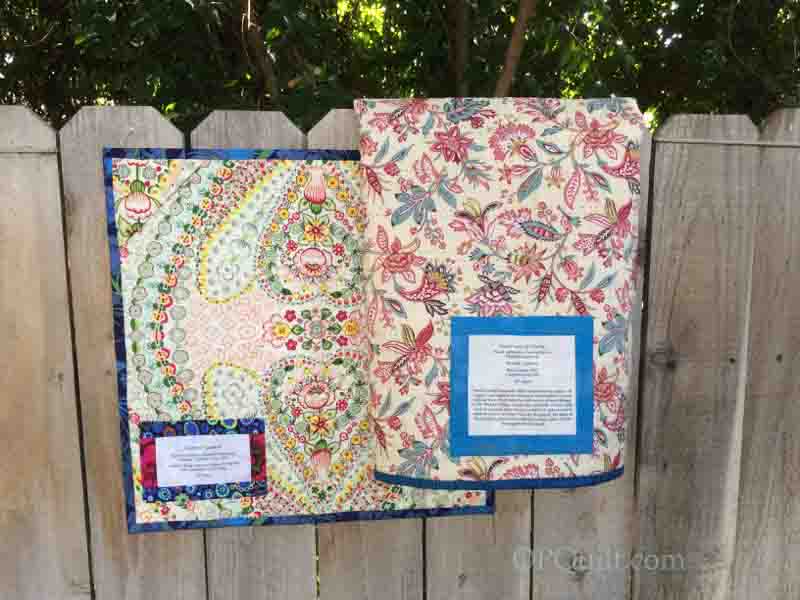
I had all but one of the fabrics for this 18″ mini quilt still in my stash, as I pretty much hoard my Kaffe Fasset fabrics. I tried to quilt it the same, too, using my favorite Magnifico Thread from Superior Threads. But the backing is different, as is the label:
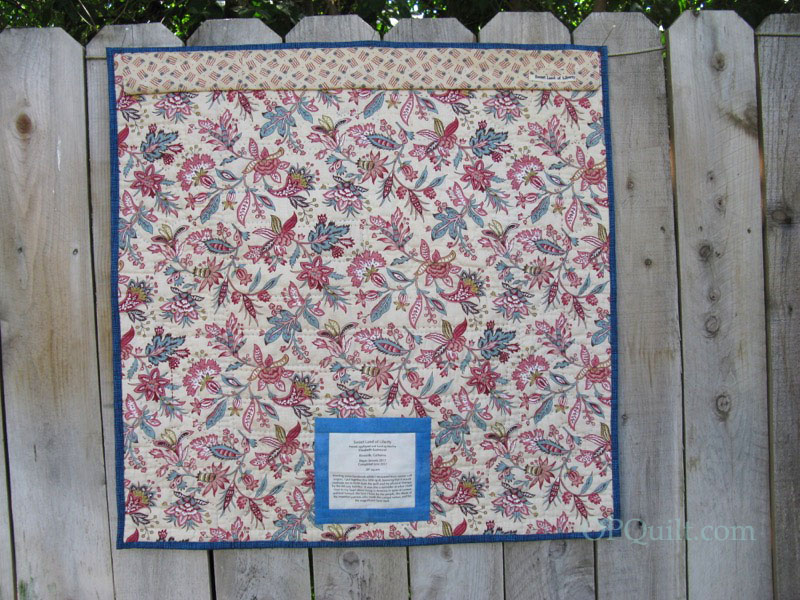
The backing is “pindar paisley” from Alexander Henry, from 2012. The front of the quilt is all Kaffe Fasset fabrics, some new, some older.
I also updated the pattern, trimming out this and that, and editing it more tightly, and it is up on Craftsy for sale, if you want to replicate this. And even though it feels strange to say this, I’m going backwards and keeping the number from the original make: this is quilt #148 of mine.
I so rarely duplicate my quilts, that this feels a little odd. I have plans to remake one more, but that will come later this summer. After sending off these two quilts to their owners, I wised up and began duplicating everything I swapped from then on. I rather like my quilts, I guess. Have you ever swapped a quilt, and then wished you had it back?
I also finished another quilt this week. Stay tuned.


 I’m way behind my friend