300 Quilts · Quilt Finish · This-and-That

Quilt Finish: (dreaming in color)

I have a 2-D Brain.

Yesterday we went to our town’s Maker Space which was filled with all kinds of machines from sublimation to a movie studio to laser cutters to several 3D printers, and it was on this last enterprise that they decided to train us. We filed into the computer room, filled with all kinds of computers (nice ones!) and opened up the program and started to design. I mean, I tried to design. The plane on which I was creating was wobbling all around, and then it would leave my screen, floating around.

Many of the design tools were like my Affinity Designer at home, but not really. I just couldn’t figure this thing out, even though I was madly clicking and trying. It was then I realized: I have a 2D brain. My final project in my Digital Art class many years ago was titled, Leaving Flatland. I won’t bore you with the details, but that exhibit came back into my mind as I sat at the fancy computer, desperately trying to leave flatland. At the end, I deleted my file of 3D doodles, and we went on a tour of the building. The very next room was a room filled with sewing machines.

Now we’re talking.

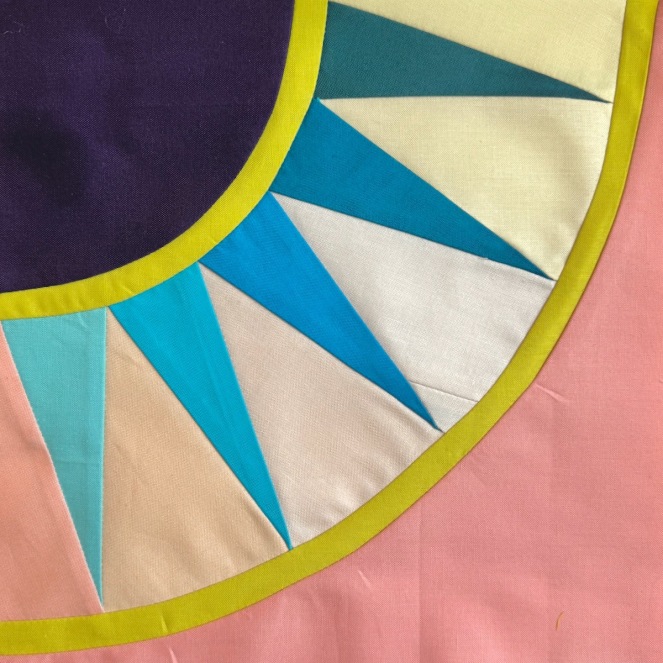
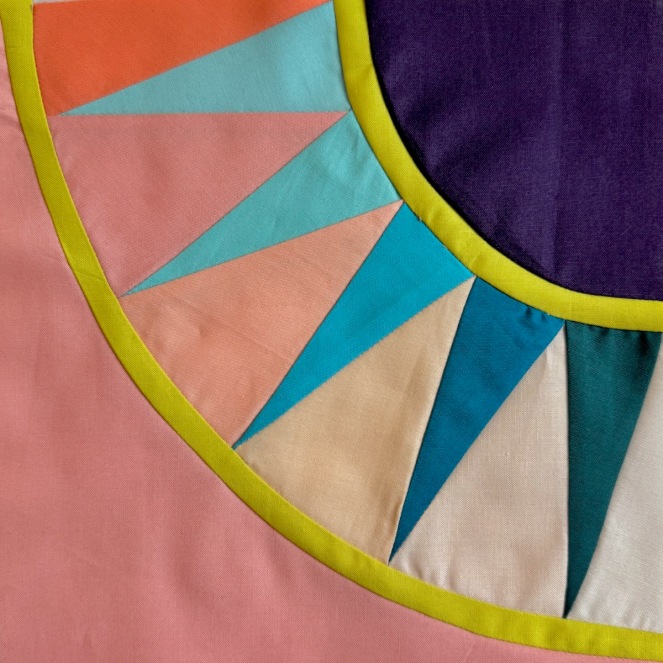
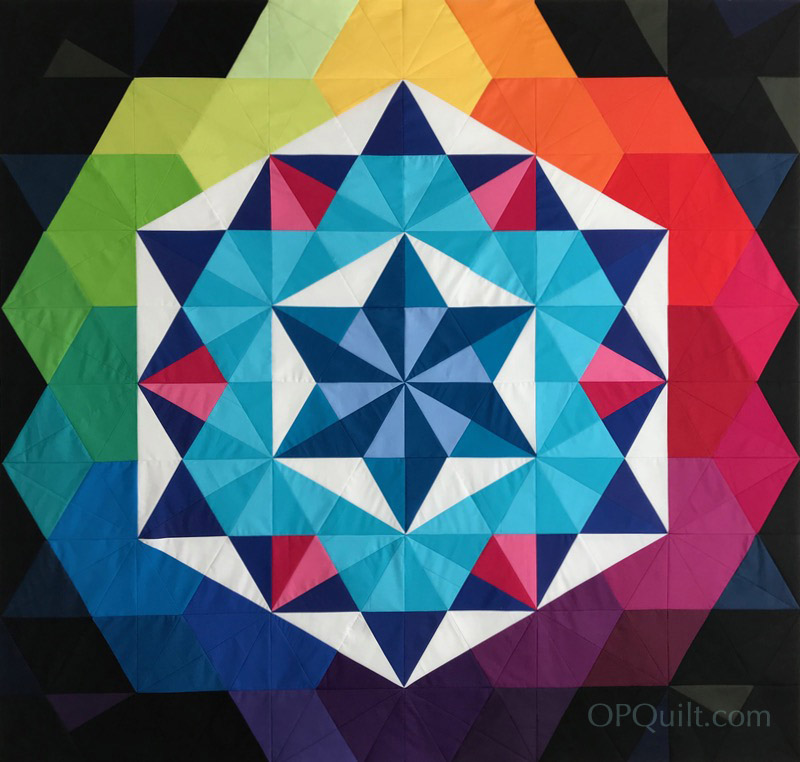
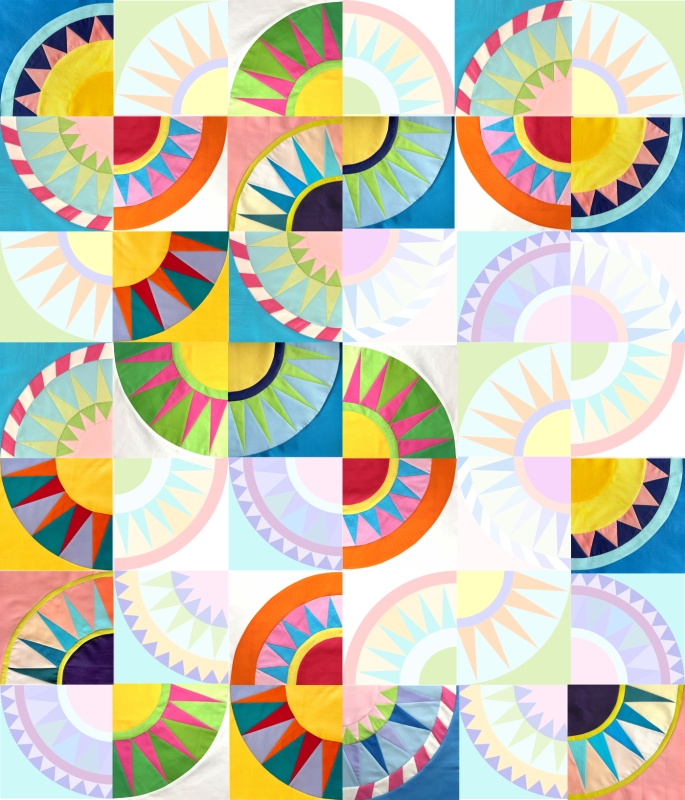
(dreaming in color) • Quilt number 289 • 24″ square

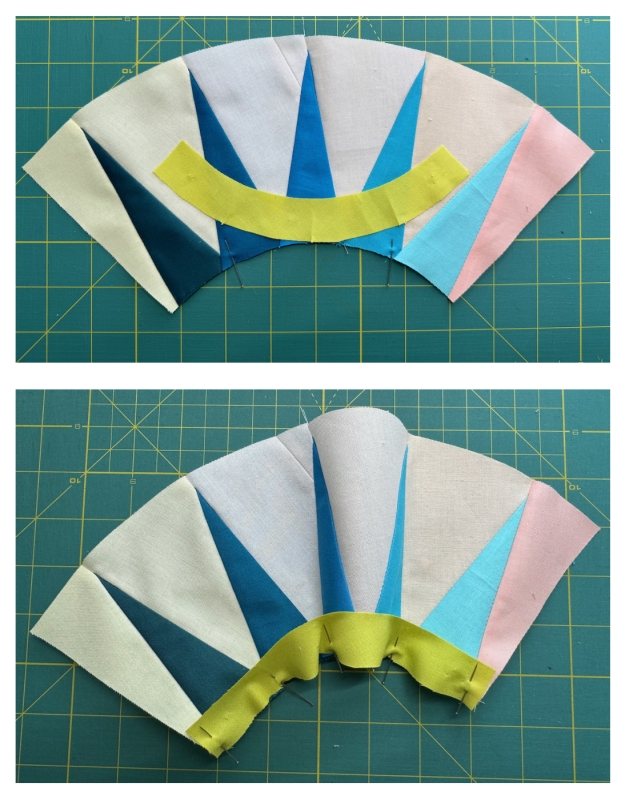
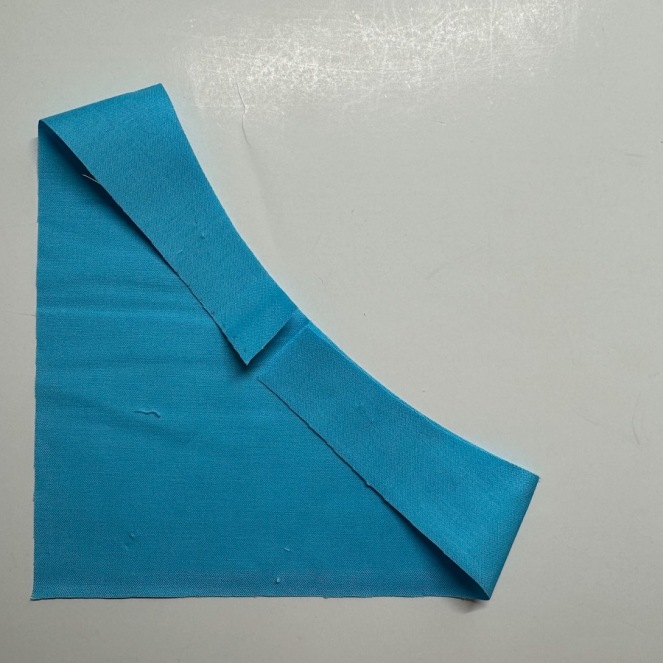
I’d been thinking about flat quilts this week, as I kept calling this “the flat houses quilt” while I was working on it. I wanted it to be a smooth 2D plane, where color would be the focus through repeated shapes. Simple. Flat. Repeated. Colorful.

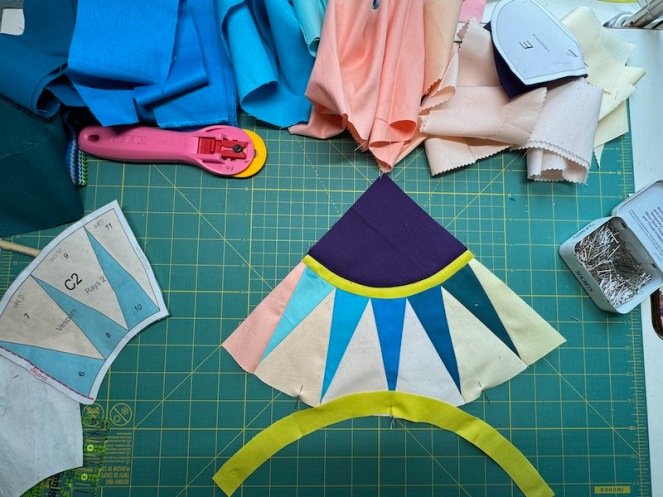
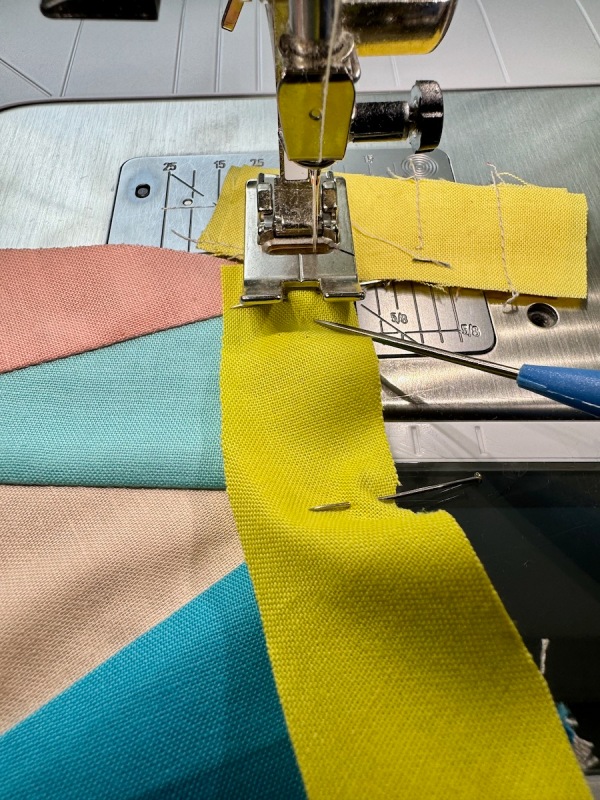
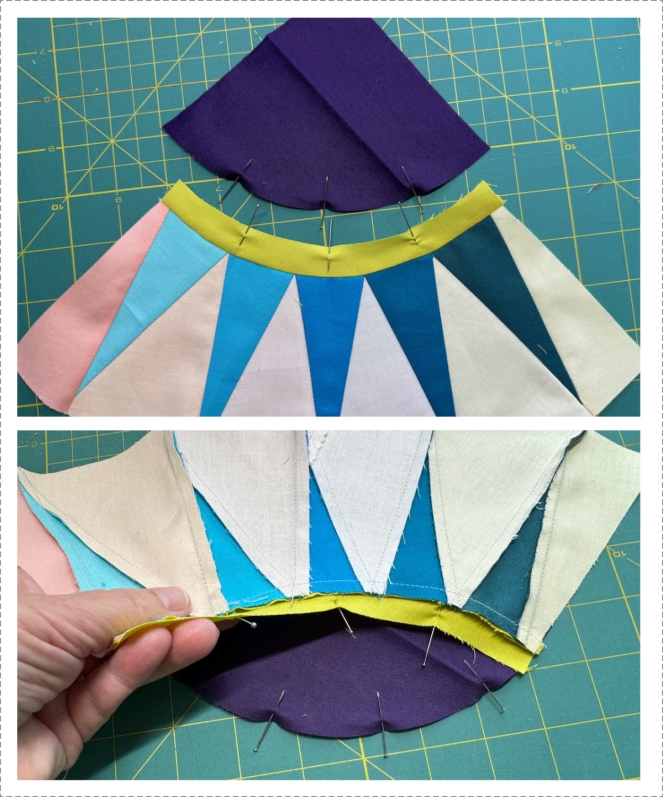
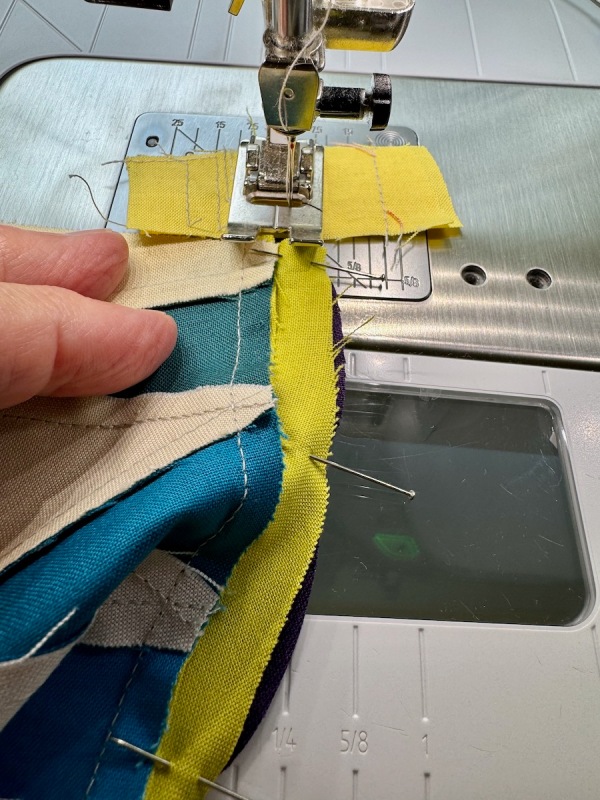
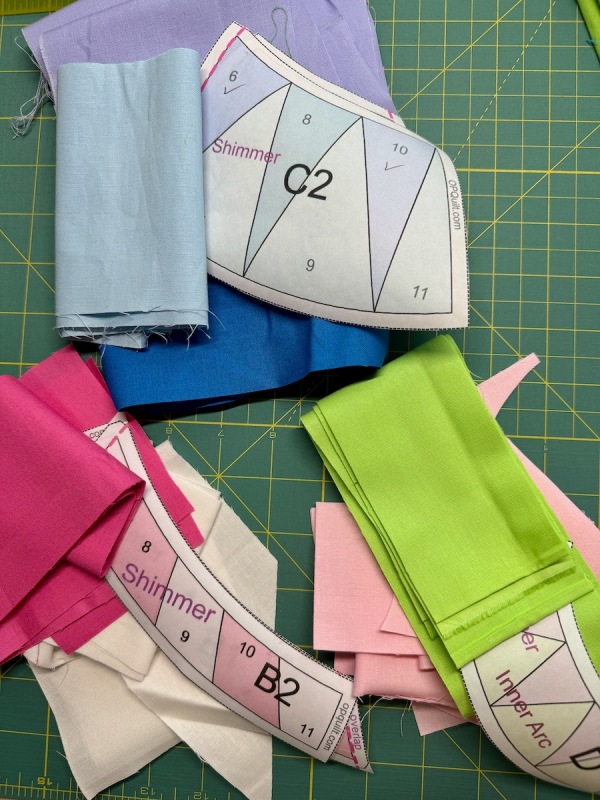
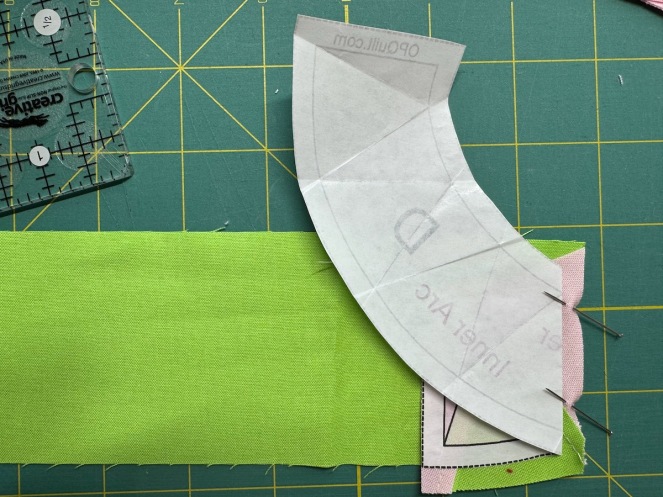
In the 3D world, they did have this concept of printing something to help you print, a circular idea which still is rolling around in my mind. But that’s sort of how my patterns evolve: I am making the quilt as I’m writing the pattern, each process a support and discovery for the other. I originally imagined this as a large wall quilt. And then maybe I wanted it a bit smaller. And smaller yet, to fit a particular corner of my sewing room. And I wanted to try some reverse appliqué. I wanted it to be made in grunge fabrics. And I wanted to be able to make it with the windows >inset< rather than >applied.< By the time I was finished with the quilt, I was finished writing the pattern.

I spent time on three patterns this week:

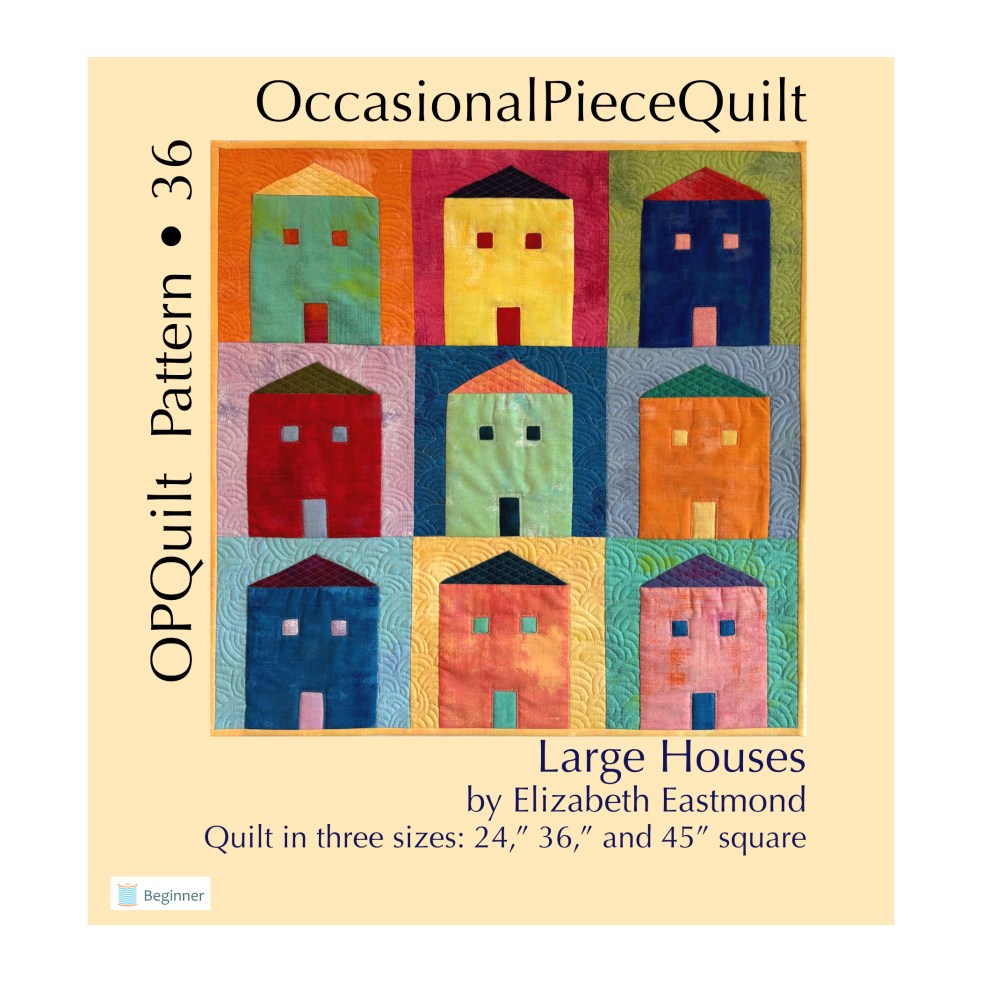
This one, because it was old and needed a make-over. How old? It didn’t even have the one-inch key on the templates, as I didn’t know how to make that item when I first started out.

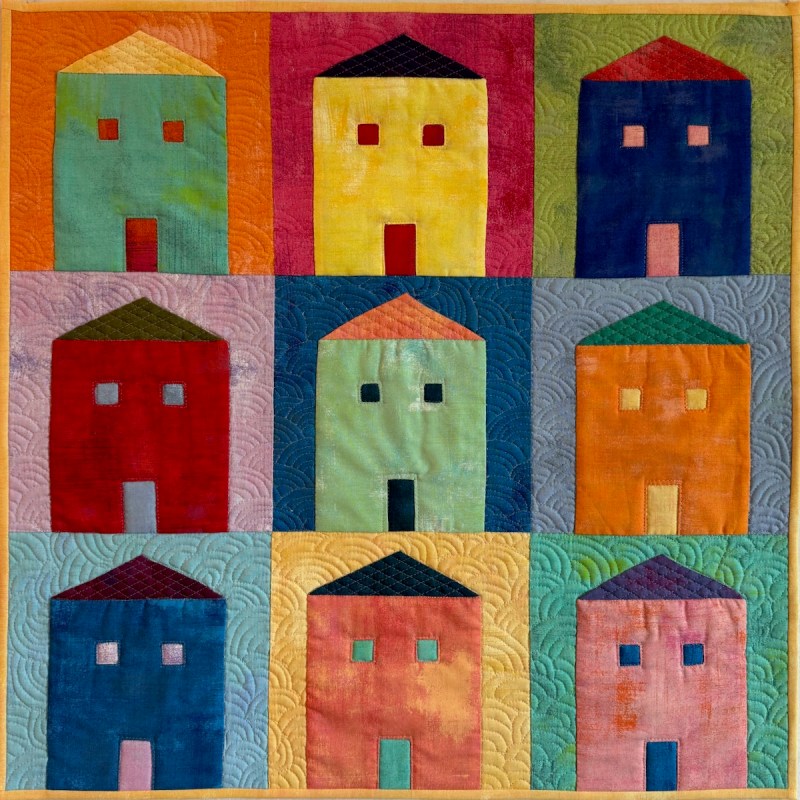
This one, because although it was mostly finished when I posted about the quilt last week, I needed to finish it up for someone who asked about it. This has three different sizes and looks.

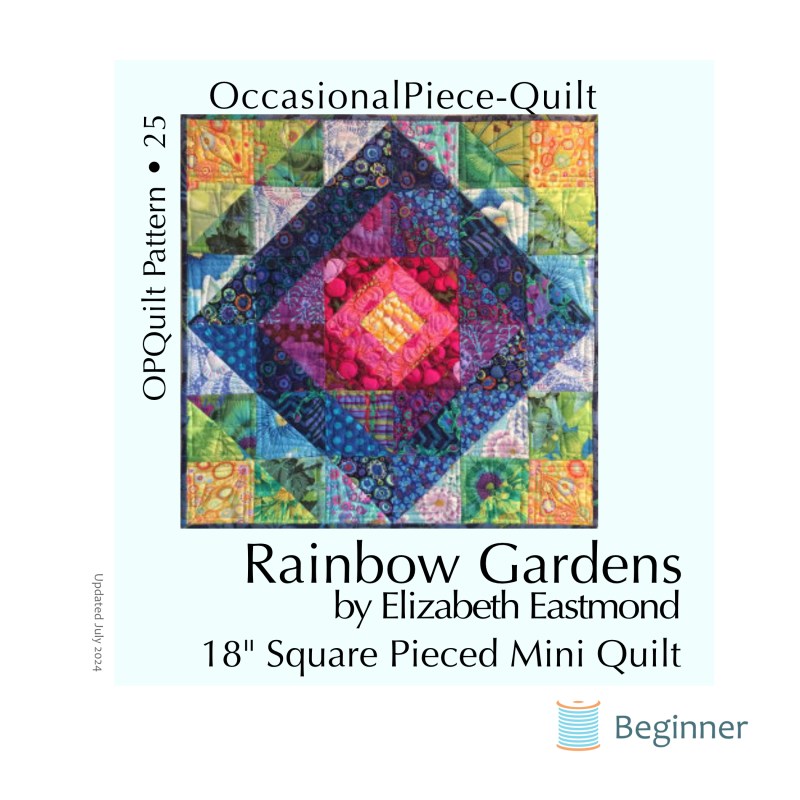
This one, because it was finished, and I was ready to post about the quilt.

Like many of you, I watched the Paris Olympics opening ceremonies, and like some pundits, declare Mongolia’s outfits far and away more beautiful and interesting than some larger nations’ costumes (like why does the USA always seem to have the same ones, over and over?) I got a kick out of the boats on the Seine, and the various parts that sort of held together with luck and a prayer, but that last song by Celine Dion was incredible, as was the lighting of the cauldron. I loved it all.

The athletes have been featured in many different ads (Sara Blazer for Dior).

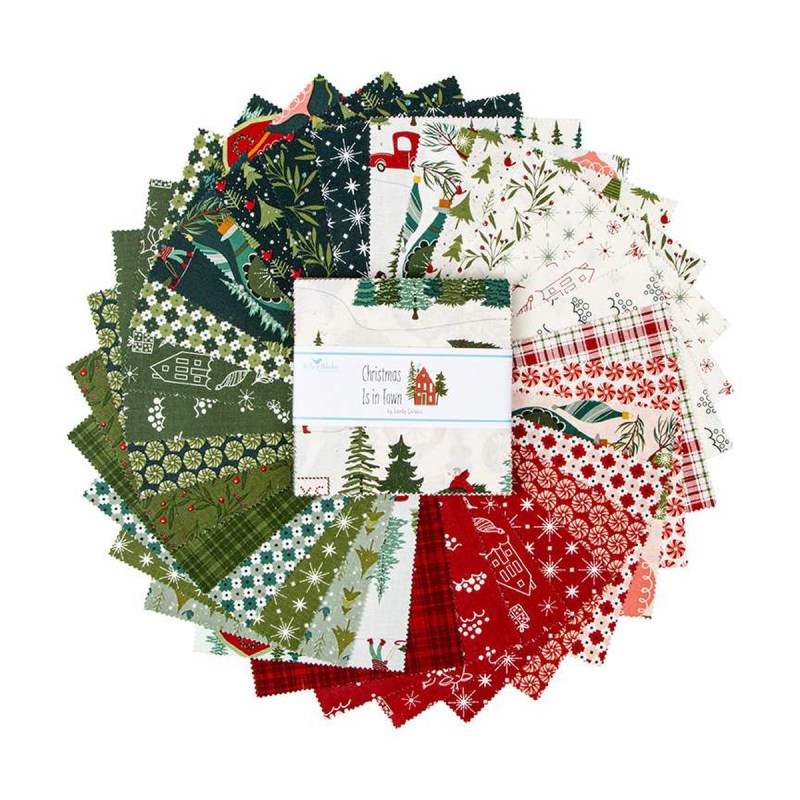
I knew it would happen: Christmas prints are finally back to Christmas green and Christmas red, after veering through pink and turquoise and whatever. While it was fun for a while, I’m happy to see these colors come back.

And this kept us on edge this week, too. This roaring fire was too close to my neighborhood and too big, and too fast and frightening. Our city’s firefighters tamed the beast, started by three teens with fireworks. As one boy was running away (as caught by a security camera), he turned and asked “Do you have a fire extinguisher?” The man of the house answered, “You are way beyond that now,” as the kid jumped into a silver pickup with his friends and roared off.

photo from here

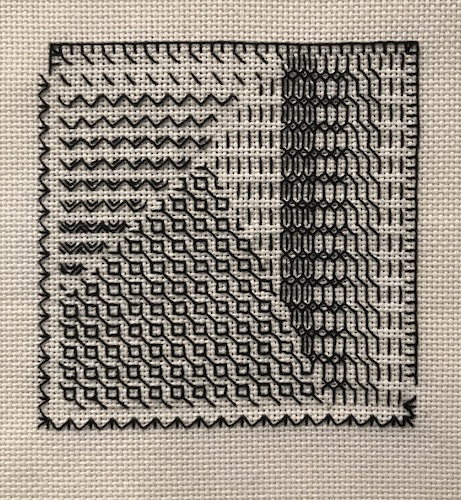
I signed up for a class at our local-yet-national quilt show, Road to California, one where I wouldn’t have to think too much, nor buy too much, nor cart insane amounts of gear: blackwork embroidery.

A friend advertised on Instagram that she was So Done With This Quilt and did anyone want it? I was second in line, and this week it showed up. Absolutely gorgeous work, with every point pristine and every flower in place. I hope I don’t ruin it, but did order pattern and fabric to try and finish it. That will be my winter project.

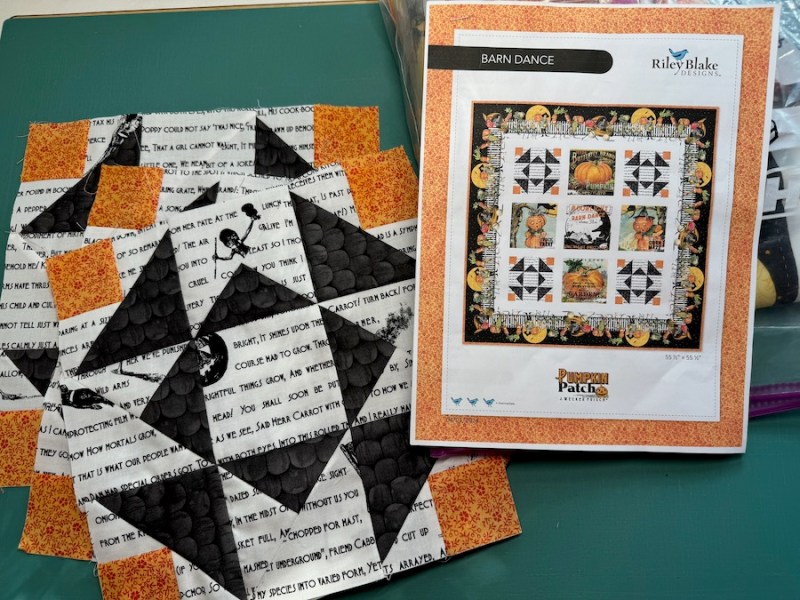
This is my summer project, with my friend Leisa: a Halloween quilt. We are both suckers for Halloween quilts.

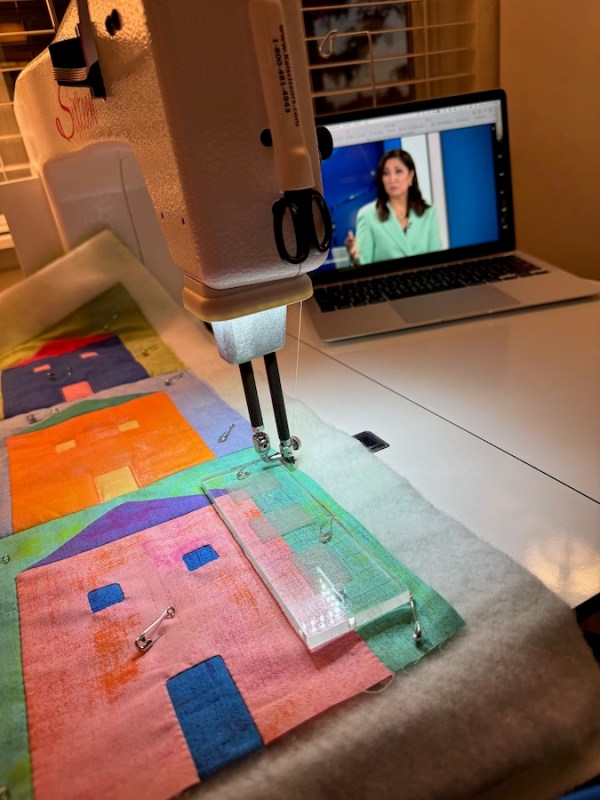
Quilting, while listening to PBS Newshour, which discussed Biden’s stepping away from the race, and Kamala Harris’ ascension to presidential candidate.

(This has turned into a This and That Post, sort of unintentionally.)

Happy [Olympic] Stitching!

The back of (dreaming in color) in the afternoon sunlight.

New York Beauties · Something to Think About

Vespers, NYBeauties Block 10

Is it a hard-to-make block? Not at all.

But it kinda broke my brain a little.

This picture illustrates my vexation. On the left, and using the color swatches in the top row, is Version 1 of this block. Not happy with how the ombre effect worked out, I tried Version 2 of this block (on the right), using the color swatches in the bottom row. So, first, color broke my brain.

Color

I’d envisioned this block to be a representation of that time in the evening when everything is settling down, with glowing shades of pink and yellow and deeply colored purple. On the left in the background of the rays, you can see that range of hues goes just so far. Then there is a huge color jump from the light pinks to that dark coral at the far left. Likewise in Version 2 on the right, there is a progression from soft yellows to corals and pinks, then another color jump at the end. I faced that sort of thing ages ago when I made Annularity. I ended up making two of these quilts:

Do you spot the anomaly in color? It’s at the very bottom, the warm-lavender diamond just to the left of center. That quilt went to Paintbrush Studio, because it was made from their first drop of their solids line. In the version on the right, made for myself, I pulled the exact blue-lavender color from another solids line that I needed to make the transition flow smoothly.

This is because we live in a world with limitations. And fabric colors, especially in solids, are one of those things. The fabric line, my favorite — Painter’s Palette by Paintbrush Studios — has since fixed that awkward color jump and they now have a perfect blue-lavender.

But now there’s a jump in the pinky coral tones. But I’m really giving this fabric line a workout: I’m creating color in my Affinity Designer program, using sliders and sampling colors from photos to get the exact color that I want in my designs. But the fabric manufacturers are working with cloth, dye, finishes, and budgets and no, they can’t make every color. (This is why I believe some people dye their own fabrics — just to get that precise color they want. But I decided long ago not to go down that road.) If this really bugs me, I may just buy it from another line, but I will be sure to prewash it twice to try and mimic what I have (both for colorfastness — the PPSolids are incredibly colorfast) and to shrink up the weave a little (PPSolids have a tight weave with a nice hand, or feel, to the cloth). Who am I kidding? I’ll just use what I’ve got.

Technique

And the other reason I was struggling is technique, or “how I sewed it.” In that Version 1, above, if you use your critical eye you can see that the narrow green band seems more “lumpy” that the one on the right. When I was majoring in Clothing and Textiles at Brigham Young University (a major no longer offered), we had to make a wool suit. Our teacher had worked in the industry and precision was her specialty. I resewed the lower front corner of my jacket with its sloping curve from center front to hem probably four times, but in the end she still gave me a B. She wrote on my grading sheet that she knew I worked hard on it, but it still wasn’t as smooth as needed.

It wasn’t necessarily my skillset that wasn’t up to succeeding, it was my technique. I needed to slow down. We all are familiar with this feeling when we finish the center of a quilt and then its borders. Borders? And we throw on just something, and then it’s quilting, and then it’s the binding, which apparently many people don’t like. They just want to Be Done.

So I slowed way down in my sewing of the narrow bands on the Version 2 block. Pressing carefully, using a different order of construction, improving my technique as I went.

This is not a hard block. So choose your colors carefully, use your best techniques in sewing, and it will go well. That’s all I wanted to say on this, but I do include my tips and tricks for the block and sewing it together below.

This is what my cutting table usually looks like, however I crop out the mess when I post photos, to keep the distraction level down. There’s a free pattern for Block One in my PayHip shop, where you can also pick up the patterns for all the blocks. Don’t forget to look at the other posts about this quilt, all found on the Master New York Beauties page.

Thanks for reading, and good luck with your colors and technique, in whatever you are stitching–

Tips and Tricks for Block 10: Vespers

Many other of the New York Beauties posts give you specific instructions on how to make that ray section; feel free to look at them for more help. We now pick it up after the parts are ready to be assembled. Please read all the way through before beginning.

Arrange the pieces so you’ll pin the INSIDE curve of the rays to the OUTSIDE edge of the narrow curved band. The Cereus block (9) discusses this. Divide the ray section and the small upper band into four sections, marking with pins, or finger pressing. Pin.

Sew a scrap, and at the edge, line up the two pieces to sew. I use a clay tool (the handle is nice and big) but you can also use a stiletto. Keeping the right-hand edges aligned, S L O W L Y stitch 1/4-inch away from the edge, easing in the fullness as you go. Remove pins as you go. To be truthful, It’s easier to put the concave on the bottom (the curving-out piece), but I think I flipped it for this photograph. The post on Cereus shows what I mean.

Press the band away from the rays.

Now we’ll attach the corner quarter-circle. Again, divide the edge into fourths. And made sure you are sewing the INSIDE edge of the narrow curved band to the outside curved edge of the quarter-circle.

All pinned up. The purple (convex side) will be placed next to the feed dogs:

Again, I use a scrap to get started. I nudge those two edges on the right together with my clay tool and sew in a quarter-inch seam, slowly.

I like dimension in my blocks, so that seam is pressed under the quarter-circle. (I’m sure you’ve noticed the pieced wedge in the center. My order from Keepsake Quilting hadn’t arrived when I was making this sample.)

Readying the next joining: outer narrow band to the lower edge of the rays.

Preparing the last seam: narrow band to outside corner. All those curved edges have bias, with the grain on the outer edges because I cut them like this:

All finished. In every step I took my time, keeping a good technique and not rushing.

Trimming is keeping several balls in the air at once, juggling them all.

  • First thing to check: your center. Make sure that diagonal line is as close to center of that center ray as you can get.
  • Next, go for the bright green arrows, seeing if you can get the outer edge of that band as close to 9 1/4″ as you can. On both sides.
  • Last, and only if you can, the bright blue arrows are asking you to see if the inner narrow band measurements are the same. Or similar.

Then trim off the excess. I designed the pattern so you would have some “play” on that outer edge.

Okay, that’s all for this block. Make 3. Will I use both blocks? Probably. In our lively quilt, I don’t think anyone will object:

I put them both up in our progress chart, and they are fine. This is all to say that if you make one and want to make a shift in colors of the same block, it will be fine. There’s another double-colored block up there now!

New York Beauties · Patterns by Elizabeth of OPQuilt

Shimmer: New York Beauties Block 8

New York Beauty block, Shimmer, by Elizabeth Eastmond

This is not Shimmer‘s first rodeo.

New York Beauty block, a different version of Shimmer, by Elizabeth Eastmond

It first started as “Dazzle” and I liked it, but then I was playing around one night and came up with that bias-stripey-trim on the outer ring, and liked it a lot more. So Dazzle went back in the Possibles File, and Shimmer came out.

I clumped the cut-out freezer paper pieces with their chosen colors and got to work. First up is folding on all those lines, something I learned from my last attempt at this. The really flat edge of the Add-an-Eighth-Plus ruler is lovely for this. (I just picked the first link that came up; there is no kick-back.)

I still use that backwards-fold-it-over method I learned from Verushka, as it allows me to see how big of a piece I need for the next segment. A somewhat confusing (apparently) discussion of all this is on my first freezer paper post. But if you follow along on the steps, you’ll get it.

This is a small ring, the first one, so there is only one section, and the piecing goes quickly. I’ve trimmed it all up. Peel off the freezer paper gently, so you don’t open up any seams.

I always keep the concave side on top, with the convex side on the bottom. In other words, the quarter-circle E piece is toward the feed dogs. I explain it in the pattern.

Two parts finished. It’s late at night, but I was determined to get the block done. Mistake.

Whoops. It’s not supposed to be two blues together.

Luckily, with freezer paper, it’s easier to unpick that if you were using paper in the traditional foundation paper-pieced gig. Got the blue replaced with lavender, but then couldn’t get the two sections lined up. Unpicked that one, re-stitched and kept going. (Don’t you love the dull light at night, even with the best lamps? No wonder I can’t see colors!)

And then went to bed bummed out because I hated it. Moral: don’t sew when you are tired. Duh.

The next afternoon, after the sun had come out from our cloudy/drizzley morning, I decided I liked the light pink and green combo. The outside sections were also working fine, but that it was the middle large rays that were the bust.

So I auditioned new colors for the rays. I also ended up changing out the A piece–the outer corner.

I decided not to take apart the block I didn’t like, but start again, making it over and using the new colors.

I also decided to press the seams toward the colorful wedges, although truly, this fabric is so good it doesn’t much matter, as there is little see-through.

Remember how I showed you I have five points of pinning on those larger curves? One in the middle…then fold the edges in, and mark those where the folds are. That makes five, with the two outer edges.

And here’s the new one. Will I throw away the first attempt? No. Look below.

If you are aiming towards a quilt, make five of the new one. Those, along the first and second blocks we made are on this Progress Chart. It doesn’t much matter that the first attempt is different. These blocks may not stay in this arrangement, but it gives you an idea of where we’re headed.

The new color chart (and the first version of Shimmer block colors) are up on the free Preview at my pattern shop. And everything is organized on the tab above: New York Beauties. I’m thinking that the pace of about every other week suits me. Hope it suits you, too. And no worries if making this is not in the cards at this time. The pattern, and these tutorials will be around for a long while. I’m still getting notes from quilters using my FPP circle patterns, and that first one was from a decade ago.

Okay, there’s another block for you in this New York Beauties Quilt (for Barbara). The pattern coupon from the last post has expired but getting twelve fascinating — but not complicated — blocks in one pattern that costs just a little more than a pastry and a beverage drink is a real deal. Grab yours here and come sew with me!