Good Heart Quilters · Quilts

Christmas Tree Block Swap

GoodHeartQuiltersBanner2016
xmastreeswap_2

This picture-filled post shows when a bunch of the local Good Heart Quilters (my little quilting group) got together to trade Christmas Tree blocks (pattern found on this post).  

xmastreeswap_1

Usually we don’t meet in December, but then Leisa had this idea about these Christmas Tree blocks.  Those who were interested in the swap came together in a Flash Mob Quilt Night; we had a great time, although family trips and sickness prevented some from coming.

xmastreeswap_3
xmastreeswap_4
xmastreeswap_5

We’re nothing if not helpful.  Some of us had our trees already made, so we all pitched in a sewed, ironed and trimmed the others’ blocks so we all went away with our set.

xmastreeswap_6

We dealt out all the blocks.  I asked everyone to count their blocks, for after an evening of letting loose with children-and-husband-and-life stories, lots of laughing (too many delicious cookies) I couldn’t be depended on to get the numbers right.

xmastreeswap_7
xmastreeswap_9
xmastreeswap_8

This is one of mine, made afterwards, with a bit of my husband’s blue-and-white plaid shirt.

xmastreeswap_10

Fun fussy-cutting.

Now I either need to make 4 more blocks, or rethink everything and add a ton more.  We could use another Christmas TV-watching quilt, because of:

the-crown

The Crown, streaming off of Netflix, fictionalizing Queen Elizabeth as a young woman.

poldark

Poldark, on PBS (we watched the first season via CDs from Netflix).

endeavor

And apparently Endeavor, a crowd-pleaser in our house, will return for a fourth season.

Oh, and then there’s that big event called Christmas, which needs some time…Happy Quilting!

tiny nine patches
200 Quilts · Quilts · Something to Think About

Not Waving, but Drowning

notwavingdrowning_front2

Not Waving, But Drowning
Quilt #173
39″ high by 43″ wide

This quilt began its life in a quilt block I designed, which I call Semaphore.   My friend Cindy saw that and made a version for a fabric manufacturer, who then put it on a world tour (see a photo at the end).  I saw it again at Quilt Market in May 2016, and decided I wanted one myself, only larger.

notwavingdrowning_detail1

I purchased several charm packs of solids, and arrayed them all out by color family and from dark to light, using several color groupings.  There were many duplicate squares, but after I felt I had a good amount, I went to work.

I titled the block Semaphore, but always in the back of my mind while I was working on this quilt was the poem titled “Not Waving, but Drowning,” by Stevie Smith, about a man who gets in trouble while out in the waves.  He drowns because people think he was waving, but in reality, he was signaling for help.

notwavingdrowning_front1

I think the half-square triangles look like a series of nautical flags, waving in the wind.  I decided to quilt it also in a wavy pattern, but didn’t want a tightly controlled wave.

notwavingdrowning_detail2

I wanted those waves loose and lanky, wild and woolly, just like those ones that come up and splat you in the face when you are wave-jumping in summer.

notwavingdrowning_detail3
notwavingdrowning_detail5
notwavingdrowning_detail4

I love the colors in this quilt, and the up and down fluid movement of the quilting. It calls me to remember that our lives, like the ocean, can lift us high, can hit us in the face, can overwhelm (as in Stevie Smith’s poem), yet also can bring a lovely memory of a summer’s day. In a nutshell, it reminds me that life is full of ups and downs, a blend of dark and light.  It’s also a reminder that, in spite of what we post on Instagram and Facebook, we all aren’t having tons of fun and radiantly happy all day long.  But we also don’t want to be drowning when we are in reality signaling for help.  So, take care of your loved ones and friends, and please please…take care of yourself.

And keep quilting.

˚˚˚˚˚˚˚˚˚˚˚˚˚˚˚˚˚˚˚˚˚˚˚˚˚˚˚˚˚˚

cindyquiltsemaphore
Cindy’s quilt at Quilt Market, using the Semaphore block.

(NOTE: This post has been updated with different content after original publication.  It was originally about depression.  Thank you all for your comments; I have them saved and will reread them often.)

300 Quilts · Christmas Quilts · Free Quilt Pattern · Patterns by Elizabeth of OPQuilt · Tutorial

Christmas Tree Block Swap

xmastreeswap
xmastreeswap_1

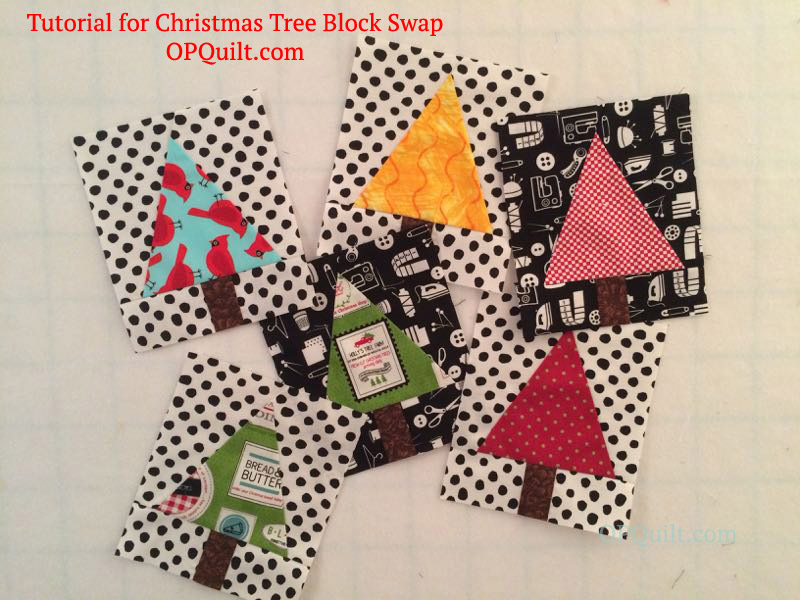
My friend Leisa saw a Christmas Tree Block Swap that was going on online, and said “Why don’t we do one like this with our group?” Sure, why not?  We don’t have anything else going on, do we? (right)

I drafted a pattern, just drawing this way and that, then made up a test block.  My graphic design guru Simone approved it, and we were off.  I transferred my dimensions to Quilt Pro, my quilt software program and here it is for you to download:

That’s FREE, no charge, but as usual please don’t print off one for your mother or your sister, but instead, send them here to get theirs.  Many thanks.

AND…as a reminder.  Please be sure to set your scale to 100%.

Now, the tutorial.  I apologize in advance for the pitiful lighting.  Chalk it up to working on a deadline, because our swap is in a a week and a half, and I need to get this to my quilt group for our Flash Mob Quilt Night.  (I hope they bring Christmas cookies to share…just saying…)

xmastreeswap_2

I also apologize for filling up your mailboxes with two posts so close together.  But then again, you might need this too, to spread a little holiday cheer around your sewing room.

xmastreeswap_3

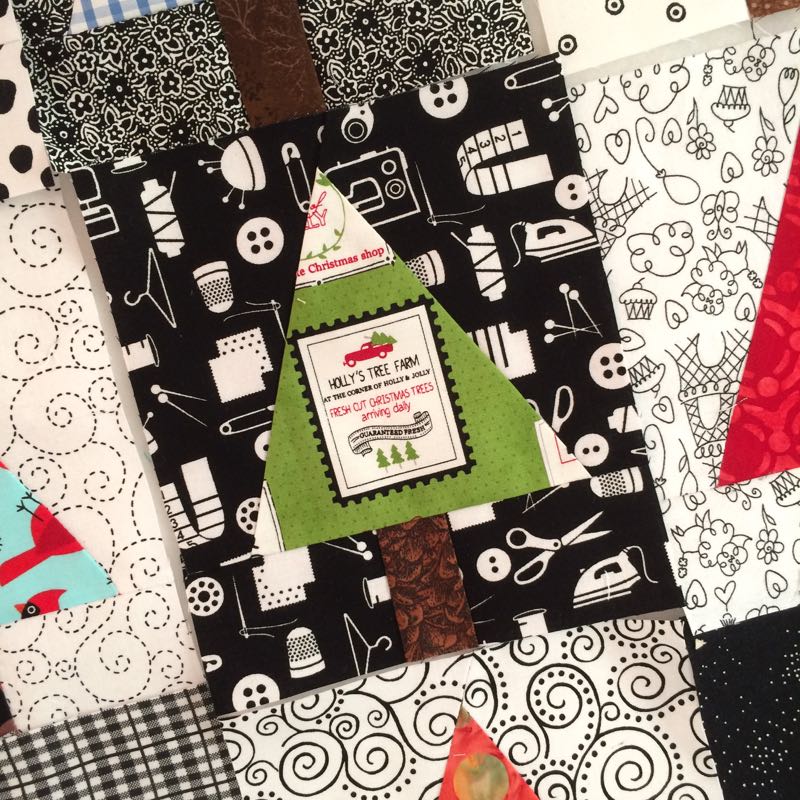
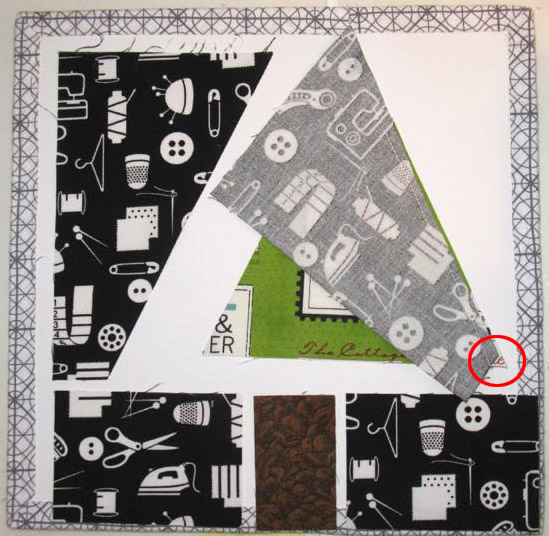
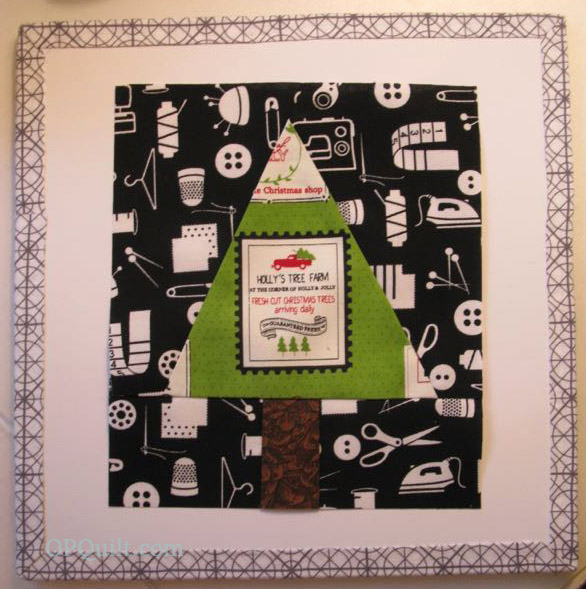
This tutorial is for one block.  It took me a grand total of about one minute to make one block.  Choosing and cutting the fabrics took a little longer.  For our trees we are using clear bright tones/prints, such as green, yellow, pink, aqua, purple/lavender, orange, red.  For the backgrounds, we are using black or white prints.  For the tree trunk: something trunkish, please.  Here are all the pieces laid out. (Thank you Mary, for my cool board.)

Sew the Upper Background piece onto the tree.  Leave that tiny wedge of 1/4″ goodness at the bottom right corner (shown in the red circle), and let the top of the upper background just hang off the tree.  Stitch 1/4″ seam.

xmastreeswap_4
xmastreeswap_5
xmastreeswap_6

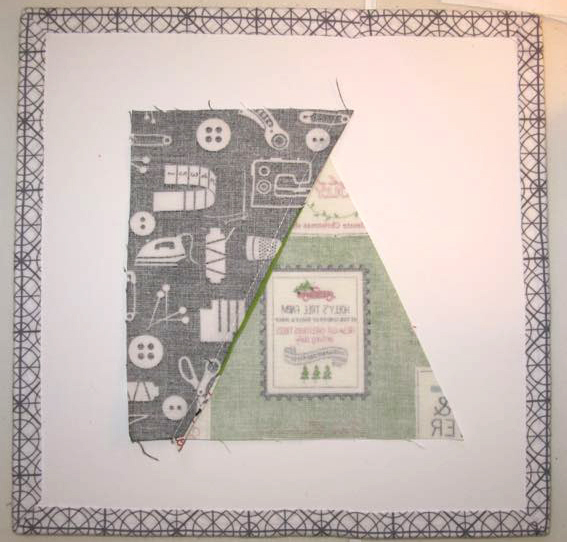
Backside of that piece.  Now the 1/4″ wedge of goodness is at the lower left, and the extra background is at the top.  Press seam towards the tree.

xmastreeswap_7

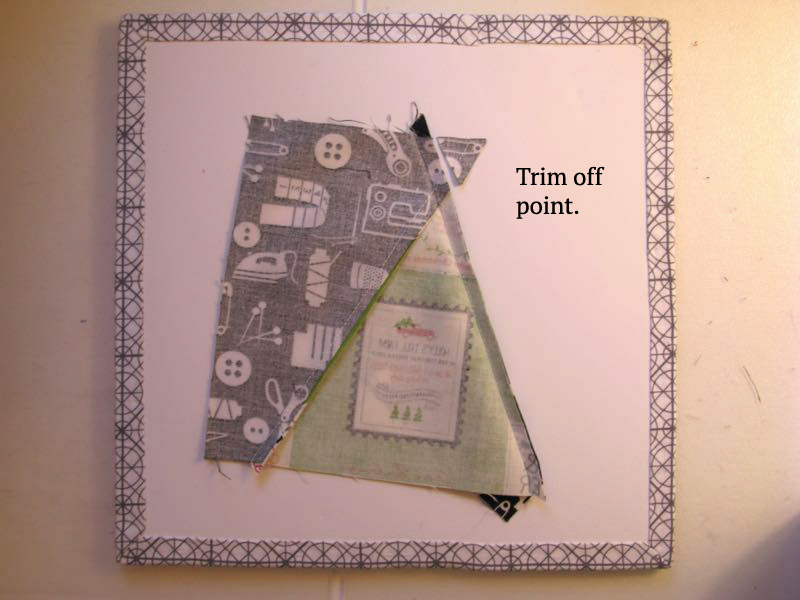
Repeat with other side.  

xmastreeswap_8
xmastreeswap_9

Trim off the extra point.  Press towards tree (see below).

xmastreeswap_10
xmastreeswap_11

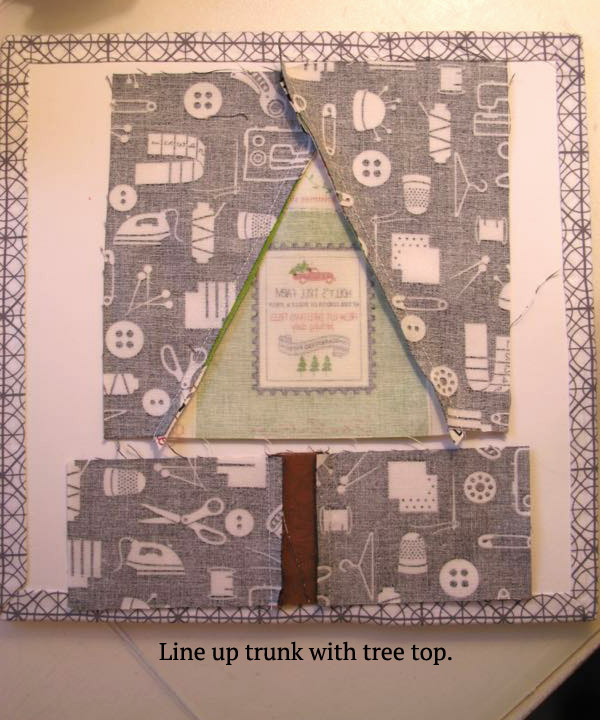
Seam the Lower Background pieces on either side of the tree trunk.  Press towards the trunk.

xmastreeswap_12

Line up the tree trunk with the tip of the tree, to get it on straight.  I’ve left a bit extra on either side, so if you want it wonky, feel free.

xmastreeswap_13

Press all seams toward tree.  You can see here the extra I’ve left you so you can adjust the trunk as needed.

xmastreeswap_14

Trim the block to 6 1/2″ by 7 1/2″ like this: Leave space above the tree tip, roughly 3/4″.

xmastreeswap_15

Then whack off the bottom, so the total height is 7 1/2″.  This tree will finish at 6 by 7″.

xmastreeswap_16

Fussy cutting is always encouraged.

Now if you want to cut out a lot of Upper Backgrounds at once, do this:

1-Layer two pieces of fabric with wrong sides together (like it comes off the bolt).

2- Cut a square 5 1/4″ by 6 1/8″.

3- Measure up 1 1/8″ on opposite sides, and draw or cut a diagonal line.  It should be the same size as your piece B or D.

Remember that these pieces are opposite of each other, so don’t layer up your fabrics with all right sides up, or this won’t work.

xmastreeswap_final1

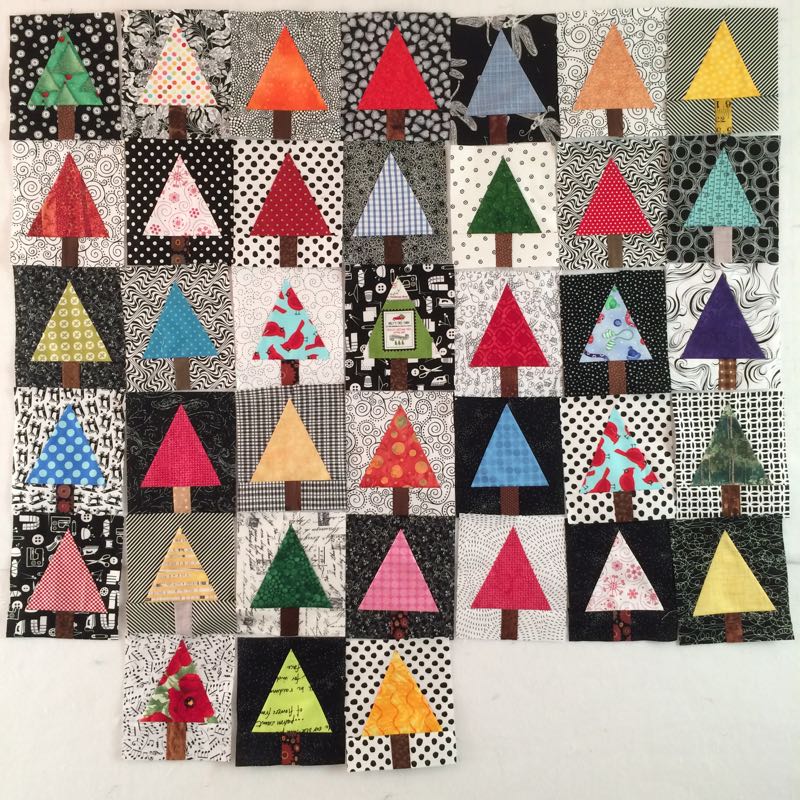
Here’s my first batch.  Now I’ll go do this some more.

Have fun making a forest!

tiny nine patches