I made this for an exchange at my Guild Night, but then my daughter and her family came into town and I didn’t go, so now I have my own little quilt.
It has its own stand, and it’s easy-peasy to make.

First, buy one of these. They used to be more durable, but this is cheap-cheap-cheap and it works.

Make yourself a sailboat. I pieced the sail on the left first before sewing it into the mini-mini-quilt. Here’s the templates in a PDF file (be sure to set your printer to 100% before printing): Tiny Sailboat And if you like to foundation paper-piece, here it is again: Tiny Sailboat PaperPiece Pattern

If you are using the foundation paper-piece, cut the pattern into three pieces, as shown by the red lines, being sure to mark it somehow with seam allowances. (I use a colored pencil and draw it along the line before cutting it apart to remind me it is NOT a cutting line, but a seam line.)


The little sailboat finishes at 6 1/2″ by 8″ which isn’t big enough for the frame. I added the sunshiney fabric on three sides, seaming a bit of “ocean” fabric on the sides to keep the horizon line. I also added ocean fabric to the bottom, so now my little boat is afloat.

Quilt as desired (curvy waves in the ocean, straight lines outlining the sailboat and sails, and stippling in the sunshine), then trim to the above size: 8-3/4″ by 10-1/2.”

Make the sleeve: Hem one short edge of a piece of fabric cut to 8-3/4″ by 9-1/2″ and place it wrong-sides-down on the back of your mini-mini quilt. Pin in a couple of places.
Cut strips of binding 1 1/4″ wide, seaming if necessary to get the desired length. Stitch the binding from the front, right-sides-together, then turn the back, tucking under the raw edge. Hand-stitch closed.
Our guild does these a couple of times a year, creating a changeable scene for your home. I’ve previously hung minis on a wall, but I’m really liking this quilt-on-a-stand idea.


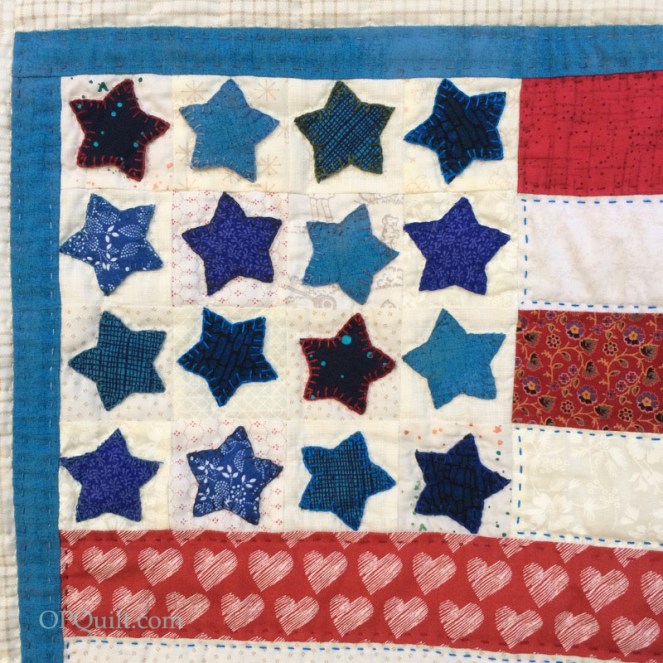
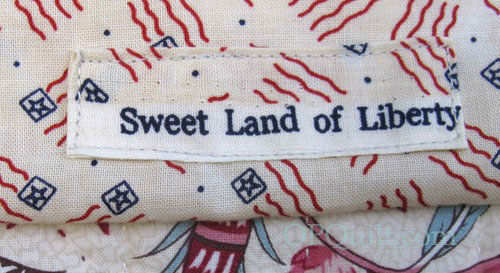
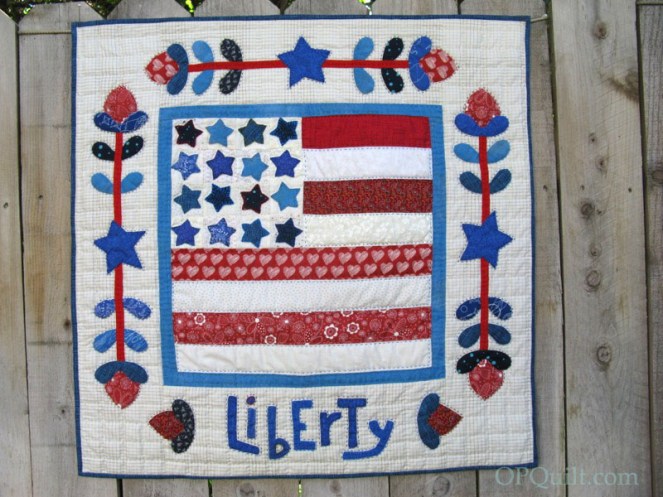 Sweet Land of Liberty
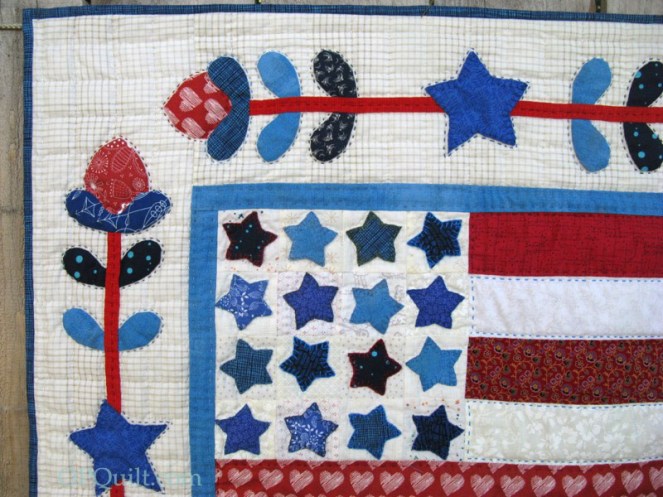


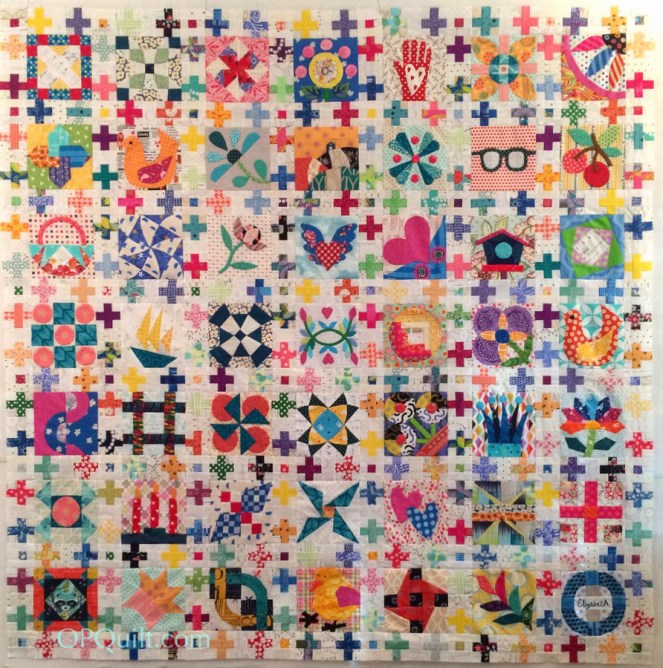
 I’m way behind my friend