Housekeeping · Tutorial

Hot Mitts

Hot Mitts

No, this isn’t a reference to our past election and Governor Romney.

Old Hot Mitt

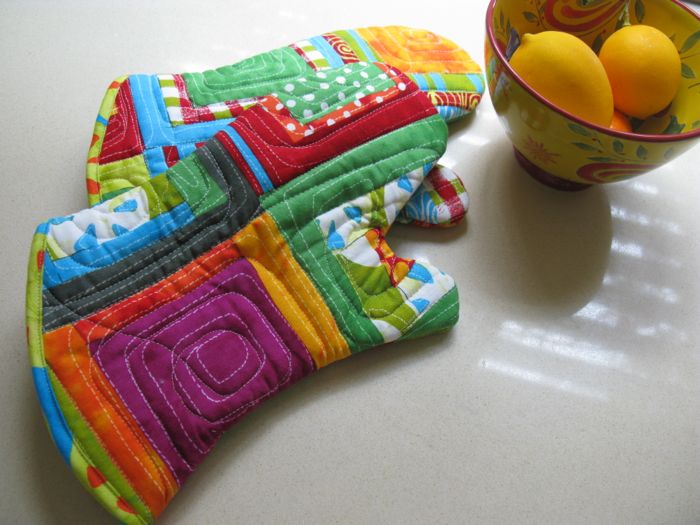
This is in rereference to my hideously stained and abused and damaged kitchen hot mitts.  I went to buy some new ones and didn’t care for the ones at a famous cooking store and at Macy’s–where Martha has taken over everything in the domestic world–there were only hot mitts with ruffles.  Ruffles?  I knew they’d be disgusting looking in short order.  (Ruffles?  I’m still shaking my head.)

Old Hot Mitt1

So one day, I turned the ones I liked inside-out to see how they were made.

Old Hot Mitt 2

Then I traced it with a sharpie onto what was laying around on the counter–an ad from the car dealer.  Actually this ended up being a good idea because it was thicker than regular paper and pretty sturdy.

Old Hot Mitt 3

And after I cut it out, I had a pattern.  But I decided I should allow for shrinkage, because I wash and dry these over and over, so I enlarged it by 10% which yielded the pattern at the end of this post.  Print it out, match up the car writing and making sure your 1-inch guide on the side is really one-inch (every printer is a little bit different), tape it together and you’ve got a good pattern.  I’d actually purchased a pattern but took it back when I realized how easy this was going to be.

Insulated Fabric

Utility Fabric

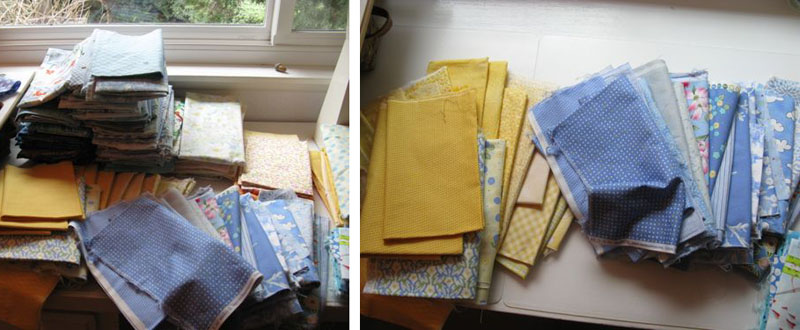
Go the Big Box fabric store and buy some utility fabric that looks like this: a metallic cotton on the outside, cotton batting on the inside, already quilted together.  Use your coupon.  I bought one yard and I’ll get four mitts out of it. Get yourself some 80% cotton/20% wool batting or some 100% cotton batting, if you don’t have scraps laying around.

Bias Tape Maker

And throw a bias tape maker into your cart, too.  I chose the 1″ version and it worked great. I picked up the Dritz (on the left) and on the right, I show the full complement of Clover Bias Tape Makers.  Either work fine.  They have decent directions on the back of the Dritz.

Layer Up Fabrics

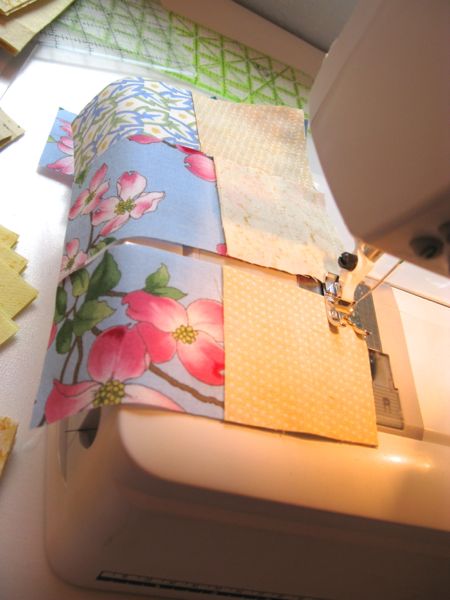
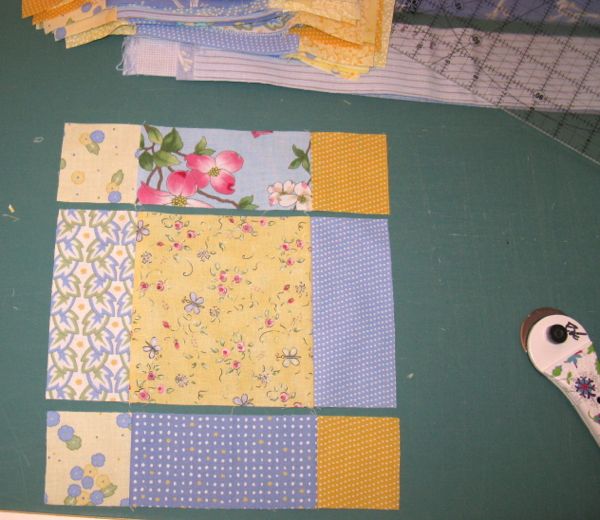
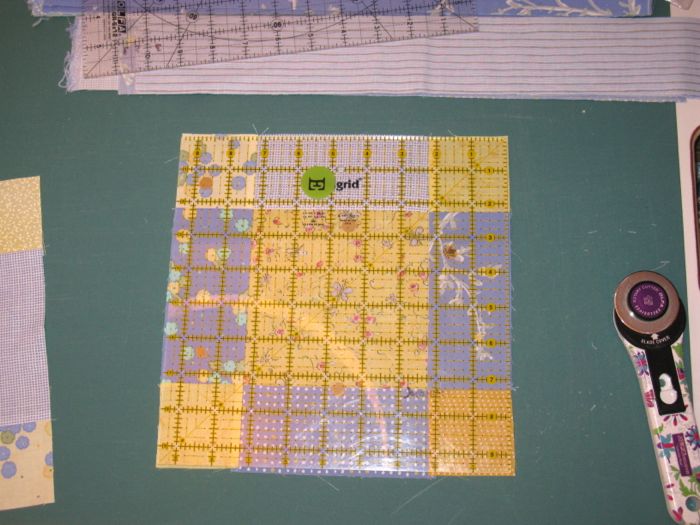
Layer in the following order: (1) Utility fabric, metallic side down  –  then –  (2) your cotton batting – then – (3) your chosen fabric.  I’m using some of Malka Dubrawsky’s first line.  I love it, but I have never figured out how to use it.  This will be perfect as it will brighten up my kitchen every day. Using pins, secure it in a few places.  Cut out what you need by placing your hot mitt pattern down and guesttimating: I think mine ended up about 14″ by 18.”  Roughly.  Quilt all layers together.  Don’t get too precious about it!

Cutting Out1

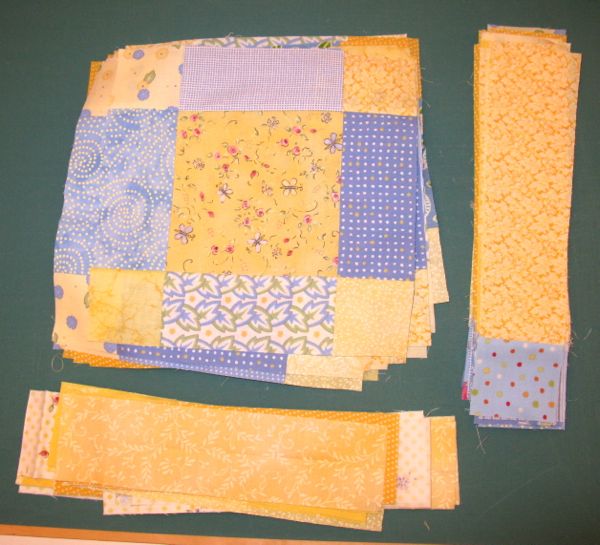
Now lay out your pattern and cut out one mitt.

Cutting out 2

Reverse the pattern by flipping it over, and cut your second mitt.  Match them up, metallic sides out, then pin in a few places so it doesn’t shift.  Sew from under the thumb all the way around the mitt STOPPING 2″ FROM EDGE.  Leave that edge flapping, as it will be easier to attach the bias tape.

Stitching Inner Curve Hot Mitts

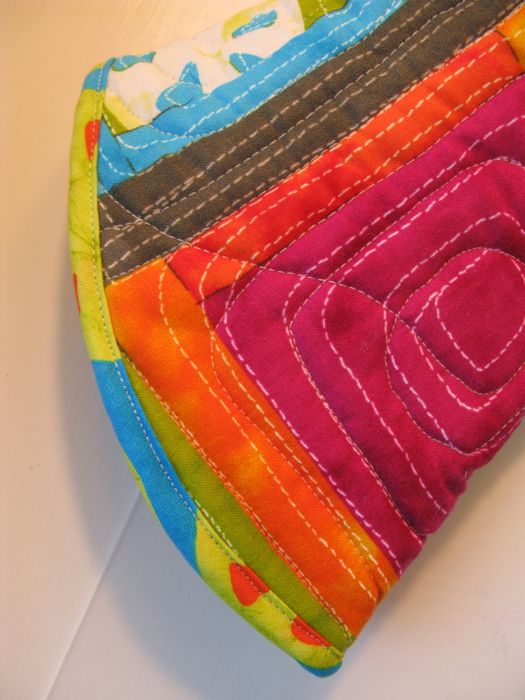
Close-up of the curve of the thumb.  Carefully clip down to the curve, stopping short of the stitching line.  This will make it lay better when you turn it inside out.

Making Bias Tape

(You can click to enlarge this picture so you can see the writing better.)

Follow the directions on the back of the tape maker package for cuting a bias strip.  Basically you fold the corner down into the fabric, creating a bias edge.  Cut the strips 1 3/4″ wide for a one-inch bias strip.  Feed it through the bias tape maker tool, using a pin to help out the leading edge if you need to.  Then use your iron to set the folds.

Bias Binding

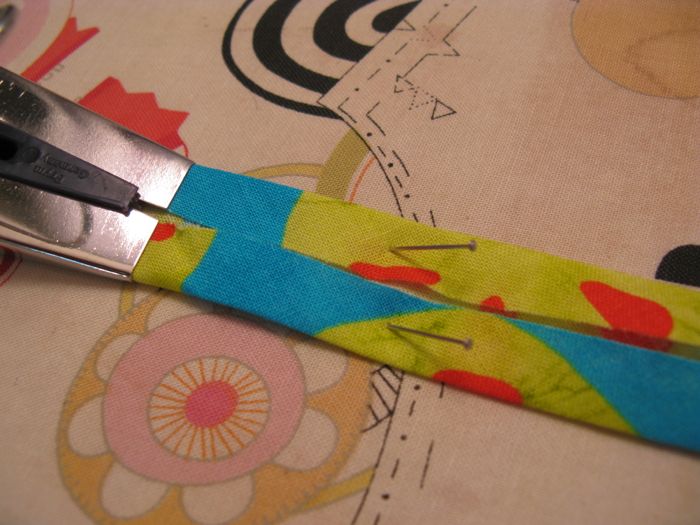
I put two pins on the tape, as I drew it out, and then pressed it.  It sounds WAY more complicated than it is.

Open Edge Hot Mitts

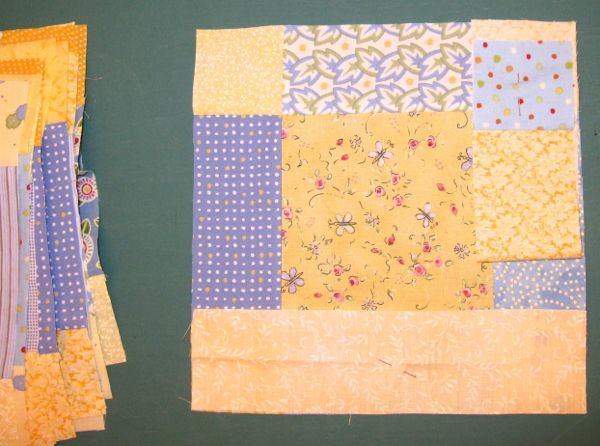
Beginning with one of the loose edges, fold the tape over the lower raw edge, and stitch the tape onto the mitt.  I found it easiest to stitch from the “inside” for some odd reason.

Stitching Bias Tape Hot Mitts

Again, don’t get too fanatical about this–just make sure that both folds of the tape are caught in the stitching.  I did one, and then decided I wanted to trim out that seam allowance under the thumb edge for about one-quarter inch up from the lower edge, just to get rid of some bulk.  The world won’t end if you don’t.

Hot Mitt inside

Finish stitching that last two inches, and backstitch to secure.

Hot Mitt binding joining

I also zig-zagged that last two inches to finish it off.  Given that it’s BIAS tape, it’s not going to ravel, but hey.  Just thought it needed it.

Hot Mitt binding finished

Flip your mitt right-side out, easing out the thumb and smoothing out the curve.

Coasters
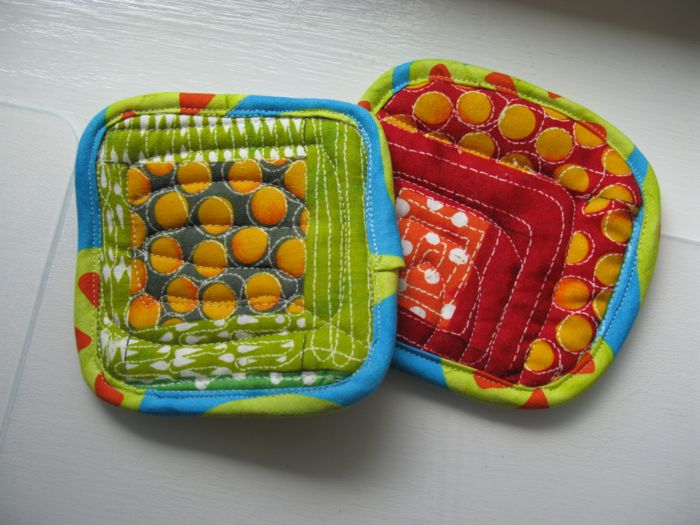
I cut some scraps into squares with rounded edges, and used the leftover bias tape to make a couple of coasters.  Don’t examine my stitching, because like I said, it’s pretty obvious I went for sturdy over beauty.

Okay, below are the patterns.  Print them out and adjust your printer settings so the inch mark is true, then tape your two halves together.  I scanned my pattern so it’s pretty true; I’m hoping you don’t have to do too much monkeying around.  My hand size? Medium in rubber gloves, so if yours is smaller or larger, use your copier/printed to enlarge or smallerize your pattern.  


Hot Mitt Lower Hot Mitt Upper

Have fun making them!

Hot Mitts final

This is one of the projects on my Finish-A-Long list that I have completed, from Leanne’s Finish-A-Long!

FinishALong Button

200 Quilts · Family Quilts · Quilts · Tutorial

Sunshine and Shadow Quilt Tutorial

SunshineShadowBlock

Here’s the recipe for the quilt I gave to my sister-in-law, Janice.  But I think you’ll notice how “lopsided” the block is–and that’s because I wanted to eliminate the sashing step, including it in the making of the quilt.  I also wanted to make this quilt completely from my fabric stash, so I chose colors I had multiples of, in different designs and shadings.  What is sashing?  It’s those long strips that separate blocks from each other and can be part of the design of a quilt, letting each block float in its own little world.  Many modern quilts eliminate them, but I like them occasionally.

Choosing from the Stash

I started with the centers and cut all of them from the same line, but used two versions of the yellow flowers.  Then I pulled out a lot of different fabrics, trying to keep in the same tonality in the blues, and in the yellows, so the quilt top would be harmonious.

1. After cutting, the first step is to sew two blue strips on the sides of the large center block.

SunshineShadow1
2. Sew two yellow blocks on the end of the blue rectangles.

SunshineShadow2

3. Line them up.  After choosing good sets that go well together, stitch the yellow square/blue strip pieces onto the center.  I pressed the seams towards the blue, away from the yellows.  Sew the strips onto the center section.

SunshineShadow3

4. True up, by placing a 9 1/2″ ruler on top.  I found if I trued it up at this stage, the rest of the construction went smoothly.

SunshineShadow4

5. Sew all but one of the blue squares onto the larger yellow strips.  Then get ready to put them all together.  You won’t use all the blue square/yellow strip pieces at this point.  Just set the extras aside.  I wanted to audition how the random yellows and blue fit together, so I took one large block, a yellow strip and a blue square/yellow strip piece, making sure I wasn’t duplicating fabrics in any significant way.

SunshineShadow5

6. I pinned the yellow strip on the bottom, and folded up the other strip and pinned it to where it would eventually be sewn.  Sew on the yellow strip.

SunshineShadow6

Here it is, with yellow strip sewn on, showing that I pressed the seam to the outside yellow.

Pressing

In all cases, first press seam flat to eliminate puckers, wobbly edges, then press the seam open.

SunshineShadow7

7. Sew the blue square/yellow strip piece on the center construction, matching seams, etc.  This is the finished block.

SunshineShadow8

8. Because my pin wall is longer from side to side, than from top to bottom, I rotated the blocks a half turn and laid them out on the wall.  I kept using my digital camera to make sure that there weren’t too many of those darker yellow-gold pieces mushed together, as well as eyeballing a good distribution of the rest of the colors.  The quilt looks a bit strange now, because you are still missing a length of “sashing” on the left side and on the bottom.

SunshineShadow9

9. Because I still wanted to sew these as blocks, I laid out the “sashing” pieces, each with a blue square on them, where they should go. I laid them out, again checking for color and value distribution.  I had to sew that random last blue square onto a yellow strip/blue square piece, then I sewed these pieces onto the adjacent block.  When you replace these new expanded blocks on your pin wall, be careful not to rotate them into a wrong orientation. Use your last digital photo as a guide.

10. Put quilt together:  I put row markers (shown in *this post*) on the blocks on the left side of the wall, in order to keep track.  Then I stitched the rows together, going across.  Stitch rows together, going down, until the quilt top is complete.  I think it goes much faster (have I said this before?) because you are sewing blocks, rather than long strips of sashing.

SunshineShadow FavMuseumShot

Quilt as desired (and my favorite way is calling Cathy and having her do it for me).  I used the extra bits of blue strips I’d cut out, plus extra, to make a scrappy binding.

Okay here’s the honest truth: I started out with a completely different idea for this quilt and cut a whole lot of blue and yellow fabrics into 2 1/2″ strips, but realized that my time was short so I had to step up to a quicker quilt.  That’s when I had the idea of adding the sashing pieces to the block, because sometimes sashing just wobbles and stretches and becomes one pain-in-the-rear step to making a quilt.  This was was much faster, and I think the integrity of the quilt doesn’t suffer for it.  You’ll notice I tried to press to the “sashing” side always, as I think that distinguishes those pieces from the “block.”

SunshineShadowLabel

To make the label, I did the usual method of pressing some fabric to freezer paper, running it through my Epson printer (they have the best inks), bordering it, then stitching it onto the quilt invisibly around the outside edges.  I also like to do it on the inside edge of the border, where the label meets the edging.  No one can tell, but it poofs out less from the surface of the quilt if it has that second round of stitching.

SunshineShadow

BlueYellowFullQuiltwTitles

I’m actually planning to make another like this, as it is really quick, and I like the fact that I can use up my stash.

I seem to have lost a few days here, but with the weekend coming (a holiday weekend!), I hope to find time to dive into some stitching, and some blogging.

Quilts · Tutorial · WIP

Snapshot: Constructing the Double Polaroid Blocks

First, let me say a thank you to Lee of Freshly Pieced Fabrics, who is hosting WIP Wednesday for us.  Click *here* to return to her blog and see other fabulous Works-in-Progress.

If you missed yesterday’s post about Snapshot, my latest quilt (above), scroll down as there is information for fabric requirements and a basic How-To for Polaroid Blocks.

The first picture (top) is Snapshot in a beauty pose.  This one (above) is the one where she’s in under the fluorescent lights in her doctor’s office, wearing only a flimsy gown that opens in the back.  You know the feeling.  But we need to examine the quilt to see how it’s put together, so I thought you needed a clinical kind of picture. Here you can see some of the variety in the tilting, and in stacking the blocks.  I had some scraps of fabric at the end and late one night made the one at the bottom left into two colors. (I should go to bed earlier, I think.)

I did these in sets.  You’ll end up making about 4 sets, alternating the blue fabric with the green fabric (only use one color at a time), as each stack is made up of 13 blocks.  However, I made a few more of each color, because I doubled up on some colors for variety (you can see it above where there are two blue blocks together).  So make 4 1/2 sets.
For each set of 13 double blocks, you’ll need:
8 strips of either blue or green (don’t mix), cut  1 and 1/2″ wide
2 strips of either blue of green (don’t mix), cut 1 and 1/4″ wide
26 Polaroid blocks, in pairs of two (take some time to match up the ones you want together)

Start by sewing the Polaroid blocks to to the wider  (1 and 1/2″) strip, placing Polaroids face down.  You are sewing this to the TOP of the blocks.

Lay out the strip of blocks and cut the blocks apart.  With scissors.  Remember those?  We finished up our discussion of The Shallows: What the Internet is Doing to Your Brains in class, and the last section talked about tools; when we adapt and adopt a tool, it become an extension of us and we may leave older tools behind if the new one suits us better.  So if you feel like the rotary cutter is an extension of your hand, you may need to practice using scissors again.  Kidding.

Press the fabric away from the block, like this:

Now sew another wide strip on the bottom of your Polaroids.

Here’s four blocks, with the top and bottom borders sewn.  Again, you are using the 1 and 1/2″ width fabric.

Lay out a strip of the narrower fabric (1 and 1/4″) and place your blocks side by side, matching up your pairs.  Separate them by about 1/4″ at the bottom.   I pinned them so it would be easier to transfer to the sewing machine.  Sew the first set (one side) onto the center strip. You should be able to get about 7 Polaroids per strip.

As you sew on the first set, pay attention matching the edge of the Polaroid block to the edge of the center strip, letting those little bits of borders stick out.  You can cut them off in an earlier stage if you need to, but I did mine after sewing them.

NOW trim off the little edges if they bug you.  For sure, trim off the big overhangs!  Just lay out the strip as shown, and cut the overhangs off, even with the long strip.  DO NOT CUT THEM APART!!!   Let me repeat.  DO NOT CUT THEM APART!!

Now, take your “right leaning” and “left leaning” PDF printouts from the last post, and set one of them at a time on the table while you do the next step.  I made all the greens to lean to the LEFT. All my blues lean to the RIGHT.  It feels backwards, but here we go.  I used the picture to get in my mind which Polaroid should be 1/4″ up and which one should be 1/4″ (or the width of that top border) down as I’m lining them up along that center strip.

Notice in this high-quality illustration that the blocks lean to the right.  To accomplish this, you have to offset them when you sew them to the center strip.  The left block is “lower” on the strip, and the block on the right side is “higher.”  This is why I used two colors: to keep things straight.

But my greens tilt the OTHER way, so I used the “left leaning” diagram to help me.

(Diagram in action!)

Again, to get the tilt, you need to jog the one on the top down about one-fourth inch.  What I did was line up the edge of the green border  with the top of my center picture in my Polaroid block.  (I know this sounds confusing, so just look at the pictures.) This will give you that offset you need in order to tilt your block.  Do this with the remainder of your pairs.  Pin, then stitch.

When working with the blue, I reversed the sewing, stitching the blocks on the right-hand side of the center strip first, then the left.

Here it is sewn.  You can really see the slipped alignment here.  Press this seam toward the center strip.  See two steps down, for the why of pressing.

Cut these blocks apart now; the cut will be angled to fit the skewed alignment.

Here’s one that’s been cut apart after sewing.  Here you can see the shift.

And in comparing these two blocks (the one directly above and the one below), you can see the difference the pressing makes.  The pressed edges can either make a block look like it’s resting on the top or like it’s “sunken” into the strips surrounding it.  I wanted my Polaroids to have that look of being bordered by strips, not the strips “supporting” and “lifting” up the Polaroids.  So that’s why all the pressing directions indicate which way to press the seams.

Here you can see the different pressing.  All right Goldilocks, you are through the deep scary forest and just about to claim that pot of gold at the end of the rainbow.

Using the wider (1 1/4″) strip again, sew the outer borders onto both sides of your block assemblage. Cut apart.

You should have 13 blocks that look like this.  Now comes more fun, more forest.

Get out that PDF picture again.  Lay it at the top while you trim your blocks.  The size you want to trim to is 4 1/2″ by 7 1/2″.

You need to tilt your ruler a bit, making sure you leave at least 1/2″ space between the edge of your white Polaroid interior block and the planned cutting line on the outside edge of your ruler.  (This is why you make extra blocks, if you get my drift.)  I tried to vary my cuts, because I think one of the charm of these Polaroid blocks is their wonkiness when set into their frames, much like a child would paste vacation photos into an album.  So sometimes I was just over 1/2″ from that edge, and other times I was closer to 3/4″.

Keep at eye on that 4 1/2 line, as well as the 7 1/2″ line.  Be a juggler, keeping all these things in mind as you go for your first cut, slicing off the top of the block.  Then flip it around, putting the cut edge at the bottom.

Lay the 4 1/2″ line of your ruler at the bottom, lining up your freshly cut edge.  Check your measurements.  You want the bottom lined up, but you also have to check that the block is centered so when you cut off that right side, you’ll have an evenly centered  7 1/2″ block.  If you are good to go, slice off that right-hand side.

At first, I flipped it around again, as I’d only have to pay attention to one last side (shown above).  But after a while I became confident enough to slice off the top, >flip<, slice off the right and top edges again, then >flip< cut the last edge off.  Which is what I’m doing in the picture above.

I took this photo mid-cutting to show you how the block can feel skitty-wampus when you look at the first two cuts.  But then you slice off the two side edges and you are Through The Forest Again!  In the arrangement of my quilt, I used 28 blue double-Polaroid blocks and 24 green.  Make enough that you have some to play around with, and if you like decorations on the back of your quilts, include some for that too.

NEXT POST:  Putting the quilt top together, and one day closer to my surprise giveaway.

Creating · Tutorial

Portuguese Tile Quilt

I started with this picture of some tiles from Portugal.

Then I mocked up a quilt in my Quilt-Pro 5 program.  I mapped it out with 8″ squares, set 6 across in 6 rows, with a 4″ border, yielding a 56″ square quilt.

I’m using the Madrona Road fabric, as I’m always wading into my outdated stash to try a new quilt, and wanted to take this new line for a test drive.  Because of the barn and the truck, I thought back to my days of Amish quilting and went with black for that windmill blade, just like the tile in Portugal, shown above.  Besides every quilt needs some contrast and this line reads to me, for the most part, as in the middle-intensity value range, a favorite of mine and nearly every other quilter.  (I have to work to get the darks and the lights into my stash.)

To cut out the large pieces, I laid out my fabric RIGHT SIDES UP, and cut a rectangle that was 7″ by 4 1/2″, then lay the template on the rectangle (see picture below), and sliced it into two. Here’s the template: PortugueseTileWindmilltemplateSM.

Print it out so you’ll have the pieces to use as a guide for cutting.  (Okay, full disclosure.  I at first didn’t lay the fabric RIGHT SIDE UP, and have quite a few pieces that are backwards, ensuring that I’ll be making this again. So try not to screw up like I did.)

I could have either cut all the black pieces according to a template, or figured out a way to make it easier.  I went with the second.  Cut a rectangle 5 3/8″ by 2 3/4″ and then slice it from corner-to-corner, diagonally.  You will have dog ears you’ll have to cut off, if that’s a consideration for you.

Cut 72 pieces of the blue line, 72 pieces of the pink/orange fabrics and 144 black triangles (that’s 72 rectangles, cut in two).

Lay a triangle across the larger piece.  To get it lined up, put the black on top, with the left point sticking 1/4″ out over the edge.  Don’t worry about that right-hand side longer point.  Stitch.  Press towards the black.

Now lop off those points, by truing this block up to 4 1/2″ square (see below).

I’ve laid them out on my  pin wall.  I don’t have enough of them to do the REAL work of laying them out, because I’m headed downstairs to make some corn-shrimp-coconut soup for dinner, but I’m thinking I do want to mix up the different types of fabric within the pink/orange group and the blue group.

Thanks for you nice atta’ boy comments yesterday.  I took to catch up on the speeches from the Democratic Convention (remember, I’d assigned the watching of these to my students, so feel like I need to keep up), and cut and sewed my cloth.  It’s amazing the difference a day makes.  I liked what Betty said, that this exhaustion must be in the zeitgeist or something.  But after a break of a day, I may even feel like grading, knowing I have this little project to come back to throughout the day.