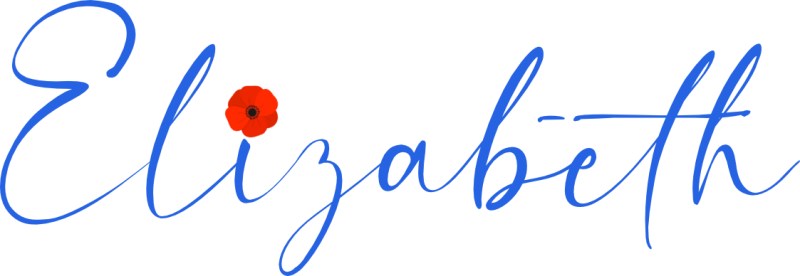
The phrase, crossing the divide, has haunted me for a while now, ever since my husband Dave and I crossed the Continental Divide twice on our April road trip.
While I was driving, and saw this sign, and knew it was coming, we did not take a photo of the actual moment we crossed. And this is like some recent experiences: somehow I crossed a dividing line and found myself in new country, and was not entirely sure how to behave or act.
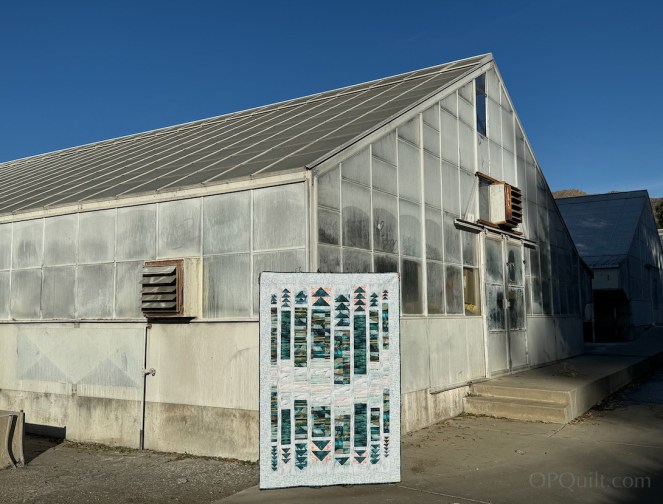
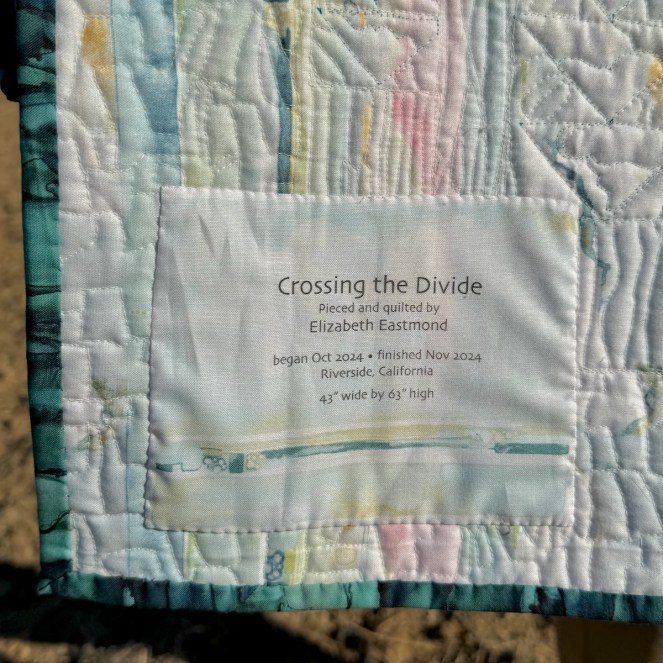
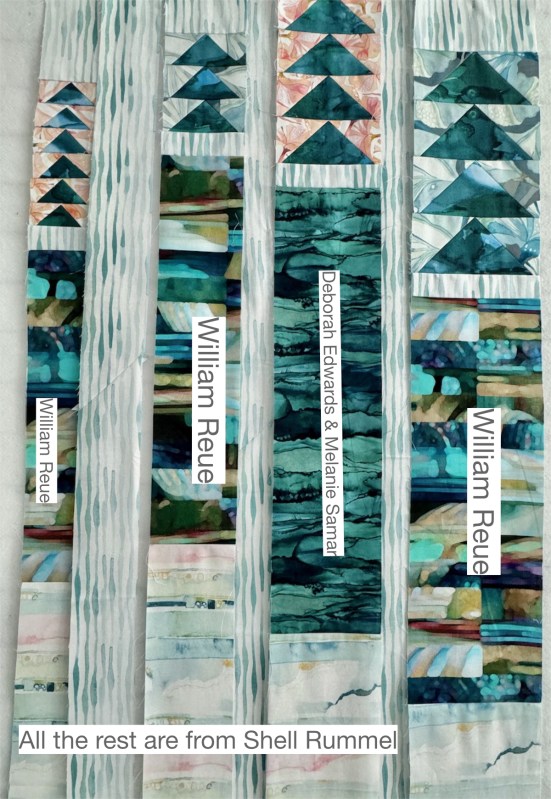
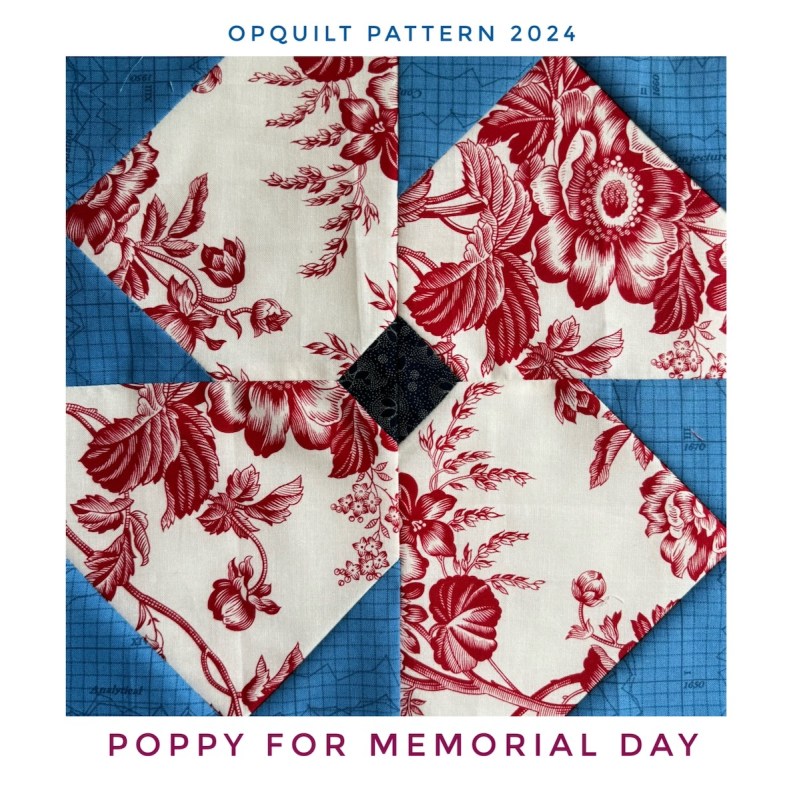
Crossing the Divide • Quilt # 294
I long had wanted to make this quilt, using some positively ethereal, painterly fabrics from Shell Rummel, William Reue, and snippets from Deborah Edwards & Melanie Samar. I had to modify the pattern, because it called for an older panel which was now out of print. I sewed it all up. I picked apart every seam and re-sewed it (like Crossing the Divide…again). I got stuck on how to quilt it, and Dave talked it over with me: follow what’s in the fabric. I think that’s kind of like going with the flow, an attitude I am always working on/struggling with.
This quilt has a divide in it, with the soft pastel interrupting the more rock-like, stream-like bars of fabric in the top and bottom.
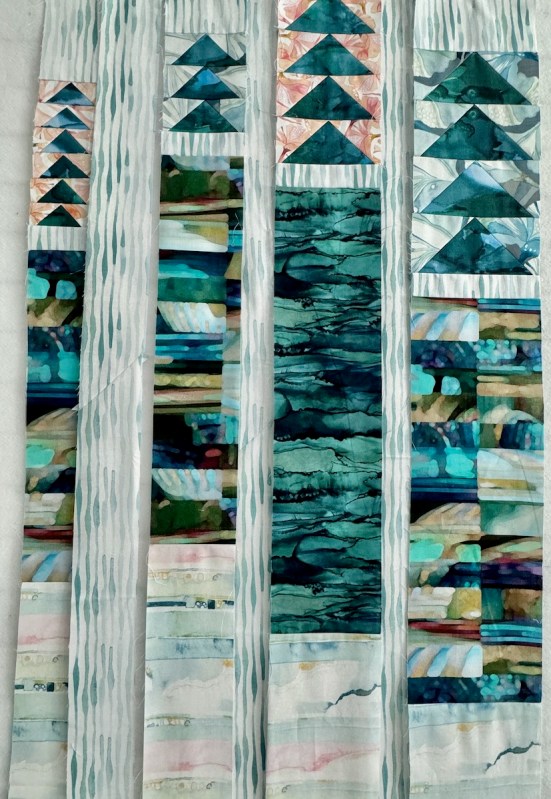
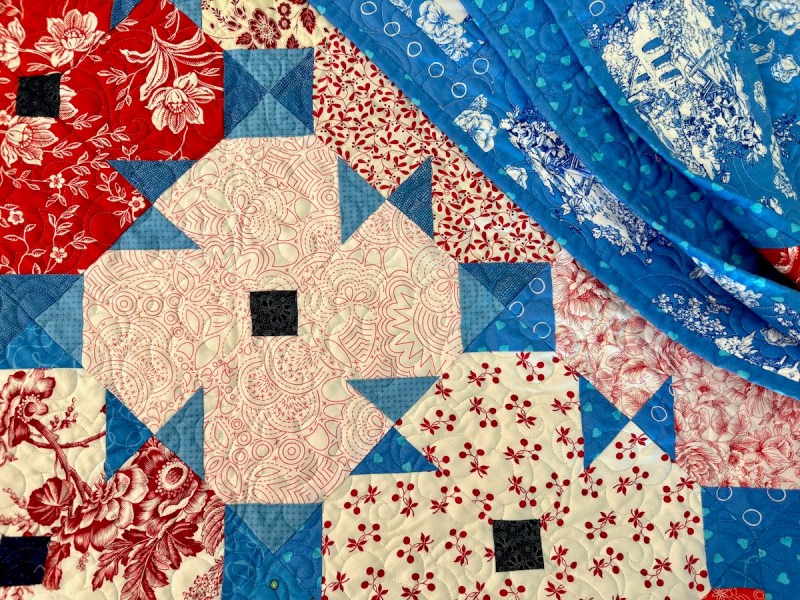
(see detail at end about fabrics)
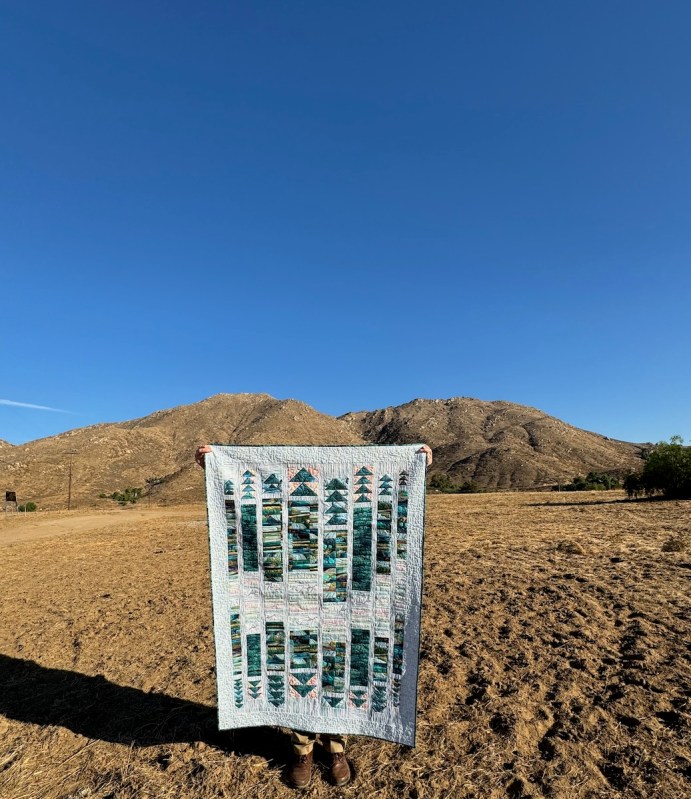
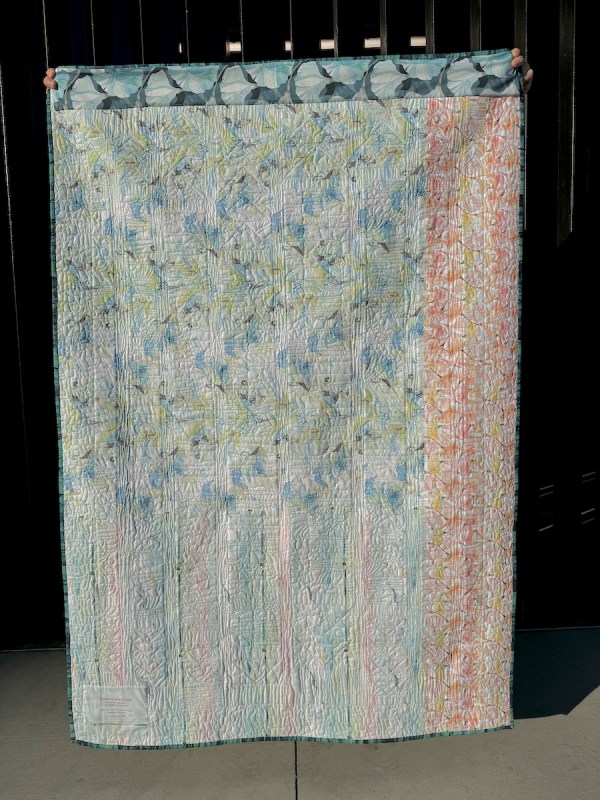
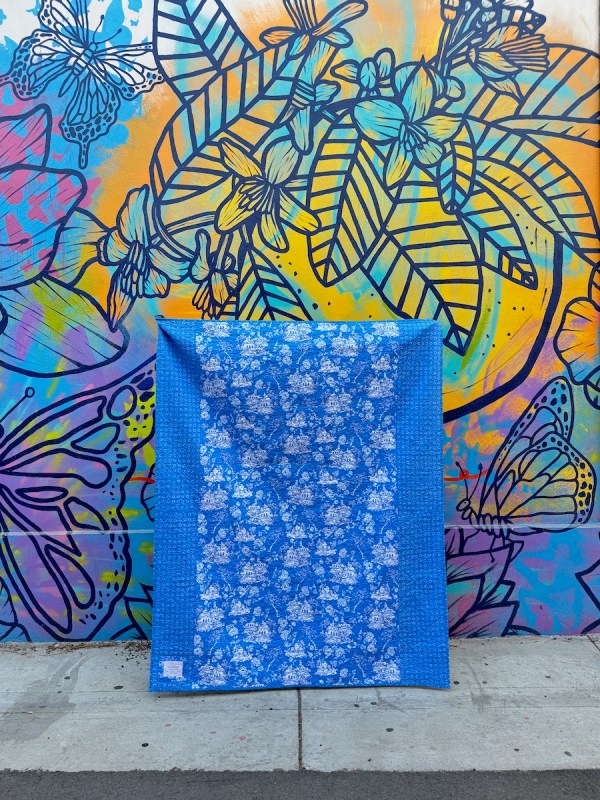
Back.
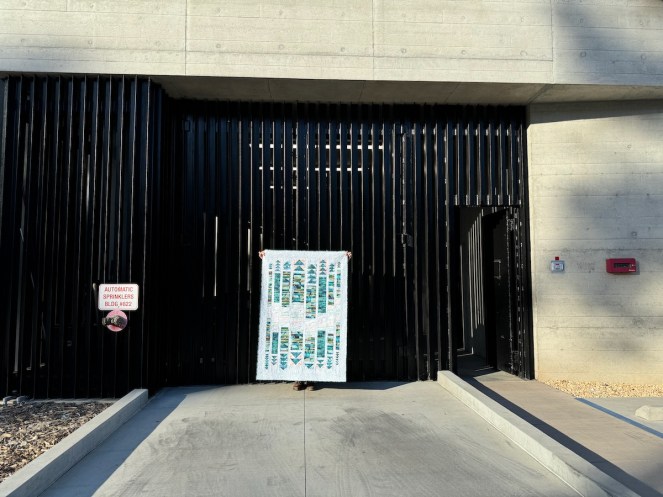
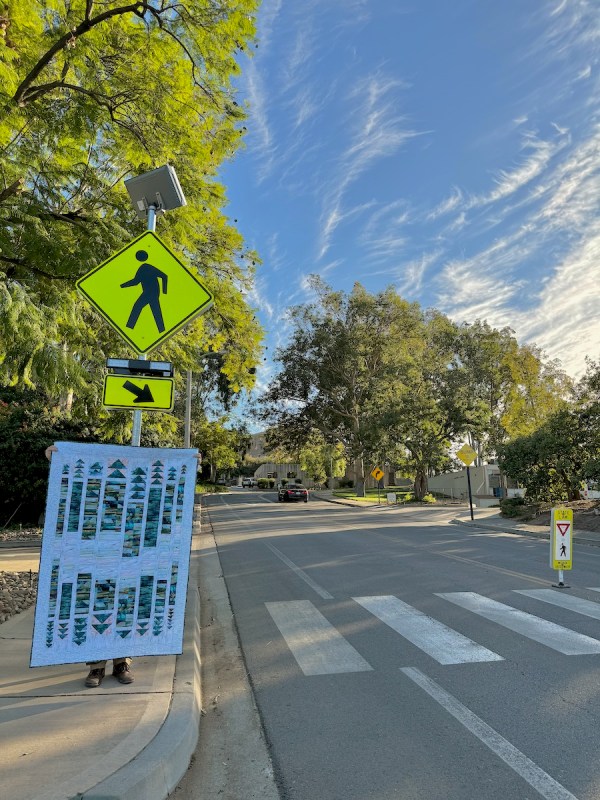
Crossing the Divide waiting to cross.
Crossings are everywhere. Some I’ve recently noticed:
We honored my mother’s death this week, a two-year anniversary.
My father’s one-year anniversary of his death is coming up.
There are no baby grandchildren.
I wake up every day with something aching.
A milestone birthday was celebrated earlier this year, and the further I get from it, the more I realize I have no idea how to behave in this new place. I get many more condescending comments from people who don’t wake up with something aching. Which is annoying.
I no longer worry about flossing my teeth or cholesterol — it’s a different mindset, but it’s hard to explain. That doesn’t mean I’m not aware of those things, but I just don’t freak out about them.
I do freak out about other, more trivial things (you can ask my husband).
I also freak out about the time left to me in this world to do what I want before I cross over permanently, but this post isn’t about that.
There are divides in this life. While I cross over most of them without being aware, other demarkations come blaring at me like a train rumbling through the night, and I scramble across the tracks as best as I can.
It’s also about seeing the line that keeps divided from each other. Sometimes that line is physical distance. Sometimes it is an age difference, or a political distance, or an emotional distance. It’s also about time-as-a-line: there is much more behind me than in front of me, by any calculation. And all this started with a color and texture division in my quilt.
Here’s to making your way across the divide, in all ways–
Sometimes we like giant things, like big spaces, big bowls of our favorite desert, big travel trips that include The Very Large Array. Other times, we don’t: huge messes that we have to clean up, massive surprise expenses, big insects, a huge amount of bumper-to-bumper traffic, or hurricanes. It’s like we know that some leaps of fancy and expressive gestures bring exuberance, excitement, joy, like standing next to a really tall sunflower in a field of yellow in the south of France. This big, we like.
Standing next to the heap of stuff we just dragged out of the garage and now have to sort and put it back in? Or the downed trees and aftermath of a storm system on our corner of the world? Or a task we’ve been putting off and putting off that has gotten ginormous in our imagination? Maybe not so much.
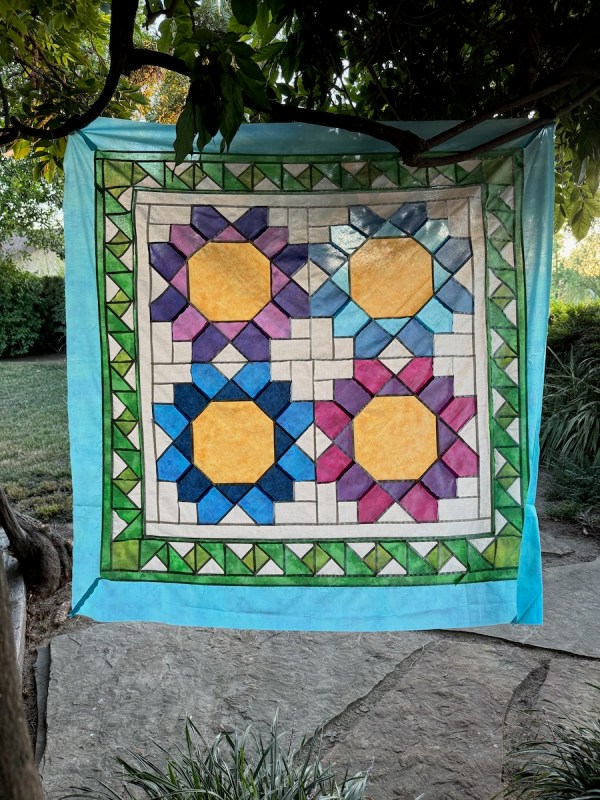
The Very Large Quilt Blocks
We like Big that we choose. We like Big that takes our breath away, like the Grand Canyon, or a sunset that stretches for miles across the New Mexico desert. We like Big where we can stand on our own solid ground and meet that idea or sight or brilliance, while not being swept down a canyon in life-threatening rushing water. As Arash Javanbakht and Linda Saab note “When our “thinking” brain gives feedback to our “emotional” brain and we perceive ourselves as being in a safe space, we can then quickly shift the way we experience that high arousal state, going from one of fear to one of enjoyment or excitement.”
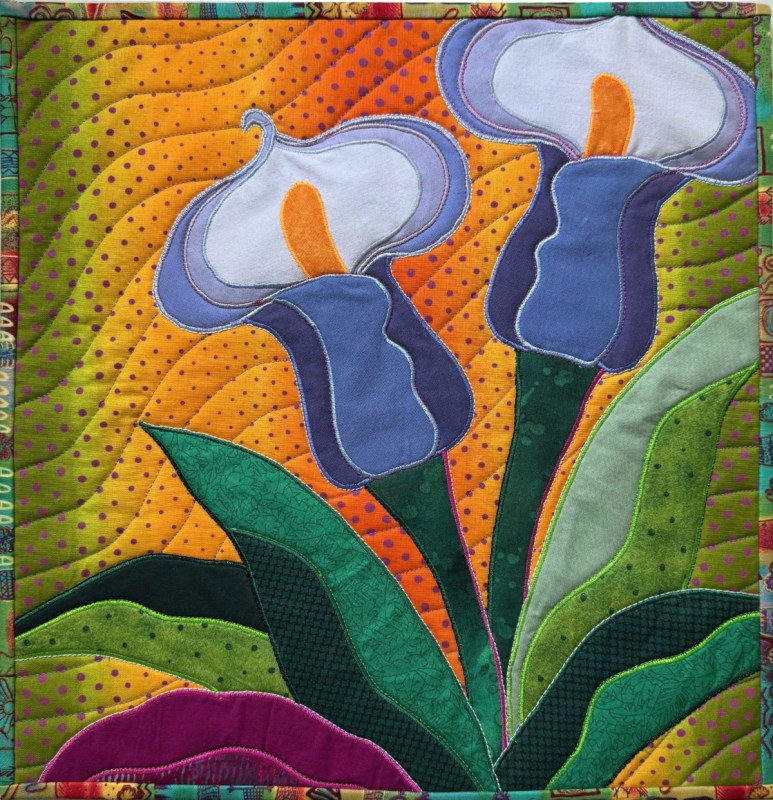
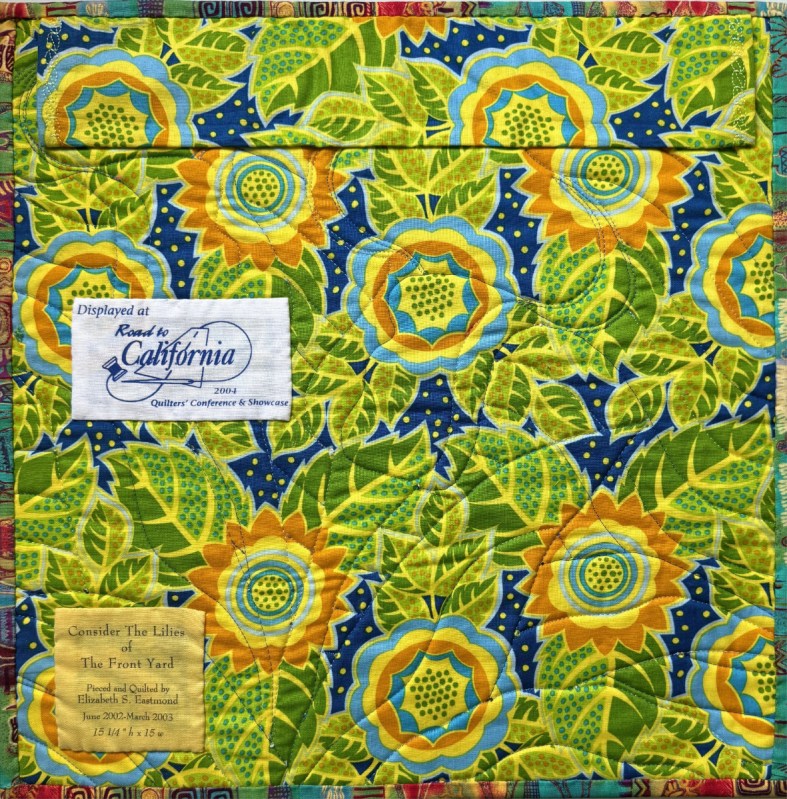
Consider The Lilies of the Front Yard, quilt number 51 • March 2003
However, I’m more interested in the brain shift needed to think Big. I remember taking a class with Jane Sassaman once at a guild retreat, and she was encouraging and lovely. I have always done better with small-scale projects, but in Sassaman’s class I got busy creating the wildest thing I could, as I greatly admired her quilts. She strolled around the class and came to help, when I raised my hand, stuck as I was on the design in front of me.
“Can you go bigger?” she asked. “Really make that lily jump out of its place? Get those leaves to look slightly menacing?” I’ll try, I said. Alas, I could not. Did not.
One website offers up that large-scale art is a way for the artist “to express themselves in a way that is unique and personal” and that “[l]arge scale art follows the tradition of monumental masters like Botticelli, Rembrandt, Monet, Picasso, and Klimt. Especially popular in the 18th century, it was used to depict scenes of history on large scale wall art. Thus, for its sheer size and themes, this type of painting was considered “more important” than portraiture, still life, and landscape.”
stained glass effect
Well, I don’t know about all that, but I did make a few giant flowers, gave them a latticework frame and a blue-sky border.
So maybe all I have to say today is to do something big. You might surprise yourself.
“What’s odd about commencement is that so many people think of it as the end of something, the end of high school or college—but that’s not what the word means at all. It means the beginning, the start of something new.” Will Schwalbe, (from The End of Your Life Book Club: A Memoir)
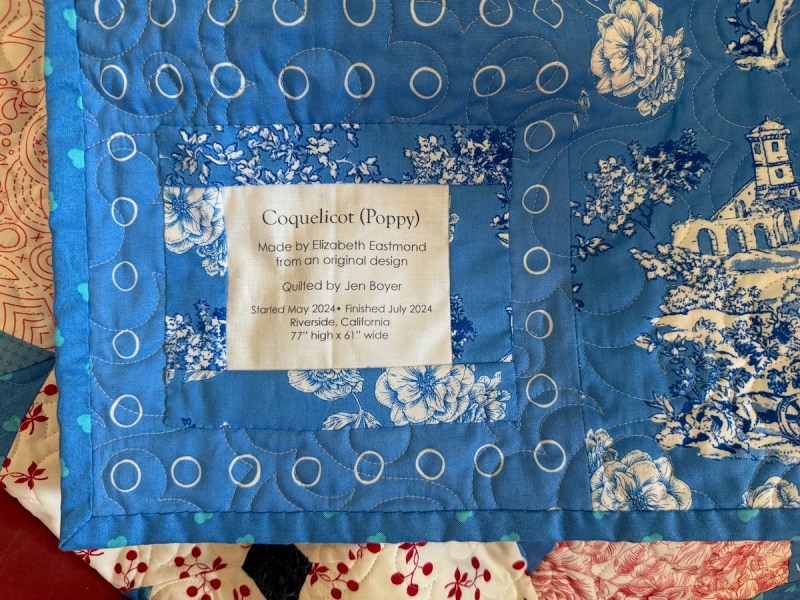
So is there a commencement for quilts? We celebrate their ending, their finishing, the last stitch. But are we really celebrating the ritual of folding away of a set of squares (or in this case) poppies, and moving it out of the way? Those unique blues that I collected all one year, that particular dye lot and color which was found everywhere, and now, nowhere — so I hoard and treasure and measure the pieces of it I am using. For when it is gone, it is gone. Is this the same as the ending of a high school education? The finishing of a quilt? The end of a season?
And from the same book:
“David K. Reynolds, who had, in the early 1980s, come up with a system he called Constructive Living, a Western combination of two different kinds of Japanese psychotherapies, one based on getting people to stop using feelings as an excuse for their actions and the other based on getting people to practice gratitude. The latter therapy has its roots in a philosophy called Naikan, developed by Ishin Yoshimoto. Naikan reminds people to be grateful for everything. If you are sitting in a chair, you need to realize that someone made that chair, and someone sold it, and someone delivered it—and you are the beneficiary of all that. Just because they didn’t do it especially for you doesn’t mean you aren’t blessed to be using it and enjoying it. The idea is that if you practice the Naikan part of Constructive Living, life becomes a series of small miracles, and you may start to notice everything that goes right in a typical life and not the few things that go wrong” (ibid, 211-212).
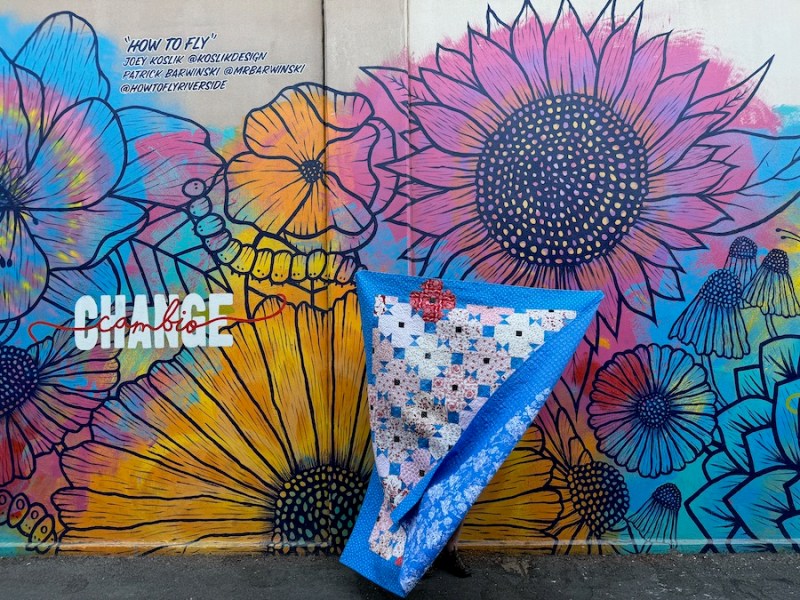
So as my husband (chief Quilt Holder) and I took the quilt down to be photographed at what we call the Butterfly Alley, we repeated a few rituals: get the quilt-holding sticks with the clamps, determine if the light is right, find a parking place and watch people’s faces as we unfurl a hand-made quilt in an urban setting, wait for the wind to die down, and take the photos (with lots of “up on the left — the other left!”).
So maybe the commencement of a quilt is a beginning of sorts. We have our rituals for this process: labels, photos, blog post. We fold up the extra blocks and tuck them away. We clean up the cutting area, and perhaps, as Yoshimoto intimates (above) that we find stray moments of gratitude. We are grateful for our tools. We are grateful for the colorful cloth. We are grateful that we have a wonderful community of quilters, of friends, of people who understand the need for quilt stores, quilt shows, and quilts. My quilting life has been a series of small miracles, full of so many things that have gone right.
Like a quilt of poppies in a field of French blue–
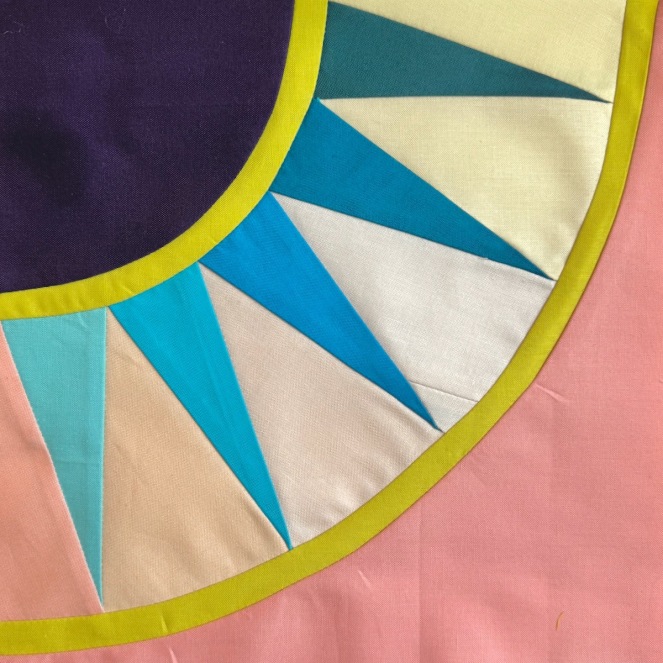
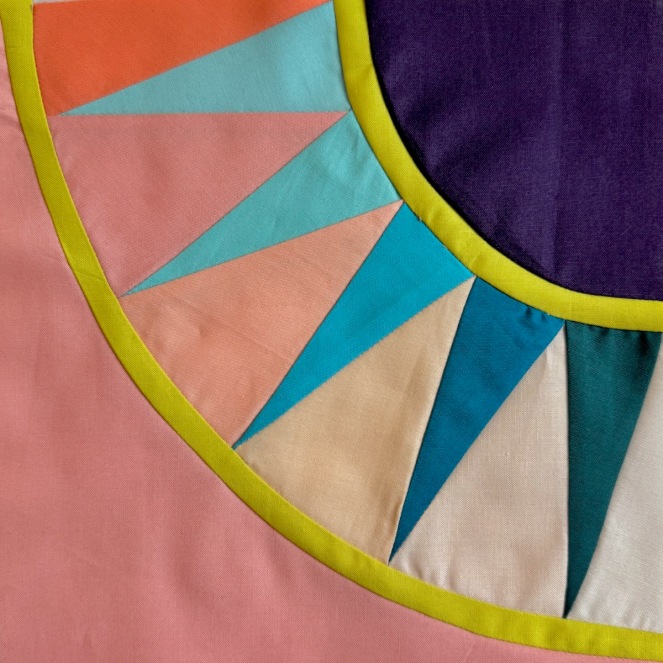
This picture illustrates my vexation. On the left, and using the color swatches in the top row, is Version 1 of this block. Not happy with how the ombre effect worked out, I tried Version 2 of this block (on the right), using the color swatches in the bottom row. So, first, color broke my brain.
Color
I’d envisioned this block to be a representation of that time in the evening when everything is settling down, with glowing shades of pink and yellow and deeply colored purple. On the left in the background of the rays, you can see that range of hues goes just so far. Then there is a huge color jump from the light pinks to that dark coral at the far left. Likewise in Version 2 on the right, there is a progression from soft yellows to corals and pinks, then another color jump at the end. I faced that sort of thing ages ago when I made Annularity. I ended up making two of these quilts:
Do you spot the anomaly in color? It’s at the very bottom, the warm-lavender diamond just to the left of center. That quilt went to Paintbrush Studio, because it was made from their first drop of their solids line. In the version on the right, made for myself, I pulled the exact blue-lavender color from another solids line that I needed to make the transition flow smoothly.
This is because we live in a world with limitations. And fabric colors, especially in solids, are one of those things. The fabric line, my favorite — Painter’s Palette by Paintbrush Studios — has since fixed that awkward color jump and they now have a perfect blue-lavender.
But now there’s a jump in the pinky coral tones. But I’m really giving this fabric line a workout: I’m creating color in my Affinity Designer program, using sliders and sampling colors from photos to get the exact color that I want in my designs. But the fabric manufacturers are working with cloth, dye, finishes, and budgets and no, they can’t make every color. (This is why I believe some people dye their own fabrics — just to get that precise color they want. But I decided long ago not to go down that road.) If this really bugs me, I may just buy it from another line, but I will be sure to prewash it twice to try and mimic what I have (both for colorfastness — the PPSolids are incredibly colorfast) and to shrink up the weave a little (PPSolids have a tight weave with a nice hand, or feel, to the cloth). Who am I kidding? I’ll just use what I’ve got.
Technique
And the other reason I was struggling is technique, or “how I sewed it.” In that Version 1, above, if you use your critical eye you can see that the narrow green band seems more “lumpy” that the one on the right. When I was majoring in Clothing and Textiles at Brigham Young University (a major no longer offered), we had to make a wool suit. Our teacher had worked in the industry and precision was her specialty. I resewed the lower front corner of my jacket with its sloping curve from center front to hem probably four times, but in the end she still gave me a B. She wrote on my grading sheet that she knew I worked hard on it, but it still wasn’t as smooth as needed.
It wasn’t necessarily my skillset that wasn’t up to succeeding, it was my technique. I needed to slow down. We all are familiar with this feeling when we finish the center of a quilt and then its borders. Borders? And we throw on just something, and then it’s quilting, and then it’s the binding, which apparently many people don’t like. They just want to Be Done.
So I slowed way down in my sewing of the narrow bands on the Version 2 block. Pressing carefully, using a different order of construction, improving my technique as I went.
This is not a hard block. So choose your colors carefully, use your best techniques in sewing, and it will go well. That’s all I wanted to say on this, but I do include my tips and tricks for the block and sewing it together below.
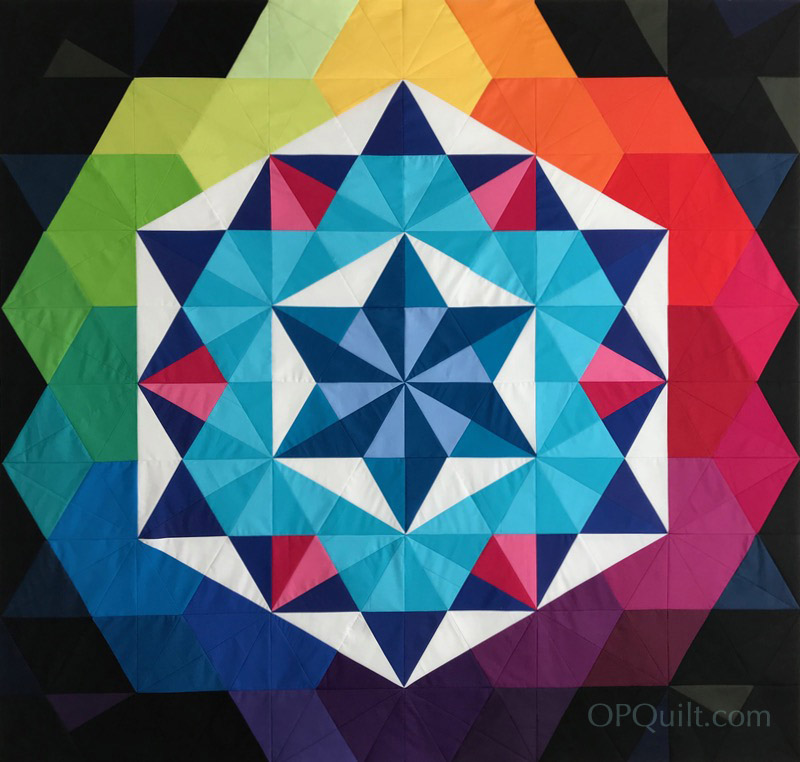
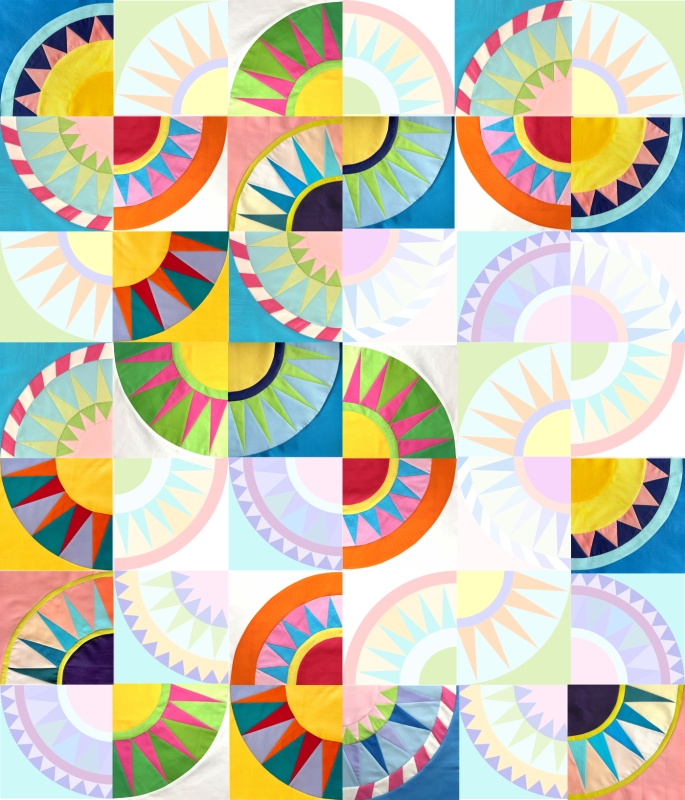
This is what my cutting table usually looks like, however I crop out the mess when I post photos, to keep the distraction level down. There’s a free pattern for Block One in my PayHip shop, where you can also pick up the patterns for all the blocks. Don’t forget to look at the other posts about this quilt, all found on the Master New York Beauties page.
Thanks for reading, and good luck with your colors and technique, in whatever you are stitching–
Tips and Tricks for Block 10: Vespers
Many other of the New York Beauties posts give you specific instructions on how to make that ray section; feel free to look at them for more help. We now pick it up after the parts are ready to be assembled. Please read all the way through before beginning.
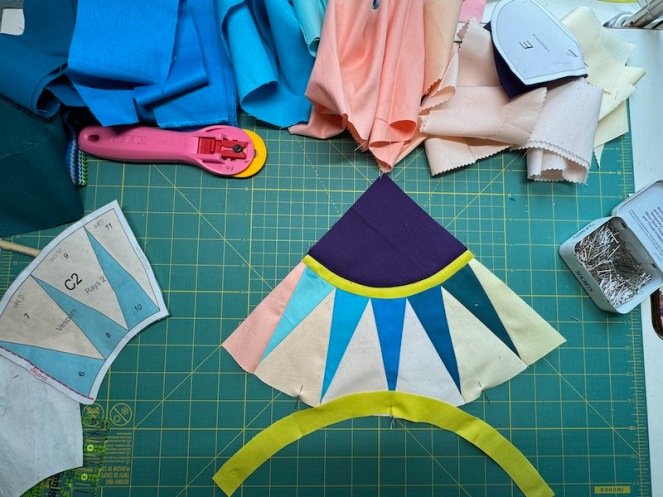
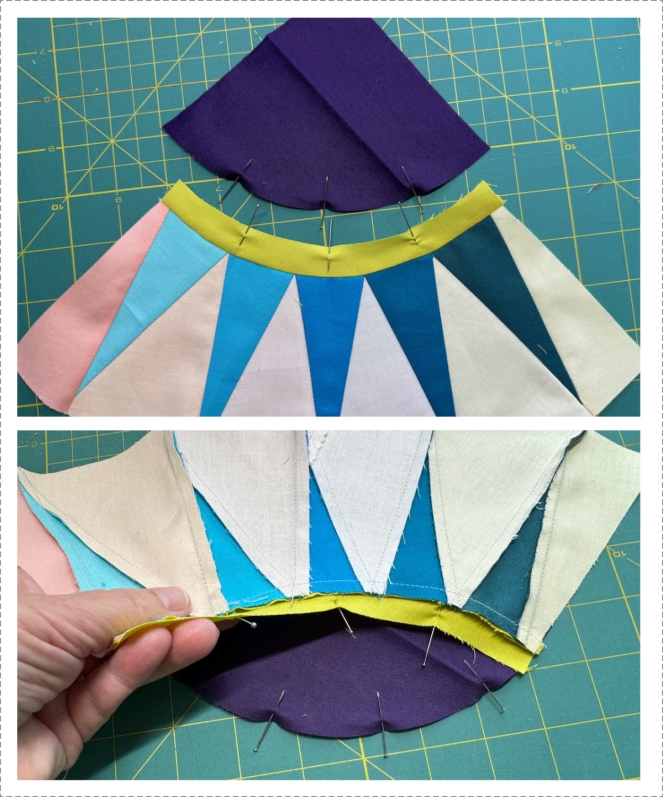
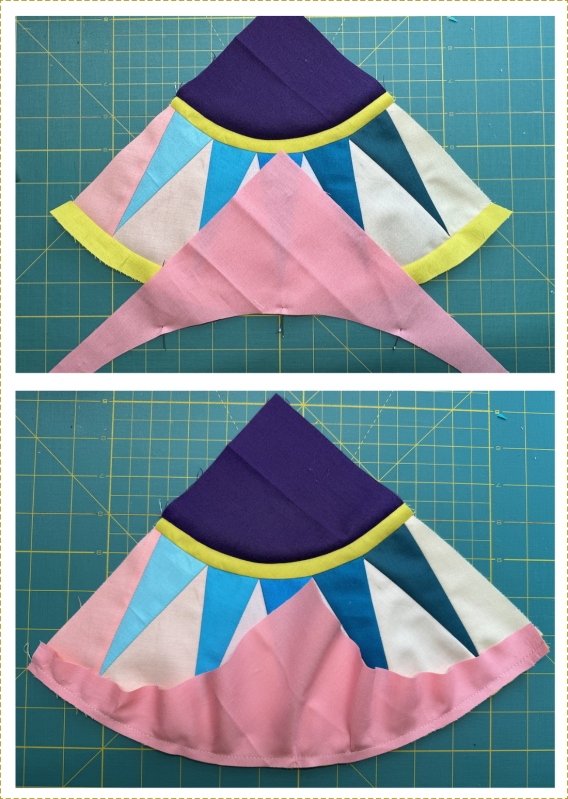
Arrange the pieces so you’ll pin the INSIDE curve of the rays to the OUTSIDE edge of the narrow curved band. The Cereus block (9) discusses this. Divide the ray section and the small upper band into four sections, marking with pins, or finger pressing. Pin.
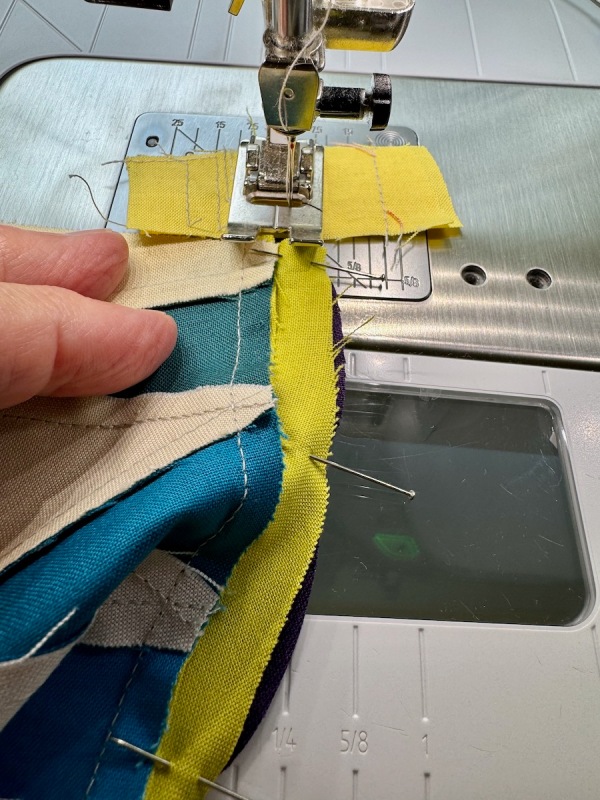
Sew a scrap, and at the edge, line up the two pieces to sew. I use a clay tool (the handle is nice and big) but you can also use a stiletto. Keeping the right-hand edges aligned, S L O W L Y stitch 1/4-inch away from the edge, easing in the fullness as you go. Remove pins as you go. To be truthful, It’s easier to put the concave on the bottom (the curving-out piece), but I think I flipped it for this photograph. The post on Cereus shows what I mean.
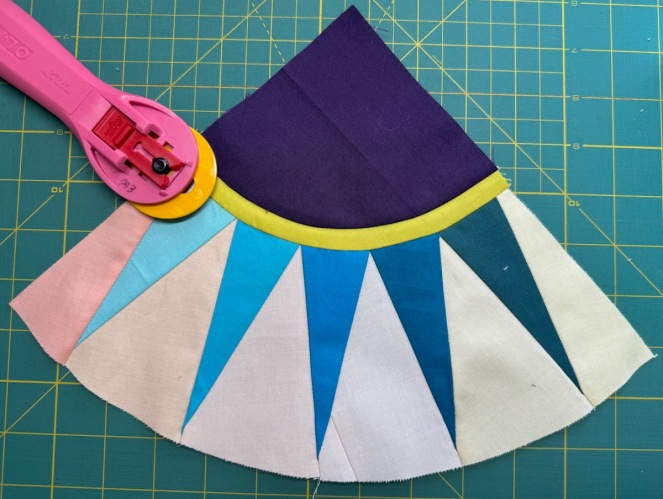
Press the band away from the rays.
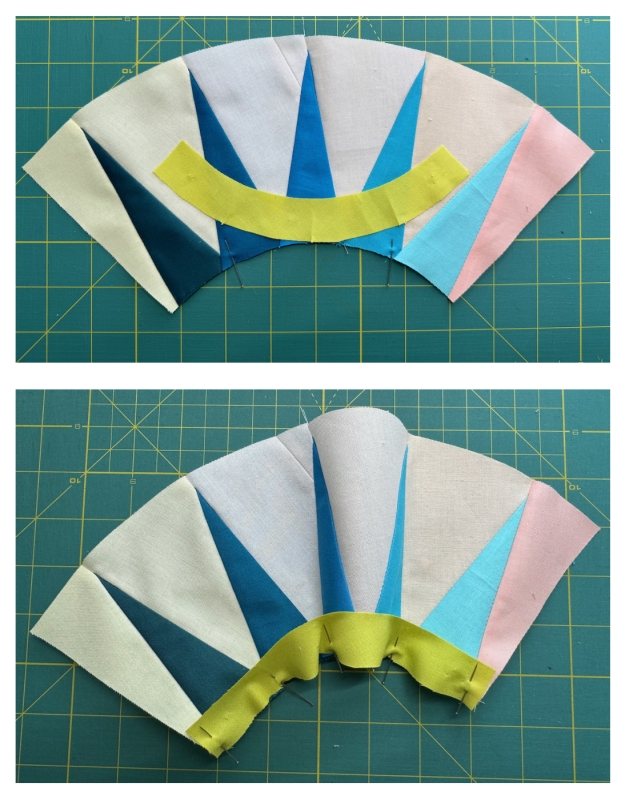
Now we’ll attach the corner quarter-circle. Again, divide the edge into fourths. And made sure you are sewing the INSIDE edge of the narrow curved band to the outside curved edge of the quarter-circle.
All pinned up. The purple (convex side) will be placed next to the feed dogs:
Again, I use a scrap to get started. I nudge those two edges on the right together with my clay tool and sew in a quarter-inch seam, slowly.
I like dimension in my blocks, so that seam is pressed under the quarter-circle. (I’m sure you’ve noticed the pieced wedge in the center. My order from Keepsake Quilting hadn’t arrived when I was making this sample.)
Readying the next joining: outer narrow band to the lower edge of the rays.
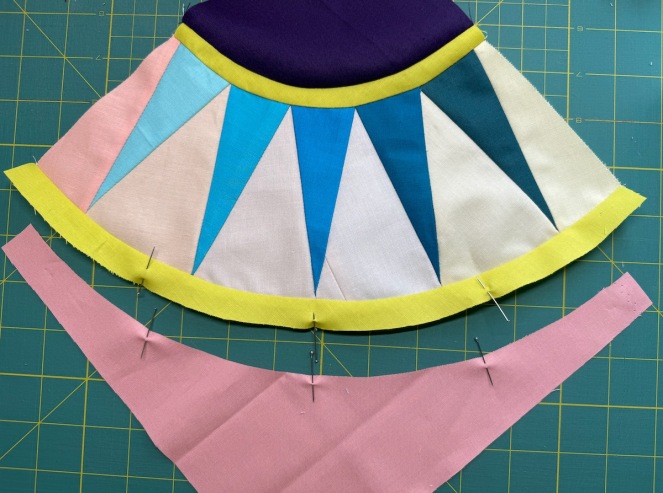
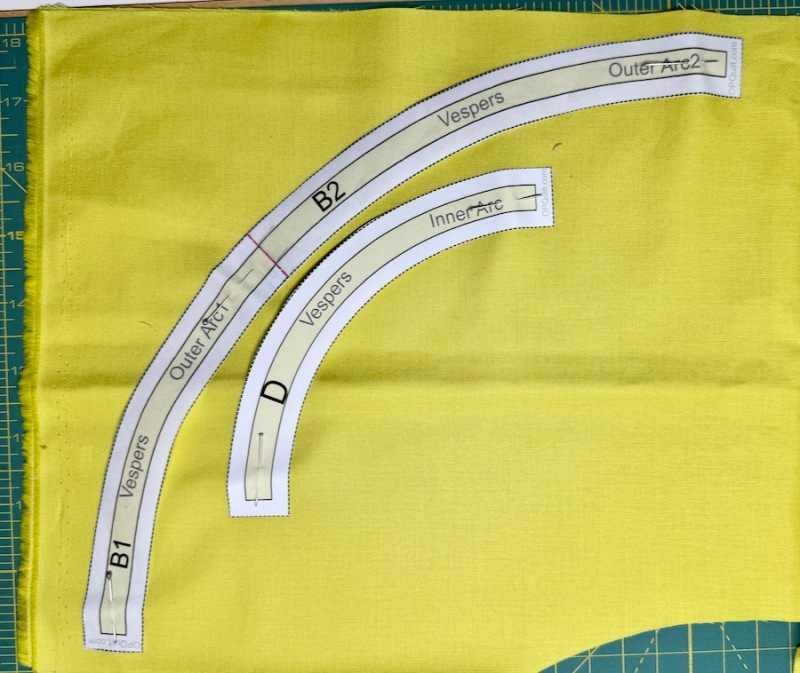
Preparing the last seam: narrow band to outside corner. All those curved edges have bias, with the grain on the outer edges because I cut them like this:
All finished. In every step I took my time, keeping a good technique and not rushing.
Trimming is keeping several balls in the air at once, juggling them all.
First thing to check: your center. Make sure that diagonal line is as close to center of that center ray as you can get.
Next, go for the bright green arrows, seeing if you can get the outer edge of that band as close to 9 1/4″ as you can. On both sides.
Last, and only if you can, the bright blue arrows are asking you to see if the inner narrow band measurements are the same. Or similar.
Then trim off the excess. I designed the pattern so you would have some “play” on that outer edge.
Okay, that’s all for this block. Make 3. Will I use both blocks? Probably. In our lively quilt, I don’t think anyone will object:
I put them both up in our progress chart, and they are fine. This is all to say that if you make one and want to make a shift in colors of the same block, it will be fine. There’s another double-colored block up there now!