
I recently received an email from a reader, asking me about the details of my Jolly Old St. Nicholas quilt. Her simple request pointed up a problem all of us blog writers face: how to find things on our blogs. I do have an index, but she specifically asked for more information about that quilt, which is NOT on the indexed link.
While it may seem strange to have a post about Christmas in June, I will occasionally be going through some long-term projects, and collecting all the information about that quilt in one post, linking to other posts when necessary. I can see several that are strung out across several months, that would benefit from this coalescing. So here it goes for Santa.

Pattern: I used Santa’s Village, from Thimblecreek, but with many changes. See Construction Photos section for more info.
Outside Large Green Blocks: I didn’t like many of the pattern’s original blocks. So I drafted my own in QuiltPro Software, and asked my Mid-Century Modern Beemates to each make me a block, shown in this post, where there are 14 blocks to choose from. You can download templates (or pattern pieces) for each block on that page.
Construction Photos

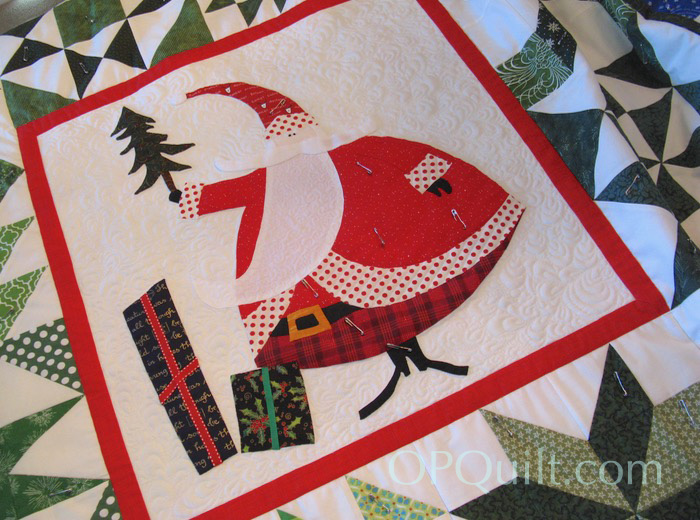
On the original pattern, you can see the top of the tree and the tips of Santa’s toes being chopped off by the addition of their giant rick-rack. I decided I wanted a cleaner finish as I wasn’t keen about the “chop-offs” on the original pattern. I measured carefully, placing everything just so, but in the end, I slimmed down the top of the tree (inset) so everything would fit.
I also added a 1-inch red band around the outside edge. Be careful in your measuring. The center Santa block needs to finish at 24″ so if you are going to add a one-inch border, then the center Santa needs to finish at 22 inches (cut the center white square down to 22 1/2″ inches to allow for seam allowances).
The feet were a torture to applique, but they make this guy, so stick with it.

As mentioned before, the blocks were made by my mates in the Mid-Century Modern Bee; here I audition them for their placement around Santa.
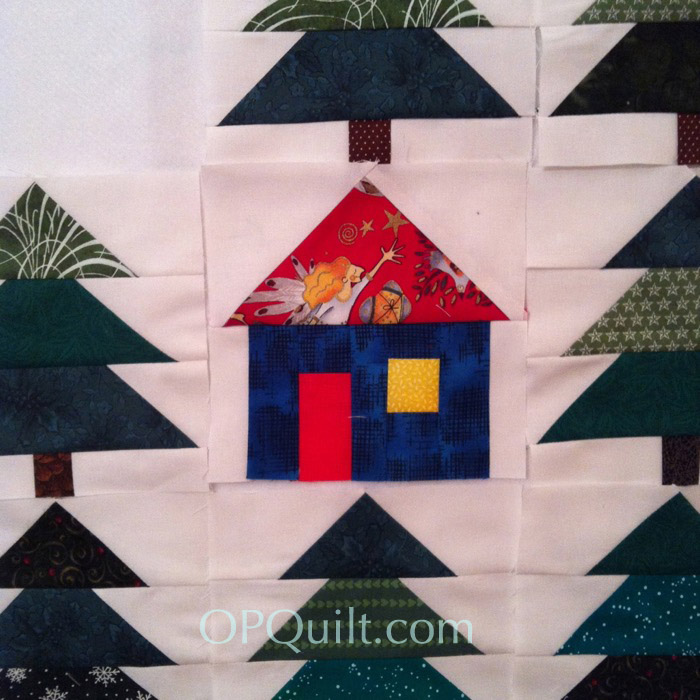
Then it was time to start on the trees and houses. The original pattern has a lot of funny pieces at the ends of the trees. Basically you make a sort of flying geese block, stretched or regular (depending on where in the tree stack it is), then added a spacer at the end to even it out. I eliminated those end spacers on the top and middle triangle sections as I thought it was a lot of bother. You can figure this out.
Truth: My pattern is either lent out to someone, or in a proverbial “safe place.” Either way I can’t put my hands on it, in order to be more specific about this.
Another Truth: This pattern needed several more rounds of pattern testing. I did talk to the designer at a quilt show sharing with him some of the problems I had with it. He wasn’t very happy with me.


I’m showing you both of these photos, so you can see the types of spacers between the house and the tree. I had to put one on each end of a house-tree strip in order to make them fit (different from the pattern), so don’t hesitate to make adjustments if needed. You can see what I’m talking about if you look at the original pattern, where the tips of the trees in the corner are touching the houses. Mine don’t touch.

Since my reader asked me about the center Santa, I thought I’d throw in a couple more photos showing how cute he is. Yes, sir.
And that’s Jolly Old St. Nicholas!
Discover more from OccasionalPiece--Quilt!
Subscribe to get the latest posts sent to your email.

This is such a lovely quilt! I am very proud to have a block in it too! And dare I say, it is much nicer than the pattern too!
Hi Elizabeth. Been awhile since I wrote but as usual you always come to the rescue to a reader in need of help. It is a lovely quilt and a nice one to display for the holidays. Glad all is well with you. Have kept in touch through your blog. Take care.
I love those bee blocks! Don’t get me started about the pattern testing …..
Love this quilt (& being a rainy part of it)!
TINY not rainy
I do love this quilt. Great adjustments on your part. It really adds to the cuteness of the pattern.
I definitely rely on the search bar a lot on my website to find what I need for myself; but if I haven’t shared about it, I’ll never find it.
I agree about difficulty finding old posts. I’ve started using more prosaic titles so that quilts are better identified in them. And I’ve started adding links to old posts on the same quilt–if not all the way through, on the final finished quilt post. Very few readers follow the links but they are there for me when I need them.
Love your Santa–patterns are for adapting.
Ungrateful pattern writer. I would think they would be grateful for improvements. Who would want to put a bad pattern out in the world?
Your quilt is delightful.
You’re just too nice to your readers, Elizabeth! I agree that it’s strange to post about Christmas in June… way too early. But you’re a sweetie for doing this. Love visiting your blog because it’s always pretty, and it WORKS! 🙂
Such a cute and jolly Santa!
Tags can help link related posts, but they rely on people knowing how to use them.
Agh, pattern testing. I asked for help testing mine, but no one spotted a fraction of the boo-boos I picked up and corrected myself. It is tough.
I can’t believe you fixed all of those problems! I’m not sure I would have known how to make it all work. I am sure it comes with experience. I recently bought a pattern and the designer (well known) had provided a youtube video on how to make the block. The youtube video was wrong. I unfortunately cut 140 triangles in the wrong size because I used the video as a guide. When I realized the mistake, I went back to the video and many before me had commented on the error (with the author saying, “Follow the pattern.”) Why not correct the video? I have gotten much better about reading patterns all the way through and thinking about the math before I start cutting.
Thank you for all of these tips – too bad the designer didn’t value your input, but I do think you did a marvelous job with it. Now to see if I can find the pattern. Do you remember how big the tree blocks are?