
Circle #11: Vintage Test Pattern
This is the eleventh block in a series of twelve circle blocks, conceived and created when I needed another hand-sewing project, and wanted something beyond hexagons. I had several sources of inspiration for this one:

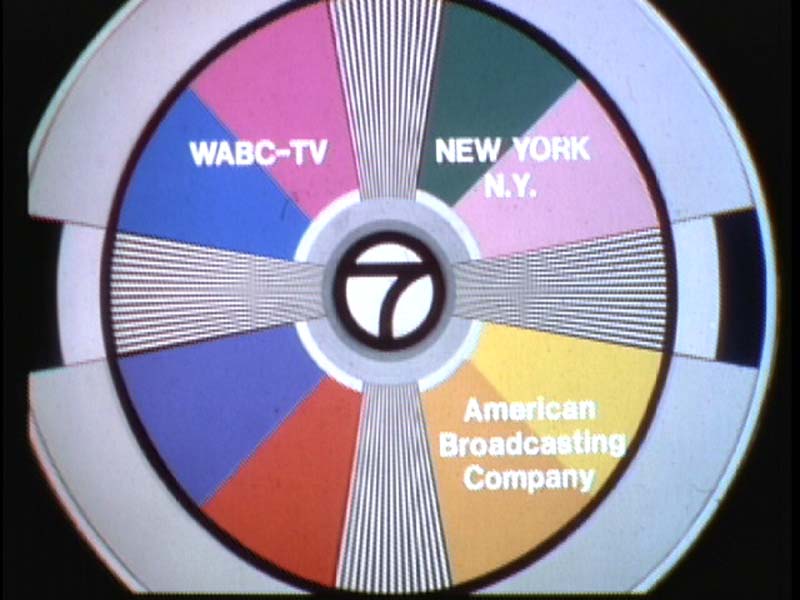


As a child, I remember these “television test patterns” on the tube when I’d get up too early, before the station had signed on. And I liked the Greek Cross reference, too, since many of these circles were designs taken from a Greek Orthodox Church in Ljubljana, Slovenia (from our vacation last year). So I give credit to both sources of inspiration.
The free patterns are now returning (I did not do Red, White & Blue version of this block). Again, I request that you not distribute them, but send people here to this website to get them. Click to download a PDF file:
Please remember to set your printer settings to 100% and check the little scale square included on the pattern. It should measure 1″ in size. Illustrations below are with the OLD version of the pattern, so it may vary from what’s included now.
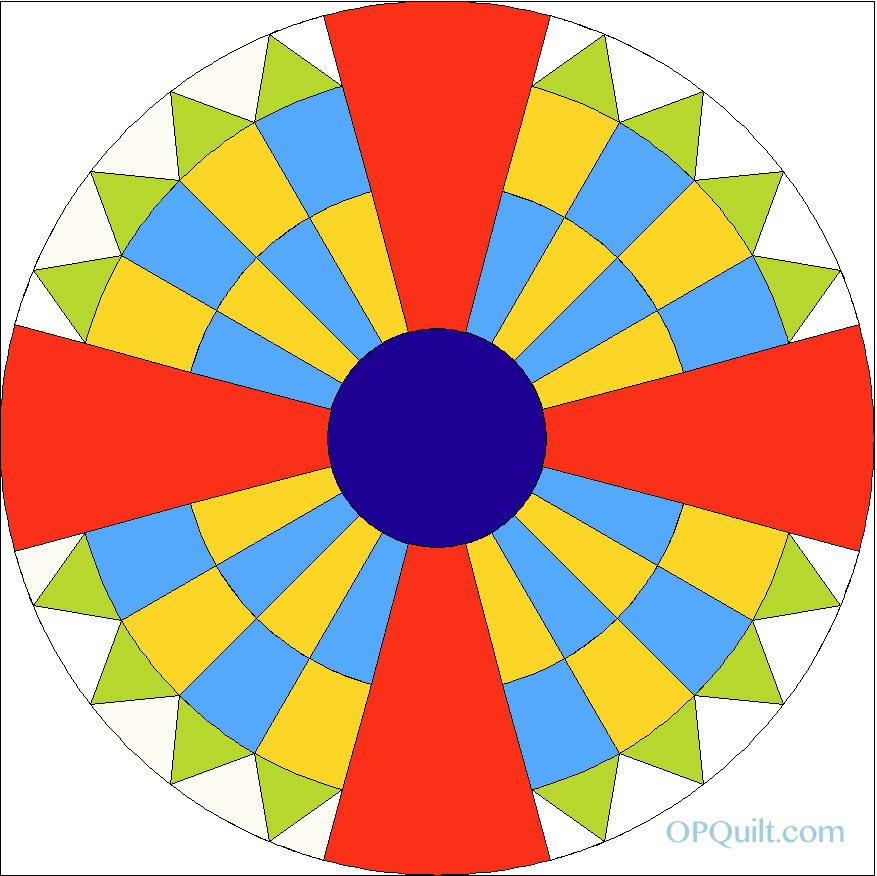
Here’s the circle drawn up in my quilt software. I’ve taken to printing out this little color drawing and putting it in a small bag with all the glued-up pieces. I like referring to the drawing as I work.

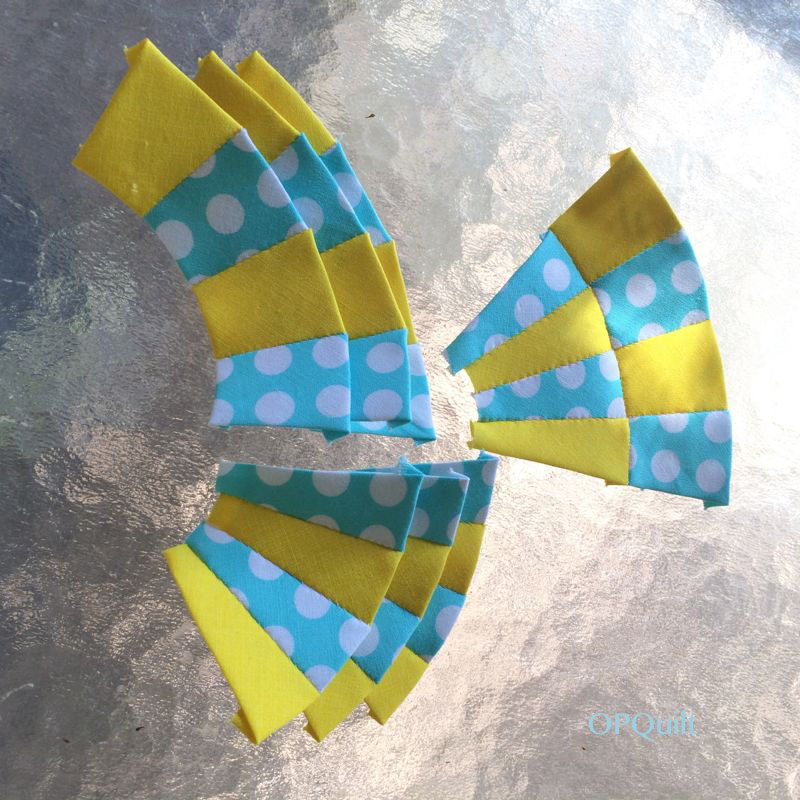
Picking fabrics–I always lay them out. I jumped the gun and cut the cross-bars early, as I have another circle with that fabric and while I wanted these circles to be different from one another, I still wanted them to be able to have a conversation, so I repeat fabrics here and there. When you cut out your center circle piece, cut it about 1/4″ bigger than it is. See Circles #10 for some tips on the center circles.

Once I got all the little points around the top of the circle printed out, I noticed that it would be hard to figure out where the “curve” of the triangle was, so I drew little arrows on every one of them. As it turned out, I was okay about figuring out how they went, but if you think you might need the extra assist, do it now.

Kind of looks like a tomato with leaves.

As is my habit, I lay out all the glued pieces for one final check before I start sewing them together.
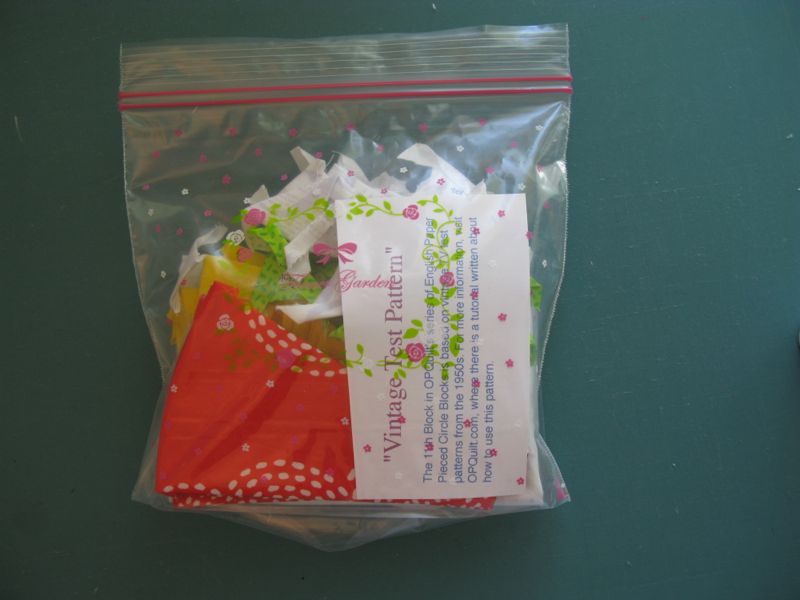
Then I loaded them all up in my little bag with the drawing and went outside to the patio to stitch, while listening to my audio book.

This time it was The Last Chinese Chef, and I was craving Chinese food by the time I finished listening to this. But not Americanized Chinese food; I wanted the food in the book.
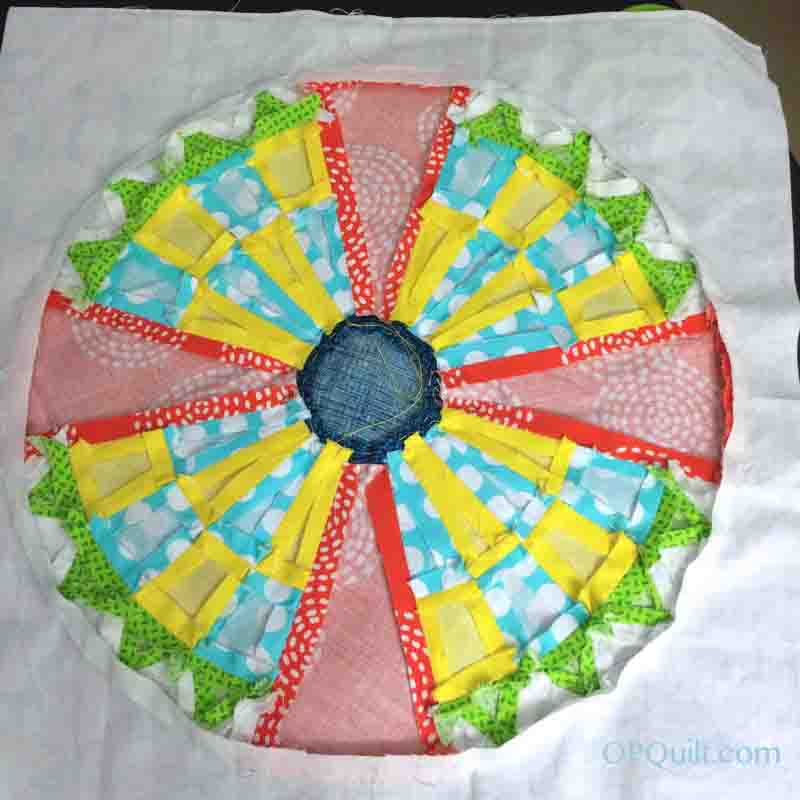
Stitch the upper row sections together, then the lower, then join them, keeping those seams aligned if at all possible. Notice that I have not glued down the lower edges of the lower section to their papers (the innermost part of the circle), as I want to appliqué the center circle onto the piece, and it’s a lot harder if I’ve folded the edges and glued them down.

Then, line up four green triangles with their curved edges at the bottom, and the points that go in-between them (three pieces). Lastly, lay the half-triangle on each side. NOW sew them together. You don’t want to be sewing on a full-triangle on those outer edges; ask me how I know.

When sewn together, it should look like this. It’s now after dinner and I’m inside, still listening, but sewing by lamplight, instead of by sunlight. I couldn’t stop listening to that book, nor stop sewing. These get addicting.

Join a checkerboard unit to the triangles unit.

Then stitch one of those ray-sections to the checkboard units, making sure you are attaching it to the same side on all four units. In this photo you can clearly see the raw fabric edges of the lower checkerboard pieces. Sew together two of these units, then sew those two units together to create a full circle. At this point, you can remove all the papers, except any that are at that outer edge. If the papers are hard to slip out because they are glued, use the tip of your small scissors or a stiletto to loosen the fabric (so you won’t have to tug and pull).
Cut a 14 1/2″ square of backing fabric. Yes, it is bigger than the circle, but I want to make sure I have enough to work with when I figure out how I’m setting all these together. (I have no clue at this point!) Now it’s decision time. This version, with the red rays arranged North-South-East-West, or. . .


. . . this version, with the rays arranged like a flower? I marked the centers of my large backing square, and set down the circle, pinning it for appliqué. I went with the traditional version (North-South-East-West).

Cut away the backing fabric, leaving a 1/4″ seam allowance. I love these little Karen Kay Buckley scissors, as the tips have little teeth that grip the fabric, holding it while trimming even the smallest bit of fabric.
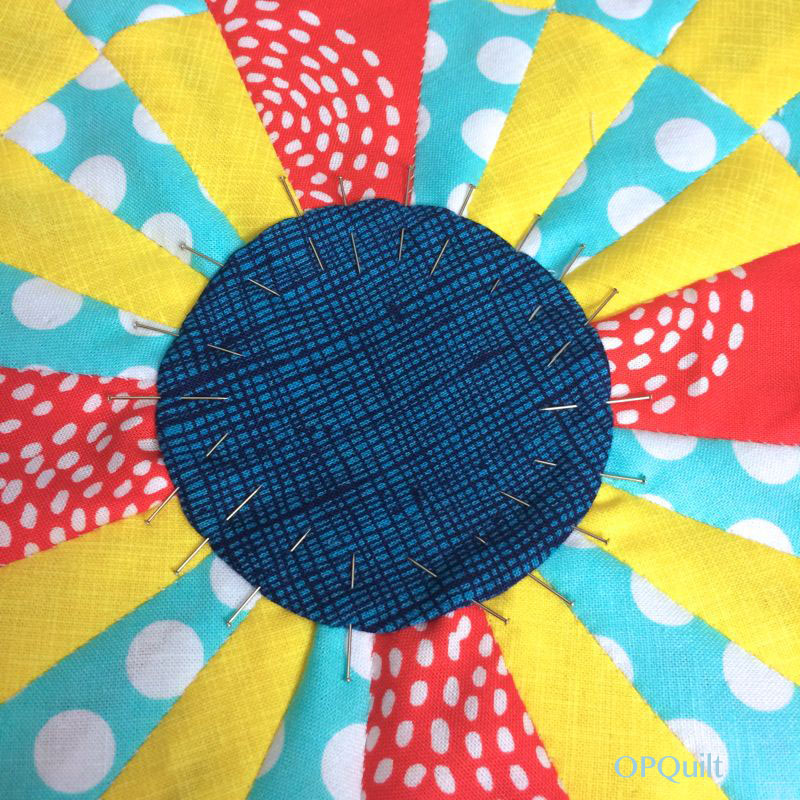
Pin on, then appliqué the center circle. See Block #10 for some appliqué tips. I should have placed that “weave” pattern aligned straight up and down, but instead I just slapped it on. As a result, I always want to tip my head to the side when looking at the center circle. I’m sure no one else will notice (well, now you will) so I’m not redoing it. Keeps it real, keeps it interesting.
Remove all the papers, and admire your work.
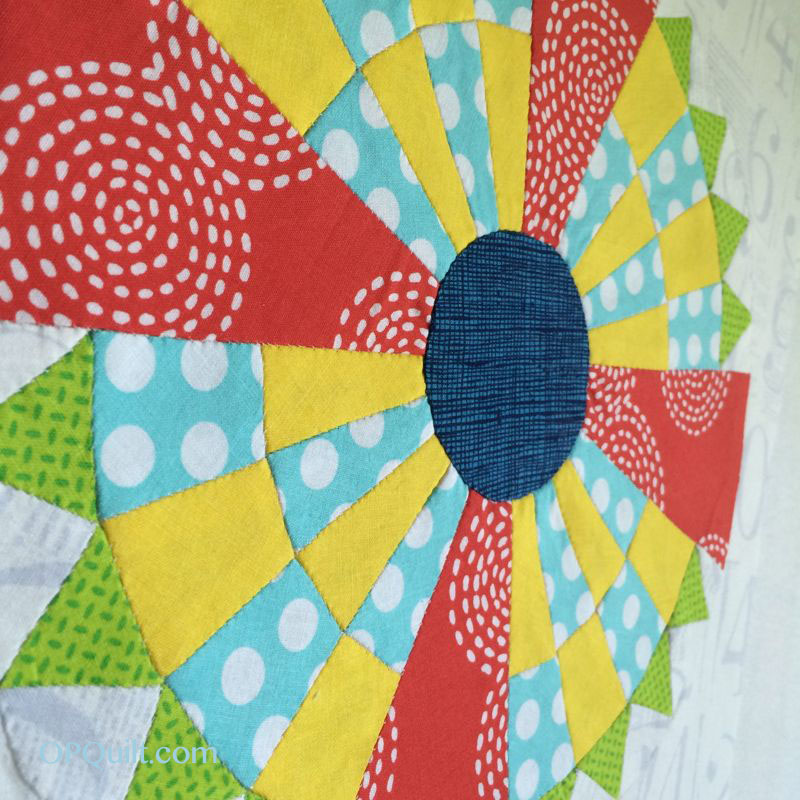

Here are they all are, lined up on an ironing board that is obviously used for other things than ironing. (Anyone else have to clear off their ironing board in order to iron something?) I think they do play well together! I’m posting this circle block a wee bit early as we have our Quarterly Four-in-Art Reveal in two days, on May 1st.

I hope you’ll join me then for our little gallery of art quilts!
Discover more from OccasionalPiece--Quilt!
Subscribe to get the latest posts sent to your email.

I think this one is my all-time favourite! I can imagine a whole quilt with just this one block! I love the colours you have chosen too! Interestingly I read that book a couple of years ago and also really enjoyed!
I just t love your work. What a prolific production line you have too. Do you ever sleep? Keep up the good work, Jan Fitzpatrick
Elizabeth, this one is outstanding! And they all look so good together – cannot wait to see a “final quilt”. Thank you for all your hard work on this and for generously sharing.
This one makes me smile inside.
Elizabeth – this is amazing. I am a novice EPP; and still working on my first 1″ hexi projects. I love your designs!!! I have not tried glue basting, but I would guess that makes the project move along quickly. I am at the point with my hexi’s of joining them into double diamonds; and someday may have enough stitched to make a quilt of reasonable size. I have 30 in progress and 5 complete! I look forward to seeing your project completed.
Its so pretty! Love the colors you used on it. You have just done a wonderful job creating all these block patterns! Really nice of you to share these.
Ha! We are obviously from the same television generation!!! That was the first thing I thought of when I opened this post. It looks just fabulous and I really like the colors you chose to make this block. You make it look so easy. Have you ever printed your patterns out on freezer paper? If so, does it stick as well as having to glue the pieces?
Elizabeth! This is my new favourite : )
I love the many inspirations you found for this block. You should be able to write off your travel as a business expense.
You write very good instructions :>) I wish your students could appreciate who they have in you. The circles all together truly are becoming more than the sum of their parts.
How fun to see it all together! I loved seeing it in progress in San Diego. And I really enjoyed our sit and sew time – that was very special. You have inspired me to keep working on my hexies!
Just wanted to mention that I shared a link on Facebook back to your “circles” . I’m glad you found the group on Facebook.
Each one keeps getting better. I remember my brothers waking me up and we’d sit on the couch, wrapped in a quilt, on Saturday morning watching the test pattern and waiting for the cartoons to start!n BTW, love your ironing board cover (the bottom layer, not the stuff that’s covering the cover — lol).
What a beautiful group. All outstanding – I really like all of them, but this may be my #1 favorite. This project would make a great book, Elizabeth. Thanks for sharing.