

It’s a new year, and with our new circles block #7, we’ve turned the corner and are more than halfway done. Yes, this does look remarkably similar to Block #1, because it is–only I’ve blocked in the spaces between the points for a different look. The complete collection of Circles Blocks, all done with English Paper Piecing (EPP), is found on the tab above titled Shine: The Circles Quilt EPP.
As always, the updated patterns are free, downloadable PDF files. And as always, please do attribute the source of this to Elizabeth at OccasionalPiece-Quilt (or OPQuilt.com) and do not print off copies for your mother or your friends. Please direct them here to get their free copies. Many thanks.
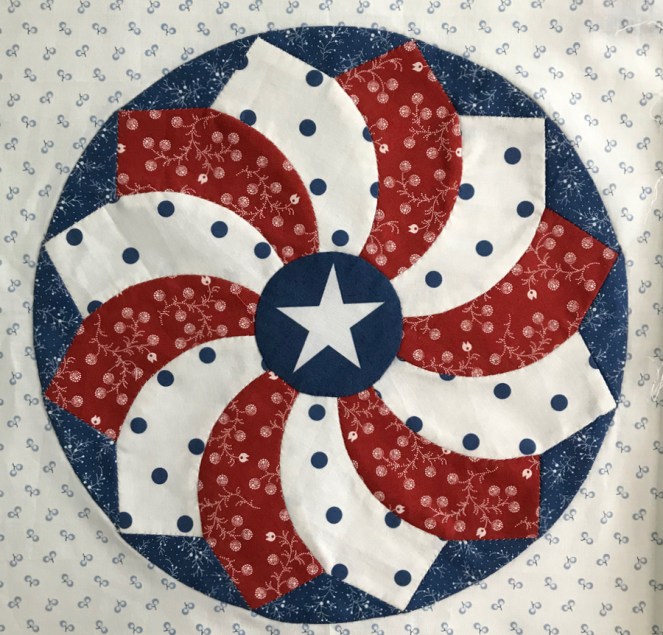
The free patterns are now returning (Red, White & Blue version is above). Again, I request that you not distribute them, but send people here to this website to get them. Click to download a PDF file:
Please remember to set your printer settings to 100% and check the little scale square included on the pattern. It should measure 1″ in size. Illustrations below are with the OLD version of the pattern, so it may vary from what’s included now.

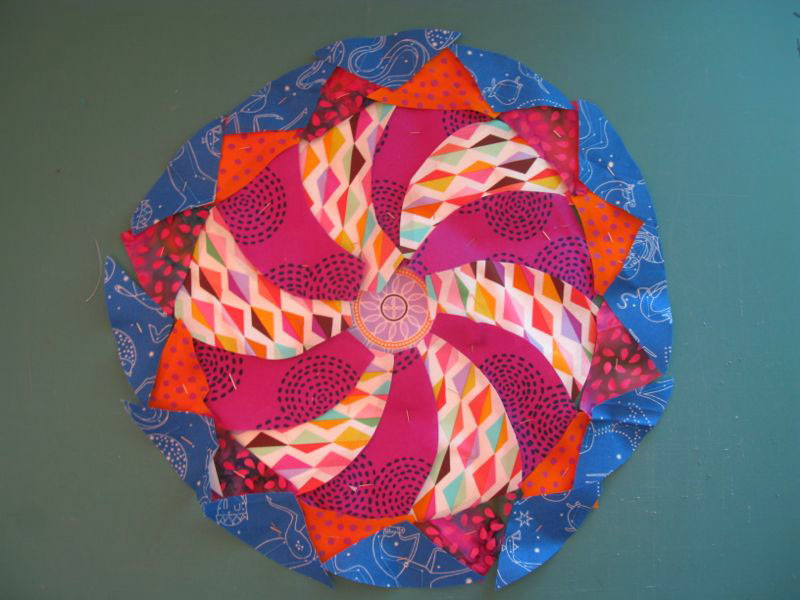
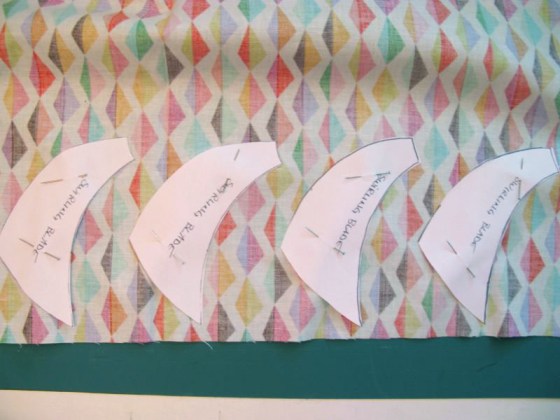

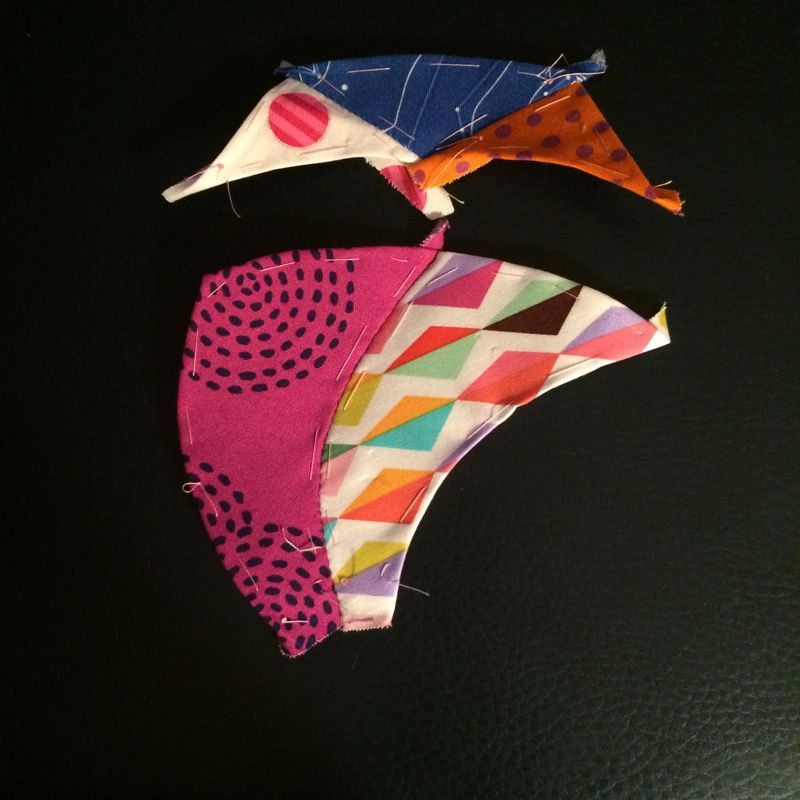
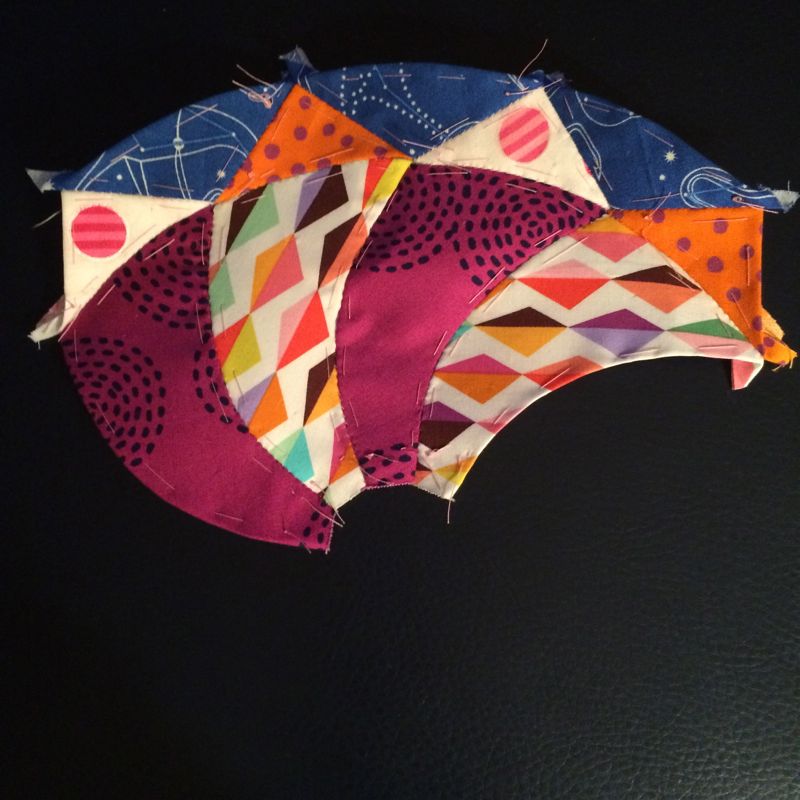
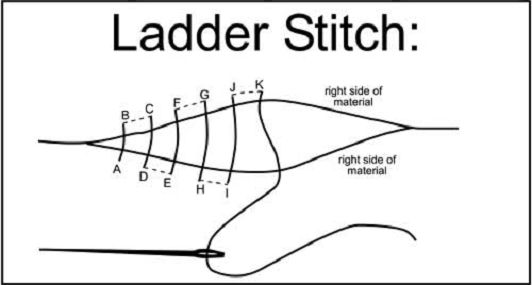
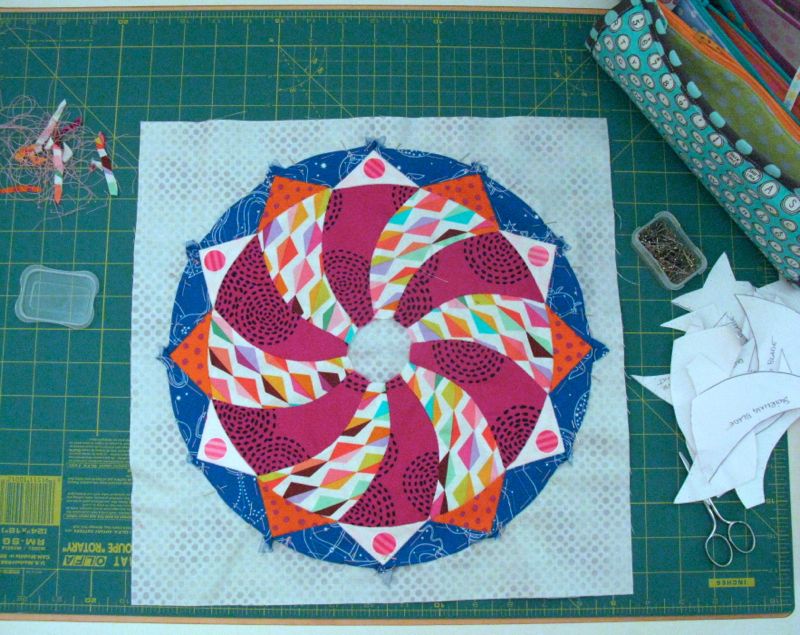
Playing with the patterns in the fabrics can be interesting. In the above, I liked the bigger, bolder, polka-dots so I clustered my points through that section. I also decided I wanted to repeat the high contrast swirling blades, so chose fabrics that brought out that aspect. To get the blades to swirl the opposite direction of Circles Block #1, place the pattern with the words visible, or facing up, as shown above. I’d originally thought a fabric that coordinated with the magenta-y purple blades and the orange points would be interesting. Here I’m trying it in the cut-fabric stage, before I’d basted it onto the papers. It looked all right, so I proceeded. But something just didn’t look right once I had the pieces basted. So then I cut out and basted the points with the pink dots. I fussy cut those to get the dots in the center. As always, I tried out my block in multiple ways, and decided on what I wanted. Most often I do this at the cutting stage, before I have basted them down, because, wow, it’s too much work to baste and then not use the pieces. But this block didn’t reveal itself until this stage, like a sulky teenager or something. I start by joining small pieces together. Then those small pieces get joined to become larger sections, and so on (and sew on?). I read on Instagram last week a discussion of how much the stitches show. However, please don’t re-do any of your stitching until you remove the papers, as one commenter noted. With all the papers in, the stitches have a “tension” on them and tend to show more. I thought that was great advice. Of course, because we are moving between strong colors, you can’t always get a thread that will match both sides of your seam. I’ve heard people sewing with Bottom Line, a very fine thread from Superior Threads, almost silk-like, and that would certainly that would help. Another commenter said she used a “ladder stitch,” taking a small “bite” of fabric on one side and running her needle through the fold, then the other side, alternating. At the end she would pull her thread tighter and the stitches nestle in. Here’s one illustration of that: And here’s a video, sort of showing the same thing. I use an overcast stitch, taking tiny bites of fabric, and just don’t worry about it all. You can see close-ups of my stitches in other Circles blocks posts. Cut a 14 1/2″ large square of your background fabric, fold it into fourths and press in the folds so they’ll serve as guidelines for centering your circle. Remove all but papers except the ones in the outer blue wedge-shaped pieces. I also trim off any wild or excessive seam allowances at this time, too, so as to remove bulk.

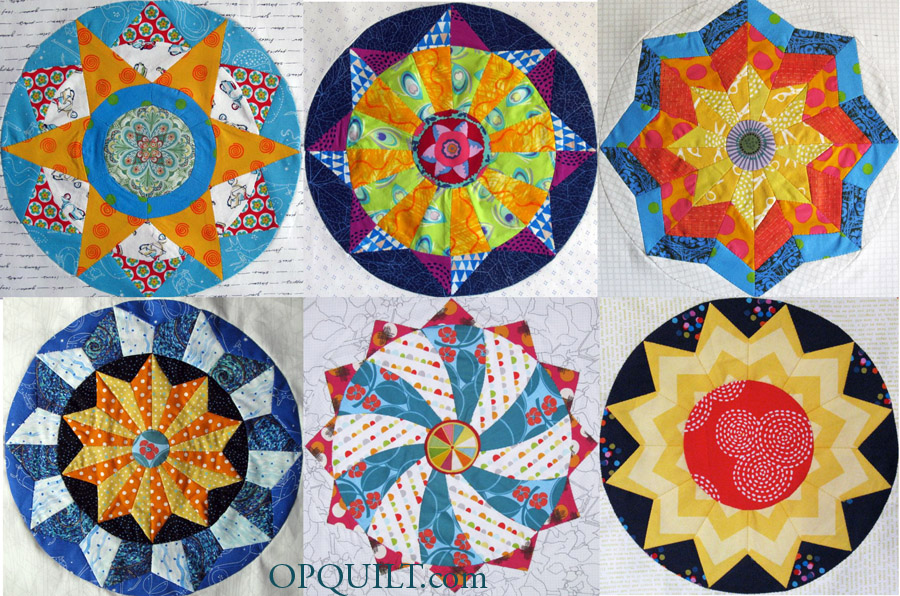

Pin down your circle, using small appliqué pins (so you won’t get stuck so much), and then stitch your circle onto the background, removing the papers, tucking under the points as you go. Turn it over and cut away the background fabric 1/4″ away from your appliqué stitching. Then stitch on your center circle, again using an appliqué stitch. I’ve done the EPP method on this part, and believe me, it’s easier just to appliqué it down. Like always, I auditioned several different centers (I’m getting quite a collection) but decided to go with this one. Not every center is a home run. The idea is to get them to play together, like the six shown below: Now there is one more! While I give tips and trick about the stitches in this post, every circles post talks about something a little different, while going over similar ground. Please refer to the other circle posts for more specifics, with all of them found on the tab above. Circles Block #1 mentions the basic method of English Paper Piecing. Circles Block #2 talks about fussy cutting your fabrics to yield a certain design, as well as joining the background via EPP, rather than appliqué. Circles Block #3 shows a cheater method for sewing together your fabrics on your machine before cutting them out, then proceeding with EPP. And so on. Have fun and we’ll see you the first part of February. It won’t be on the first day, because that’s the day for our reveal for the Four-in-Art Art Quilts, but shortly after that. Have fun sewing!
Discover more from OccasionalPiece--Quilt!
Subscribe to get the latest posts sent to your email.

You are SO good, Elizabeth! I don’t know how you’re designing these ePP circles, but they’re wonderful. Your explanations are spot-on. Personally, I prefer the whip stitch, as you do. Tried the ladder stitch and I thought those showed more. I have also used Bottom Line, which is great, but it too-easily slips off the needle. I think there’s a way to “knot” it onto the eye, to prevent that. You’re starting off 2015 with a great block.
Another beautiful block, Elizabeth! Your fabrics are so lovely in each one.
Although I really love the “ladder stitch” (learned it years ago when making teddy bears…..the only way to securely close a seam after ‘stuffing’ has been inserted) but for piecing I also use a simple, very tiny, overcast. Great advice to not make a judgement ’til the paper is removed. Happy New Year!!!!! and hugs…….
I really like this one. I always love swirl blocks when I see them in other quilts. Thanks!
These all look so fabulous together : ) so pretty
These blocks are amazing. I can’t wait to pull fabrics and start. Thank you SO MUCH for sharing all your hard work with us.
Grand, as usual. I really like the way you share the process of choosing (and rejecting) fabrics as you work through the block. Question. Have you ever thought about piecing your circles into the backbround instead of appliqueing them? Just wondering. They are large enough that I’d tackle all of the piecing by machine. Am wondering if you could invisibly (kinda, sorta) EPP by machine using a very fine invisible or nearly invisible thread and a very narrow zig zag. Wonder what it would look like. I may have to try it.
Im quite impressed by all your EPP circle blocks so far. Hard to choose a favorite. Also Im looking forward to what you and the others come up with this year in Four-in-Art. I’m sure to be inspired.