

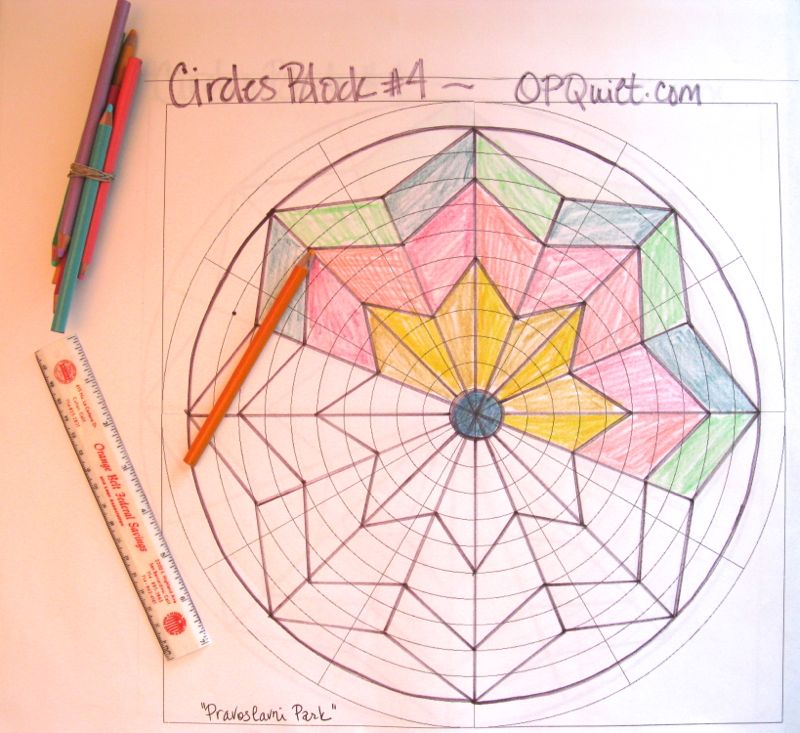
Circle #4: Pravoslavni Park
Here is the fourth circle in our EPP Sew-A-Long, another circle taken from Ljubljana, Slovenia in an ornately painted church. I chose not to make the outer arcs in a different color in order to let the star points pop out of this eight-point star. (If I were doing this one again, I’d make the arcs in a different color. I just like the look of that circle shape.)

Here they are all together, all different, but they play nicely together, I think. I was asked about color selection for my blocks. I have to admit I just have chosen my favorite fabrics from my stash. I do keep in mind that they need to coordinate, but I also know that the repetition of this circular shape would also tie the blocks together.
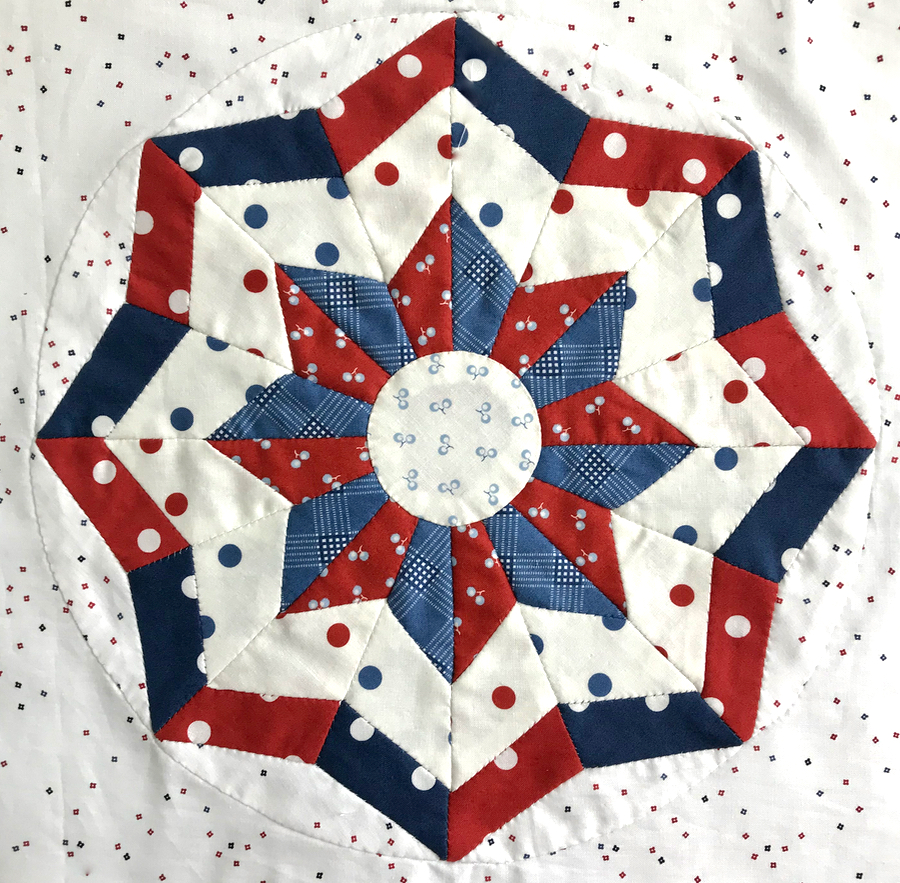
The free patterns are now returning (Red, White & Blue version is above). I request that you not distribute them, but send people here to this website to get them. Click to download a PDF file:
Please remember to set your printer settings to 100% and check the little scale square included on the pattern. It should measure 1″ in size. Illustrations below are with the OLD version of the pattern, so it may vary from what’s included now.

As before, print out enough copies so you can make your eight-pointed star, then staple them all together heavily so you can cut them out without them shifting.

Again, if the pieces have no direction (are the same shape if folded along an axis line), lay them with the printing either up or down. If they are specific, like the point-pieces, lay them out on your fabric with the printed side facing the wrong side of the fabric, and then cut them out. Sometimes if I whack off too big of a seam allowance, I’ll trim it later as I’m basting around it. It’s all very forgiving, so don’t stress. There are more tips and instructions on Circles #3, Ljubljana.
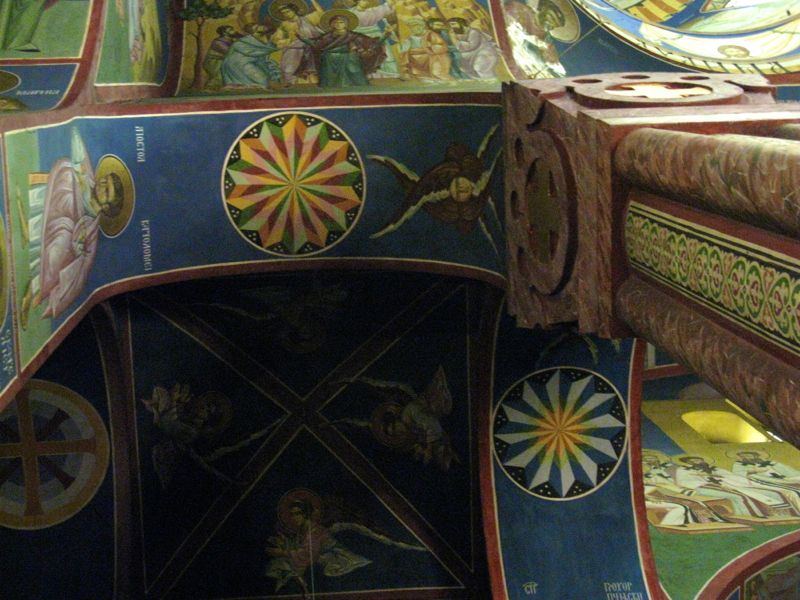
The inspiration for this block came from a combination of the two above blocks. I wanted fewer points than are shown in the church paintings but I did like the division or the “layers” of points. Again, these circles are high above floor level, so they are a bit hard to capture in a photograph.
Here’s some “making” shots:

All three sections joined together, the left side and the right side done separately.
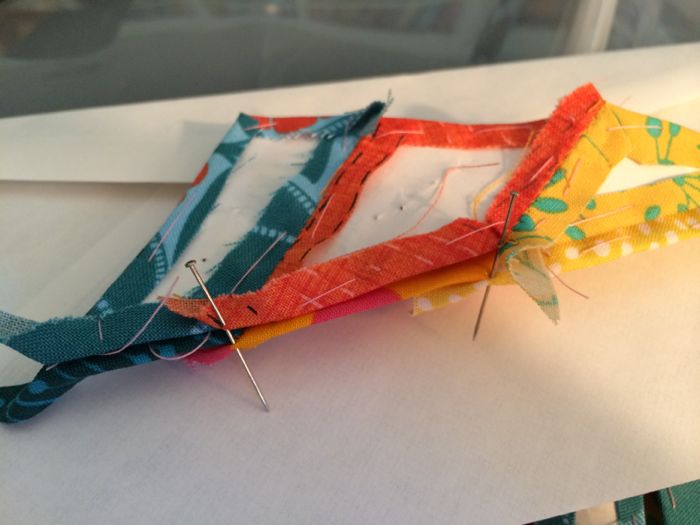
I put pins in the joining seams to keep them aligned as I sew.

I located the tip of the paper inside my basted piece and started sewing them together from the bottom, matching that teensy end first.


This is when I had one done. I laid out all the pieces to see if I liked it. I didn’t.

I had started in the usual way,with the fabrics like this, trying to lay them out as I think they will work in the design.

It looked okay as laid out, but after I finished one, I didn’t like it at all. I brought out more fabrics.

I liked this better, but I kept trying. As usual, I try not to obsess too much about perfection in design and color and pattern and all those other things we quilters worry about. Scrap quilts can sometimes boggle our minds as they don’t fit together as easily as those ones we make from one line of fabric, that line of fabrics perfectly keyed to work together. These kinds of quilts can stretch us as quilters, as well as teach us patience and confidence. But it’s good practice to make up one point of your star to see if you like it, knowing that with a few snips, you can change it out. I kept doing this until I was happy with my choices, and again, made one more star point to check.

I liked it a lot better. Carry on!

This is the photo I took this morning before I starched and ironed it, and you can see how it looks, all soft from the handwork.

Back.
I used the same technique I used in Circles #3, of appliquéing the large pointed circle onto a 14.5″ square of background. Then I appliqué that smaller center circle on, cut out the underneath, snipping away the yellow points. Before I’d done that, it was a bit lumpy there, but it all flattened out once I cut away the points.
I love that color of blue against that tangeriney orange in the second division.
A couple of quilters have written to me, showing me their circle projects. Here are a couple:

Missie Carpenter of Traditional Primitives

Dittany Matthews of Blue Moth
And I found this post from Quilt Inspiration about another quilter’s journey in circles.
I’ll post the next circles block sometime around the first part of November. Have fun sewing!
Discover more from OccasionalPiece--Quilt!
Subscribe to get the latest posts sent to your email.

Thanks for sharing your expertise on these amazing circles Elizabeth! I have the Georgetown Turnaround pattern that has long been on my ‘to-do’ list! I think I need to move it to the top! I love how you share your ideas and are not afraid to change your mind!
I have done minimal EPP but see how well your technique comes together. Beautiful piecings……..variety with enough commonality to be wonderfully cohesive. Love them!!!
This is a beauty!
What a perfect block! I was marvelling at how you lined up that skinny point even though you were going to cover it with a circle. It’s gorgeous. They all are : )
I love these blocks, and am saving them for “someday”. Quilts made from one line of fabric mainly show the fabric designer’s ideas; scrap quilts show YOUR ideas. And it’s great fun to work with what you already have in your stash.
absolutely beautiful!
Great block!
I think this is my favorite one so far. I like the changes to fabric you made and I love seeing the source for your inspiration.
All your circle blocks are amazing Elizabeth, but I believe this one is my favorite so far!
I love that fabric you used for the centre – it’s perfect . And thank you for including an image of my block.
I like this one the best of the first four. I can see a whole of this one. Thanks, Elizabeth. Now if I only had time to do it.