100 Quilts · Quilts

Harvest Weekend

pumpkins

With pumpkins and tawny hues and brown grasses prevalent in the colors at this time of year and in the Northern Hemisphere, falling temperatures, it triggers the idea of harvest: cutting the wheat, gathering the last of the fall vegetables,  All Is Safely Gathered In, and that sort of thing. Well, what constitutes a harvest?

Amish Doll Quilt_detail

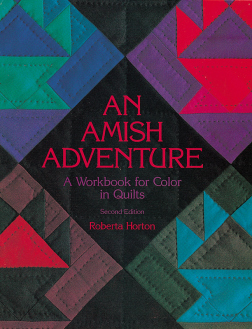
It all starts with seeds, a planting of an idea, a sowing of labor with the yield some time off in the future.  An idea, like beginning to learn how to make Amish quilts from a book, as I sat in the scorching heat of a Dallas Texas summer many years ago, sweat running down my back reading Roberta Horton’s Amish Adventure.

Amish Adventure_1

I had escaped to the back porch for three minutes peace from the marauding hordes of hot tired children in watching some movie on the VCR, steeping my mind in the stillness of these stunning quilts.

Horton Amish-Quilt-1

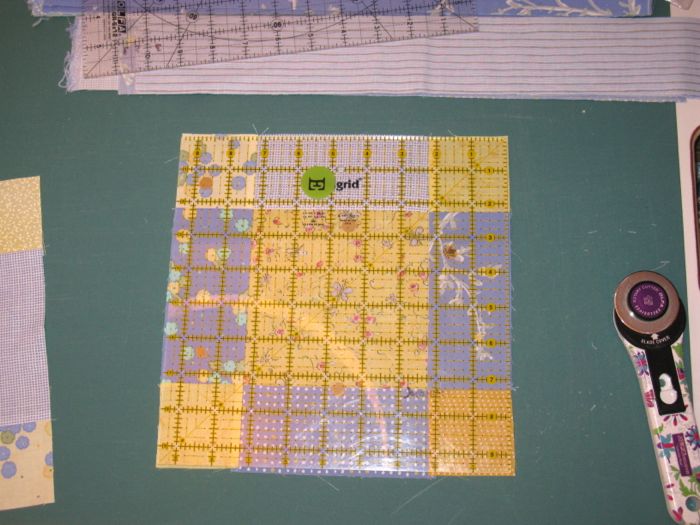
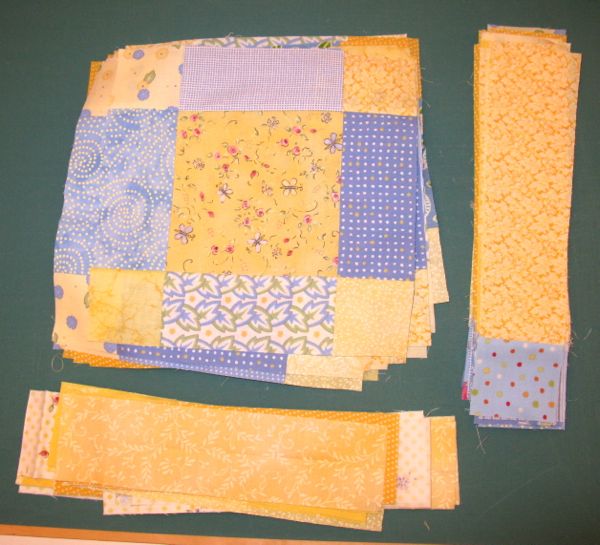
Strong graphic design and the muted, yet brilliant, colors enticed me, and I began small, with doll quilts, experimenting in the shapes, the colors.  At that time the best we could hope in terms of solid fabrics was a mix of cottons and polyester-cottons.  Purists would gasp now, but we had just barely graduated from using cardboard templates with taped edges to cutting out the lids of margarine tubs to use instead.

Amish Doll Quilt_2

Roberta Horton’s book, first published in 1983, rocked my tiny isolated world of quilting.

Amish Nine-patch

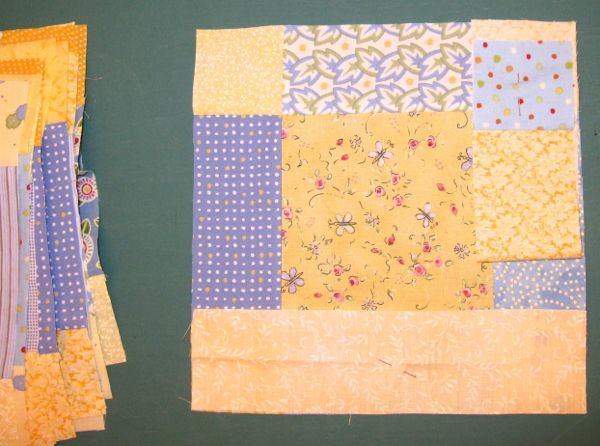
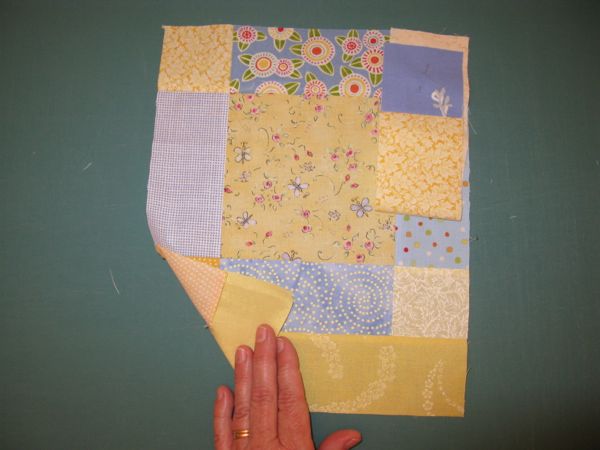
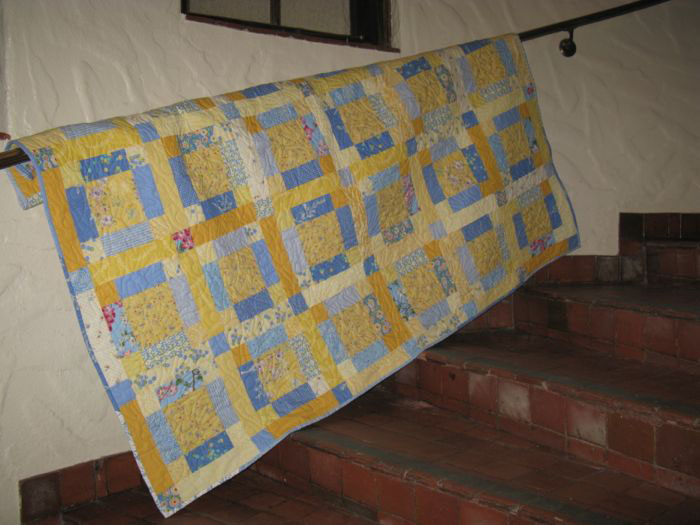
I moved from doll quilt-sized quilts to a larger wall quilt, still unfinished.  And then to a larger quilt, laid out in rows in the corner of my bedroom for weeks, while I refined the gradations of color.

Amish Sunshine and Shadow

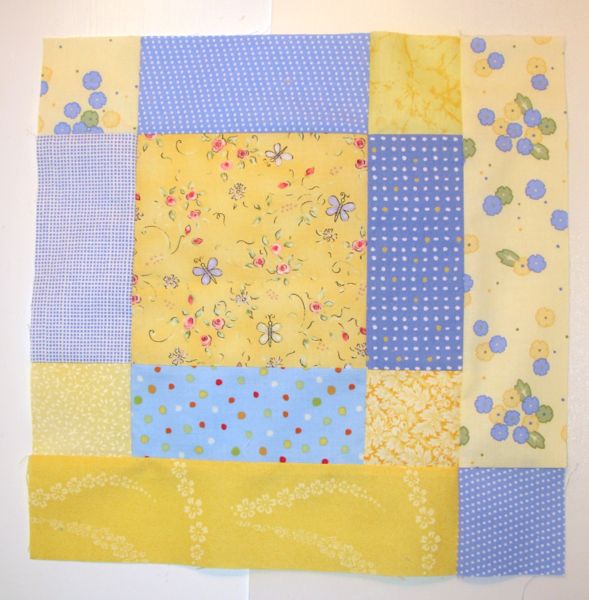
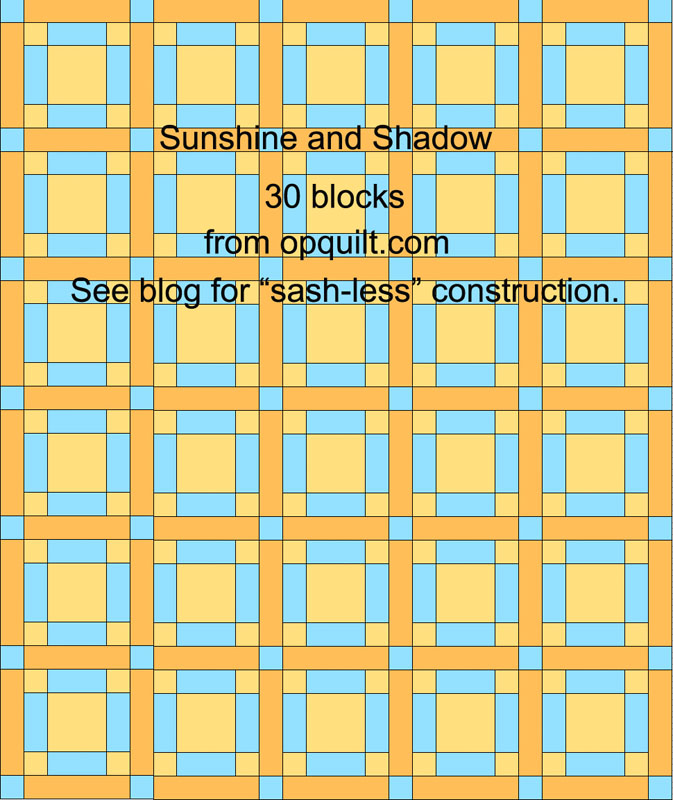
I had drawn out Sunshine and Shadow on graph paper, trying to figure out the coloration, mimicking what I saw in fabric. This was early in my quilting career: all of my quilts on this post are numbers 10 and 11 quilts on my 100 Quilts list.  I also made a faceless doll to match what I’d heard were common in the Amish country.  And then, Amish Quilting was the first quilt class I ever taught, in a small shop in Arlington, Texas, now defunct, and yes, we made a doll quilt, and yes, we used Roberta Horton’s book.

Amish Sunshine and Shadow_back

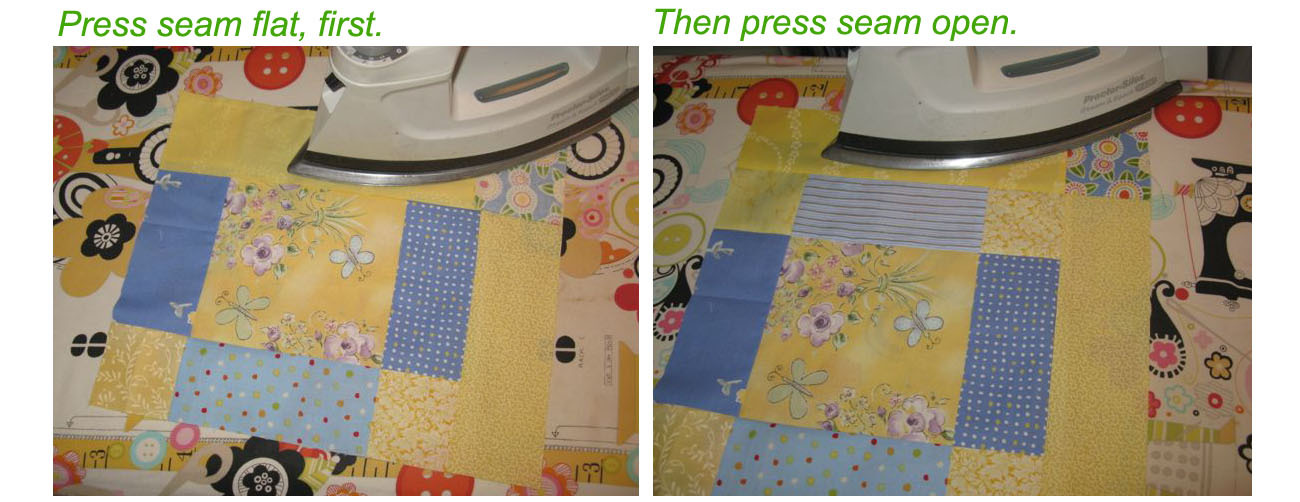
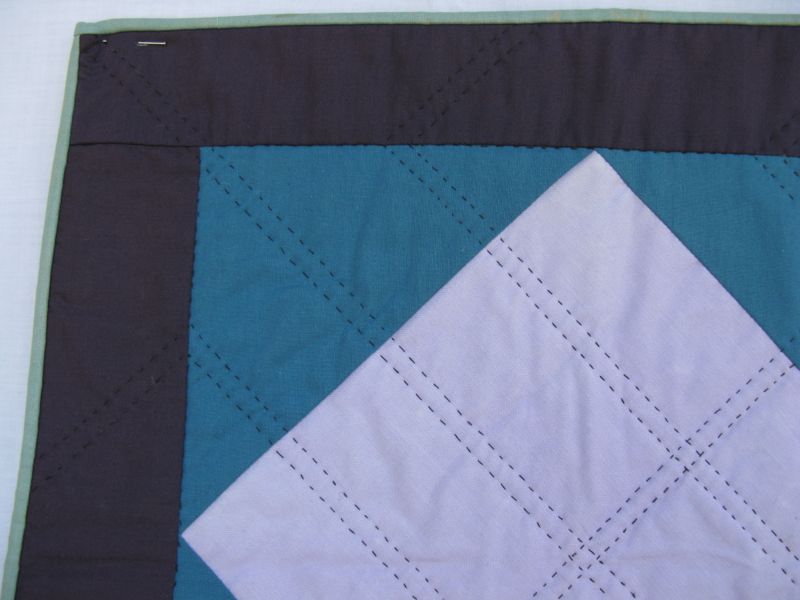
Back to the Sunshine and Shadow, I figured out the borders, sandwiched with flannel (as she noted that Amish quilts were flatter than our fluffy renditions) and I began quilting it by hand, criss-cross, and then cut paper patterns for a twined-vine border design.

Amish Quilts Adventure Continues

The seed planted by Horton and her quilts and her book is now in a second harvest, if that’s possible.  Last summer, C & T Publishers put out a call for Amish quilts of all types to be considered for a new rendition of An Amish Adventure. I submitted my photographs and had one quilt accepted.  The book has now been released and is titled Amish Quilts–The Adventure Continues, and it as much a celebration of that first book in C & T’s publishing history as it is the style and cultural contribution of the Amish quilt–certainly a forerunner to today’s modern quilts.

Amish Quilts Book_2a

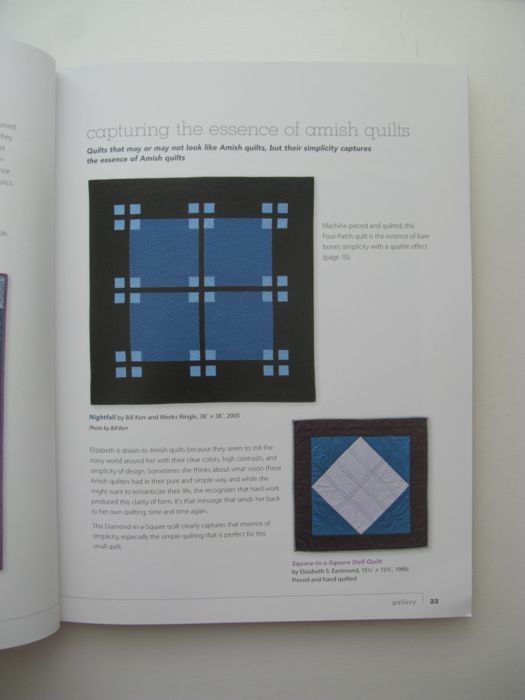
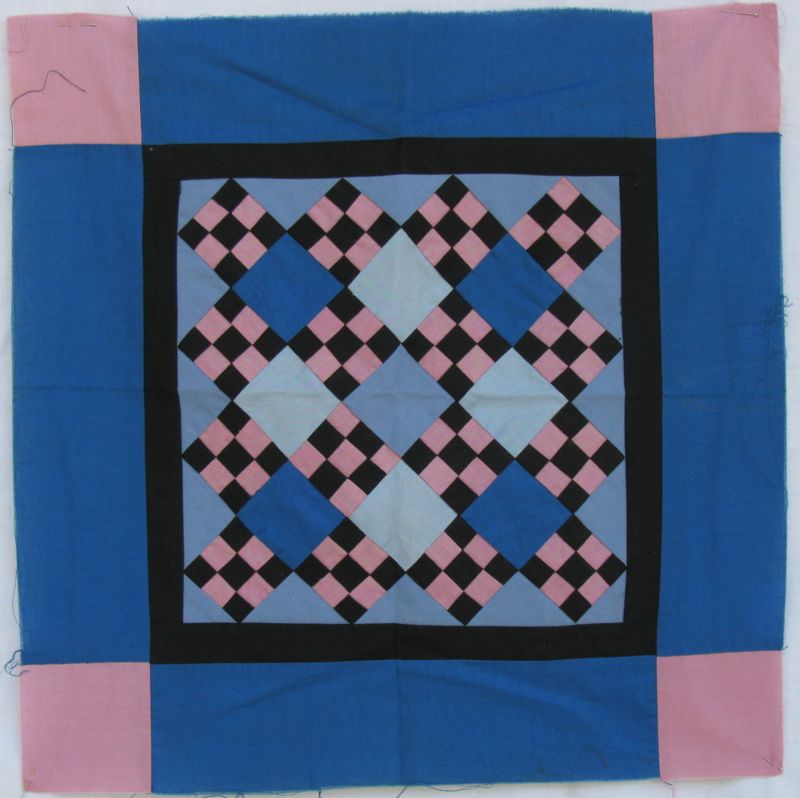
Here’s my doll quilt, made so many years ago.  I now consider it as an entry in the first round of strong bold graphic designs and solid fabrics.  In the book, mine is right next to Weeks Ringle and Bill Kerr, of the Modern Quilt Studio and Craft Nectar blog.  I certainly did do a happy dance in the kitchen as I opened up the package.

You can get the book from the C & T Publishing website and from Amazon.com.  My mother already has her copy, so I know it is shipping.  If you haven’t had a chance to make yourself an Amish quilt, perhaps now is the time, before too many more harvests stride past.

Amish Doll Quilt

I like to think about harvests, as to me it always indicates a leap of faith somewhere.  At some point I made a quilt, and now can “raise the song of harvest home.”

˚˚˚˚˚˚˚˚˚˚˚˚˚˚˚˚˚˚˚˚˚˚˚˚˚˚˚˚˚˚˚˚˚˚˚˚˚˚˚˚˚˚˚˚˚˚˚˚
As a reminder, occasionally my blogging software will include an ad at the bottom of my posts; however, I receive no monies from their ads.  Since I use this software for free, I consider it a fair trade.

200 Quilts · Quilts · Tutorial

Sunshine and Shadow Quilt Tutorial

SunshineShadowBlock

Here’s the recipe for the quilt I gave to my sister-in-law, Janice.  But I think you’ll notice how “lopsided” the block is–and that’s because I wanted to eliminate the sashing step, including it in the making of the quilt.  I also wanted to make this quilt completely from my fabric stash, so I chose colors I had multiples of, in different designs and shadings.  What is sashing?  It’s those long strips that separate blocks from each other and can be part of the design of a quilt, letting each block float in its own little world.  Many modern quilts eliminate them, but I like them occasionally.

Choosing from the Stash

I started with the centers and cut all of them from the same line, but used two versions of the yellow flowers.  Then I pulled out a lot of different fabrics, trying to keep in the same tonality in the blues, and in the yellows, so the quilt top would be harmonious.

1. After cutting, the first step is to sew two blue strips on the sides of the large center block.

SunshineShadow1
2. Sew two yellow blocks on the end of the blue rectangles.

SunshineShadow2

3. Line them up.  After choosing good sets that go well together, stitch the yellow square/blue strip pieces onto the center.  I pressed the seams towards the blue, away from the yellows.  Sew the strips onto the center section.

SunshineShadow3

4. True up, by placing a 9 1/2″ ruler on top.  I found if I trued it up at this stage, the rest of the construction went smoothly.

SunshineShadow4

5. Sew all but one of the blue squares onto the larger yellow strips.  Then get ready to put them all together.  You won’t use all the blue square/yellow strip pieces at this point.  Just set the extras aside.  I wanted to audition how the random yellows and blue fit together, so I took one large block, a yellow strip and a blue square/yellow strip piece, making sure I wasn’t duplicating fabrics in any significant way.

SunshineShadow5

6. I pinned the yellow strip on the bottom, and folded up the other strip and pinned it to where it would eventually be sewn.  Sew on the yellow strip.

SunshineShadow6

Here it is, with yellow strip sewn on, showing that I pressed the seam to the outside yellow.

Pressing

In all cases, first press seam flat to eliminate puckers, wobbly edges, then press the seam open.

SunshineShadow7

7. Sew the blue square/yellow strip piece on the center construction, matching seams, etc.  This is the finished block.

SunshineShadow8

8. Because my pin wall is longer from side to side, than from top to bottom, I rotated the blocks a half turn and laid them out on the wall.  I kept using my digital camera to make sure that there weren’t too many of those darker yellow-gold pieces mushed together, as well as eyeballing a good distribution of the rest of the colors.  The quilt looks a bit strange now, because you are still missing a length of “sashing” on the left side and on the bottom.

SunshineShadow9

9. Because I still wanted to sew these as blocks, I laid out the “sashing” pieces, each with a blue square on them, where they should go. I laid them out, again checking for color and value distribution.  I had to sew that random last blue square onto a yellow strip/blue square piece, then I sewed these pieces onto the adjacent block.  When you replace these new expanded blocks on your pin wall, be careful not to rotate them into a wrong orientation. Use your last digital photo as a guide.

10. Put quilt together:  I put row markers (shown in *this post*) on the blocks on the left side of the wall, in order to keep track.  Then I stitched the rows together, going across.  Stitch rows together, going down, until the quilt top is complete.  I think it goes much faster (have I said this before?) because you are sewing blocks, rather than long strips of sashing.

SunshineShadow FavMuseumShot

Quilt as desired (and my favorite way is calling Cathy and having her do it for me).  I used the extra bits of blue strips I’d cut out, plus extra, to make a scrappy binding.

Okay here’s the honest truth: I started out with a completely different idea for this quilt and cut a whole lot of blue and yellow fabrics into 2 1/2″ strips, but realized that my time was short so I had to step up to a quicker quilt.  That’s when I had the idea of adding the sashing pieces to the block, because sometimes sashing just wobbles and stretches and becomes one pain-in-the-rear step to making a quilt.  This was was much faster, and I think the integrity of the quilt doesn’t suffer for it.  You’ll notice I tried to press to the “sashing” side always, as I think that distinguishes those pieces from the “block.”

SunshineShadowLabel

To make the label, I did the usual method of pressing some fabric to freezer paper, running it through my Epson printer (they have the best inks), bordering it, then stitching it onto the quilt invisibly around the outside edges.  I also like to do it on the inside edge of the border, where the label meets the edging.  No one can tell, but it poofs out less from the surface of the quilt if it has that second round of stitching.

SunshineShadow

BlueYellowFullQuiltwTitles

I’m actually planning to make another like this, as it is really quick, and I like the fact that I can use up my stash.

I seem to have lost a few days here, but with the weekend coming (a holiday weekend!), I hope to find time to dive into some stitching, and some blogging.

200 Quilts

Sunshine and Shadow

QuiltingSunshineShadow

Thanks be to you for all your sweet and touching comments about my brother-in-law’s passing away this week.  I read all of them to my husband (it’s his sister’s husband who died) and will mention them to her a bit later, when the family has all gone home.

SnowyDay

The drive up the state was snowy, yet in between being worried about the roads and driving and those semis, the snow would stop for a few minutes and I would see winter scenes like the one above.  I stitched the binding on as we drove (the first picture is a shot of the quilt on my lap).  We stopped in a snowstorm to buy a ribbon for the quilt, then I needed a place to photograph it before sending it on its journey.  But where?  There were lots of beautiful old farmhouses, but we were in the middle of huge snowstorm.

SunshineShadow2

Then I thought of the Springville Art Museum, where I’d seen a quilt show the summer before.  It was perfect.  I explained my story to the docent at the front desk and she was enthusiastic. ( This may be the closest I ever come to having my quilt in a museum.)

SunshineShadow1

Draped up their curving staircase.

SunshineShadow 4

And over the top of the grand piano in the Grand Salon.

LadyinBlackwithQuilt

I loved this painting of a woman looking mysteriously out from underneath her hat.  Title: Lady in Black.  So I titled this picture, Lady in Black with Yellow and Blue Quilt.

By now we thought that Janice was back from picking up the last in-coming daughter from the airport so we drove over to her house to drop off the quilt.  There were tears as we talked, visited with her family, discussed the plans for the funeral and burial tomorrow.  More tears, and she apologized for crying.  We hugged.  I told her the quilting was hearts and hands–hands to give her a quilty hug when I wasn’t there, and hearts so she’d know that she was loved.

The title of this quilt is Sunshine and Shadow, taken as much from the colors in the quilt and gradation in colors on the backing as from what life hands out to us on a regular basis; you know what I mean.  As I sit here tonight typing this, my husband is writing his talk for the services, my other sister-in-law has started the laundry for her mother who took a fall and can’t live by herself anymore, and up on the wall behind me is a sampler declaring “Tis a gift to be simple,” made for them by a young married daughter who has rheumatoid arthritis and can’t stitch anymore.

Those shadowy times are in all our lives.   But we look to the sun, and go forward.

SunshineShadowback1

Quilts · Something to Think About

On A Day Like This

What do you serve for dinner on a day like this?  It’s a day where the food needs to be hearty and warm and go down easily in between the tears.  Soup?  Spaghetti made with that good sauce from Trader Joe’s?  Chocolate needs to be in the picture, better schedule some brownies for dessert.  A whole pan, so more can be cut up and carried in the car on the way to the funeral.

What do you do on a day like this?  The news came early this morning, my husband weeping as he tells me of his brother-in-law passing away in the morning.  I am strong.  I don’t cry.  I get more information later, that my husband’s sister was sitting at Bruce’s bedside, having been awoken at 4 a.m. by her daughter, each taking two-hour shifts through the last few nights.  They sat there, his breathing diminishing, faltering, until at 6:30 it ceased.  A quiet, in-sleep, in-home death.  One we all would choose if we could.

IMG_6738

On a day like this, I finish up the quilt and the angelic quilter lady agrees to a rush job and later, much later, after I sit numbly at the computer, and I become not strong, do I realize how Bruce’s death diminishes our family.  This is not a new idea.  I felt it when my other brother-in-law died, when my husband’s parents died, when my grandmothers died and it has been expressed by writers since time began.  It just feels new, each death bringing with it memories and associations and words that can not ever now be spoken.

IMG_6737

On a day like this, I clean out a cupboard and jar breaks.  I look at it, get the dustpan and broom, wander to the mailbox, ask the neighbors to throw the papers on the porch while we’re gone and then the quilter drives up, bringing me my quilt, making me cry again.  Because.  Because on a day like this we need hands to hold us, hearts to share our sorrow.  And something easy to eat for dinner.