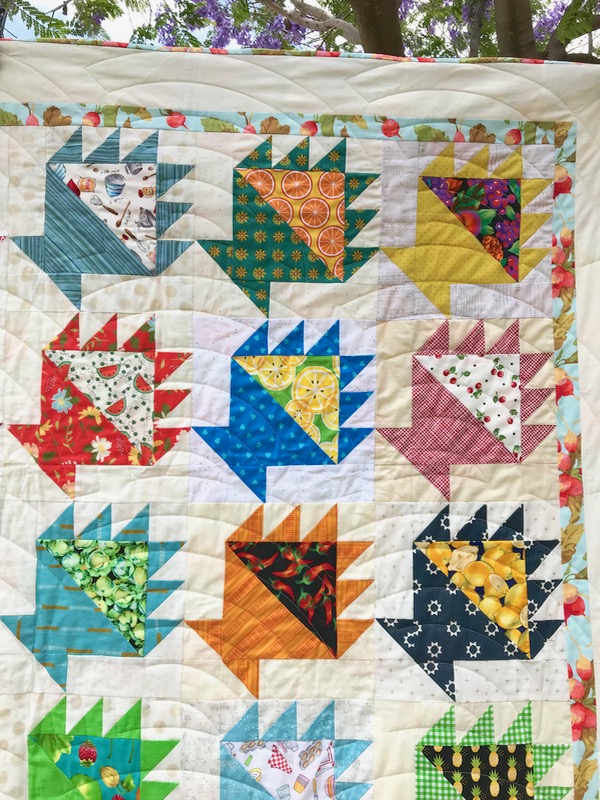
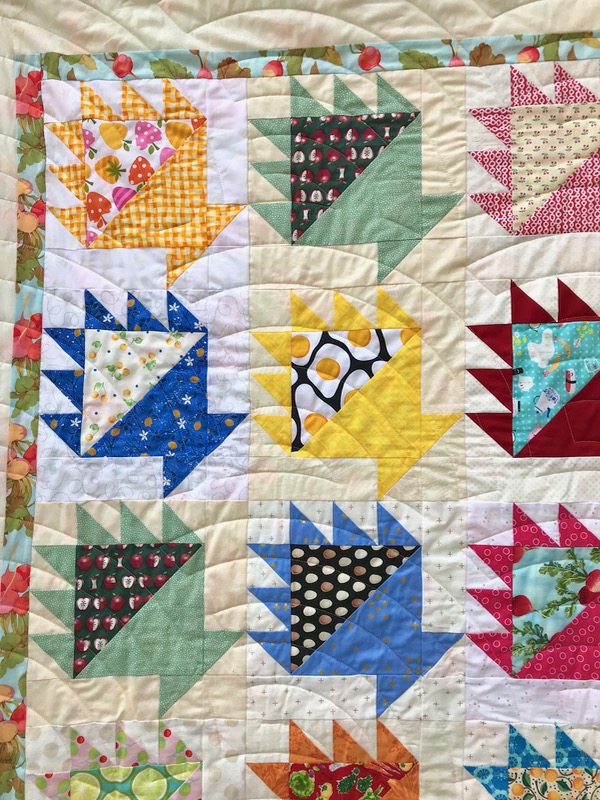
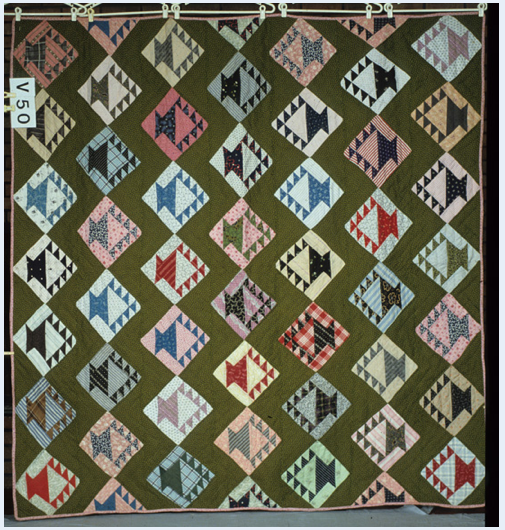
Delectable Baskets • Quilt #220 Approximately 70″ wide by 90″ high
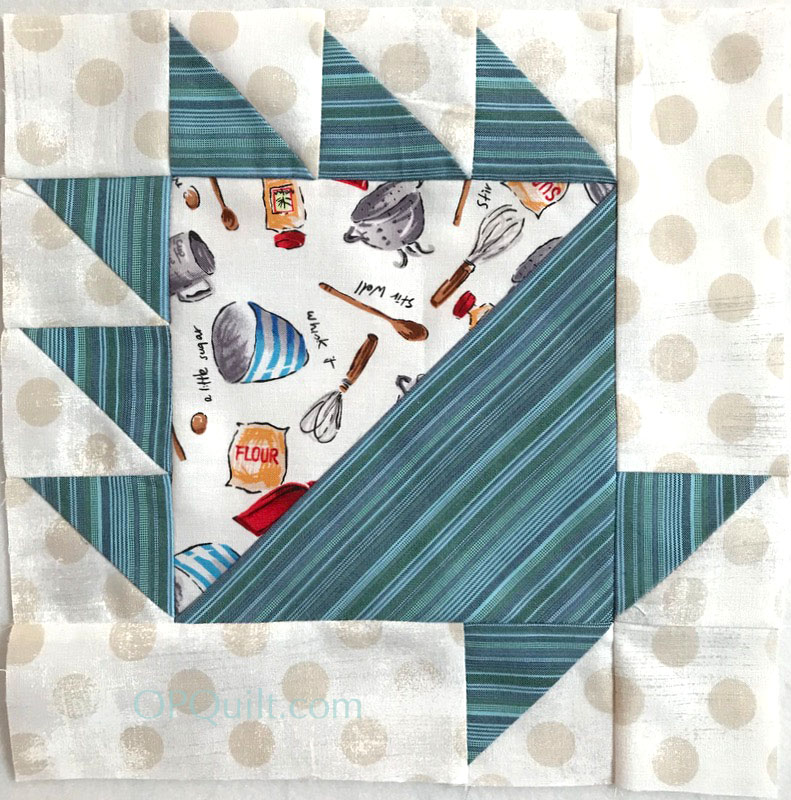
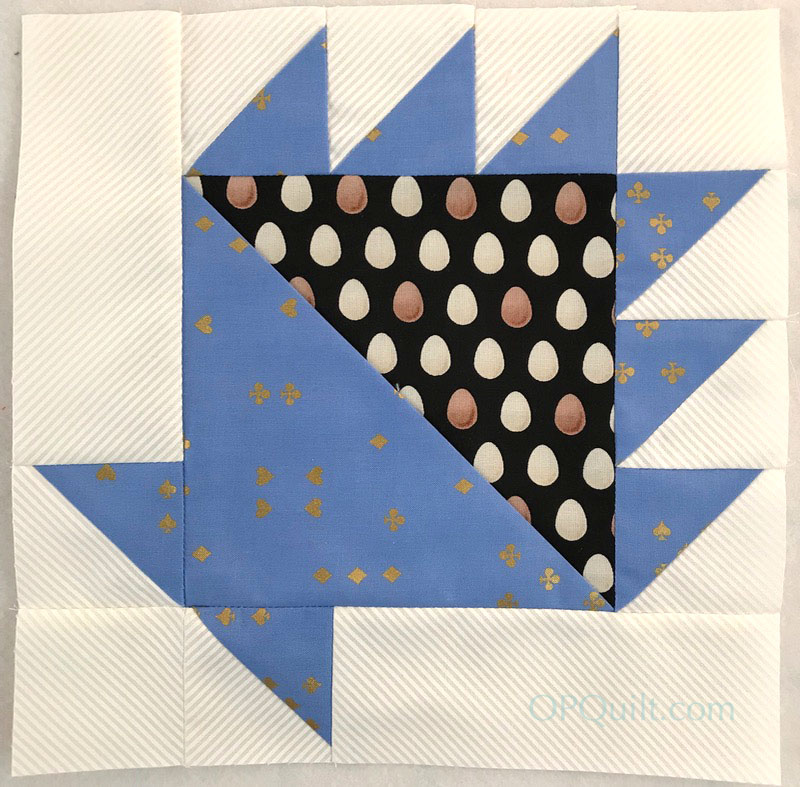
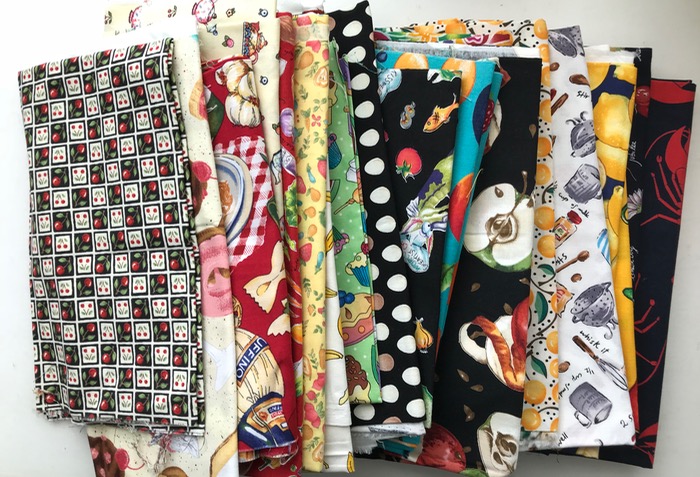
Delectable Baskets gets its name because each basket is filled with food — well — food fabrics. I’d been collecting for over twenty years, so I had a few to choose from. In February 2018 I was Queen Bee for the Gridsters, and put up a post about making basket blocks, deciding that I wanted to use my collection of fabrics with food motifs. I sent each of my beemates a couple of squares. (There is a free basket tutorial on that post, if you are interested in making some baskets.)
Not only did my Gridster Beemates send me blocks, but a few other long-time friends sent them also; I had so many blocks that my quilt grew and grew, and then it was overflowing, a lovely dilemma to have. So I pruned it a bit, as I was aiming for twin-size, and still have enough baskets for an upcoming wall-hanging.
Cathy of CJ Designs did an expanded Baptist Fan on it, leaving it nice and soft, which is a good thing, as I intend it for use in the guest bedroom, which is currently the quilting-and-thread-storage bedroom. I promise that maybe I can share.
The back, using some Phillip Jacobs (on the right) and some Marimekko (from Crate and Barrel’s outlet sale some years ago). The signature blocks (the white Xs) are pieced into the Phillip Jacobs, or at least I think that’s who designed that fabric. At any rate, the print is a lovely-as-can-be radishes.
Thank you to everyone who sent me blocks. Delectable Baskets has been on my radar for a couple of decades or more, beginning with visits to Fabric Patch quilt shop, the vendor mall in the early years of Road to California, a couple of Southern California Shop Hops, and an occasional trip to Utah. There were no mail-order shops then, as there was no internet then. We bought fabric from JoAnns which it wasn’t then (maybe Cloth World?). I accrued fabrics a yard at a time, a piece at a time, a slow compilation.
This quilt was finished in an era where everything is on hyperdrive. The internet runs, assists and invades our lives, helping and hindering us in our quilting. Sometimes we are in a quilt bubble, making the same quilt (see my Flag Quilt from last post), using the same colors, same fabric lines. Other times it brings us news of friends in Australia, in Japan, Canada, Germany and certainly from around the United States, and allows us to meet and be friends with people all over the world.
Our gathering of Gridsters would not be possible without the internet, and all members, past or present, contribute to my life is a positive and beneficial way.
I am happy to know you all, Gridster Bee member or not. Thank you for enriching my life, making it a veritable feast. I dedicate Delectable Baskets to you.
I belong to an online bee called the Gridsters, and February is my month to choose a block that my beemates make for me. You can find all our work on Instagram, using the hashtag #gridsterbee.
I chose a basket block.
I also have been saving food-themed fabrics forever for a basket block quilt with the baskets full of food beginning at least a couple of decades ago, and continuing as I picked up a food fabric here and there.
I was also inspired to make basket blocks by Barb, of Fun With Barb and Kelly of Pinkadot who decided to do it together; their tutorials are on each of the links, above. I upsized the basket block to 10 inches in size, so the making would go faster. (You’d think with all the quilts in this house, I would have enough twin-sized, but I don’t, so I’ve already decided that’s the size it will be.)
If you want to join in with me, or Barb and Kelly, in making baskets, I’d suggest we follow their request to tag our Instagram photos with #basketswu [Baskets Sew With Us]. (Gridsters please tag them also with #gridsterbee.)
For the Gridster Bee
I’ve sent you some food fabrics; please use those for the A section of your blocks. I don’t care what you use for the basket–it can match, it can contrast, it can coordinate, it can clash–choose what you think creates the look you want. You can use small scale prints, large prints, florals, novelties, checks, whatever.
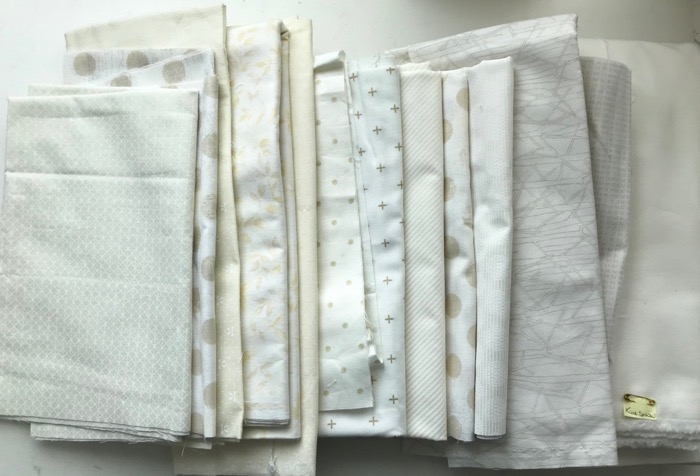
For the low-volume background, use these types of fabrics:
They are a range of creamy-toned fabrics, without strong secondary designs.
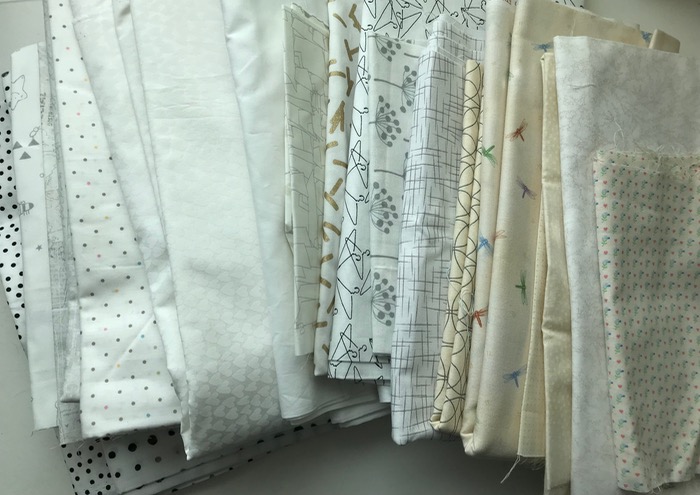
Avoid these types:
Solid in creams is okay, but avoid white, grey, tan, beige, white-on-white (I really don’t like beige for this quilt, but understand the limitations of our stashes–just do your best). Many of the above fabrics have strong motifs and patterns, so reject those too. Basically, I want the background to recede without being dull or same-same.
Basket Tutorial
Not to size, for reference only–please use the PDF link below.
Here’s my cutting sheet for this tutorial, in PDF form, but the usual requests apply here–don’t print off a million copies for your mother and your friends, but please send them here to get their own: Basket Block 10 inch_OPQuilt
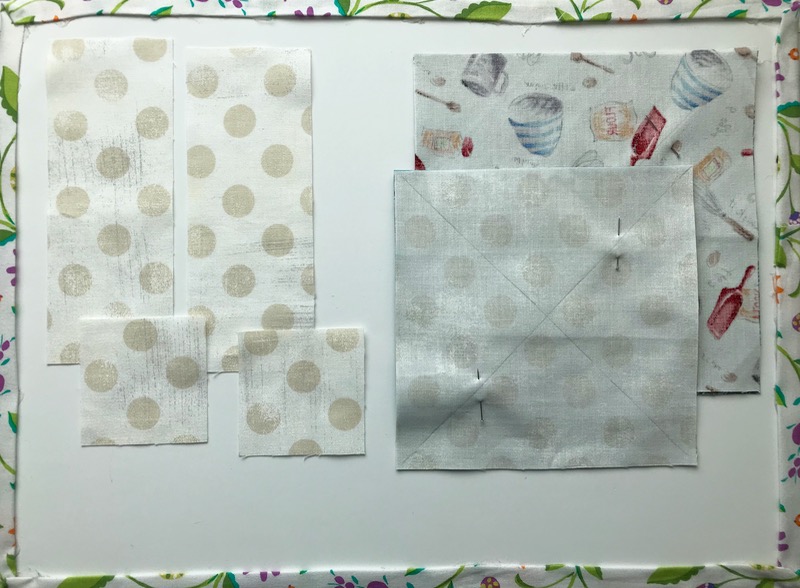
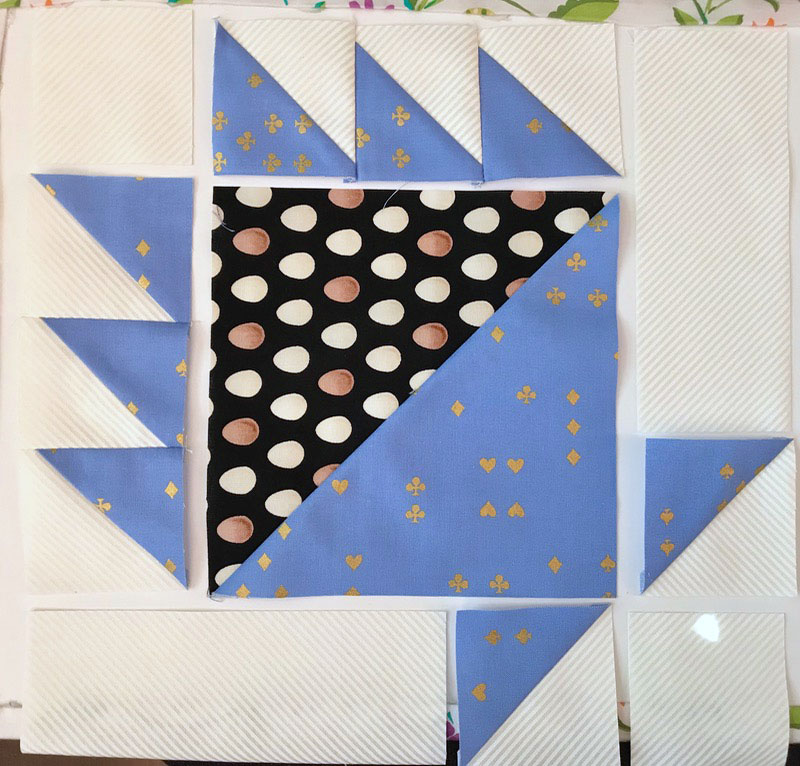
All my basket pieces laid out.
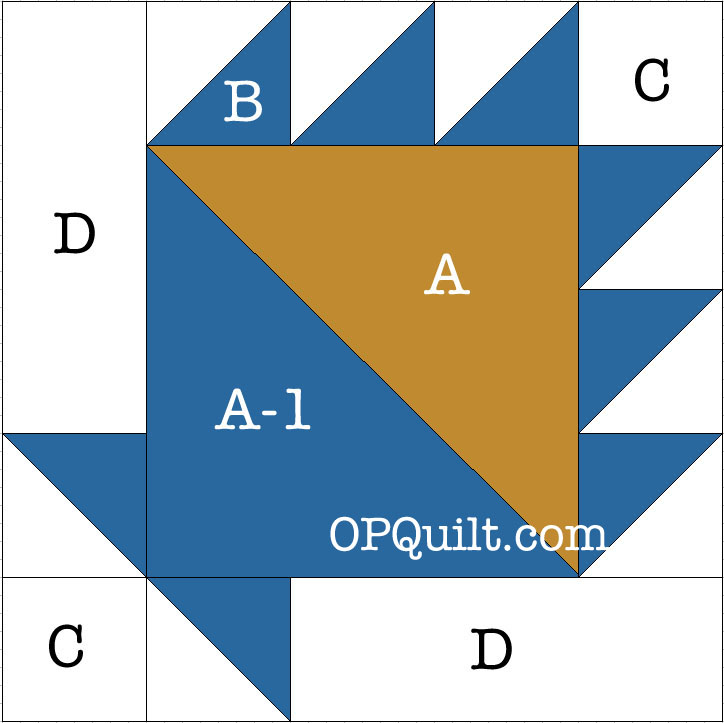
First, make the Half Square Triangles.
[Background: One method is from Alyce, and she has a nice chart if you want to figure out your own eight-way Half-square Triangles. However, I also have a different chart on this post which came from Jeni Baker, who encourages the use of a bigger initial square. That means for us (and especially if you like to trim your HSTs) you would begin with a 6″ block, which is what I’ve specified on the cutting chart. BTW, her book on triangles is a good one to have in your library. ]
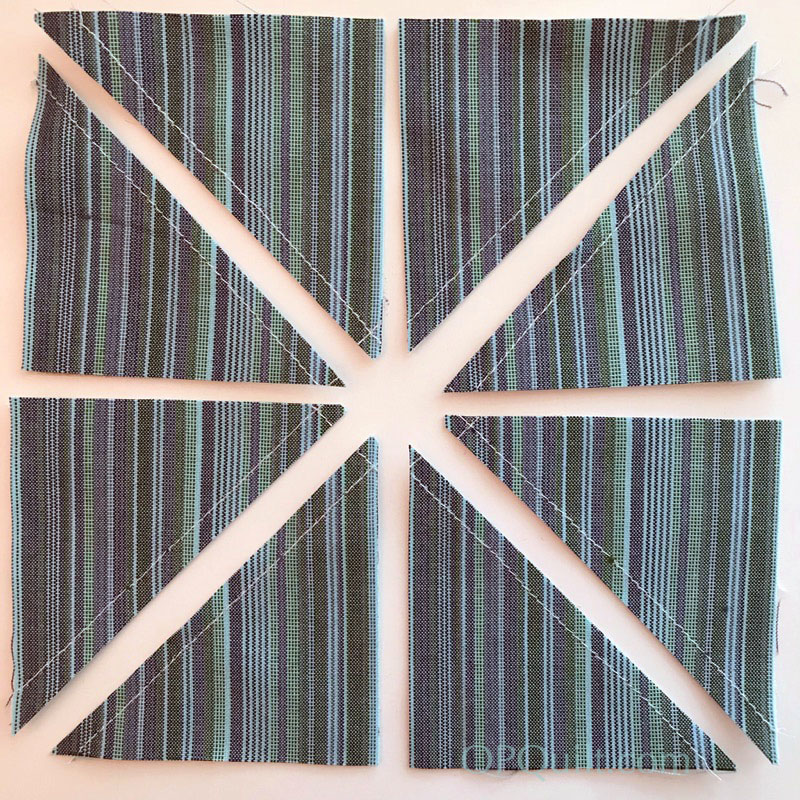
Place one 6″ background square and one 6″ basket square right sides together. Mark two diagonal lines, and sew 1/4″ on either side of the marked lines. On the left is the pieces with the sewn diagonals. Press it flat to settle down the wrinkles, which you see on the right.
I moved mine apart to demo this; leave yours close together.
Cut on marked lines. Now without moving your squares, cut on mid-lines, crossing the centers, as shown below. Press, with seam allowance to the dark side, trimming out dark fabric, if necessary, so it doesn’t show through. Trim to 2-1/2″ inches square.
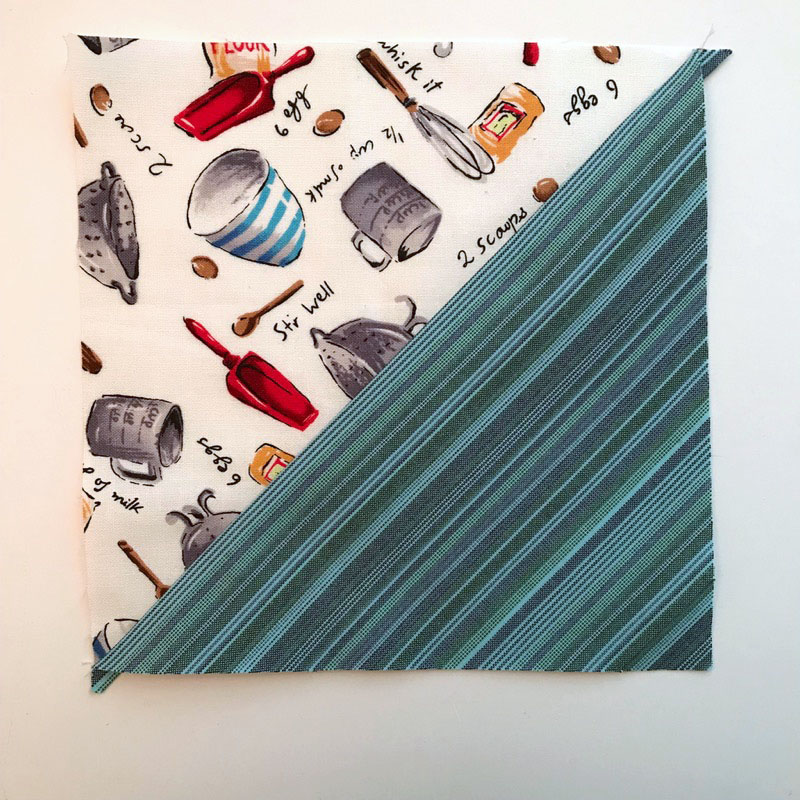
Make center half-square triangle (piece A-1): Place a food fabric (measuring 6-7/8″ square) onto a basket square (same size), drawing a diagonal line, then stitching on either side of that line. Press, then cut on marked line, then press towards the basket. You’ll have an extra center to toss into your Random Patches Box. (You do have one of those, don’t you?)
Press seam allowance ALWAYS towards basket, to give that dimensional look that something is IN the basket. Now trim that center to 6-1/2″.
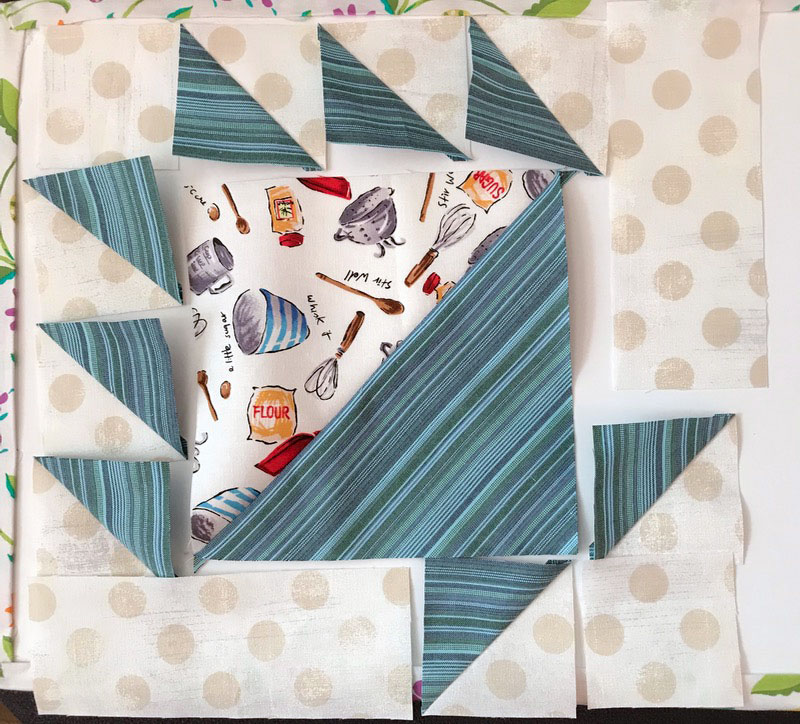
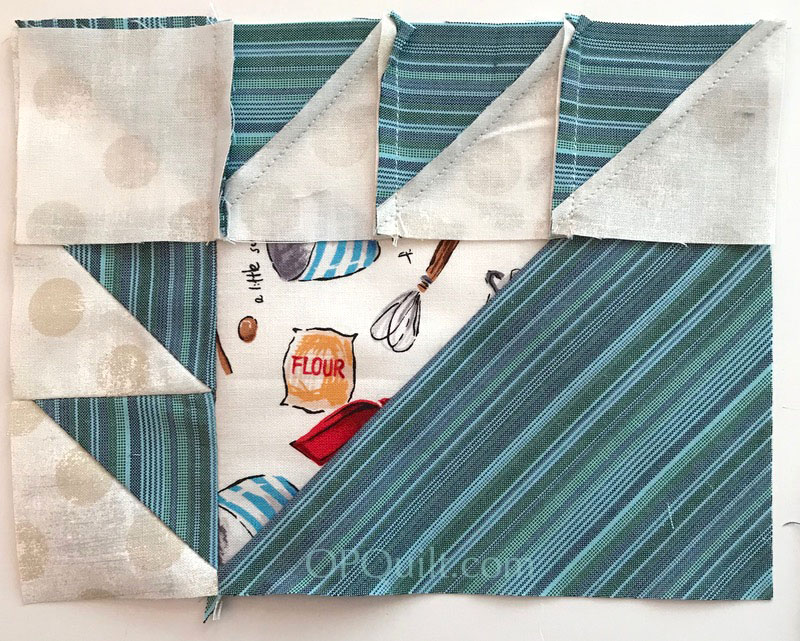
Here are all the pieces, laid out. I chose a stripe to demo, so you can see the direction the stripes go. If you use the eight-at-a-time half-square triangle method, you’ll have no problem getting the stripes in the small half-square triangles go the direction you want. Yes, I did cut the 6-7/8″ square (basket) on the bias, so I could have the stripes go across the unit.
I made two blocks at once; one had a light center, and one had a dark center.
Stitch together the three small half-square triangle pieces; press in the direction they want to go, which is usually toward the flat triangle piece.
Stitch one 2-1/2″ block onto one unit (shown in upper left corner). It helps to arrange your square as you go, so you get everything all sorted out right.
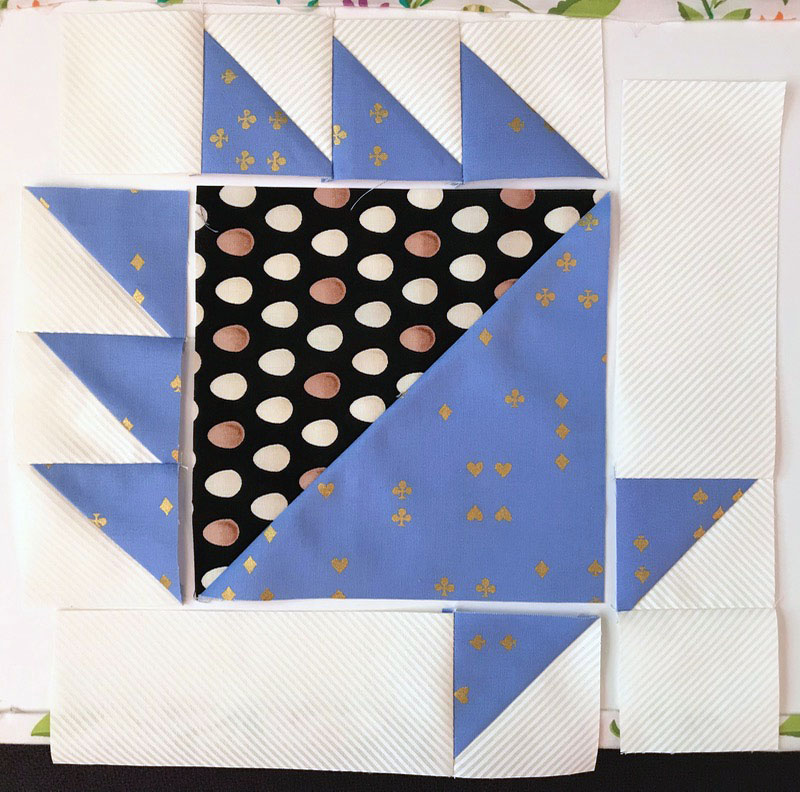
Sew the first three-unit “basket handle” to the center HST, as shown on the left. Press seams away from basket, even though they don’t want to go there, again to preserve the illusion that something is in your basket.
Sew the second three-unit “handle” with the C square to the center unit, as shown. I pressed the square C-block toward the three-triangle unit so that the seams would nest neatly when I arrived at this step.
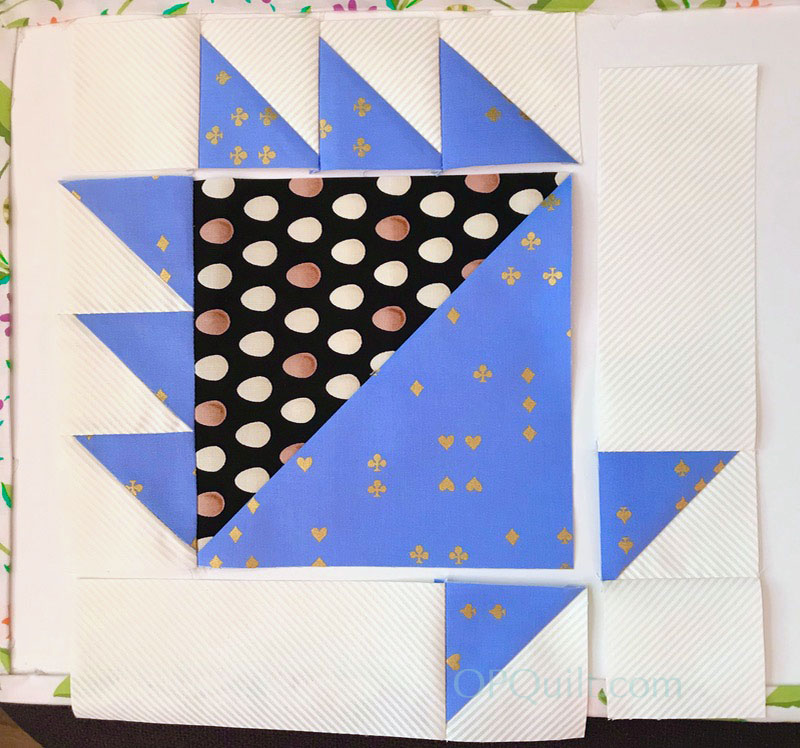
Create basket stand by sewing one of your small HST to the D-rectangle. Pay attention to which direction the triangles are going. Stitch this first unit onto the basket.
Repeat with second HST and D-rectangle. Sew ONE of the C (2-1/2″ squares) to ONE of the basket stand units. Stitch this onto the existing basket.
And you are done!
There are lots of fun ways I can finish this basket quilt:
I like this setting, with all those energetic chevrons in between the baskets.
Looks like red is a pretty popular color for setting these blocks. I have more basket ideas on my Pinterest site, if you want to see more block settings. (I’ve been collecting these ideas for ages.)
Thanks to the Gridsters for making me baskets this month, and I hope you all have fun making a few for yourselves.
This very cute quilt arrived yesterday from Jana, my (secret) Simply Mini Quilt Swap partner. Boy, was I bowled over–I love it! I had to take it outside to my back fence photo studio today to get a good shot of it and I love the pinwheels and the colors and that perfect binding. Thank you so much, Jana!
This too-light, too-washed-out, picture doesn’t do the blocks from the Traveling Threads Bee justice. They are a collection for Marci, who is making a sampler quilt. As always, I tried to look at the quilt to see what it needs, not like I’m some quilt-whisperer or something, but just every once in a while, it can just pop into your mind.
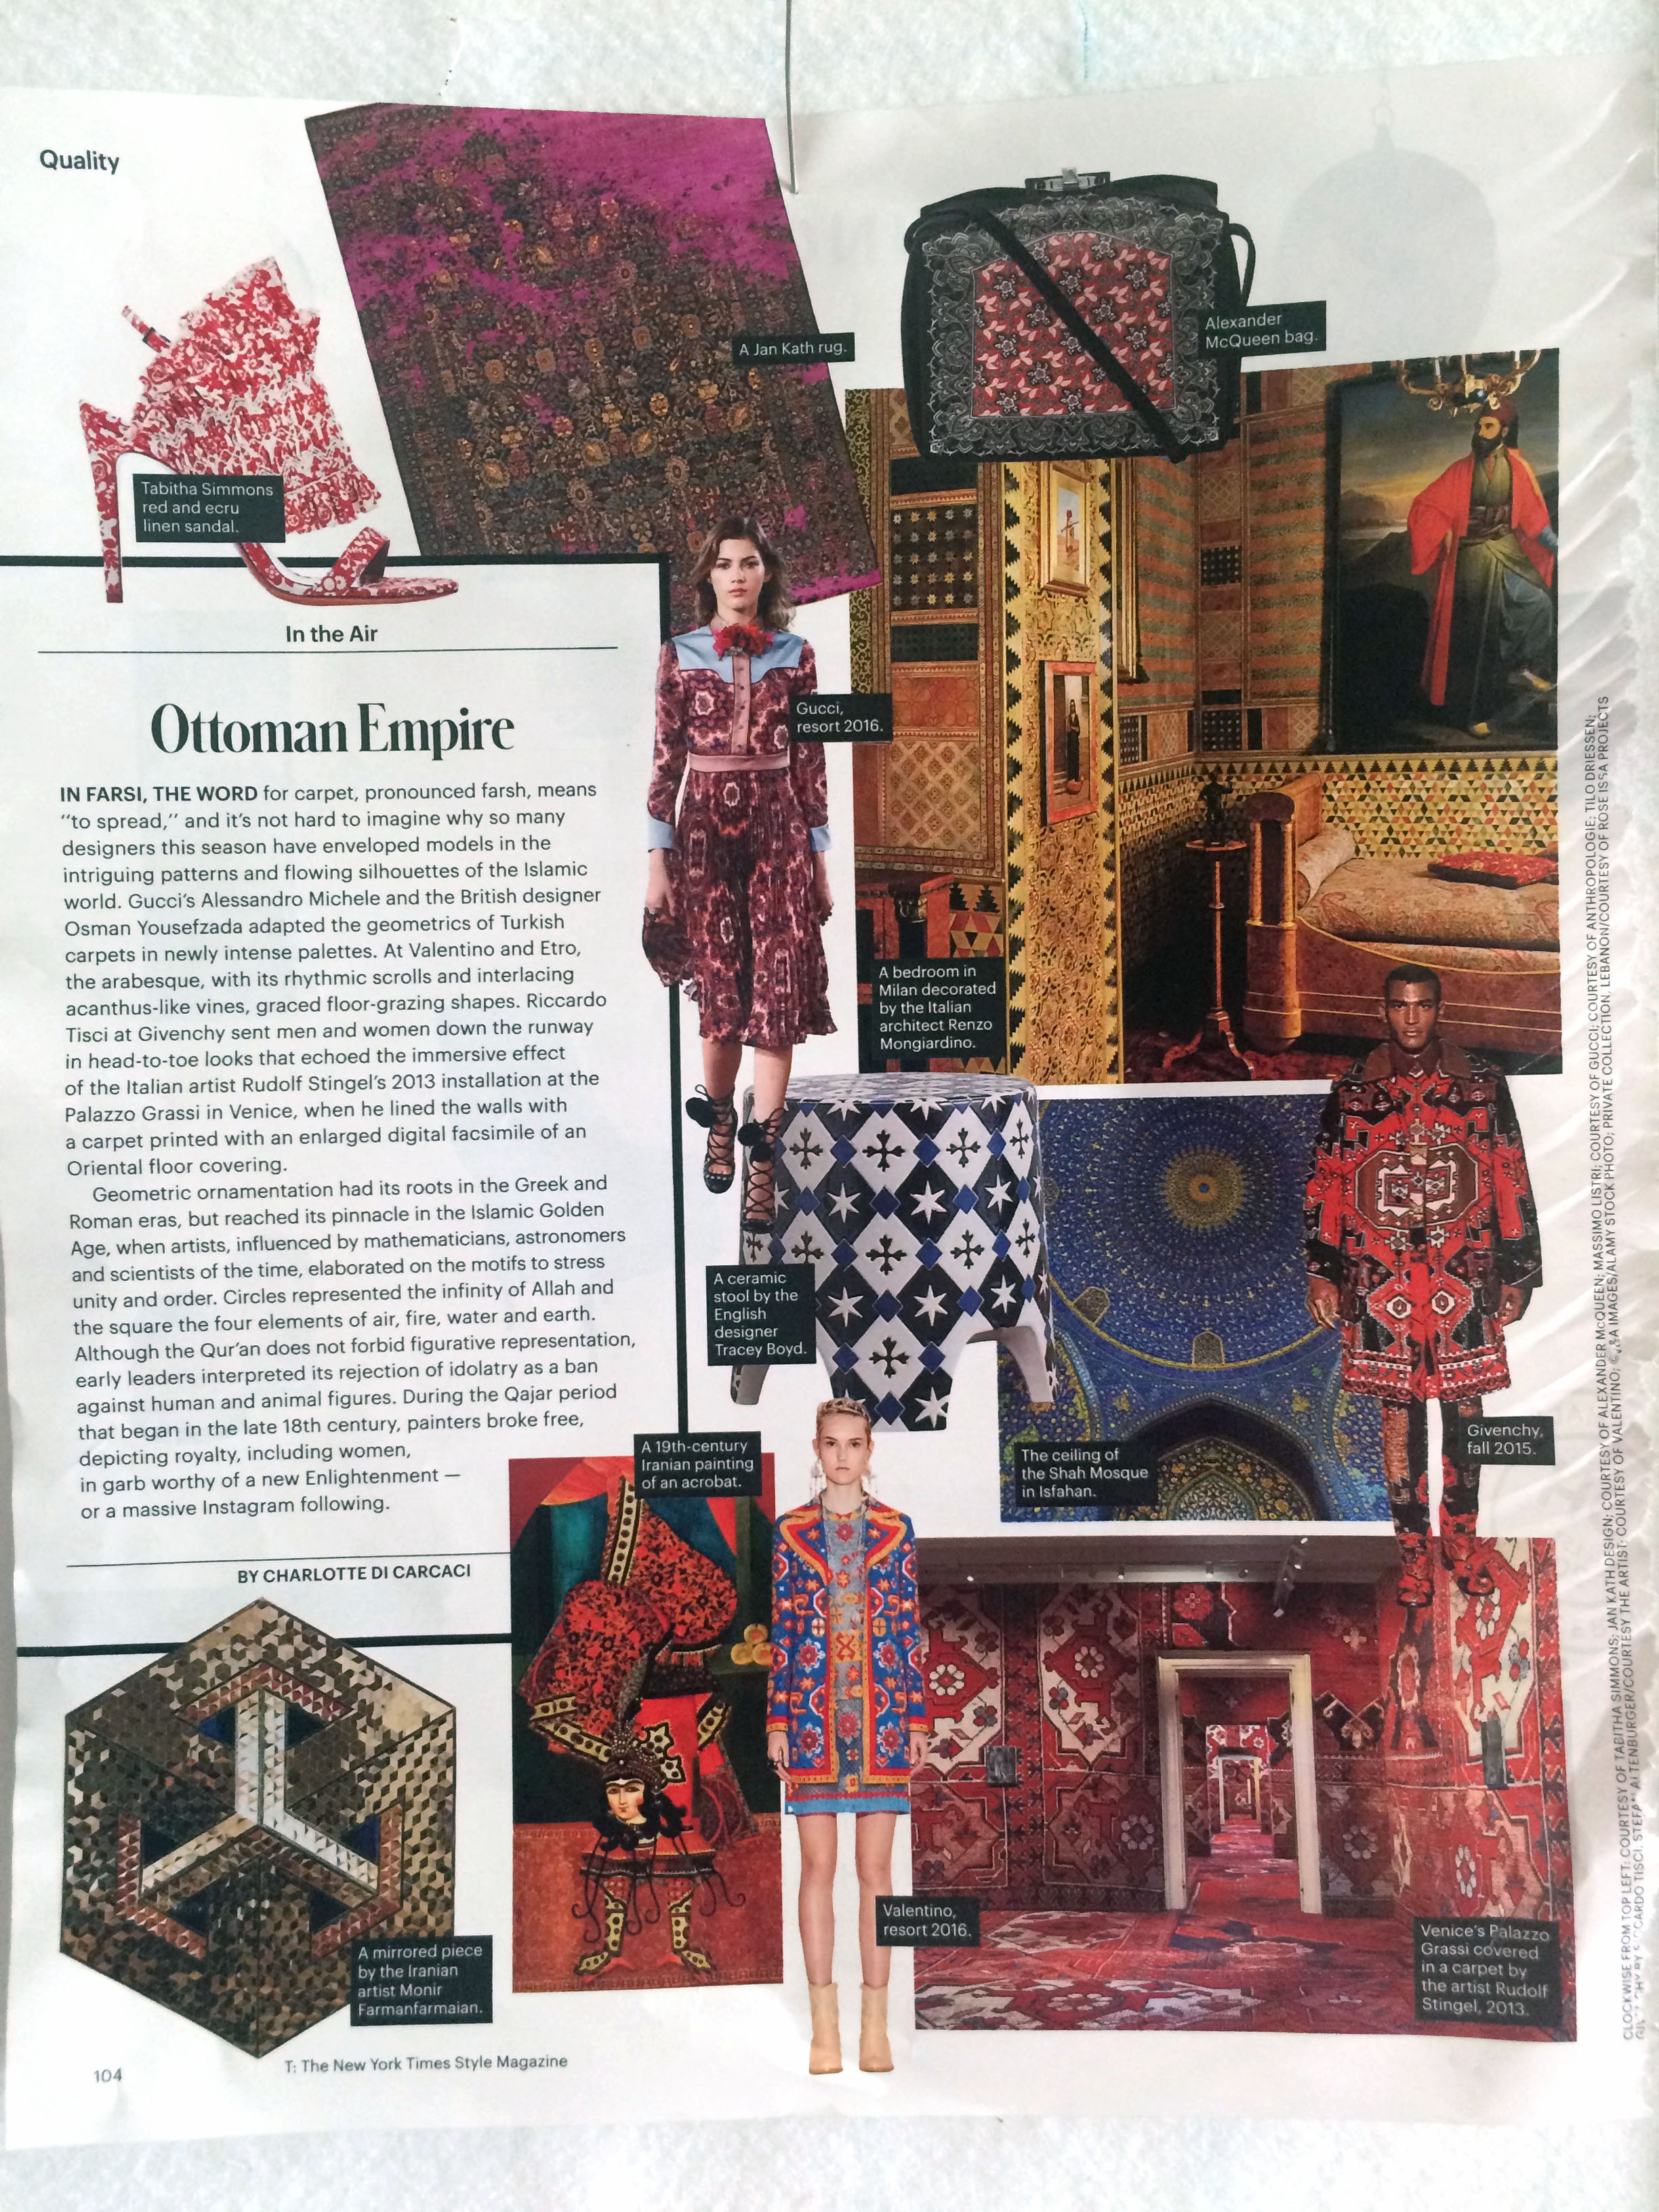
And since she specified she wanted a sampler quilt, I decided it needed some curves, as in a basket block and a Dresden plate block. I cleared the Dresden with her, and just threw in the basket with that curvy handle. I set it on some of Marci’s favorite fabric: the clothespins. I think I only have one more to go until I’ve finished making for my bee-mates. The regular delivery of these treasures seems to have bunched up somewhere; hopefully it will arrive before Christmas!Some more sewing. . .I had fun sewing on the various badges and rank achievements for four Scouts: my eldest son and his three boys. It was like deja vu to an earlier time. I clipped this out of the New York Times style magazine this past Sunday, as I loved all the texture shown, both in architecture/design and in fashion. We who are doing the Millefiore quilts are right on trend! Which reminds me that I need to get back to that. . .
. . . right after I finish up my Four-in-Art quilt, which is posting this coming Sunday, November 1st. This is the last post of our literature theme, and I look forward to seeing all the creations of those in my group.
I did finish up my Quilt Abecedary project: a way to teach myself how to make quilt letters, in preparation for the 2016 Spelling Bee, a group who will make quilty words for each other. I hope I’ll improve in my lowercase k skills in the future. That one was tricky.
We think we are finally turning the corner on summer and finding our way to fall, which means get our fall garden planted: spinach, cabbage, lettuce (2 kinds), a Glacier tomato plant (trying it for the first time), oregano, chard, cauliflower and broccoli. Some of these are new to me; we’ll see what survives.
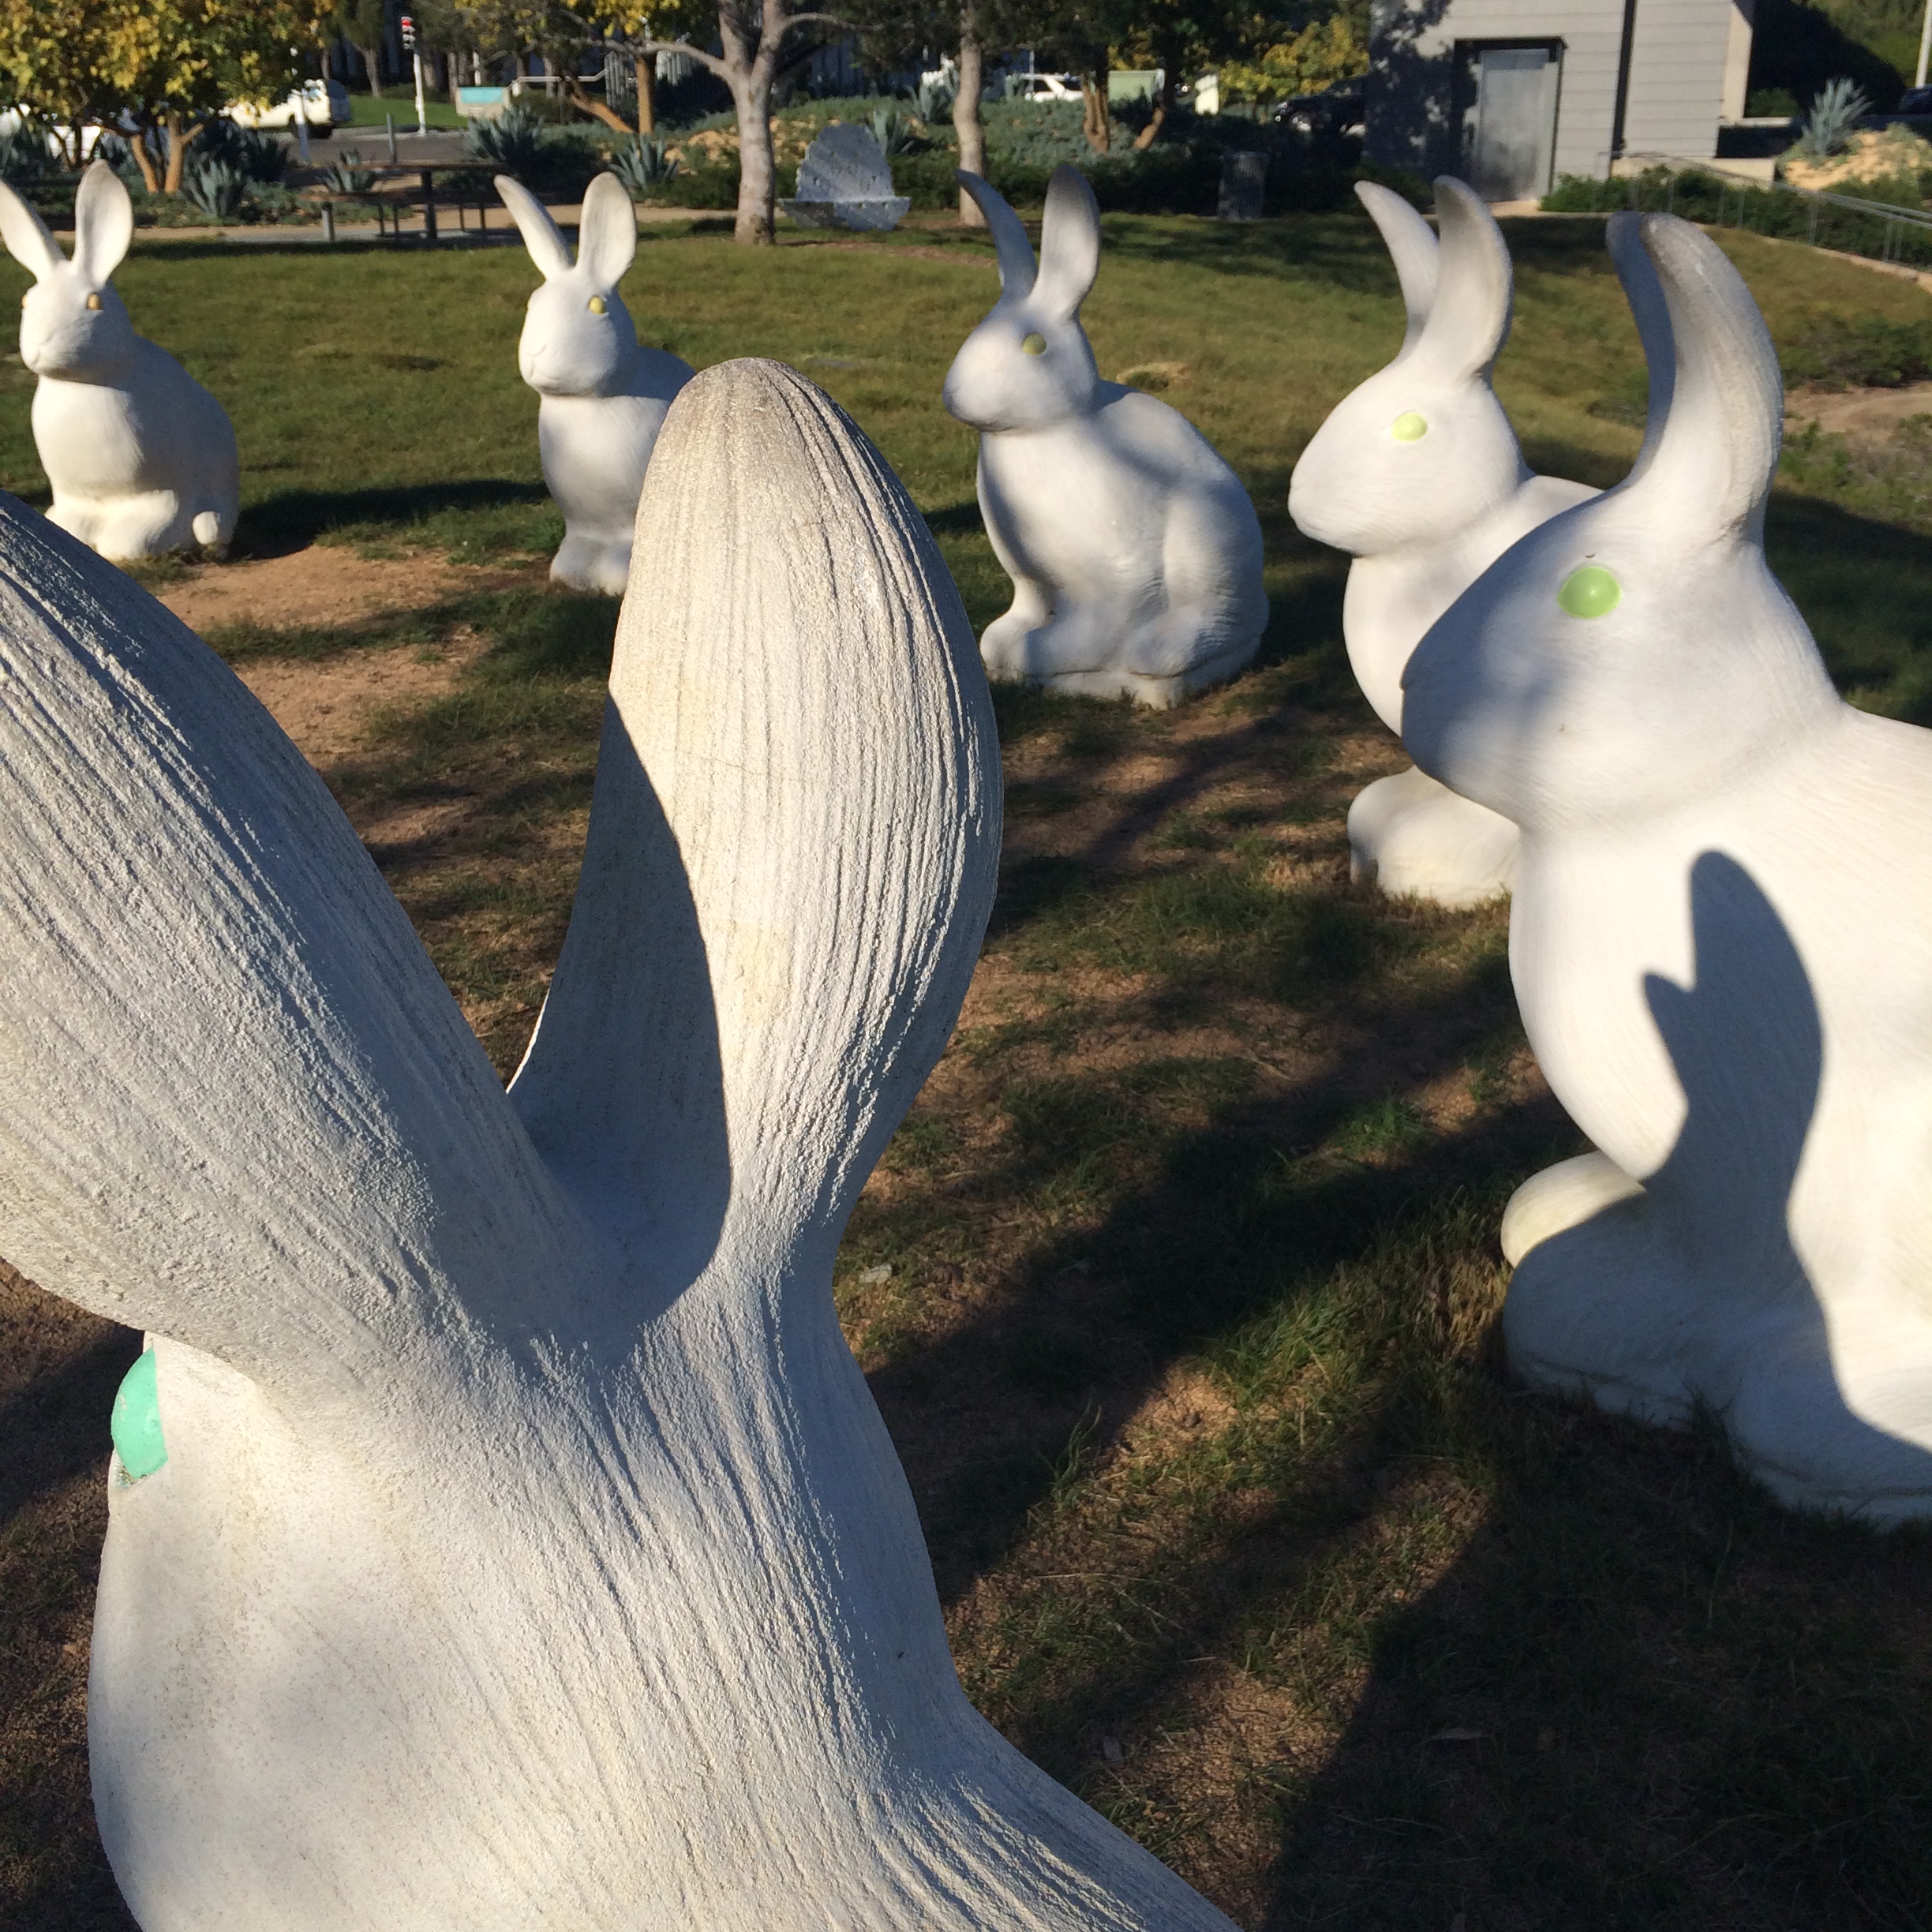
Another sign of fall is the scheduling of my Fall Frolic trip to Orange County with my former colleague/now friend, Judy. We hit the usual: Roger’s Gardens, ‘lette Macaron Shop, Wafu’s Sushi, South Coast Plaza, Din Tai Fung Dumpling House, Crystal Court, and IKEA. This year we found something new and whimsical: a pocket park of sculpture next to the Newport Beach Civic Center and Fashion Island Mall, from where these bunnies — almost waist-high — were photographed. They’ve been nicknamed Bunnyhenge by the locals. I loved them.
Lastly, I have actually filled in some plans on my calendaring book. This is revolutionary. I often would rather write down what I did, then cross it off, than make plans that will never be achieved. You can call me a goal-setting wimp.