Quilts

Sentimental Journey: Bee Blocks for Always Bee Learning

AlwaysBeeLearningbutton
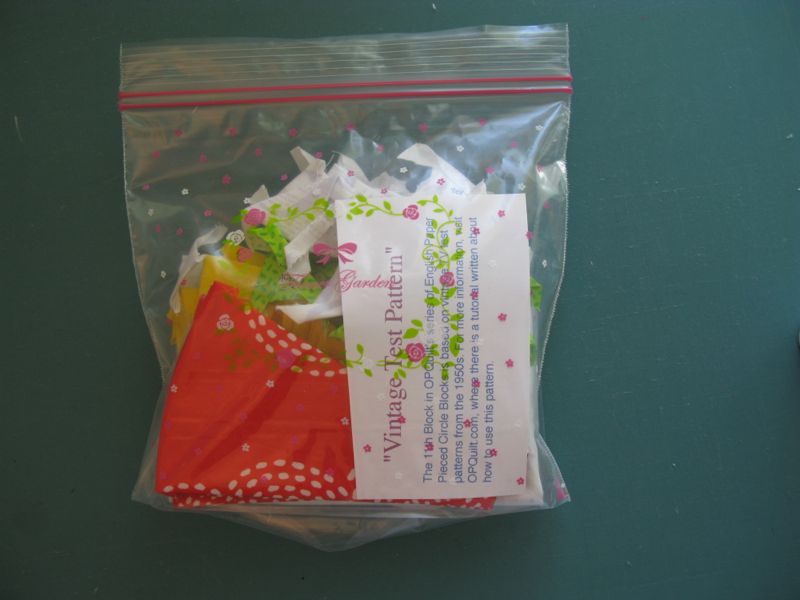
I saw a notice on IG one day, with Megan saying that she had room for another participant in her bee.  I jumped at the chance to be with such illustrious quilters, and they gracefully accepted this newbie.  This bee sent out their fabrics to everyone, so we would get a little packet of fabrics with directions, then we’d sew it together and send it back.  Only once did I worry about running out of fabric, and once, when I screwed up a block, I was relieved that I had similar fabric in my stash.

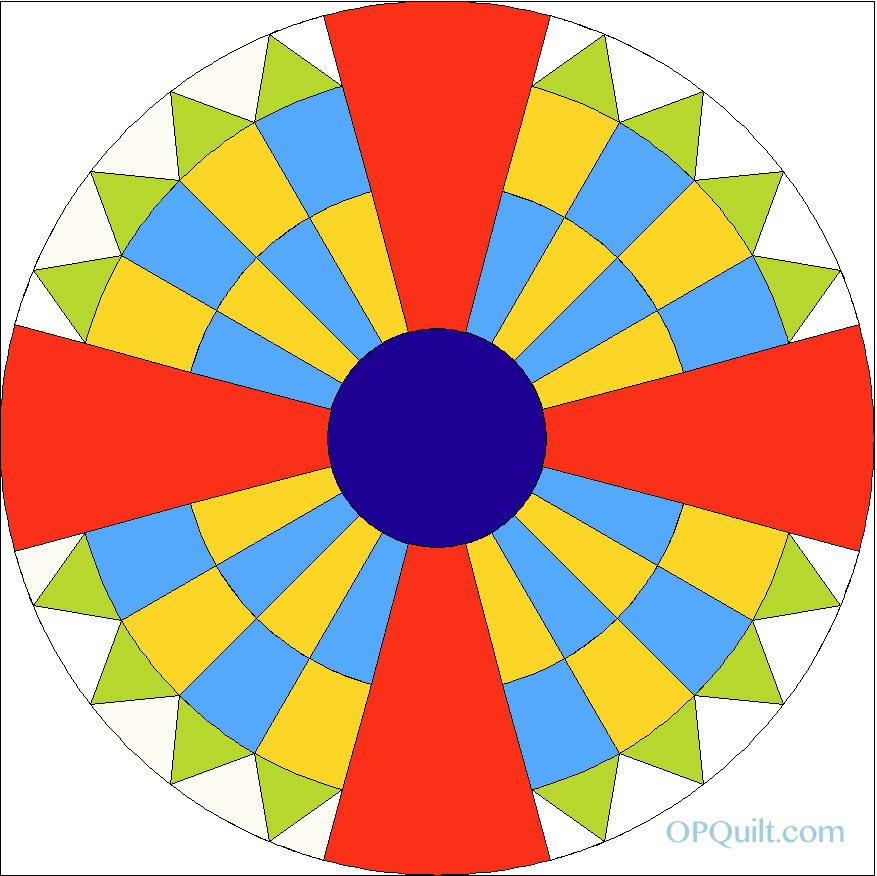
I grow rather attached to the bee blocks I make, even the ones that give me fits.  I always feel badly when the blocks aren’t just so, and given the number of notes I’ve received on my bee blocks from others saying the same thing, I know I’m in good company.  So I got to wondering one day: what ever happened to the bee blocks I’ve made?  I sent out emails and I’m happy to show you what I’ve received in return.  If they recipient hadn’t made it up into a quilt, that was not a problem; some sent a picture of a grouping of blocks.  If that wasn’t sent, no big deal. I guess I just wanted a final wrap-up post about my time with this bee.  This bee was on their third year, so it disbanded after my final block, but it was fun bee-ing in their company.  

The following blocks/quilts are in no particular order:  

ABL April 2014_Smith

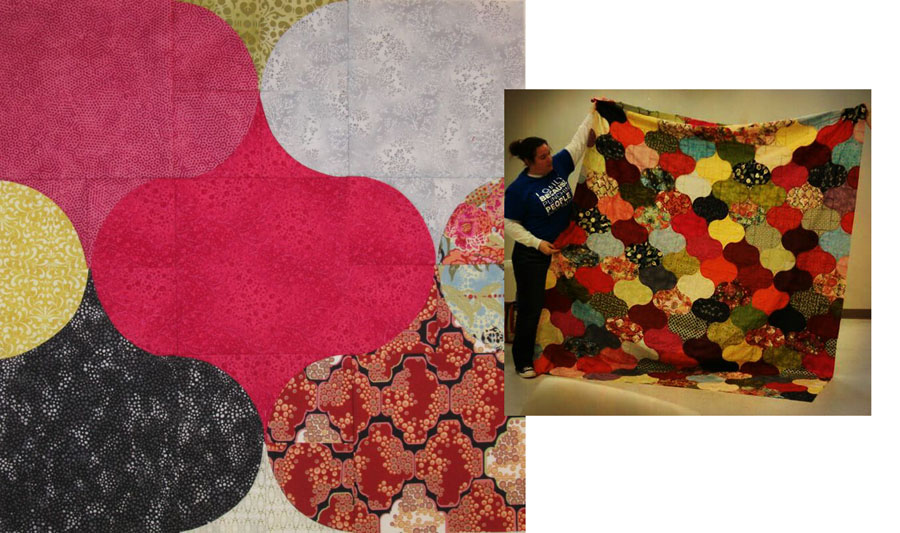
We made ogee blocks for Mary’s turn.  One of the hallmarks of this bee was to always be learning, so a lot of new techniques were tried.   This one was curves in a Drunkard’s Path block, that when assembled makes an Ogee Block.

ABL Aug 2013_Evans

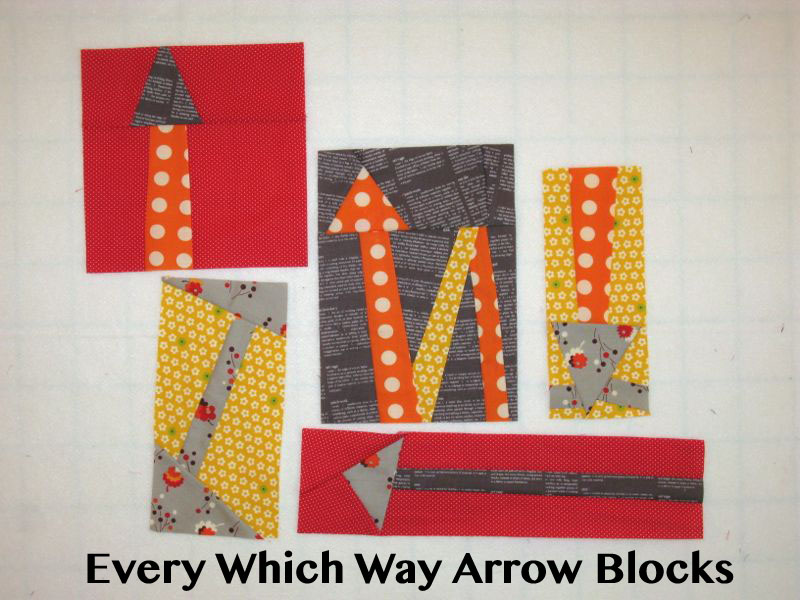
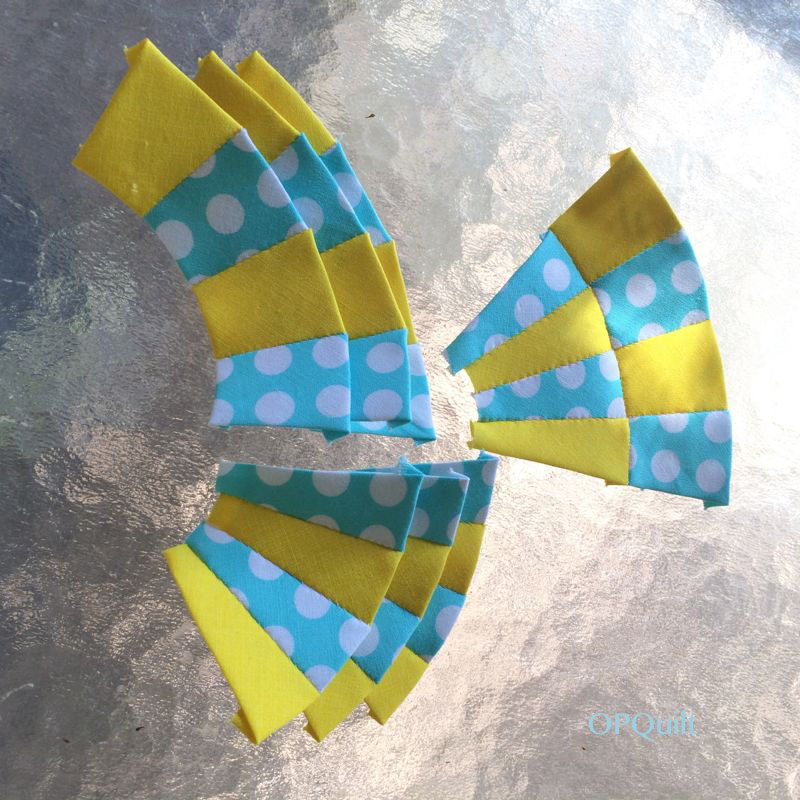
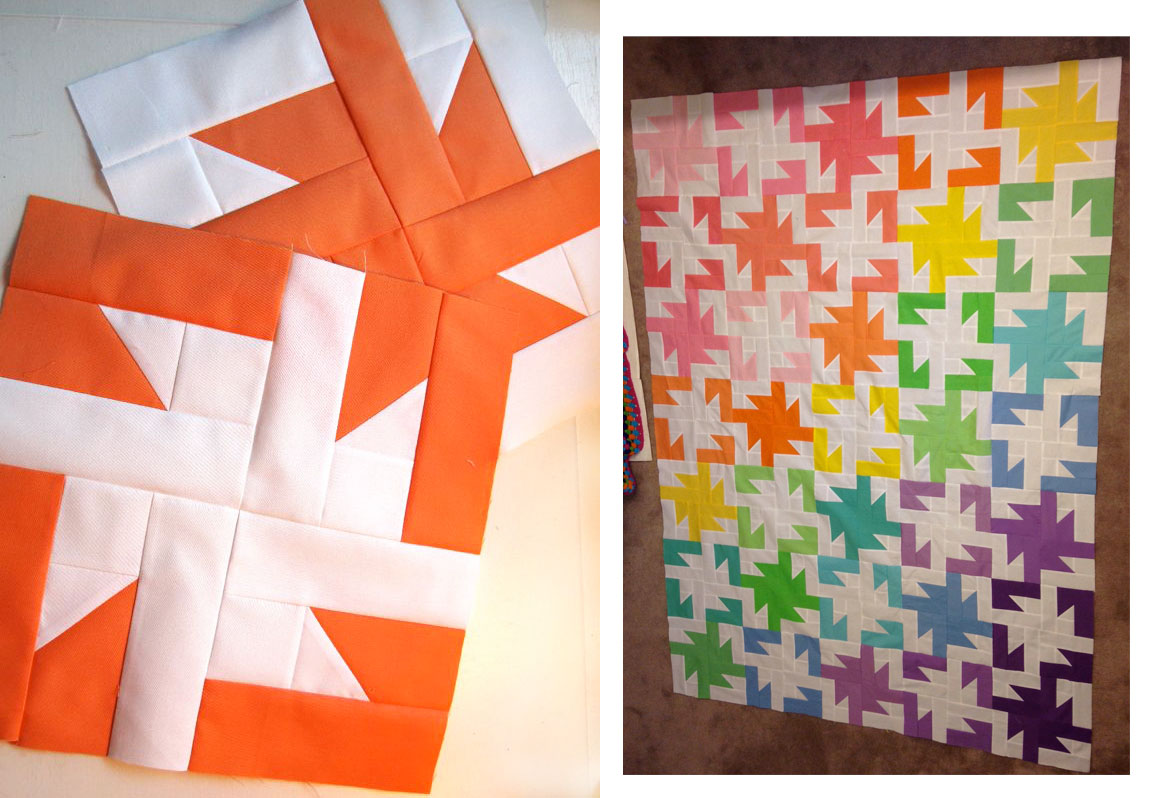
This was the first set I made, and Megan requested arrow blocks that turned every which way.

ABL Feb 2014_Kill

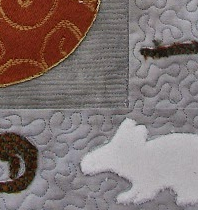
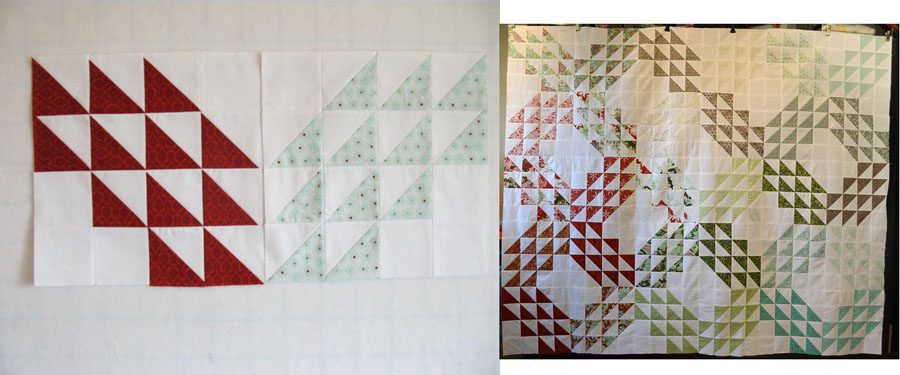
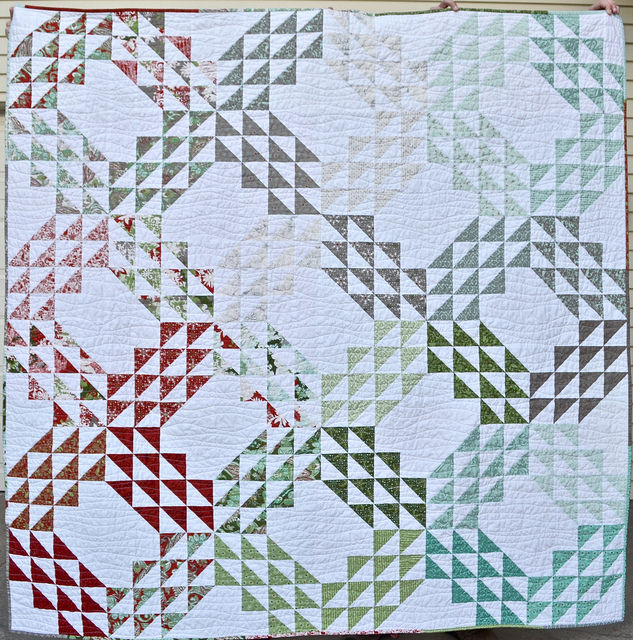
Hettie sent us directions for Hobo Quilt Blocks, and everyone’s was different; it was to be a quilt for her sister, who was graduating with a PhD.

ABL Jan 2014_Lovelady

Toni’s Christmas spiderweb blocks were really fun to make, and I love the fun holiday quilt that came from hers and our efforts.

ABL June 2014_JohnsonCeleste added to what we sent of Bonnie Hunter’s Boxy Stars, and made two quilts for charity.

ABL June 2014_Wardwell

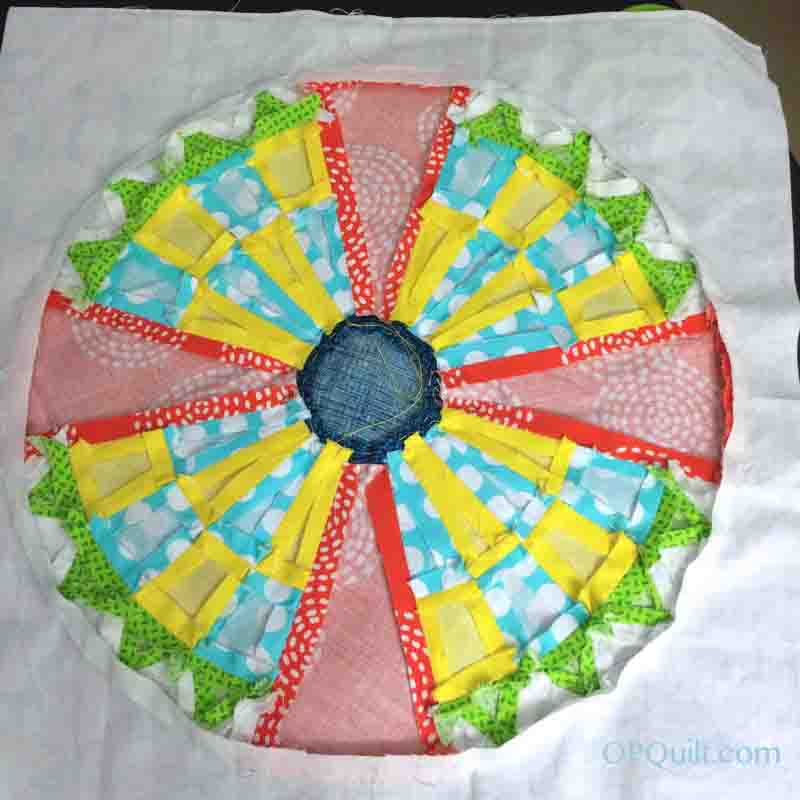
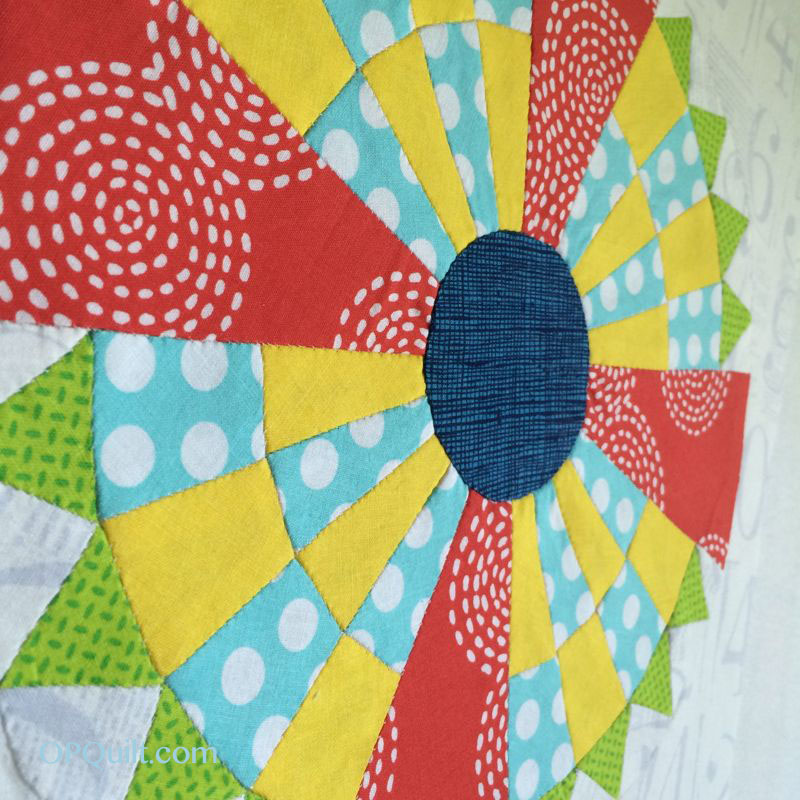
Kristina asked for Sparkler Blocks, a pattern by Lee Heinrich.

ABL May 2014_Jeske
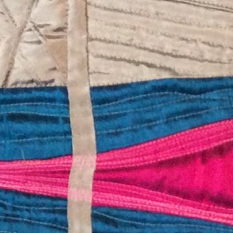
Debbie sent us the link to make these half-square rectangles, and turned them all on their sides to make her Ziggity-Zag Quilt.  This was a good challenge to make sure the angles went the right way.

ABL Nov 2013_ChahleyLeanne walked us through making perfect points for her Ocean Waves block. I didn’t get all of them perfect, but her finished flimsy is wonderful.

Leanne_Winter

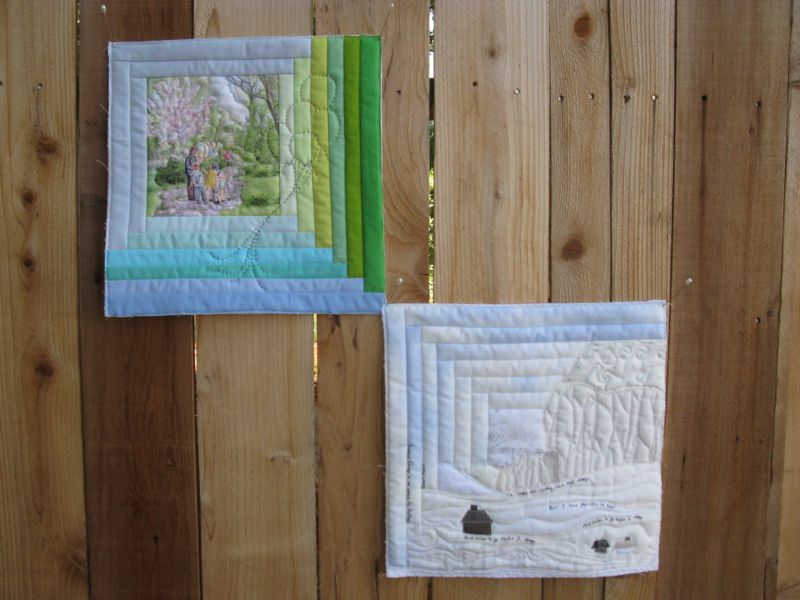
And here is her finished quilt, titled Winter.

ABL October 2013_Ruyle
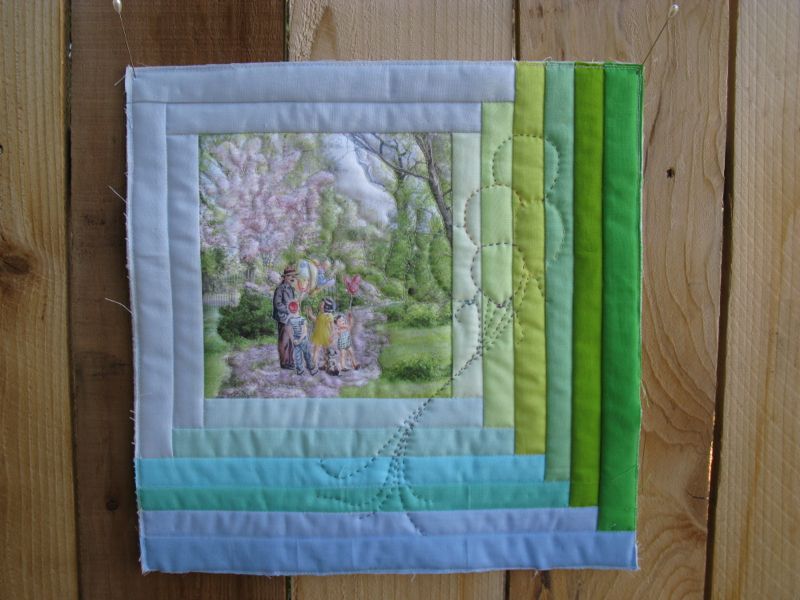
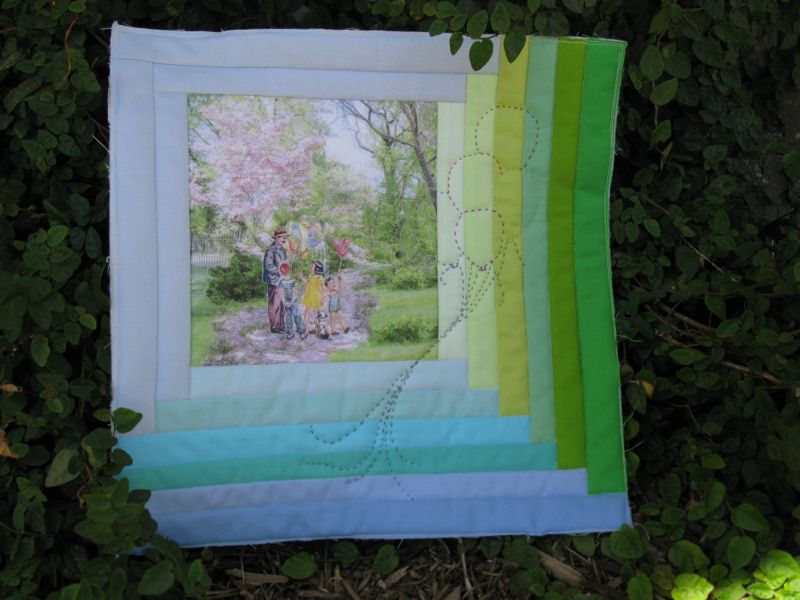
Anything that Stephanie conjures up is going to be great, and although I fretted over these blocks (as I worried about running out of fabric and really worried that my finished product was only “pretty good” in my estimation), I love her finished quilt, titled One of these blocks is not like the others.

ABL March 2014_Debetaz

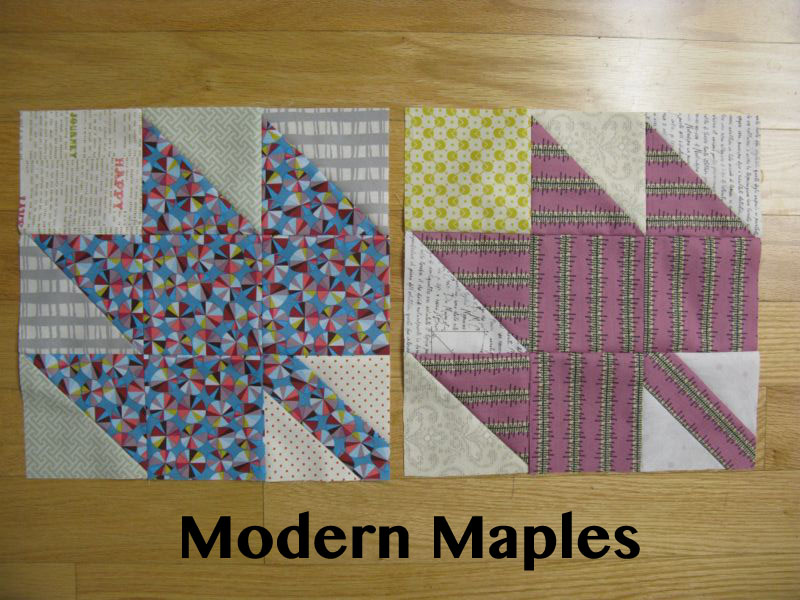
Marci’s Modern Maples were fun and fast, with interesting fabrics.

ABL Sept 2013_Dietrich

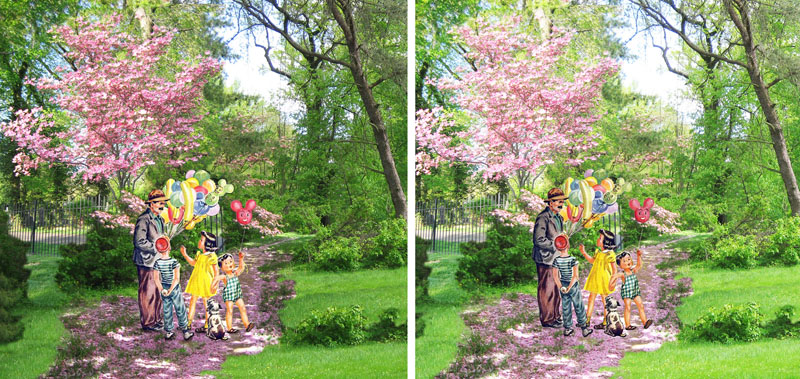
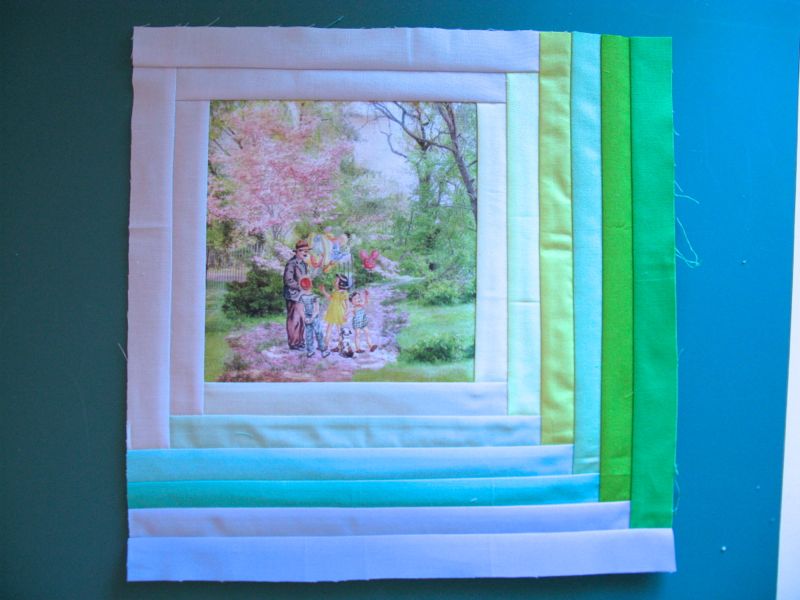
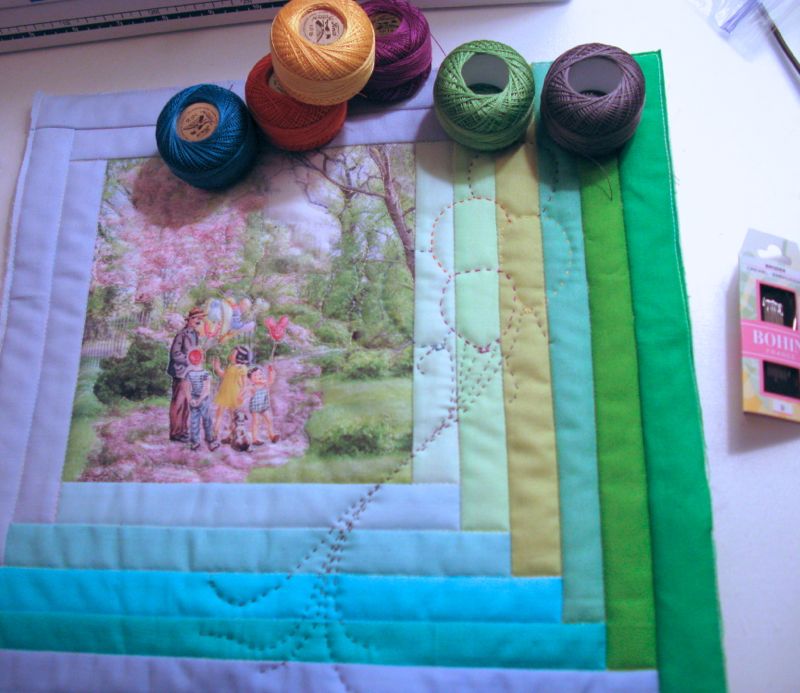
The last bee blocks in this lineup are Michonne’s.  The lovely story about this is after I sent around the emails last month, asking for photos of either the blocks together or a the quilt/top, she hurried and finished hers so I could post it here with the rest; it looks terrific!  And what did these beemates make for me?

Pineapple Block August ABL

 Pineapple blocks.

Pineapples and Crowns_front

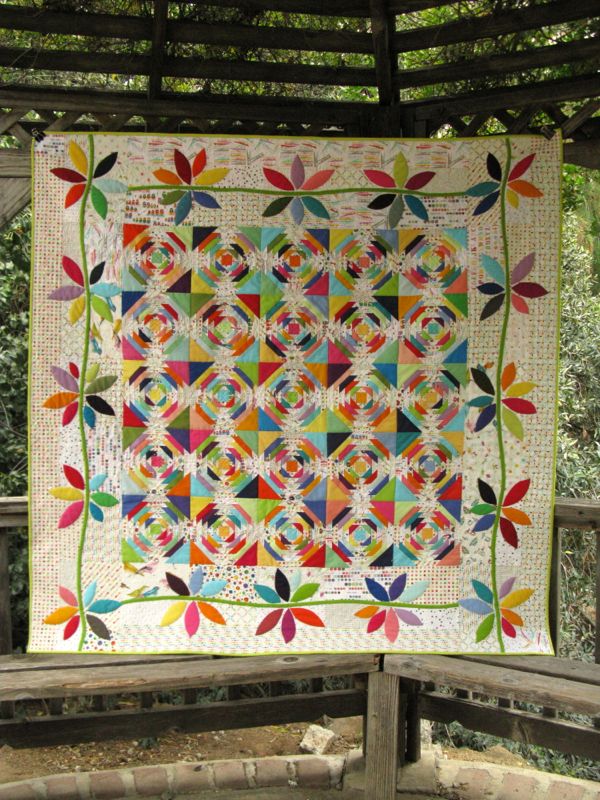
I really enjoyed seeing all these blocks and quilts together.  Thank you everyone!
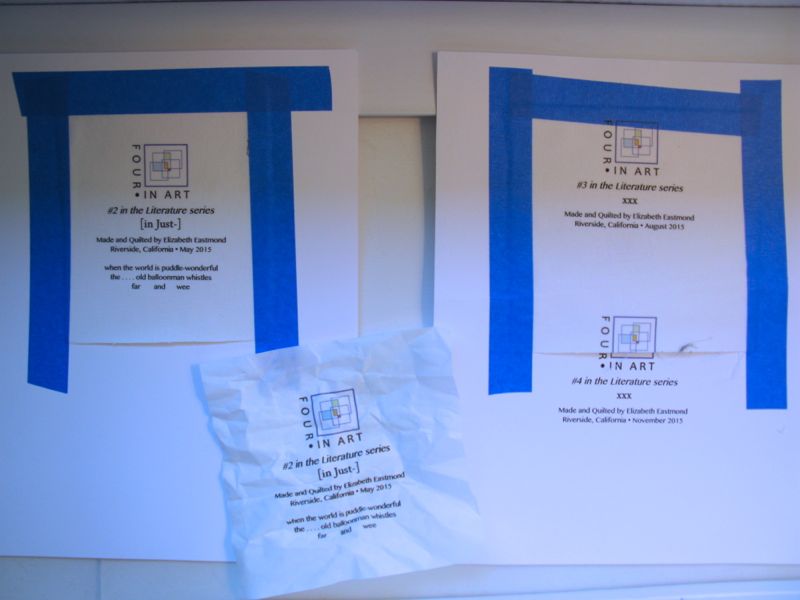
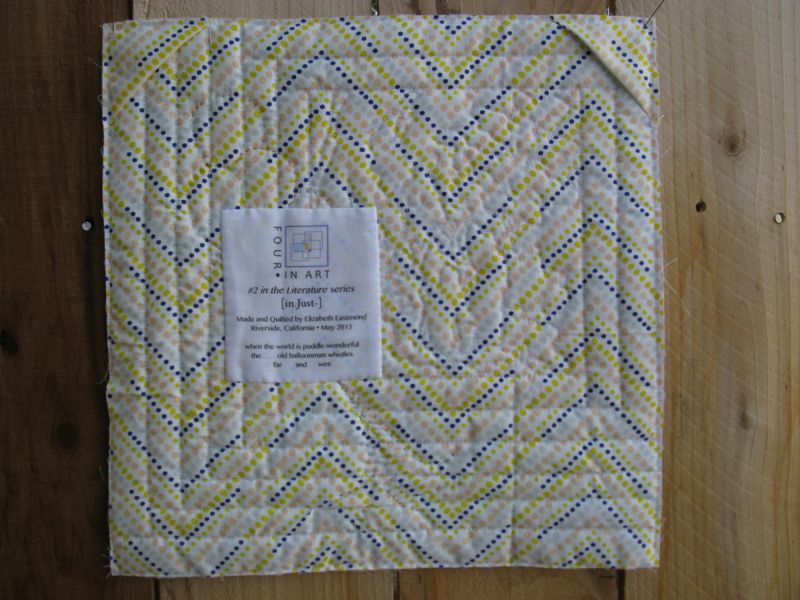
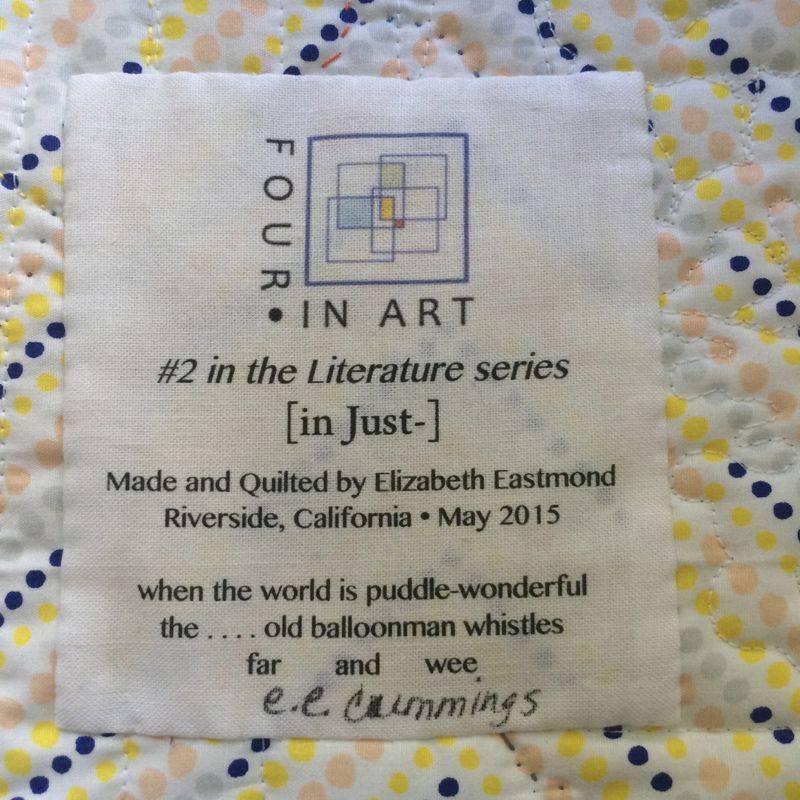
 

Quilts

[in Just-], Deconstructed


4-in-art_3buttonin Just_in the garden

Yesterday, I revealed my quarterly art quilt challenge, and as is my usual, this post is about some of the how-to’s.

in Just_1

When trying to think about how to illustrate this poem, I kept thinking of all the pictures I’d taken in Washington DC during cherry blossom season and was thinking that they might work for this.  I first searched for a picture of a balloon seller, and found an illustration from what looked to be c. 1950s, perfect for I wanted–a nice, clean interpretation.

Photoshop Balloon Man Poem

This is a composite of several photos; I added in the balloon man last.  I saved all this (multiple times) and then started to prepare my fabric.  I wanted to use the Bubble Jet Set again, like I did for an earlier art quilt (more info *here*), so soaked my Kona white squares and hung them to dry.

in Just_2a

I ironed them to freezer paper, then tried to feed them through the printer just as they were.

Biff_1

Fail.

in Just_4a

So this time I trimmed down the edges and taped it to a piece of cardstock on three edges and then fed it through the printer (I have a flow-through feed path, but I have done in those printers that do a U-turn).  Success.  I didn’t care that the image was a bit wider and spilled out onto the tape, as I knew I was going to sew fabric strips around the edges.  I let it sit for 30 minutes.

in Just_3

The other part of using Bubble Jet is to rinse the printed fabric in their Bubble Jet Set, so after waiting the allotted amount of time, I rinsed the printed images, and hung them to dry (below).

in Just_3b

in Just_4b

I’d printed two different versions of the balloon man.  One with all full-out color everywhere, and one where I had lightened the background by about 30% to let the man and the children pop out a bit more.  That one worked best for fabric.

Contrasting Balloon Man Pix

On the screen, they don’t look too different (lighter background is on the right).  But my husband said the full-color print was “all a bit much,” language for toning down one part of the picture so that the other could shine.  He liked the difference.

in Just_5

in Just_5a

I cut the strips 1 1/4″ wide as I wanted a narrow range of gradated colors.

in Just_5b

Strips on.  I made it a wee bit bigger than our 12″ so when I sew all four of these together at the end, I’ll have room to maneuver.

in Just_6a

I drew out the balloons on some waxie paper squares that they use in delis. I’d purchased a big box ages ago and I use them to try out quilting ideas.

in Just_6b

I tried drawing it on with a white pencil, but it didn’t show very well, so I just pinned on the waxie paper, and kept flipping it back and forth.

in Just_6c

If you read the post about the quilt and the meanings of the motifs, you’ll know why these balloons are here.

Biff_2

I like to attach the label before the reveal date.  On this day, my father was going into surgery for a broken hip.  He fell when he was hanging a painting in his art studio.  Did I mention that he’ll be 90 in December, and is still a source of inspiration for me–still going down to his studio to paint daily?  But today, while I thought about him, I couldn’t make the labels at all–something I usually can do in my sleep.  The middle shows the label. . . printed on the freezer paper backing.  Next.  The righthand side shows the label when I forgot to print only the first page, plus I obviously put the fabric down too low and it printed partially on the masking tape.  I finally got it the third time.  He had his surgery, and is fine, but to say I was feeling a wee bit distracted and out of sorts would be an understatement.

Spiffing up Other quilt

Now I’m thinking that the other quilt needs to be spiffed up with a photo or two.  I need to get those woods darker and deeper, but will have to think about how to do this.

PostscriptI always enjoy trying to interpret a theme or an idea in these little quilts, but there are some days I approach the task kicking and screaming.  It’s always soooo much easier to just pick up a block or two, start whacking away with my rotary cutter and tada! a stack of blocks is sewn and done.  It is harder to take the time to think about what I want to say and how to say it.  It’s on days like that I’m keenly aware that I’m not an fine arts artist like my sister Christine, or my father.

However, I’m my own kind of quilt artist, and I choose to keep doing these little art quilts because it stretches my brain and pushes me to explore new techniques.  Everyone has to find a way to keep growing in their quilting, otherwise we become stagnant and stale and slip out of the conversation.  For me, this is one way to remain in the stream of creativity, and I’m always glad to have these art quilt challenges come around again.

Many thanks to the other quilt artists who participate–they inspire me!

Quilts

[in Just-], a Four-in-Art Quilt

4-in-art_3

For those of you who are avid English Paper-Piecers and are new followers, welcome!

in Just_in the garden

[in Just-]
#2 in the Literature Series
Quilt #147

Continuing our theme of literature and my personal love of poetry, this is the second in a series of four art quilts for this year, a collaborative effort by the Four-in-Art Quilters, a name chosen because we do four small (12″ square) art quilts per year.  For this quarter, I chose e.e. cummings’ poem “[in Just-],” a poem about a balloon man selling balloons in Spring.  I’m also following a seasonal theme, as the last art quilt focused on Winter.

in Just_front

e.e. cummings’ poem appears on the surface to be a simple sensory poem about “when the world is puddle-wonderful” and “bettyandisbel come dancing / from hop-scotch and jump-rope.”  It’s a world where the wonders of childhood dominate, from mud, “piracies” and “marbles” to  the sight of a balloon man with his wares to sell to the children.

in Just_in the vines

But in the last stanza of the poem, the capitalization and descriptions change.  The “old balloonman” becomes the “goat-footed balloonMan,” with his whistling pipes and inferences of Pan, a somewhat lascivious ancient god who is half goat, but has the reputation of pursuing the women.  Suddenly the poem changes, the games of childhood left behind as Pan brings different games to “eddieandbill” and “bettyandisbel,” games from which they will never stop playing.

Balloon Man

(detail of center panel)

When this version is presented by my students to the group (they each have to choose a poem, analyze it and present it), there are some groans, as in, “can’t this just be about balloons and spring and mud and marbles?”  Yes, it can.  But perhaps e.e. cummings is trying to have us look at two spheres at once: childhood and adulthood, and that razor-thin edge where we cross over from one into another.  We then have an interesting discussion (all very G-rated) about when they felt they crossed the dividing line from childhood to adulthood, and the answers vary from when I got my driver’s license, to when I first kissed a boy, to when someone left home, to when they had their first jobs and bills and live-in girlfriends.  And so it goes.  The balloons of childhood escape from our hands into the heavens, and we can never get them back.

Two Art Quilts

I plan to join all the quilts together when I’m finished; here are the two I’ve completed thus far.

in Just_back

[in Just-]

in Just_labelI can’t believe I left off the author’s name, so I hand-wrote it in.  There will be a final label when all the four quilts from this series are joined, so I’m just not going to worry about redoing it right now.  The “Deconstruction Post” will be next, with some info about how I made this quilt.

Tiny Nine-Patch

About Us: We live all over the world, from Scotland and Australia to the continental United States.  Our blog is *here.*

Please visit the other Four-in-Arters, and their quilts around this theme:

Betty May 2015Betty at a Flickr site: http://www.flickr.com
Catherine May 2015
Catherine  at Knotted Cotton
Jennifer May 2015
Nancy May 2015
Nancy at  Patchwork Breeze
Rachel May 2015
Simone May 2015
Simone at Quiltalicious
 Susan May 2015
Susan at PatchworknPlay
Tiny Nine-Patch
EPP · Quilts · Shine: The Circles Quilt

Circles Block #11–EPP Sew-A-Long

Circles EPP Button

Circle Block #11_OPQuilt

Circle #11: Vintage Test Pattern

This is the eleventh block in a series of twelve circle blocks, conceived and created when I needed another hand-sewing project, and wanted something beyond hexagons.  I had several sources of inspiration for this one:

Vintage TV Test Pattern

TP-WABCcolor

2012-Ma-June-044

1960s-Color-TP-v1As a child, I remember these “television test patterns” on the tube when I’d get up too early, before the station had signed on.  And I liked the Greek Cross reference, too, since many of these circles were designs taken from a Greek Orthodox Church in Ljubljana, Slovenia (from our vacation last year).  So I give credit to both sources of inspiration.

The free patterns are now returning (I did not do Red, White & Blue version of this block).  Again, I request that you not distribute them, but send people here to this website to get them.  Click to download a PDF file: 

SHINE Block 11 pattern_opquilt

Please remember to set your printer settings to 100% and check the little scale square included on the pattern.  It should measure 1″ in size. Illustrations below are with the OLD version of the pattern, so it may vary from what’s included now.

Circles Block Eleven

Here’s the circle drawn up in my quilt software.  I’ve taken to printing out this little color drawing and putting it in a small bag with all the glued-up pieces.  I like referring to the drawing as I work.

Circles 11_1Choosing Fabric

Picking fabrics–I always lay them out.  I jumped the gun and cut the cross-bars early, as I have another circle with that fabric and while I wanted these circles to be different from one another, I still wanted them to be able to have a conversation, so I repeat fabrics here and there.  When you cut out your center circle piece, cut it about 1/4″ bigger than it is.  See Circles #10 for some tips on the center circles.

Circles 11_2points layout

Once I got all the little points around the top of the circle printed out, I noticed that it would be hard to figure out where the “curve” of the triangle was, so I drew little arrows on every one of them.  As it turned out, I was okay about figuring out how they went, but if you think you might need the extra assist, do it now.

Circles 11_3glued points and raysKind of looks like a tomato with leaves.

Circles 11_4 pieces laid out

As is my habit, I lay out all the glued pieces for one final check before I start sewing them together.

IMG_4762

Then I loaded them all up in my little bag with the drawing and went outside to the patio to stitch, while listening to my audio book.

the-last-chinese-chef-cover

This time it was The Last Chinese Chef, and I was craving Chinese food by the time I finished listening to this.  But not Americanized Chinese food; I wanted the food in the book.

Circles 11_5 first units stitched

Stitch the upper row sections together, then the lower, then join them, keeping those seams aligned if at all possible.  Notice that I have not glued down the lower edges of the lower section to their papers (the innermost part of the circle), as I want to appliqué the center circle onto the piece, and it’s a lot harder if I’ve folded the edges and glued them down.

Circles 11_6 more bits laid out

Then, line up four green triangles with their curved edges at the bottom, and the points that go in-between them (three pieces). Lastly, lay the half-triangle on each side.  NOW sew them together.  You don’t want to be sewing on a full-triangle on those outer edges; ask me how I know.

Circles 11_7 crown stitched

When sewn together, it should look like this.  It’s now after dinner and I’m inside, still listening, but sewing by lamplight, instead of by sunlight.  I couldn’t stop listening to that book, nor stop sewing.  These get addicting.

Circles 11_8 crown onto first unit

Join a checkerboard unit to the triangles unit.

Circles 11_9 rays to first units

Then stitch one of those ray-sections to the checkboard units, making sure you are attaching it to the same side on all four units. In this photo you can clearly see the raw fabric edges of the lower checkerboard pieces.  Sew together two of these units, then sew those two units together to create a full circle.  At this point, you can remove all the papers, except any that are at that outer edge.  If the papers are hard to slip out because they are glued, use the tip of your small scissors or a stiletto to loosen the fabric (so you won’t have to tug and pull).

Cut a 14 1/2″ square of backing fabric.  Yes, it is bigger than the circle, but I want to make sure I have enough to work with when I figure out how I’m setting all these together.  (I have no clue at this point!)  Now it’s decision time.  This version, with the red rays arranged North-South-East-West, or. . .

Circles 11_10 OPQuilt

Circles 11_ 10aAlternate Circle. . . this version, with the rays arranged like a flower?  I marked the centers of my large backing square, and set down the circle, pinning it for appliqué.  I went with the traditional version (North-South-East-West).

Circles 11_11 OPQuilt

Cut away the backing fabric, leaving a 1/4″ seam allowance. I love these little Karen Kay Buckley scissors, as the tips have little teeth that grip the fabric, holding it while trimming even the smallest bit of fabric.

Circles 11_12 OPQuilt

Pin on, then appliqué the center circle.  See Block #10 for some appliqué tips.  I should have placed that “weave” pattern aligned straight up and down, but instead I just slapped it on.  As a result, I always want to tip my head to the side when looking at the center circle.  I’m sure no one else will notice (well, now you will) so I’m not redoing it.  Keeps it real, keeps it interesting.

Circles 11_13 OPQuilt

Remove all the papers, and admire your work.

Circles 11_14 OPQuilt

Circles All Eleven by Ironing BoardHere are they all are, lined up on an ironing board that is obviously used for other things than ironing.  (Anyone else have to clear off their ironing board in order to iron something?) I think they do play well together! I’m posting this circle block a wee bit early as we have our Quarterly Four-in-Art Reveal in two days, on May 1st.

4-in-art_3

I hope you’ll join me then for our little gallery of art quilts!